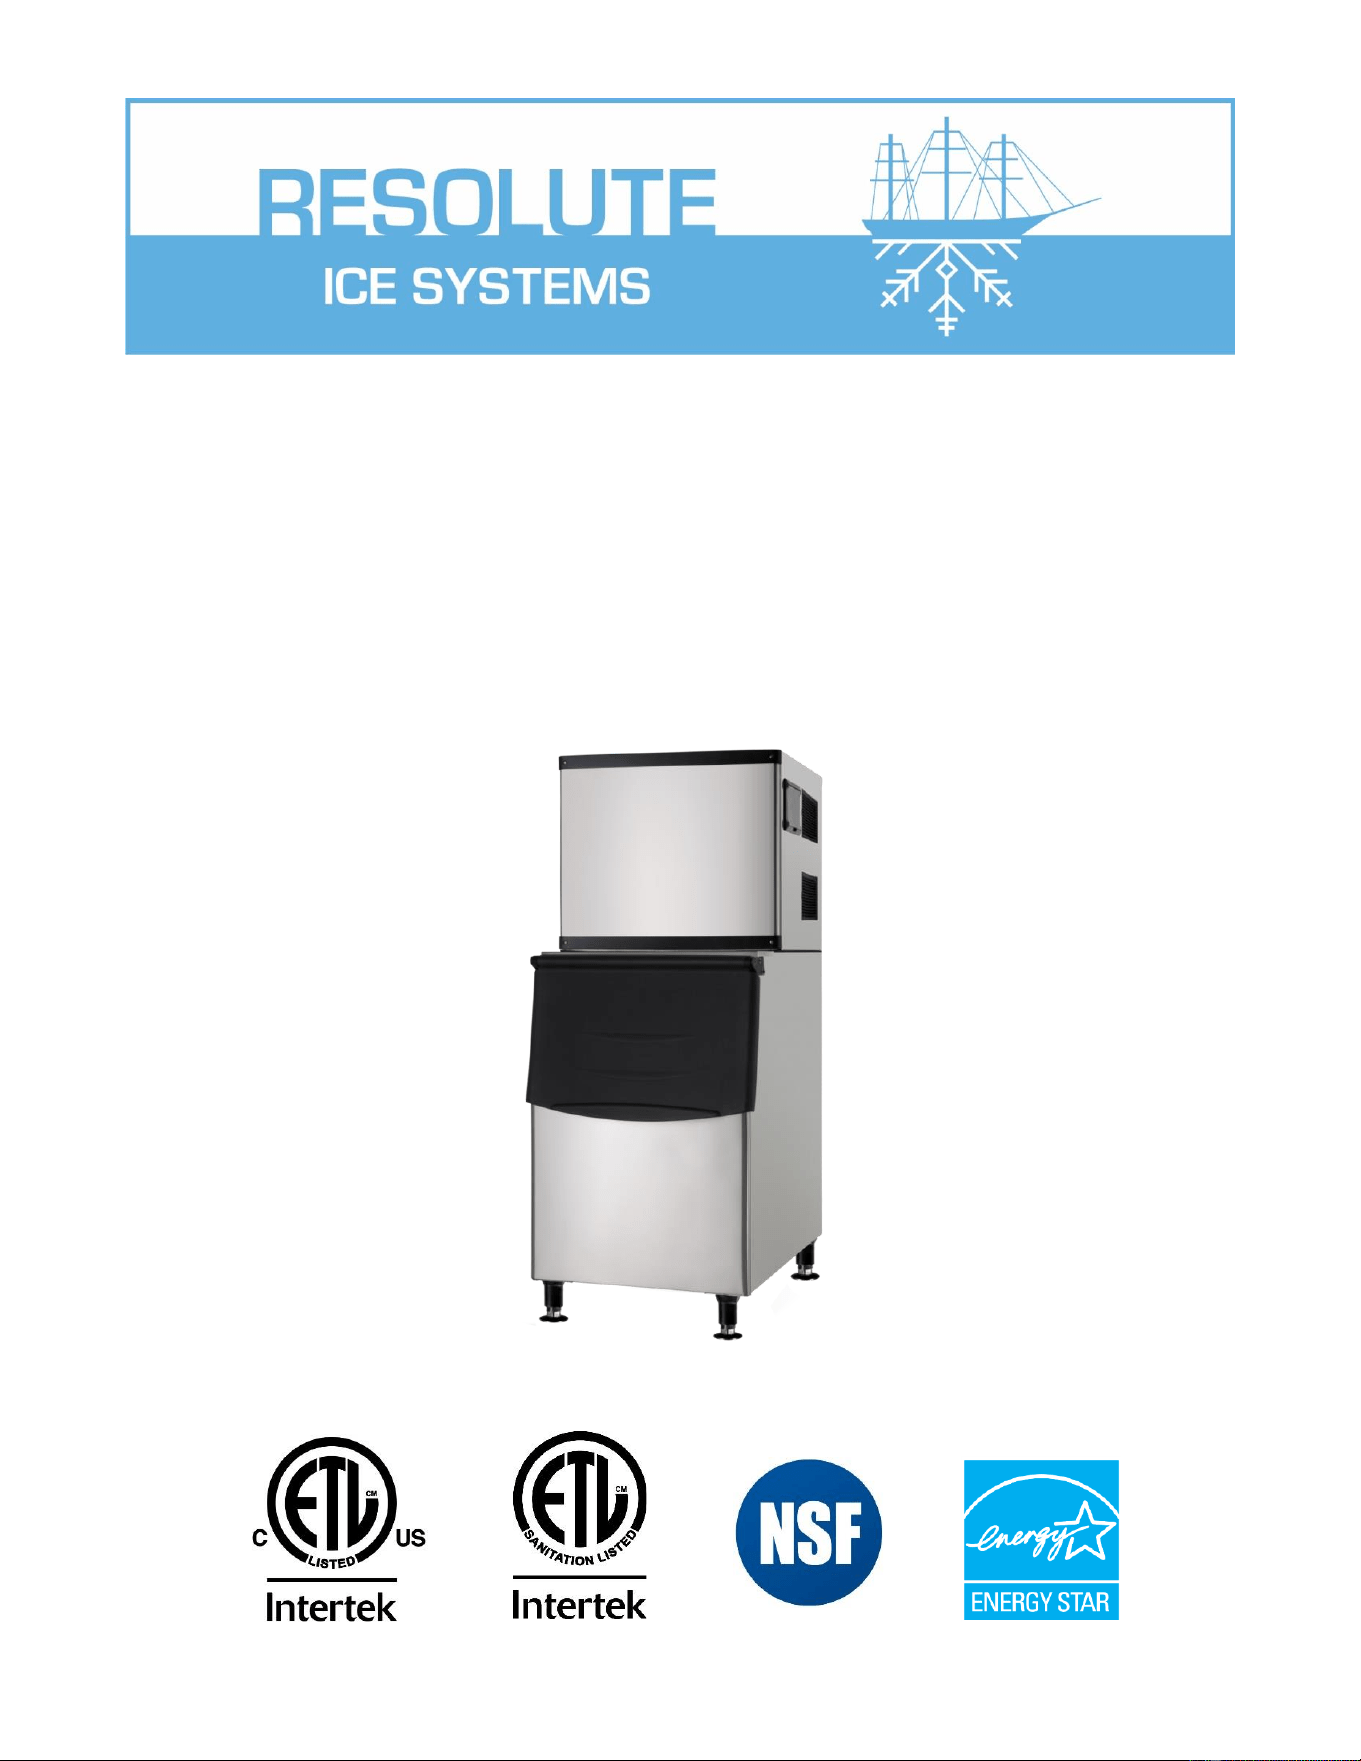
Commercial Modular Ice Maker
User Manual for Installation and
Maintenance
August 2022

1
Table of Contents
Important Information ..................................................................................................................................... 2
Warning and safety instructions ....................................................................................................................... 3
General ................................................................................................................................................................ 5
Installation ........................................................................................................................................................... 5
Location for Installation ............................................................................................................................. 5
Schematic Diagram of Installation ........................................................................................................... 6
Installation Steps ........................................................................................................................................ 6
Startup and Operation ............................................................................................................................... 7
Operation Instructions ....................................................................................................................................... 8
Control Panel ...................................................................................................................................................... 9
Maintenance ..................................................................................................................................................... 11
Clean Function ................................................................................................................................................. 12
Service Call ....................................................................................................................................................... 12
Warranty ............................................................................................................................................................ 14
Note: please keep this manual in a place accessible to users at any time.
2
Important Information
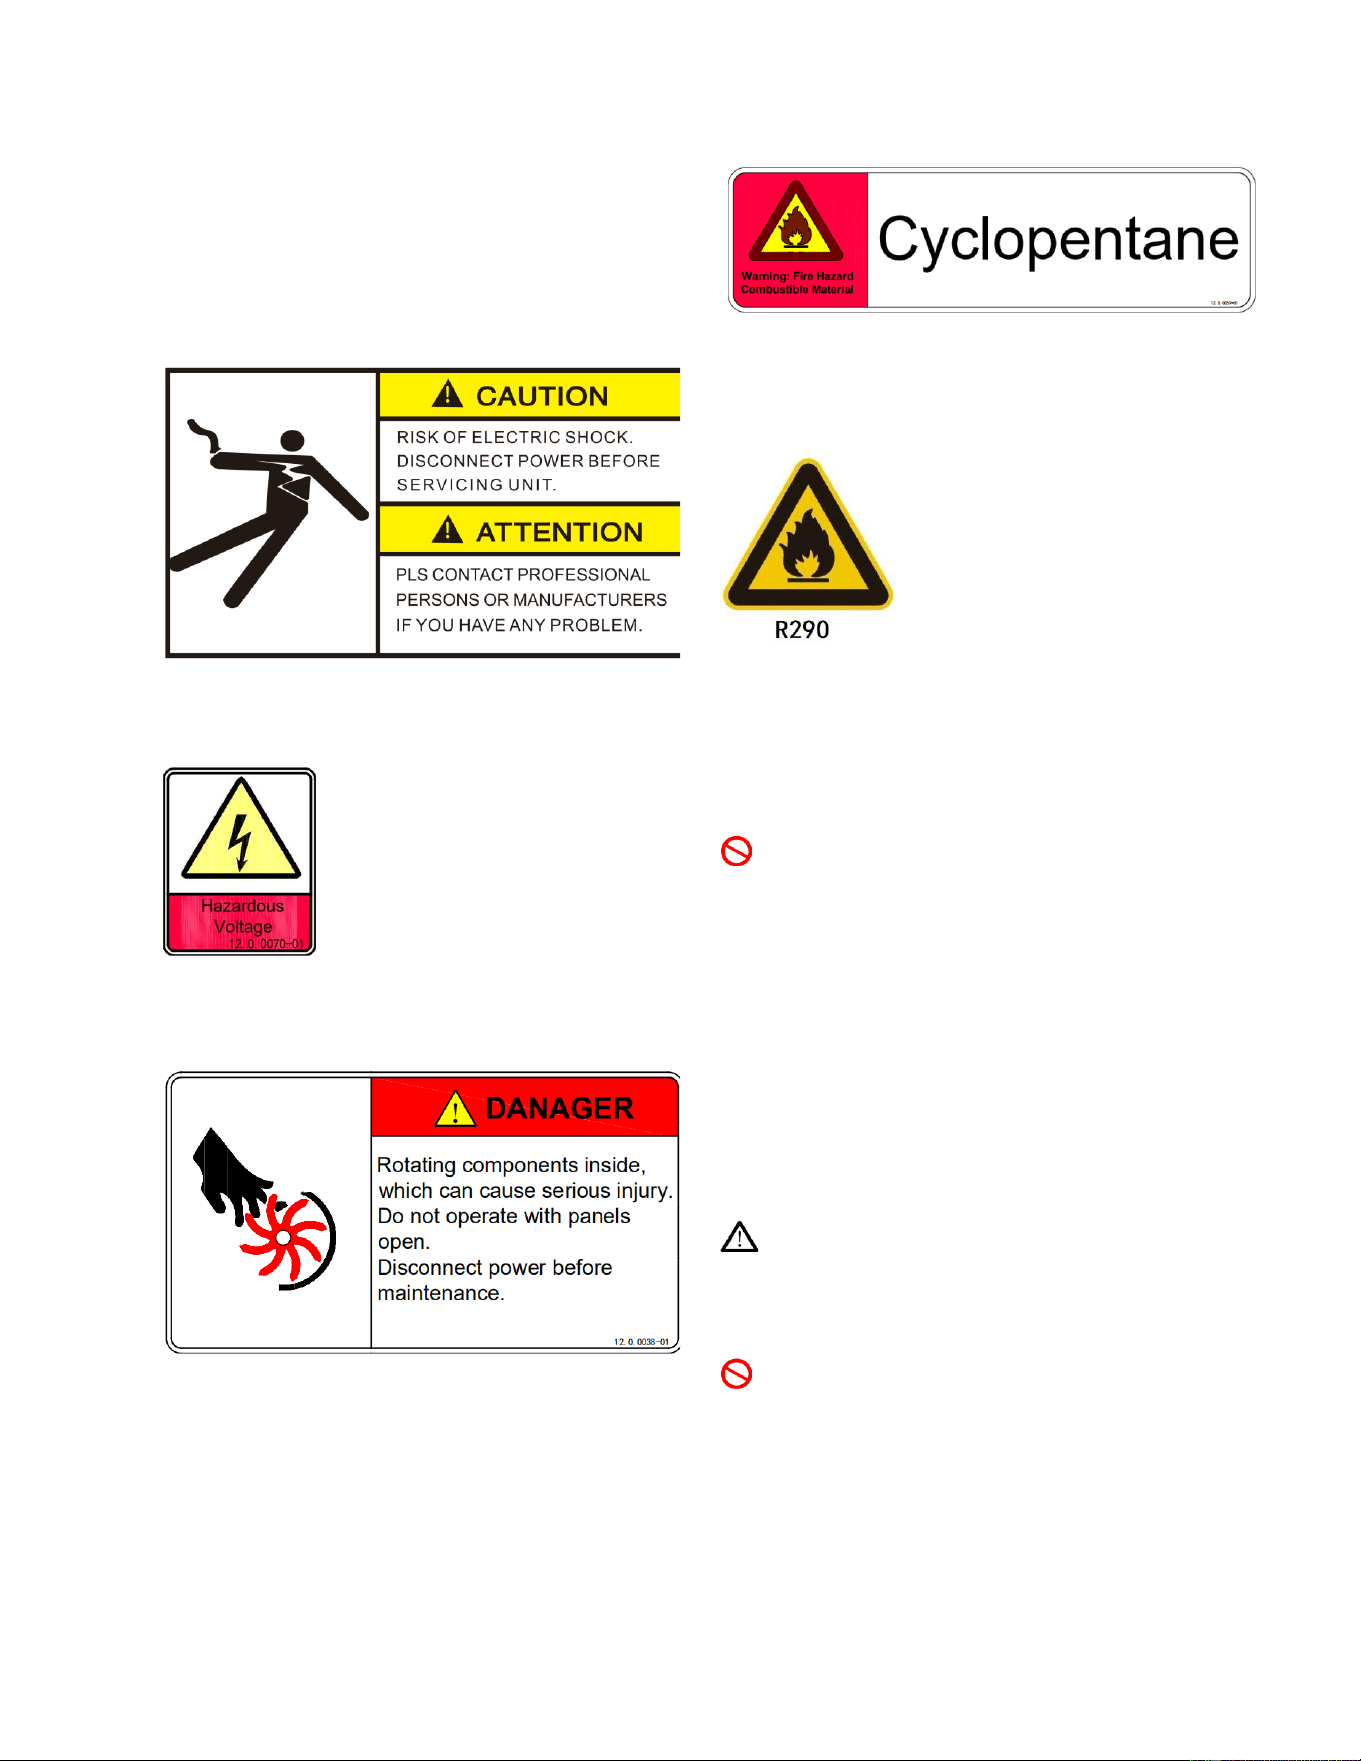
Please pay attention to the following
warning labels on the ice maker
The label indicates a hazardous voltage.
There is a risk of electric shock.
The label indicates a hazardous voltage.
There is a risk of electric shock.
The label indicates rotating components
inside. There is a risk of serious
mechanical injury.
The label indicates a flammable foaming
agent “Cyclopentane” used. There is a
risk of fire.
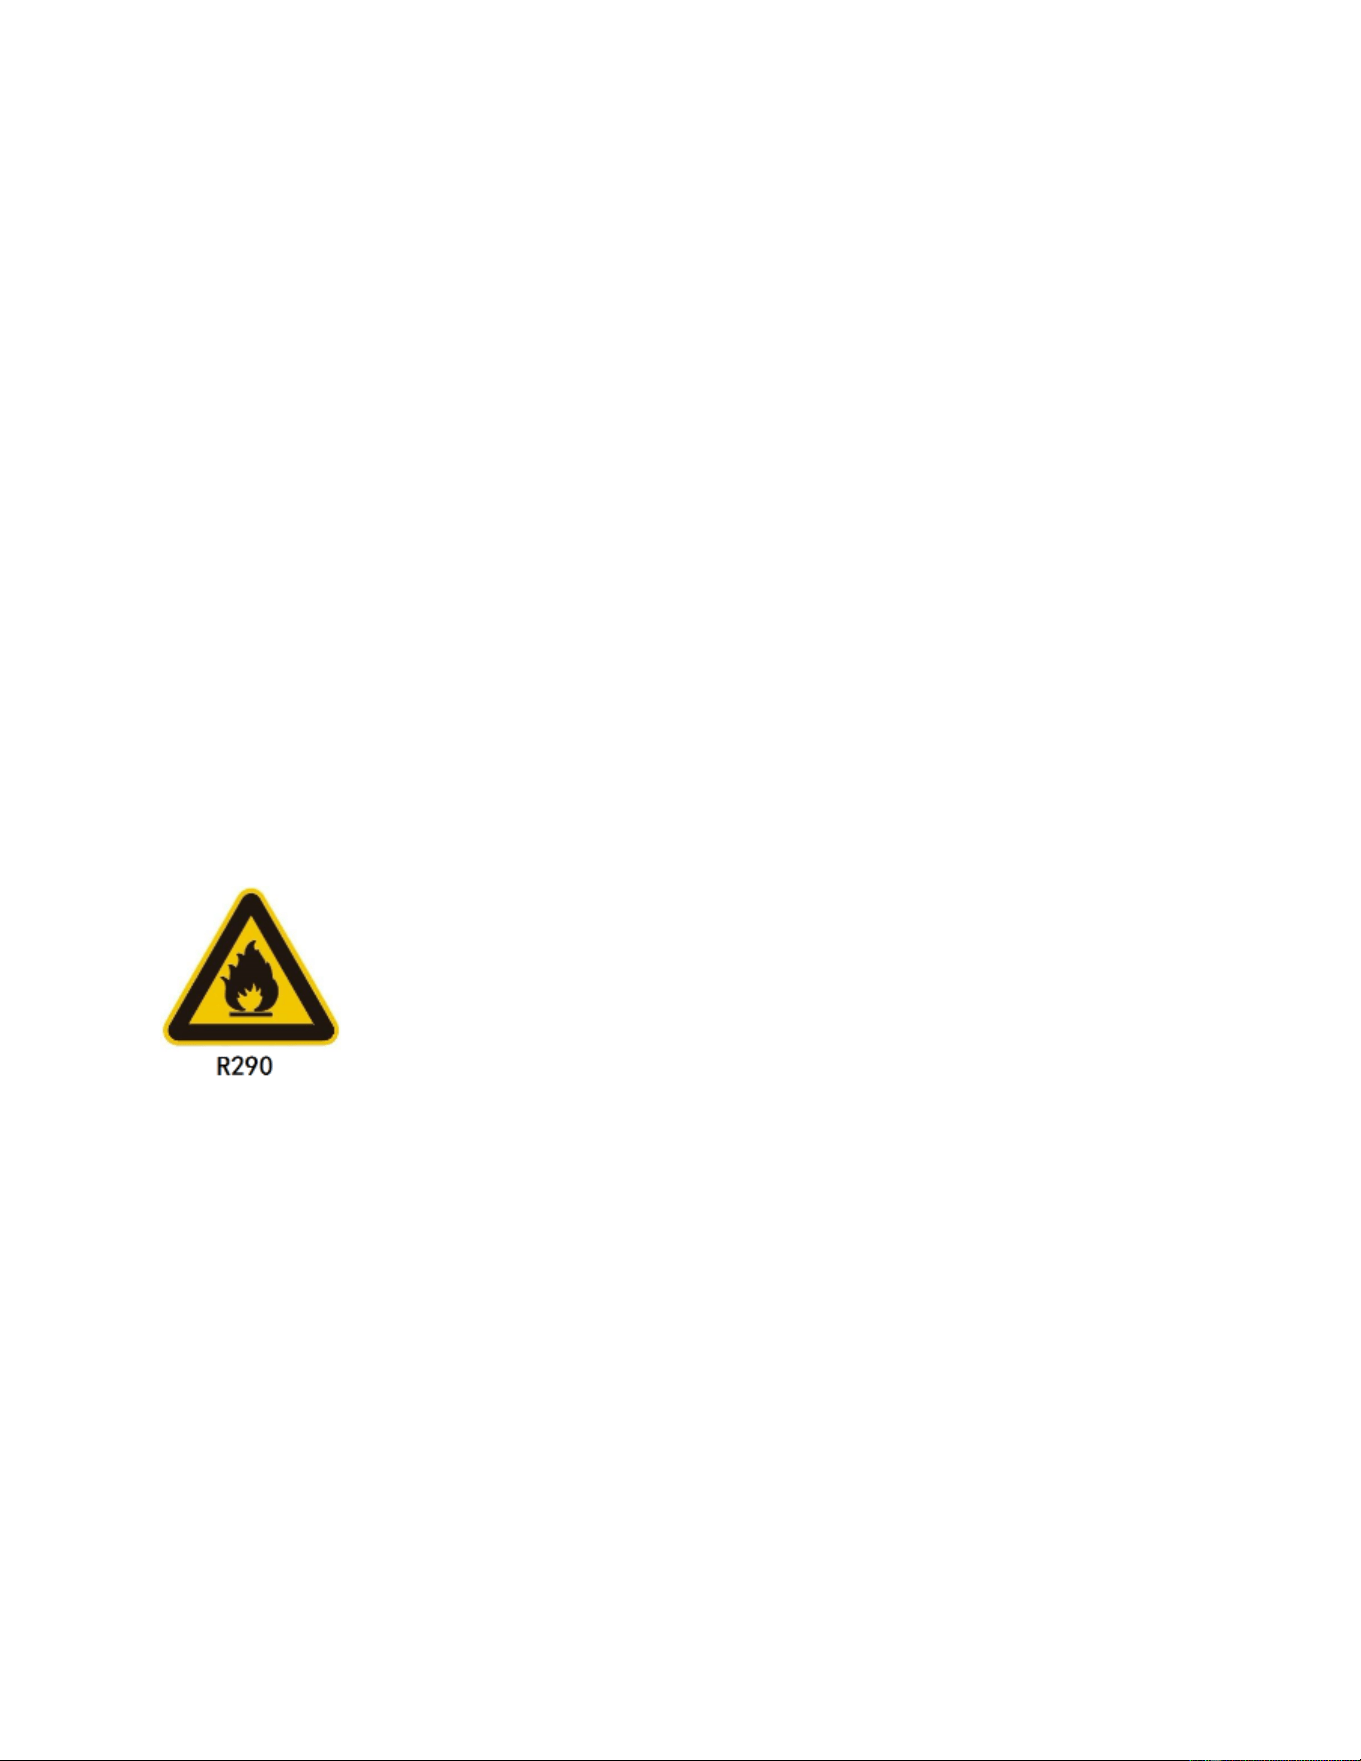
The label indicates a flammable
refrigerant “R290” used. There is a risk of
fire.
Warning:The ice making water inlet
of ice maker can only be connected with
drinking water, and groundwater or other
non drinking water sources cannot be
used.
Instruction of symbols in this
Manual
Alert sign: indicating the item
requiring particular attention.
Warning sign: special attention is
required and operation is prohibited.

3
Warning and safety instructions
This product cannot be used in outdoor environment.
This ice machine is not intended for use by children, and those with physical
weakness, slow response, or mental disorders.
The installation, repair or maintenance of this ice machine must be carried out by professional
and qualified personnel, or electric shock, fire, personal injury may cause from incorrect
operation.
After the ice machine is delivered, please keep the machine upright for more than 24 hours,
to have the lubricant be fully precipitated before startup, otherwise the compressor may be
damaged.
When the power cord of the ice maker is damaged, in order to avoid electric shock, fire or
personal injury, it must be replaced by the manufacturer or professional and qualified
personnel.
The water pipe assembly in the accessory box of the ice maker must be used. In order to
ensure food safety, the water pipe assembly removed from the old machine should not be
used.
When handling, keep the cabinet upright, with the inclination not exceeding 45 degrees. Do
not invert the machine or lay it horizontally.
This ice machine should not be placed in wet or easily splashed area.
The grounding of this ice machine cannot be connected to gas pipe, water pipe, telephone
line or lightning rods, etc.
There are rotating components in this ice machine. Do not insert slim objects into ventilation
or exhaust ports, or serious mechanical injury may occur.
Do not store volatile or flammable substances in this ice machine, or it may result in explosion
or fire.
Do not store any sundries, or freeze any food in the storage bin. Keep the ice scoop clean.
The ice machine must be placed on the floor sufficient to supports its weight. Insufficient base
may cause the equipment fall over and cause injury.
There should be sufficient ventilation space around the ice machine. Keep good ventilation.
Only the power supply specified on the machine nameplate can be used with this ice machine.
4
This ice machine cannot be connected to hot water.
Socket for this ice maker must be reliably grounded and with leakage protection.
The ice machine must be disconnected from power before manual cleaning, repairing and
maintenance.
Before cleaning, repairing and maintenance, the remaining ice in the ice bin should be
removed from the ice machine to avoid contamination to ice.
Do not splash water directly onto the surface of the ice machine during the cleaning process;
otherwise it may cause short circuit, leakage or other faults.
Flammable foaming agent is used for insulation. The ice maker should be disposed of and
recycled by qualified personnel and institutions.
The ice machine should be properly managed to ensure that children will not play with the
machine.
When the ice machine malfunctions, turn off the power and contact professional personnel
for repairs.
For the ice maker with flammable refrigerant R290:
DANGER – RISK OF FIRE OR EXPLOSION. FLAMMABLE REFRIGERANT USED.
MUST BE ENOUGH VENTILATION SPACE AROUND THE ICE MAKER TO KEEP
THE VENTILATION SMOOTH.
DANGER – RISK OF FIRE OR EXPLOSION. FLAMMABLE REFRIGERANT USED.
DO NOT USE MECHANICAL DEVICES TO DEFROST REFRIGERATOR. DO NOT
PUNCTURE REFRIGERANT TUBING.
DANGER – RISK OF FIRE OR EXPLOSION. FLAMMABLE REFRIGERANT USED.
TO BE REPAIRED ONLY BY TRAINED SERVICE PERSONNEL. DO NOT
PUNCTURE REFRIGERANT TUBING.
DANGER – RISK OF FIRE OR EXPLOSION. FLAMMABLE REFRIGERANT USED.
DO NOT USE ANY ELECTRICAL APPLIANCES IN THE ICE STORAGE BIN OF THE
ICE MAKER.
CAUTION – RISK OF FIRE OR EXPLOSION. FLAMMABLE REFRIGERANT USED.
CONSULT REPAIR MANUAL/OWNER'S GUIDE BEFORE ATTEMPTING TO

5
SERVICE THIS PRODUCT. ALL SAFETY PRECAUTIONS MUST BE FOLLOWED.
CAUTION – RISK OF FIRE OR EXPLOSION. DISPOSE OF PROPERLY IN
ACCORDANCE WITH FEDERAL OR LOCAL REGULATIONS. FLAMMABLE
REFRIGERANT USED.
CAUTION – RISK OF FIRE OR EXPLOSION DUE TO PUNCTURE OF
REFRIGERANT TUBING; FOLLOW HANDLING INSTRUCTIONS CAREFULLY.
FLAMMABLE REFRIGERANT USED.
General
The ice machine is fully automatic. With proper installation and connection to potable water and
power source, the ice making will start properly. When the ice cubes fill up the storage bin, the
machine will automatically stop. The ice machine is generally used in the following and similar
occasions:
The kitchen area of a store, office or other workplace
Farm, hotel, car hotel and restaurant
Catering and similar non-retail occasions
This ice machine is not intended for residential use
Installation
Location for Installation
The ice machine should be installed in a proper location meeting the following conditions:
Indoor, not more than 2,000m (6562 ft.) above sea level
Ambient temperature: 5-40°C (41-104°F)
Power supply: the rated voltage indicated on the machine nameplate ±6%
Water source: potable water, with water pressure from 0.13MPa to 0.55MPa; water
temperature: 5-35°C (41-95°F)
The ice machine should be kept away from heat sources and should be strictly forbidden to
use at extremely high temperature or low temperature environment and should avoid direct
sunlight.
There should be sufficient ventilation space around the ice machine and keep good
ventilation; the distance from the ice maker to the wall should be no less than 30cm (12") for
the front, 15cm (6") for the sides, and 20cm (8") for the rear.
6
The ice machine must be placed on a floor sufficient to support its weight
Socket for the ice maker must be reliably grounded and with leakage protection
Proper floor drainage must be provided near the installation location of the ice machine
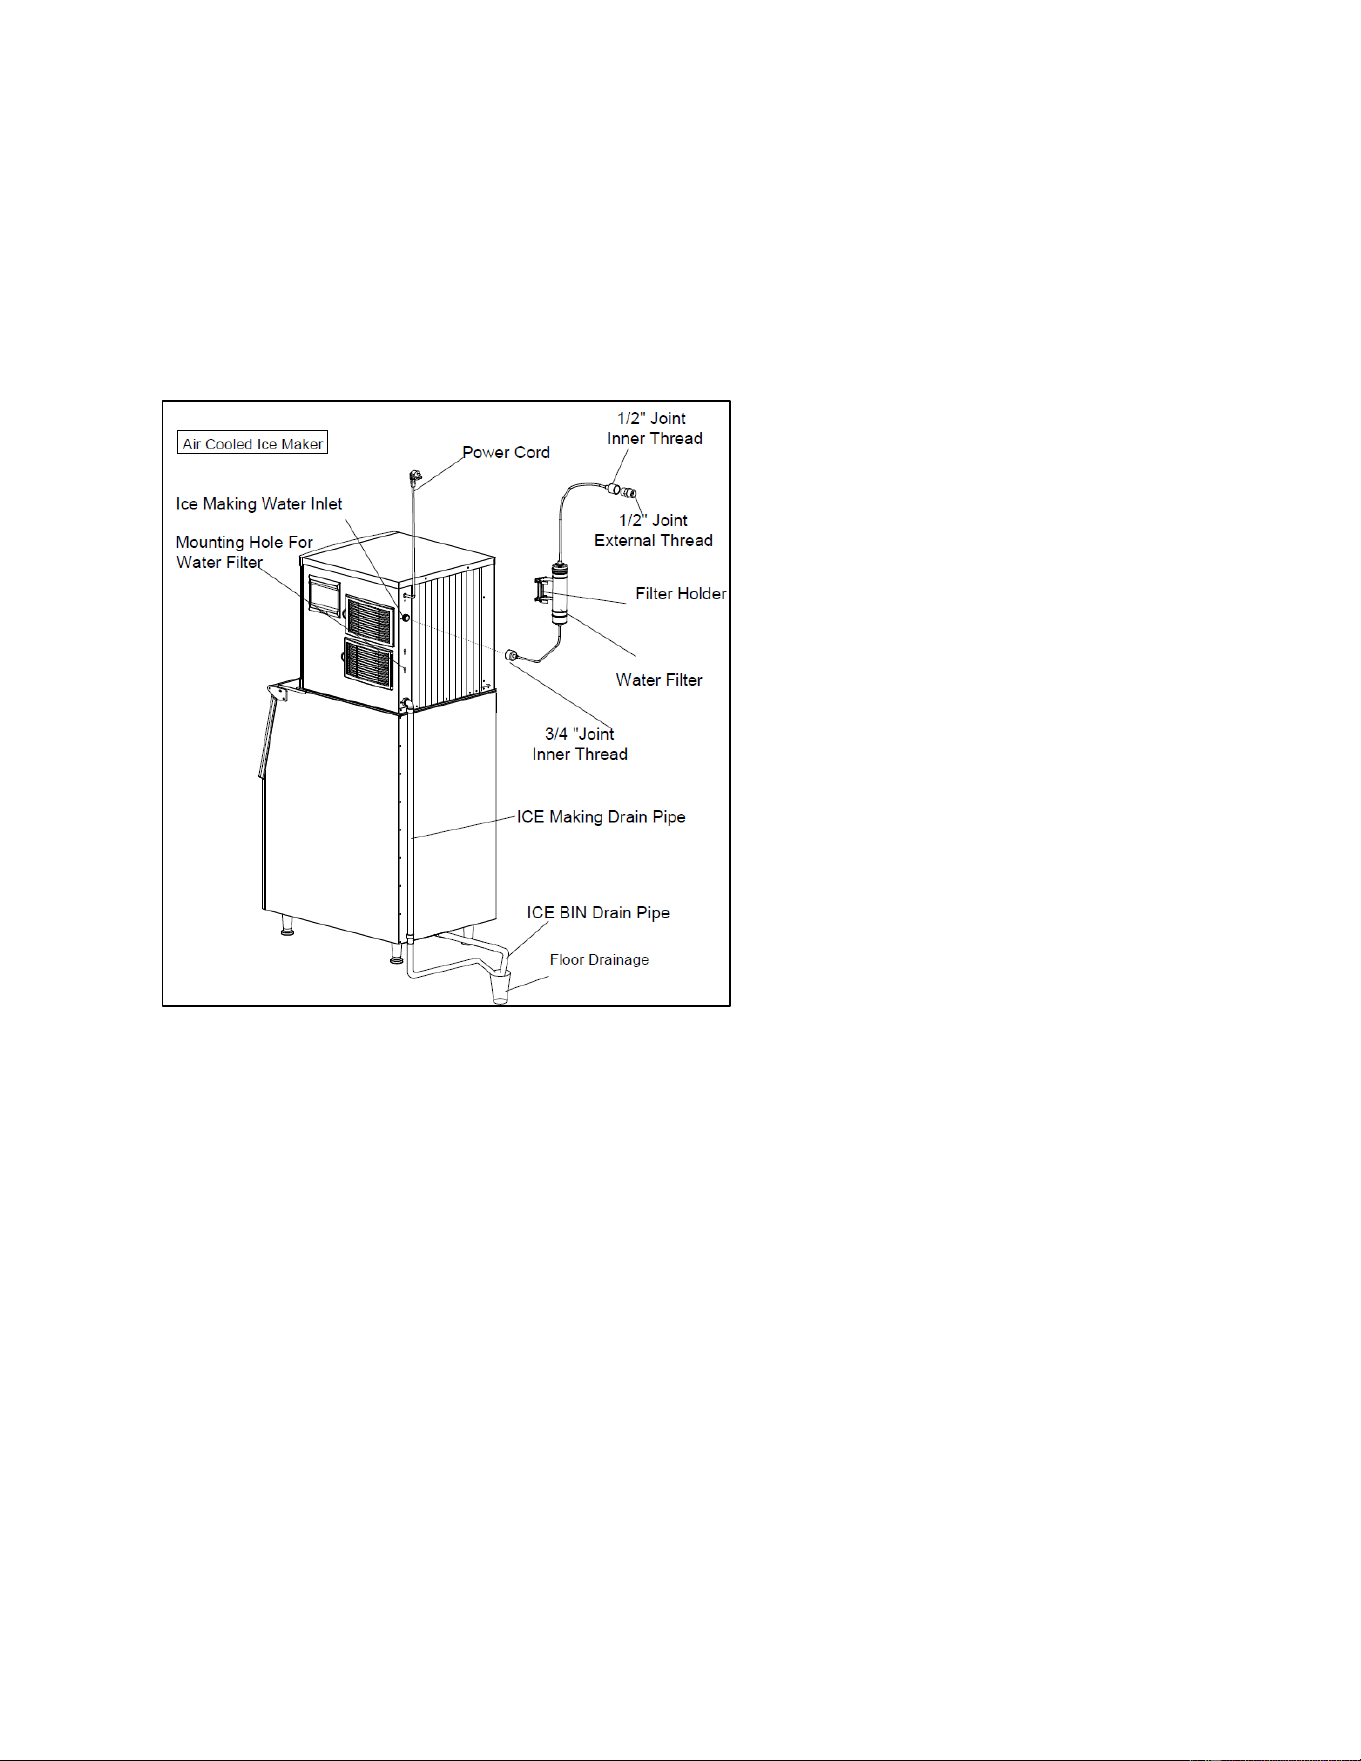
Schematic Diagram of Installation
Installation Steps
1. Check if the ice machine is in good condition and the accessories are complete; check the
machine model and the machine nameplate.
2. Clean the ice storage bin and internal surfaces with a sponge soaked in warm water and
soda. Then wash and dry it with potable water.
3. Place the ice machine in the operation area; ensure that the machine is placed on a leveled
floor to ensure the water flows evenly on the evaporator.
4. The compressor chamber is located at the back, where the compressor and condenser are
installed. The machine requires good ventilation. Therefore, the front and rear of the ice
maker must have ventilation space of more than 20-30cm (8-12").
5. The bottom of the ice machine is equipped with adjustable legs for level adjustment and floor
cleaning.
6. Connect the machine's inlet water filter and water pipe referring to the schematic diagram of

7
installation; if the installation site is already equipped with a drinking water system, the water
filter may be omitted.
Note: the filter flow direction should be correctly installed as per the direction marker
on the filter head cover or the filter body.
Note: This machine is equipped with an inlet water filter. The filter will have
impurities from the water accumulated as the machine is running. Generally, it needs to
be replaced every month to every 3 months.
7. Connect the machine to the water supply using the 3/4" inlet pipe supplied with the machine.
It is recommended to install a water valve (not supplied with this machine) on the water supply
line.
8. Connect the drainpipe to the drain connection. To ensure proper draining, it is recommended
that the drainpipe should have a difference of level more than 3cm per meter (0.4"/ft.); and
confirm that the drainpipe is not blocked. It is recommended that the drainpipe be connected
to an open drainage port.
9. Any joint in the drainpipe must not be higher than the machine drainage port; any joint in the
drainpipe cannot be higher than the previous joint.
10. Confirm the power requirements stated in the machine nameplate; ensure that the power
supply meets the requirements.
11. A circuit breaker or switch with leakage protector and reliably grounding is required.
12. Turn off the switch on the power line and connect the machine to the power source.
Startup and Operation
1. Before you start up the machine, please check and confirm:
That the packaging tape inside the ice machine has been removed
The accessories or items in the ice bin have been taken out
The ice machine has been adjusted to a leveled state
The water pipe has been connected and the water valve is open
The plug has been connected to the power supply and the power switch is off
The ambient temperature, water temperature, and pressure of the water supply meet the
above requirements
2. Start up: turn on the power switch. After power-on, the machine begins to make ice
automatically.

8
3. For normal operation, please confirm:
✓ There is water in the water trough and no overflow occurs
✓ The pump is working properly and water is flowing evenly on the evaporator
✓ The compressor is running normally, the temperature of the evaporator and the ice making
water is gradually decreasing
✓ Check the fan is running normally, and there is stable air flow in the inlet and outlet of the ice
machine
✓ The ice machine has no abnormal noise
✓ The ice machine has no abnormal vibration
✓ It takes about 10 to 20 minutes to make one batch ice, depending on the ambient temperature
and the temperature of the water. The higher the temperature is, the longer the ice making
will take
✓ Ice cube can be properly defrosted from the machine
Operation Instructions
Startup: after proper installation, connect the water source and turn on the power supply, the
machine will start working. Please confirm that the machine is operating normally when you
turn it on for the first time.
Note: In case of thunderstorm or not in use for a long time, please disconnect the
power and water source!
Self-check: with power on for the first time, the ice maker will do self-check and pump out
remaining water.
Preparing: when the ice machine is powered on, the inlet valve opens and the inlet water
will flow in until it reaches the set level; then the ice maker will do defrosting one time.
Ice making: after pre-cooling for 30 seconds, the water pump starts, the water flows through
the evaporator smoothly and evenly, the ice cubes are gradually formed in the ice cube tray.
Ice Harvest: after the ice making process, the water pump is turned off, the defrosting valve
is turned on, and after the hot gas enters into the evaporator for about 1-2 minutes, the ice
cubes slides from the evaporator into the storage bin.
Warning: Do not put your hand into the ice storage bin during the ice-falling process
to prevent the ice from hitting your hand!
9
Shutdown: The ice maker will stop working when you click the “on/off” button on the panel
during running process.
Bin full stop: in the running state, with the storage bin filled to a certain height, the ice sliding
board cannot be rebounded or reset because of the block of the freshly produced ice cubes,
the ice maker will stop in 40 seconds.
Repeat ice-making: when the ice cubes on the ice sliding board are taken away, the ice
maker will resume making ice in a few seconds.
Control Panel
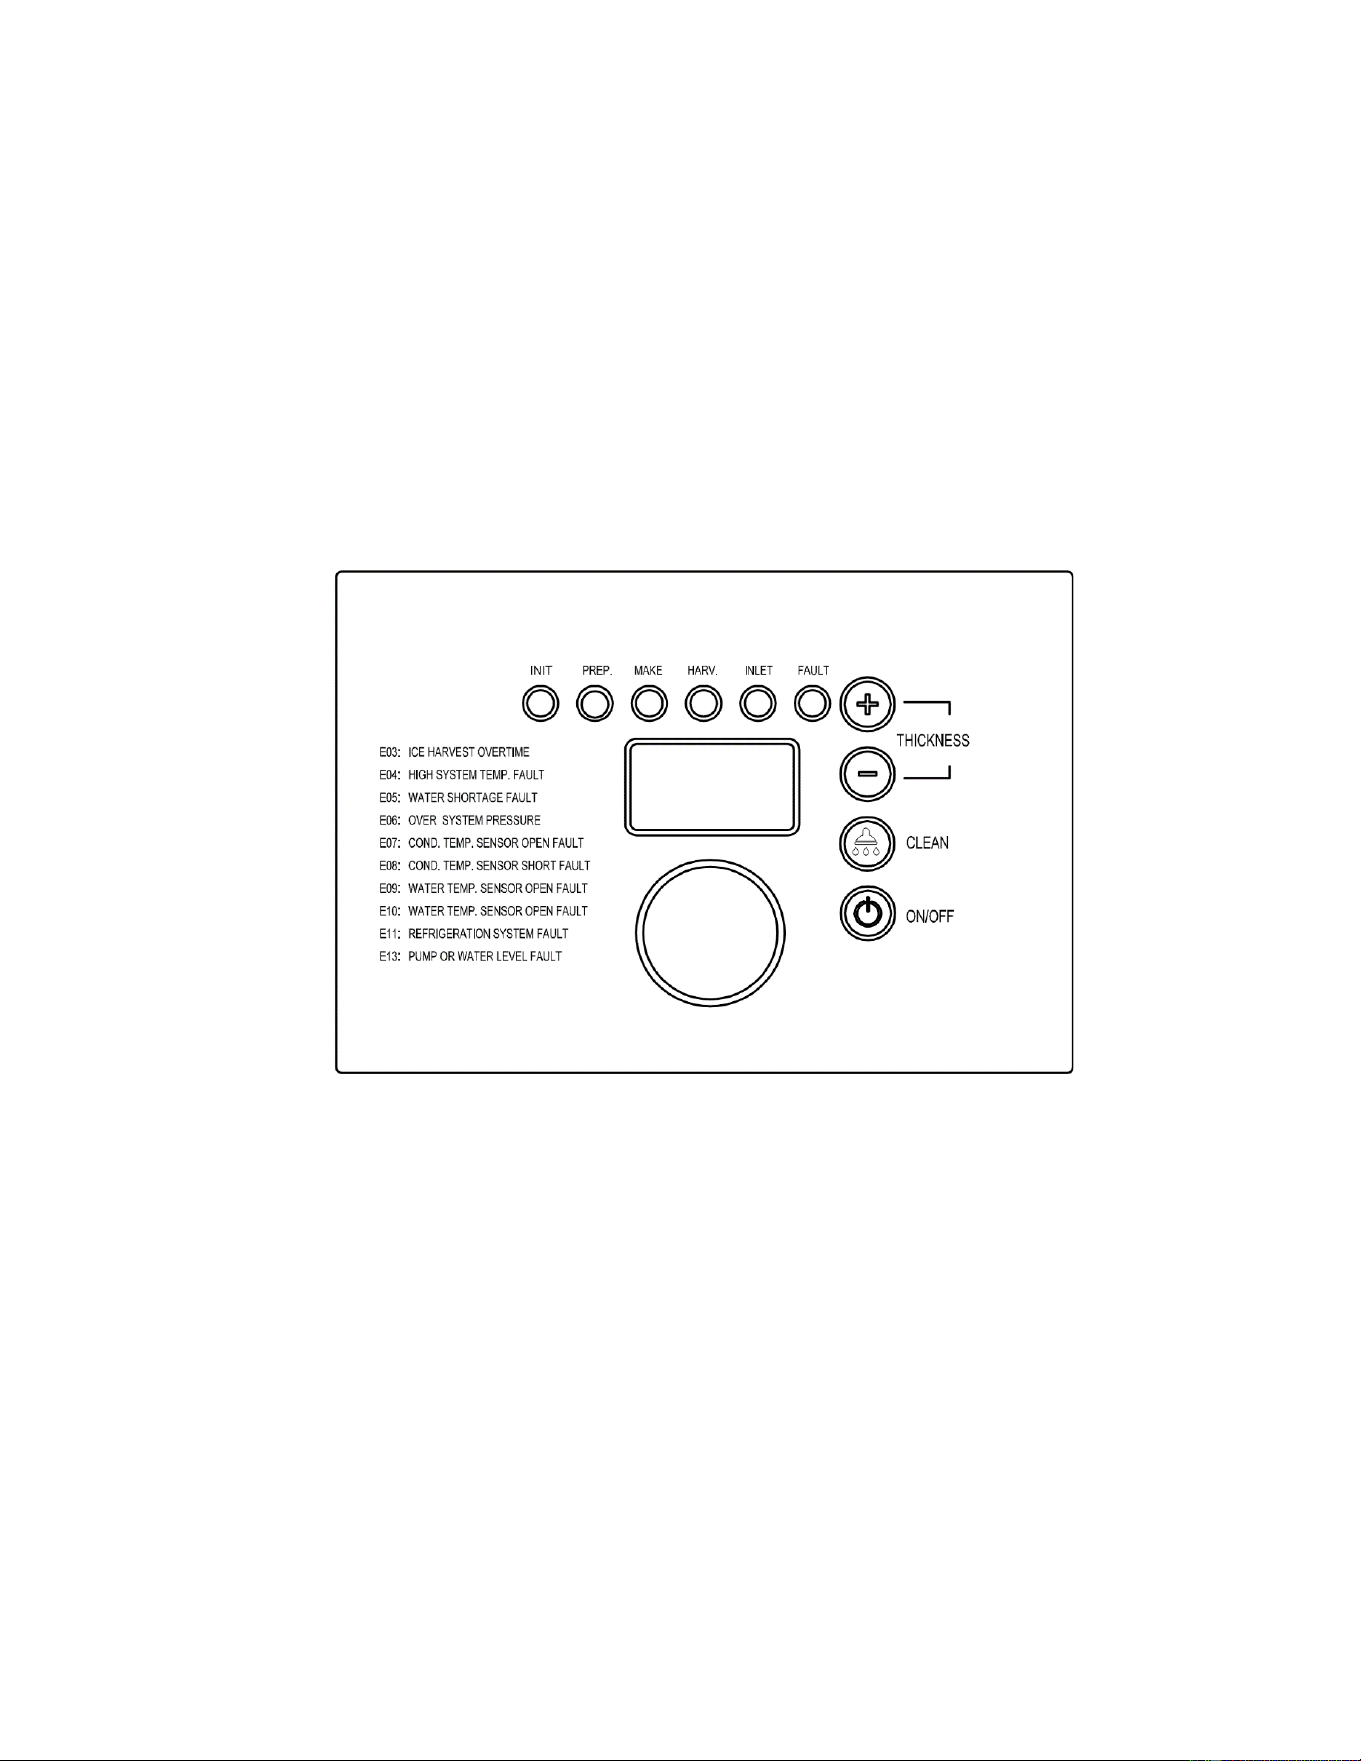
1. LED Display:
Self-check: Display “ini” code.
Preparing: Counting seconds positively.
Ice making: Counting seconds positively prior the water reaching 0°C (32°F). Counting
seconds down to 0 s after.
Ice Harvest: Counting seconds positively.
Clean: Display “CLE” during cleaning and sterilizing; Display “rin” during rinsing.
2. LED Lamps: Lights on during the related process.
3. Ice cube thickness adjustment: During the ice making process, if you are not satisfied with
the ice thickness, press the Ice cube “–” button for 3 seconds, then click the button “+” or “-”
10
on the panel to adjust the thickness of ice cube.
Note: By clicking the “+” or “-” button one time, the ice making time is extended or
shortened by 1.5 minutes.
4. Cleaning: During the normal operation, hold the cleaning button for 3 seconds to enter the
cleaning process. During the entire cleaning process, cleaning agents and disinfectants need
to be put into the water trough. When the clean process is finished, the ice maker will go to
ice making process.
5. Switch: When the device is powered, click the “Switch” button to switch OFF/ON the device.
6. Please open and close the storage bin door gently. Do not slam the door. After taken the ice
cubes, please close the door.
7. If the ice maker is not in use for a long time, it should be powered on and run for 2 to 4 hours
every 2 months.
Other special protection - shutdown
If the ice machine has not detected ice cube falling off in three cycles, it will shut down for
safety protection. The ice maker needs to be checked.
The ice machine detects that the ambient temperature is too high and will stop for safety
protection.
If the water-cooled ice machine detects an abnormality in water supply, it will stop for safety
protection.
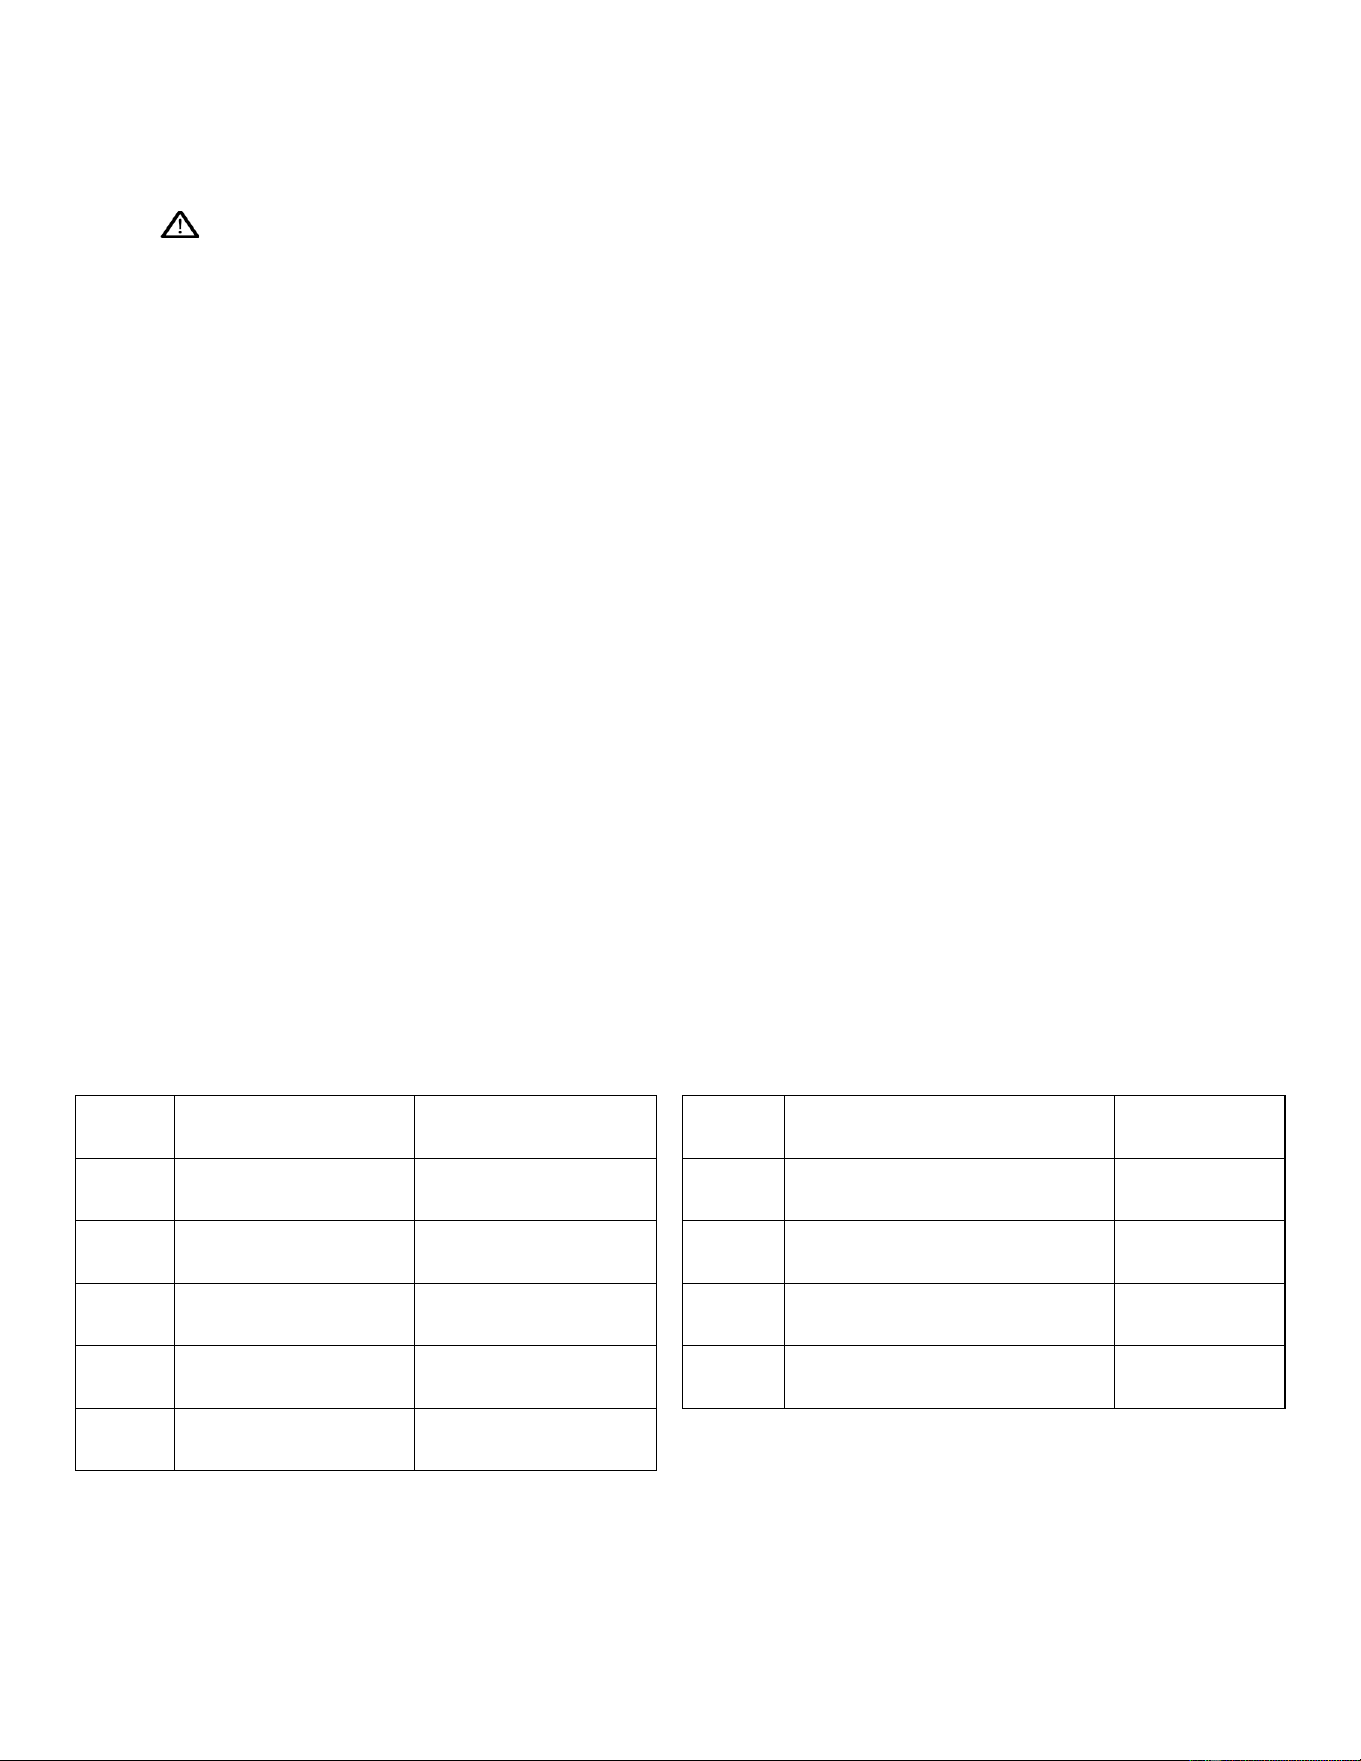
The fault code and its comments are displayed as follows:
Code
Comments
Machine action
Code
Comments
Machine
action
E01
Sliding board fails
Protective
shutdown
E07
Condensation sensor
open circuit
Not stop
E03
Overtime of ice
making
Protective
shutdown
E08
Condensation sensor
short circuit
Not stop
E04
High temperature
Protective
shutdown
E09
Water temp. sensor open
circuit
Not stop
E05
Water shortage
Protective
shutdown
E10
Water temp. sensor short
circuit
Not stop
E06
High pressure
Protective
shutdown
11
Maintenance
Note: Maintenance must be done by qualified professional personnel.
Warning: Before maintenance or manual clean, be sure to cut off the water source and
power supply.
Exterior cleaning
Frequently clean the environment around the ice machine to keep it clean. Do not block the
vents.
The outer enclosure should be cleaned with a mild detergent and then wiped clean. If necessary,
use commercial stainless steel cleaners and polishes.
Note: Stainless steel may rust without proper maintenance.
Inlet water filter
The filter element should be inspected regularly. It is recommended to replace filter element
every month to every 3 months.
Interior cleaning
The inside of the ice storage bin can be washed directly with water pipes.
Note: Check and confirm the water pressure lower than the maximum allowed
pressure. Do not flush the part above the water pump or the evaporator directly for water
protection.
Condenser
The condenser should be cleaned every three weeks, using a soft brush or a vacuum cleaner
with a brush. Brush it up and down along the fin direction to avoid damage to the fins and further
affecting the cooling effect.
The condenser filter should be cleaned every 2 weeks.
Note: Be careful when doing the condenser cleaning as the edges of the fins are
sharp.
Water pipe
To ensure food safety, the water pipe of the ice machine should be cleaned regularly.
Wintering
Turn off the water and power supply, drain the residual water from the water trough, inlet pipe
and drainpipe.
The maintenance of the ice machine is not covered by the manufacturer's warranty!
12
Clean Function
Note: Please empty the bin of ice in advance.
Note: Please clean and sterilize the bin and rinse completely.
Note: Please clean and sterilizing the ice sliding board, water distribution pipe, water
supply pipe, water pump, then do complete rinsing.
Turn on the ice maker; push “clean” button for 3 seconds and the ice maker will pass into
clean mode. Manually add the proper amount of cleaning solution, carefully following the
instructions.
Push “clean” button. The ice maker will auto clean for about 15 minutes. Spray cleanser to
the evaporator in the meantime to ensure a complete clean. When finished, the led display
flashes “Clean” slowly again.
Manually add the proper amount of sterilizing solution, carefully following the instructions.
Push the “clean” button again, the ice maker will auto sterilize for about 15 minutes. Spray
sterilizing solution on the evaporator in the meantime to ensure complete sterilization.
When finished, the ice maker will start the rinsing process. 5 rinse cycles will be completed,
each cycle taking about 5 minutes.
The ice maker will resume making ice as soon as the clean process ends.
Throw away the next 5 batches of ice in case of residual cleaning product.
Service Call
If the ice machine works abnormally, please confirm below before making a service call:
1. Check the water supply
✓ whether there is water in the water trough
✓ whether the water pressure for the ice machine is 0.13MPa to 0.55MPa; the water
temperature is 5-35°C (41-95°F)
✓ whether the water valve is open
✓ whether there is no water leakage
2. Check the power
13
✓ whether the indicator on the display panel is ON
✓ whether the panel display does not display the OFF standby state
✓ If the LED on the display panel is not ON, check whether the plug and socket are normal, and
whether the power supply switch is ON
3. Check nameplate and serial number
✓ Check the nameplate located on the side or back of the ice machine and record the model
and serial number of the ice machine
Note: If the machine fails due to the user’s faults, such as no supply of water,
electricity or environmental factors, rather than the fault of the ice maker, the door-to-
door service will be charged.
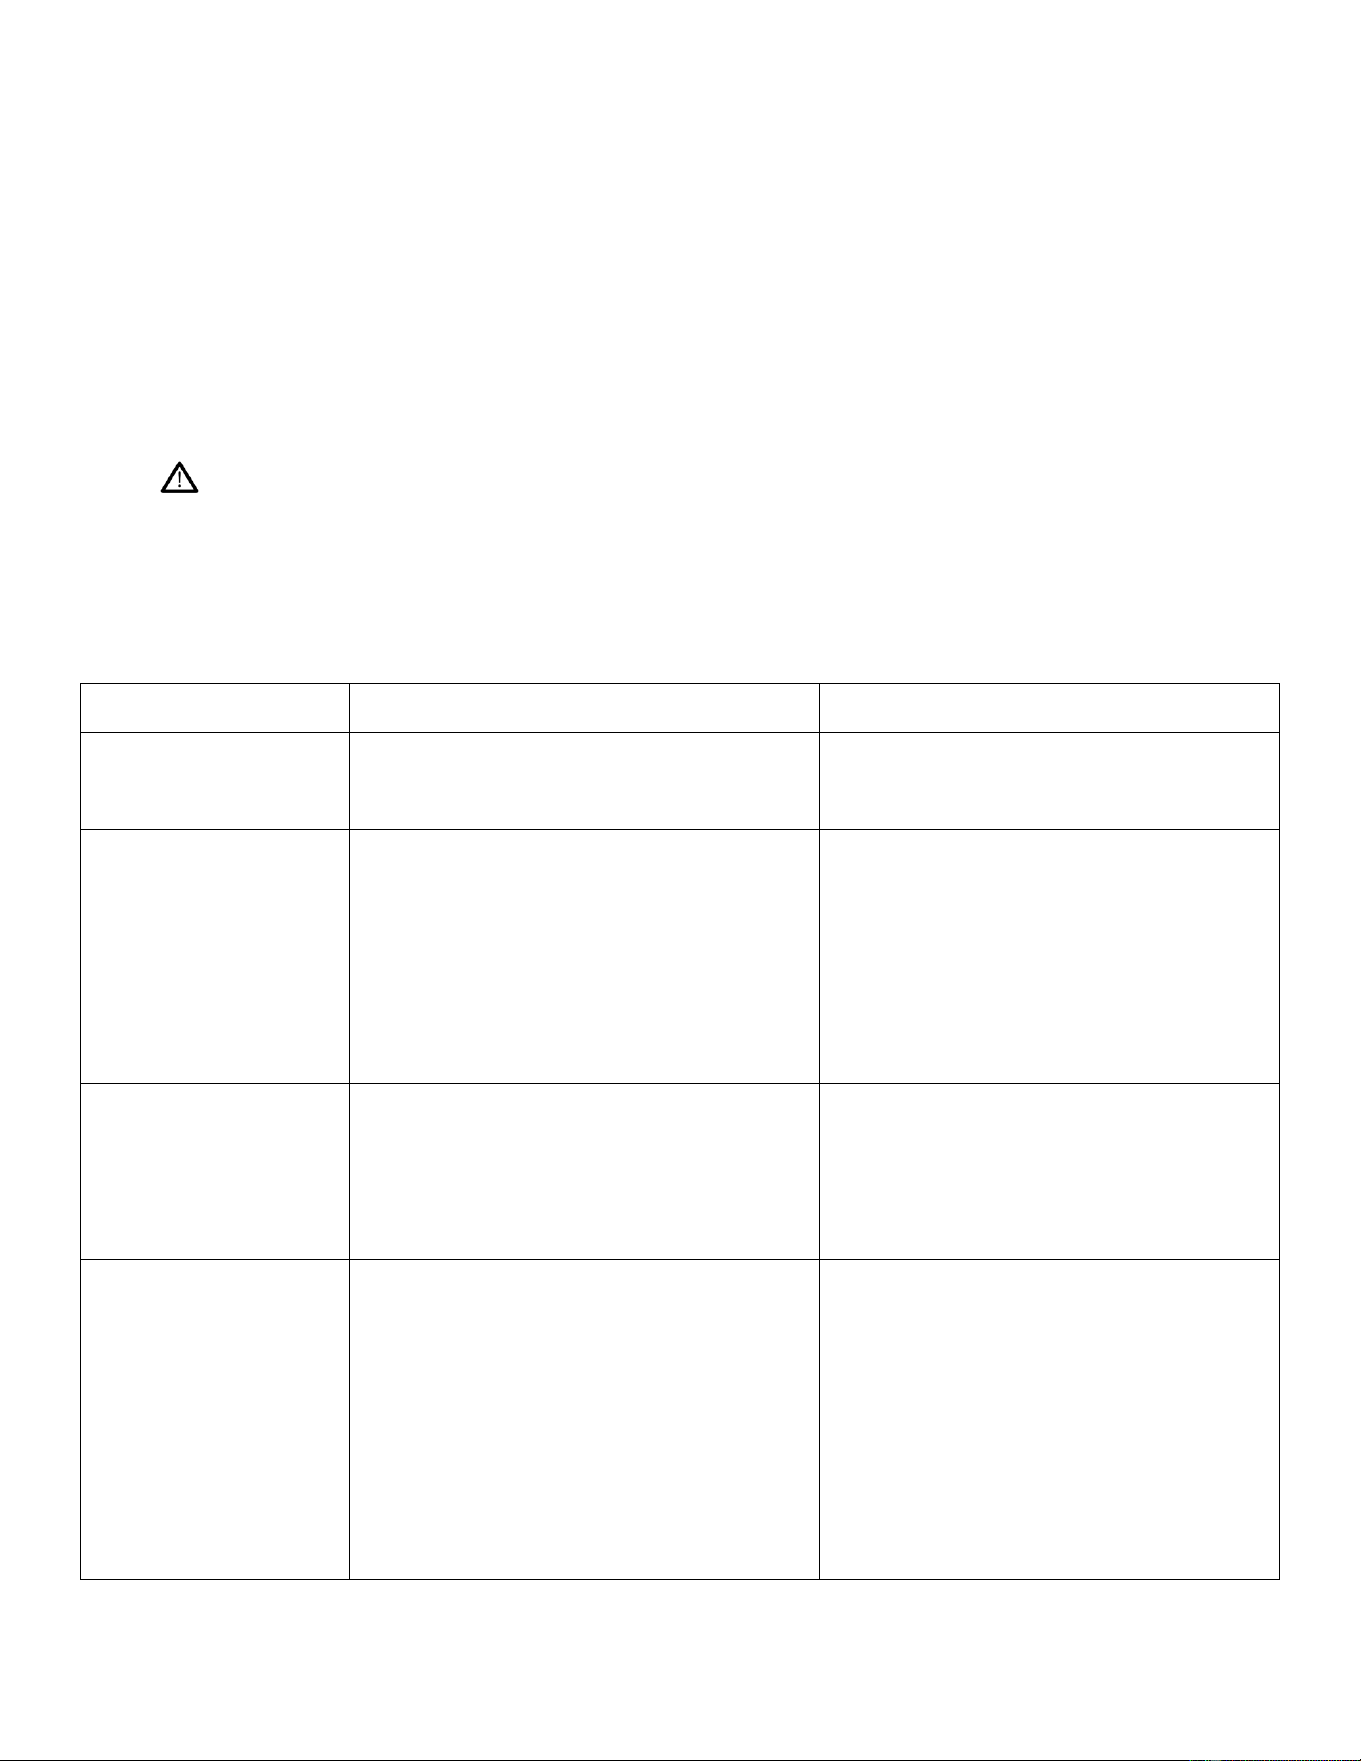
Common Faults and Troubleshooting
Fault
Potential cause
Troubleshooting
Not working
Indicator is OFF
Power switch not turned on
Plug is loose
Turn on the power switch
Check plug and socket
Shutdown every 3
minutes after startup;
the display shows E04
high temperature
The display shows
E06 high pressure
protection
The ambient temperature is too high
Condenser is dirty and blocked
High pressure switch wires fallen off
Fan does not start
Normal working temperature range of 5-
40°C (41-104°F)
Clean the condenser
Check and correct high pressure switch
wires
Check and correct the fan
Ice defrost abnormal
Ambient temperature too low
Defrost valve does not start normally
Ice thickness too thin or too thick
Normal working temperature range of 5-
40°C (41-104°F)
Check and correct the defrosting valve
Check and correct ice thickness setting
Poor transparency of
ice cubes; ice cubes
too thin or incomplete
Ice thickness too thin
Water pressure too low
Water temperature too high
Inlet water valve does not work
Inlet water valve is dirty and blocked
Water leaking
Inlet water filter has not been replaced
Check and correct ice thickness setting
Check that the water supply pressure is
0.13MPa to 0.55MPa
Water temperature of 5-35°C (41-95°F)
Check and correct the inlet water valve
Check whether water leaks and correct
Check and correct the inlet water filter
14
for a long time
Too slow in ice making
The condenser or air filter is dirty
High ambient temperature
Poor ventilation
Water temperature is too high
Clean the condenser and filter screen
Normal working temperature range of 5-
40°C (41-104°F)
Check the environment around the ice
machine
Check the water supply temperature of
5-35°C (41-95°F)
Too much noise
The ice machine is not placed in a
leveled foundation, or the ice maker is
not leveled.
Level the ice machine
Warranty
The following circumstances are not covered by the warranty:
Normal cleaning or maintenance
Unauthorized modification of the ice machine or use of non-native parts
Damage caused by improper power supply, water supply and drainage
Damage caused by installing, cleaning or maintaining of the ice machine not in
accordance with the instructions of this manual
Artificial damage
Note: Warranty service should be provided by an agent or repair organization
approved by the manufacturer.
Note: this Manual is subject to any technical change without further notice. Please refer
to the nameplate on the product for exact information.