CloverAir
Low Vision AR Glasses

User Guide
REV1.2
Contents
Precaution .......................................................................................................1
Quick Start ...................................................................................................... 2
Basic Operation ............................................................................................. 9
Image Operation ..........................................................................................12
OCR/TTS ...................................................................................................... 15
Screen Mirroring .......................................................................................... 17
Open .............................................................................................................. 18
Setting ........................................................................................................... 23
Specification ................................................................................................. 27
1
Precaution
Charge before first use. Refer to the Battery
Charging section for more details.
Do not expose the device to high temperatures
or sunlight for a long time, and try to use it in an
environment with a temperature range of 10°and
35°C (50°and 95°F).
The device is not waterproof, keep it dry and
away from liquids and chemicals,and try to use
it in an environment with a relative humidity of
less than 70%.
Do not attempt to repair the device. Any
unauthorized attempt will void the product
warranty. Please contact with your distributor.
Please use the battery, charger and data cable
that comes with the device, and the compatibility
of other unofficial accessories is not guaranteed.

2
Quick Start
Overview
The CloverAir series is a glassed-style electronic video
magnifier focused on improving vision perception for visually
impaired person. It provides clear image quality while offering
unrestricted portability, supporting mobile use in all indoor
and outdoor scenarios.
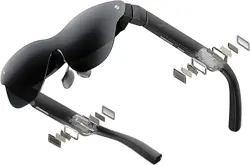
The CloverAir low-vision AR glasses use a modular design
that separates the computing unit, battery, and display optical
module into two independent parts, greatly reducing the
weight of the glasses (around 80g) and heat generation
(around 30°C), improving comfort for long-term wear. The
glasses are creatively equipped with dual cameras. The front
main camera captures visual information such as text and
objects and processes it through algorithms to achieve image
magnification, contrast enhancement, and color optimization.
The processed image is then projected onto the glasses'
binocular HD OLED display module. When switched to the
close-up camera, users don’t need to lower their heads
excessively to capture content on a desk, greatly improving
the experience of reading and writing on paper at a desk.
In addition, CloverAir is equipped with OCR, mobile screen
mirroring, external HDMI input, and a variety of other features
3
and interfaces to seamlessly meet the daily needs of visually
impaired person.
Compositions
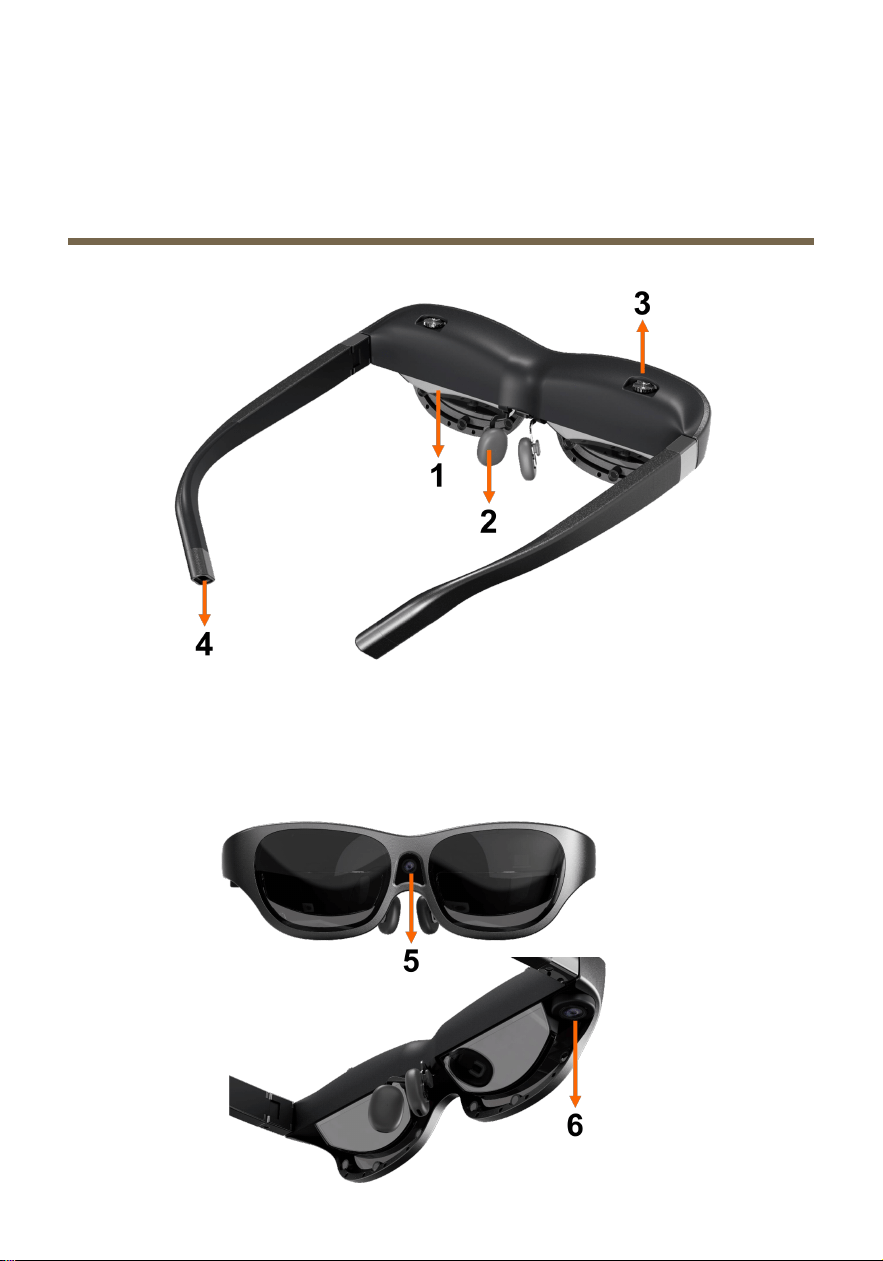
Head-mounted Display
1. AR display module
2. Nose pad
3. Diopter knob
4. USB Type-C port
4
5. Main camera
6. Close-up camera
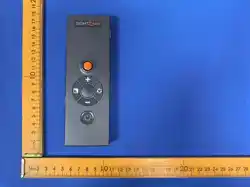
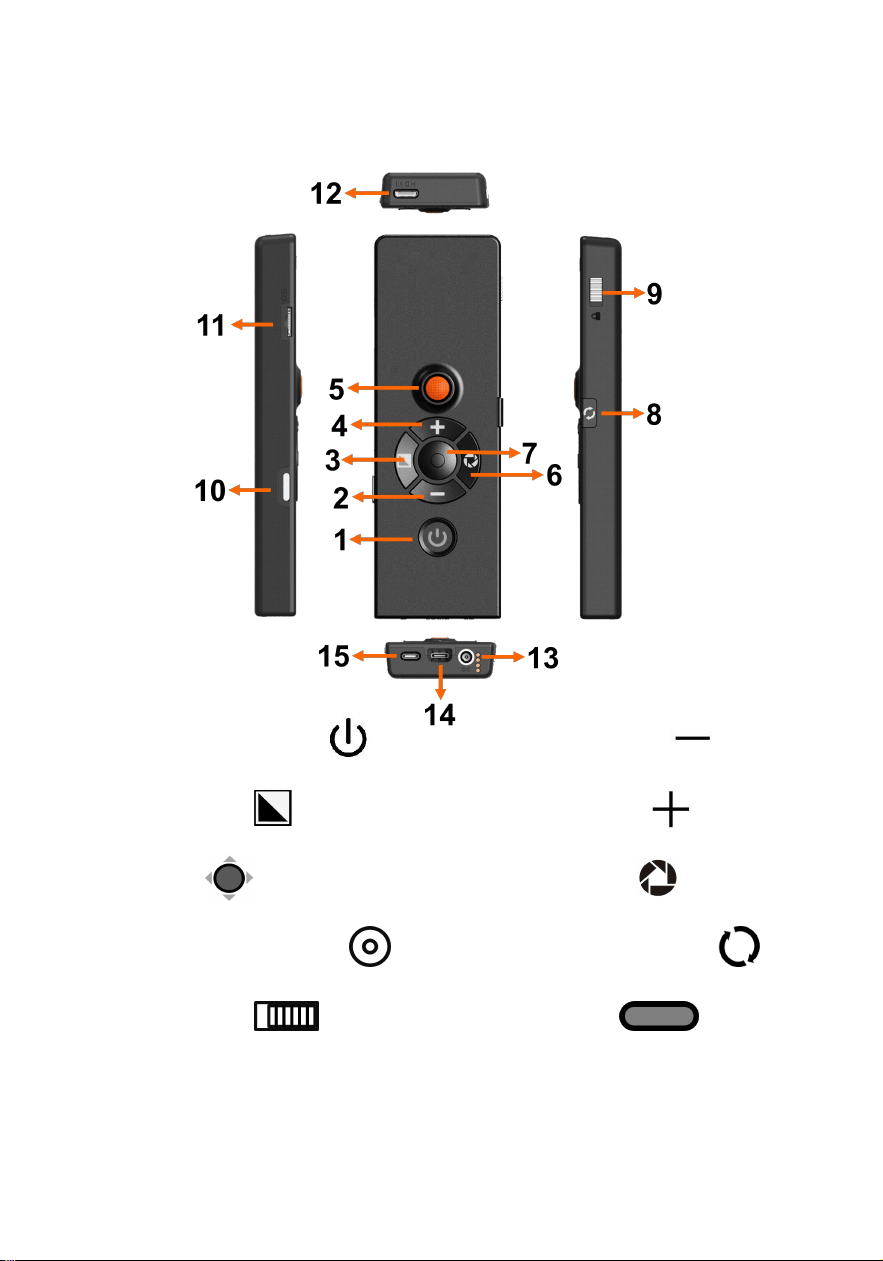
Visual Processing Box
1. Power/TTS button
2. Zoom Out button
3. Color button
4. Zoom In button
5. Joystick /Enter
6. Freeze button
7. Lookup/Enter button
8. Switch/Return button
9. Button lock
10. Shift button
11. MicroSD card slot
12. HDMI Input
13. DC charging port
14. Signal port
5
15. Lightning port
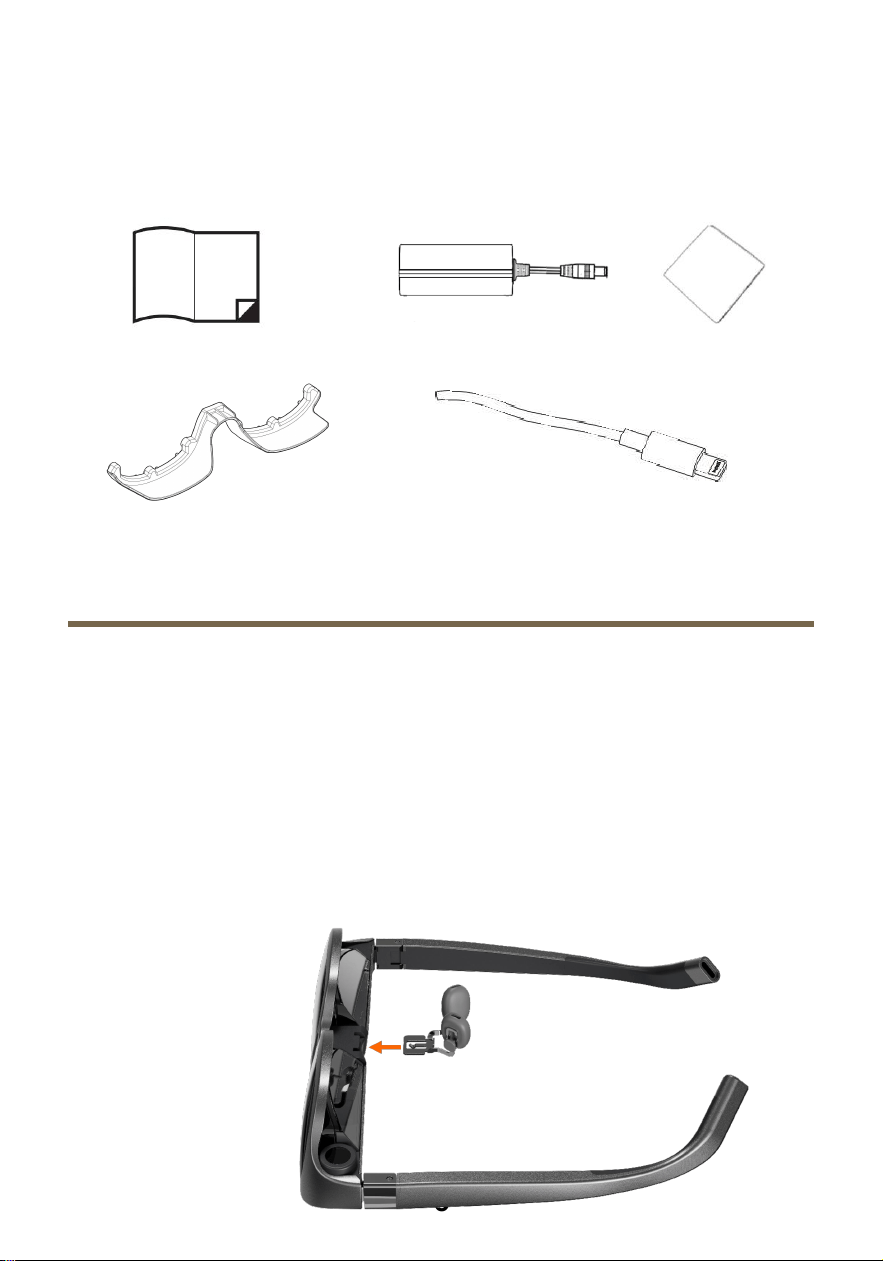
Accessories
Eyewear Fitting
User Manual
Power Adapter
Cleaning Cloth
Sunshade
Lightning to USB type-C cable
Nose Pad
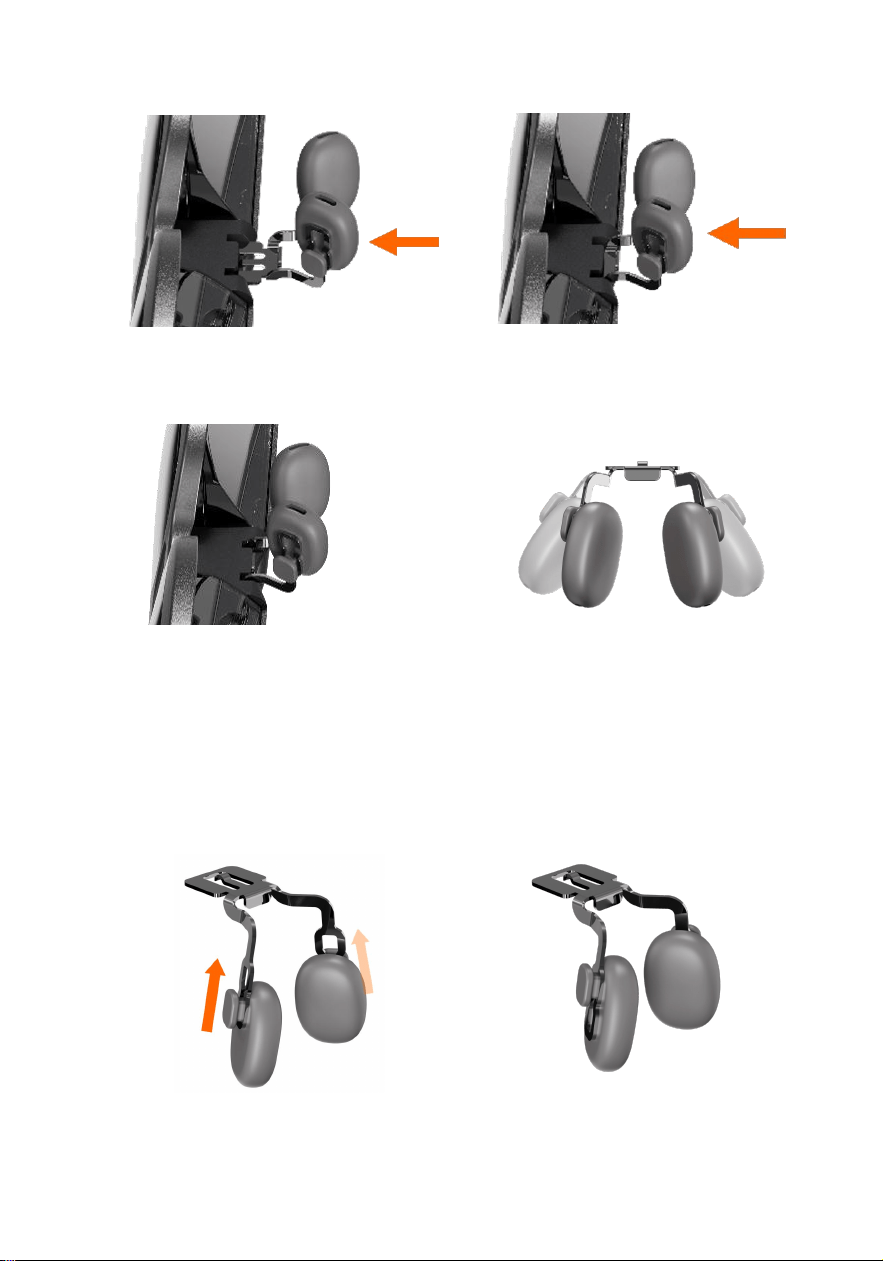
1) Setup
The nose pad offers 3 adjustable positions.
a) Align the nose pad connector with the frame slot.
b) Insert it straight into your preferred position until it locks
into place.
c) Adjust the nose pad arms to make them fit more closely
against the nose.
6
Position 1
Position 2
Position 3
Nose pad arm adjustment
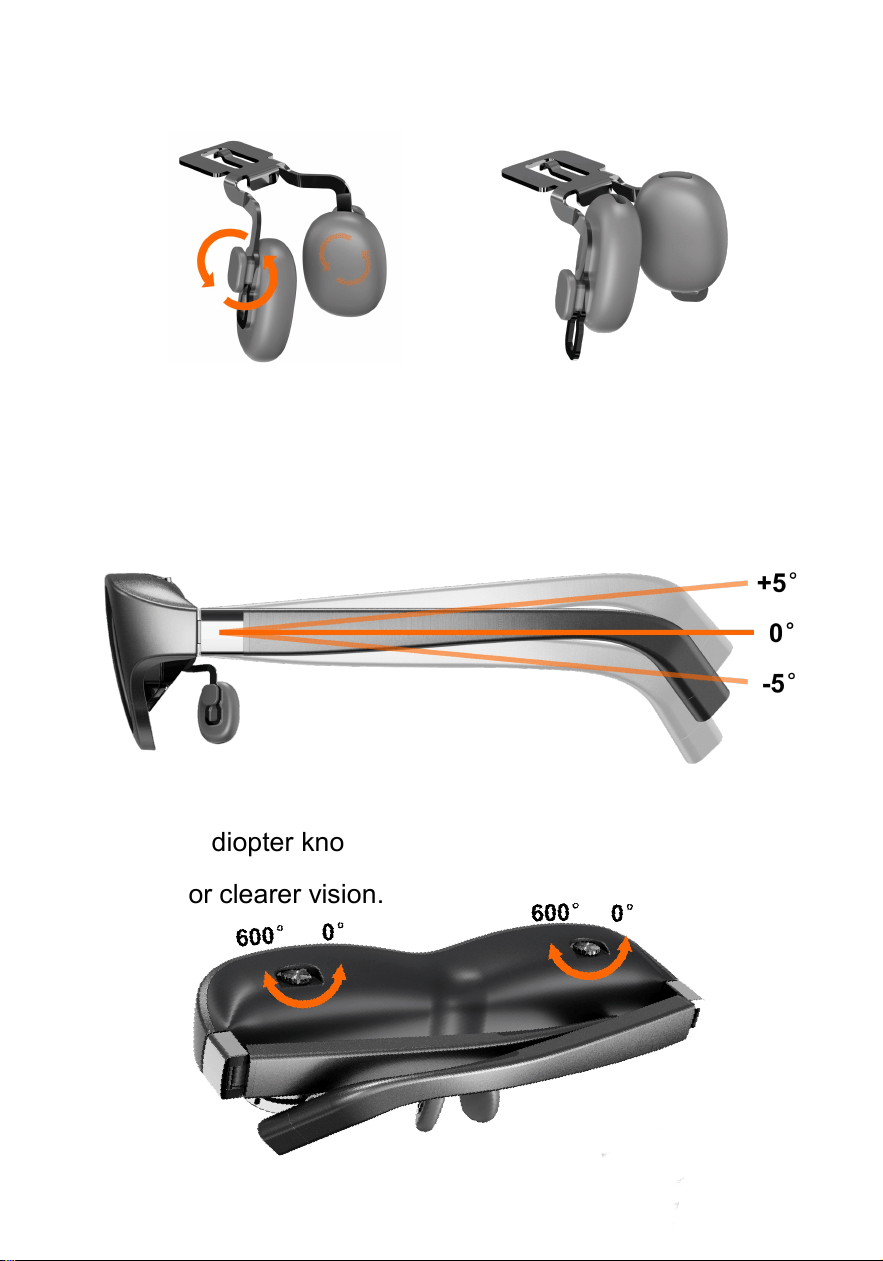
2) Nose Pad Cushion Adjustment
a) The soft cushions on the nose pad can be adjusted
vertically for a customized fit. Gently slide the cushions up
or down along the support arm.
b) The nose pad cushions can be rotated outward or inward
to match the contour of your nose. Simply grasp the
7
cushions and pivot them to the position.
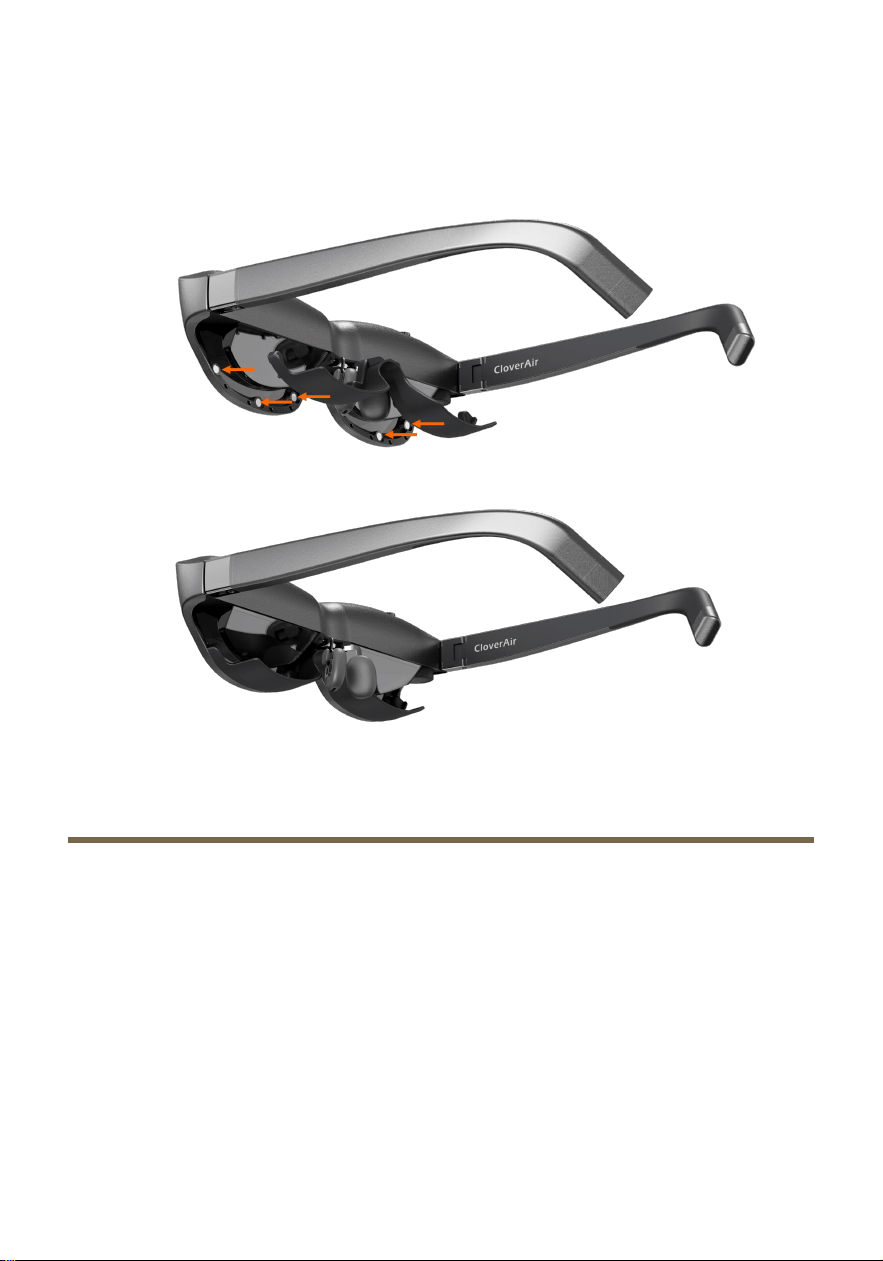
Eyeglass Temple
The temple can be adjusted within a ±5° range for a
personalized fit. Gently bend the temple upward or downward
to your desired angle until it rests comfortably against the
side of your head.
Myopia diopter
Rotate the diopter knob to adjust the Myopia diopter (from 0°
to 600°) for clearer vision.
8
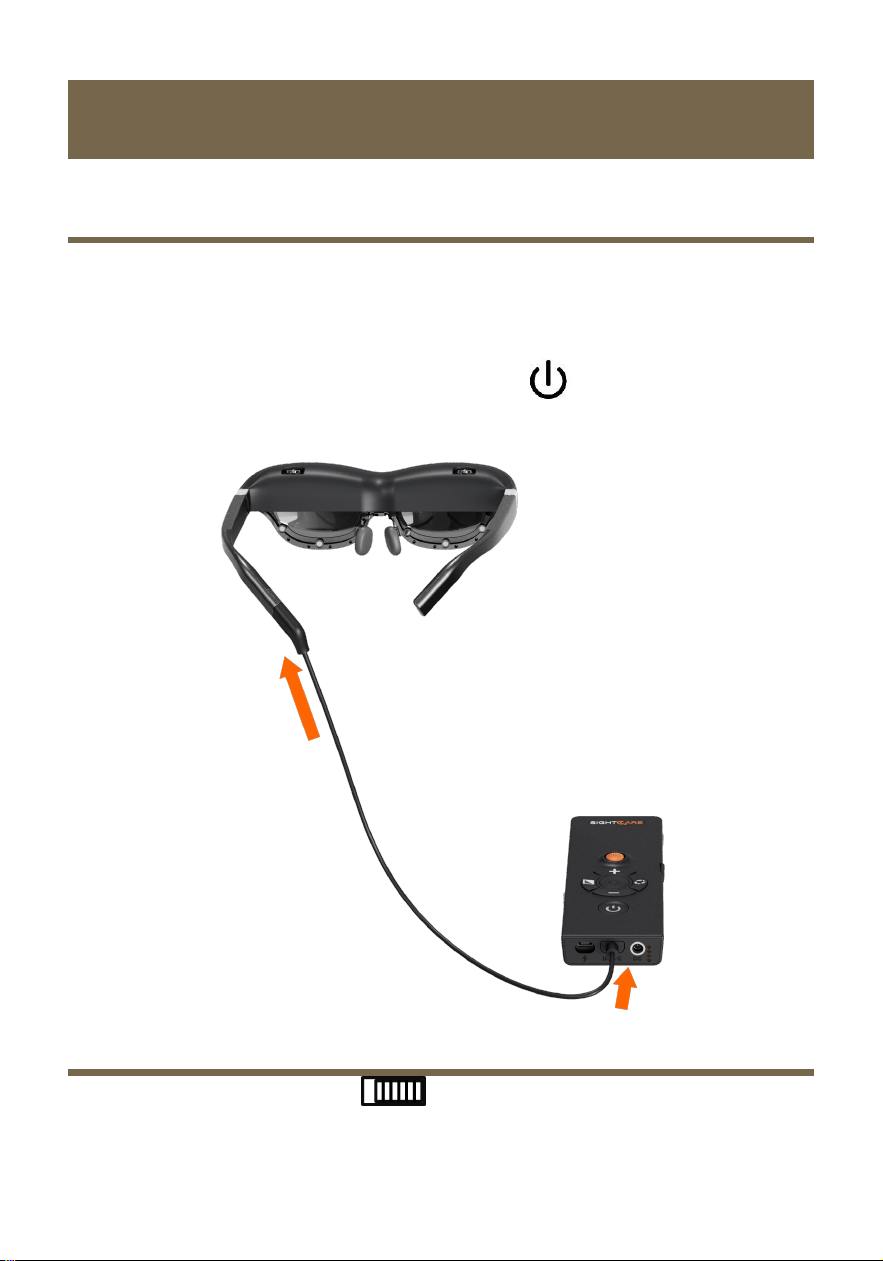
Sunshade
Align the sunshade with the magnetic positions on the frame,
until it clicks magnetically.
Battery Charging
Connect the supplied power cable to the DC port of Visual
Processing box, and plug power adapter into an AC outlet to
start charging. The green light is on when charging, and the
green light is off when it is fully charged in the shutdown
state.
9
Basic Operation
Power On / Off
Connect the Head-mounted Display and Visual Processing
Box using the supplied signal cable.
Press and hold the Power/TTS button for 2 seconds to
turn on/off the device.
Button lock
Slide the Button lock to lock or unlock the button
operations (except for power on/off).
10
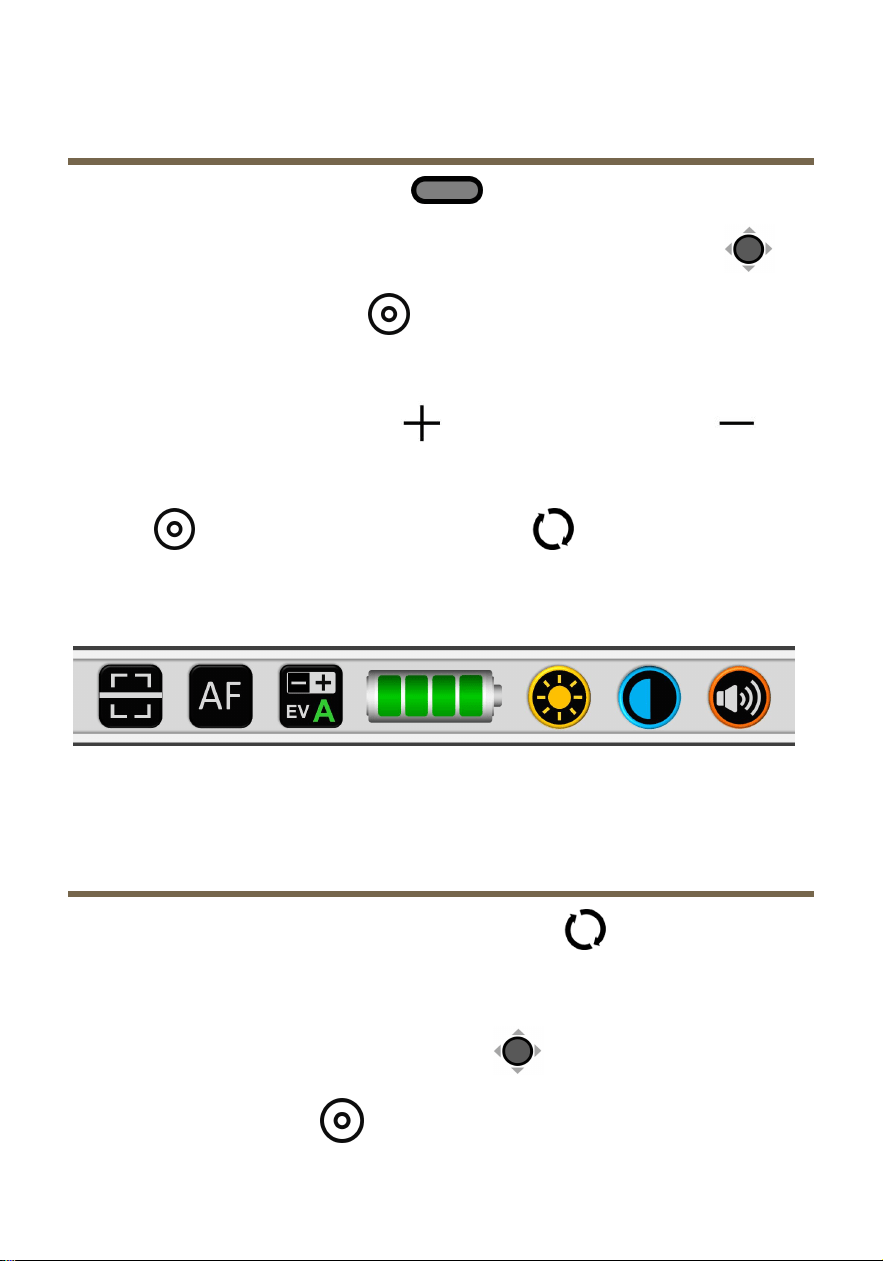
Quick Control Bar
Short press the Shift button to pop up/close the quick
control bar. Push and short press down the Joystick or
the Lookup/Enter button to select the related function or
setting.
Press the Zoom In button or Zoom Out button to
adjust the setting, and short press the Lookup/Enter
button or the Switch/Return button to confirm.
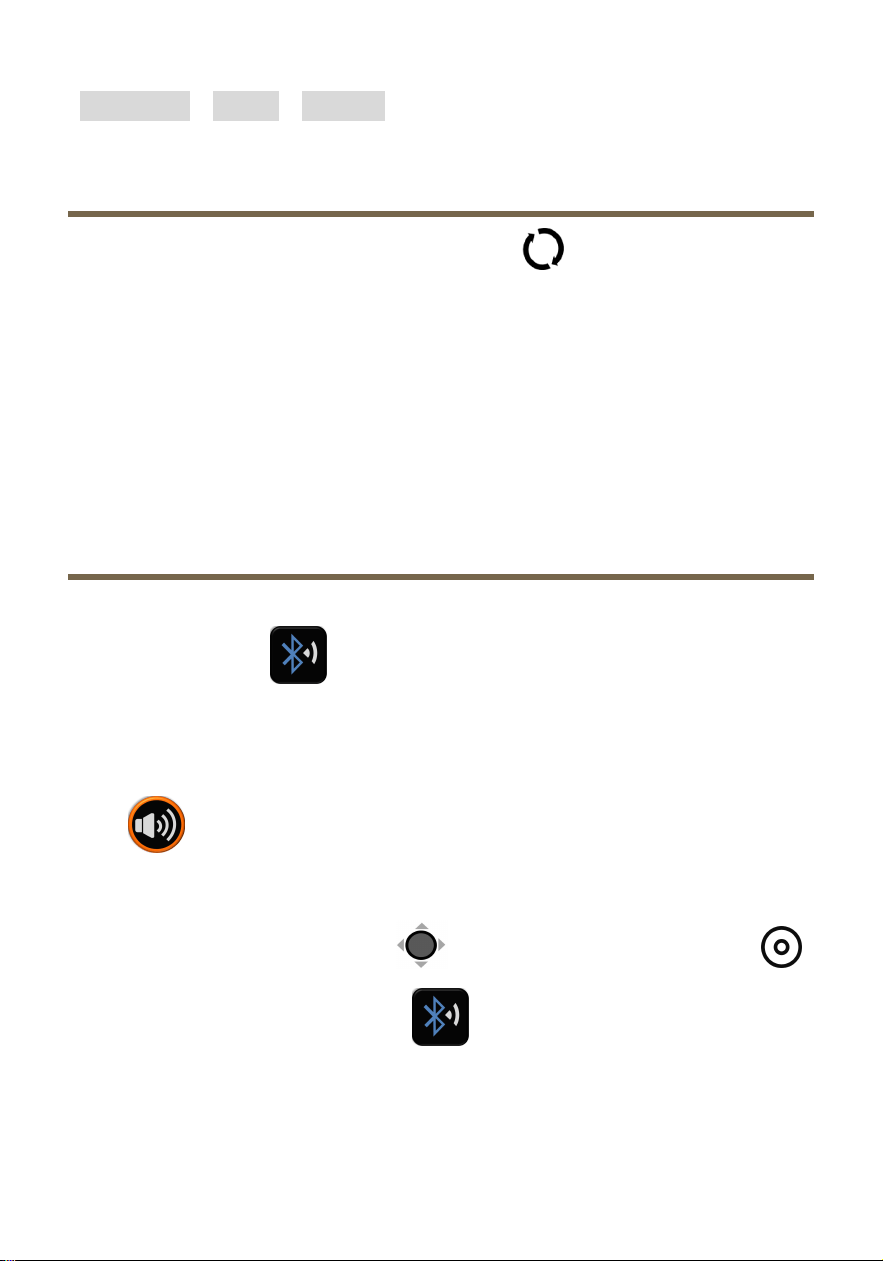
Main Menu
Press and hold the Switch/Return button for 2 seconds to
exit the current module and enter the Main Menu. Push and
short press down the Joystick or short press the
Lookup/Enter button to enter the following modules:
Line
Mask
Image
Exposure
Screen
Brightness
Bluetooth
Volume
Focus
Control
Battery
Status
Image
Contrast
11
Magnifier - Open - Setting
Display Switching
Short press the Switch/Return button to switch between:
Main camera display, Close-up camera, HDMI Input and
Mirroring.
The device supports external HDMI audio and video input
with 1920*1080 video resolution.
Bluetooth and Volume
When no Bluetooth audio device is connected, click the
Bluetooth icon on the Quick Control Bar to pair and
connect the scanned Bluetooth headphones or speakers.
When Bluetooth audio device is connected, click the volume
icon on the Quick Control Bar to adjust the volume.
Bluetooth audio device can be switched by pushing and short
pressing down the Joystick or the Lookup/Enter button
to click the Bluetooth icon on left side of the volume
bar.
12
Image Operation
Image Scaling
Press the Zoom In button or Zoom Out button to
zoom in or zoom out the image.
Enhanced Color / Edge Mark
Short press the Color button to switch between different
edge mark and enhanced color combinations.
Edge mark and color combinations can be customized in the
setting module.
Press down and hold the Color button for 2 seconds to
quickly return to the natural color.
Press and hold the Shift button , and short press the
Color button to change the color of edge mark.
Image Freeze / Storage
Short press the Freeze button to freeze the image at a
higher quality.
13
Press and hold the Freeze button for 2 seconds to pop up
the saving checkbox and choose to save the image.
Short press the Freeze button again to unfreeze the
image.
Image Lookup
Short press the Lookup/Enter button to reduce the image
to 1/3 of the current size, and short press again to return.
Press and hold the Lookup/Enter button to reduce the
image to the minimum zoom level, and release to return.
Image Panning
Push the Joystick to navigate the image around. Head
movement tracking can also be used to navigate the still
image.
Panning Speed Adjustment
Keep pushing the Joystick to any direction and short
press the Zoom In button or Zoom Out button to pop
up and adjust the Panning Speed Bar.
14
Picture Positioning
Quickly push the Joystick in the same direction twice to
jump to the image edge directly.
In the Mirroring module or reading PDF, press down the
Joystick to Jump to the upper left corner of the image. In
the other modules, press down the Joystick to jump to the
image center.
Image Focus
Press and hold the Shift button for 2 seconds to trigger
the focus manually.
Click the Focus Control icon on the Quick Control Bar to
toggle between autofocus and focus lock which is especially
useful for handwriting or handwork to prevent the fault focus
on the hand or pen.
Reading Line/Mask
Click the Line Mask icon on the Quick Control Bar to
toggle between horizontal reading line, vertical reading line
and reading mask.
15
Press and hold the Shift button , and push the
Joystick to change the position or the thickness of reading
line/mask.
Press and hold the Shift button , and short press the
Color button to change the color of reading line.
Image Exposure
Click the Image Exposure icon on the Quick Control Bar
to pop up the exposure control bar.
Exposure Value = 0
Exposure Value ≠ 0
Auto Exposure
Manual Exposure
OCR/TTS
Abbreviation: OCR (Optical Character Recognition) ; TTS
(Text to Speech)
Before OCR recognition, set the corresponding language
type in the Language Setting Page.
Short press the Power/TTS button to pop up the OCR
checkbox.
16
After confirmation, the current image will be recognized and
the text will be converted to speech and start reading aloud.
Click the Exit icon or press and hold the Switch/Return
button for 2 seconds to exit reading aloud.
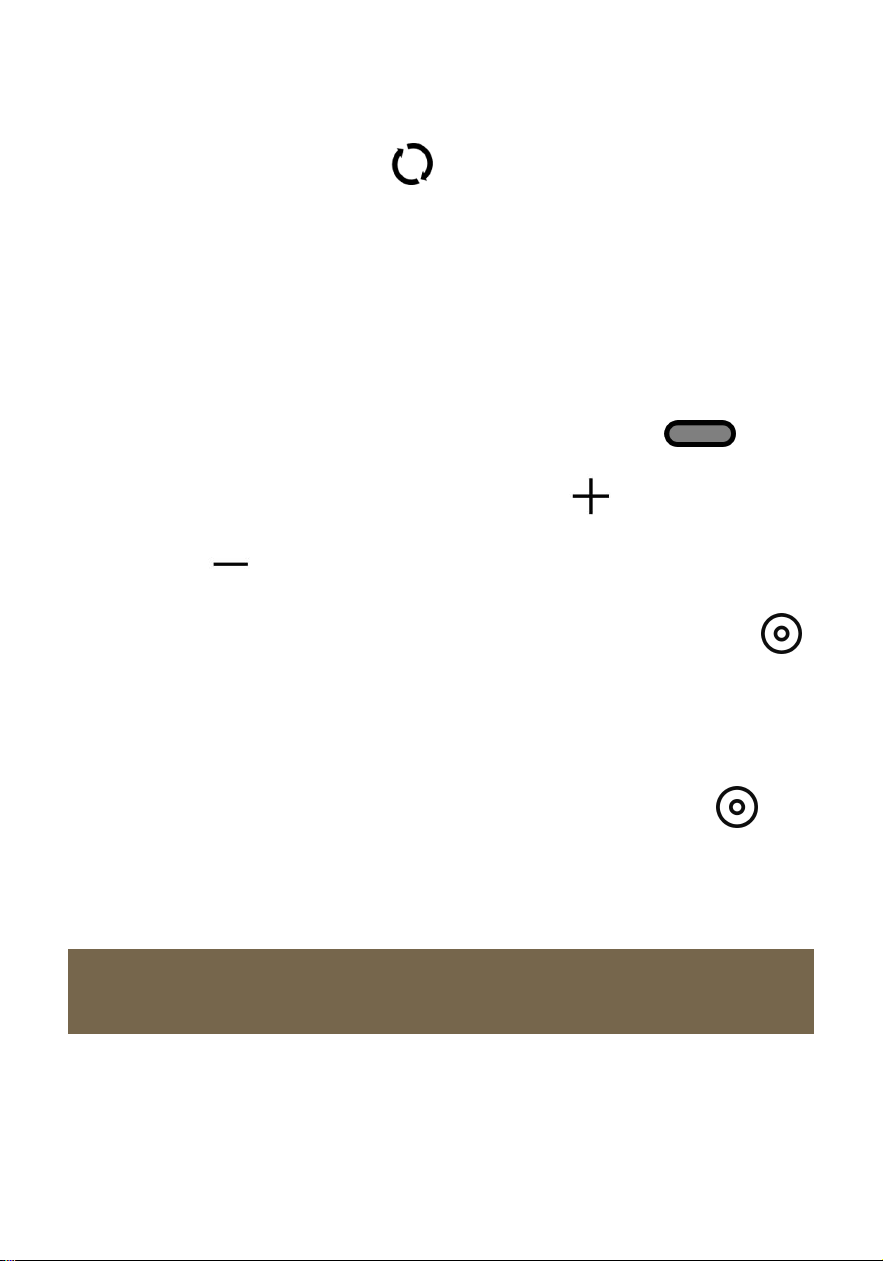
TTS Control Bar
Short press the Shift button to pop up the TTS control
bar together with the quick control bar.
TTS Operation
Play / Pause: Click the play/pause icon or short
press the Power/TTS button to play or pause the
reading aloud.
Exit
Picture
Read-aloud
Play
Speech
Rate
Segmentation
Enabled
Exit
Plain Text
Read-aloud
Pause
Speech
Rate
Segmentation
Disabled
17
Picture / Plain Text Read-aloud: Short press the
Switch/Return button to choose to read aloud in
picture mode or plain text mode. Only the text of the
current section is displayed with segmentation enabled,
and the whole recognized text is displayed with
segmentation disabled.
Skip lines: Press and hold the Shift button , and
short press the Zoom In button or Zoom Out
button to jump to the previous or next section or
sentence. Press and hold the Lookup/Enter button
for 2 seconds to activate the cursor and use Head
movement tracking to jump to different sections or
sentences and release the Lookup/Enter button to
start reading aloud.
Screen Mirroring
Android smartphone/pad with MirrorPlay APP installed can
be screen casted. iPhone/iPad can be screen casted without
18
additional APP installed.
Use the official USB type-C / Lightning cable to connect the
phone and the device, and the device will automatically
detect and enter the Mirroring module.
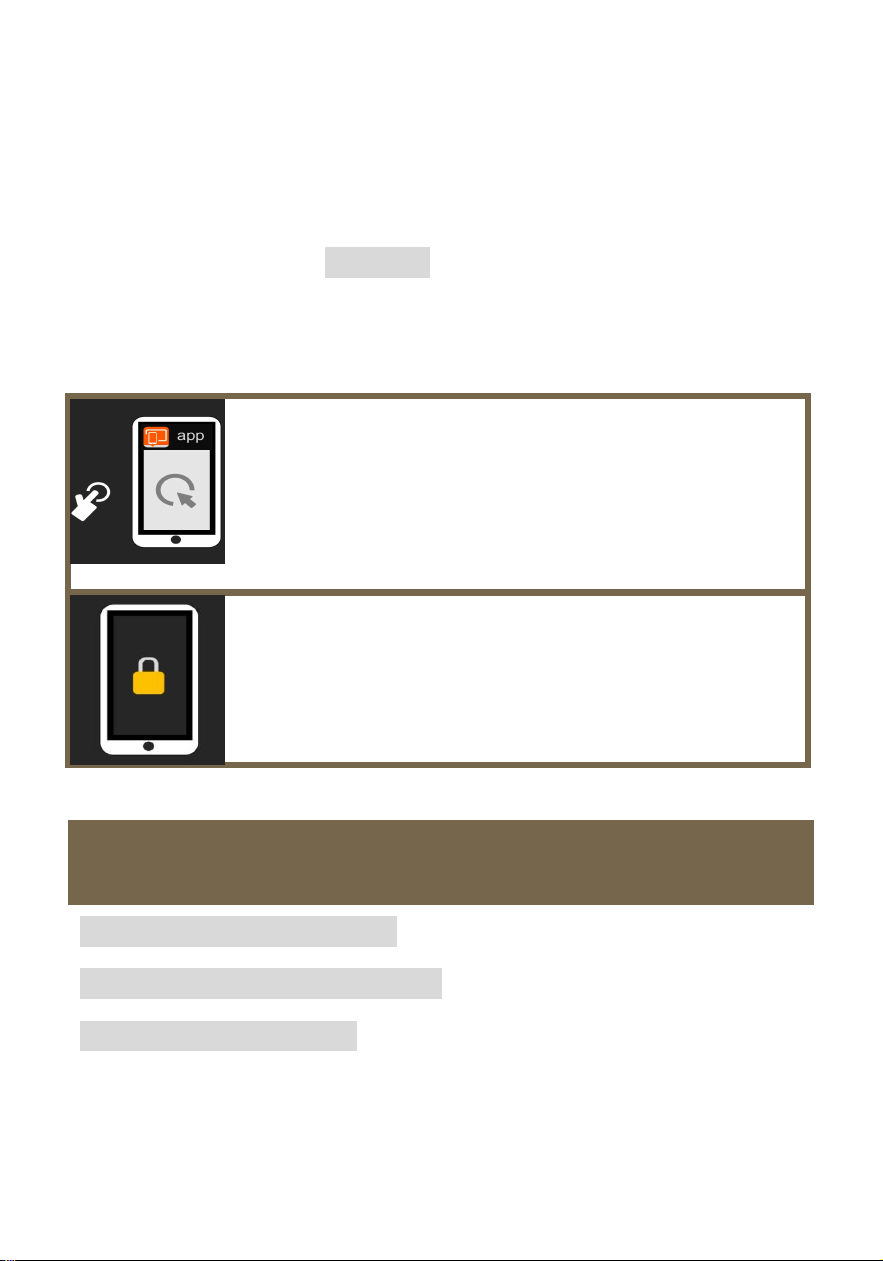
If the following user interface appears on the device screen,
perform the following operations.
Please open the MirrorPlay APP on Android
smartphone and authorize screen casting.
If it is not working, please try reconnecting
the USB Type-C cable.
The phone is in the lock screen state, please
unlock the phone.
Open
Recognized image formats: JPG, BMP, PNG
Recognized document formats: TXT, PDF
Supported file systems: FAT32, exFAT
19
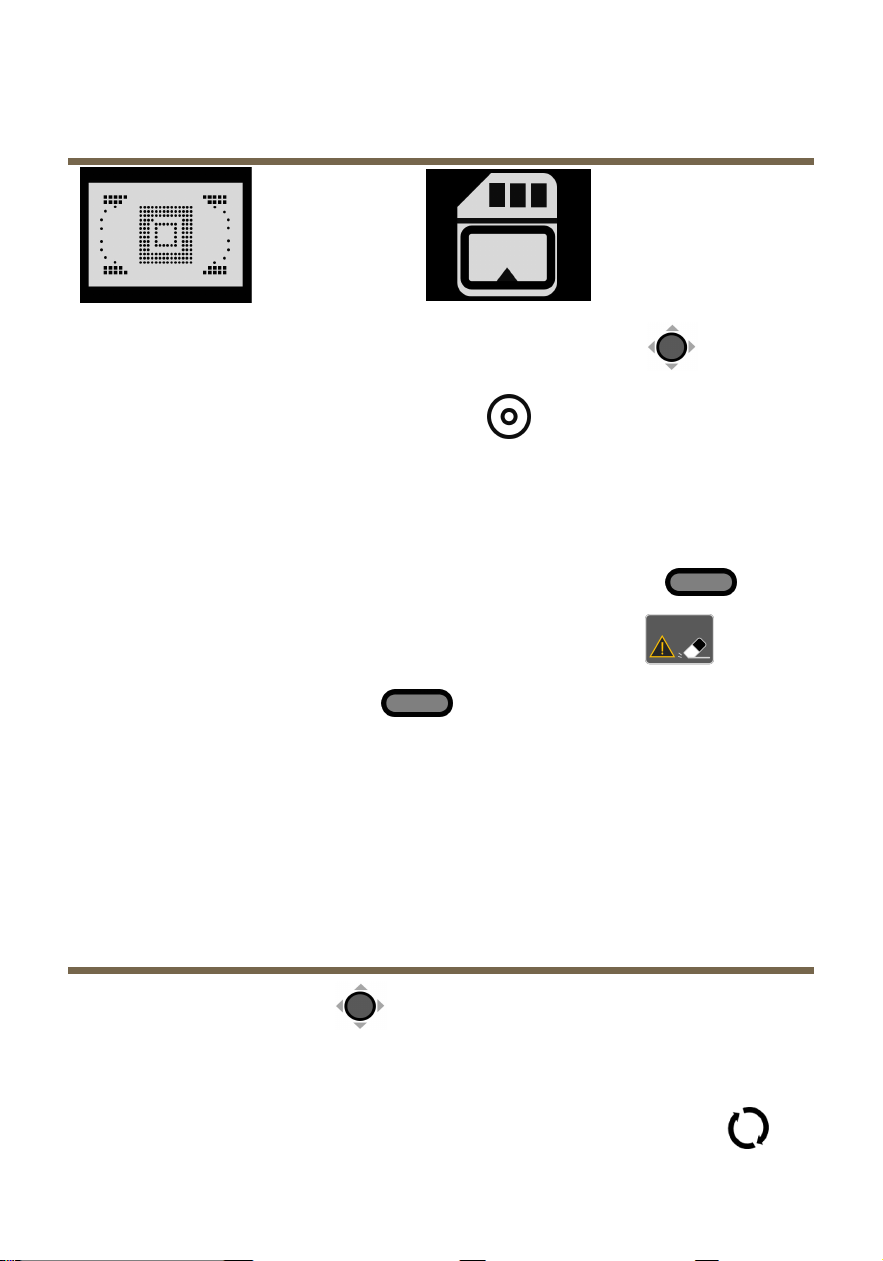
Storage Medium
Memory
MicroSD Card
Push and short press down the Joystick or short
press the Lookup/Enter button to choose the storage
medium and open the folder of selected storage medium.
The memory folder can be formatted. Select and highlight
the folder, press and hold the Shift button for 5
seconds to pop up the format checkbox , short
press the Shift button again to format the folder, or
press the other buttons to cancel the formatting.
Note: The formatting will erase all files in the selected
folder, so please do it carefully and make a backup.
Thumbnail Grid
Push the Joystick to turn the page up and down when
in the image or document folder of selected storage
medium. Short press the Switch/Return button to
20
return to the parent directory. Short press down the
Joystick or the Lookup/Enter button to open the
selected file.
Press down and hold the Joystick or the
Lookup/Enter button for 2 seconds to activate or
inactivate the multi-selection for files. Push and short
press down the Joystick or the Lookup/Enter
button to select the images or documents which can
be transferred or deleted in batches.
Files can be copied from different storage medium. Files
from internal memory can be exported to an SD card by
short pressing the Freeze button . Files from the SD
card can also be imported into the Shared Picture or
Shared Document folder of internal memory by short
pressing the Freeze button .
Press and hold the Freeze button for 3 seconds to
copy all files in batches.
Short press the Shift button to pop up the delete
21
prompt on the highlighted thumbnail. Short press again to
confirm the deletion or press other buttons to cancel.
Press and hold the Shift button for 5 seconds to
delete all pictures or documents in this folder. Short press
again to confirm the deletion or press other buttons to
cancel.
The thumbnail of the image saved in the OCR/TTS
module will appear with an embedded text icon in
the upper left corner. Short press the Zoom In button
to open the text attached to the image.
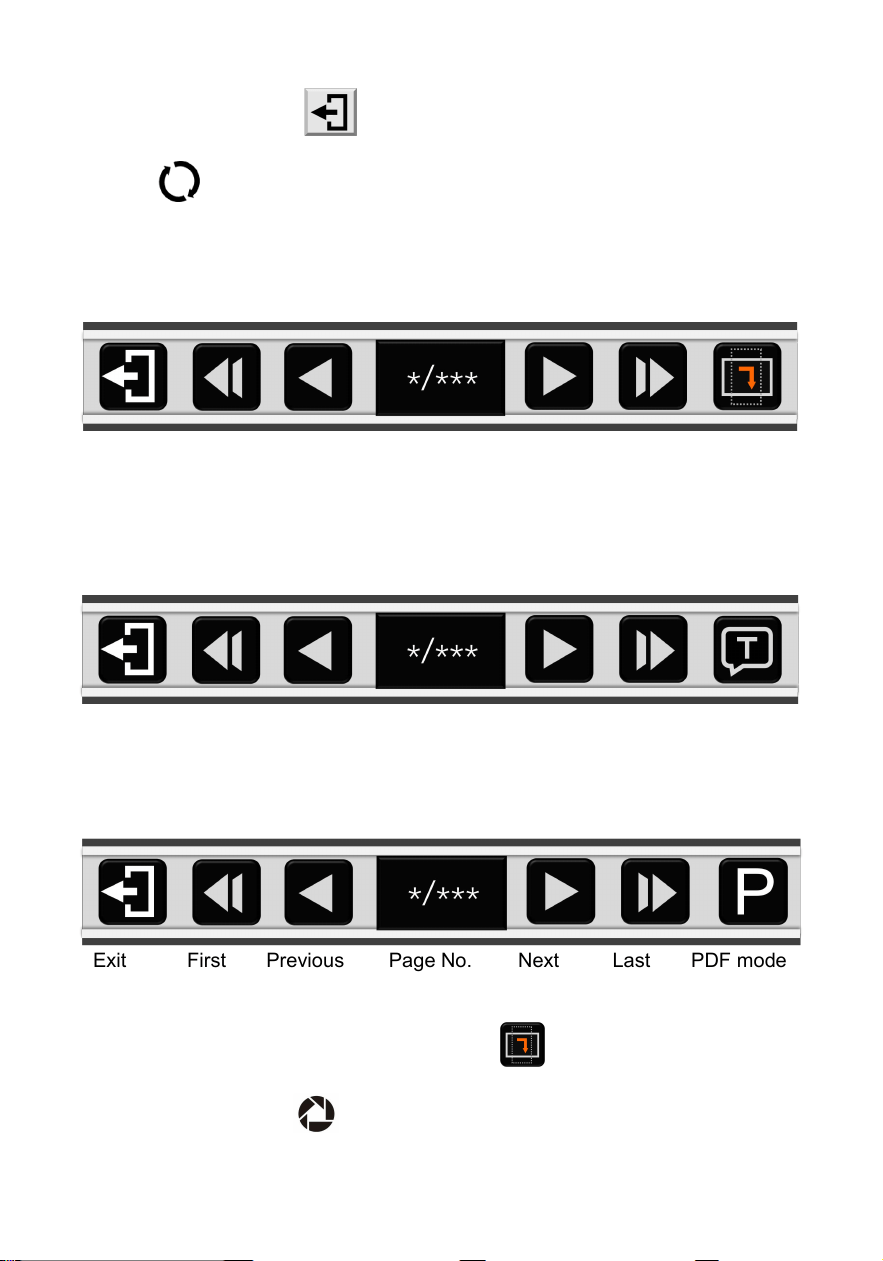
File Control Bar
Short press the Shift button to pop up the file control
bar together with the quick control bar. Push and short press
down the Joystick or the Lookup/Enter button to click
the highlighted icon.
22
Click the Exit icon or press and hold the Switch/Return
button for 2 seconds to close the file and return to the
thumbnail grid.
Picture Control Bar:
TXT Control Bar:
PDF Control Bar:
Click the image rotation icon or short press the
Freeze button to rotate the image.
Exit
First
One
Previous
One
Picture No.
Next
One
Last
One
Rotation
Exit
First
Page
Previous
Page
Page No.
Next
Page
Last
Page
TTS
Exit
First
Page
Previous
Page
Page No.
Next
Page
Last
Page
PDF mode
23
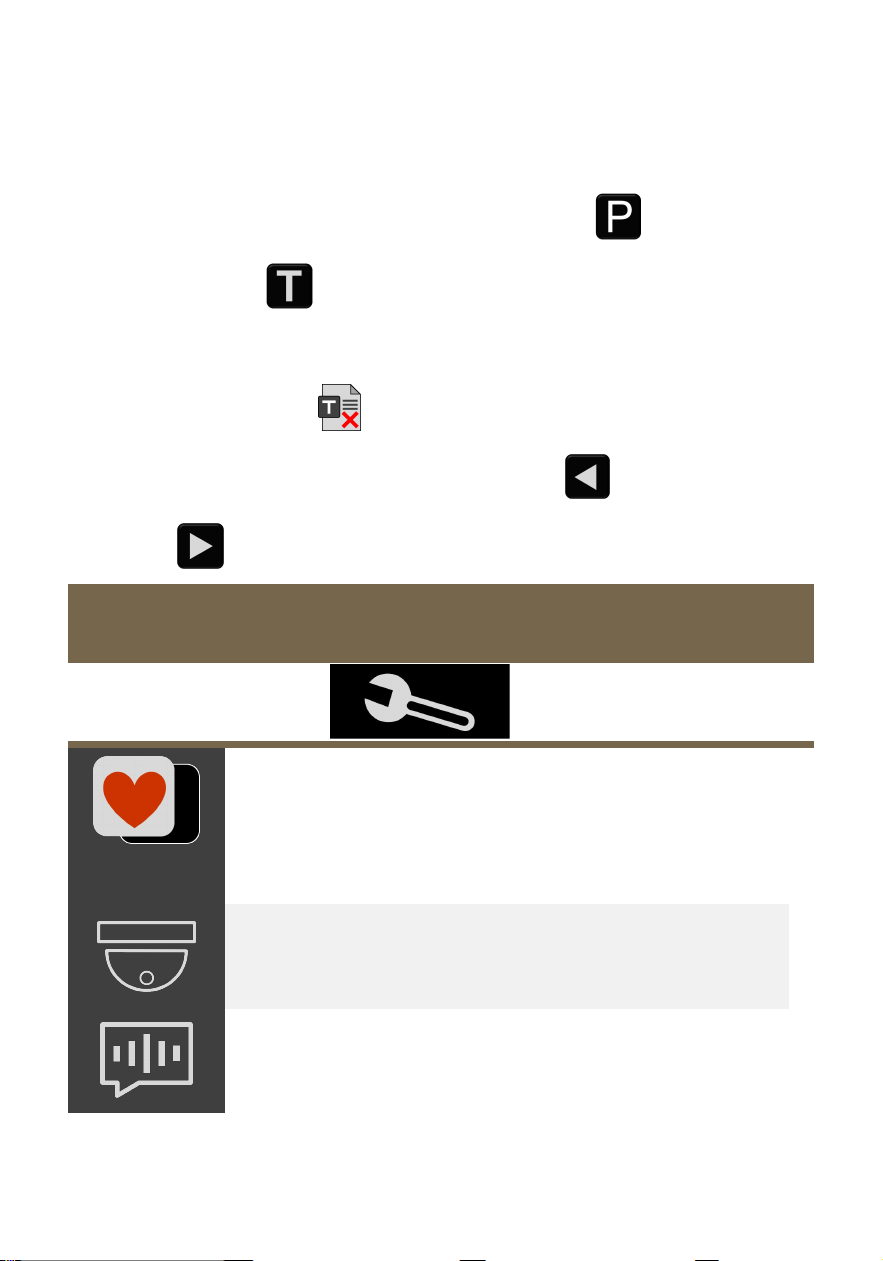
Automatic pagination for the large TXT format document.
The PDF document may also contain TXT text
information, click the PDF mode icon or the TXT
mode icon to switch between each other. If the
current PDF page does not contain TXT format text, an
Empty TXT icon is displayed.
Click and hold on the Page Up icon or Page Down
icon to turn multiple pages at once.
Setting
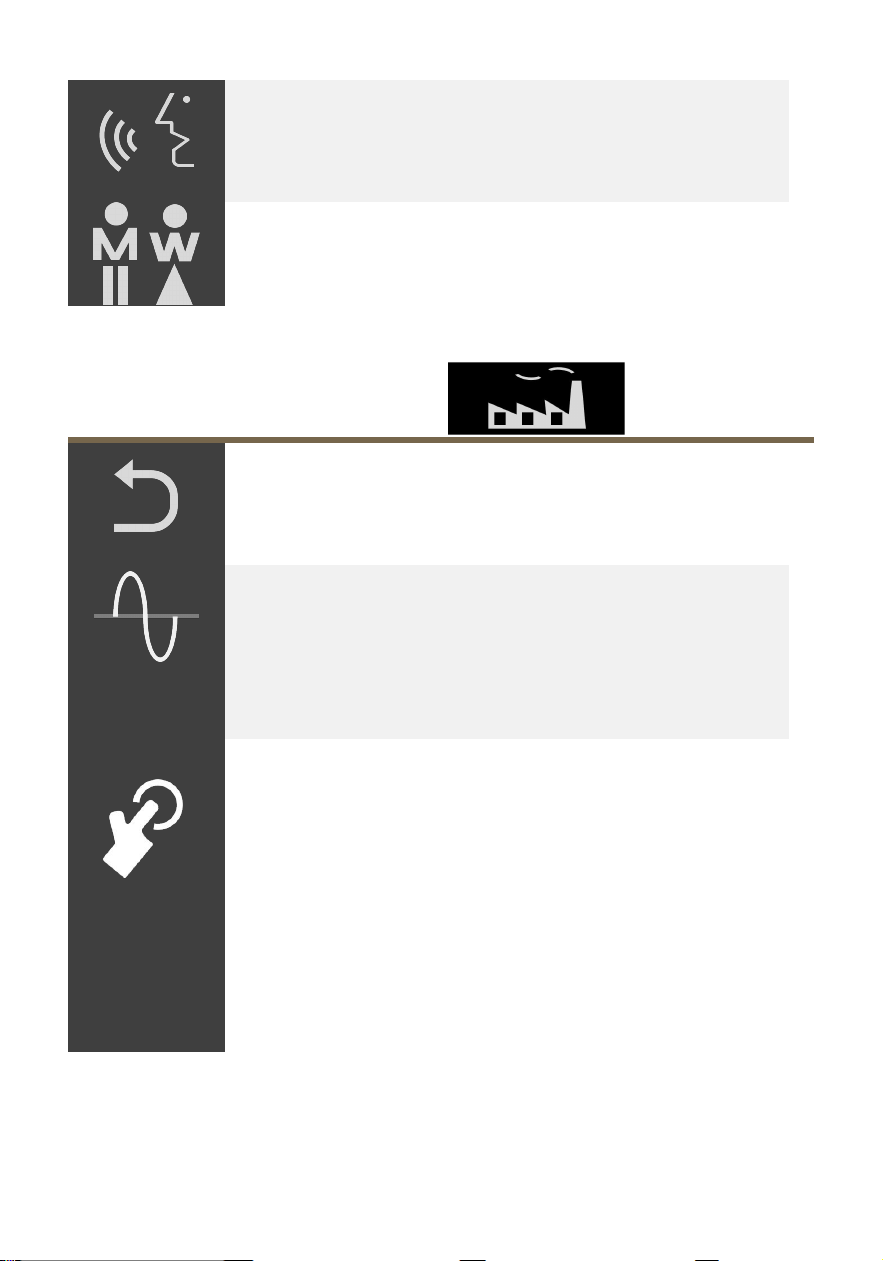
Option Page
Color Mode Combination: Customize the
desired color mode from 12 selectable color
combinations and 2 edge mark types.
Enable or disable the Close-up camera.
Enable or disable Text to Speech.
24
Language Setting:Set the target region and
language for OCR.
Male and female voice selection.
Factory Setting Page
System Reset : Restore the default factory
settings.
Power Frequency:The power frequency can
be manually set to 50HZ or 60HZ according to
different countries and regions.
User Interface: Standard UI mode provides
comprehensive functionality; Simple UI mode
disables most combo key functions as well as
other complex features such as image freeze,
saving, playback, line mask, live panning, and
OCR.

25
Hardware Reset
When the device is hung or can’t be turned off normally,
press down the Power button and Zoom In button and
Zoom Out button at the same time to trigger the hardware
reset.
FCC Statement
This equipment has been tested and found to comply with the
limits for a Class B digital device, pursuant to part 15 of the
FCC Rules. These limits are designed to provide reasonable
protection against harmful interference in a residential
installation. This equipment generates, uses and can radiate
radio frequency energy and, if not installed and used in
accordance with the instructions, may cause harmful
interference to radio communications. However, there is no
guarantee that interference will not occur in a particular
installation. If this equipment does cause harmful interference
to radio or television reception, which can be determined by
turning the equipment off and on, the user is encouraged to
try to correct the interference by one or more of the following

26
measures:
•Reorient or relocate the receiving antenna.
• Increase the separation between the equipment and
receiver.
• Connect the equipment into an outlet on a circuit different
from that to which the receiver is connected.
•Consult the dealer or an experienced radio/TV technician for
help.
Caution: Any changes or modifications to this device not
explicitly approved by manufacturer could void your authority
to operate this equipment.
This device complies with part 15 of the FCC Rules.
Operation is subject to the following two conditions: (1) This
device may not cause harmful interference, and (2) this
device must accept any interference received, including
interference that may cause undesired operation.
RF Exposure Information
The device has been evaluated to meet general RF exposure
requirement. The device can be used in portable exposure
condition without restriction.

27
Specification
Model:
CloverAir
Optical system:
AR Birdbath
Field of view:
FOV43° @0D
Eye box @ Eye relief:
10*7mm@12mm
Diopter:
-6D ~ 0D
Display panel:
0.49-inch Mirco-OLED, 1920*1080
Perceived brightness:
100 to 400 nits adjustable
Interpupillary distance:
53 to 73 mm
Main camera:
Standard 48MP
Close-up camera:
Telephoto 24MP
Magnification:
Near: 1.2x - 30x; Distance: up to 30x
Color mode:
Nature color; Edge mark; False color
Connection:
SD; Lightning; HDMI IN; Bluetooth
Battery:
6000 mAh Li battery; 7 hours duration
Power Adapter:
Input: 100-240V; Output: 5V/3A
Weight:
≤ 80g (Glasses); ≤ 180g (Box)
Dimension:
≤ 155*57*48mm (Glasses folded)
≤ 155*168*48mm (Glasses unfolded)
≤ 160*53*21mm (Box)
Ver.
Low Vision