USER GUIDE
8QT LOCKING LID SLOW COOKER

2
IMPORTANT
SAFEGUARDS
When using an electrical appliance,
basic safety precautions should always
be followed, including the following:
1. IMPORTANT: Read all instructions carefully
before first use.
2. This product is not meant for deep frying.
3. Do not touch hot surfaces. The metal housing
will become hot during use. Use handles on
side or on lid.
4. CAUTION: Lid and handles may become
hot during prolonged use. Use caution when
removing lid or lifting by handles. To reduce
the risk of electric shock, cook only
in removable inner bowl.
5. Use tongs or other heat safe utensils to
remove food. Do not pour or lift appliance.
6. Close supervision is necessary when any
appliance is used by or near children.
7. To protect against electrical shock, do
not immerse cord, plug, or cooker body
in water or other liquid.
8. Do not add liquid within an inch of the top
of aluminum inner pot, or the water may
flow out during cooking.
9. Do not allow food to boil or cook dry.
10. Unplug from outlet when not in use and
before cleaning. Allow to cool before
putting on or taking off parts, and before
cleaning the appliance. Do not use abrasive
cleaning solutions, steel wool or nylon
scrubbing sponges.
11. Do not operate any appliance with a
damaged cord or plug or after the appliance
malfunctions or has been damaged in any
manner. Return appliance to the nearest
authorized service facility for examination,
repair, or adjustment.
12. The use of accessory attachments not
recommended by the appliance manufacturer
may cause injuries.
13. Intended for counter top use only as directed.
14. Do not use the appliance for other than
intended use.
15. Do not use outdoors.
16. Extreme caution must be used when moving
an appliance containing hot liquids.
17. Do not let cord touch hot surfaces or hang
over the edge of table or counter.
18. WARNING: Spilled food can cause serious
burns. Keep appliance and cord away from
children. Never drape cord over edge of
counter, never use outlet below counter, and
never use with an extension cord.
19. Prior to first use, please make sure that
the electrical rating of the appliance
is in conformity with the current
electric rating.
20. Plug cord into wall outlet. To disconnect,
switch appliance off, then remove plug
from wall outlet.
21. The bowl is used on stove top or in
oven only as directed. When cooking
on a burner make sure it is of a similar
base diameter to the bowl.
22. To reduce the risk of electric shock,
cook only in removable bowl.
DO NOT pour food directly in the
unit base without bowl.
23. When using bowl to cook on gas,
adjust flame so it does not flare up on
the sides of the bowl. Ensure heat does
not exceed 390°F.
24. SAVE THESE INSTRUCTIONS Do not
throw away. Read before operating
your new Slow Cooker. Keep for
future reference.
25. In order to ensure safe operation and
optimum performance, please read the
entire Instruction/Care & Use Booklet.
26. Do not place on or near a hot gas or
electric burner, or in a heated oven.
SAVE THESE
INSTRUCTIONS
FOR
HOUSEHOLD
USE ONLY
SPECIAL CORD SET INSTRUCTIONS:
A short power-supply cord is provided to
reduce the risks resulting from becoming
entangled in or tripping over a longer cord.
Warning: This appliance has a polarized
plug (one blade is wider than the other). To
reduce the risk of electric shock, this plug is
intended to fit into a polarized outlet only
one way. If the plug does not fit fully into the
outlet, reverse the plug. If it still does not fit,
contact a qualified electrician.Do not attempt
to modify the plug in any way.

3
HEALTHY
COOKING
STARTS WITH
GREENPAN
Since inventing healthy ceramic nonstick
in 2007, we’ve dedicated ourselves to
unique advances that make cooking
better for everyone. From healthy ceramic
nonstick cookware to revolutionary home
appliances, our groundbreaking designs
deliver remarkable performance so you
can focus on the flavor. Enjoy!
CONTENTS
Description of Parts
Before First Use
General Usage
Operation
Cleaning/Maintenance
Troubleshooting
Warranty
04
04
04
05
08
09
10
4
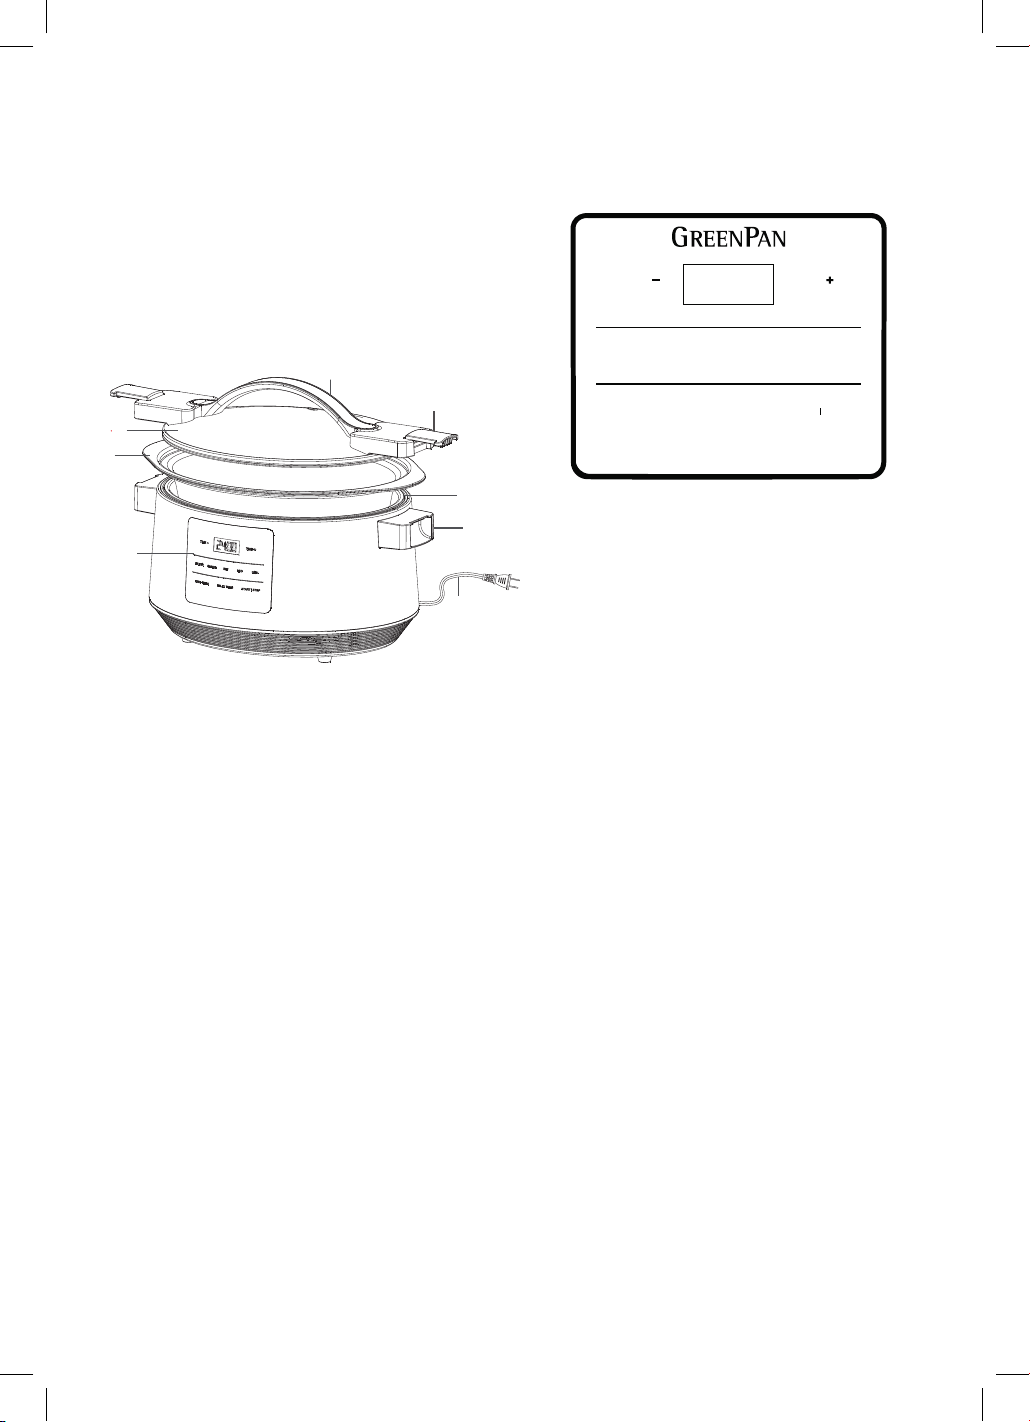
PARTS
BEFORE FIRST USE
1. Read all instructions and important
safeguards.
2. Remove all packaging materials and
check that all items have been received
in good condition.
3. Tear up all plastic bags and dispose of
properly as they can pose a suffocation
or choking risk to children.
4. Remove the lid and the removable 8QT
Slow Cooker Bowl and wash with warm
soapy water and dry thoroughly before
returning to the base.
5. Wipe body clean with a damp cloth.
NOTE: Do not use harsh abrasive cleaners,
scouring pads or products that are not
considered safe to use on nonstick coatings.
If washing dishwasher safe parts in the
dishwasher, a slight discoloration to the
8QT Slow Cooker Bowl and accessories
may occur. This is cosmetic only and will
not affect performance.
6. Place 8QT Slow Cooker Bowl inside of
the inner housing, and place lid on top
of 8QT Slow Cooker Bowl.
7. Plug power cord into outlet.
8. Your Slow Cooker is now ready for use.
GENERAL USAGE
KNOW YOUR CONTROL PANEL
REHEAT- Use REHEAT mode to heat up
cooked food quickly before serving.
SIMMER- Use SIMMER mode for soups,
stews and homemade stocks. The longer
the cooking time, the more flavorful your
stock soups and stews will be. Also perfect
for entertaining and serving.
LOW- Use LOW mode for recipes that
have extended cooking times and more
complex proteins.
MED (MEDIUM)- Use MED mode for
when a little more heat is needed or if
you are using large cuts of protein.
HIGH- Use HIGH mode for higher
heat over a shorter period of time.
Good for poultry and less tough proteins.
This can also be used for “baking” in
your slow cooker.
KEEP WARM- KEEP WARM mode is
intended only for keeping already cooked
food warm, not for cooking. This is selectable
option or will automatically start after cooking.
DELAY TMER- Use DELAY TIMER to plan
your meals up to 24 hours in advance.
START | STOP- Use the START | STOP
button to confirm or turn off the mode
you selected.
TIME - Use this button to decrease
the timer setting on modes.
TIME + Use this button to increase
the timer setting on modes.
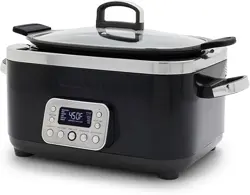
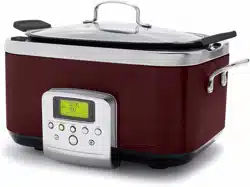
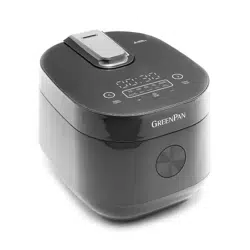
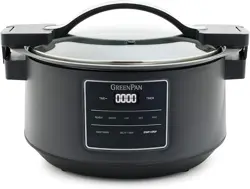
A. Glass Lid
B. Locking Lid
C. Locking Lid
Latches
D. 8QT Slow
Cooker Bowl
E. Inner Housing
F. Body Side
Handles
G. Power Cord
H. Control Panel
C.
B.
G.
A.
E.
H.
F.
D.
TIME TIME
REHEAT SIMMER LOW MED HIGH
KEEP WARM DELAY TIMER
STA RT STOP

5
OPERATION
Power Operation
1. Ensure your Slow Cooker is plugged
directly into a wall outlet. Do not use
an extension cord.
2. Be sure that the 8QT Slow Cooker Bowl
is correctly placed within the appliance
and the appliance is on a level
heat-resistant surface.
3. Once plugged in the START | STOP
button will flash.
4. Press any mode you want to cook with.
The indicator of the mode selection will
light on and the START | STOP and LED
display will flash until START | STOP
is pressed.
5. Adjust Default Cooking time if
needed. Press START | STOP
button to begin cooking.
6. Lock the lid into place using the locking
lid latches and body side handles.
7. After Time has completed the
8QT Locking Lid Slow Cooker
will go into Keep Warm on
(excluding Keep Warm mode).
COOKING MODES
Slow Cook Modes
Slow cooking works best with foods that
require long, low-heat cooking. Examples:
stews, soups, beans, and fattier meats such
as roasts, pork shoulder, and ribs.
REHEAT
1. Press REHEAT Mode on the Slow Cooker
Control Panel. REHEAT Mode indicator light
will be on to show this mode is selected.
2. Use default time on screen or modify time
by pressing Time - or Time + button and
press START | STOP button to begin mode.
3. If you want to modify time while cooking
press Time - or Time + button. After 5 seconds
the time you selected will lock in or press
START | STOP to start new time immediately.
4. After Time has elapsed Food will
automatically go into keep warm mode.
The timer will count up for 8 hours and
shut off after completed.
SIMMER
1. Press SIMMER Mode on the Slow Cooker
Control Panel. SIMMER Mode indicator
light will be on to show this mode is selected.
2. Use default time on screen or modify
time by pressing Time - or Time + button
and press START | STOP button to
begin mode.
3. If you want to modify time while cooking
press Time - or Time + button. After 5
seconds the time you selected will lock
in or press START | STOP to start new
time immediately.
4. After time has elapsed, Slow Cooker will
automatically go into Keep Warm mode.
The timer will count up for 8 hours and shut
off after completed.
LOW
1. Press LOW Mode on the Slow Cooker Control
Panel. LOW Mode indicator light will be on to
show this mode is selected.
2. Use default time on screen or modify time
by pressing Time - or Time + button and
press START | STOP button to begin mode.
3. If you want to modify time while cooking
press Time - or Time + button. After 5 seconds
the time you selected will lock in or press
START | STOP to start new time immediately.
4. After time has elapsed, Slow Cooker will
automatically go into Keep Warm mode.
The timer will count up for 8 hours and shut
off after completed.
MED (MEDIUM)
1. Press MED Mode on the Slow Cooker Control
Panel. MED Mode indicator light will be on to
show this mode is selected.
2. Use default time on screen or modify time
by pressing Time - or Time + button and
press START | STOP button to begin mode.
3. If you want to modify time while cooking press
Time - or Time + button. After 5 seconds the time
you selected will lock in or press START | STOP
to start new time immediately.
4. After time has elapsed, Slow Cooker will
automatically go into Keep Warm mode.
The timer will count up for 8 hours and shut
off after completed.
HIGH
1. Press HIGH Mode on the Slow Cooker Control
Panel. HIGH Mode indicator light will be on
to show this mode is selected.
2. Use default time on screen or modify time
by pressing Time - or Time + button and
press START | STOP button to begin mode.
3. If you want to modify time while cooking press
Time - or Time + button. After 5 seconds the time
you selected will lock in or press START | STOP
to start new time immediately.

6
3. Before selecting DELAY TIMER if you do
not want to use a default time. Modify
TIME– or TIME + to increase or decrease
preset cooking time.
4. Press DELAY TIMER and set time for how
long you want to wait before previously
selected program will begin.
5. DELAY TIMER will flash until time is
confirmed with START | STOP button.
6. Press TIME – or TIME + to decrease
or increase delay timer start time.
7. Press START | STOP to confirm.
8. If you want to modify the mode cooking
time while waiting for delay timer to
expire press the mode you want to modify.
The mode will flash allowing you to adjust
the TIME– and TIME+. Press START | STOP
to confirm new time for mode or wait
5 seconds.
9. Once the delay timer has expired, Delay
timer indicator light will turn OFF, and
the unit will start cooking.
Please Note – While using delay timer we
suggest using ingredients that will not spoil
while being left out. Suggested maximum
delay-start time for uncooked meat or
chicken is two hours.
RECIPE TIPS
• Be sure to spread oil in the Slow Cooker
before cooking, using a heat-resistant
spatula or other utensil. Do not use cooking
sprays. Cooking sprays will carbonize quickly
and damage the ceramic nonstick coating.
• Always use tongs or other utensil to remove
food. Do not lift the Slow Cooker to pour.
• The Slow Cooker must be placed on a
level surface during use – uneven cooking
or spilling may result otherwise.
• The Locking Lid Slow Cooker comes with
a coated 8QT Bowl with a special PFAS-FREE
coating designed for kitchen appliances. The
8QT Slow Cooker Bowl is stovetop and oven
safe to 400°F.
• When Browning/Sautéing, always use a little
oil or butter suited for frying for best results.
Avoid low smoke point oil or aerosol sprays
as they cannot withstand high heat.
4. After time has elapsed, Slow Cooker
will automatically go into Keep Warm
mode. The timer will count up for 8
hours and shut off after completed.
KEEP WARM
NOTE: This mode is intended only for
keeping already cooked food warm,
not for cooking.
1. Press KEEP WARM Mode on the
Slow Cooker Control Panel. KEEP
WARM Mode indicator light will
be on to show this mode is selected.
2. Use default time on screen or modify
time by pressing Time - or Time +
button and press START | STOP
button to begin mode.
3. If you want to modify time while
cooking press Time - or Time +
button. After 5 seconds the time
you selected will lock in or press
START | STOP to start new time
immediately.
TIME - & TIME +
1. Press TIME - or TIME + to change
default cooking time.
2. This can be done before a mode has
started or during the cooking process.
3. To change time before a mode starts
Press TIME – or TIME + while indicator
light of the START | STOP is flashing,
then press START | STOP to start new
time immediately.
4. The timer setting will increase or
decrease in increments of 30 mins
for LOW, MED, HIGH, KEEP WARM
& DELAY TIMER. REHEAT mode will
increase or decrease in increments
of 10 mins. SIMMER mode will
increase or decrease in increments
of 10 mins for the first hour. After
setting time for more than 1 hour
increments will increase to 30 mins.
5. The Timer can be used during the
cooking process if you need to
adjust the amount of time simply
press TIME – or TIME + to modify.
Time on the LED will flash, After
new time has been selected press
START | STOP to confirm or wait
5 seconds.
DELAY TIMER
1. Postpone cooking up to 24 hours.
Press Cooking Mode you wish to
use before pressing DELAY TIMER.
2. Select from LOW, MED, HIGH,
REHEAT or SIMMER.

7
MODE SUMMARY CHART
Setting Guidelines Recipes Default
Time
Time
Range
Auto Keep
Warm
HIGH Use HIGH mode for higher heat over a
shorter period. Good for poultry and less
tough proteins. This can also be used for
“baking” in your slow cooker.
Poultry, Casseroles,
Puddings,
Cheesecakes,
rolls
4 Hours
0:30 to 12
Hours
Y
MED
(Medium)
Use MED mode for when a little more heat is
needed or if you are using
large cuts of protein.
Large cuts of
protein, Desner
stocks.
6 Hours 0:30 to 12
Hours
Y
LOW Use LOW mode for recipes that have
extended cooking times and more
complex proteins.
Braises,
Roasts, Stew, ribs,
Casseroles,
Shanks, Chops, less
tender cuts of meat,
soups.
8 Hours 0:30 to 24
Hours
Y
SIMMER Use SIMMER mode for soups, stews and
homemade stocks. The longer the cooking
time, the more flavor your stock soups and
stews will be. Also perfect for entertaining
and serving.
Soups, Stews,
Stocks Serving
2 Hours 0:10 to 8
Hours
Y
REHEAT REHEAT mode will quickly reheat already
cooked food. Not designed for extended
cooking time due to the high heat.
N/A 1 Hour 0:10 to 3
Hours
Y
KEEP
WARM
KEEP WARM mode is intended only for
keeping already cooked food warm, not for
cooking. This is selectable option under the
slow cook modes or will automatically start
after cooking.
The timer will count up to 8 hours, after
a mode has been completed to indicate
elapsed time.
If selected as a mode, you will be able to
set time for up to 8 hours. If Keep Warm is
selected the timer will count down.
N/A 4 hours 0:30 to 8
Hours
N
DELAY
TIMER
Use DELAY TIMER mode to plan meals up to
24 hours in advance.
N/A 1 Hour 0:30 to 24
Hours
N
STOVETOP AND OVEN COOKING
Please remove 8QT Slow Cooker bowl from the inner housing to cook on
the stovetop. The housing and lid are not stovetop safe. REMOVE LID before
placing on stovetop or in oven.
The Slow Cooker Bowl is oven and stovetop safe to 400°F. When cooking on a gas stovetop
adjust flame so it does not flare up on the sides of the 8QT Slow Cooker Bowl. Do not exceed
400°F. For standard electric stovetops, the typical Medium setting is 400°F. Do not use higher
settings.
For oven use, ensure that temperature does not exceed 400°F. When taking the bowl out of
the oven, be sure that you use safety gloves or oven mitts. This bowl will be hot, so proceed
with caution.
8
CLEANING AND MAINTENANCE
1. Before cleaning, always unplug your Slow Cooker and allow it to cool. The inner pot
and lid are both safe for dishwasher use.
2. If you prefer, you can wash the inner pot and lid with a gentle detergent after removing
them from the base.
3. Rinse with water and then gently pat dry with a dish towel or cloth.
4. Wipe the outside of the Slow Cooker with a damp sponge or cloth. Refrain from
using scouring pads, brushes, powders or chemical detergents on the Slow Cooker.
Note: Any other servicing should be performed by an authorized service representative.
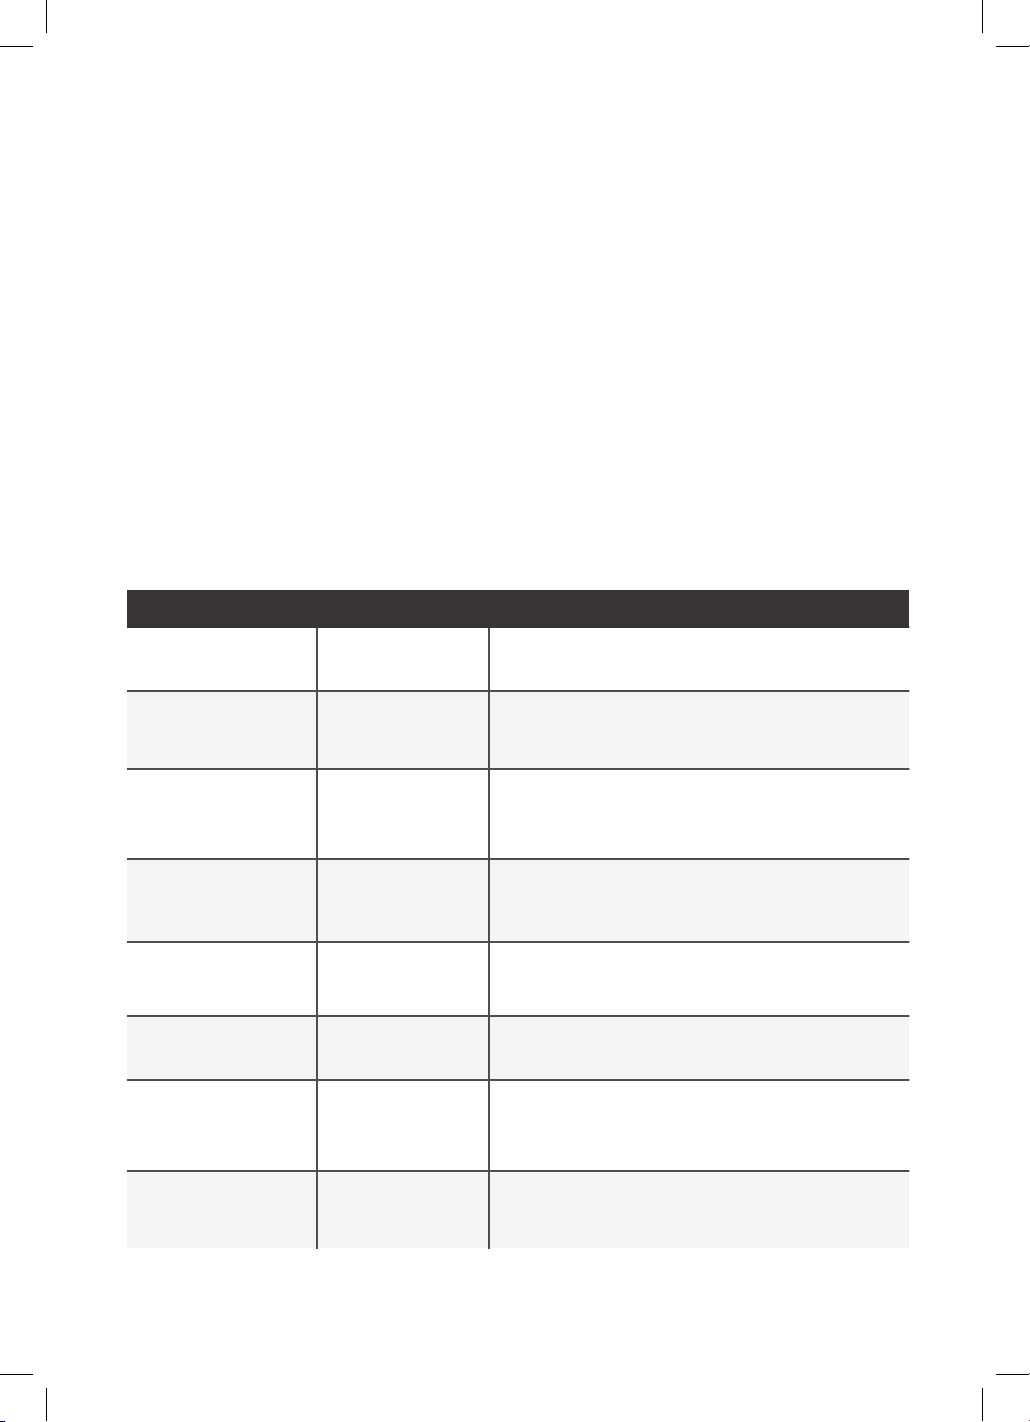
Summary Chart:
Part Diswasher Safe Wipe with Damp Cloth
Slow Cooker
Housing
Removable
8QT Slow
Cooker Bowl
Locking Lid
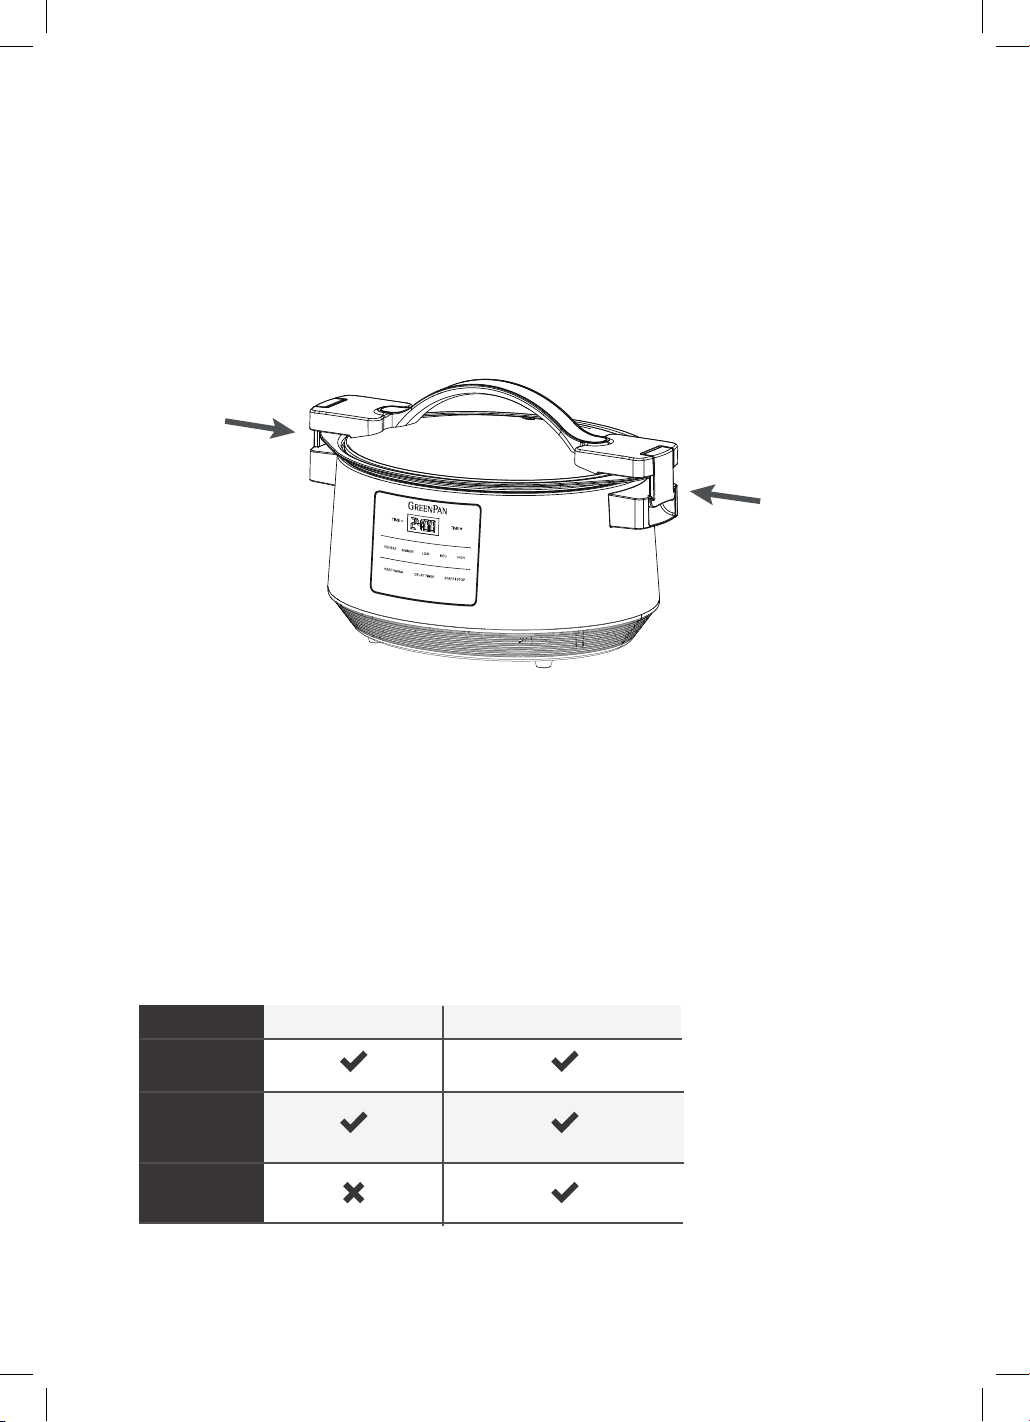
HOW TO TRANSPORT SLOW COOKER
1. Secure the Glass Lid onto 8QT Slow Cooker Bowl, make sure the Lid latches on
side of the lid line up with the side handle.
2. Press the lid latches down to lock into the body side handles. A snapping sound
should be heard once it is in the right position.
3. IMPORTANT: When the Lid is locked, use both side handles to transport the Slow Cooker.
NEVER use lid handle to move the Slow Cooker.
4. When ready to serve, pull the lid latches up from the side handles, then remove the
Locking Lid.
9
Power Plug
Do not touch the outside of the Slow Cooker,
burns may result. Instead use handles only when
Slow Cooker is operating.
Check whether the power plug is connected to
a functional, electrical outlet
Contact Customer Service
Slow Cooker turns
on, but does not
get hot during any
cooking mode
Outside of
Slow Cooker is
hot during use
Slow Cooker does
not turn on
Internal Error
This is normal,
especially after
extended use
Appliance slow
to heat up
Food is undercooked
Food is overcooked
Check cooking
time and
temperature
Slow Cooker Bowl
not seated correctly
or debris in way
Ensure that there is no debris or oil affecting the
connection to heating element to the Slow Cooker
Bowl. If this does not work, contact customer service.
Increase cooking time, or check C&U for alternate
mode.
Decrease cooking time, or check C&U for alternate
mode.
Check cooking time
and temperature
Small scratch mark
or dent appear on
cooking surface
Large scratch mark
or dent mark appear
on cooking surface
Normal Use
Chipping up to 1 to 2 mm is a perfectly normal
occurrence because ceramic coatings are very
hard – i.e. in the same way as Porcelain Ceramics
are hard but not very flexible.
Contact Customer Service
N/A
Problem Cause Solution
TROUBLESHOOTING
STORAGE
Ensure the Slow Cooker is cool and dry before storing. The power cord wraps around
the built in cord wrap for easy storage.
BEFORE RETURNING
YOUR GREENPAN PRODUCT
If you are experiencing problems with your GreenPan Slow Cooker, we suggest that
you call GreenPan customer service at 877-926-6526 before returning the product.
A representative can confirm whether the product is under warranty and advise on
next steps.
IMPORTANT: If the defective product is to be serviced by someone other than GreenPan’s
authorized service, please tell the servicer to call our consumer service at 877-926-6526 to
ensure that the problem is properly diagnosed, the product is serviced with the correct parts,
and the product is still under warranty.

10
LIMITED WARRANTY
GreenPan Electrics are covered by a limited
warranty against defects in materials and
workmanship, beginning on the date you
receive the product and lasting for two years.
If your GreenPan Electrics product has a defect
covered by the limited warranty during the
warranty period, The Cookware Company
(USA), LLC will either repair or replace the
product. Further information on the warranty
claim process, exclusions from warranty
coverage, and other terms can be found in
the complete limited warranty for this product,
available online at greenpan.us/warranty.
TERMS OF SALE;
ARBITRATION
The terms on which The Cookware Company
(USA), LLC sells GreenPan Electrics are
available online at greenpan.us/pages/terms-
of-sale (the “Terms”). The Terms contain very
important information regarding your rights and
obligations, as well as conditions, limitations,
and exclusions that may apply to you. Please
read them carefully.
In particular, the Terms provide that, by
your purchase of this product, you and The
Cookware Company (USA), LLC are agreeing
to give up any rights to litigate in a court or
before a jury, or to participate in a class action
or representative action with respect to a claim.
Other rights that you would have if you went
to court may also be unavailable or limited in
arbitration.Any claim, dispute, or controversy
between you and The Cookware Company
(USA), LLC arising from or relating in any way
to your purchase of products or services will
be resolved exclusively and finally by binding
arbitration.
The arbitration will be administered by the
American Arbitration Association (“AAA”) in
accordance with the Consumer Arbitration
Rules (the “AAA Rules”) then in effect, except
as modified hereby. (The AAA Rules are
available at adr.org or by calling the AAA at
1-800-778-7879.) The Federal Arbitration Act
will govern the interpretation and enforcement
of this arbitration and waiver provision.
The Cookware Company (USA), LLC will be
responsible for the AAA filing fee of any such
proceeding. Other than your right to pursue a
claim in small claims court, as described in the
Terms, the arbitrator will have exclusive authority
to resolve any dispute relating to arbitrability
and/or enforceability of this arbitration
provision, including any unconscionability
challenge or any other challenge that the
arbitration provision or these Terms are void,
voidable or otherwise invalid. The arbitrator
will be empowered to grant whatever relief
would be available in court under law or in
equity. Any award of the arbitrator(s) will
be final and binding on each of the parties
and may be entered as a judgment in any
court of competent jurisdiction. Attorney fee
shifting in this case is governed by the Terms.
You agree to an arbitration on an individual
basis. In any dispute, NEITHER YOU NOR THE
COOKWARE COMPANY (USA), LLC WILL BE
ENTITLED TO JOIN OR CONSOLIDATE CLAIMS
BY OR AGAINST OTHER CUSTOMERS IN
COURT OR IN ARBITRATION OR OTHERWISE
PARTICIPATE IN ANY CLAIM AS A CLASS
REPRESENTATIVE, CLASS MEMBER OR IN A
PRIVATE ATTORNEY GENERAL CAPACITY. The
arbitral tribunal may not consolidate more than
one person’s claims, and may not otherwise
preside over any form of a representative or
class proceeding. The arbitral tribunal has no
power to consider the enforceability of this class
arbitration waiver and any challenge to the
class arbitration waiver may only be raised in a
court of competent jurisdiction.If any provision
of the arbitration agreement described herein
and in the Terms is found unenforceable, the
unenforceable provision will be severed and the
remaining arbitration terms will be enforced.

11
NOTES

1400029647