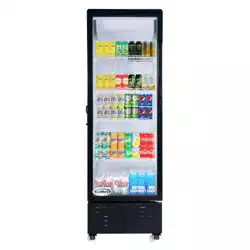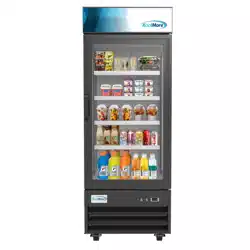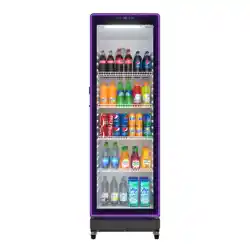
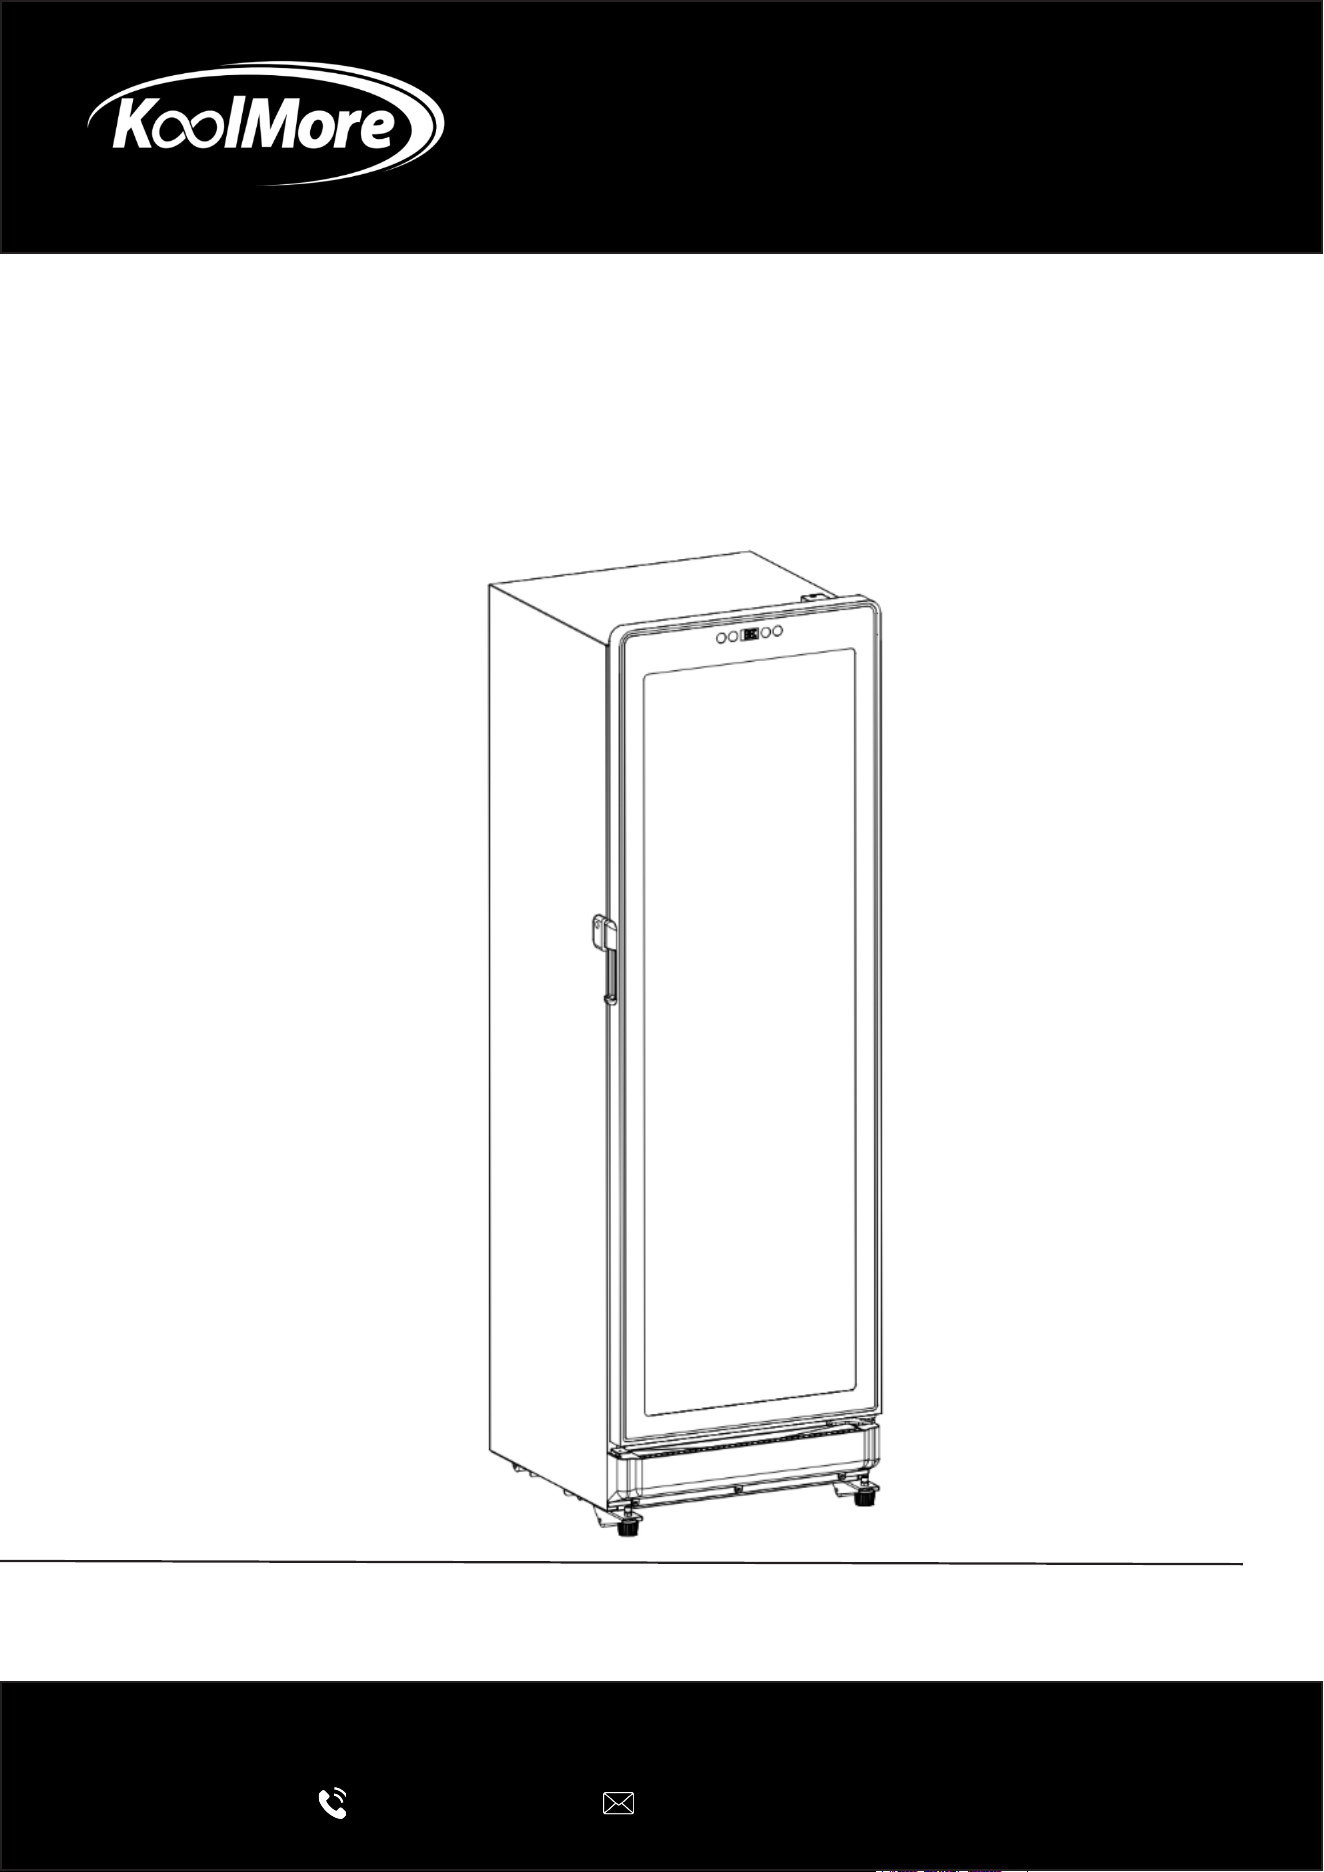
MERCHANDISER
12 Cu. Ft. Merchandiser with Multi-Colored
Lights
USER MANUAL
Before using, please read the operating instructions carefully to
ensure proper application and achieve satisfactory results.
For any service related issues, please contact us:
718-576-6342
suppor[email protected]
Models: KM-MDR-12CFL
Stay informed with the latest information for your
KoolMore Appliance.
Scan the QR code below to access the most recent User Manual
on our website, which is constantly being updated and improved.
If you need any assistance or have questions, our customer support
team is here to help.
Phone- 718-576-6342 Email- support@koolmore.com
Please write down the model number and serial number below for future reference. Both numbers are located on the
rating label on the back of your unit or inside of the unit and are needed to obtain warranty service. You may also
want to staple your receipt to this manual as it is your proof of purchase and may also be needed for service
under warranty.
Model Number:
Serial Number:
Date of Purchase:
To better serve you, please do the following before contacting customer service:
If you received a damaged product, immediately contact the retailer or dealer that sold you the product.
Read and follow this User Manual carefully to help you install, use, and maintain your unit.
Refer to the Troubleshooting section of this manual as it will help you diagnose and solve many common issues.

3
Contents
Safety ............................................................................................. 4
Installation ..................................................................................... 7
Operation ....................................................................................... 9
Cleaning & Maintenance ................................................................. 12
Troubleshooting ............................................................................. 15
Warranty ......................................................................................... 15

4
Safety
• This equipment is intended for the storage and display of non-time/temperature control for
safety foods bottled or canned products only.
• This appliance is not intended for use by persons (including children) with reduced physical,
sensory or mental capabilities, or lack of experience and knowledge, unless they have been
given supervision or instruction concerning use of the appliance by a person responsible for
their safety.
• Children should be supervised to ensure that they do not play with the appliance.
• Cleaning and user maintenance shall not be made by children without supervision.
• Do not store explosive substances such as aerosol cans with a ammable propellant in this
appliance.
• If the supply cord is damaged, it must be replaced by the manufacturer or its service agent or a
similarly qualied person in order to avoid a hazard.
• Please according to local regulations regarding disposal of the appliance for its ammable
blowing gas. Before you scrap the appliance, please take off the doors to prevent children
trapped.
• WARNING — Keep ventilation openings, in the appliance enclosure or in the built-in structure,
clear of obstruction.
• WARNING — Do not use mechanical devices or other means to accelerate the defrosting pro-
cess, other than those recommended by the manufacturer.
• WARNING — Do not damage the refrigerant circuit.
• WARNING — Do not use electrical appliances inside the food storage compartments of the
appliance, unless they are of the type recommended by the manufacturer.
This appliance is intended to be used in household and similar applications such as:
• Staff kitchen areas in shops, oces and other working environments.
• Farm houses and by clients in hotels, motels and other residential type environments.
• Catering and similar non-retail applications.
• The appliance shall not be installed in public corridors or lobbies.
• Warning: the appliance shall be installed in accordance with national wiring regulations.
• The appliance is to be installed in accordance with the Safety Standard for Refrigeration Sys-
tems, ANSI/ASHRAE 15.
Notice: Any person who is involved with working on or breaking into a refrigerant circuit should
hold a current valid certicate from an industry-accredited assessment authority, which authorizes
their competence to handle refrigerants safely in accordance with an industry recognized assess-
ment specication.
Notice: Servicing shall only be performed as recommended by the equipment manufacturer. Main-
tenance and repair requiring the assistance of other skilled personnel shall be carried out under
the supervision of the person competent in the use of ammable refrigerants.
Notice: Component parts shall be replaced with like components so as to minimize the risk of pos-
sible ignition due to incorrect parts.
5
• The appliance is to be installed in accordance with the Safety.
WARNING
• Do not use means to accelerate the defrosting process or to clean, other than those recom-
mended by the manufacturer.
• The appliance shall be stored in a room without continuously operating ignition sources (for
example: open ames, an operating gas appliance or an operating electric heater).
• Do not pierce or burn.
• Be aware that refrigerants may not contain an odour.
• Warning: The appliance shall be stored in a well-ventilated area where the room size corre-
sponds to room area as specied for operation.
• Warning: The appliance shall be stored in a room without continuously operating open ames
(for example an operating gas appliance) and ignition sources (for example an operating elec-
tric heater).
• Warning: The appliance shall be stored so as to prevent mechanical damage from occurring.
• Check that cabling will not be subject to wear, corrosion, excessive pressure, vibration, sharp
edges, or any other adverse environmental effects. The check shall also take into account the
effects of aging or continual vibration from sources such as compressors or fans.
• Before carrying out Decommissioning procedure, it is essential that the technician is complete-
ly familiar with the equipment and all its detail. It is recommended good practice that all refrig-
erants are recovered safely. Prior to the task being carried out, an oil and refrigerant sample
shall be taken in case analysis is required prior to re-use of recovered refrigerant. It is essential
that electrical power is available before the task is commenced.
When removing refrigerant from a system, either for servicing or decommissioning, it is recom-
mended good practice that all refrigerants are removed safely.
The recovery equipment shall be in good working order with a set of instructions concerning the
equipment that is at hand and shall be suitable for the recovery of all appropriate refrigerants in-
cluding, when applicable, FLAMMABLE REFRIGERANTS.
The recovered refrigerant shall be returned to the refrigerant supplier in the correct recovery cyl-
inder, and the relevant waste transfer note arranged. Do not mix refrigerants in recovery units and
especially not in cylinders.
Refrigerant class A3 per ANSI/ASHRAE 34
Warning: Risk of re / ammable materials, taking care to avoid causing a re by igniting amma-
ble material.
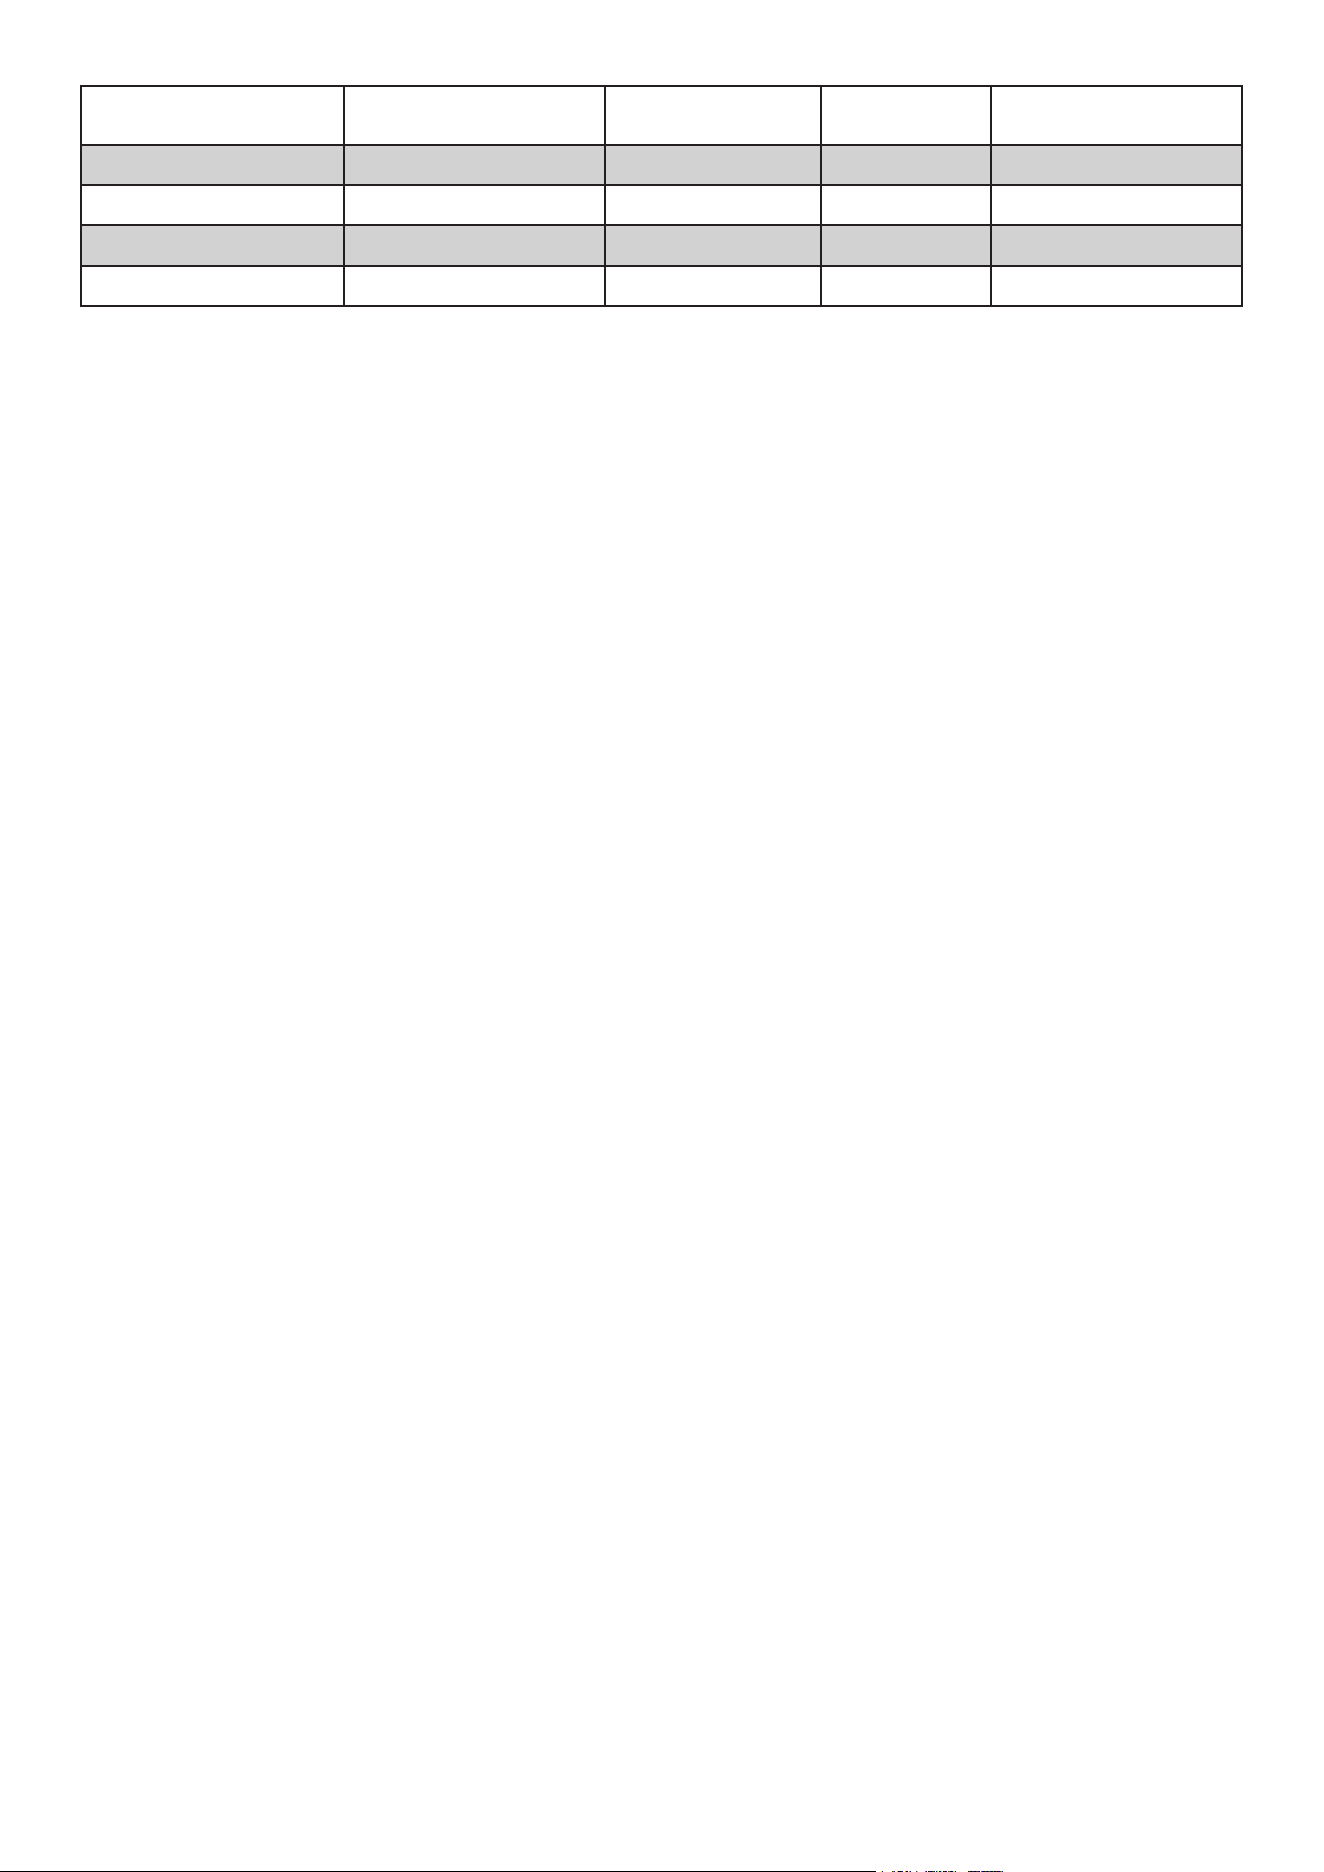
The ambient temperature and humidity conditions of the show case climate class following the
tab below:
Test Room Climate
Class
Dry Bulb Temperature
°C
Relative Humidity % Dew Point °C
Water Vapour Mass in
Dry Air g/kg
0 20 50 9.3 7.3
1 16 80 12.6 9.1
8 23.9 55 14.3 10.2
2 22 65 15.2 10.8
3 25 60 16.7 12.0
6
NOTE: The water vapour mass dry air is one of the main points inuencing the performance and
the energy consumption of the cabinets. Therefore, the order of the climate class in the table is
based on the water vapour mass column. See also Annex B to compare lab and store conditions.
• All maintenance staff and others working in the local area shall be instructed on the nature of
work being carried out. Work in conned spaces shall be avoided.
• If any hot work is to be conducted on the refrigerating equipment or any associated parts,
appropriate re extinguishing equipment shall be available on hand. A dry chemical or CO2 re
extinguisher should be adjacent to the charging area.
• Notice: Any person who is involved with working on or breaking into a refrigerant circuit should
hold a current valid certicate from an industry-accredited assessment authority, which autho-
rizes their competence to handle refrigerants safely in accordance with an industry recognized
assessment specication.
• Notice: Servicing shall only be performed as recommended by the equipment manufacturer.
Maintenance and repair requiring the assistance of other skilled personnel shall be carried out
under the supervision of the person competent in the use of ammable refrigerants.
• No person carrying out work in relation to a REFRIGERATING SYSTEM which involves exposing
any pipe work shall use any sources of ignition in such a manner that it may lead to the risk
of re or explosion. All possible ignition sources, including cigarette smoking, should be kept
suciently far away from the site of installation, repairing, removing and disposal, during which
refrigerant can possibly be released to the surrounding space. Prior to work taking place, the
area around the equipment shall be surveyed to make sure that there are no ammable haz-
ards or ignition risks. “No Smoking” signs shall be displayed.
• Checking for presence of refrigerant. The area shall be checked with an appropriate refrigerant
detector prior to and during work, to ensure the technician is aware of potentially toxic or am-
mable atmospheres. Ensure that the leak detection equipment being used is suitable for use
with all applicable refrigerants, i.e., non-sparking, adequately sealed, or intrinsically safe.
• Ensure that the area is in the open or that it is adequately ventilated before breaking into the
system or conducting any hot work. A degree of ventilation shall continue during the period
that the work is carried out. The ventilation should safely disperse any released refrigerant
and preferably expel it externally into the atmosphere. Where electrical components are be-
ing changed, they shall be t for the purpose and to the correct specication. At all times, the
manufacturer’s maintenance and service guidelines shall be followed. If in doubt, consult the
manufacturer’s technical department for assistance.
• Detection of ammable refrigerants: Under no circumstances shall potential sources of ignition
be used in the searching for or detection of refrigerant leaks. A halide torch (or any other detec-
tor using a naked ame) shall not be used.
Test Room Climate
Class
Dry Bulb Temperature
°C
Relative Humidity % Dew Point °C
Water Vapour Mass in
Dry Air g/kg
4 30 55 20.0 14.8
6 27 70 21.1 15.8
5 40 40 23.9 18.8
7 35 75 30.0 27.3

7
Before Installation
1. Unpack the Unit
• Remove all packaging materials, tape, and protective lms.
• Inspect the unit for shipping damage. Do not install if damage is found.
• Remove any accessories from inside the cabinet.
2. Initial Cleaning
• Clean the interior and exterior surfaces with warm water and a mild, neutral detergent.
• Dry thoroughly with a soft cloth.
• For glass surfaces, use a glass cleaner only. Do not use water alone, as it may leave mineral
residue.
Installation Location Requirements
This unit is designed for indoor use only.
For best performance and safety, ensure the installation location meets the following conditions:
• Install the unit away from direct sunlight and heat sources.
• Do not place near ovens, heaters, or other heat-producing equipment.
• Avoid areas exposed to drafts from doors, windows, or ventilation fans.
• Do not install beneath roof-mounted or overhead ventilation systems.
• Do not install outdoors or in areas exposed to rain or moisture.
• The installation area must be well ventilated.
Clearance & Ventilation
Proper airow is critical for performance and safety.
• Maintain a minimum clearance of 4 inches (10 cm) from the rear and sides of the unit.
• Keep all ventilation openings clear and unobstructed.
• Do not block air intake or exhaust vents.
• Ensure sucient space around the unit to allow heat to dissipate.
Positioning & Leveling the Unit
1. Place the unit in its nal installation location.
2. Ensure the unit is positioned on a at, stable, and level surface.
3. Use a spirit level on a shelf to check levelness from side to side and front to back.
4. Adjust the leveling feet as needed until the unit is stable.
5. Slightly tilting the unit back (approximately 2°) is recommended to ensure proper door closing
and condensate drainage.
Proper leveling is essential to prevent vibration, excessive noise, and improper drainage.
Installation

8
Environmental Conditions
• Recommended ambient temperature range: 41°F–100°F.
• Performance may be affected in environments with high temperature or high humidity.
• Do not operate the unit in open or unprotected areas.
After Installation
• Allow the unit to stand upright for at least 2 hours before turning it on.
• Once powered on, allow the unit to run empty for approximately 2 hours before loading prod-
ucts.
• Verify that the door opens and closes smoothly and seals properly.
9
Allow the unit to stand upright for at least 2 hours after installation before powering on.
Before First Use
1. Ensure the unit is installed correctly and properly leveled.
2. Plug the unit into a grounded electrical outlet.
3. Turn the unit on and allow it to run empty for approximately 2 hours before loading products.
4. Verify that the interior temperature begins to decrease normally.
Control Panel Overview
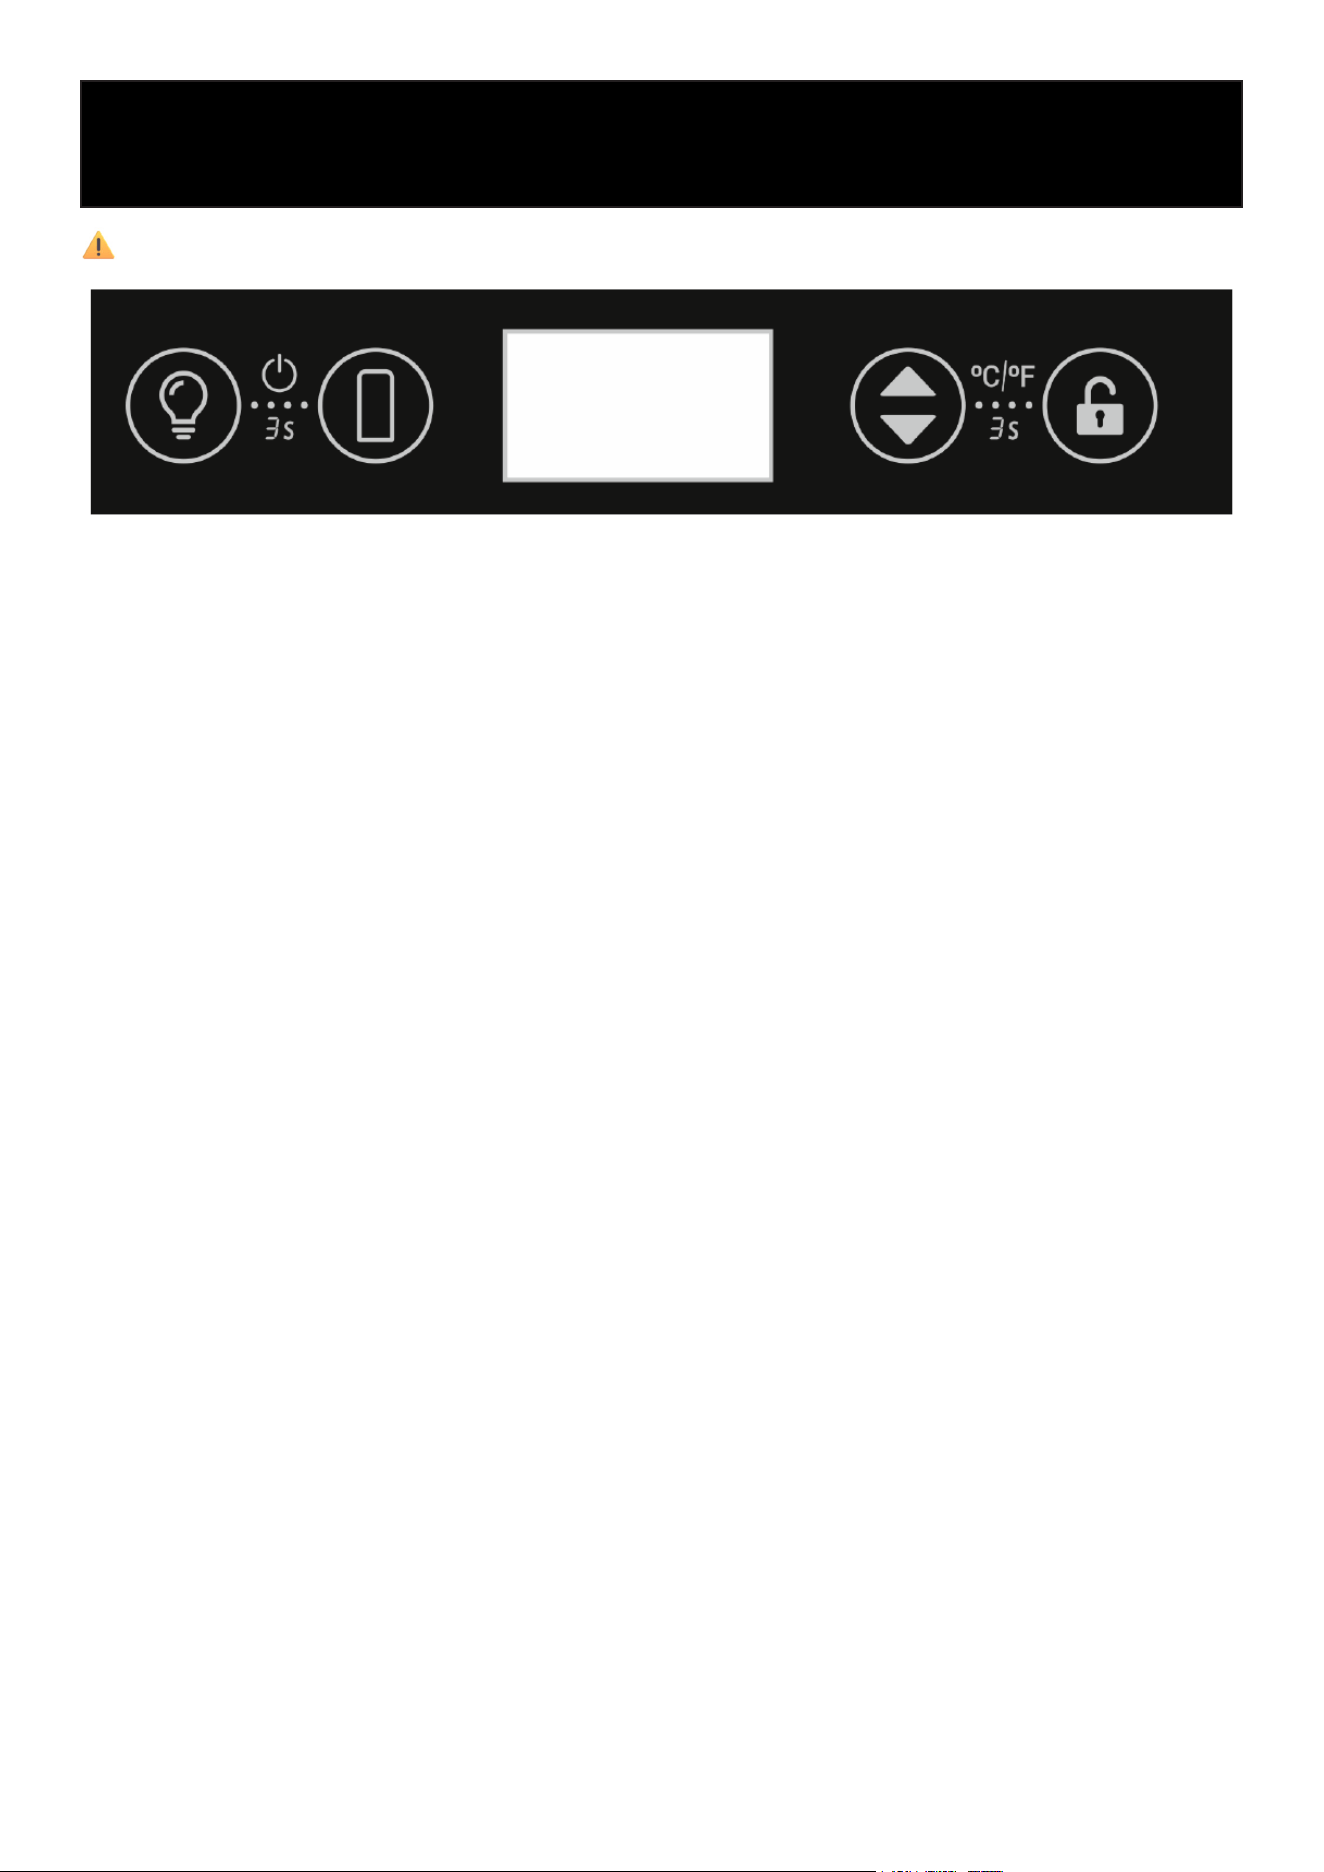
The unit is equipped with an electronic temperature control panel located on the front of the cabi-
net.
The control panel allows you to:
• Set and adjust the internal temperature
• Switch between Fahrenheit (°F) and Celsius (°C)
• Control interior and door lighting
• Lock and unlock the control panel
• Turn the unit on or off
Powering the Unit ON / OFF
• The unit is powered ON by default when plugged in.
• To turn the unit ON or OFF, press and hold the Interior Light button and the Door Light button
simultaneously for 3 seconds.
• When the unit is turned off, “OFF” and the internal temperature will alternate on the display.
Setting the Temperature
1. Press the Temperature Adjustment button.
2. The set temperature will ash on the display.
3. Each press of the button increases the temperature by 1°F / 1°C.
4. Temperature range: 32°F–50°F
5. When the maximum setting is reached, the temperature will cycle back to the lowest setting.
6. After 5 seconds without input, the display will stop ashing and return to showing the actual
internal temperature.
Operations

10
Switching Between °F and °C
• Press and hold the Temperature Adjustment and Lock buttons simultaneously for 3 seconds.
• The display will switch between Fahrenheit and Celsius.
• The corresponding indicator light will illuminate.
When switching units, both the set temperature and displayed temperature will convert auto-
matically.
Interior Light Control
• Press the Interior Light button to turn the interior light ON or OFF.
• The interior light is ON by default when the unit is powered on.
Door Light Control (Color Lighting)
• The door light is OFF by default.
• To turn the door light ON or OFF, press and hold the Door Light button for 3 seconds.
• When the door light is ON, press the Door Light button once to cycle through the available light-
ing effects.
• Each press advances to the next lighting effect in sequence.
• There are 17 lighting effects available, which cycle continuously.
Lighting Effect Sequence
1. Rainbow
2. Digital hourglass
3. Marquee
4. Light spreads from the center to both sides
5. RGB three-color transition
6. Seven-color ash (three times)
7. Seven-color sequential change
8. Seven-color gradient
9. RGB three-color breathing effect
10. RGB seven-color breathing effect
11. Red
12. Yellow
13. Green
14. Cyan
15. Blue
16. Purple
17. White
Control Panel Lock / Unlock
To prevent accidental changes to settings:
Unlocking the Control Panel
1. Press and hold the Lock button for 3 seconds.
2. A buzzer will sound, and indicator lights will ash once.
3. All buttons will become active.

11
Locking the Control Panel
1. Press and hold the Lock button again for 3 seconds.
2. A buzzer will sound, and “Lc” will appear on the display.
3. All buttons will be disabled.
4. Pressing any button while locked will cause the buzzer to sound.
The unit ships in the unlocked state by default.
Loading & Daily Use Guidelines
• Allow food and beverages to cool to room temperature before placing them inside the unit.
• Do not overload shelves or block internal air circulation.
• Space products evenly to allow proper airow.
• Avoid frequent or prolonged door openings to maintain stable temperatures.
• Keep doors fully closed during operation.
Normal Operating Sounds & Conditions
The following are normal during operation:
• Mild operating noise or humming
• Warm surfaces near the compressor or condenser
• Light condensation on exterior surfaces in high-humidity environments
These conditions do not indicate a malfunction.

12
Always disconnect the unit from the power supply before cleaning or performing any mainte-
nance. Failure to do so may result in electric shock or injury.
Routine Cleaning
Regular cleaning helps maintain performance, appearance, and food safety.
Interior & Exterior Cleaning
• Clean the interior and exterior surfaces using:
• A soft cloth
• Warm water and a mild, neutral detergent
• Dry all surfaces thoroughly after cleaning.
• Do not allow moisture to remain on surfaces for extended periods, as this may cause corrosion
over time.
Do not use abrasive cleaners, scouring pads, strong acids, solvents, or corrosive chemicals.
Glass Surface Cleaning
• Use a glass cleaner suitable for appliance glass.
• Avoid using water alone on glass surfaces, as it may leave mineral or lime residue.
• Wipe dry with a clean, soft cloth.
Cleaning Frequency
• General cleaning is recommended every 30–45 days, depending on usage and environment.
• Clean more frequently in high-humidity or high-use environments.
Condenser Cleaning
Keeping the condenser clean is essential for proper cooling performance and energy eciency.
• Periodically inspect the condenser for dust or debris buildup.
• If the condenser is dirty:
• Turn the unit OFF and unplug it.
• Allow the unit to cool.
• Carefully clean the condenser surface using a soft brush or dry cloth.
• A dirty condenser can cause:
• Reduced cooling performance
• Increased operating noise
• Higher energy consumption
Do not use water, sharp tools, or pressurized air to clean the condenser.
Condensation & Moisture
• In high-humidity environments, condensation may form on exterior surfaces.
• This is normal operation.
• Wipe away moisture promptly using a soft, dry cloth.
Cleaning & Maintenance

13
Long-Term Storage or Non-Use
If the unit will not be used for an extended period:
1. Turn the unit OFF and unplug it.
2. Remove all contents.
3. Clean and dry the interior and exterior thoroughly.
4. Leave the door slightly open to prevent odors and moisture buildup.
5. Before returning the unit to service, inspect the power cord and electrical connection.
Service & Repairs
1. Do not attempt to repair or service internal components yourself.
2. Servicing of the refrigerant system must be performed only by qualied, certied technicians.
3. Use only manufacturer-approved replacement parts.
4. If the power cord is damaged, it must be replaced by the manufacturer, authorized service
agent, or a qualied technician.
14
Troubleshooting
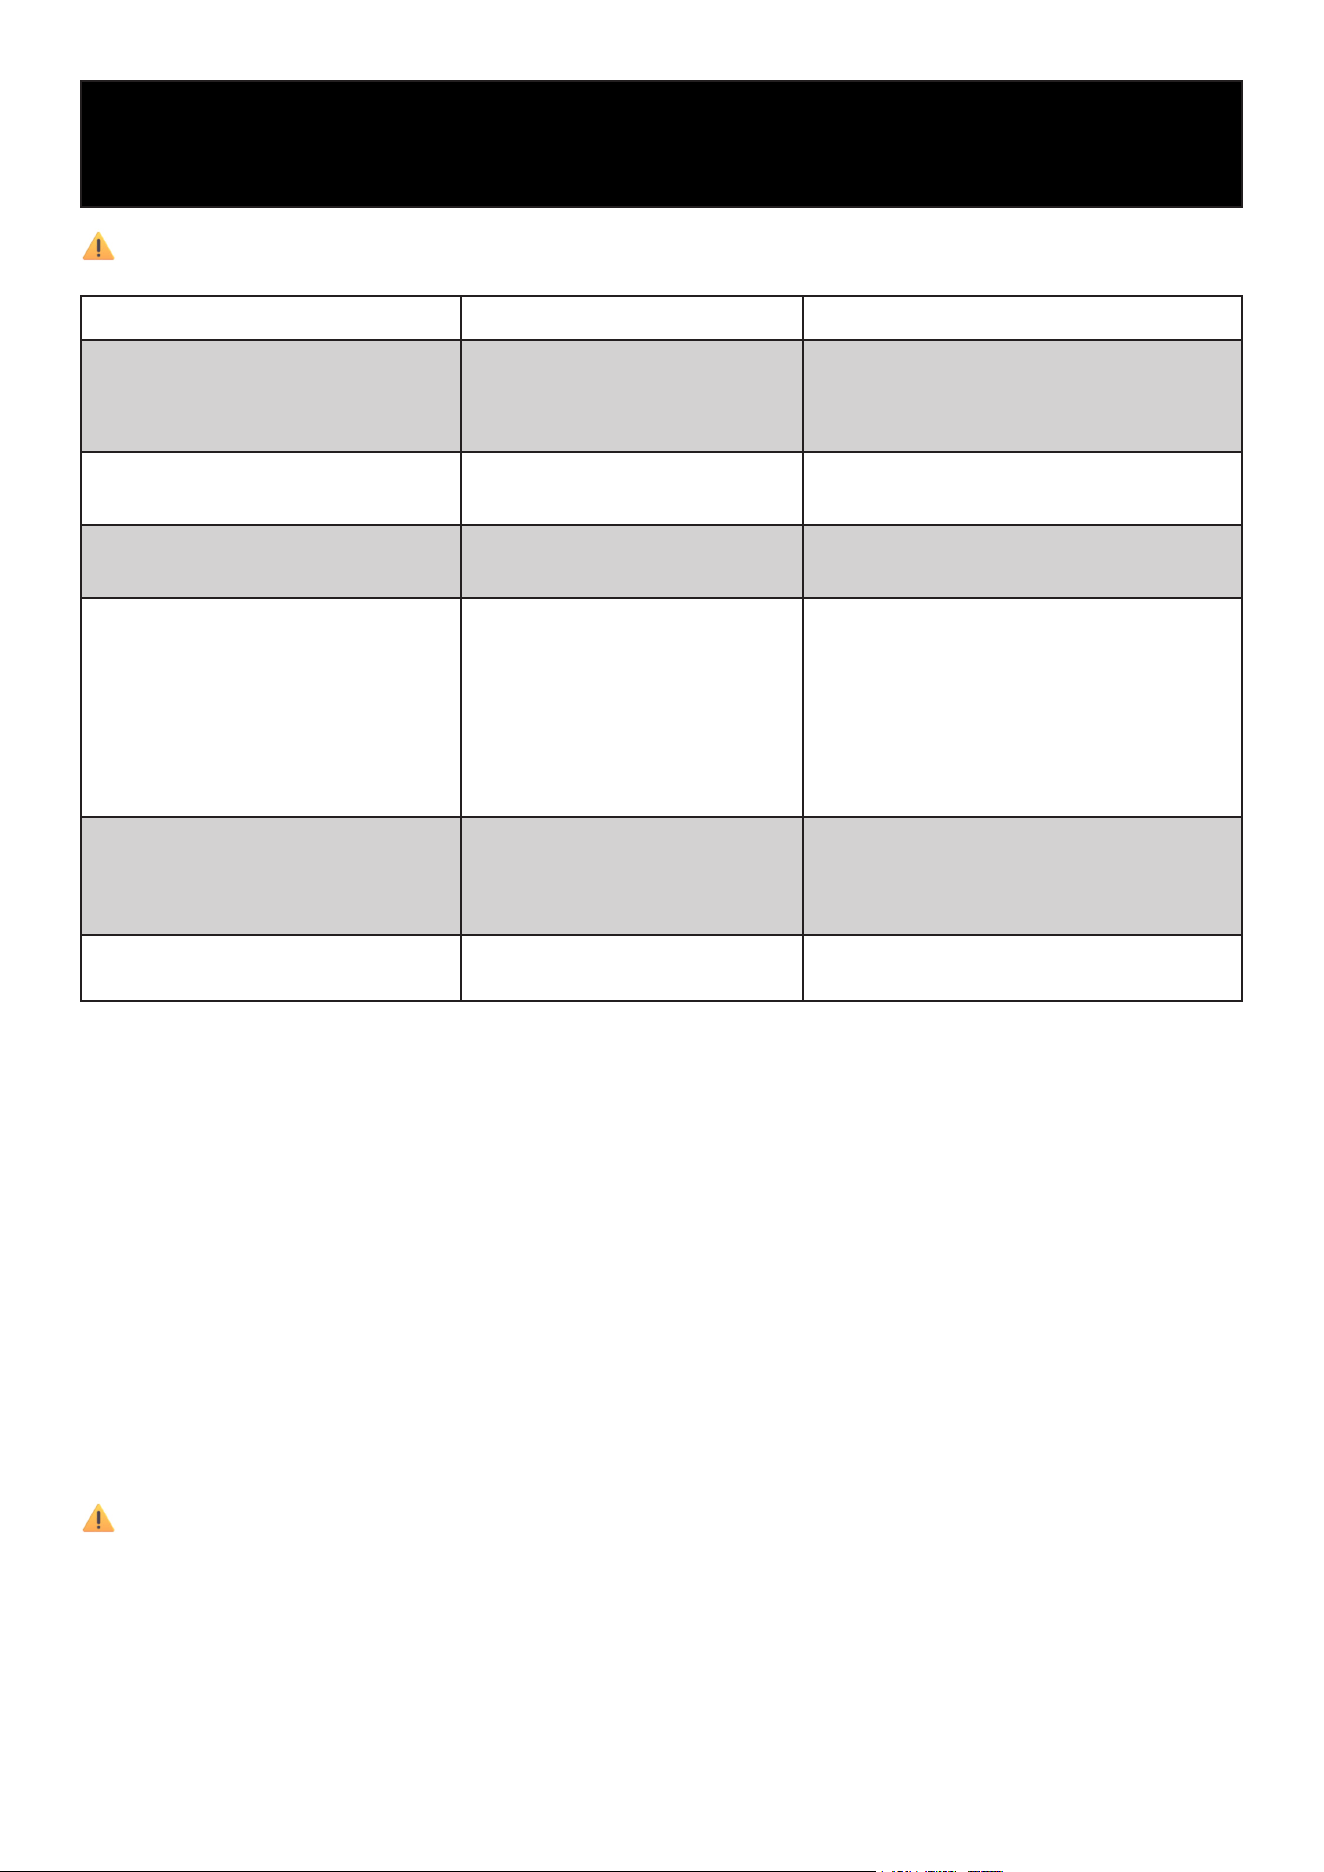
Problem Possible Cause Recommended Solution
Unit does not turn on
• Power plug is not fully
inserted
• No power at the outlet
• Plug the power cord securely into the
outlet
• Check that the outlet is working and
has power
Indicator light is on, but compressor
does not start (buzzing sound)
• Power voltage is too low
(below 97V)
• Consult a licensed electrician refarding
a voltage stabilizer
Compressor starts and stops repeat-
edly
• Power voltage is too high
(above 130V)
• Use a voltage stabilizer to maintain
proper voltage
Unit is running, but cooling is weak
or slow
• Door opened too frequently
or left open
• Items blocking airow or unit
overloaded
• Frost buildup inside cabinet
• Condenser is dirty
• Door seal not sealing prop-
erly
• Reduce door opening frequency
• Rearrange items to allow proper air
circulation
• Remove contents and allow unit to
defrost
• Clean the condenser (see Cleaning &
Maintenance)
• Inspect and adjust the door seal
Excessive noise during operation
• Unit is not level
• Loose components or fas-
teners
• Refrigerant pipes touching
• Place the unit on a at, stable surface
and adjust leveling feet
• Tighten loose components
• Ensure pipes are not in contact
Condensation on exterior surfaces • High ambient humidity
• Wipe with a soft, dry cloth (normal
condition)
Always disconnect the unit from the power supply before inspecting or cleaning.
Normal Operating Conditions (Not a Malfunction)
The following conditions are normal and do not require service:
• Mild operating or humming noise
• The compressor or condenser feels warm during operation
• Light exterior condensation in humid environments
When to Contact Customer Service
Contact KoolMore Customer Service if:
• The unit does not cool after performing the steps above
• Electrical components appear damaged
• The power cord is damaged
• Refrigerant system service is required
Do not attempt to repair refrigerant components yourself. Service must be performed by quali-
ed technicians only.

15
LIMITED WARRANTY
KoolMore Supply Inc. extends a limited warranty to the original purchaser, guaranteeing that this KoolMore product is
free from manufacturing defects in material or workmanship for one year from the date of purchase.
Should you discover any such defect within the warranty period, KoolMore Supply Inc. reserves the right to repair or re-
place the product without charge, or to cover the cost of replacement parts and repair labor needed to correct defects
present at the time of purchase or resulting from regular usage, when the appliance has been installed, operated, and
maintained as per the instructions provided.
At its sole discretion, KoolMore Supply Inc. may decide to replace the product. In such an event, your replacement
appliance will carry the warranty for the remaining term of the original unit’s warranty period.
This warranty is valid exclusively to the original purchaser of the product and only applicable within the United States.
The warranty commences from the date of original consumer purchase. Proof of the original purchase date will be
required to obtain service under this warranty.
Under this limited warranty, your sole and exclusive remedy will be product repair, as outlined above. All services must
be provided by a KoolMore designated service company.
To claim warranty or request repair service:
Email [email protected]. Please include your name, address, phone number, warranty repair request, and a copy
of your proof of purchase receipt. Alternatively, visit koolmore.com and use the Contact Us page. A KoolMore custom-
er service representative will promptly arrange service for your appliance.
We thank you for choosing KoolMore.
WARRANTY EXCLUSIONS
This limited warranty will not cover:
1. Failure of the product to perform during power failures or interruptions,
or due to inadequate electrical service.
2. Damage incurred during transportation or handling.
3. Damage caused by accidents, vermin, lightning, winds, re, oods, or acts of God.
4. Damage resulting from accidents, alterations, misuse, abuse, improper installation, repair, or maintenance. This
includes using any external device that alters or converts the voltage or frequency of electricity.
5. Unauthorized product modications, repairs by unauthorized centers, or use of non-approved replacement parts.
6. Abnormal cleaning and maintenance not aligned with the user’s manual.
7. Use of incompatible accessories or components.
8. Any costs associated with repairs or replacements under these excluded circumstances shall be the responsibility
of the consumer.
WARRANTY