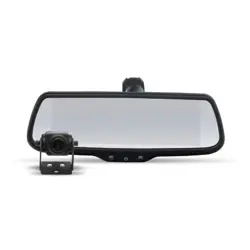
User Manual
7.3” Rear-View Mirror Monitor
with Optional Back-Up Sensor Overlay
PMK-UN06

2
Installation Guide
email - [email protected]
tel - 1-727-592-5991
PMK-UN06
7.3” Rear-View Mirror Monitor with
Optional Back-Up Sensor Overlay
Introduction
Thank you for purchasing your EchoMaster Pro automotive monitor and
camera.
Your monitor displays a clear, high resolution image of the area surrounding
your vehicle, meaning your maneuvering and vehicle awareness will be greatly
improved.
Please ensure you read and understand all aspects of this manual before fitting
or using your EchoMaster monitor and camera.
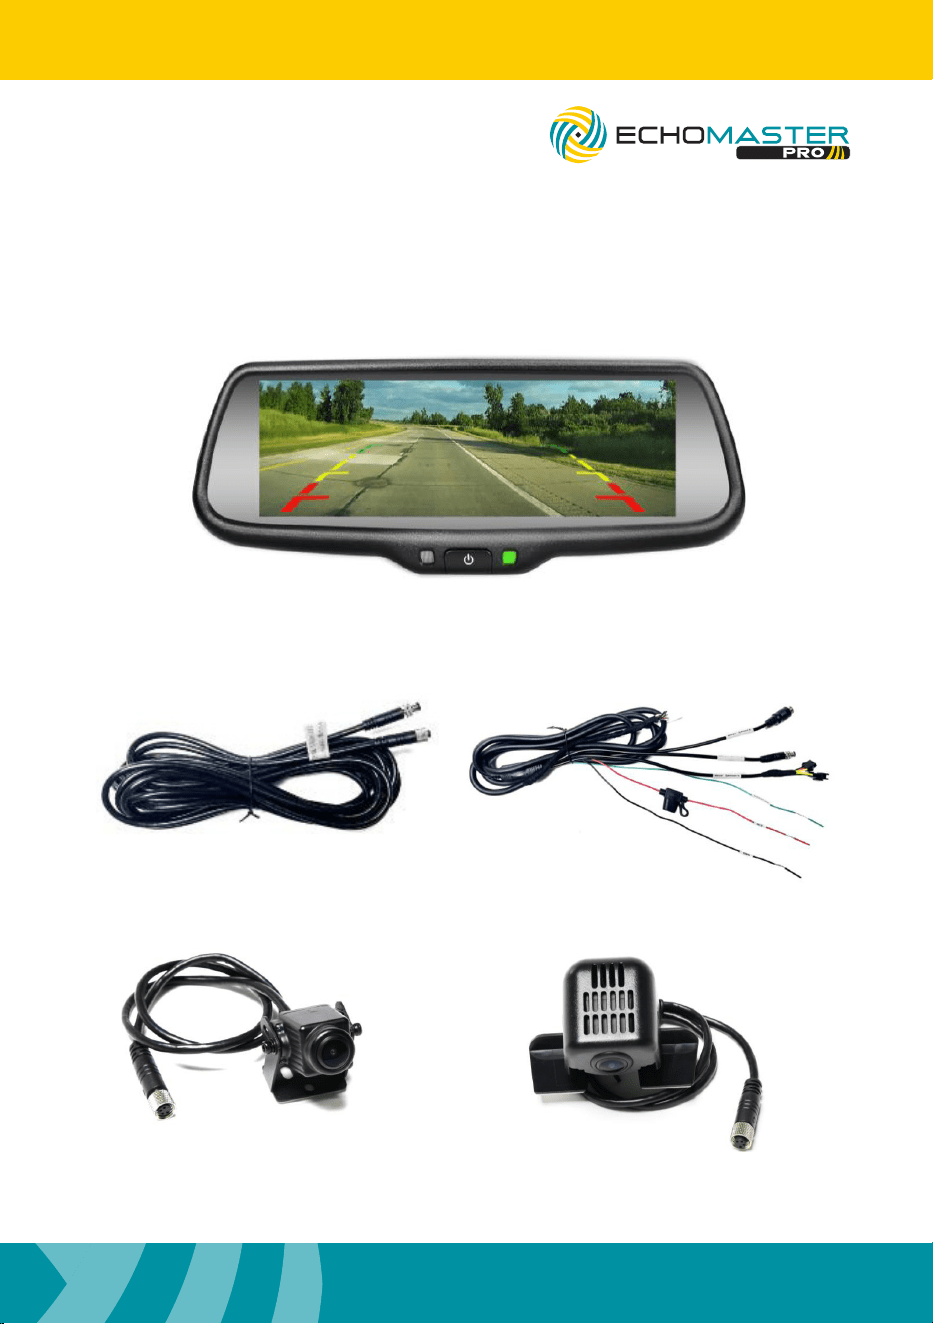
Box Contents Key Features
u HD Display
u Adjustable vertical view
u Adjustable brightness
u Auto-dimming display
u 720p 60fps AHD Camera
u Parking Sensor Integration Capabilities
u Mirror Monitor
u Full View Camera
u Camera Extension Harness
u Mirror Power Harness
u Alternate Camera Mount
3
email - [email protected]
tel - 1-727-592-5991
Installation Guide
PMK-UN06
7.3” Rear-View Mirror Monitor with
Optional Back-Up Sensor Overlay
What’s in the Box

4
Installation Guide
email - [email protected]
tel - 1-727-592-5991
PMK-UN06
7.3” Rear-View Mirror Monitor with
Optional Back-Up Sensor Overlay
PMK-UN06 Rearview Mirror and
Camera Installation Instructions
The PMK-UN06 mirror is designed to replace your vehicle’s factory rearview
mirror. Begin by carefully removing the original mirror and installing the PMK-
UN06 in its place. Ensure the new mirror is securely mounted before proceeding.
Next, route the attached cable along the vehicle’s headliner and down the
A-pillar. Be cautious not to obstruct or interfere with any airbags housed within
the A-pillar area. The cable must be routed behind any airbag assemblies, not in
front of them.
Select an appropriate mounting location for the camera—ideally positioned
centrally on the rear of the vehicle for optimal viewing coverage. Mount the
camera securely, then connect it to the Camera Extension Harness. Route this
harness through the vehicle toward the Main Harness connection point.
Once all cables for both the mirror and camera are routed, connect the camera
input and power leads according to the wiring diagram provided in this manual.
If you are installing a reverse camera, connect it to the GX connector on the
mirror harness. For reverse cameras that do not use a GX connection, a GX-to-
RCA adapter (sold separately) can be used to complete the integration.
The PMK-UN06 mirror is compatible with the PS-6CRBP reverse sensor system
(sold separately). This system connects to the mirror via the speaker output on
the PS-6CRBP, using the “Rear Sensor” T-harness to enable the Rear Sensor
Overlay display feature. You may either:
Use the external chime speaker supplied with the PS-6CRBP by connecting it
to the “T-Harness”, or use the mirror’s internal speaker by leaving the external
speaker disconnected.
If you choose to use the mirror’s internal speaker, it must be enabled in the
mirror’s settings menu as described on page 6.

5
email - [email protected]
tel - 1-727-592-5991
Installation Guide
PMK-UN06
7.3” Rear-View Mirror Monitor with
Optional Back-Up Sensor Overlay
Full View Camera Instructions
The vehicle ignition must be in the ON or ACC position for the mirror to operate.
The mirror will automatically power on and off with the vehicle key and display
the full view camera image when active. While the mirror is on, a brief press of
the power button will toggle the display off and on; the system remains powered
even when the display is turned off with this button.
Brightness Adjustment
With the mirror powered on, pressing and holding the power button for 3
seconds will enter the Brightness Adjustment menu. While in this menu, short
pressing the power button will adjust the brightness 0-100. The system will
automatically exit this menu and store the displayed value after 5 seconds.
Vertical Position Adjustment
While in the Brightness Adjustment menu, press and hold the power button for
3 seconds to enter the Vertical Position Adjustment menu. The default vertical
position is set to level 5, which represents the center position.
Within this menu, short-pressing the power button will adjust the mirror’s vertical
position incrementally between 0 and 10. The system will automatically exit the
menu and store the value if no adjustments are made after 5 seconds.

6
Installation Guide
email - [email protected]
tel - 1-727-592-5991
PMK-UN06
7.3” Rear-View Mirror Monitor with
Optional Back-Up Sensor Overlay
Reverse Operating Instructions
Reverse Camera Signal Detection
The PMK-UN06 mirror supports two types of reverse camera input signals:
CVBS and AHD. During initial installation, the mirror will automatically detect the
video signal type from the connected reverse camera input.
When switching between CVBS and AHD signals, start with the mirror power
OFF. Connect the desired camera (CVBS or AHD) to the reverse camera input.
Then, press and hold the power button on the mirror for approximately 5
seconds while turning the vehicle’s ignition ON.
Once the mirror’s green indicator light turns on, release the power button. Shift
the vehicle into reverse—the system will automatically detect and configure itself
to the connected camera signal.
Brightness Adjustment
When shifting the vehicle to reverse, the camera view will switch from the full
view camera to the reverse camera within 2 seconds. While the vehice is in
reverse, short pressing the power button will adjust the brightness from 0-100
and will automatically exit this brightness adjustment after 5 seconds.

7
email - [email protected]
tel - 1-727-592-5991
Installation Guide
PMK-UN06
7.3” Rear-View Mirror Monitor with
Optional Back-Up Sensor Overlay
Parking Sensor Functionality
Press and hold the button for 3 seconds to enter the Parking Sensors menu. In
this menu, short-pressing the power button toggles the Parking Sensor feature
ON or OFF. The default setting is ON. When the Parking Sensor feature is turned
OFF, the Volume and Vehicles menus will not be available.
While in the Parking Sensor menu, press and hold the button for another 3
seconds to enter the Parking Sensor Volume menu. Short-press the button to
cycle through the volume levels for the built-in speaker: OFF, LOW, MID, and
HIGH. The default setting is OFF.
While in the Parking Sensor Volume menu, press and hold the button for 3
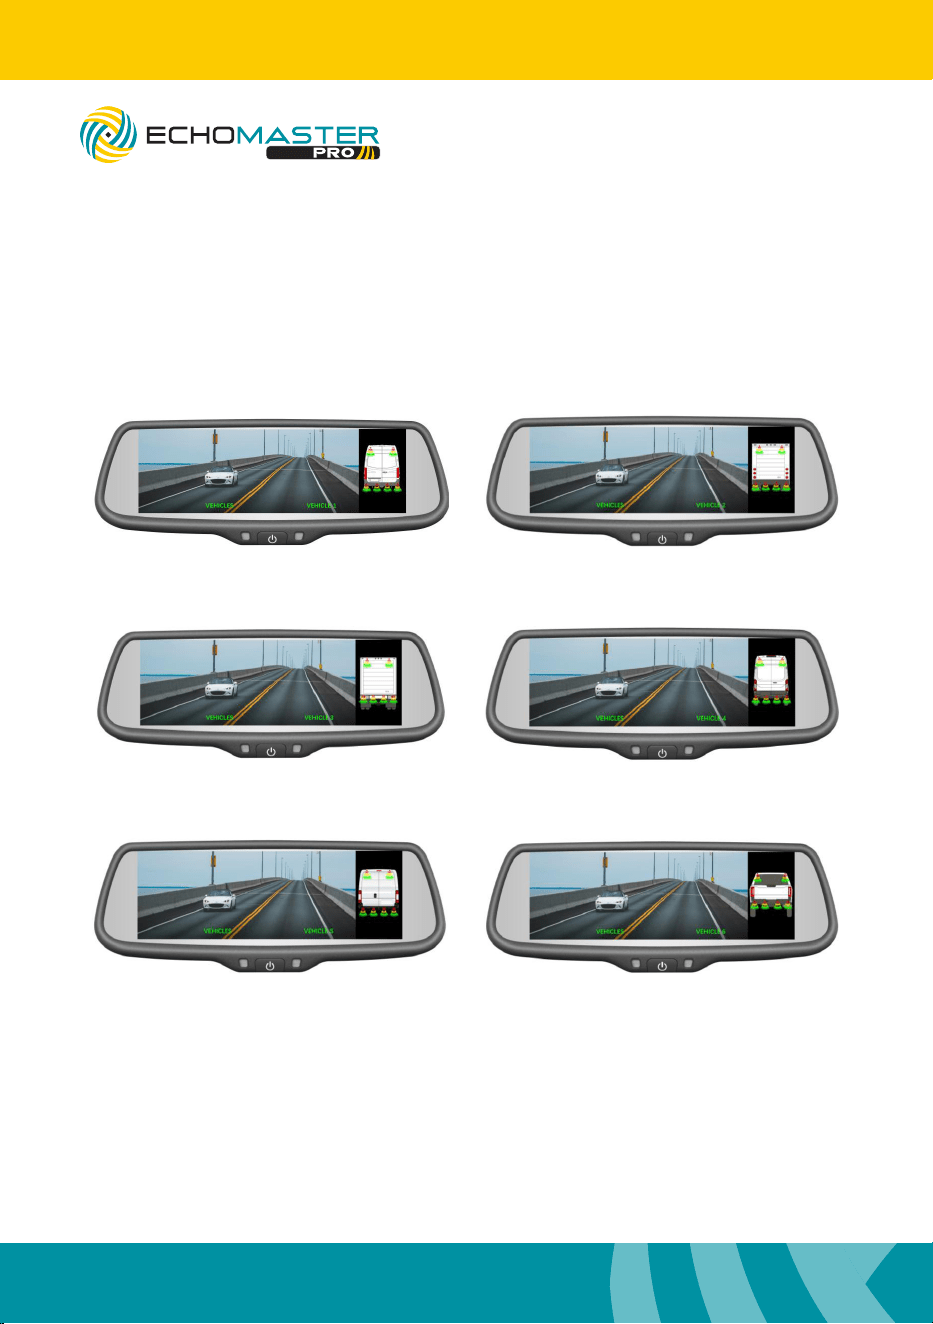
seconds again to enter the Vehicles menu. In this menu, short-pressing the
button will switch between the available vehicle icon options: Vehicle 1, Vehicle
2, Vehicle 3, Vehicle 4, Vehicle 5, and Vehicle 6.
The default selection is Vehicle 1.
Refer to pages 7–8 for visual references of the vehicle icons.
8
Installation Guide
email - [email protected]
tel - 1-727-592-5991
PMK-UN06
7.3” Rear-View Mirror Monitor with
Optional Back-Up Sensor Overlay
Vehicle Icons
VEHICLE 4
VEHICLE 5
VEHICLE 6
VEHICLE 1
VEHICLE 2
VEHICLE 3
9
email - [email protected]
tel - 1-727-592-5991
Installation Guide
PMK-UN06
7.3” Rear-View Mirror Monitor with
Optional Back-Up Sensor Overlay
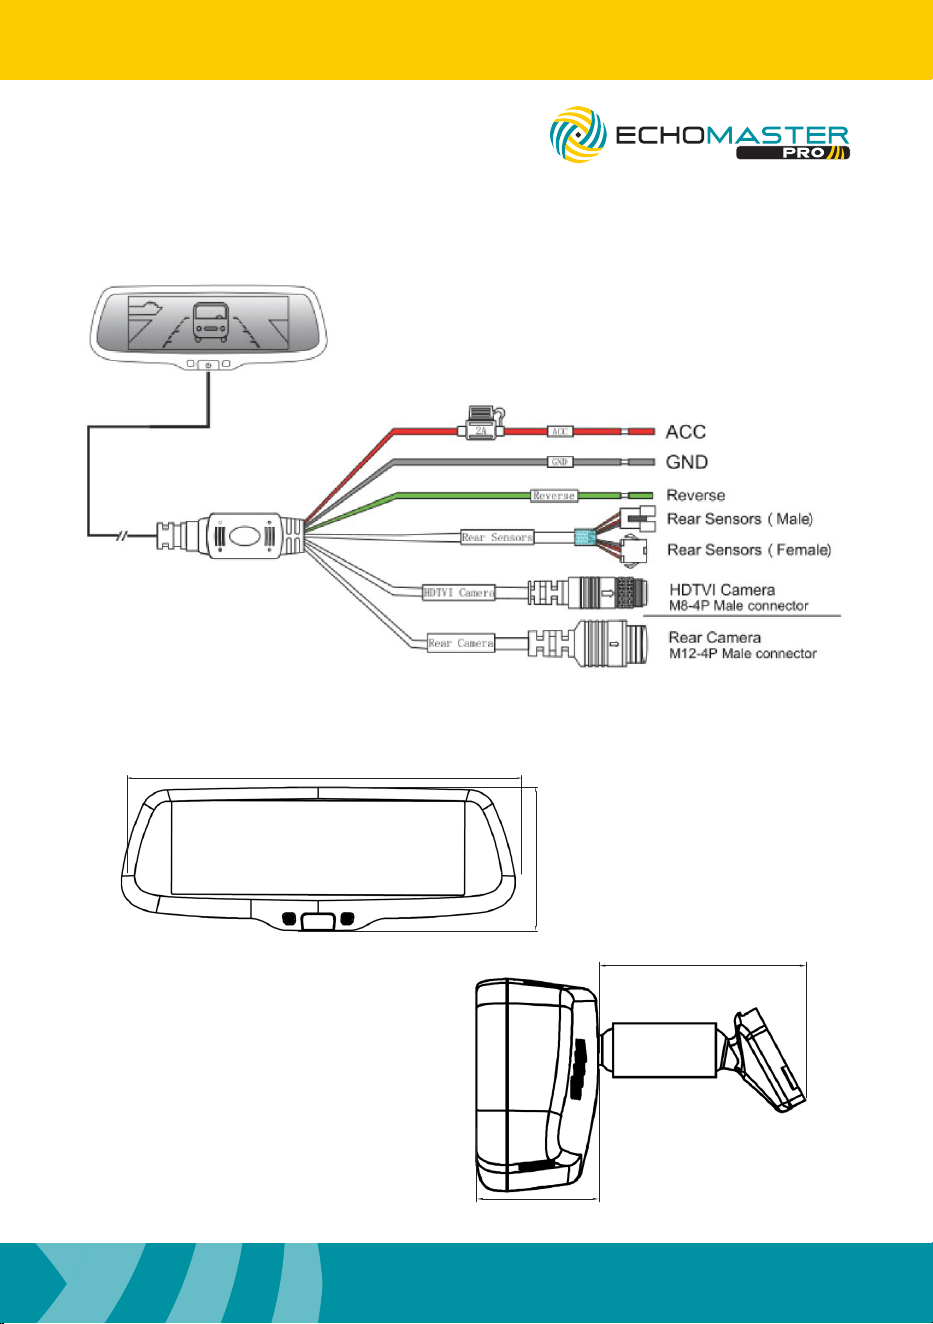
Wiring Diagram
Dimensions (in)
9.48 inches (240.9 mm)
3.42 inches (86.96 mm)
3.5 inches (88.22 mm)
1.96 inches (49.8 mm)

10
Installation Guide
email - [email protected]
tel - 1-727-592-5991
PMK-UN06
7.3” Rear-View Mirror Monitor with
Optional Back-Up Sensor Overlay
PMK-UN06
Screen Size 7.3"
Aspect Ratio 16:9
Power Supply 9-18V DC
Mirror Video Resolution 1280 x 370
Sensor Size 1/3” CMOS
Video Input Analog 720p HDTVI & CVBS/AHD
Video Framerate 60 fps
Audio Inputs N/A
Camera Operating Temperature -20°C ~ +70°C
Camera IP Rating IP67
Dimensions (in)
Dimensions (mm)
(L) 9.5 x (H) 2.8 x (D) 2.1
(L) 242 x (H) 71 x (D) 53
Connection Type Power, Mini Din, & GXE
Specification

EchoMaster is a Power Brand of Stinger.
EchoMaster.com
email - [email protected] (US)
tel - 1-727-592-5991
9620 Executive Center Drive, Suite 200, St Petersburg, Florida 33702
Rev. A DC030226