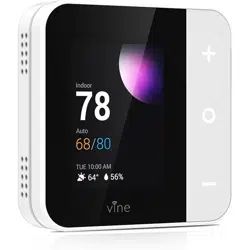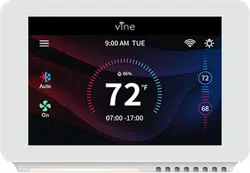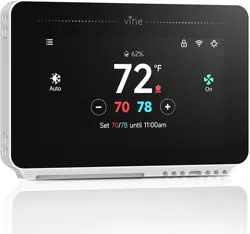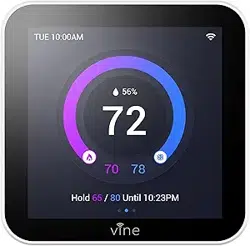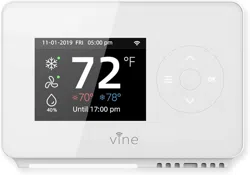
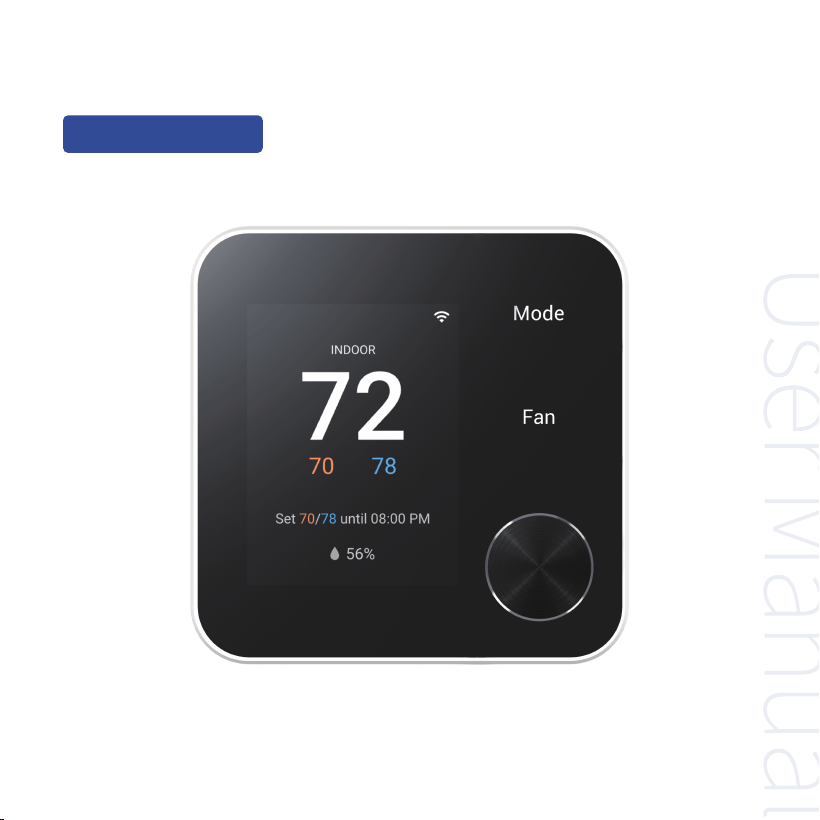
TJ-126 Wi-Fi Thermostat
User Manual
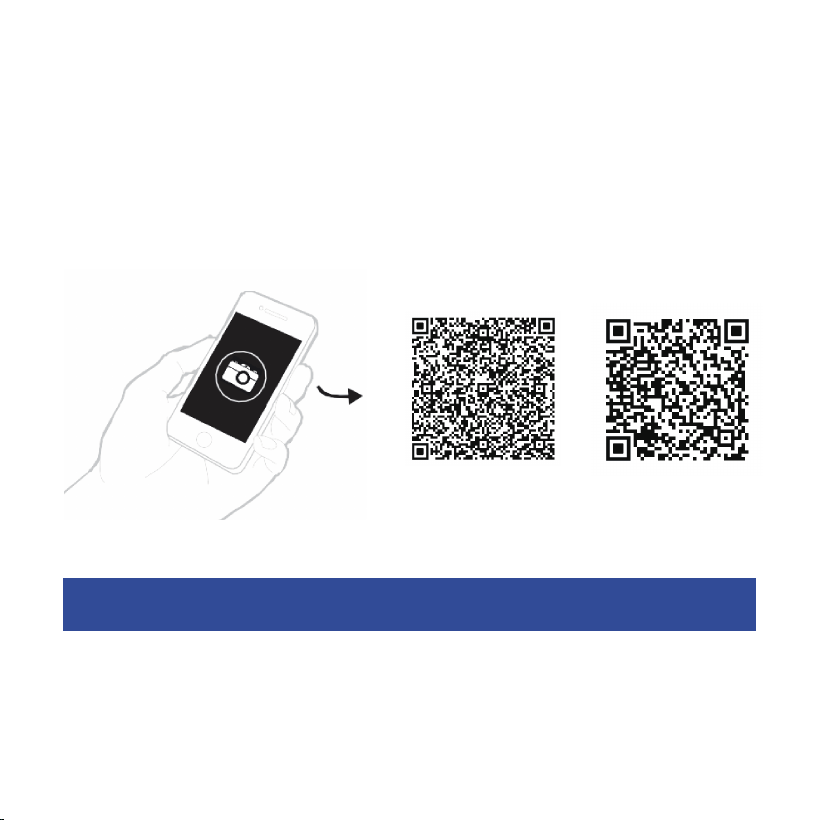
Electronic manual and installation video
1. This user manual only includes installation and simple setup instructions. For the more detailed
operating instructions and user guide, scan the QR code.
2. Watch installation video by scanning the QR code.
Electronic manual
Installation Video
WE ARE HERE TO HELP, 24/7 !
WEBSITE: www.vineconnected.com
EMAIL: support@vineconnected.com
HOTLINE: 1-800-264-3457(09:00am~05:00pm MON~FRI PST)
01
02
App Setup
1. To download the "Smart life" app, scan the QR code in the Apple App Store or Google Play
Store.
2. Open the "Smart Life" app. If you already have an account, tap Sign In. To create a new
account, tap Sign Up.
Note: You must create your own "Smart Life" account to use third-party services and
products. These will not work with a guest account. With a "Smart Life" account, you can also
allow your family and friends to control your smart thermostat.
3. Tap "+" and select your smart thermostat.
4. Follow the in-app instructions to set up your smart thermostat.
Note: You can change the name and icon at any time by going to the smart thermostat screen and
tapping. You can use the "Smart Life" app to connect your smart thermostat to "Amazon Alexa" or
"Google Assistant".
iOS/Android
App Download
Download on the
APP Store
GET IT ON
Google Play
TJ-126 Thermostat - A smart Choice for Smart Life!
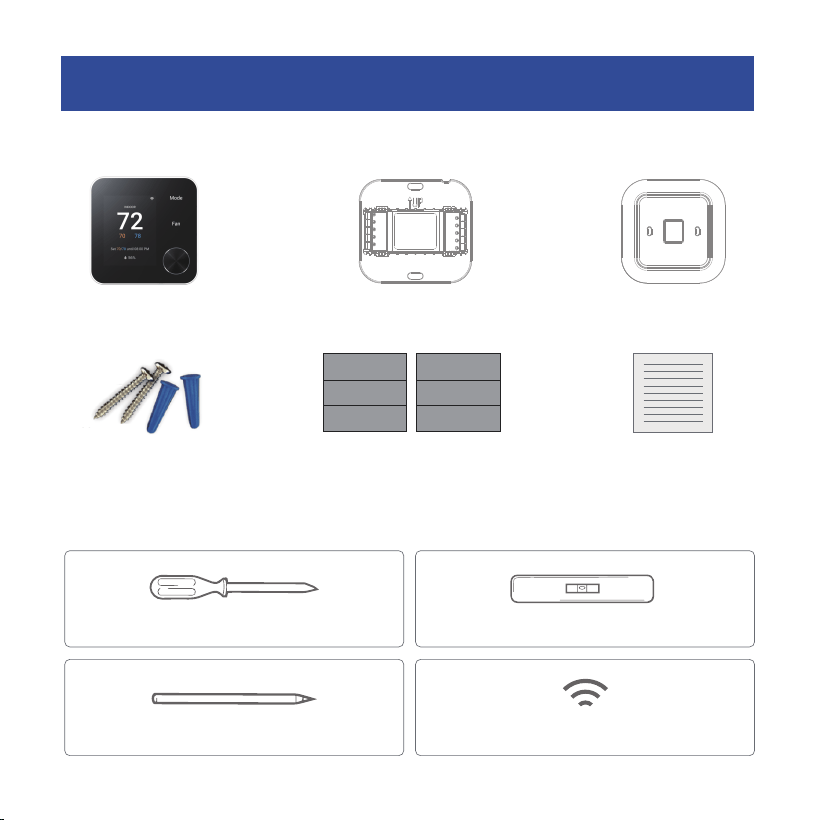
You may also need these tools:
Wi-Fi Thermostat Wall Plate Large Trim Plate
Items included in box:
Screws Sets
Wiring labels
User Manual
R R
RC RC
RH RH
C C
Y Y
Y2 Y2
Phillips screwdriver
Pencil
Level
Home Wi-Fi Password
03
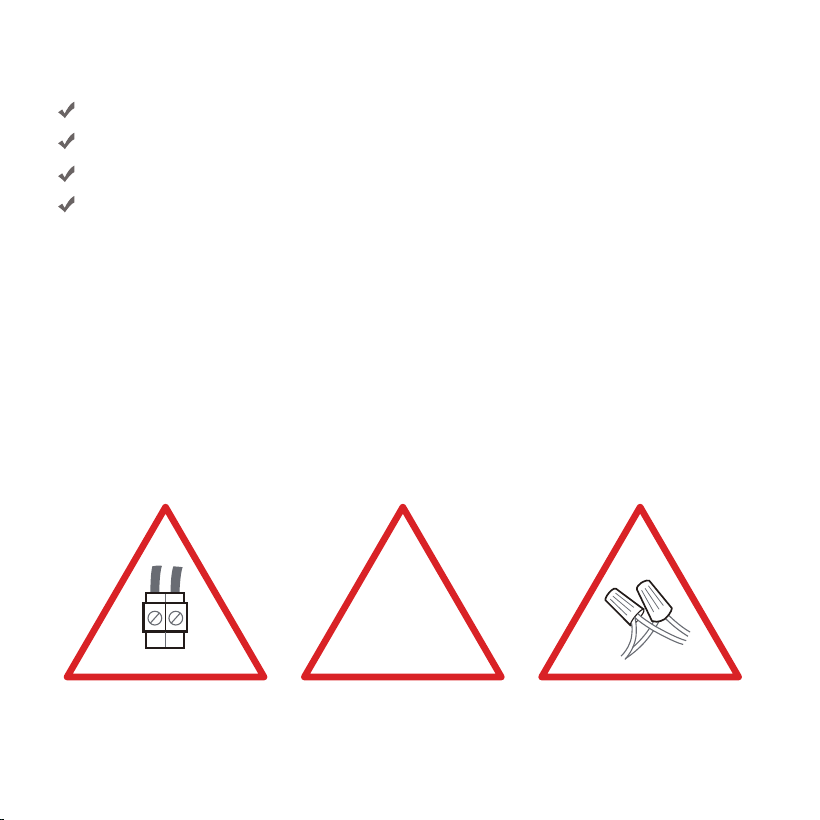
Incompatible wiring and voltage
Please check your old thermostat for compatibility to see if it:
·Does not work with electric baseboard heat (110VAC~240V AC)
·Does not work with millivolt systems
·Does not support S terminals for indoor and outdoor sensors.
Note: If you are not sure, please contact a processional or call 1-800-264-3457.
110 VAC
or
120 VAC
or
240 VAC
L1 L2
Compatibility
* Require C-Wire to power the thermostat(24V-AC)
Conventional (2H/2C)
Heat Pump (3H/2C) include Auxiliary Heat or Emergency Heat
Gas, Oil, Electric
Dual Fuel Support
04
Installation
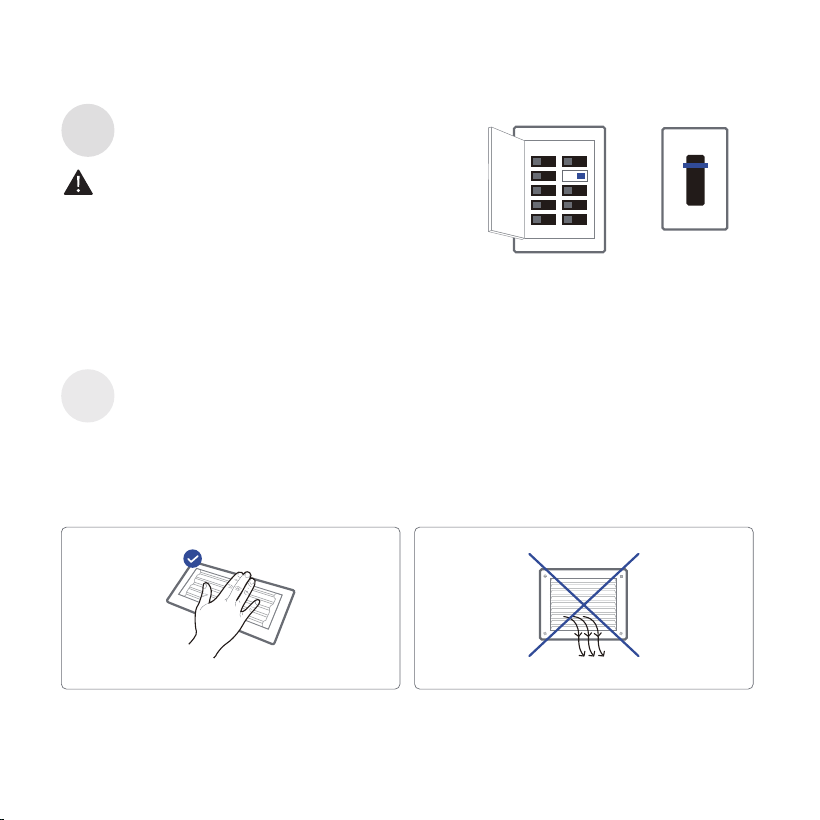
Switch off the power
Step 1
Breaker Box
Switch
or
OFF
ON
Check that your system is off
Step 2
Confirm your system is off by turning on your heat (during winter) or your AC(during summer). Wait a
few minutes-you should not feel air coming from your vents.
NOTE : If you have a digital thermostat that has a blank display, skip this step.
05
Electrical shock can cause injury or death.
IMPORTANT: To ensure the power is off, adjust
the temperature on your current thermostat and
wait at least 5 minutes to confirm the system has
shut down. This step also helps prevent blown
fuses in your equipment.
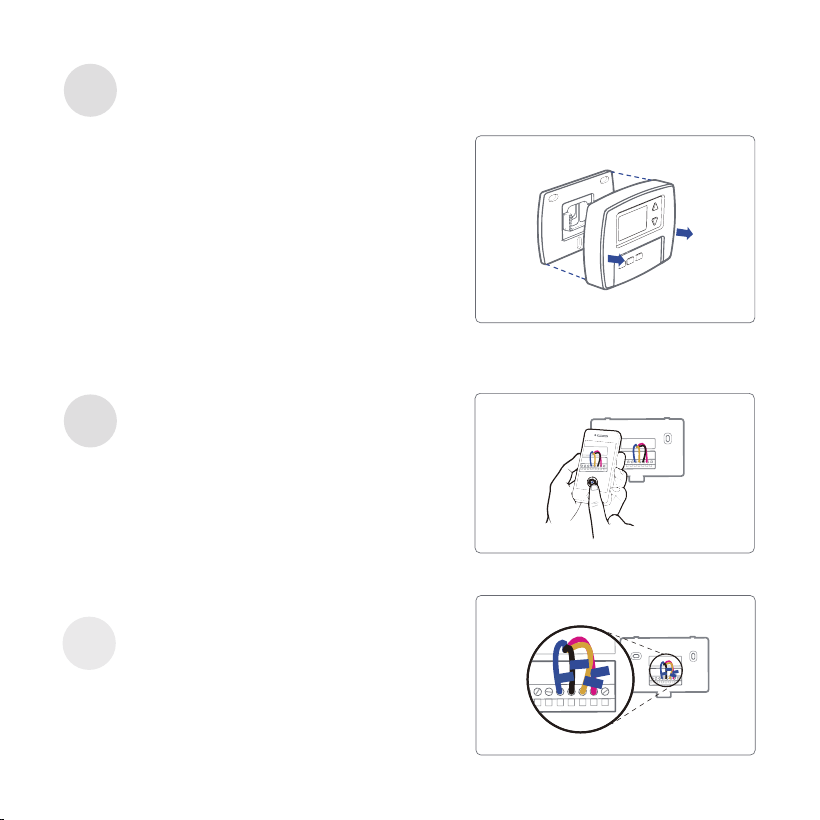
Most thermostats allow you to remove the main unit
and provide access to a wall plate which holds the
wiring terminals, you can take off the thermostat by
grasping and gently pulling. Some thermostats may
have screws, buttons, or clasps.
Take a picture of your existing wall plate′s wiring
and save it for reference. Make sure you can read
the wire terminal labels.
Note: Do not remove any wires from your thermostat
at this time!
Remove your old thermostat from the wall-plate
Step 3
Take a picture of the wiring
Step 4
Label the wires
Step 5
Label the old wall plate with our new thermostat
labels from packing box.
G
C
Y
R
G
C
Y
R
06
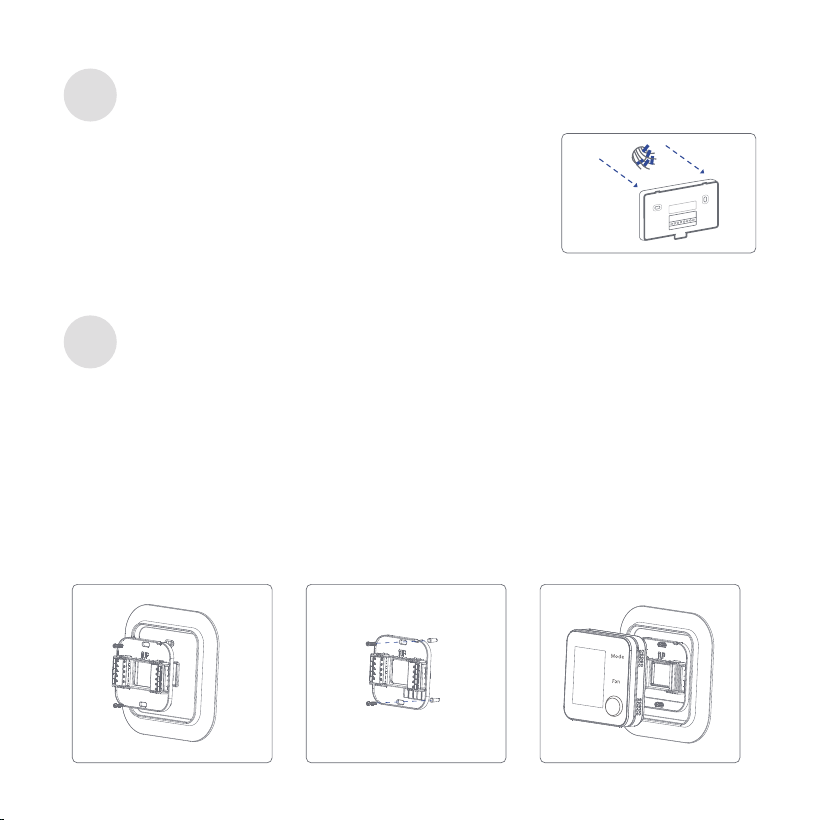
Disconnect the wires from the old thermostat one by one, you may
need a screwdriver to release the wires from terminals. Unscrew and
take off the mounting plate of your old thermostat from the wall.
You can choose to use the trim plate which comes along with your thermostat. The trim plate is
useful if you want to hide marks or holes left on the wall of your old thermostat.
If the trim plate is to be used, then align the mounting holes on the trim plate and wall plate and
press them together.
Pull the wires through the hole in the middle of the wall plate and attach the wall plate to the wall
using the screws sets(screw& anchor) to mount the new wall plate. Be sure to check the alignment
of your wall plate before and after the wall plate installation.
Note: Wrap the wires around a pen or pencil so they don′t fall back.
Disconnect the wires and remove the old wall plate
Step 6
Mount the new wall plate
Step 7
07
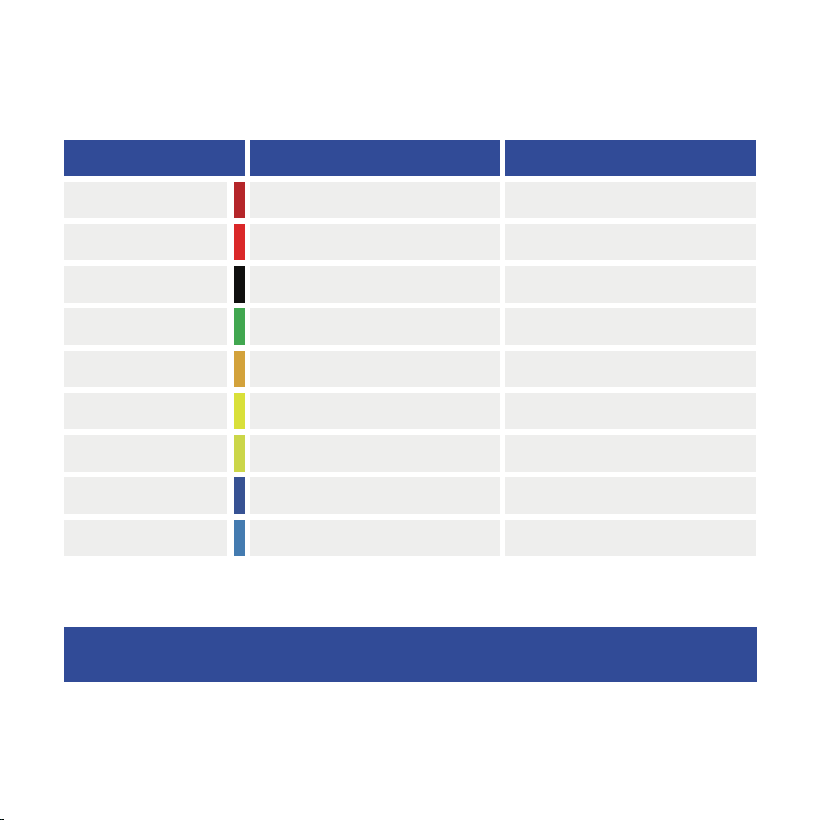
Use the picture you took before as reference to wire, the following chart is a wiring diagram for
common systems, please make sure that a C -wire exists in our old thermostat system.
Terminal
RC
RH
C
G
Y
Y2
W2
W/E
O/B
Conventional System
Power for cooling, 24V
Power for heating, 24V
Common wire, 24V
Fan
Power for cooling, 24V
Power for heating, 24V
Common wire, 24V
Fan
1st Stage Cool
2nd Stage Cool
1st Stage Heat
2nd Stage Heat
1st outdoor Stage Heat
2nd outdoor Stage Heat
Auxiliary Heat activated at W2
Auxiliary Heat activated at W1
------
Changeover (reversing valve)
connection for heat pump
Heat Pump System
08
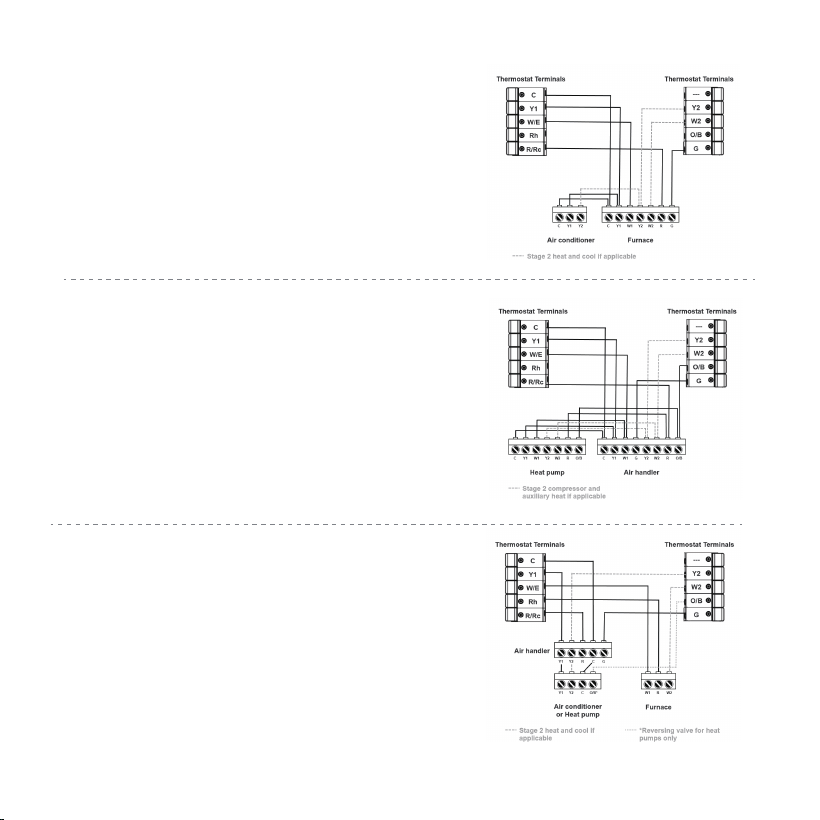
Wiring diagrams
The following pages provide wiring diagrams for common HVAC equipment configurations.
09
Conventional heating
and cooling (up to 2
stages each)
Heat pump (air or
geothermal) with
auxiliary heat
Furnace or radiant
system with air handler
and conventional
cooling or heat pump
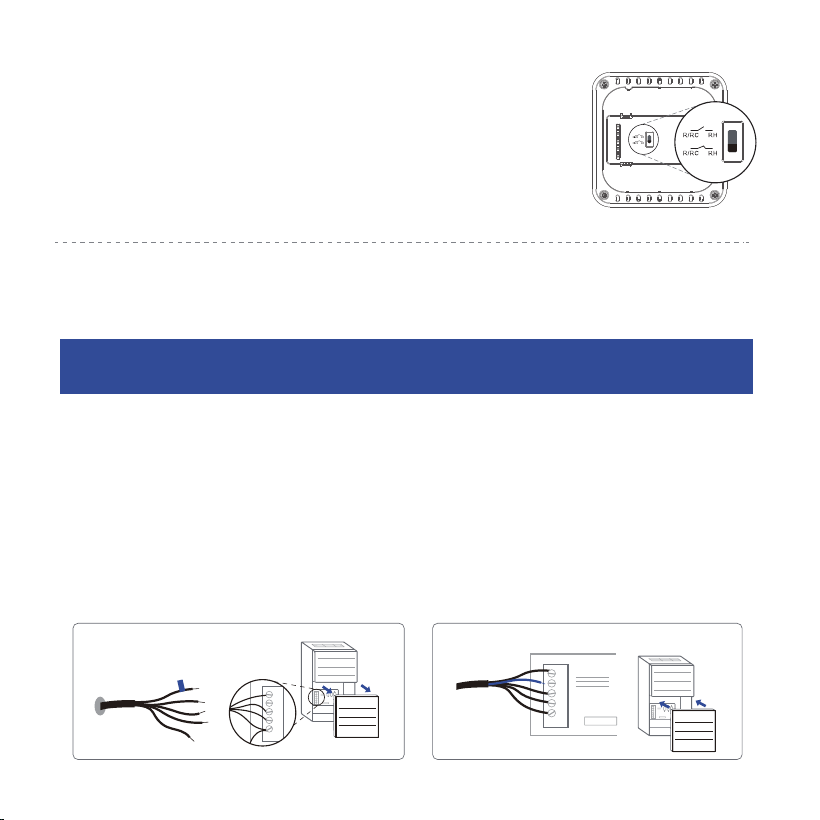
Do you have a spare wire? Yes.
If C- wire does not exist in your system, check the instruction below:
Check for spare wire behind your wall plate of old thermostat, if you have a spare wire, connect it
to the C terminal on the new wall plate.
Remove cover from furnace or heating system, open the heating and cooling system to find the
control board where you should find the same terminal labels as of the thermostat.
Find the other end of the spare wire, locate the bundle of wire with the same labels as that of your
thermostat.
Connect the spare wire to the C-terminal.
Close the cover to the furnace or heating system.
1 .
2 .
3 .
4 .
5 .
G
C
R
W/E
Y
G
C
R
W/E
Y
c
The switch is used to connect R/RC with RH.
If you have two power wires (R/RC and RH),
please flip the switch to the disconnect side
to disconnect R/RC with RH.
*
Disconnect
Connect
Disconnect
Connect
10
Insert your remaining wires into the side(not the front) of their
corresponding terminal blocks. Pull wires to ensure wires are
securely connected. When all wires are connected well, place
excess part of the wires back to the wall.
Connect the wires to the new wall plate
Step 8
C
Y1
W/E
Rh
R/RC
PEK
Y2
W2
O/B
G
Y/Y1
RC
C
W2
G
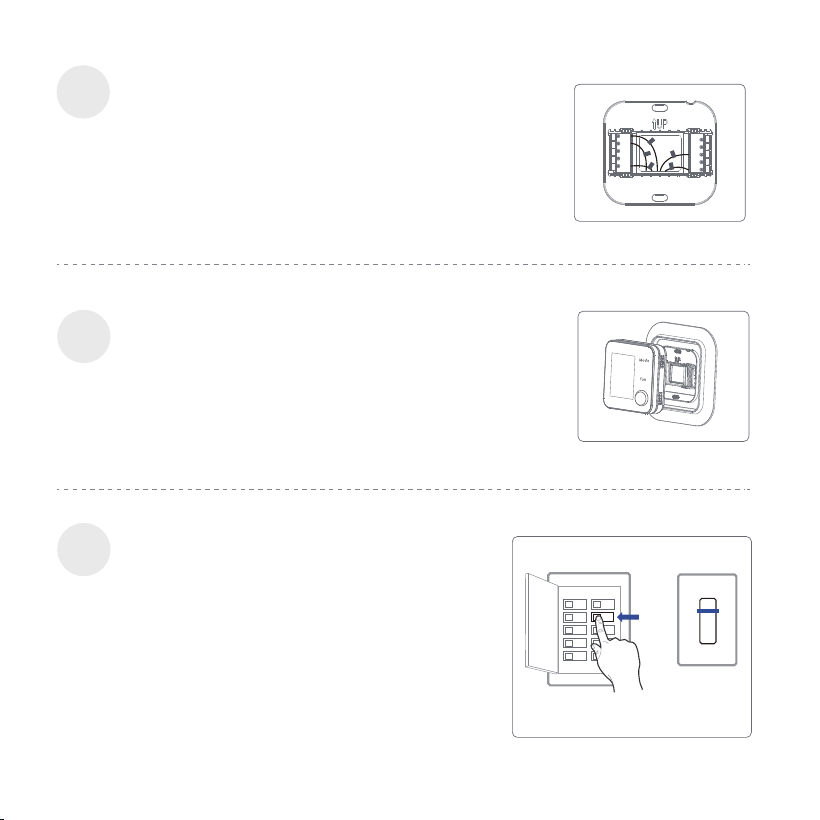
First aim the four clips of the back plate of the
thermostat, the gently push and fit the wiring pole to
the terminals on the wall plate.
Install the thermostat to the wall plate
Step 9
Turn on the switch that controls your heating and cooling
system, the thermostat will be powered on and prompt you
to start the setup. If you have any trouble installing the
device or app, check the below information for help, simply
visit our website for installation videos.
Power on and enjoy
Step 10
Breaker box
Switch
ON
ON
OFF
11
12
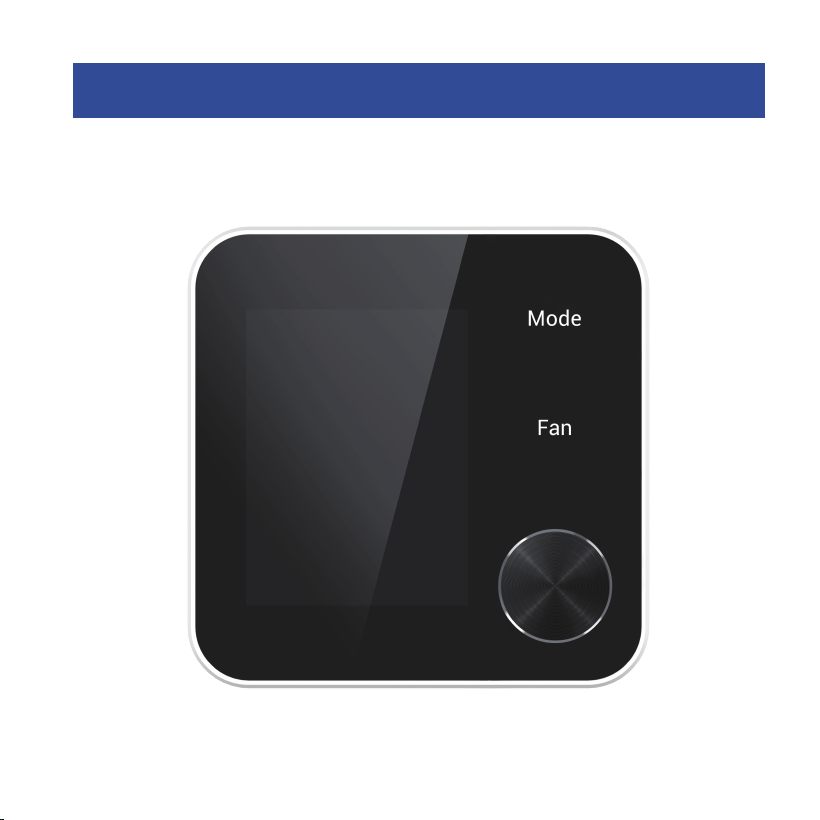
Congratulations, you did it!
Say hi to your new thermostat ! To complete , follow the instruction on your thermostat screen.
13
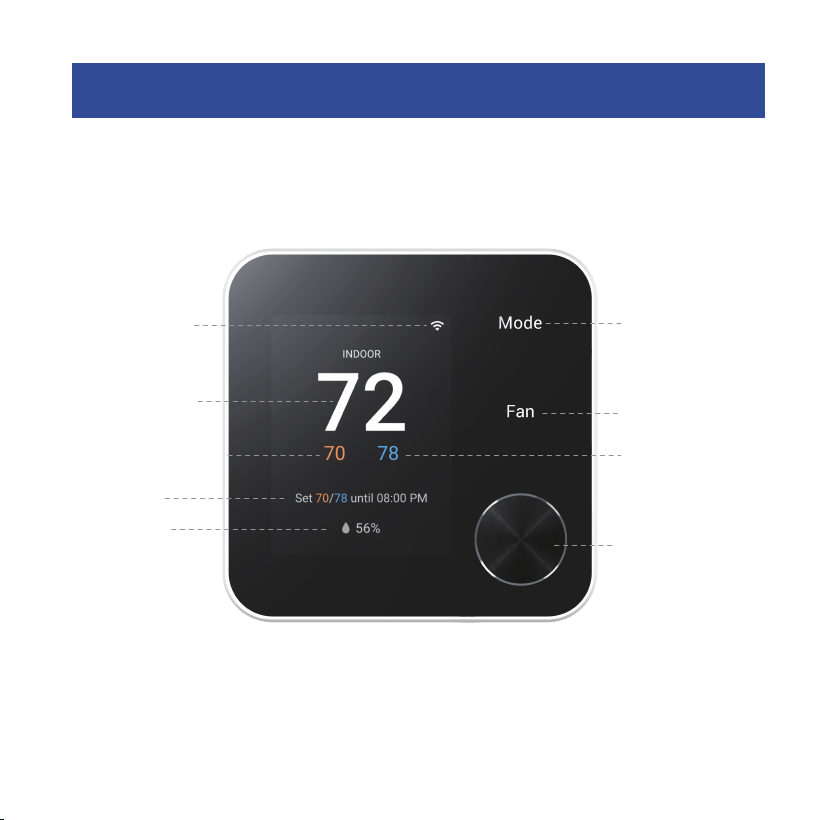
Device Main Screen
Wi-Fi
Mode
Menu/Confirm/Back
Cooling Setpoint
Indoor Temperature
Heating Setpoint
Indoor Humidity
Current Schedule
Period
Fan
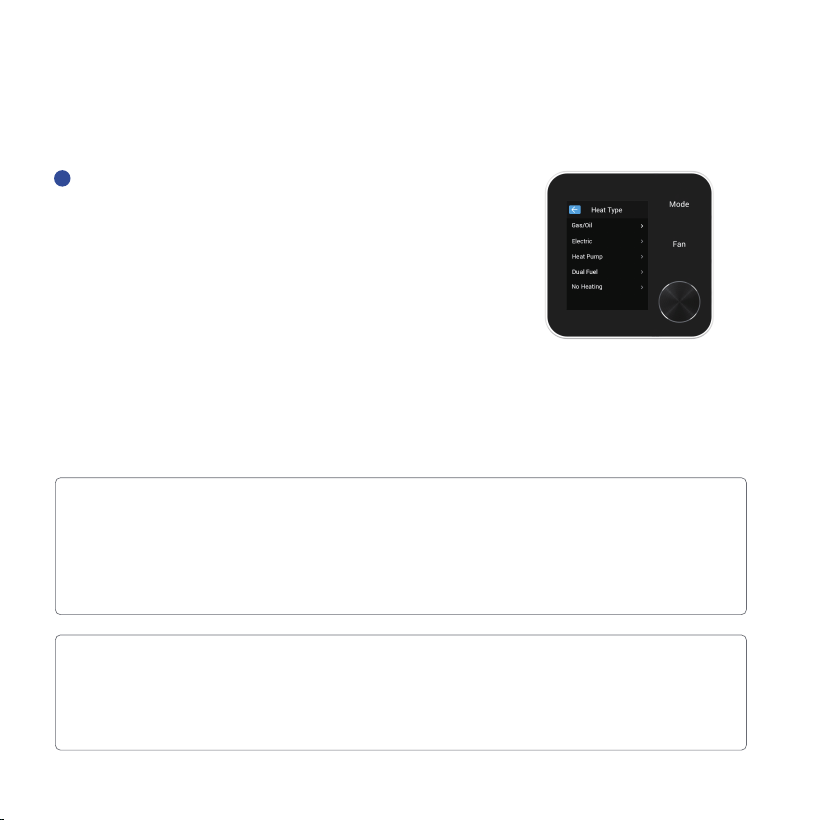
Device Initial Setup
NOTE : If you are not sure of which one to select, contact Vine Customer Service.
For a quick and easy way to begin using your new smart thermostat, the device will automatically
direct you to the Initialization Setup process once it′s turned on for the first time.
If you have a furnace or boiler installed:
1. Select Gas/ Oil and press the knob to proceed to the next step.
2. Then select appliance or thermostat depending on your personal preferences for fan control.
Rotate the knob clockwise or anticlockwise to select the bottom "Next" option, then lightly
press the button to confirm and continue.
Below is a list of possible examples which may help you to select
correctly:
If you have an electric system:
1. Select Electric and press the knob to proceed to the next step.
2. Select "Next" at the bottom and press the knob to continue.
Gas /Oil /Furnace, Electric, Heat Pump, Dual
Fuel or no Heating, select according to your
heating system.
Heat Type
Select your home′s HVAC type from
the options available:
1
14
15
If you have a heat pump:
1. Select Heat Pump and press the knob to proceed to the next step.
2. Specify what the Heat Pump runs when the O/B Reversing Valve is engaged: On Cool runs
cooling when O/B engages;
3. Select "Next" at the bottom and press the knob to continue.
If you have a dual fuel system:
1. Select Dual Fuel and press the knob to continue.
2. Then follow the on-screen instructions to configure the fossil fuel heating appliance settings.
3. Select "Next" at the bottom to continue to configure the heat pump heating appliance
settings.
If you have a no heating appliance:
1. Select No Heating and press the knob to continue.
2. Select "Next" at the bottom and press the knob to continue.
After creating an account, signing in to the Smart Life App, the App will ask you to "Create My
Home" or "Join a Home", if you are owner of the thermostat, select "Create my Home".
Enter a home name and address to enable weather forecast, timezone and more information on
this device, then select "Save Home" and press the knob to continue.
Create your Home
2
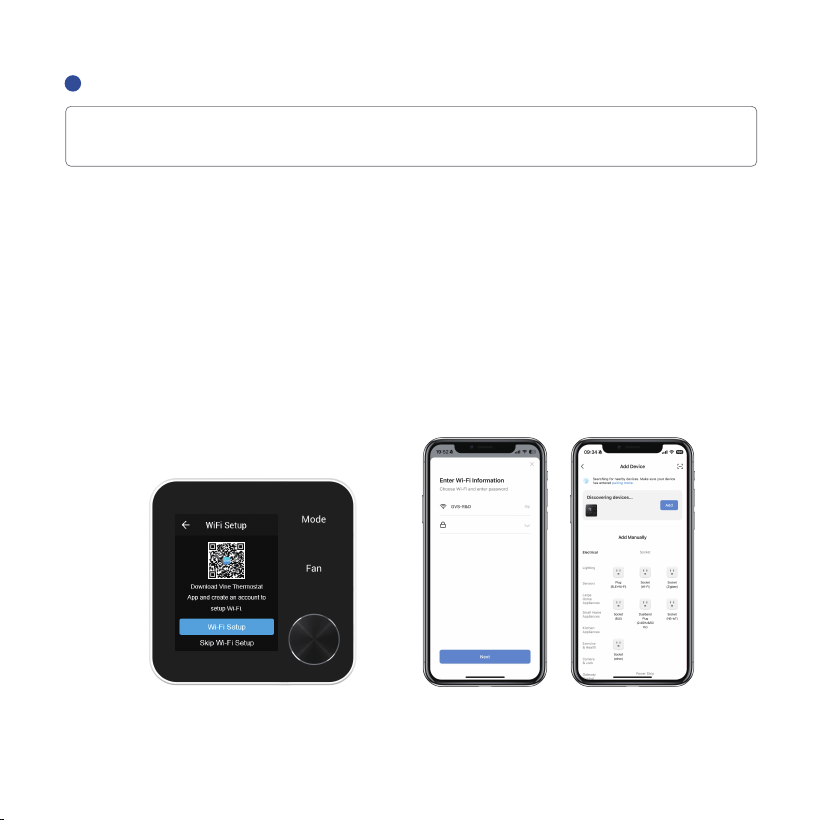
A reliable Wi-Fi connection is required in order to access smart features such as remote access, weather
forecast and more. Please follow on-screen instructions to complete the Wi-Fi setup.
If your thermostat was professionally installed, or if the thermostat was installed by yourself and is
not yet connected to Wi-Fi, follow the steps below and your app will immediately begin connecting
the thermostat to Wi-Fi.
Note: If you skip this step during the first time connection, you will be required to connect Wi-Fi by
steps: Menu-> Wi-Fi Connect->Wi-Fi Setup and follow the instruction on screen to finish the Wi-Fi
connection.
a. Select "Wi-Fi Setup" and follow instruction to start Wi-Fi connection.
b. After signing into your account, tap "+" icon on the screen to add new device, which under this
case the TJ-126.
c. Follow the step-by-step instruction in the "Smart Life" app. The Wi-Fi connection process will be
slightly different dependent to your phone′s operation system(iOS/Android).
d. Congratulations! Now you can enjoy to control your thermostat by App.
Add device
3
16
17
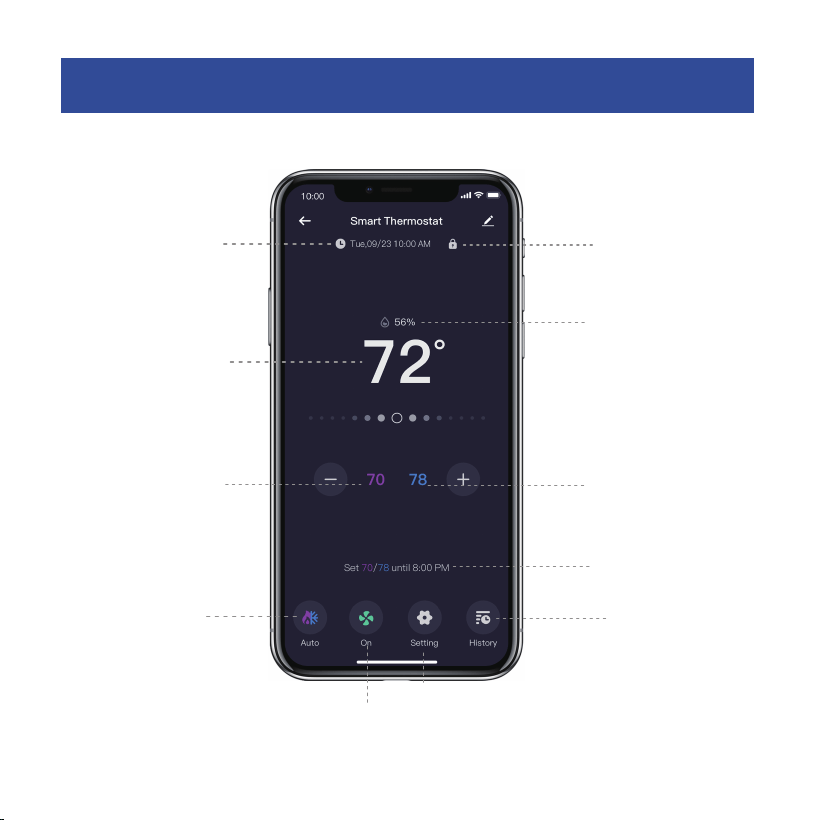
Indoor Temperature
Current Mode
Current Date & Time
Current Fan Mode
Setting
Indoor Humidity
Heating Setpoint
Lock
Cooling Setpoint
Current Schedule Period
History
APP Main Screen
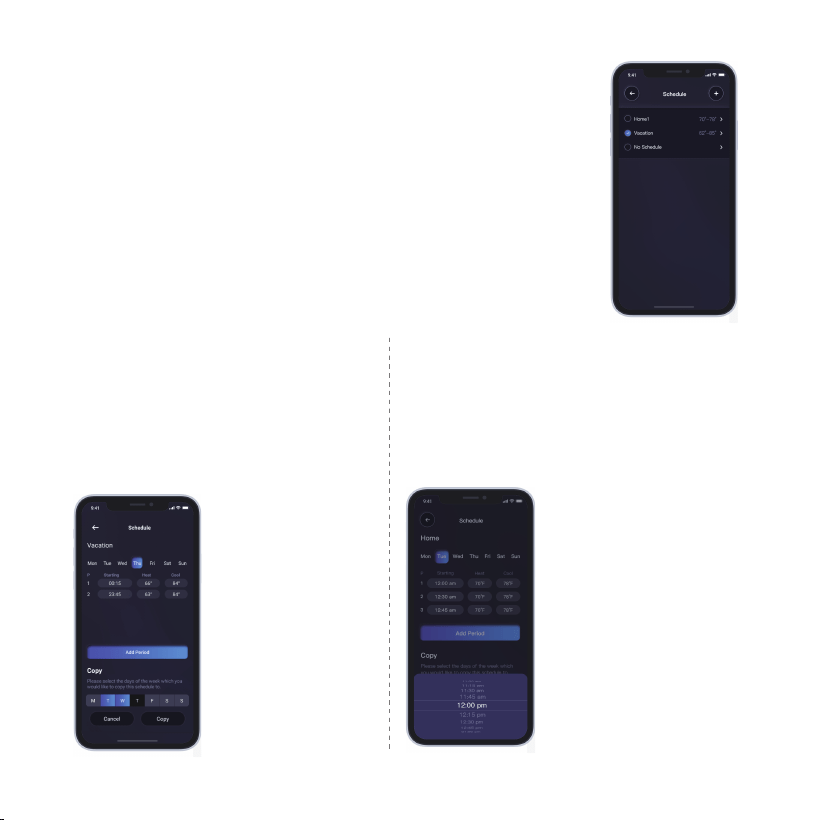
Program/Adjust a schedule
1 . To modify an existing schedule, select one
from the list and edit.
2 . To delete an existing schedule, swipe left the
schedule and select "Delete".
Add a New Period
Tap "Add Period" button
and select and set starting
time, heating setpoint and
cooling setpoint.
Edit an existing period
Tap on the starting, heating
or cooling value of the
existing period to edit as you
desire.
18
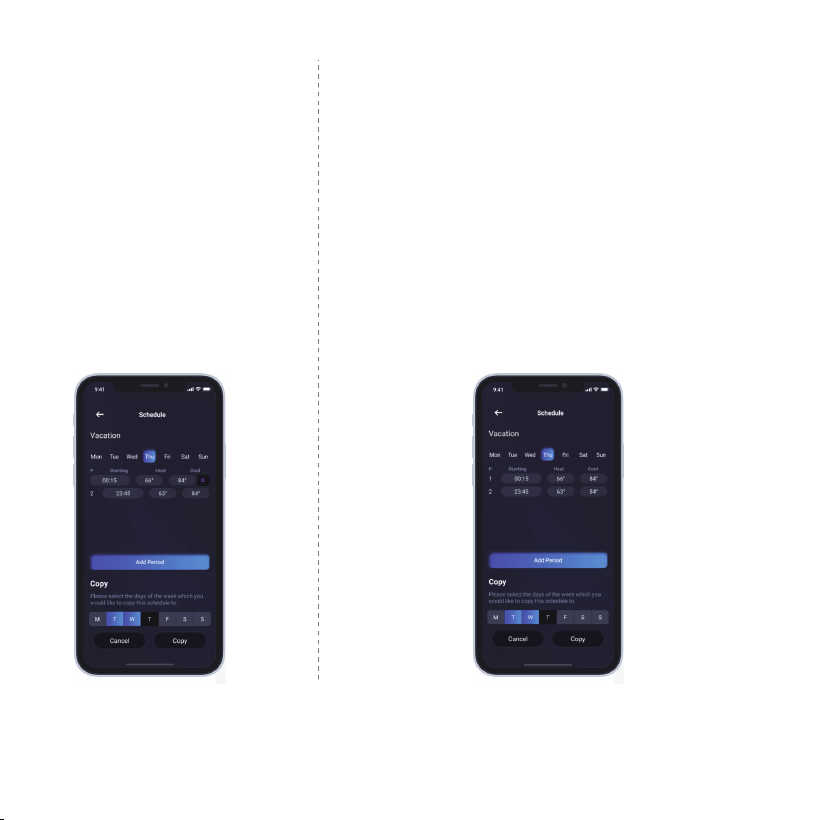
Delete an existing period
Swipe left the existing period and
select "Delete".
Copy a schedule
To copy a schedule to other days of the week, tap and
select the days you want to copy at the bottom of the
screen,
Save schedule
Use the arrow on the upper left corner to save and
return to the
schedule list.
then tap "Copy".
19
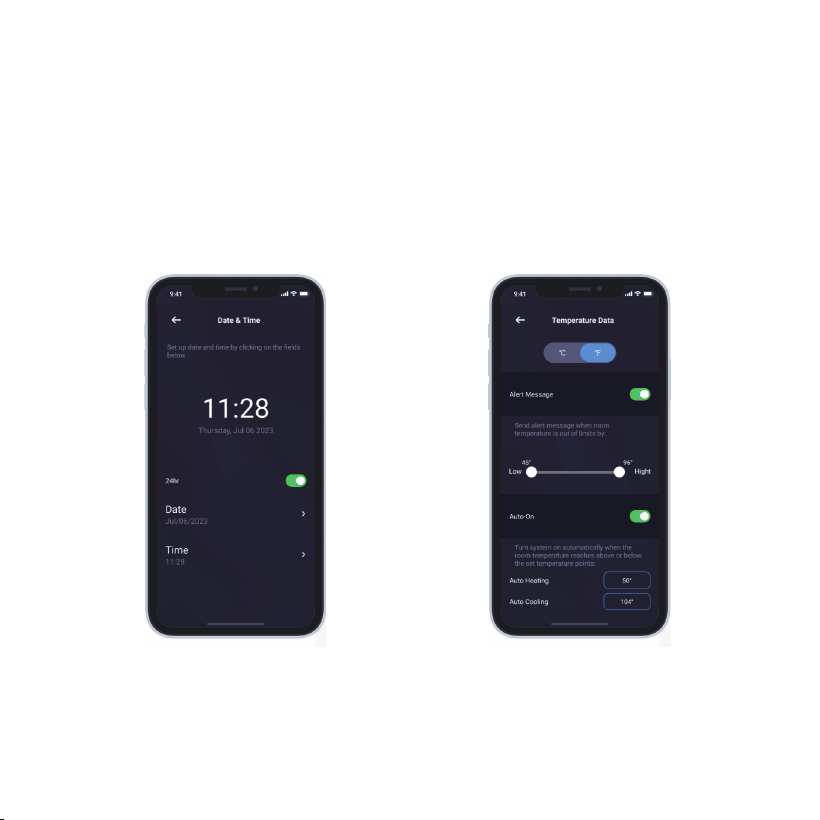
DeleteAdd
Copy
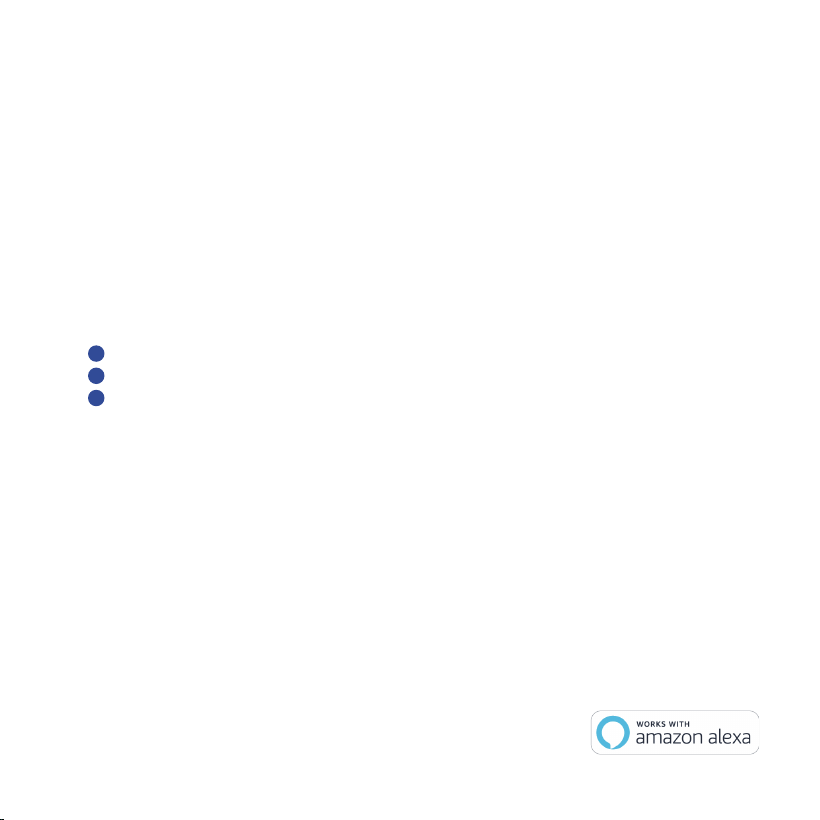
Device Settings
Follow the on-screen instructions to view and modify the thermostat settings for the night-light, brigh
tness and schedule, date & time, temperature units, safety functions regarding your thermostat.
20
21
Additional Features
Except from the above basic settings, MegaLight Smart Wi-Fi Thermostat also provides possibility
to connect to the Alexa and Google Assistant, hence helps you to control your room temperature
by voice control. Follow our instructions below to get connected with Alexa/Google:
Download and register the thermostat as instructed in page 1~16.
Download "Amazon Alexa" App and set up your Alexa-enabled device.
Tap "More" button on the bottom right corner of Alexa app main screen.
IMPORTANT Step- link the Skill.
Tap "Skills" in Alexa app menu.
Type and search "Smart Life", then select and tap "Enable to Use" to enable the skill.
Enter your "Smart Life" account credentials to link the Alexa.
Now you can control your thermostat over "Amazon Alexa".
How to connect to Alexa?
1 .
2 .
3 .
4 .
Common commands:
Common commands for Alexa to control Thermostat:
Try out some of the commands and enjoy!
Alexa, turn (Device Name) on.
Alexa, turn (Device Name) off.
Alexa, Change (Device Name) mode to Cool/Heat/Auto.
Alexa, Increase (Device Name) by __ degrees.
Alexa, Decrease (Device Name) by __ degrees.
Alexa, Set (Device Name) to __ degrees.
Alexa, what is the (Device Name) set to?
Alexa, what is the temperature of the (Device Name)?
5 .
1
2
3
21
22
NOTE : "Google Home" currently supports only English Commands.
Install and register the thermostat as instructed in page 1~16.
Download "Google Home" app and set up your Google-enabled device.
Tap "+" button in the middle of the "Google Home" app screen.
IMPORTANT Step-link the Action.
Tap the sidebar menu on the upper left corner of the main page of "Google Home", select
"Home Control" .
Tap the "+" button on the lower right corner and search for "Smart Life" .
Tap open "Smart Life" and select country, then enter app account/password and tap "Link
Now" to link your account to Google.
Enter "Smart Life" login account to Google Skill.
Now you can control your thermostat over "Google Home".
Hey Google, what′s the __ temperature?
Hey Google, make it warmer (or cooler).
Ok Google, set the temperature to __ degrees.
Ok Google, raise (or lower) the temperature __ degrees.
Ok Google, what is the current temperature in the Bedroom?
Hey Google, what′s the Living Room set to?
Ok Google, what′s the temperature of my thermostat?
Ok Google, turn on heat mode in the Bedroom.
Hey Google, change to automatic mode in the Living Room.
Ok Google, turn on cool mode in the Bedroom.
How to connect to Google Assistant?
1 .
2 .
3 .
4 .
Control your smart device with "Google Home".
Common commands for "Google Home "to control MegaLight Thermostat:
1
2
3
4
22

FCC WARNING
This device complies with part 15 of the FCC Rules. Operation is subject to the following two conditions:
(1) this device may not cause harmful interference, and
(2) this device must accept any interference received, including interference that may cause undesired
operation.
Any changes or modifications not expressly approved by the party responsible for compliance could
void the user's authority to operate the equipment.
NOTE: This equipment has been tested and found to comply with the limits for a Class B digital device,
pursuant to Part 15 of the FCC Rules. These limits are designed to provide reasonable protection against
harmful interference in a residential installation. This equipment generates, uses and can radiate radio
frequency energy and,
if not installed and used in accordance with the instructions, may cause harmful
interference to radio communications.
However, there is no guarantee that interference will not occur in a particular installation.
If this equipment does cause harmful interference to radio or television reception,
which can be determined by turning the equipment off and on, the user is encouraged to try to correct
the interference by one or more of the following measures:
-- Reorient or relocate the receiving antenna.
-- Increase the separation between the equipment and receiver.
23