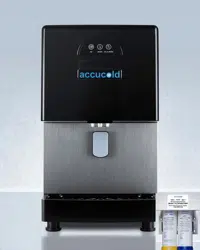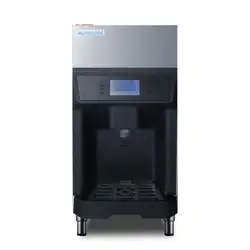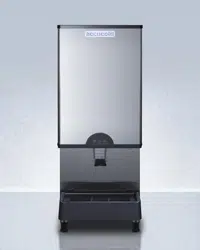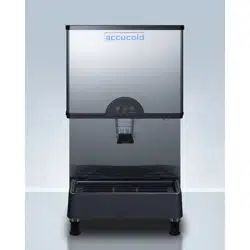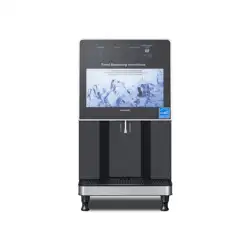
Ice & Water Dispenser
User Manual
Models:
AIWD150
SCIWD150
BEFORE USE, PLEASE READ AND FOLLOW ALL SAFETY RULES AND OPERATING INSTRUCTIONS
Write Model & Serial Numbers here:
Model:
Serial No.
Felix Storch, Inc.
An ISO 9001:2015 registered company
770 Garrison Ave
Bronx, New York 10474
www.summitappliance.com

1
TABLE OF CONTENTS
Safety Guidelines
Electrical
Location of Parts
Installation
Operating Instruction
Troubleshooting
Limited Warranty
2
4
4
5
7
8
10
2
Safety Guidelines
Safety Information:
Before using your ice machine, please read this manual thoroughly to ensure that you know how to operate the features and
functions that the equipment offers safely and efficiently.
Important Safety Symbols and Precautions:
Please read and follow all safety instructions in this manual.
This is the safety alert symbol.
This symbol alerts you to potential hazards than can kill or hurt you and others.
All safety messages will follow the safety alert symbol and either the word “DANGER” or “WARNING”
Hazard or unsafe practice that may result in severe personal injury, property damage or death.
The warning signs are here to prevent injury to you and others, please follow them explicitly. After reading this manual,
keep it in a safe place for further reference.
Warning Information:
1. Read these instructions carefully before operating,
installation or maintenance. Failure to follow instruction
can cause your personal injury, property damage, injury,
or death.
2. The installation instructions shall indicate that the ice
maker is to be installed in accordance with the Safety
Standard for Refrigeration Systems, ASHRAE 15. In
addition, the instructions shall indicate that the ice maker
should not be installed in corridors or hallways of public
buildings.
3. The installation and operating instructions shall indicate
that component parts shall be replaced with like
components and that servicing shall be done by factory
authorized service personnel, to minimize the risk of
possible ignition due to incorrect parts or improper
service.
4. Installation and operating instructions shall be provided
with cautionary statements concerning the handling,
moving, and use of the ice machine to avoid either
damaging the refrigerant tubing, or increasing the risk of
a leak.
5. At least three people or a lifting device are required to
move this ice machine to prevent injury.
6. When moving this ice machine, please keep the unit
upright with inclination not exceeding 45° degrees. Do
not invert the unit or lay it horizontally.
7. To keep the lubricant fully precipitated before starting
up, keep the machine upright for 24 hours before
plugging, otherwise compressor may damage.
8. Allow sufficient space, minimum clearance of ⅝” (15mm)
around the ice maker and install it on a flat, firm surface
to support the full weight of the ice machine when load
with ice and water.
9. Do not keep volatile, flammable objects or liquids in or
near to the ice machine.
10. Do not use high-pressure water cleaning devices to clean
the ice machine.
11. Do not install the ice machine in a damp or wet location.
Moisture can damage electrical insulation, increasing the
risk of electric shock or fire.
3
Safety Guidelines
Danger Information:
1. The ice machine may contain flammable refrigerant R-
290 that risk of fire, explosion, contact your local
authority regarding the safe disposal of this product.
Please check the nameplate on the rear panel of machine
to identify the type of refrigerant to confirm the
refrigerant type and amount.
2. To minimize the risk of ignition due to improper
installation, replacement part or service procedures, only
certified and properly trained refrigerator technicians are
allowed to work on these ice machines.
Risk of fire or
explosion! Do not
use mechanical
devices to defrost
the machine, do
not puncture the
cooling tube.
3. Do not operate the ice machine if there are any
unauthorized changes to the original manufacturer’s
specifications or if the machine has been misused,
abused, or neglected.
4. All replacement parts must be obtained from the
equipment manufacturer.
5. Due to potential safety hazards, ensure the power plug
is a grounded, 3-prong type and that the unit is properly
grounded. Make sure the plug is not crushed or
damaged. Do not use the ice machine with an extension
cord.
WARNING:
1. Proper installation, use and maintenance of this machine
are all important for maintaining production and user
safety. In order to reduce the failure rate please read
these instructions carefully. Improper use could result in
equipment damage, personal injury or even death.
2. Do not use the ice maker if you have not been
properly trained.
3. At least two people are required to lift the ice maker, or
it is recommended that a lifting device is used to avoid
injury.
4. Installation, repairs, or maintenances must be performed
by certified and properly trained technicians.
5. Do not operate the ice maker if there are unauthorized
changes to the original manufacturer specifications or if
the machine has been misused, abused, or neglected.
6. Do not cover the ice maker vents, there must be a
minimum clearance of 6 inches (150mm) around the ice
maker while operating.
7. Do not store flammable gases or liquids in or near to the
ice maker.
8. Do not use high-pressure water cleaning devices to clean
the icemaker.
9. Due to potential safety hazards risk, do not use this ice
maker if any extension leads.
10. It is the user’s responsibility to ensure the ongoing
maintenance of the ice maker is completed in
accordance with the manufacturer’s instructions laid out
in this manual.
11. To prevent accidental injuries, keep the area surrounding
the ice maker clean and tidy and free from obstructions.
12. Do not install or operate this machine outdoors, this ice
maker is intended for indoor use only.
13. When moving the machine, keep unit upright with
inclination not exceeding 45 degrees. Do not invert the
unit or lay it horizontally.
14. To keep the lubricant fully precipitated before startup,
the ice maker must remain upright for 24 hours before
operating, otherwise it may damage the compressor.
15. The ice maker’s location should be firm and level and
able to support the full weight of the ice maker when it
is fully loaded with ice and water. The unit has 4
adjustable feet at the bottom for levelling. Use a spirit
level to ensure the unit is leveled.
16. Do not installation in areas where water flows free or
high-pressure water jets are used.
17. The ambient temperature drops below 46.4°F (8°C) the
unit should not be used. If the ambient temperature
drops below 41°F (5°C) drain the water from the unit and
supply hoses to prevent damage from frozen water.
DANGER
R290
Highly
Flammable
4
Electrical
• Plug the ice maker into a dedicated power outlet that matches the voltage and frequency specified on the unit’s
name plate. Do not operate the machine outside the listed voltage range, as this may cause damage.
• Due to potential safety hazards, do not use an extension cord with this ice maker.
• The ice maker must be connected to a stable power supply. Voltage fluctuation should not exceed +10% or -15%
of the rated voltage. If your power supply is unstable, a voltage regulator (monostat) must be installed.
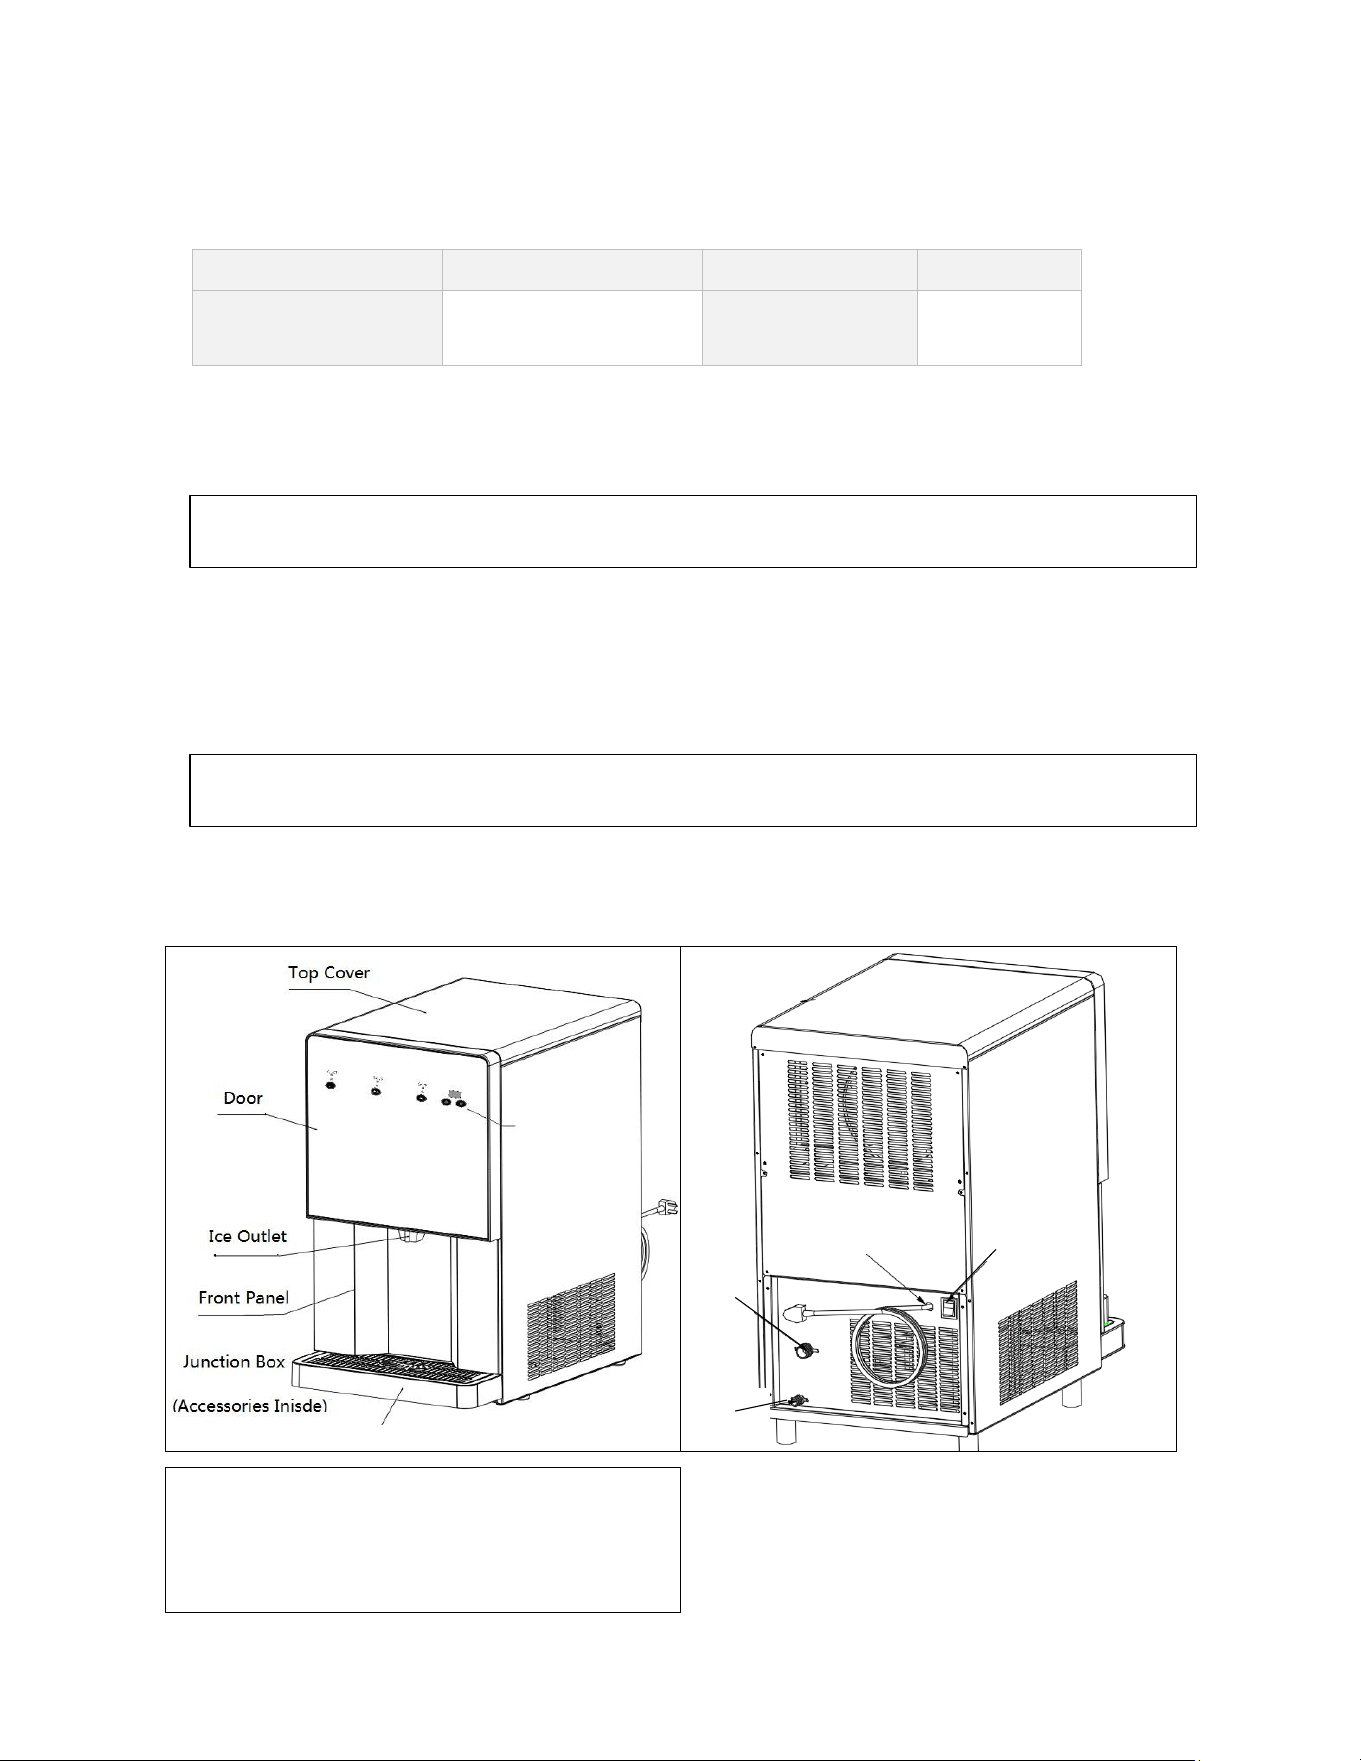
Location of Parts
MODEL
PRODUCT SIZE
TOTAL POWER
CURRENT
AIWD150
SCIWD150
17 ¾” x 24” x 28 ⅜”
450 x 610 x 720mm
400 W 5.5 AMPS
WARNING: If the power supply cable is damaged, do not install or operate the machine until the cable has been replaced
by an authorized service person or a qualified electrician.
WARNING: All electrical connections must comply with local electrical codes and be performed by a qualified electrician or
technician.
Power Cord
Switch
Water
Drainage
Water
Inlet
Control Panel
Accessories:
1. Water Inlet Pipe
2. Drainage Hose
3. Legs
5
Installation
UNPACKING:
• Carefully inspect the packaging for any signs of
damage before opening.
• Remove all shipping materials, including tape and
protective packaging. The ice maker will not
operate correctly if packaging materials are left in
place.
• After unpacking, check that the ice maker and all
included components are in good condition.
• If you notice any damage or missing parts, do not
install or use the unit. Contact your supplier
immediately.
WATER AND DRAIN CONNECTION:
• We recommend installing an inline water filter on
the water supply and drain connection. This helps
reduce limescale buildup, improve efficiency, and
extend the overall lifespan of the unit. A water filter
will also remove impurities, produce clear and
better-tasting ice.
• Water supply pressure should be between 0.15
MPa and 0.3 MPa. If the pressure exceeds 3 MPa,
a pressure reducing valve must be used.
• The water temperature should be between 44.6°F
(7°C) and 86°F (30°C). Faults due to low or high-
water pressure and temperature are not covered
under warranty.
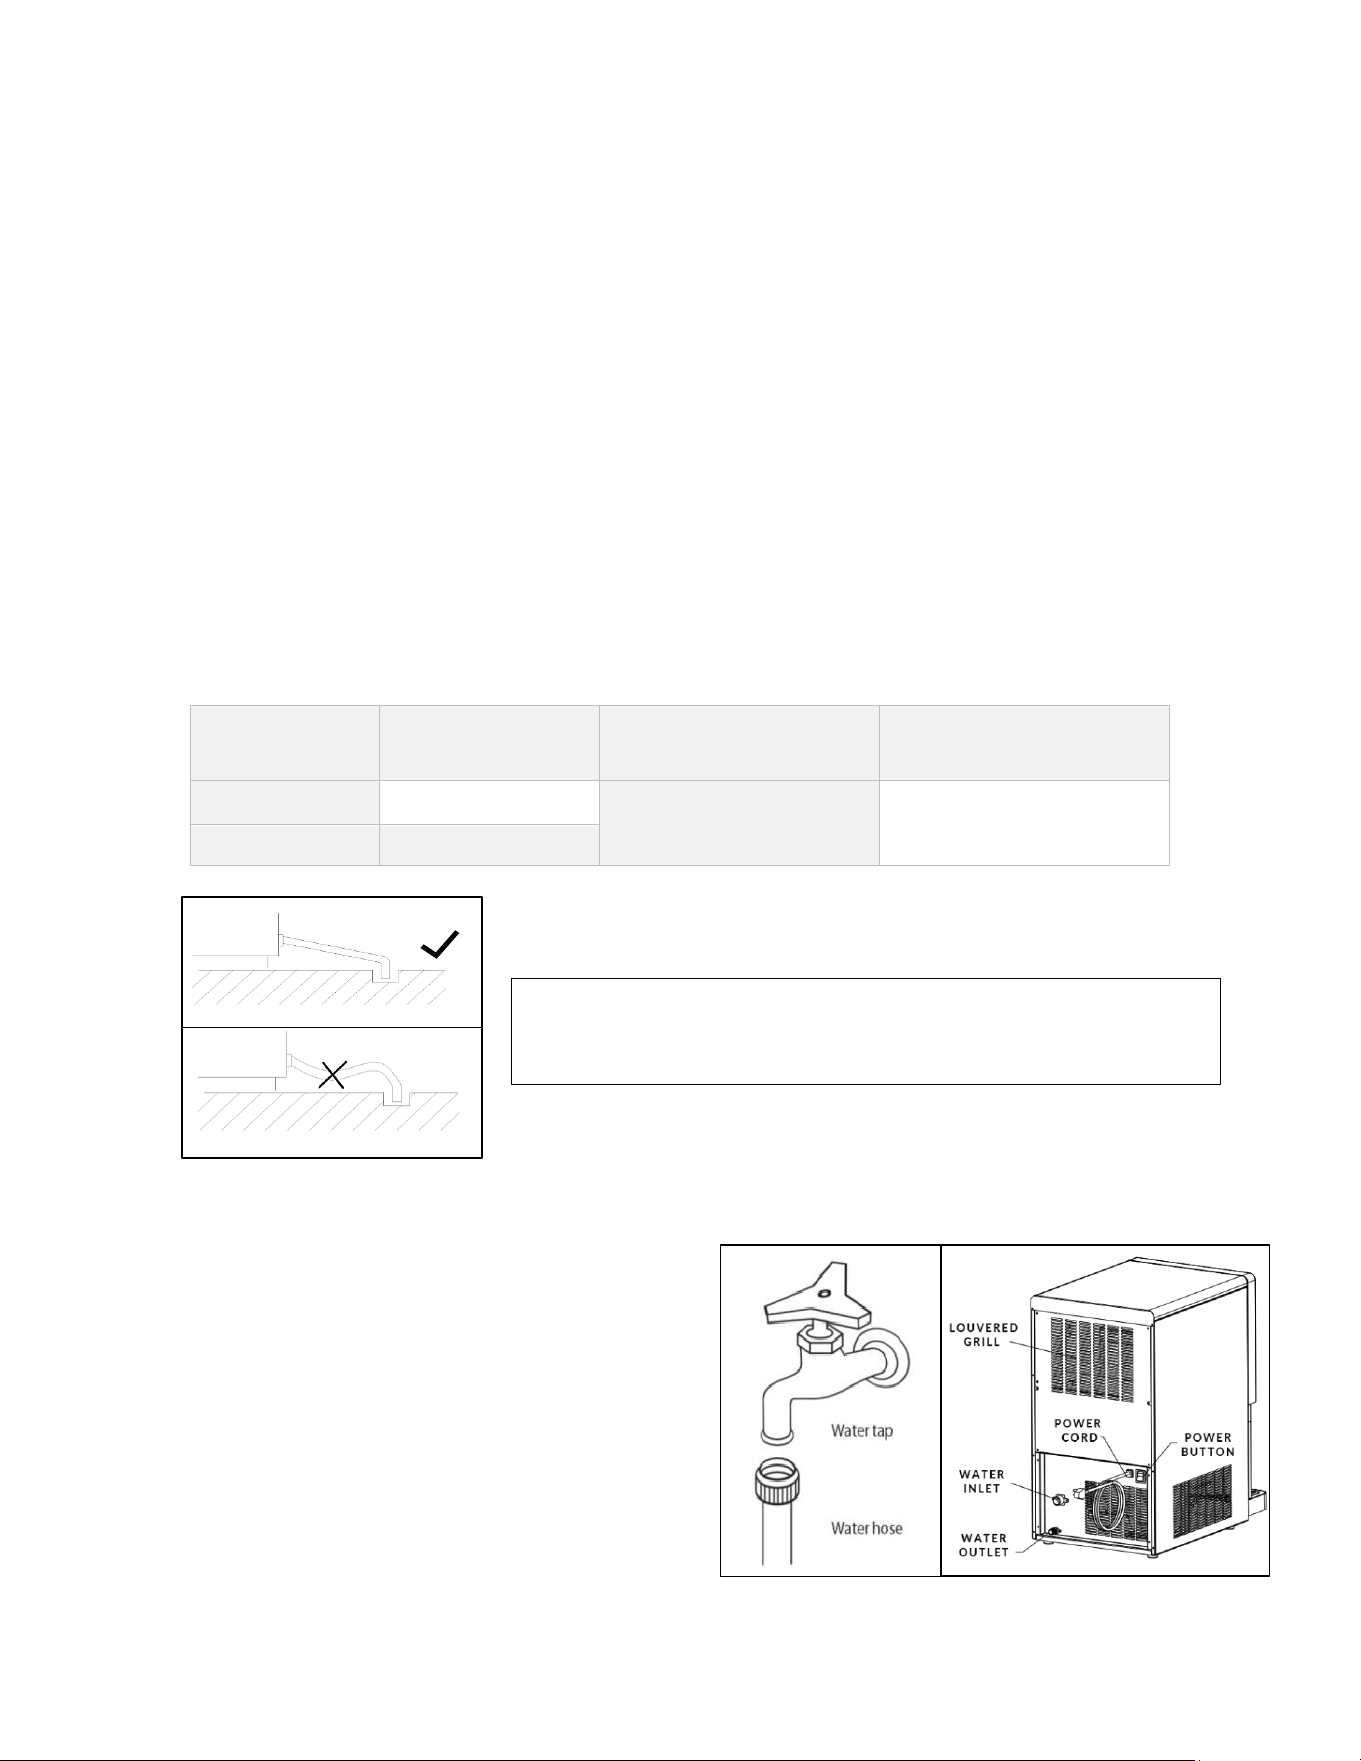
CONNECT THE WATER INLET HOSE:
1. Attach one end of the inlet hose to the water inlet fitting
on the rear of the machine.
2. Connect the other end to the main water supply.
3. It is recommended to install a shut-off valve near the unit.
4. Ensure both washers are properly seated to prevent leaks.
INSTALL THE DRAIN HOSE:
1. Attach the flexible drain hose to the drain spigot located
at the rear of the machine.
2. Secure the hose using the provided clip.
3. If necessary, cut the hose to length, maintaining a slight
downward slope to allow proper drainage.
WATER
TEMPERATURE
WATER PRESSURE
WATER PIPE
DRAINPIPE
44.6°F (7°C)
Minimum 0.15Mpa
Two side internal diameter
¾” (19 mm) connector
Internal diameter ⅝” (15mm)
pipe
86°F (30°C)
Maximum 0.3Mpa
NOTE: The ice maker uses a gravity drain system—install the unit above the
drain connection and ensure the drain hose is straight and unobstructed to
allow water to flow out freely.

6
PRE-INSTALLATION CHECK LIST:
The ice maker is factory preset before shipment, and no programming adjustments are required for a new
installation.
However, to ensure proper operation, please refer to Operating Instruction on page 5.
CHECKLIST BEFORE USE:
The ice maker is installed on a horizontal and level surface
The unit is leveled using the adjustable feet
Water and drain pipes are securely connected with no leaks
All inner and outer packaging has been removed
The ice maker is connected to a suitable power supply
The unit is properly grounded
There is proper ventilation on all sides
The water supply is turned on
The power is turned on
The room temperature is between 8°C and 38°C
The inlet water temperature is between 5°C and 30°C
Water pressure is within the required range
All users have been trained in operating the unit
NOTE: It is the operator’s responsibility to regularly check and monitor the performance of the ice maker.
7
Operating Instruction
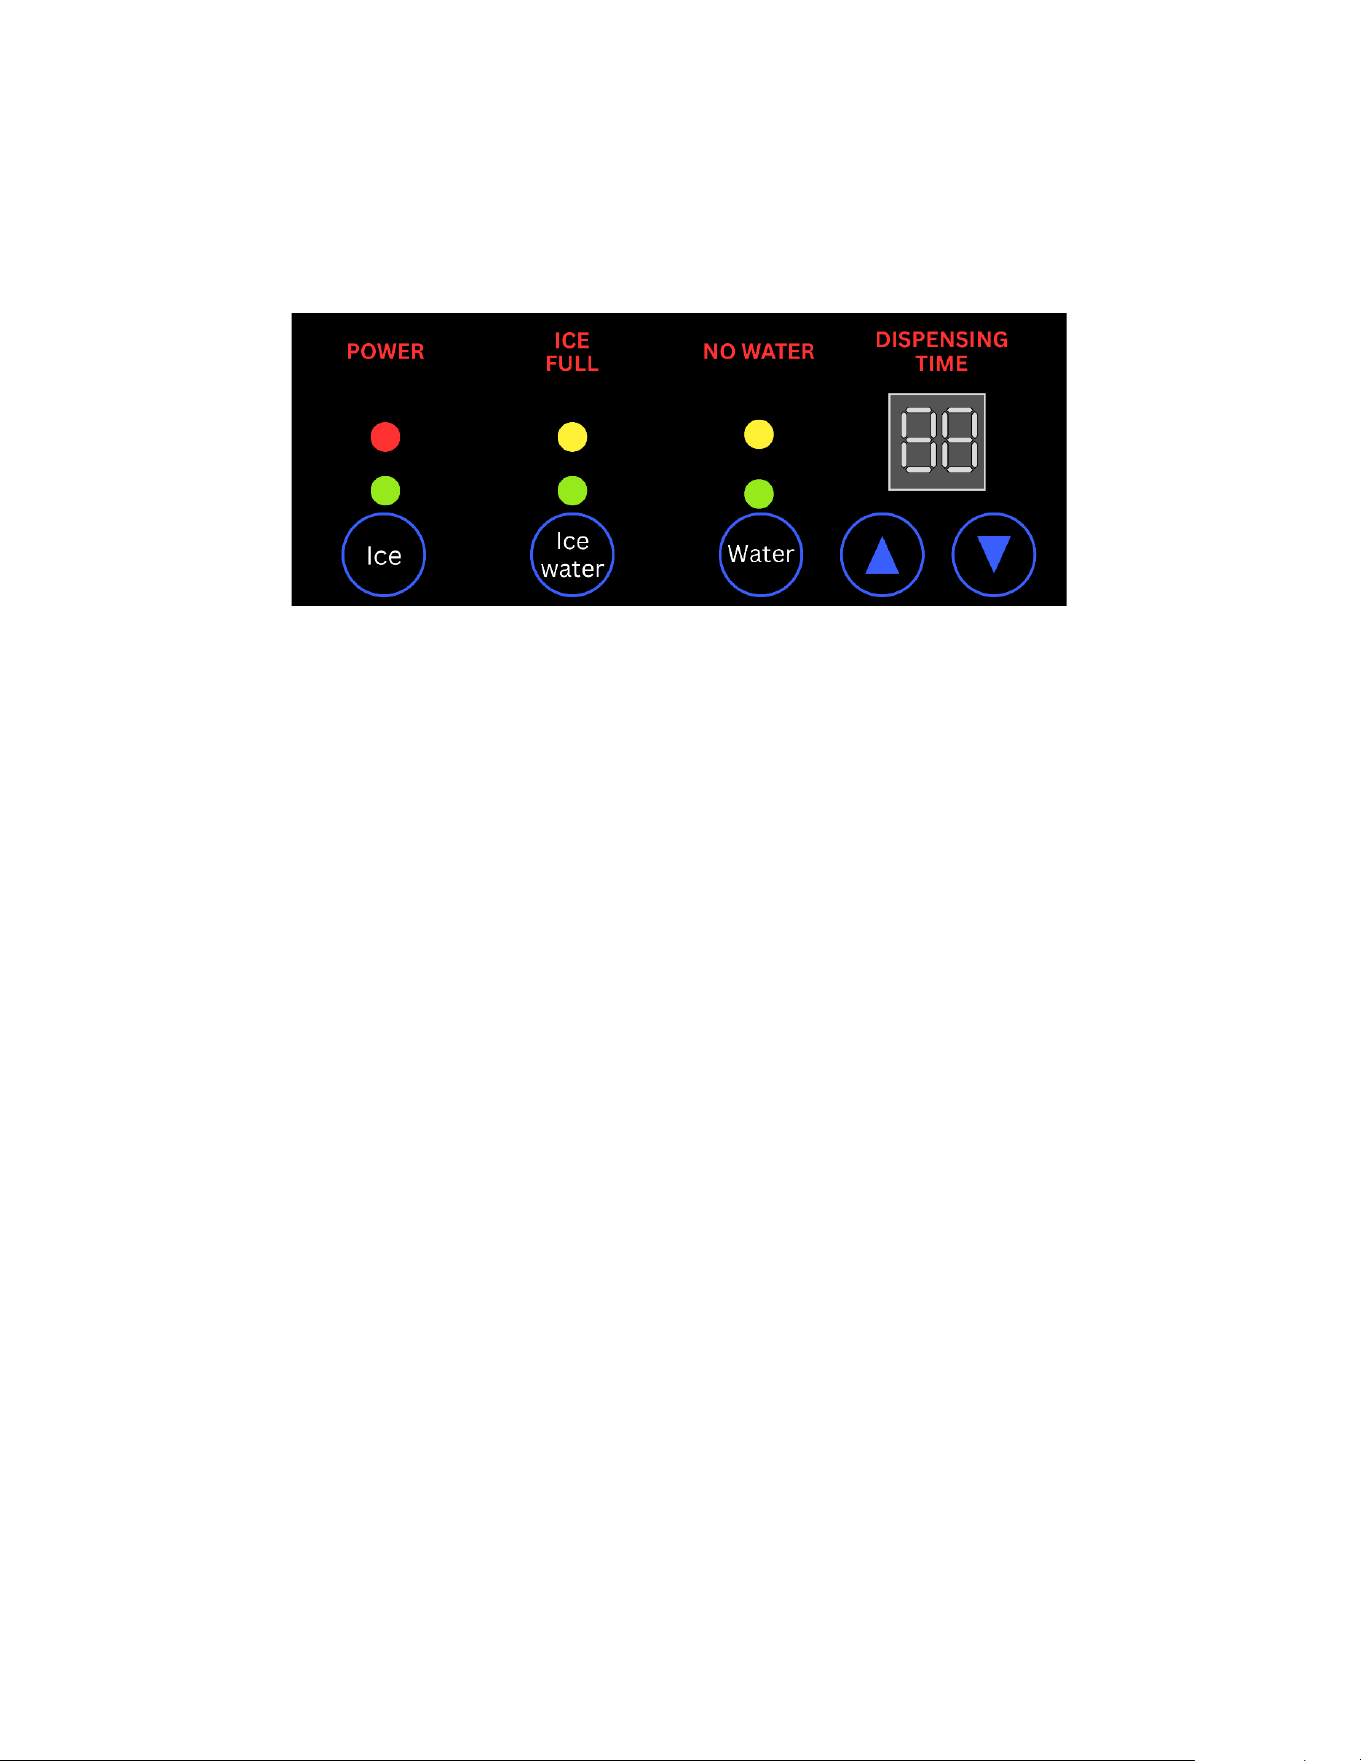
DISPLAY PANEL
1. Indicator Lights
The indicator lights show the machine’s status and
activity:
• Power Indicator (Red):
The unit is powered on.
• Ice Full Indicator (Yellow):
The ice storage is full.
• Water Shortage Indicator (Yellow):
o Solid yellow indicates low water level.
o Flashing yellow signals a critical water
shortage.
• Dispensing Indicator (Green):
Lights up when dispensing.
2. Dispensing Modes
The unit features three touch-sensitive buttons,
each corresponding to a specific dispensing mode:
• Ice
• Ice + Water
• Water
All dispensing modes function the same way.
3. Dispensing Options
• Press and Hold:
Press and hold the selected mode to dispense
continuously. Release the button to stop.
• Quick Double Tap:
Double tap the desired mode to activate a
timed dispense. Dispensing begins after a 2-
second delay.
Use the arrow buttons ( ▲ / ▼ ) to adjust the
dispensing time.
4. Dispense Time Setting
You can set how long the machine dispenses ice
or water when using the Quick Double Tap feature.
• The LED screen (top right) shows the current
dispensing time in seconds.
• Use the ▲ / ▼ buttons to adjust the time.
(1 - 10 seconds).
• After setting the time, double tap any mode
button to dispense for the selected duration.
8
LONG-TERM SHUTDOWN / VACATION
1. Turn off the water supply and disconnect the water inlet hose.
2. Switch off the power (back of the unit) and unplug the machine.
3. Empty the ice bin, then clean and dry the interior and exterior of the machine.
4. Remove the silicone end cap and drain any remaining water from the water tank. Replace the end cap once the
draining is complete.
Troubleshooting
If your ice maker is not operating as expected, you may be able to resolve the issue with a few simple checks before
contacting customer service. Please review the items below:
• Is the water supply to the ice maker turned on?
• Is the water pressure within the recommended range?
• Is the power cord properly plugged in to a working outlet?
If the problem persists after checking the above, refer to the troubleshooting guide:
If you have checked the information above and you still need help with your appliance, call our Customer Service
facility at 800-932-4267 (Ext. 513) between 9:00 AM and 5:00 PM ET or visit our website
summitappliance.com/support at any time. We will do our best to answer your questions.
To order replacement parts, visit our website: summitapplianceparts.com
Faulty
Possible cause
Solution
The unit does not start.
Power not connected.
1. Ensure the power switch is turned on.
2. Reset the switch, if applicable.
3. Check and replace the fuse.
Function switch is not set to ice making mode.
Ensure the function switch is in the correct
position and the Ice Making indicator light is
on.
Ice machine has stopped
working.
Safety limit protection.
Restart machine
No/slow ice production.
1. Ice machine is dirty
2. Unit is not level
3. Ambient temperature is too low
1. Clean the ice machine
2. Adjust to ensure the machine is on a level
surface
3. Ensure the ambient temperature is above
33.8°F (1°C)
Water shortage indicator is on
1. Water valve is closed
2. Filter is blocked
1. Open the water valve
2. Replace water filter
‘Ice full’ light flash
Condenser sensor faulty
Replace condenser sensor
‘Ice making’ light flash
Evaporator sensor faulty
Replace evaporator sensor
Poor quality ice (soft or dirty)
1. Poor water quality
2. Dirty water filter
3. Dirty ice machine
1. Have water quality checked by a qualified
technician
2. Replace the water filter
3. Clean ice machine
Low ice production
1. Dirty condenser
2. High ambient temperature
3. Poor ventilation
4. Blocked airflow around the machine
1. Clean condenser
2. Ensure the ambient temperature is below
39.2°F (40°C)
3. Place the unit in a well-ventilated area
4. Remove any obstructions or items
crowding the unit

9
Notes
10
Limited Warranty
FELIX STORCH, INC.
770 Garrison Avenue Bronx, NY 10474
Phone: (718) 893-3900
Fax: (844) 478-8799
www.summitappliance.com
For parts and accessory ordering,
troubleshooting and helpful hints, visit:
www.summitappliance.com/support
ONE-YEAR LIMITED WARRANTY
Warranty coverage is available within the 48 contiguous United States, along with select areas of Alaska, Hawaii, and Canada.
For locations not covered, consumers can either contact a local provider or coordinate with Felix Storch, Inc. to find nearby
service options, which may qualify for partial reimbursement.
The warranty for this appliance is valid for one year from the date of purchase, provided the appliance is operated and
maintained according to the instructions included with the product. The warrantor will cover the cost of factory-specified
parts and repair labor needed to correct defects in materials or workmanship. Service must be performed by a designated
service company.
All parts, except the compressor, are warranted for one year against manufacturing defects. Plastic parts, shelves, and
cabinets are produced to commercially acceptable standards but are not covered for damages incurred during handling or
for breakage.
5-YEAR COMPRESSOR WARRANTY
1. The compressor is covered for 5 years.
2. Replacement does not include labor.
ITEMS WARRANTOR WILL NOT PAY FOR:
1. Service calls to correct the installation of your appliance, to instruct you how to use your appliance, to replace or
repair fuses or to correct wiring or plumbing.
2. Service calls to repair or replace appliance light bulbs or broken shelves. Consumable parts (such as filters) are
excluded from warranty coverage.
3. Damage resulting from accident, alteration, misuse, abuse, fire, flood, acts of God, improper installation, installation
not in accordance with electrical or plumbing codes, or use of products not approved by warrantor.
4. Replacement parts or repair labor costs for units operated outside the 48 contiguous United States, along with
select areas of Alaska, Hawaii, and Canada.
5. Repairs to parts or systems resulting from unauthorized modifications made to the appliance.
6. Expenses for travel and transportation for product service in remote locations.
7. The removal and reinstallation of your appliance if it is installed in an inaccessible location or is not installed in
accordance with published installation instructions.
DISCLAIMER OF IMPLIED WARRANTIES; LIMITATION OF REMEDIES
CUSTOMER'S SOLE AND EXCLUSIVE REMEDY UNDER THIS LIMITED WARRANTY SHALL BE PRODUCT REPAIR AS PROVIDED
HEREIN. IMPLIED WARRANTIES, INCLUDING WARRANTIES OF MERCHANTABILITY OR FITNESS FOR A PARTICULAR
PURPOSE, ARE LIMITED TO ONE YEAR. WARRANTOR SHALL NOT BE LIABLE FOR INCIDENTAL OR CONSEQUENTIAL
DAMAGES. SOME STATES DO NOT ALLOW THE EXCLUSION OR LIMITATION OF INCIDENTAL OR CONSEQUENTIAL
DAMAGES, OR LIMITATIONS ON THE DURATION OF IMPLIED WARRANTIES OF MERCHANTABILITY OR FITNESS, SO THESE
EXCLUSIONS OR LIMITATIONS MAY NOT APPLY TO YOU. THIS WARRANTY GIVES YOU SPECIFIC LEGAL RIGHTS AND YOU
MAY ALSO HAVE OTHER RIGHTS, WHICH VARY FROM STATE TO STATE.
11
Felix Storch, Inc.
An ISO 9001:2015 registered company
770 Garrison Ave
Bronx, New York 10474
www.summitappliance.com
WARNING: This product can expose you to chemicals including Nickel (Metallic) which is
known to the State of California to cause cancer.
For more information go to www.P65Warnings.ca.gov
Note: Nickel is a component in all stainless steel and some other metallic compositions.
CALIFORNIA CARB/SNAP DISCLOSURE
This product uses eco-friendly hydrocarbon refrigerant and fully complies with California CARB regulations.
However, we are required by California Law to provide the following disclosure statement in every product sold in
California.
"This equipment is prohibited from use in California with any refrigerants on the 'List of Prohibited Substances' for
that specific end-use, in accordance with California Code of Regulations, title 17, section 95374. This disclosure
statement has been reviewed and approved by Felix Storch, Inc. and Felix Storch, Inc. attests, under penalty of perjury,
that these statements are true and accurate."
This product does not use any refrigerants on the 'List of Prohibited Substances'"