IN230800050V02_UK_FR_ES_DE_IT
845-261
EN_IMPORTANT, RETAIN FOR FUTURE REFERENCE: READ CAREFULLY.
FR_IMPORTANT: A LIRE ATTENTIVEMENT ET A CONSERVER POUR VOUS Y REFRERER
ULTERIEUREMENT
ES_IMPORTANTE, LEA DETENIDAMENTE Y GUARDE PARA FUTURAS REFERENCIAS.
DE_WICHTIG! SORFGFÄLTIG LESEN UND FÜR SPÄTERES NACHSCHLAGEN AUFBEWAHREN.
IT_IMPORTANTE, LEGGERE E CONSERVARE QUESTO MANUALE D'ISTRUZIONE PER UN USO
FUTURO.
Please read these operating instructions carefully and note the information given. Use these
operating instructions to familiarize yourself with the product, the proper use and the safety
instructions.
Correct use:
The Hose Reel is provided with auto rewind system and intended for use in the private home and hobby
garden or car washing etc.
NOTE: The item cannot be used for drinking water as well as harmful air of causticity, chemistry,
grease or poisonous liquid.
Please
hold the hose stop ball when the hose retracts.
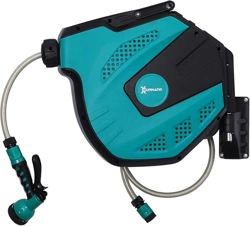
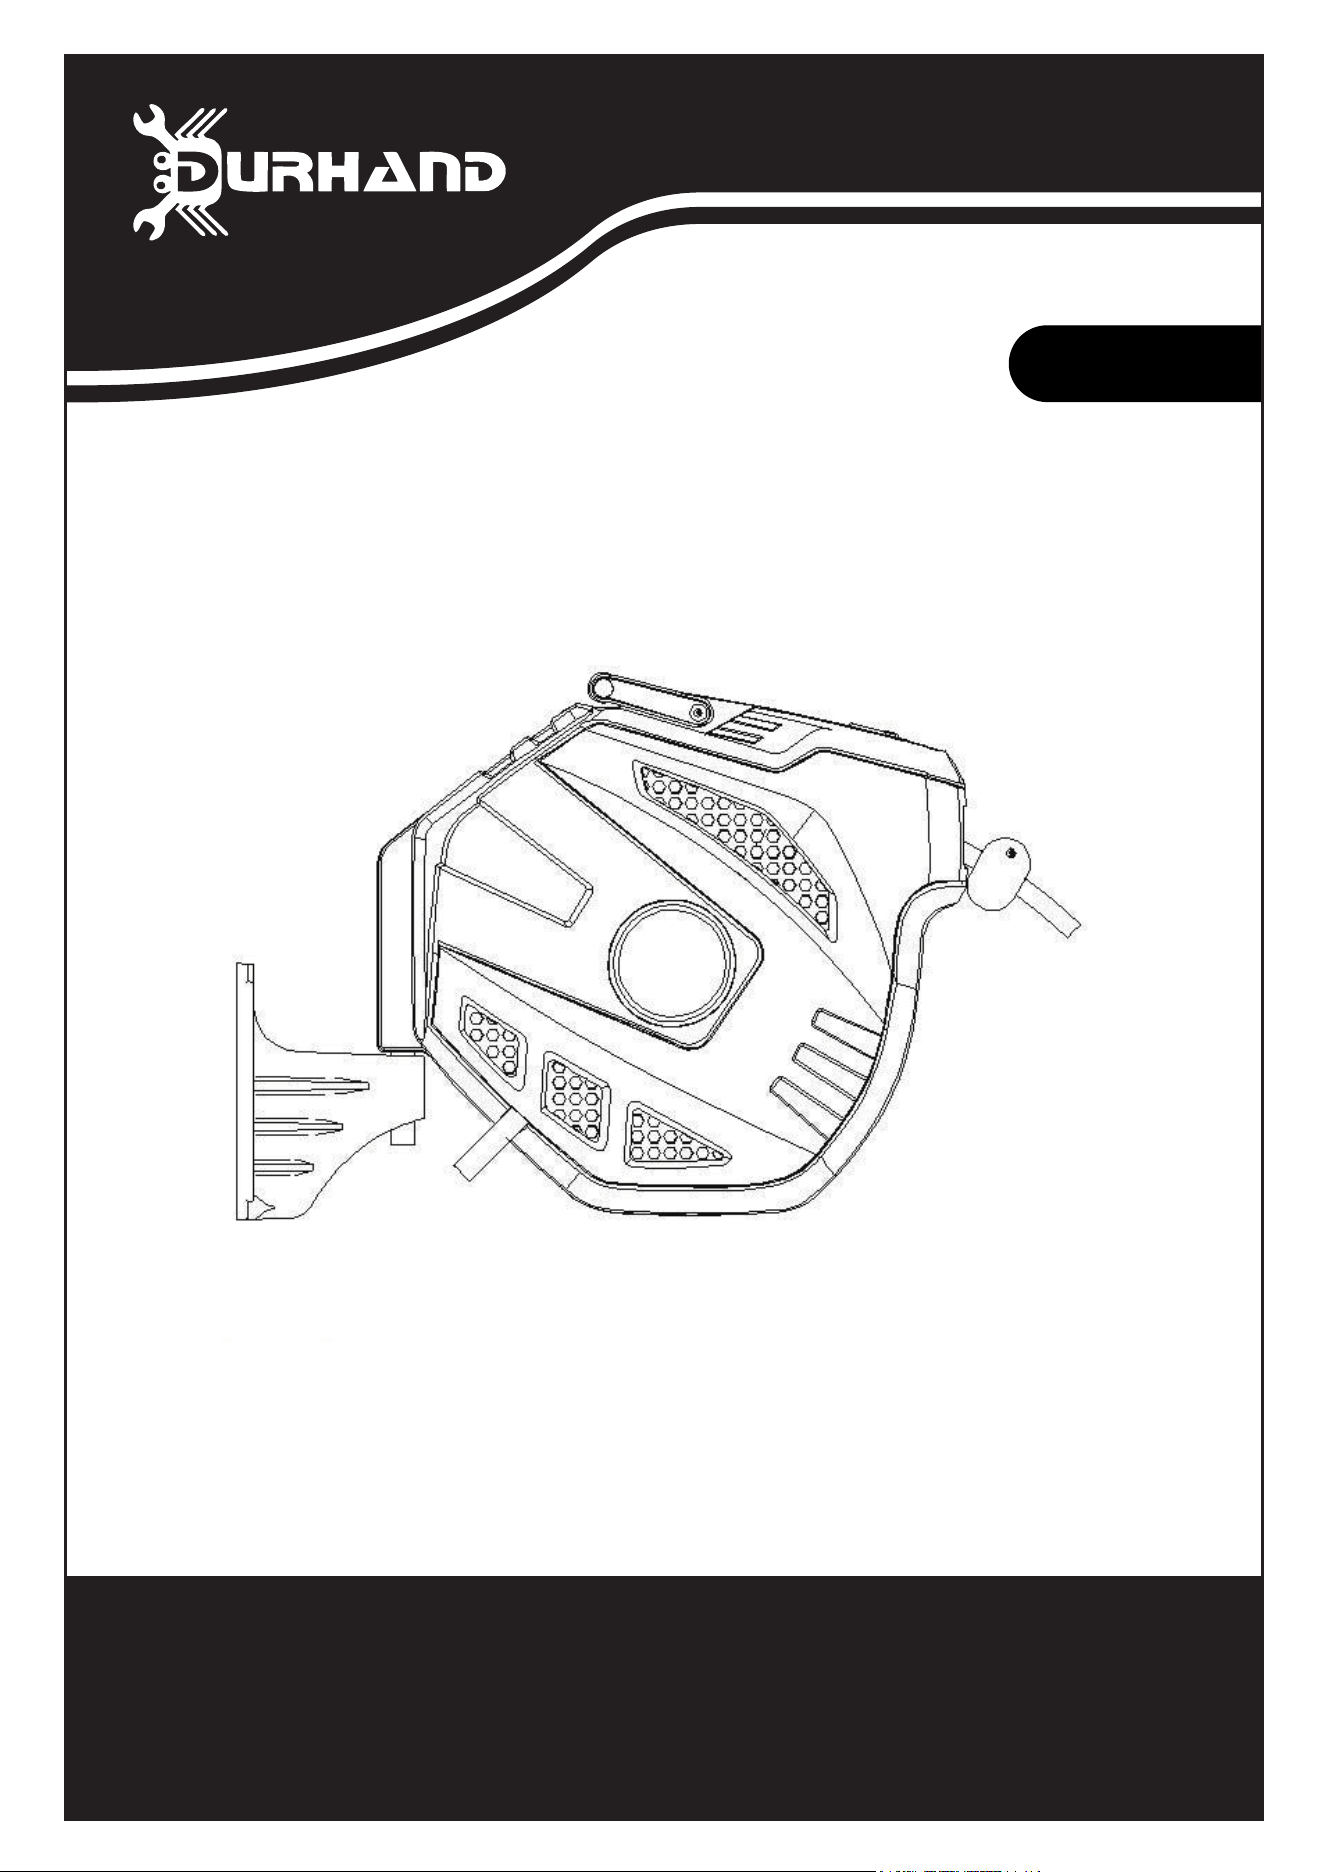
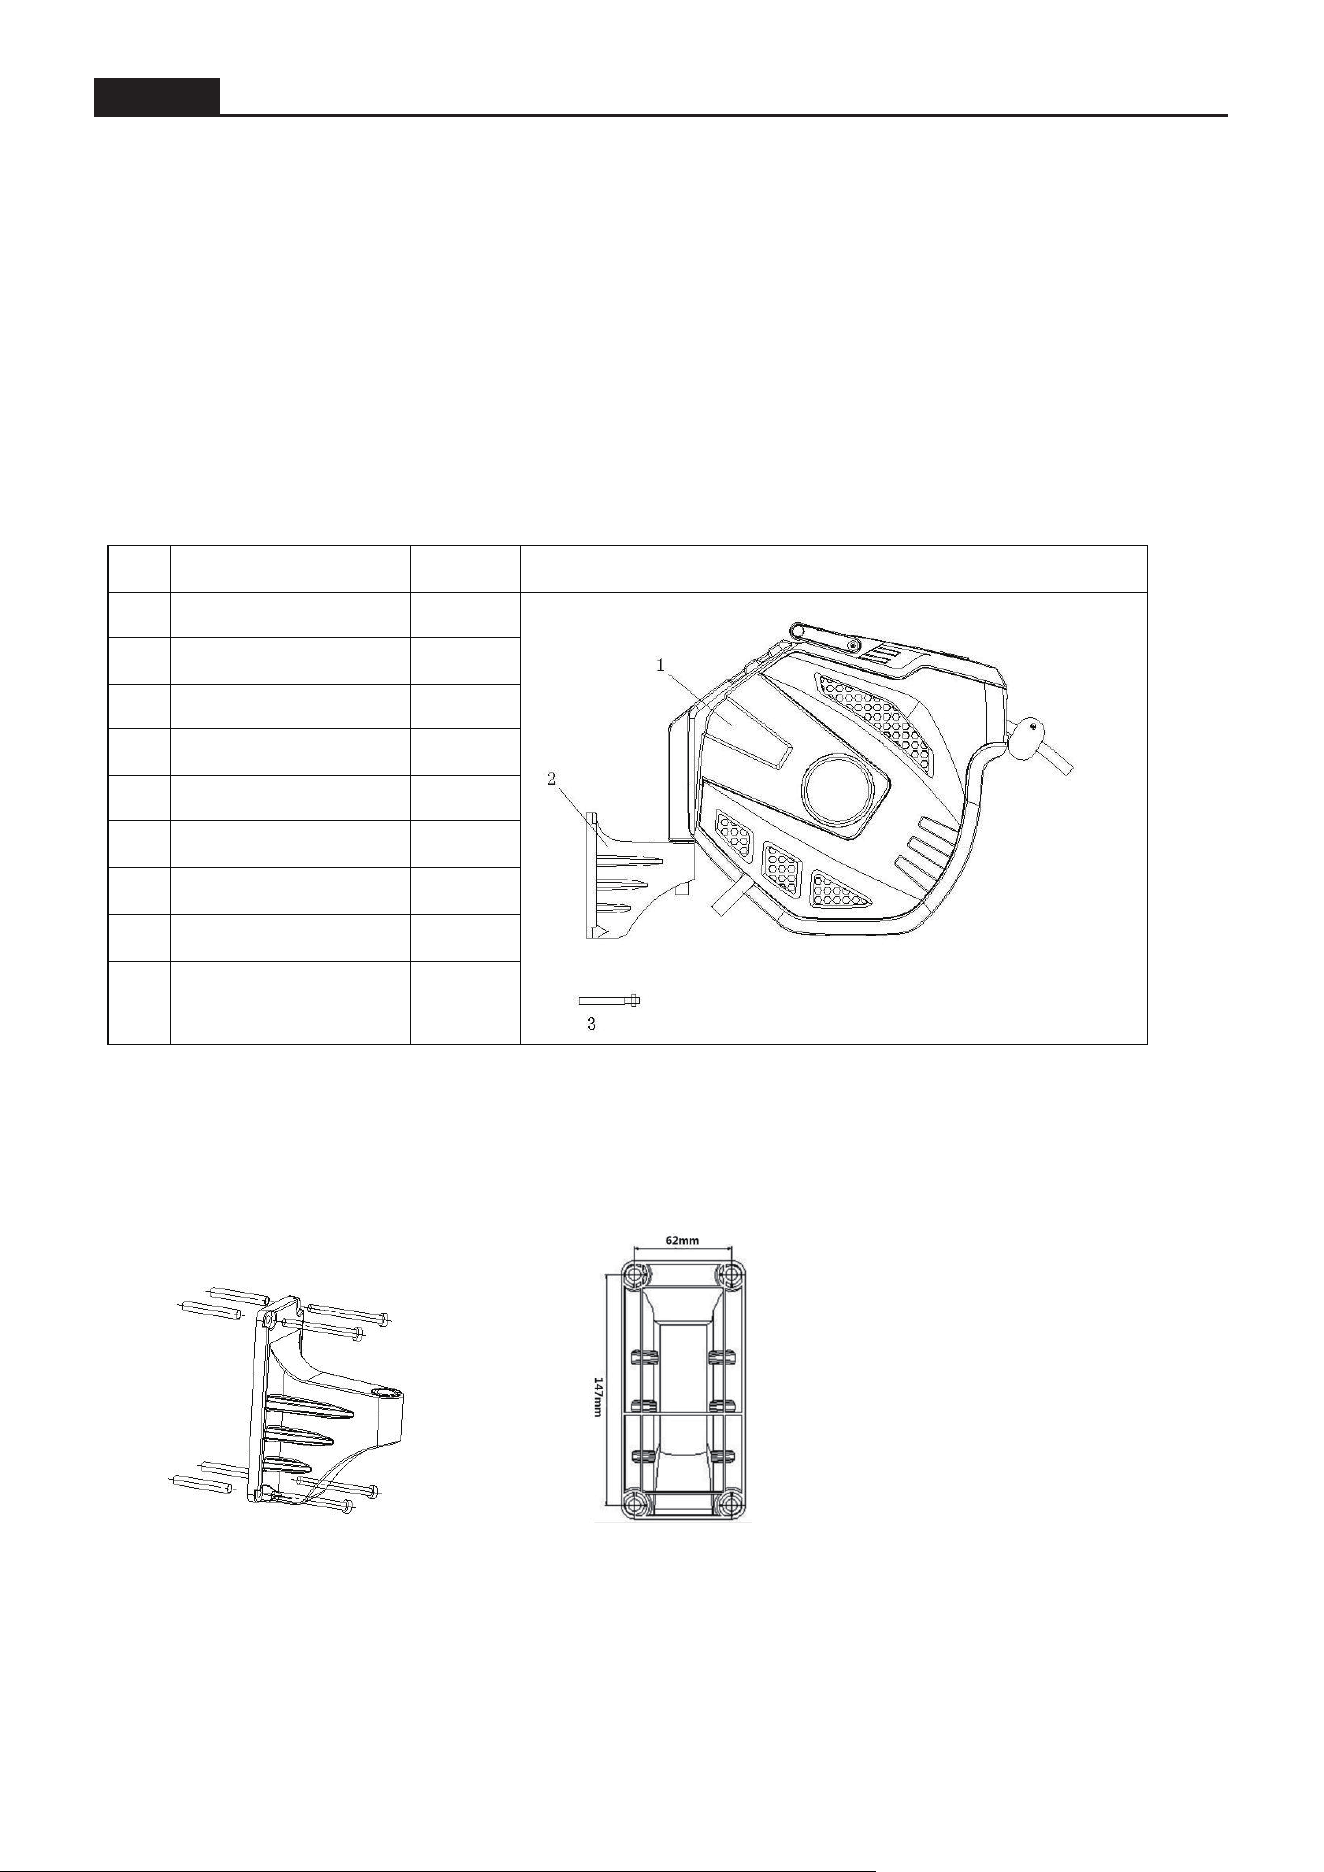
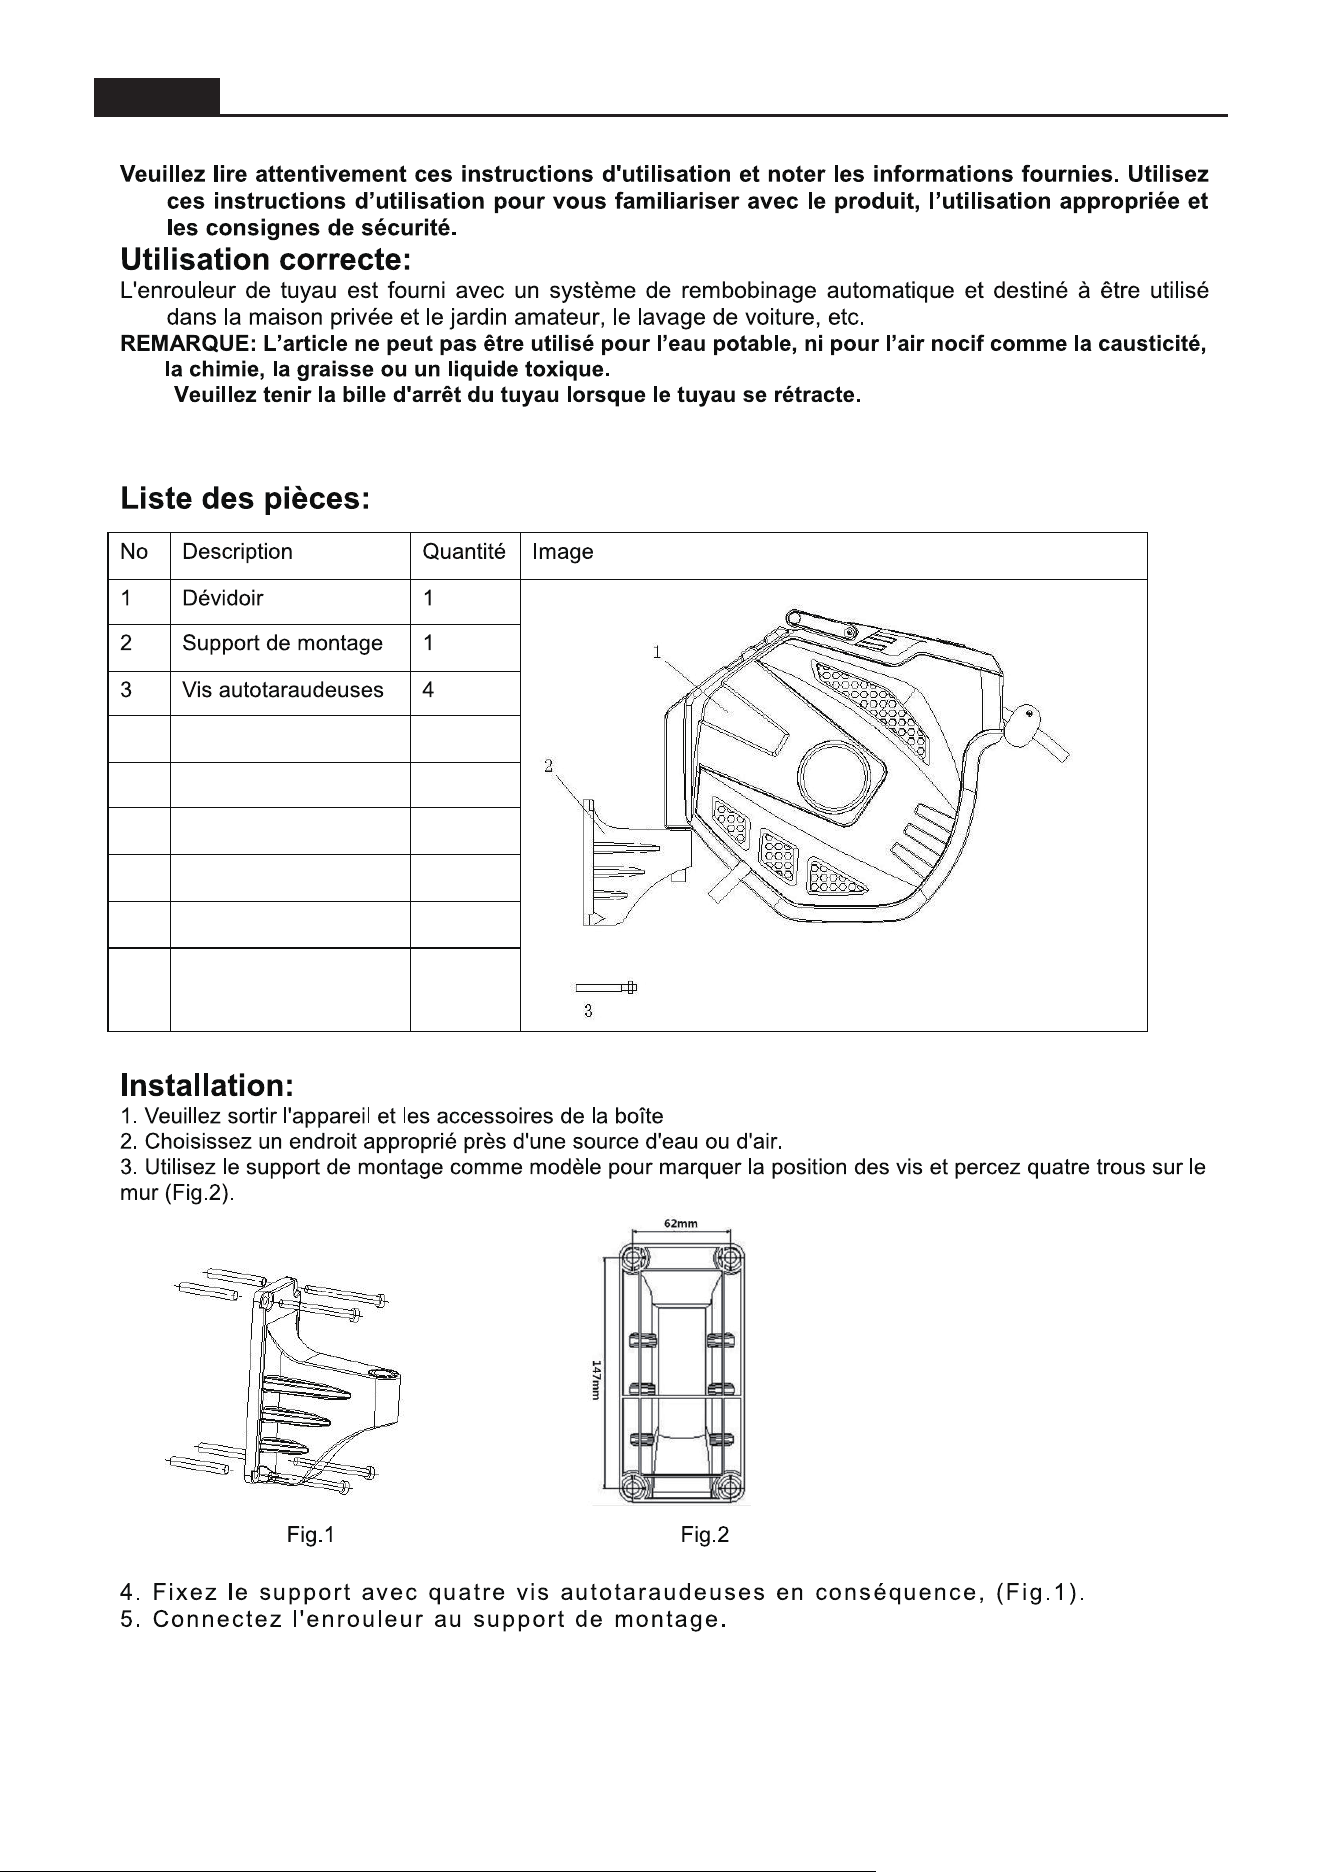
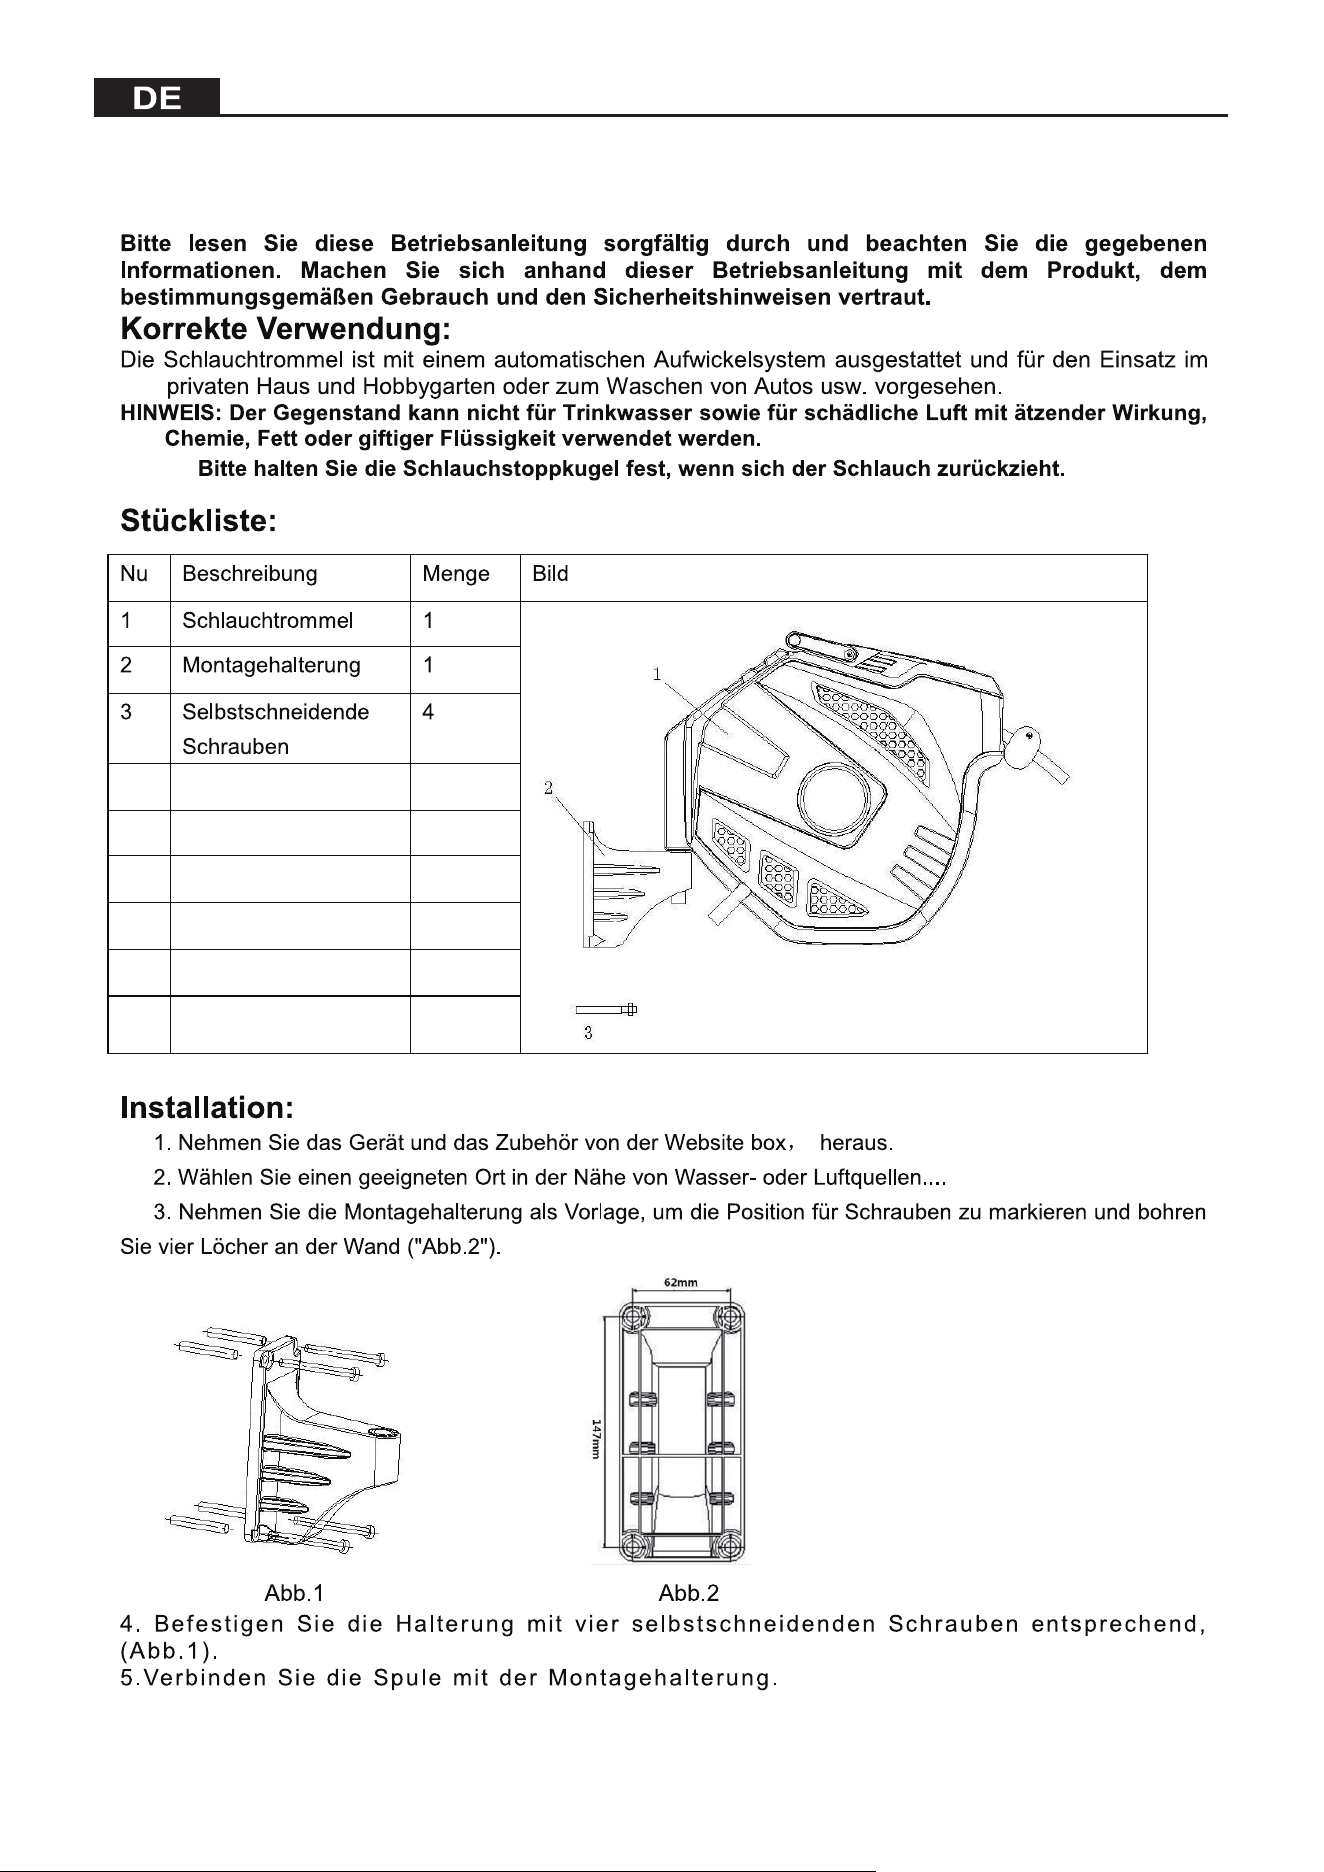
Parts list:
No Description Quantity Picture
1 Hose reel 1
2 Mounting bracket 1
3 Self-tapping screws 4
Installation:
1. Take out the unit and accessories from the box,
2. Choose a suitable place near source of water or air..
3. Take the mounting bracket as a template to mark the position for screws and drill four holes on the
wall( Fig.2)
Fig.1 Fig.2
4. Fix the bracket by four self-tapping screws accordingly, (Fig.1)
5. Connect the reel to the mounting bracket.
EN

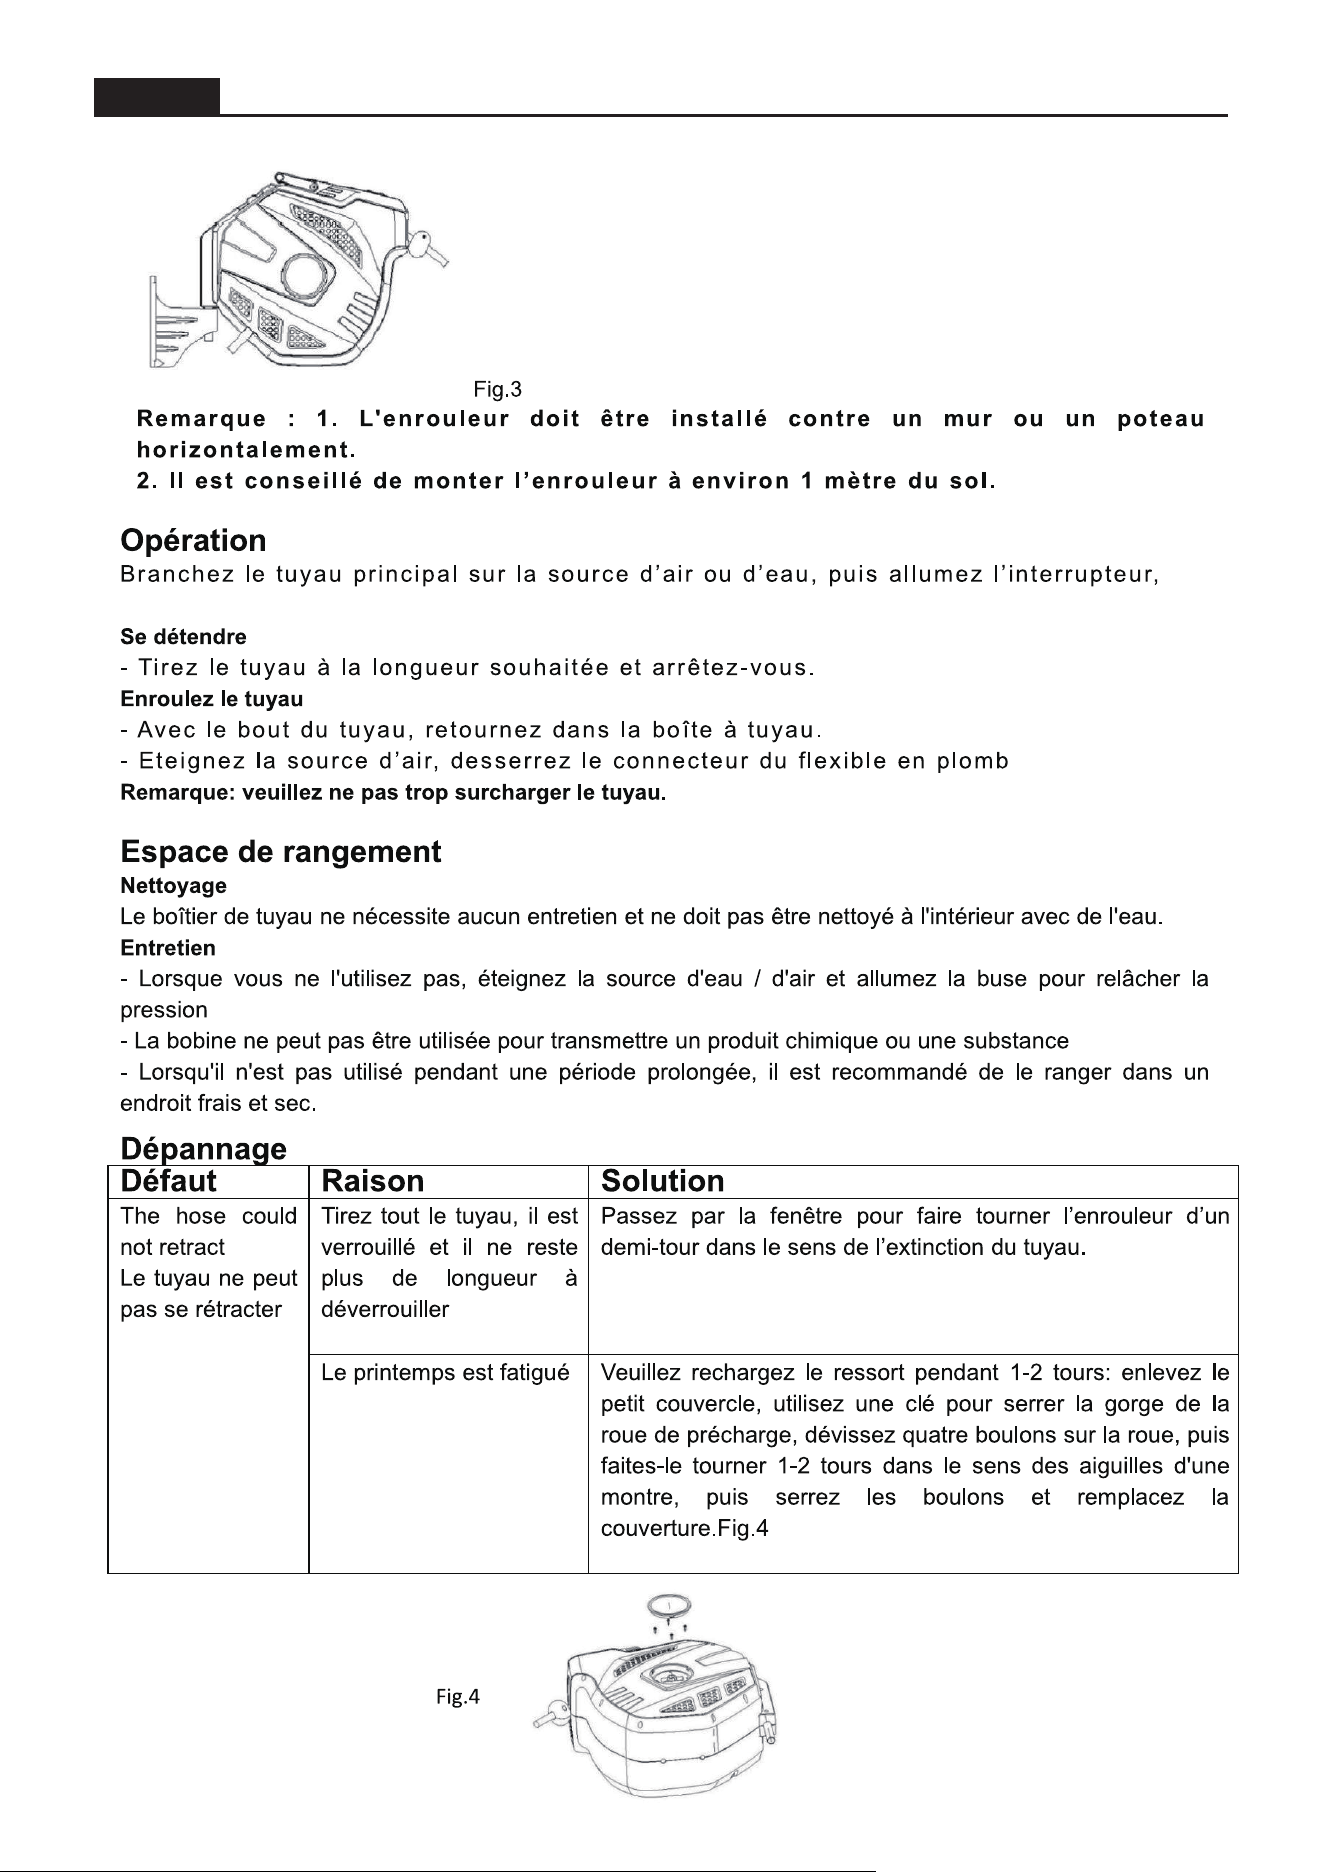
Fig.3
Note: 1. The reel should be installed to a wall or post horizontally.
2. It is suggested to mount the reel approximately 1 meter above the ground.
Operation
Connect the leader hose to the air or water source, then turn on the switch,
Unwind
-
Pull out hose to desired length and stop.
Roll up the hose
-
With the end of the hose, go back to the Hose Box.
- Turn off the air source, loosen the connector of lead hose
Note: Please do not overpull the hose to the end.
Storage
Cleaning
The hose box is maintenance-free and must not be cleaned internally with water.
Maintenance
- When not in use, please turn off the source of water/air, and turn on the nozzle to release the pressure
- The reel cannot not be used to transmit any chemical and substance
-
When not in use for an extended period of time it is recommended to be stored in a cool dry place.
Troubleshooting
Default Reason Solution
The hose could
not retract
Pull out all the hose,then
it is locked, and left no
more length to unlock
Go through the window to turn the reel for half a
turn in the direction of hose being pulled out.
Spring is fatigued Please re-preload the spring for 1-2 turns:
remove the small cover, use spanner to clamp
the groove of preload wheel, unscrew four bolts
on the wheel, then rotate it for 1-2 turns in
clockwise, then fasten the bolts, and replace the
cover.Fig.4
Fig.4
EN
FR
FR


Lea atentamente este manual de instrucciones y tenga en cuenta la información facilitada. Utilice
este manual de instrucciones para familiarizarse con el producto , el uso correcto y las
indicaciones de seguridad.
Uso correcto:
El carrete de manguera está provisto de sistema de rebobinado automático y está diseñado para su uso
doméstico para tareas de jardín, lavado de coches, etc.
NOTA: El artículo no se puede utilizar para agua potable ni para aire nocivo de causticidad, quími-
ca, grasa o líquido venenoso.
Sostenga la bola de tope de la manguera cuando la manguera se retraiga.
Instalación:
1. Saque la unidad y los accesorios de la caja.
2. Elija un lugar adecuado cerca de una fuente de agua o aire.
3. Tome el soporte de montaje como plantilla para marcar la posición de los tornillos y taladre cuatro
orificios en la pared (Fig. 2).
4. Fije el soporte con cuatro tornillos autorroscantes en consecuencia, (Fig.1)
5. Conecte el carrete al soporte de montaje.
Lista de partes:
Descripción
Carrete de manguera
Soporte de fijación
Soporte de fijación
No Cantidad Imagen
1 1
2 1
3 4
Fig.1 Fig.2
ES

Fig.3
Resolución de problemas
Defecto Causa Solución
Fig.4
ES
Nota: 1. El carrete debe instalarse en una pared o poste horizontalmente.
2. Se sugiere montar el carrete aproximadamente a 1 metro del suelo.
Funcionamiento
Conecte la manguera guía a la fuente de aire o agua, luego encienda el interruptor.
- Tire de la manguera hasta la longitud deseada y deténgase.
Enrolle la manguera
- Con el extremo de la manguera, vuelva a la caja de mangueras.
- Apague la fuente de aire, afloje el conector de la manguera de plomo.
Nota: No tire de la manguera hasta el final.
Almacenamiento
Limpieza
The hose box is maintenance-free and must not be cleaned internally with water.
Mantenimiento
- Cuando no se utilice, cierre la fuente de agua/aire y abra la boquilla para liberar la presión.
- El carrete no se puede utilizar para transmitir cualquier producto químico y sustancia.
- Cuando no se utilice durante un largo periodo de tiempo, se recomienda guardarlo en un lugar fresco y
seco.
La manguera
no se retrae
Tiró de toda la manguera,
entonces se bloqueó , y
no dejó más longitud
para desbloquear
Es debido al
sistema retráctil
Pase por la ventana para girar el carrete media
vuelta en la dirección en que se extrae la
manguera.
Vuelva a precargar el muelle 1-2 vueltas: retire la
tapa pequeña , utilice la llave para sujetar la ranura
de la rueda de precarga , desenrosque cuatro
tornillos de la rueda, luego gírela 1-2 vueltas en el
sentido de las agujas del reloj , luego apriete los
tornillos y vuelva a colocar la tapa.Fig.4

Leggere attentamente questo manuale di istruzioni e tenere in considerazione le informazioni
fornite. Utilizzare questo manuale di istruzioni per familiarizzare con il prodotto, l'uso corretto e le
indicazioni di sicurezza.
Uso corretto:
Il tamburo avvolgitubo è dotato di un sistema di riavvolgimento automatico ed è progettato per l'uso
domestico per lavori di giardinaggio, lavaggio auto, ecc.
NOTA: L'articolo non può essere utilizzato per acqua potabile né per aria nociva, caustica, chimi-
ca, grasso o liquido velenoso.
Tenere la sfera di arresto del tubo quando il tubo si ritrae.
Installazione:
1. Rimuovere l'unità e gli accessori dalla scatola.
2. Scegliere un luogo adatto vicino a una fonte d'acqua o d'aria.
3. Utilizzare il supporto di montaggio come modello per segnare la posizione delle viti e praticare quattro
fori nel muro (Fig. 2).
4. Fissare il supporto con quattro viti autofilettanti di conseguenza (Fig.1).
5. Collegare il tamburo avvolgitubo al supporto di montaggio.
Elenco delle parti:
Descrizione
Tamburo avvolgitubo
Supporto di fissaggio
Viti autofilettanti
No Quantità Immagine
1 1
2 1
3 4
Fig.1 Fig.2
IT
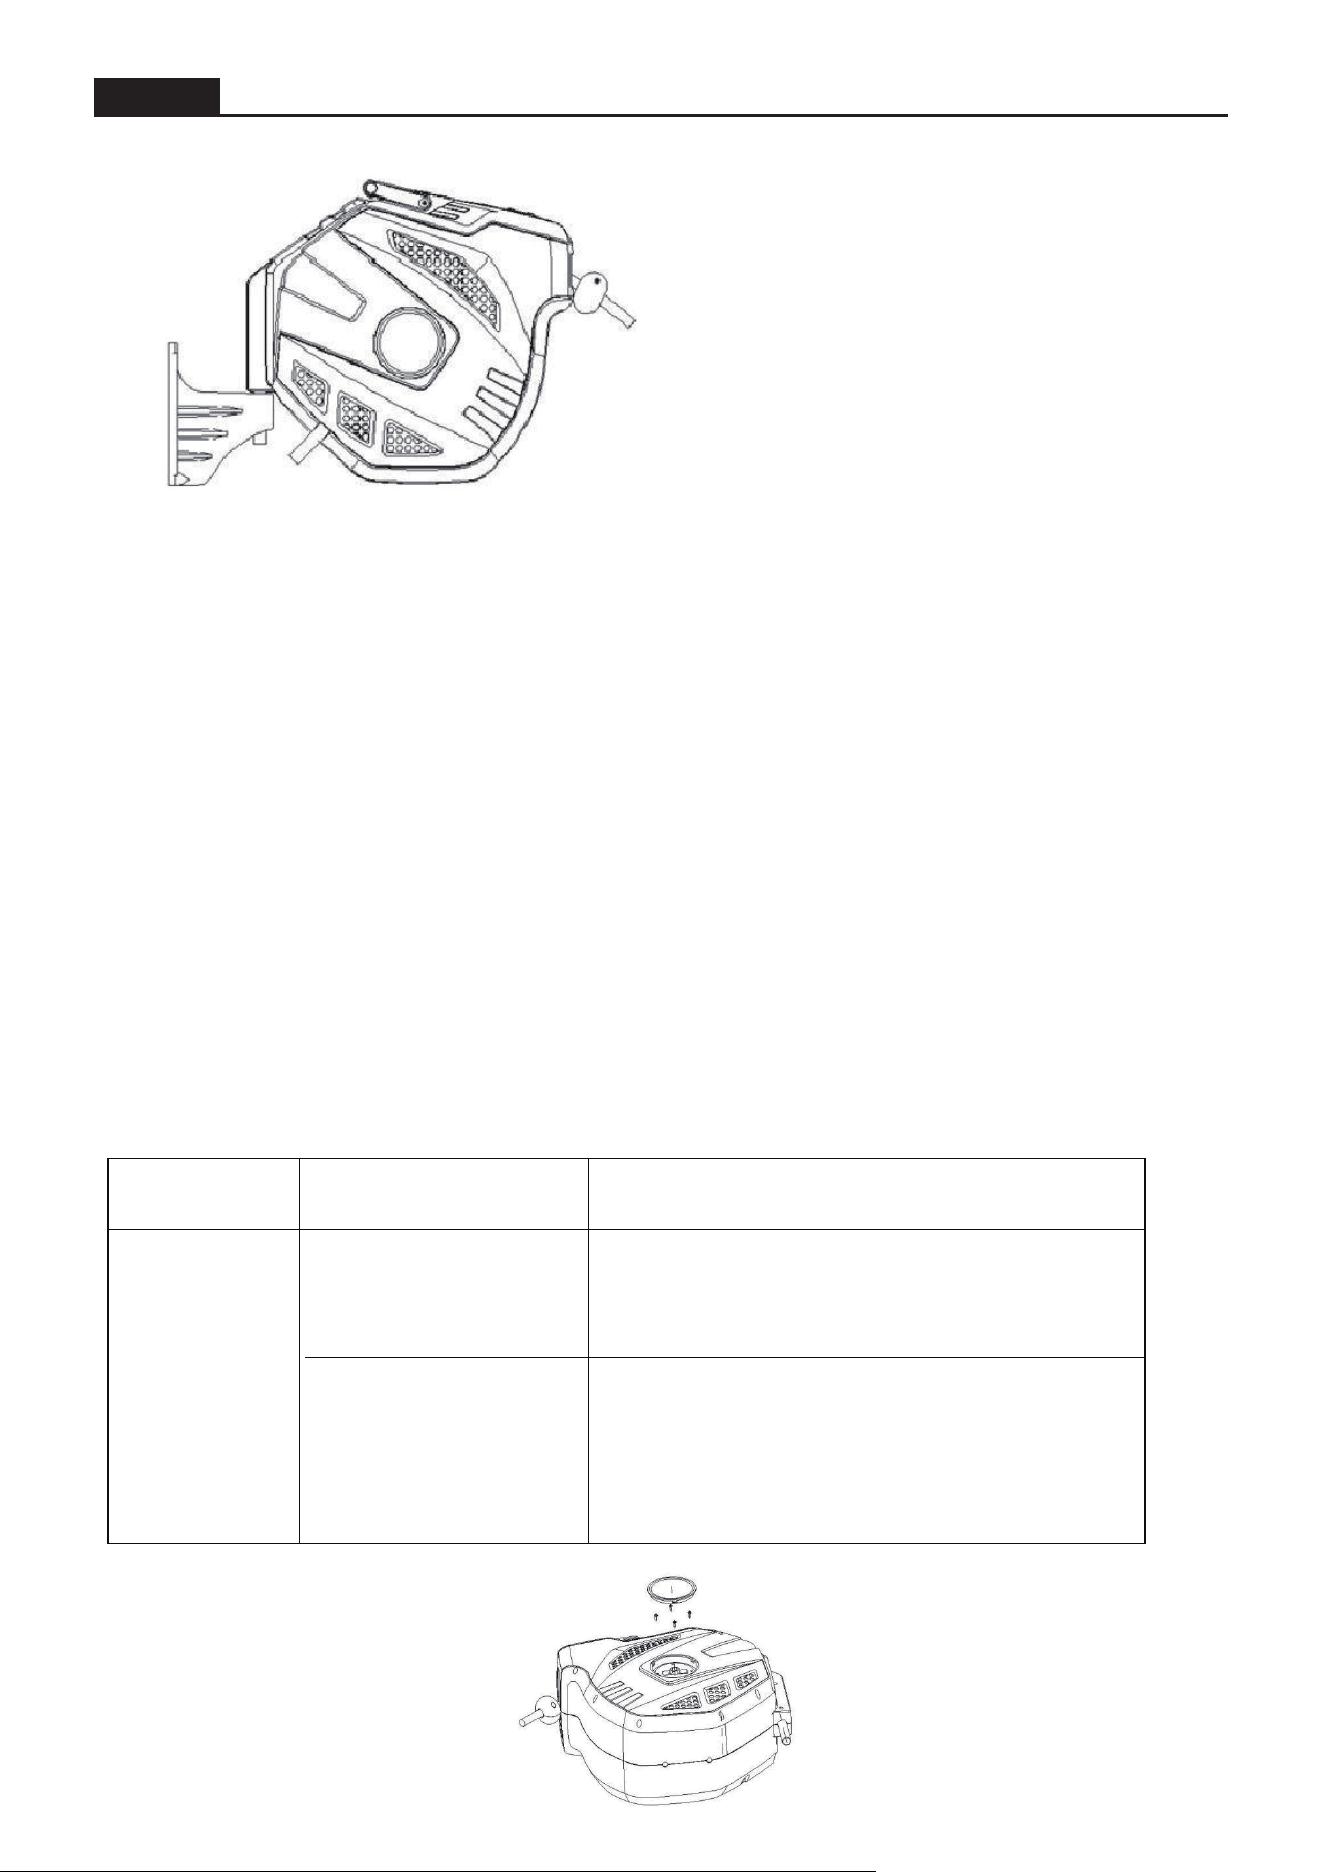
Fig.3
Risoluzione dei problemi
Difetto Causa Soluzione
Fig.4
IT
Nota:
1. Il tamburo deve essere installato orizzontalmente su una parete o un palo.
2. Si suggerisce di montare il tamburo a circa 1 metro dal suolo.
Funzionamento:
Collegare il tubo guida alla fonte d'aria o acqua, quindi accendere l'interruttore.
- Tirare il tubo fino alla lunghezza desiderata e fermarsi.
Avvolgimento del tubo:
- Con l'estremità del tubo, ritornare alla scatola del tubo.
- Spegnere la fonte d'aria, allentare il connettore del tubo di guida.
Nota: Non tirare il tubo fino alla fine.
Conservazione:
Pulizia:
La scatola del tubo è esente da manutenzione e non deve essere pulita internamente con acqua.
Manutenzione:
- Quando non viene utilizzato, chiudere la fonte d'acqua/aria e aprire l'ugello per rilasciare la pressione.
- Il tamburo non può essere utilizzato per trasmettere qualsiasi prodotto chimico o sostanza.
- Quando non viene utilizzato per un lungo periodo, si consiglia di conservarlo in un luogo fresco e asciutto.
Il tubo non si
ritrae
Hai tirato tutto il tubo,
quindi si è bloccato e non
ha lasciato ulteriore
lunghezza per sbloccare
È a causa del sistema
retrattile
Passare dalla finestra per girare il tamburo di
mezzo giro nella direzione in cui si estrae il tubo.
Ricaricare la molla di 1-2 giri: rimuovere la piccola
copertura, utilizzare la chiave per tenere la fessura
della ruota di precarica, svitare quattro viti della
ruota, quindi girarla 1-2 giri in senso orario, poi
stringere le viti e rimettere la copertura. Fig. 4