
3A81fH1100180
GB
F
E
NL
D
Operating instruction ....... 02 - 12
Mode d’emploi .................. 13 - 25
Instruccions de manejo ... 26 - 38
Gebruiksaanwijzing .......... 39 - 50
Bedienungsanleitung ....... 51 - 62
Istruzioni per l'uso ............ 63 - 75
DDR-7
I
01
2 314
5
8 79
6
12
11
10
13
02
GB
F
E
NL
D
I
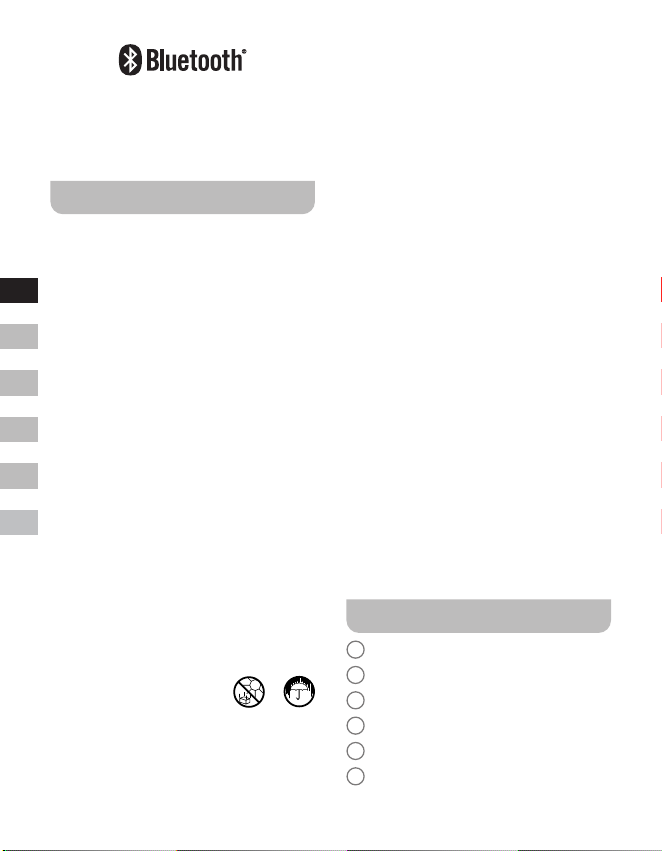
The Bluetooth
®
word mark and logos are
registered trademarks owned by Bluetooth
SIG, Inc. and any use of such marks by
SANGEAN ELECTRONICS INC. is under
license.
Important safety instructions
1. Do not install near any heat sources
such as radiators, heat registers, stoves
or other apparatus (including amplifiers)
that produce heat.
2. Only use attachments / accessories
specified by the manufacturer.
3. To reduce the risk of fire or electric
shock, do not expose this appliance to
rain or moisture.
4. Apparatus shall not be exposed to
dripping or splashing and no objects
filled with liquids, shall not be placed on
the apparatus.
5. The batteries shall not be exposed to
excessive heat such as sunshine, fire or
the like.
6. Any changes or modifications not
expressly approved by the party
responsible for compliance could void
the user’s authority to operate the
equipment and warranty.
7. CAUTION: Risk of explosion if the
battery is replaced by an incorrect type.
8. Do not allow your radio to be exposed
to water, steam or sand.
9. Do not leave your radio
where excessive heat
could cause damage.
10. If safety relevant, the following information
should be included as far as applicable:
● minimum distances around the
apparatus for sucient ventilation;
● the ventilation should not be impeded
by covering the ventilation openings
with items, such as newspaper, table-
cloths, curtains, etc.;
● no naked flame sources, such as
lighted candles, should be placed on
the apparatus;
● attention should be drawn to the
environmental aspects of battery
disposal;
● the use of apparatus in tropical and /
or moderate climates.
11. CAUTION: Danger of explosion if battery
is incorrectly replaced. Replace only with
the same or equivalent type.
12. If an apparatus is provided with a
replaceable lithium battery, the following
applies:
● if the battery is intended to be
replaced by the user, there shall be
a warning close to the battery or
in both the instruction for use and
service instructions;
● if the battery is not intended to be
replaced by the user, there shall be a
warning close to the battery or in the
service instructions.
Warning:
Please do not attempt to remove or replace
the built-in lithium battery. Unauthorized
replacements may also void the warranty.
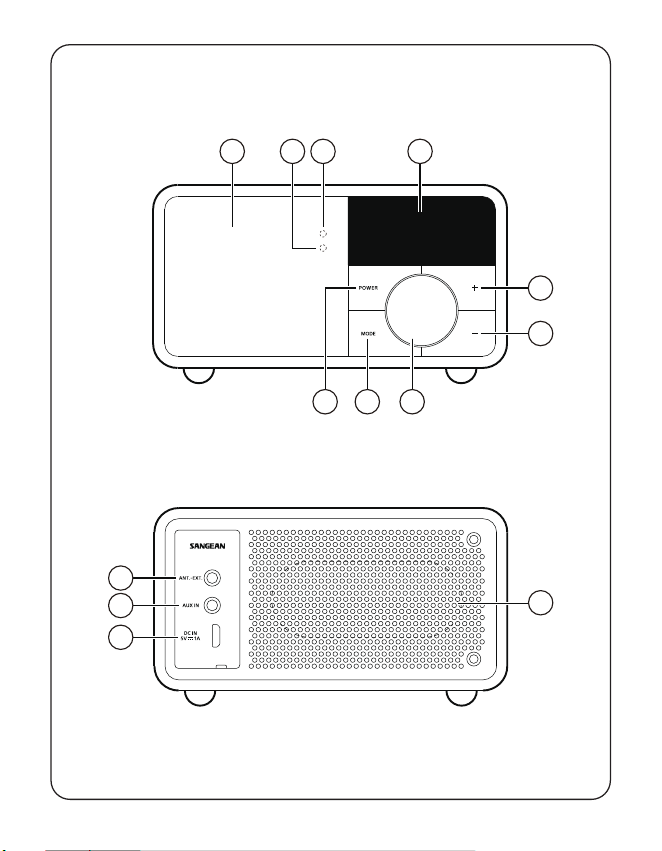
Controls
1
Speaker
2
Battery charging indicator
3
Bluetooth LED indicator
4
OLED display
5
Volume Up button
6
Volume Down button
03
GB
F
E
NL
D
I
7
Tuning control knob / Select / Info /
Menu button
8
Mode button
9
Power button
10
DC IN 5V / 1A USB charging socket
11
Auxiliary input socket
12
External antenna socket
13
Passive speaker
Charging the radio
The radio operates on a built-in Lithium-ion
battery that can be recharged either using
the USB charging port or from a USB power
adaptor (not included) with a rated output of
DC 5V, 1000mA. Reduced power, distortion,
‘stuttering’ sounds or battery power indicator
in low
are all signs that the battery
needs to be recharged.
Before operating the radio for the rst time
please fully charge the battery.
NOTE:
You can begin using the radio while charging.
Please be aware that in this case make sure
the USB power source can provide 5V 1A of
electrical current. If not, it may damage the
USB power source.
● Connect the (supplied) micro USB plug to
the micro USB charging port on the rear
of the unit.
● Connect the (supplied) standard USB plug
end of the cable to a power USB port on
a computer or other USB charging device.
When the battery is charging, the battery
indicator light will be solid red. After the
battery is fully charged, the red battery
charging indicator will turn off.
Operating your radio - DAB
1. Insert the (supplied) external antenna
plug into the external antenna socket
located on the rear of your radio.
2. Press the Power button to switch on your
radio.
3. If this is the first time the radio is used, a
quick scan of the Band III DAB channels
will be carried out. If the radio has been
used before the last used station will be
selected.
4. During the scanning process, as new
stations are detected the station counter
will increase and the stations will be
added to the list which is stored in
the radio. The bar graph indicates the
progress of the scan.
5. When the scanning is completed the
first station (in numeric-alpha order
0...9...A....Z) will be selected.
6. If the station list is still empty after the
scan, your radio will show “No Service”. If
no signals are found it may be necessary
to relocate your radio to a position giving
better reception.
Selecting a station - DAB
1. Press the Power button to switch on your
radio.
2. Press the Mode button to select DAB
radio mode.
3. Rotate Tuning control knob to scroll
through the list of available stations.
4. Press the Select button to select and tune
to the desired station.
5. Use the Volume Up / Down button to set
the sound level as needed. Alternatively
to access the station list using the DAB
menu, press and hold the Menu button and
then rotate Tuning control knob to choose
‘Station List’. Press the Select button.
NOTE:
If after selecting a station the station does
not tune it may be necessary to relocate your
radio to a position giving better reception.
04
GB
F
E
NL
D
I
Secondary services - DAB
Some radio stations may have one or more
additional broadcasts associated with them.
If these are available, they will appear
immediately after the main station as you
rotate the Tuning control knob. To tune to the
selected service, press the Select button.
Finding new stations - DAB
As time passes new stations may become
available or you may have moved your radio
to a dierent part of the country. In this case
you may need to cause your radio to scan
for new stations.
1. When in DAB mode, press and hold the
Menu button to enter the DAB menu.
2. Rotate Tuning control knob to select “Full
Scan”.
3. Press the Select button. Your radio will
perform a scan of the Band III DAB
channels.
As new radio stations are found the
station counter on the display will
increase and the radio stations will be
added to the list stored in the radio.
Manual tuning - DAB
Manual tuning allows you to tune directly to the
various Band III DAB channels (5A to 13F).
1. When in DAB mode press and hold the
Menu button to enter the DAB menu.
2. Rotate the Tuning control knob to select
“Manual Tune”.
3. Press the Select button to enter manual
tune option.
4. Rotate the Tuning control knob to choose
the required DAB channel.
5. Press the Select button to cause the
radio to tune to the chosen channel.
Station order setup - DAB
Your radio has 3 station order settings from
which you can choose. The station order
settings are alphanumeric, ensemble and valid.
1. When in DAB mode press and hold the
Menu button to enter the DAB menu.
2. Rotate the Tuning control knob to select
the “Station Order”.
3. Press the Select button to enter the
station order adjustment mode.
4. Rotate the Tuning control knob to choose
“Alphanumeric”, “Ensemble” and “Valid”.
“Alphanumeric” - sorts the station list
alpha-numerically 0...9...A....Z.
“Ensemble” - organizes the station list by
DAB multiplex.
“Valid” - shows only those stations for
which a signal can be found.
5. Press the Select button to confirm the
required station order.
Dynamic Range Control
settings - DAB
Dynamic Range Control (also known as
DRC) can make quieter sounds easier to
hear when your radio is used in a noisy
environment by reducing the dynamic range
of the audio signal.
1. When in DAB mode press and hold the
Menu button to enter the DAB menu.
2. Rotate the Tuning control knob to select
the “DRC Value”.
3. Press the Select button to enter the DRC
adjustment mode.
4. Rotate the Tuning control knob to
highlight the required DRC setting (the
default is Off).
O - DRC is switched o, Broadcast DRC
will be ignored.
05
GB
F
E
NL
D
I
Low - DRC level is set to 1 / 2 that sent
by broadcaster.
High - DRC is set as sent by broadcaster.
5. Press the Select button to confirm the
setting.
NOTE:
Not all DAB broadcasts use the DRC
function. If the broadcast does not provide
DRC information, then the DRC setting in
the radio will have no eect.
Prune stations - DAB
If you move to a dierent part of the country,
some of the stations which were listed
may no longer be available. Also, from
time to time, some DAB services may stop
broadcasting, or may change location or
frequency. Stations which cannot be found,
or which have not been received for a very
long time are shown in the station list with a
question mark. The Prune stations function
will delete the marked DAB stations from
your station list.
1. When in DAB mode press and hold the
Menu button to enter the DAB menu.
2. Rotate the Tuning control knob to select
the “Prune Station”.
3. Press the Select button to enter
adjustment mode.
4. To activate the Prune function, rotate the
Tuning control knob to select “Yes”. Press
the Select button to confirm the setting.
If you do not wish to prune stations,
choosing “No” or “Back” will go back to
the previous menu display. Press the
Select button to confirm your choice.
NOTE:
If you have moved your radio to a dierent
part of the country you should also carry out
a search for new stations (please see the
section ‘Finding new stations’).
Operating your radio - FM
1. Insert the (supplied) external antenna
plug into the external antenna socket
located on the rear of your radio.
2. Press the Power button to switch on your
radio.
3. Press the Mode button to select the FM
band.
4. Press and hold the Menu button to enter
the FM menu.
5. Rotate the Tuning control knob to select
“SCAN”. Press the Select button to cause
your radio to search from low frequency
to high frequency. When it finds a station
of sufficient strength, the frequency
will flash 6 seconds on the display and
the radio will continue to scan after 6
seconds. To tune to the station or stop
the scanning, press the Select button.
6. The display will show the frequency of the
signal found. If the signal is strong enough
and there is RDS data present then the
radio will display the station name.
7. When the end of the waveband is reached
your radio will recommence tuning from
the opposite end of the waveband.
8. Press the Volume Up / Down button to
adjust the sound level as needed.
9. To switch off your radio, press the Power
button.
Manual tuning - FM
1. When in FM mode, rotate Tuning control
knob to tune to a station.
2. Press the Volume Up / Down button to
adjust the sound level as needed.
Scan sensitivity setting - FM
Your radio includes a local / distant option
for the auto-scan function. By setting the

06
GB
F
E
NL
D
I
radio to the “local” scan option, weaker
signals from more distant transmitters can
be ignored by the radio, making stronger
signals easier to nd.
1. When in FM mode, press and hold the
Menu button to access FM menu.
2. Rotate the Tuning control knob to select
“FM Scan Zone”. Press the Select button
to enter the scan sensitivity adjustment
mode. The current setting will be marked
with an asterisk.
3. Rotate the Tuning control knob to select
“Local” (Strong stations only) or “Distant”
(All stations). The “Distant” option will
allow the radio to find weaker signals
when scanning.
4. Press the Select button to confirm your
selection. The setting is stored in the
radio and remains in force until changed
or until a System Reset.
Presetting stations in DAB
and FM modes
There are 10 presets each for DAB and FM
radio. They are used the same way for each
operating mode.
1. Press the Power button to switch on your
radio.
2. Tune to the required radio station as
previously described.
3. Press and hold the Menu button. Then
rotate the Tuning control knob to select
“Favorite Station”. Press the Select button
to enter the setting.
4. Rotate Tuning control knob to select
“Preset Station”. Press the Select button.
5. Rotate Tuning control knob to scroll
through the preset list until you reach an
unused preset or a preset that you wish
to change.
6. Press Select button to store the preset.
‘Preset 2 saved’ for example will be
shown on the display.
Repeat this procedure as needed for
the remaining presets. Stations which
are already stored in the presets may
be overwritten by following the above
procedure.
NOTE:
The radio station presets are retained in
memory when the radio is switched o.
Recalling a preset in DAB
and FM modes
1. Press the Power button to switch on your
radio.
2. Select the required operating mode using
the Mode button.
3. Press and hold the Menu button. Then
rotate the Tuning control knob to select
“Favorite Station”. Press the Select button
to enter the setting.
4. Rotate Tuning control knob to select
“Recall Station”. Press the Select button.
5. Rotate Tuning control knob to select the
desired preset station. Press the Select
button. Your radio will then tune to the
station stored in the selected preset
memory. The chosen preset number is
also shown in the display, e.g. “P2”.
Display options - DAB / FM
/ Bluetooth
Your radio has a range of display options
when in DAB, FM and Bluetooth modes:
● Press the Info button to cycle through the
various options.
DAB display options
Your radio can display the following in DAB
mode:
07
GB
F
E
NL
D
I
Scrolling text, Program type, Multiplex name,
Time / Date, Frequency, Bit rate and audio
type, Coding information, DL Plus text,
Signal strength.
For the DL Plus text, some stations may
provide other programme related information
for the display in addition to the regular text.
If none is available, a message ‘no info’ is
displayed.
FM display options
In FM mode your radio can use the Radio
Data System (RDS) to display the radio
station name and additional text when
provided by the broadcaster and where the
radio signal is suciently clear.
Your radio can display the following in FM
mode:
Radio Text, Program Type, Time / Date,
Frequency.
Bluetooth display options
If your connected device is able to provide
information from the track being played, your
radio can display the following in Bluetooth
mode:
Device Name, Title, Artist, Album.
Please note that the availability of
information depends on the specific media
format.
Listening to music via
Bluetooth streaming
You need to pair your Bluetooth device with
your DDR-7 before you can auto-link to
play / stream Bluetooth music through your
DDR-7. Pairing creates a ‘bond’ so the two
devices can recognize each other.
Pairing and playing your
Bluetooth device for the first time
1. With your radio switched on, press the
Mode button to select Bluetooth function.
“Bluetooth Pairing” will show on the
display. The Bluetooth LED indicator on
the radio will flash a fast blue to show the
radio is discoverable.
2. Activate Bluetooth on your device
according to the device’s user manual
to link to the radio. Locate the Bluetooth
device list and select the device named
“DDR-7” (With some Smartphone’s that
are equipped with earlier versions than
BT2.1 Bluetooth device, you may need to
input the pass code “0000”).
3. Once connected, there will be a confirmation
tone sound and the name of your connected
Bluetooth device will show on the display.
The Bluetooth LED indicator will turn a solid
blue. You can simply select and play any
music from your source device.
4. The volume control can be adjusted from
your source device, or directly from the
radio. Use the controls on your Bluetooth-
enabled device or on the radio to play /
pause and navigate tracks.
NOTE:
● If 2 Bluetooth devices are pairing for the
first time, both will search for your radio, it
will show its availability on both devices.
However, if one device links with this unit
first, then the other Bluetooth device will
not find it on the list.
● If you take your source device out of
range, the connection will be temporarily
disconnected to your radio. Your radio
will automatically reconnect if the source
device is brought back in range. Be aware
that during the period of disconnection,
no other Bluetooth device can pair or link
with your radio.
● If “DDR-7” shows in your Bluetooth device
list but your device cannot connect with
it, please delete the item from your list
and pair the device with the radio again
following the steps described previously.
08
GB
F
E
NL
D
I
● The effective operation range between
the system and the paired device is
approximately 10 meters (30 feet). Any
obstacle between the system and the
device can reduce the operational range.
● Bluetooth connectivity performance
may vary depending on the connected
Bluetooth devices. Please refer to the
Bluetooth capabilities of your device
before connecting to your radio. All
features may not be supported on some
paired Bluetooth devices.
● With some mobile phones, making /
receiving calls, text messages, e-mails
or any other activities unrelated to audio
streaming may mute the Bluetooth audio
streaming or even temporarily disconnect
from your device. Such behavior is a
function of the connected device and does
not indicate a fault with your DDR-7.
Playing audio files in Bluetooth
mode
When you have successfully connected
your radio with the chosen Bluetooth source
device you can start to play your music using
the controls on your connected Bluetooth
device.
1. Once playing has started adjust the
volume to the required setting using the
Volume control on your radio or on your
enabled Bluetooth source device.
2. Use the controls on your Bluetooth
source device to play / pause and
navigate tracks.
Alternatively, control the playback using
Tuning control knob on your radio.
Rotate the Tuning control knob in a
clockwise direction to play next track.
Rotate the Tuning control knob in an anti-
clockwise direction to play previous track.
NOTE:
Not all player applications or devices may
respond to all of these controls.
Reconnecting a previously-
paired Bluetooth source device
The DDR-7 can memorize up to 8 sets of
paired Bluetooth source devices, when the
memory exceed this amount, the earliest
paring device will be over written from the
device.
If your Bluetooth source device already
paired with the DDR-7 previously, the unit
will memorize your Bluetooth source device
and it attempts to reconnect with a Bluetooth
source device in memory which is last
connected. If the last connected Bluetooth
source device is not available, the DDR-7 will
try to connect to the second last Bluetooth
source device.
Disconnecting your Bluetooth
device
1. Press and hold the Menu button to enter
the Bluetooth menu.
2. Rotate Tuning control knob to select
“Cancel Pairing”. Then press the Select
button.
3. To disconnect with your Bluetooth device,
rotate Tuning control knob to select “Yes”
and then press the Select button. There
will be a confirmation tone sound and
the Bluetooth LED indicator on the radio
will flash a fast blue to show the radio is
discoverable again for pairing. Choosing
“No” or “Back” will go back to the previous
menu display. Press the Select button to
confirm your choice.
4. Alternatively, you can press the Mode
button to select any mode other than
Bluetooth mode or turn off Bluetooth
on your Bluetooth device to disable the
connection.
Deleting Bluetooth paired device
memory
1. Press and hold the Menu button to enter
the Bluetooth menu.
09
GB
F
E
NL
D
I
2. Rotate Tuning control knob to select “Clear
Pairing”. Then press the Select button.
3. To clear the memory of all paired devices,
rotate Tuning control knob to select “Yes”.
Then press the Select button.
Choosing “No” or “Back” will go back to
the previous menu display. Press the
Select button to conrm your choice.
Sleep timer
Your radio can be set to turn off after a
preset time has elapsed. The sleep timer
setting can be adjusted between 15 and 120
minutes in increments.
1. With your radio switched on, press and
hold the Menu button to access the menu
for the current mode.
2. Rotate the Tuning control knob to select
“System Setup”. Press the Select button
to enter the system settings menu.
3. Rotate the Tuning control knob to select
“Sleep”. Press the Select button to enter
the setting.
4. Rotate the Tuning control knob to select
the required sleep time. The sleep
timer can be set to between 15 and 120
minutes, or to “Sleep off”. Press the
Select button to confirm the setting.
5. An active sleep timer is shown using
a sleep timer indicator on the playing
displays. To view the remaining time of an
active sleep timer setting, press and hold
the Menu button and then rotate the Tuning
control knob to select “System Setup”.
Press the Select button. Rotate the Tuning
control knob to select “Sleep”. Press the
Select button to view the remaining time of
an active sleep timer on the display.
6. To cancel the sleep time before the preset
time has elapsed and to turn off the radio,
press the Power button to turn the radio
off manually.
To cancel the sleep timer and leave the
radio playing, go back into the sleep timer
settings (steps 1 to 4 above) and select
the “Sleep o” option in step 4. Press the
Select button to conrm the setting.
Contrast
The contrast of the display can be adjusted.
1. With your radio switched on, press and
hold the Menu button to access the menu
for the current mode.
2. Rotate the Tuning control knob to select
“System Setup”. Press the Select button
to enter the system settings menu.
3. Rotate the Tuning control knob to select
“Contrast”. Press the Select button to
enter the setting.
4. Rotate the Tuning control knob to adjust
the contrast. The contrast level indication
on the screen will change at the same
time. When you find the setting that gives
the best legibility for the location in which
the radio is used, press the Select button
to confirm the setting.
Automatically updating the
clock
Your radio will automatically update each time
you turn on the radio and tune to a DAB+ radio
station or to an FM station which is broadcasting
the time via RDS. Time display will ash 00:00
for a few seconds then display the clock time
when it receives DAB+ or FM-RDS clock time
signal. You may specify that the radio sets its
clock from DAB or FM radio broadcasts.
1. With your radio switched on, press and
hold the Menu button to access the menu
for the current mode.
2. Rotate the Tuning control knob to select
“System Setup”. Press the Select button
to enter the system settings menu.
10
GB
F
E
NL
D
I
3. Rotate the Tuning control knob to select
“Time update”. Press the Select button to
enter the setting.
4. Rotate the Tuning control knob to choose
an update option from “DAB”, “FM” or
“Any” as required. Press the Select button
to confirm your choice.
Language selection
By default your radio will display all menus
and messages in English. You can choose
your preferred language.
1. With your radio switched on, press and
hold the Menu button to access the menu
for the current mode.
2. Rotate the Tuning control knob to select
“System Setup”. Press the Select button
to enter the system settings menu.
3. Rotate the Tuning control knob to select
“Language”. Press the Select button to
enter the setting menu.
4. Rotate the Tuning control knob to select
your desired language. Press the Select
button to confirm the setting. The display
will change to the chosen language.
Factory reset
If you wish to completely reset your radio
to its initial state this may be performed by
following this procedure. By performing a
factory reset, all user entered settings will be
erased.
1. With your radio switched on, press and
hold the Menu button to access the menu
for the current mode.
2. Rotate the Tuning control knob to select
“System Setup”. Press the Select button
to enter the system settings menu.
3. Rotate the Tuning control knob to select
“Factory Reset”. Press the Select button
to enter the setting.
4. Rotate the Tuning control knob to select
“Yes” or “No”. If you do not wish to carry
out a system reset, select “No” and then
press the Select button to confirm the
setting. Or choosing “Back” will go back
to the previous menu display. Press the
Select button to confirm your choice.
5. With “Yes” selected, press the Select
button to reset the radio. It will erase
all saved settings and preset memory
stations. All settings will revert to factory
default settings.
Software version display
The software version display is provided for
reference and customer support purposes
and cannot be changed.
1. With your radio switched on, press and
hold the Menu button to access the menu
for the current mode.
2. Rotate the Tuning control knob to select
“System Setup”. Press the Select button
to enter the system settings menu.
3. Rotate the Tuning control knob to select
“SW Version”. Press the Select button to
display the software version.
4. Press the Menu button as needed to exit.
Auxiliary input socket
A 3.5mm stereo Auxiliary Input socket is
provided on the rear of your radio to permit
an audio signal to be fed into the unit from
an external audio device such as iPod, MP3
or CD player.
1. With your radio switched on, press the
Mode button until “Aux In” is displayed.
2. Connect an external audio source (for
example, iPod, MP3 or CD player) to the
Auxiliary Input socket.
3. Adjust the volume setting on your iPod,
MP3 or CD player to ensure an adequate
signal level from your device. Then adjust
the Volume on the radio as needed for
comfortable listening.
11
GB
F
E
NL
D
I
Specications
Frequency Coverage
FM 87.5-108 MHz
DAB 174.928-239.200 MHz
Amplier
Output power 1.6W 10%T.H.D. @ 100Hz
Aux In
Input sensitivity IN 400mV Output 1.6W @ 100Hz
Speaker
Speaker 40mm 4ohm x 1
Passive speaker 74.2X36.7 mm
Bluetooth
Bluetooth specication Bluetooth
®
Ver 4.1
Prole Support A2DP
Bluetooth Audio CODEC SBC
Transmitting Power Specication Power Class 2
Line of sight range 10meters / 30feet
The frequency and maximum
transmitted power
2402MHz ~ 2480MHz: 3.81dBm (Bluetooth EDR)
Built-in Battery
Battery
Rechargeable Lithium-ion battery 18650 3.65V
2600mAh
Battery life
Speaker output 10mW, the battery life is approx.20
hours for 4 hours a day at normal volume level.
12
GB
F
E
NL
D
I
General
DC-IN Micro USB jack 5V 1A
Charging current 500mA
Charging time approximately 6.0Hr
Operating temperature range 0°C to + 35°C
※
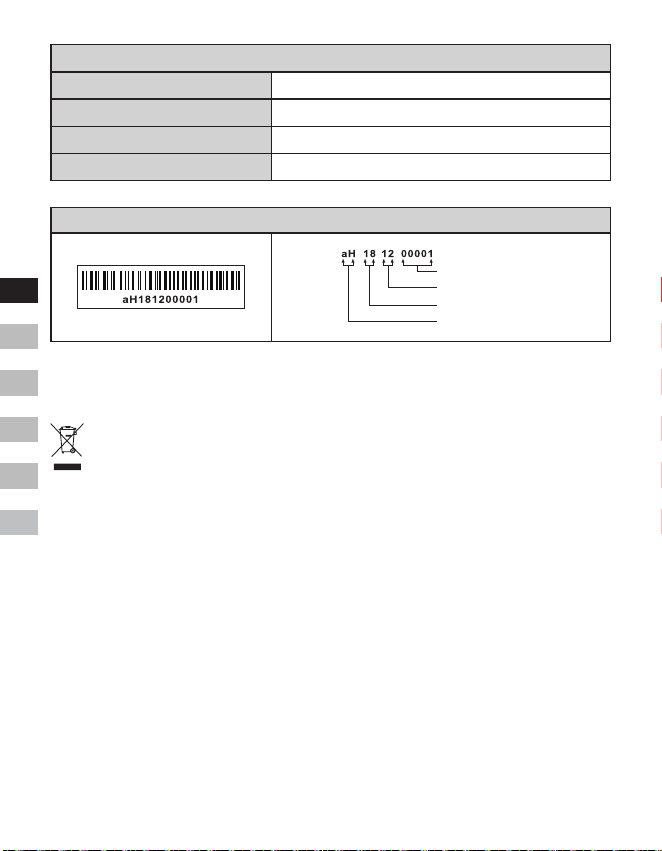
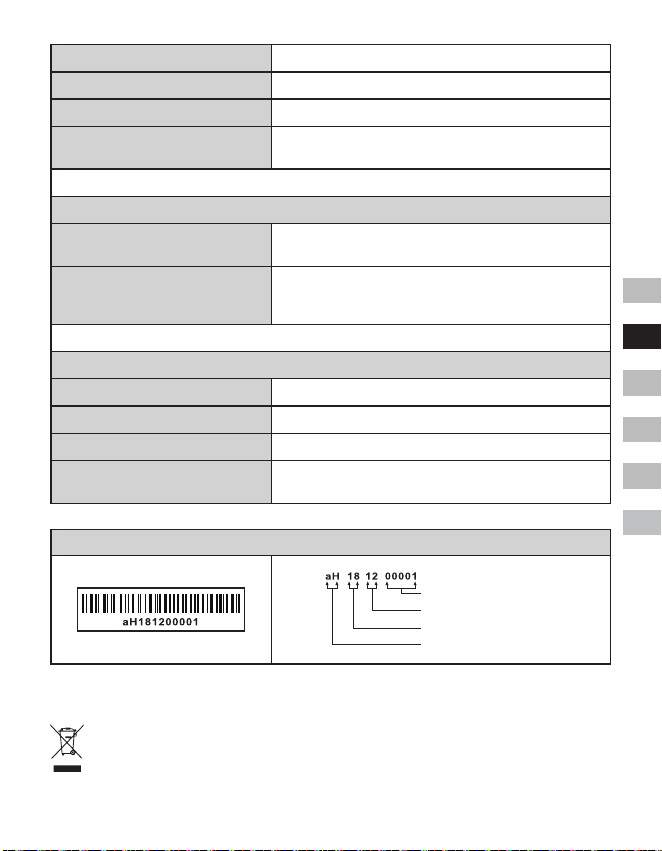
Thebarcodelabelontheproductisdenedasbelow:
Serial number
Production month
Production year
Product code
Sangean reserves the right to amend the specications without notice.
RECYCLING This product bears the selective sorting symbol for Waste electrical and
electronic equipment (WEEE). This means that this product must be handled pursuant
to European directive 2012/19/EU in order to be recycled or dismantled to minimize its
impact on the environment.
13
GB
F
E
NL
D
I
La marque et les logos Bluetooth
®
sont des
marques déposées appartenant à Bluetooth
SIG, Inc. et toute utilisation de ces marques
par SANGEAN ELECTRONICS INC. est
soumise à une licence.
Instructions importantes
concernant la sécurité
1. N’installez pas à proximité de sources
de chaleur telles que radiateurs,
registre de chaleur, poêle ou autres
appareils (y compris les amplificateurs)
qui produisent de la chaleur.
2. N’utilisez que les extensions /
accessoires spécifiés par le fabricant.
3. Pour réduire le risque d’incendie ou
de choc électrique, n’exposez pas cet
appareil à la pluie ou l’humidité.
4. L’appareil ne doit pas être exposé aux
égouttements ou aux éclaboussures
et aucun objet rempli de liquide ne doit
être placé dessus.
5. Les piles ne doivent pas être exposées
à des chaleurs excessives telles que la
lumière du soleil, le feu ou autres.
6. Tout changement ou modification non
approuvée expressément par la partie
responsable de la conformité peut
entraîner l’annulation de l’autorisation
pour l’utilisateur d’utiliser l’équipement
et la garantie.
7. ATTENTION: Risque d’explosion en
cas de remplacement des piles par des
piles de type incorrect.
8. N’exposez pas la radio à l’eau, la
vapeur ou au sable.
9. Ne laissez pas votre
radio dans un endroit où
une chaleur excessive
pourrait causer des dommages.
10. Pour des mesures de sécurité plus
importantes, les informations suivantes
doivent être incluses dans la mesure du
possible:
● les distances minimales autour
de l’appareil pour une ventilation
efficace;
● la ventilation ne doivent pas être
entravée en couvrant les ouvertures
de ventilation avec des articles tels
que des journaux, des nappes, des
rideaux, etc.;
● aucune source de flamme nue, telle
qu’une bougie allumée, ne doit être
placée sur l’appareil;
● une attention toute particulière
doit être porter sur les aspects
environnementaux de l’élimination
des batteries;
● I’utilisation d’appareils dans des
climats tropicaux et / ou modérés.
11. ATTENTION: Danger risque
d’explosion si la batterie est remplacée
incorrectement. Remplacez uniquement
avec le même type ou un type
équivalent.
12. Si un appareil est fourni avec une
batterie au lithium remplaçable, ce qui
suit s’appliquera:
● si la batterie est destinée à être
remplacée par l’utilisateur, il doit
comporter un avertissement à
proximité de la batterie ou dans les
instructions d’utilisation et d’entretien;
● si la batterie n’est pas destinée à
être remplacée par l’utilisateur, il doit
y avoir un avertissement à proximité
de la batterie ou dans les instructions
d’entretien.
Avertissement:
Veuillez ne pas essayer de retirer ou de
remplacer la batterie au lithium intégrée.
Les remplacements non autorisés peuvent
également annuler la garantie.
14
GB
F
E
NL
D
I
Contrôles
1
Haut-parleur
2
Indicateur de charge de la batterie
3
Icône LED Bluetooth
4
Écran OLED
5
Bouton Volume Haut (Augmenter le volume)
6
Bouton Volume Bas (Diminuer le volume)
7
Molette de réglage (Tuning) / Bouton
Sélectionner / Info / Menu
8
Bouton Mode
9
Bouton d’Alimentation
10
Prise de charge USB DC IN 5V / 1A
11
Prise d’entrée auxiliaire Aux In
12
Fiche de l’antenne externe
13
Haut-parleur passif
Recharger la radio
La radio fonctionne sur une batterie Lithium-
ion intégrée qui peut être rechargée à l’aide
du port de charge USB ou d’un adaptateur
USB (non fourni) ayant une puissance
nominale de 5V CC et de 1000mA. La batterie
doit être rechargée lorsque vous observez les
signes suivants: une puissance réduite, une
distorsion, des bruits de « bégaiement » ou
un indicateur de batterie achant une charge
faible
.
Avant d’utiliser la radio pour la première fois,
chargez complètement la batterie.
REMARQUE:
Vous pouvez commencer à utiliser la radio
pendant la charge. Sachez que dans ce
cas, vous devez vous assurer que la source
d’alimentation USB peut fournir 5V et 1A de
courant électrique. Autrement, cela pourrait
endommager la source d’alimentation USB.
● Connectez la prise micro USB (fournie) au
port de charge micro USB situé à l’arrière
de l’appareil.
● Connectez la prise USB standard (fourni)
du câble sur un port USB d’alimentation
d’un ordinateur ou d’un autre périphérique
de charge USB. Lorsque la batterie est en
cours de charge, le voyant de la batterie
sera rouge fixe. Une fois la batterie
complètement chargée, le voyant rouge
de charge de la batterie s’éteindra.
Fonctionnement de votre
radio - DAB
1. Insérez la fiche de l’antenne externe
(fournie) dans la prise d’antenne externe
située à l’arrière de votre radio.
2. Appuyez sur le bouton d’Alimentation
pour allumer la radio.
3. Si c’est la première fois que vous utilisez
la radio, une recherche rapide des
canaux DAB de bande III sera exécutée.
Si la radio a été utilisée avant, la dernière
station écoutée sera sélectionnée.
4. Durant le processus de recherche, comme
les nouvelles stations seront détectées, le
compteur des stations augmentera et les
stations seront ajoutées à la liste stockée
dans la radio. Le graphique à barres
indique la progression du scan.
5. Lorsque le scan est complet, la première
station sera sélectionnée (en ordre
alphanumérique 0…9…A…Z…).
6. Si la liste des stations est encore vide
après le scan, l’écran affichera « No
service » (Aucun service). Si aucun signal
n’est détecté, il peut être nécessaire de
repositionner votre radio à un endroit
offrant une meilleure réception.
Choix d’une station - DAB
1. Appuyez sur le bouton d’Alimentation
pour allumer votre radio.
15
GB
F
E
NL
D
I
2. Appuyez sur le Bouton Mode pour choisir
le mode radio DAB.
3. Tournez la molette de réglage (Tuning)
pour parcourir la liste des stations
disponibles.
4. Appuyez sur le Bouton Sélectionner pour
choisir et syntoniser la station désirée.
5. Réglez les boutons Volume Haut ou
Bas au niveau désiré. Pour accéder à
la liste des stations à l’aide du menu
DAB, appuyez sur le bouton Menu et
maintenez-le enfoncé, puis tournez la
molette de réglage (Tuning) pour choisir «
Station list » (Liste des stations). Appuyez
ensuite sur le bouton Sélectionner pour
valider.
REMARQUE:
Si après la sélection d’une station, la station
ne syntonise pas, il peut être nécessaire de
repositionner votre radio dans une position
donnant une meilleure réception.
Services secondaires - DAB
Certaines stations de radio DAB peuvent
être associées à une ou plusieurs stations
secondaires. Si une station dispose d’une
station secondaire, celle-ci apparaît dans
la liste des noms de station sous la station
principale (ou primaire) lors que vous
tournez la molette de réglage Tuning. Pour
écouter un service secondaire, tournez la
molette de réglage Tuning pour accéder à
la station choisie et appuyez sur le bouton
Sélectionner pour syntoniser la station.
Trouver de nouvelles
stations - DAB
Avec le temps, de nouvelles stations peuvent
devenir disponibles ou vous avez peut-être
déplacé votre radio dans une autre région
du pays. Pour trouver de nouvelles stations,
procédez comme suit:
1. Une fois en mode DAB, appuyez sur le
bouton Menu et maintenez-le enfoncé
pour entrer dans le mode DAB.
2. Tournez sur la molette de réglage (Tuning)
pour sélectionner « Full Scan » (Scan
complète).
3. Appuyez sur le bouton Sélectionner pour
lancer le scan. Votre radio effectuera un
scan des fréquences DAB de la Bande
III.
Au fur et à mesure que de nouvelles
stations de radio sont détectées, le
compteur de stations affiché augmente
et les stations de radio sont ajoutées à la
liste stockée dans la radio.
Syntonisation manuel - DAB
La syntonisation manuelle vous permet de
syntoniser directement les diérents canaux
DAB de la Bande III (5A à 13F).
1. En mode DAB, appuyez sur le bouton
Menu et maintenez-le enfoncé pour
accéder au menu DAB.
2. Tournez la molette de réglage Tuning
pour sélectionner « Syntonisation
manuelle ».
3. Appuyez sur le bouton Sélectionner
pour confirmer l’option de syntonisation
manuelle.
4. Tournez la molette de réglage Tuning
pour choisir le canal DAB requis.
5. Appuyez sur le bouton Sélectionner
pour que la radio syntonise vers le canal
choisi.
Organisation des stations -
DAB
Votre radio dispose de 3 paramètres
d’organisation / d’ordre des stations
parmi lesquels vous pouvez choisir.
L’organisation peut être dénie de manière
16
GB
F
E
NL
D
I
alphanumérique, multiplexe / ensemble et
active.
1. En mode DAB, maintenez enfoncé le
bouton Menu pour accéder au menu
DAB.
2. Tournez la molette de réglage Tuning
jusqu’à ce que « Organisation des
stations » (Station Order) apparaisse sur
l’écran.
3. Appuyez sur le bouton Sélectionner pour
entrer dans le menu.
4. Tournez la molette de réglage Tuning
jusqu’à ce que le réglage requis de
l’organisation des stations s’affiche.
Choisissez entre alphanumérique, active
et ensemble.
« Alphanumérique »- trie la liste des
stations alpha-numériquement 0...9...A....
Z.
« Ensemble » - organise la liste des
stations par multiplexe DAB.
« Active » - affiche uniquement les
stations pour lesquelles un signal peut
être trouvé.
5. Appuyez sur le bouton Sélectionner pour
confirmer le paramètre d’organisation
souhaité.
Paramètres du compresseur
audio (Dynamic Range
Control) - DAB
Le contrôle du compresseur audio
(également appelé DRC) permet d’obtenir
des sons plus propre et agréables à écouter,
spécialement quand vous utilisez votre radio
dans un environnement bruyant en réduisant
la plage dynamique du signal audio.
1. En mode DAB, appuyez sur le bouton
Menu et maintenez-le enfoncé pour
accéder au menu DAB.
2. Tournez la molette de réglage Tuning
pour sélectionner « DRC Value ».
3. Appuyez sur le bouton Sélectionner pour
entrer dans le mode de réglage DRC.
4. Tournez la Molette de réglage (Tuning)
pour sélectionner le paramètre DRC
de votre choix (la valeur par défaut est
désactivée / Off).
Off (désactivé): Le paramètre DRC est
désactivé, la diffusion par DRC sera
ignorée.
Low (niveau bas): Le niveau de
compression DRC est xé au 1 / 2 de ce
qui est envoyé par la société de diusion.
High (niveau élévé): Le niveau de
compression DRC est fixé au même
niveau que celui envoyé par la société de
diusion.
5. Appuyez sur le bouton Sélectionner pour
confirmer le paramètre.
REMARQUE:
Tous les programmes DAB n’utilisent pas la
fonction DRC. Si le programme ne propose
pas d’information DRC, alors le paramètre
DRC de la radio n’aura pas d’eet.
Prune stations (Rafraîchir
la liste des stations) - DAB
Si vous partez dans un endroit du pays
différent, certaines des stations que vous
aviez répertoriées risquent de ne plus
être disponibles. Par ailleurs, de temps
en temps, certains services DAB peuvent
cesser de diffuser ou peuvent changer
de d’emplacement ou de fréquence. Les
stations qui ne peuvent être trouvées ou qui
n’ont pas été reçus pendant un très long
moment sont indiquées dans la liste des
stations avec un point d’interrogation. La
fonction d’élimination des stations effacera
les stations DAB marquées de votre liste de
stations.

17
GB
F
E
NL
D
I
1. Une fois en mode DAB, appuyez sur le
bouton Menu et maintenez-le enfoncé
pour entrer dans le mode DAB.
2. Tournez la Molette de réglage (Tuning)
jusqu’à ce que « Prune Station » (Effacer
les stations inactives) s’affiche sur l’écran.
3. Appuyez sur le bouton Sélectionner pour
entrer dans le mode de réglage.
4. Pour activer la fonction « Prune » tournez
la Molette de réglage pour mettre « Yes »
(Oui) en surbrillance. Appuyez sur le
bouton Sélectionner pour confirmer votre
choix. Si vous ne souhaitez pas rafraichir
la liste des stations, choisissez « No »
(Non) ou « Back » (Retour) pour revenir à
l’affichage du menu précédent. Appuyez
sur le bouton Sélectionner pour confirmer
votre choix.
REMARQUE:
Si vous avez déplacé votre radio dans
une région différente du pays vous devrez
également exécuter une recherche de
nouvelles stations (veuillez pour cela
consulter la section « Recherche de
nouvelles stations » dans la section
précédente).
Fonctionnement de votre
radio - FM
1. Insérez la fiche de l’antenne externe
(fournie) dans la prise d’antenne externe
située à l’arrière de votre radio.
2. Appuyez sur le bouton d’Alimentation
pour allumer la radio.
3. Appuyez sur le bouton Mode pour
sélectionner la bande FM.
4. Appuyez sur le bouton Menu et
maintenez-le enfoncé pour accéder au
menu FM.
5. Tournez la molette de réglage (Tuning)
pour sélectionner « SCAN ». Appuyez
sur le bouton Sélectionner pour que
votre radio effectue une recherche à
partir des valeurs de basses fréquences
aux valeurs de hautes fréquences.
Lorsqu’elle détecte une station
suffisamment puissante, la fréquence
clignotera pendant 6 secondes sur l’écran
et la radio continuera le scan après que
ces 6 secondes soient écoulées. Pour
syntoniser la station ou arrêter le scan,
appuyez sur le bouton Sélectionner.
6. L’écran affichera la fréquence du signal
trouvé. Si le signal est suffisamment fort
et que des données RDS sont présentes,
la radio affichera le nom de la station.
7. Lorsque la fin de la bande de fréquence
est atteinte, votre radio recommencera à
syntoniser à partir de l’extrémité opposée
de la bande de fréquences.
8. Appuyez sur le bouton de réglage Volume
Haut / Bas pour régler le niveau sonore
selon vos besoins.
9. Pour éteindre votre radio, appuyez sur le
bouton d’Alimentation.
Syntonisation manuelle - FM
1. Tournez la Molette de réglage (Tuning)
pour régler une station.
2. Réglez le Volume à votre convenance
avec le bouton Volume Haut / Bas.
Réglage de sensibilité du
scan - FM
Votre radio est équipée d’une option
« local / distant » pour la fonction de scan
automatique. En réglant la radio sur l’option
de recherche « Local », les signaux plus
faibles des émetteurs distants peuvent être
ignorés par la radio, rendant les signaux plus
forts plus faciles à trouver.
1. En mode FM, appuyez sur le bouton
Menu et maintenez-le enfoncé pour que
l’écran affiche le menu FM.
18
GB
F
E
NL
D
I
2. Tournez la Molette de réglage (Tuning)
jusqu’à ce que « FM Scan zone » (Zone
de scan FM) apparaisse sur l’écran.
Appuyez sur le bouton Sélectionner pour
entrer dans le menu de réglage du mode
de sensibilité du scan. Le paramètre
actuel sera indiqué avec un astérisque.
3. Tournez la Molette de réglage (Tuning)
pour changer entre les options
« Local » (stations avec signal puissant
uniquement) et « Distant » (Toutes les
stations). L’option « Distant » permettra à
la radio de trouver des signaux de faible
puissance lors des scans.
4. Appuyez sur le bouton Sélectionner pour
confirmer votre sélection. Le paramètre
« Local » ou « Distant » est sauvegardé
dans la radio et reste activé jusqu’à ce
qu’il soit changé ou que le système soit
réinitialisé.
Présélectionner des stations
en modes - DAB et FM
Il y a 10 présélections de mémoire pour
la bande DAB et pour la bande FM. La
procédure pour régler des présélections et
les utiliser pour régler des stations est la
même pour les modes FM et DAB, et est
décrite ci-dessous.
1. Appuyez sur le bouton d’Alimentation
pour allumer la radio.
2. Syntonisez la station de radio souhaitée
comme décrit précédemment.
3. Appuyez sur le bouton Menu et
maintenez-le enfoncé. Tournez ensuite
la molette de réglage (Tuning) pour
sélectionner « Favorite Station » (Stations
favorites). Appuyez sur le bouton
Sélectionner pour entrer dans le menu.
4. Tournez la molette de réglage (Tuning)
pour sélectionner « Preset Station »
(Prérégler les stations). Appuyez sur le
bouton Sélectionner pour valider.
5. Tournez la molette de réglage (Tuning)
pour faire défiler la liste des préréglages
jusqu’à ce que vous atteigniez un
préréglage inutilisé ou un préréglage que
vous souhaitez modifier.
6. Appuyez sur le bouton Sélectionner
pour enregistrer le préréglage. Par
exemple, «Preset 2 saved» (Préréglage 2
sauvegardée) sera affiché à l'écran.
Répétez cette procédure si nécessaire
pour les préréglages restants. Les
stations déjà stockées dans les
préréglages peuvent être écrasées en
suivant la procédure ci-dessus.
REMARQUE:
Les stations de radio préréglées sont
conservées en mémoire lorsque la radio est
éteinte.
Rappeler une station
préréglée dans les modes
DAB et FM
1. Appuyez sur le bouton d’Alimentation
pour allumer votre radio.
2. Sélectionnez le mode de fonctionnement
souhaité à l’aide du bouton Mode.
3. Appuyez sur le bouton Menu et
maintenez-le enfoncé. Tournez ensuite
la molette de réglage (Tuning) pour
sélectionner « Favorite Station » (Stations
Favorites). Appuyez sur le bouton
Sélectionner pour entrer dans le menu.
4. Tournez la molette de réglage (Tuning)
pour sélectionner « Recall Station »
(Rappeler un préréglage). Appuyez sur le
bouton Sélectionner pour valider.
5. Tournez la molette de réglage (Tuning)
pour sélectionner la station préréglée
souhaitée. Appuyez sur le bouton
Sélectionner pour valider. Votre radio
syntonisera alors la station enregistrée
dans la mémoire du préréglage
19
GB
F
E
NL
D
I
sélectionnée. Le numéro de préréglage
choisi est également affiché à l'écran, par
ex. « P2 ».
Options d’affichage des
modes - DAB / FM / Bluetooth
Votre radio dispose d’une gamme d'options
d'achage en mode DAB, FM et Bluetooth:
● Appuyez sur le bouton Info pour parcourir
les différentes options.
Options d’affichage du mode
DAB
Votre radio peut afficher les informations
suivantes en mode DAB:
Texte délant, Type de programme, Nom du
multiplexe, Heure / Date, Fréquence, Débit
binaire et Type audio, les informations de
codage, texte DL Plus et l’intensité du signal.
Pour le texte DL Plus, certaines stations
peuvent fournir d’autres informations liées
au programme pour l’affichage en plus du
texte normal. Si aucun n’est disponible, un
message « No Info » (Aucune information)
s’ache.
Options d’affichage en mode FM
En mode FM, votre radio peut utiliser le
système RDS (Radio Data System) pour
afficher le nom de la station de radio et
une info texte supplémentaire fournis par la
société de radiodiffusion lorsque le signal
radio est susamment clair.
Votre radio peut afficher les informations
suivantes en mode FM:
Radiotexte, Type de programme, Heure /
Date, Fréquence.
Options d’affichage en mode
Bluetooth
Si votre appareil connecté est en mesure
de fournir des informations à partir de la
piste en cours de lecture, votre radio peut
acher les informations suivantes en mode
Bluetooth:
Nom de l’appareil, Titre, Artiste, Album.
Veuillez noter que la disponibilité des
informations dépend spécifiquement du
format du support.
Écouter de la musique via
le streaming Bluetooth
Vous devez coupler votre périphérique
Bluetooth avec votre DDR-7 avant de
pouvoir effectuer une liaison automatique
pour lire / diuser de la musique Bluetooth
via votre DDR-7. Le couplage crée une «
liaison » an que les deux appareils puissent
se reconnaître.
Coupler et lire votre appareil
Bluetooth pour la première fois
1. Avec votre radio allumée, appuyez sur
le bouton Mode pour sélectionner la
fonction Bluetooth. « Bluetooth Pairing »
(Couplage Bluetooth) sera affiché à
l’écran. L’icône LED Bluetooth sur l’écran
de la radio clignotera rapidement en bleu
indiquant que la radio est maintenant
détectable.
2. Activez le Bluetooth sur votre appareil
en fonction du mode d’emploi de
l’appareil pour établir un lien avec la
radio. Localisez la liste des périphériques
Bluetooth et sélectionnez le périphérique
nommé « DDR-7 » (avec certains
smartphones équipés de versions
antérieures au périphérique Bluetooth
BT2.1, vous devrez peut-être entrer le
code d’accès « 0000 »).
3. Une fois connectée, une notification
sonore se fera entendre et le nom
de l’appareil connecté sera affiché à
l’écran. L’icône LED Bluetooth s’arrêtera
de clignoter pour rester allumé. Vous
20
GB
F
E
NL
D
I
pouvez simplement sélectionner et lire la
musique que vous voulez depuis votre
appareil source.
4. La molette de contrôle du volume peut
être réglée à partir de votre appareil
source ou directement à partir de la
radio. Utilisez les commandes de votre
périphérique compatible Bluetooth ou
de la radio pour lire / mettre en pause et
parcourir les pistes.
REMARQUE:
● Si deux appareils Bluetooth sont
couplés pour la première fois, les deux
rechercheront votre radio. Elle montrera
sa disponibilité sur les deux appareils.
Cependant, si un appareil a été couplé
avant à cet appareil, l’autre appareil
Bluetooth ne le trouvera pas dans sa liste.
● Si vous sortez votre appareil source
hors de la portée effective, la connexion
sera temporairement interrompue avec
votre radio. Votre radio se reconnectera
automatiquement si l’appareil source est
ramené à portée. Sachez que pendant
la période de déconnexion, aucun autre
périphérique Bluetooth ne peut être
couplé ou connecté à votre radio.
● Si « DDR-7 » s’affiche dans votre liste
d’appareils Bluetooth mais que votre
appareil ne peut pas s’y connecter,
veuillez supprimer l’élément de votre liste
et couplez l’appareil à la radio en suivant
les étapes décrites précédemment.
● La portée de fonctionnement effective
entre le système et l’appareil couplé
est d’environ 10 mètres (30 pieds). Tout
obstacle entre le système et l’appareil
peut réduire la portée de fonctionnement.
● Les performances de la connectivité
Bluetooth peuvent varier en fonction
des périphériques Bluetooth connectés.
Veuillez-vous référer aux capacités
Bluetooth de votre appareil avant de
vous connecter à votre radio. Toutes les
fonctionnalités peuvent ne pas être prises
en charge sur certains appareils Bluetooth
couplés.
● Avec certains téléphones portables,
passer ou recevoir des appels, des
messages texte, des e-mails ou toute
autre activité sans lien avec le streaming
audio peut couper le streaming audio
Bluetooth ou même vous déconnecter
temporairement de votre appareil. Un
tel comportement est une fonction de
l’appareil connecté et n’indique pas une
erreur avec votre DDR-7.
Lecture de fichiers audio en
mode Bluetooth
Lorsque vous avez connecté avec succès
votre radio avec l’appareil source Bluetooth
choisi, vous pouvez commencer à écouter
votre musique à l’aide des commandes de
votre appareil Bluetooth connecté.
1. Une fois que la lecture a commencé,
réglez le volume sur le réglage requis à
l’aide de la molette de contrôle du volume
de votre radio ou de votre appareil source
Bluetooth.
2. Utilisez les commandes de votre
périphérique source Bluetooth pour lire /
mettre en pause et parcourir les pistes.
Vous pouvez aussi utiliser la molette de
réglage (Tuning) sur votre radio pour
contrôler la lecture.
Tournez la molette de réglage (Tuning)
dans le sens des aiguilles d’une montre
pour passer à la lecture de la piste
suivante
Tournez la molette de contrôle (Tuning)
dans le sens contraire des aiguilles d’une
montre pour passer à la lecture de la
piste précédente.
REMARQUE:
Toutes les applications ou tous les
périphériques du lecteur ne peuvent pas
répondre à toutes ces commandes.
21
GB
F
E
NL
D
I
Reconnexion d’un périphérique
source Bluetooth précédemment
couplé
Le DDR-7 peut mémoriser jusqu’à 8
ensembles de périphériques sources
Bluetooth couplés. Lorsque la mémoire
dépasse cette quantité, le premier
périphérique couplé sera écrasé de
l’appareil.
Si votre appareil source Bluetooth est déjà
associé au DDR-7, l’appareil mémorisera
votre appareil source Bluetooth et tentera
de se reconnecter à l’appareil Bluetooth qui
s’est connecté pour la dernière fois. Si le
dernier appareil source Bluetooth connecté
n’est pas disponible, le DDR-7 tentera de
se connecter au deuxième appareil source
Bluetooth.
Déconnecter votre appareil
Bluetooth
1. Appuyez et maintenez enfoncé le
bouton Menu pour entrer dans le menu
Bluettooth.
2. Tournez la molette de réglage (Tuning)
pour sélectionner « Cancel Pairing »
(Déconnecter l’appareil). Puis appuyez
sur le bouton Sélectionner pour afficher
le message de confirmation.
3. Pour déconnecter l’appareil Bluetooth,
tournez la molette de réglage (Tuning)
pour sélectionner « Yes » (Oui)
et appuyez ensuite sur le bouton
Sélectionner pour valider le choix. Une
notification sonore se fera entendre
et l’icône LED Bluetooth sur la radio
clignotera rapidement indiquant que la
radio est détectable à nouveau pour le
couplage.
Si vous choisissez « no » (Non) ou
« Back » (Retour), la radio reviendra un
menu précédant. Appuyez alors sur le
bouton Sélectionner pour conrmer votre
choix.
4. Vous pouvez aussi appuyez sur le bouton
Mode pour sélectionner tous les modes
sauf le mode Bluetooth ou désactiver le
Bluetooth sur l’appareil connecté pour
supprimer la connexion.
Supprimer la liste des appareils
Bluetooth couplés
1. Appuyez et maintenez enfoncé le bouton
menu pour entrer dans le menu Bluetooth.
2. Tournez la molette de réglage (Tuning)
pour sélectionner « Clear pairing »
(Supprimez la liste des appareils
couplés). Ensuite appuyez sur le bouton
Sélectionner pour valider votre choix.
3. Pour supprimez de la mémoire tous les
appareils couplés, tournez la molette
de réglage (Tuning) pour sélectionner
« Yes » (Oui) et appuyez ensuite sur le
bouton Sélectionner pour valider. Si vous
choisissez « No » (Non) ou « Back »
(Retour), la radio reviendra au menu
précédant. Appuyez alors sur le bouton
Sélectionner pour confirmer votre choix.
Minuterie de mise en veille
(Sommeil)
Votre radio peut être réglée pour s'éteindre
après une durée prédéfinie. Le réglage de
la mise en veille / fonction sommeil peut être
réglé entre 15 et 120 minutes.
1. Avec votre radio allumée, appuyez et
maintenez le bouton Menu enfoncé pour
accéder au menu du mode actuel.
2. Tournez la molette de réglage (Tuning)
pour sélectionner «System Setup»
(Paramètres système). Appuyez alors sur
le bouton Sélectionner pour accéder au
menu des paramètres du système.
3. Tournez la molette de réglage (Tuning)
pour sélectionner « Sleep » (Sommeil).
Appuyez sur le bouton Sélectionner pour
entrer dans l’option.
22
GB
F
E
NL
D
I
4. Tournez la molette de réglage (Tuning)
pour sélectionner le temps de sommeil
requis. La minuterie de sommeil peut
être réglée entre 15 et 120 minutes ou
sur «Sleep Off » (Fonction sommeil
désactivée). Appuyez sur le bouton
Select pour confirmer le réglage.
5. L’icône de minuterie de sommeil active
est affichée à l’écran lorsque vous
utilisez tout paramètre de sommeil
(excepté « Sleep off ») et sera présente
sur les écrans de lecture. Pour afficher
le temps restant d’une minuterie de
sommeil active, appuyez sur le bouton
Menu et maintenez-le enfoncé, puis
tournez la molette de réglage (Tuning)
pour sélectionner «System Setup »
(Paramètres système). Appuyez sur
le bouton Sélectionner pour valider et
tournez la molette de réglage (Tuning)
pour sélectionner «Sleep» (Sommeil).
Appuyez sur le bouton Sélectionner pour
afficher le temps restant d’une minuterie
de sommeil active à l’écran.
6. Pour annuler la minuterie de sommeil
avant que le temps prédéfini ne soit
écoulé et pour éteindre la radio, appuyez
sur le bouton d’Alimentation pour éteindre
la radio manuellement.
Pour annuler la minuterie de sommeil
et laisser la radio continuer la lecture,
revenez aux réglages de la minuterie
de sommeil (étapes 1 à 4 ci-dessus)
et sélectionnez l’option «Sleep off»
(Fonction sommeil désactivée) à l’étape
4. Appuyez sur le bouton Sélectionner
pour conrmer le choix.
Réglage du contraste
Le contraste de l’achage peut être réglé.
1. Avec votre radio allumée, appuyez et
maintenez le bouton Menu enfoncé pour
accéder au menu du mode actuel.
2. Tournez la molette de réglage (Tuning)
pour sélectionner «System Setup»
(Paramètres système). Appuyez sur le
bouton Sélectionner pour accéder au
menu des paramètres du système.
3. Tournez la molette de réglage (Tuning)
pour sélectionner «Contrast» (Contraste).
Appuyez sur le bouton Sélectionner pour
entrer dans le menu.
4. Tournez la molette de réglage (Tuning)
pour régler le contraste au niveau voulu.
L’indication du niveau de contraste
à l’écran changera en même temps.
Lorsque vous trouvez le réglage
qui donne la meilleure lisibilité pour
l’emplacement dans lequel la radio
est utilisée, appuyez sur le bouton
Sélectionner pour confirmer le réglage.
Mise à jour automatique de
l’horloge
Votre radio se mettra automatiquement à
jour chaque fois que vous allumez la radio
et syntonisez une station de radio DAB+ ou
une station FM diffusant l’heure via RDS.
L’affichage de l’heure clignotera 00:00
pendant quelques secondes puis affichera
l’heure de l’horloge lorsqu’il reçoit le signal
de l’heure DAB+ ou FM-RDS. Vous pouvez
spécifier que la radio règle son horloge à
partir d’émissions radio DAB ou FM.
1. Avec votre radio allumée, appuyez et
maintenez le bouton Menu enfoncé pour
accéder au menu du mode actuel.
2. Tournez la molette de réglage (Tuning)
pour sélectionner «System Setup»
(Paramètres système). Appuyez sur le
bouton Sélectionner pour accéder au
menu des paramètres du système.
3. Tournez la molette de réglage (Tuning)
pour sélectionner «Time update» (Mise à
jour de l’horloge). Appuyez sur le bouton
Sélectionner pour entrer dans le menu.

23
GB
F
E
NL
D
I
4. Tournez la molette de réglage (Tuning)
pour choisir une option de mise à jour
à partir du mode « DAB », « FM » ou
« Any » (qu’importe le mode) selon
les besoins. Appuyez sur le bouton
Sélectionner pour confirmer votre choix.
Sélection de la langue
Par défaut, votre radio affichera tous les
menus et messages en anglais. Vous
pouvez choisir votre langue préférée.
1. Avec la radio allumée, appuyez sur le
bouton Menu et maintenez-le enfoncé
pour accéder au menu du mode en
cours.
2. Tournez la molette de réglage Tuning
pour sélectionner « System Setup ».
Appuyez sur le bouton Sélectionner pour
accéder au menu des paramètres du
système.
3. Tournez la molette de réglage Tuning
pour sélectionner « Langue » et appuyez
sur le bouton Sélectionner pour accéder
au menu de réglage de la langue.
4. Tournez la molette de réglage Tuning
jusqu’à ce que la langue souhaitée
apparaisse sur l’écran. Appuyez sur le
bouton Sélectionner pour confirmer votre
choix. L’écran d’affichage passera à la
langue choisie.
Réinitialisation aux
paramètres d’usine
Si vous souhaitez réinitialiser complètement
votre radio à son état initial, vous pouvez
suivre cette procédure. En effectuant une
réinitialisation aux paramètres d’usine, tous
les paramètres entrés par l’utilisateur seront
eacés.
1. Avec votre radio allumée, maintenez le
bouton Menu enfoncé pour accéder au
menu du mode en cours.
2. Tournez la molette de réglage Tuning
pour sélectionner « System Setup ».
Appuyez sur le bouton Sélectionner pour
accéder au menu des paramètres du
système.
3. Tournez la molette de réglage Tuning
pour sélectionner « Réinitialisation aux
paramètres d’usine » et appuyez sur le
bouton Sélectionner pour entrer dans le
menu de réglage.
4. Tournez la molette de réglage Tuning
pour sélectionner entre « Oui » ou
« Non ». Si vous ne souhaitez pas
réinitialiser le système, sélectionnez
« Non » et appuyez sur le bouton
Sélectionner pour confirmer le réglage.
Ou choisissez « Back » (Retour) pour
revenir à l’affichage du menu précédent.
Appuyez sur le bouton Sélectionner pour
confirmer votre choix.
5. Sélectionnez «Yes » (Oui) et appuyez sur
le bouton Sélectionner pour réinitialiser
la radio. Cela effacera tous les réglages
enregistrés et les stations préréglées
en mémoire. Tous les paramètres
reviendront aux paramètres d'usine par
défaut.
Affichage de la version du
logiciel
L’affichage de la version du logiciel est
fourni à titre de référence et pour vous aider
avec le support client mais ne peut pas être
modié.
1. Avec la radio allumée, appuyez sur le
bouton Menu et maintenez-le enfoncé
pour accéder au menu du mode en
cours.
2. Tournez la molette de réglage Tuning
pour sélectionner « System Setup ».
Appuyez sur le bouton Sélectionner pour
accéder au menu des paramètres du
système.
24
GB
F
E
NL
D
I
3. Tournez la molette de réglage Tuning
jusqu’à ce que « SW Version» apparaisse
sur l’écran. Appuyez sur le bouton
Sélectionner pour faire afficher la version
du logicielle.
4. Appuyez sur bouton Menu pour quitter
l'affichage de la version du logiciel.
Prise d’entrée auxiliaire Aux
In
Une prise d’entrée auxiliaire stéréo de 3,5mm
est située sur le côté droit de votre radio
pour permettre l’arrivée d’un signal audio
dans l’unité depuis un appareil audio externe
comme un iPod, MP3 ou lecteur CD.
1. Avec votre radio allumée, appuyez sur le
bouton Mode jusqu’à ce que « Aux In »
s’affiche.
2. Connectez une source audio externe (par
exemple, iPod, MP3 ou lecteur CD) sur la
prise d’entrée auxiliaire (marquée « Aux
In »)
3. Réglez les paramètres du volume sur
votre iPod, lecteur MP3 ou CD pour
garantir un signal adéquat et réglez le
volume sur la radio pour une écoute
confortable.
Spécications
Couverture des fréquences
FM 87.5-108 MHz
DAB 174.928-239.200 MHz
Amplicateur
Puissance de sortie 1,6W 10%T.H.D. @ 100Hz
Aux In
Sensibilité d'entrée Entrée 400mV Sortie 1,6W @ 100Hz
Haut-parleur
Haut-parleur 40mm 4ohm x 1
Haut-parleur passif 74,2X36,7 mm
Bluetooth
Spécication du Bluetooth Bluetooth
®
Version 4.1
Prole supporté A2DP
25
GB
F
E
NL
D
I
CODEC Audio Bluetooth SBC
Puissance d’émission Spécication Classe 2 de puissance
Portée de fonctionnement 10mètres / 30pieds
Fréquence et puissance maximale
transmise
2402MHz ~ 2480MHz: 3.81dBm (Bluetooth EDR)
Batterie intégrée
Batterie
Batterie Lithium-ion rechargeable 18650 de 3,65V et
2600mAh
Autonomie de la batterie
sortie du haut-parleur de 10mW, l’autonomie de la
batterie est d'environ 20 heures pour 4 heures par jour
d’écoute à un niveau de volume normal.
Général
DC-IN prise micro USB de 5V et 1A
Tension de charge 500mA
Temps de charge environ 6,0 Heures
Plage de température de
fonctionnement
0°C à + 35°C
※
L’étiquetteducode-barressurleproduitestdéniecommesuit:
Numéro de série
Mois de la production
Année de la production
Code du produit
Sangean se réserve le droit de modier les spécications sans préavis.
RECYCLAGE Ce produit porte le symbole du tri sélectif pou r les Déchets
d’équipements élec t r iques et électroniques (DEEE). Cela signie que ce produit doit
être manipulé conformément à la directive européenne 2012/19/UE an d’être recyclé
ou démantelé an de minimiser son impact sur l’environnement.)
26
GB
F
E
NL
D
I
La marca de Bluetooth
®
y sus logotipos
son marcas registradas pertenecientes
a Bluetooth SIG, Inc. y el uso de dichas
marcas por SANGEANELECTRONICS INC.
Se realiza bajo licencia.
Importantes instrucciones
de seguridad
1. No instale cerca de fuentes de calor,
como radiadores, estufas, fuegos de
cocina u otros aparatos (incluyendo
amplificadores) que produzcan calor.
2. Utilice únicamente accesorios
especificados por el fabricante.
3. Para reducir el riesgo de incendio o
descarga eléctrica, no exponga este
aparato a la lluvia o la humedad.
4. El aparato no debe ser expuesto a
goteos ni salpicaduras y no deberán
colocarse objetos que contengan
líquidos sobre este.
5. Las pilas no deberán ser expuestas a
un calor excesivo, como el producido
por la luz solar, un fuego, etc.
6. Cualquier cambio o modificación no
aprobada expresamente por la parte
responsable podría anular la autoridad
del usuario para operar el equipo y su
garantía.
7. PRECAUCIÓN: Riesgo de explosión
si la batería se reemplaza por el tipo
incorrecto.
8. No deje que su radio quede expuesta a
agua, vapor o arena.
9. No deje su radio donde
haya calor excesivo que
pudiera causar daños.
10. Si fuera relevante para la seguridad, en
la medida de lo posible se debe incluir
la siguiente información:
● las distancias mínimas alrededor
del aparato para una ventilación
suficiente;
● la ventilación no debe impedirse
cubriendo las aperturas de ventilación
con elementos como periódicos,
manteles, cortinas, etc.;
● no se deben colocar llamas
descubiertas, como velas encendidas,
sobre el aparato;
● al eliminar la batería, se debe
prestar atención a los aspectos
medioambientales;
● el uso del aparato en climas tropicales
o moderados.
11. PRECAUCIÓN: Existe peligro de
explosión si la batería se reemplaza
incorrectamente. Reemplácela solo con
una del mismo tipo o equivalente.
12. Si el aparato se suministra con batería
de litio reemplazable, se aplica lo
siguiente:
● si la batería está pensada para ser
reemplazada por el usuario, deberá
haber una advertencia cerca de la
batería o tanto en las instrucciones
de uso como en las de servicio;
● si la batería no está pensada para
ser reemplazada por el usuario,
deberá haber una advertencia cerca
de la batería o en las instrucciones
de servicio.
Advertencia:
No intente retirar o reemplazar la batería
integrada de litio. Los reemplazos no
autorizados también pueden anular la garantía.
Controles
1
Altavoz
2
Indicador de carga de la batería
3
Indicador LED Bluetooth
27
GB
F
E
NL
D
I
4
Pantalla OLED
5
Botón de subir volumen
6
Botón de bajar volumen
7
Control de sintonización / botón de
seleccionar / información / menú
8
Botón de modo
9
Botón de encendido
10
Toma de carga USB de entrada de CC
5V / 1A
11
Toma de entrada auxiliar
12
Toma de antena externa
13
Altavoz pasivo
Carga de la radio
La radio funciona con una batería de iones
de litio integrada que puede cargarse usando
el puerto de carga USB o un adaptador de
corriente USB (no incluido) con una potencia
de salida nominal de CC de 5V y 1000mA.
Una potencia reducida, distorsión, cortes
en el sonido o que el indicador de batería
este bajo
son señales de que la batería
necesita ser cargada.
Antes de usar la radio por primera vez,
cargue completamente la batería.
NOTA:
Puede empezar a usar la radio mientras
la carga. En ese caso, asegúrese de que
la fuente de alimentación USB pueda
proporcionar 5V, 1A de corriente eléctrica.
De lo contrario, podría dañar la fuente de
alimentación USB.
● Conecte el enchufe microUSB (suministrado)
al puerto de carga microUSB en la parte
trasera de la unidad.
● Conecte el extremo USB estándar del
cable (suministrado) a un puerto USB
de alimentación en un ordenador u
otro dispositivo de carga USB. Cuando
la batería se esté cargando, la luz
indicadora de batería estará en color rojo.
Una vez que la batería se haya cargado
completamente, el indicador rojo de carga
de la batería se apagará.
Uso de la radio - DAB
1. Inserte el enchufe de la antena externa
(suministrado) en la toma de antena
externa ubicada en la parte trasera de la
radio.
2. Presione el botón de encendido para
encender la radio.
3. Si es la primera vez que se usa la radio,
se realizará un escaneo rápido de los
canales DAB de la banda III. Si la radio
se ha usado antes, se seleccionará la
última emisora usada.
4. Durante el escaneo, a medida que se
detecten nuevas emisoras, el contador
de emisoras aumentará y las emisoras se
añadirán a la lista guardada en la radio.
La barra indica el progreso del escaneo.
5. Cuando se complete el escaneo, la
primera emisora (en orden alfanumérico:
0…9…A.…Z) se seleccionará.
6. Si la lista de emisoras aún está vacía
tras el escaneo, la radio mostrará “No
Service” (sin servicio). Si no se encuentra
ninguna señal, puede que sea necesario
cambiar la posición de la radio a una en
la que tenga mejor recepción.
Seleccionar una emisora -
DAB
1. Presione el botón de encendido para
encender la radio.
2. Presione el botón de modo para
seleccionar el modo de radio DAB.
3. Gire el control de sintonización para
recorrer la lista de emisoras disponibles.
28
GB
F
E
NL
D
I
4. Presione el botón de seleccionar para
seleccionar y sintonizar la emisora
deseada.
5. Use los botones de subir / bajar volumen
para ajustar el volumen según desee.
Alternativamente, para acceder a la
lista de emisoras usando el menú DAB,
mantenga presionado el botón de menú
y a continuación, gire el control de
sintonización para seleccionar “Station
List” (lista de emisoras). Presione el
botón de seleccionar.
NOTA:
Si tras seleccionar una emisora, esta no se
sintoniza, puede ser necesario reubicar la
radio a una posición que proporcione mejor
recepción.
Servicios secundarios - DAB
Algunas emisoras de radio pueden tener
una o más transmisiones secundarias
asociadas a ellas. Si están disponibles,
aparecerán inmediatamente después de
la emisora principal a medida que gira el
control de sintonización. Para sintonizar el
servicio seleccionado, presione el botón de
seleccionar.
Buscar nuevas emisoras -
DAB
A medida que pasa el tiempo, puede que
haya nuevas emisoras disponibles o que
haya movido la radio a una parte diferente
del país. Si así fuera, puede que necesite
hacer que la radio busque nuevas emisoras.
1. Estando en el modo DAB, mantenga
presionado el botón de menú para entrar
al menú DAB.
2. Gire el control de sintonización para
seleccionar “Full Scan” (escaneo completo).
3. Presione el botón de seleccionar. La
radio realizará un escaneo de los canales
DAB de la banda III.
A medida que se encuentren nuevas
emisoras, el contador de emisoras en
pantalla se incrementará y las emisoras
se añadirán a la lista guardada en la radio.
Sintonización manual - DAB
La sintonización manual le permite sintonizar
directamente los diferentes canales DAB de
la banda III (de 5A a 13F).
1. Estando en modo DAB, mantenga
presionado el botón de menú para entrar
al menú DAB.
2. Gire el control de sintonización para
seleccionar “Manual tune” (sintonización
manual).
3. Presione el botón de seleccionar para
entrar a la opción de sintonización
manual.
4. Gire el control de sintonización para
seleccionar el canal DAB deseado.
5. Presione el botón de seleccionar
para que la radio sintonice el canal
seleccionado.
Conguracióndelordende
las emisoras - DAB
La radio tiene 3 conguraciones de orden de
las emisoras para elegir. Las conguraciones
son: alphanumeric (alfanumérica), ensemble
(conjunto) y valid (válida).
1. Estando en modo DAB, mantenga
presionado el botón de menú para entrar
al menú DAB.
2. Gire el control de sintonización para
seleccionar “Station order” (orden de las
emisoras).
3. Presione el botón de seleccionar para
entrar al modo de configuración del orden
de las emisoras.
29
GB
F
E
NL
D
I
4. Gire el control de sintonización para
seleccionar “alfanumérico”, “conjunto” o
“válida”.
“Alfanumérico” - ordena la lista
alfanuméricamente: 0...9...A....Z.
“Conjunto” - organiza las emisoras por el
multiplex DAB.
“Válida” - muestra solo aquellas emisoras
para las que se puede encontrar una
señal.
5. Presione el botón de seleccionar para
confirmar el orden de emisoras deseado.
Ajustes de control del rango
dinámico - DAB
El control de rango dinámico (también
conocido como DRC - Dynamic Range
Control) puede hacer que los sonidos más
silenciosos sean más fáciles de escuchar
cuando usa la radio en un entorno ruidoso
mediante la reducción del rango dinámico de
la señal de audio.
1. Estando en modo DAB, mantenga
presionado el botón de menú para entrar
al menú DAB.
2. Gire el control de sintonización para
seleccionar “DRC Value”.
3. Presione el botón de seleccionar para
entrar al modo de ajustes de DRC.
4. Gire el control de sintonización para
seleccionar el ajuste DRC deseado (por
defecto es “Off” (apagado)).
O (apagado) - El DRC está apagado. El
DRC de la transmisión se ignorará.
Low (bajo) - El nivel de DRC se estable a
1 / 2 de lo enviado por la emisora.
High (alto) - El DRC se establece tal y
como lo envía la emisora.
5. Presione el botón de seleccionar para
confirmar los ajustes.
NOTA:
No todas las retransmisiones de DAB
emplean la función DRC. Si la retransmisión
no proporciona información DRC, el ajuste
de DRC en la radio no tendrá ningún efecto.
Depurar emisoras - DAB
Si se desplaza a otra parte del país, algunas
de las emisoras que aparecían en la lista
podrían dejar de estar disponibles. Además,
de vez en cuando, algunos servicios DAB
podrían dejar de emitir, o podrían cambiar de
ubicación o de frecuencia. Las emisoras que
no puedan encontrarse, o las que no se han
recibido desde hace tiempo, se mostrarán
en la lista de emisoras con un signo de
interrogación. La función ‘Prune stations’
eliminará las emisoras DAB marcadas de su
lista de emisoras.
1. Estando en el modo DAB, mantenga
presionado el botón de menú para entrar
al menú DAB.
2. Gire el control de sintonización para
seleccionar “Prune Station” (depurar
emisora).
3. Presione el botón de seleccionar para
entrar al modo de ajustes.
4. Para activar la función de depuración de
emisoras, gire el control de sintonización
para seleccionar “Yes” (sí). Presione el
botón de seleccionar para confirmar los
ajustes. Si no desea depurar emisoras,
seleccionar “No” o “Back” (atrás) le
llevará a la pantalla del menú anterior.
Presione el botón de seleccionar para
confirmar su elección.
NOTA:
Si ha movido la radio a una parte diferente
del país, debería realizar una búsqueda de
nuevas emisoras (consulte la sección de
“Buscar nuevas emisoras”).

30
GB
F
E
NL
D
I
Uso de la radio - FM
1. Inserte el enchufe de la antena externa
(suministrado) en la toma de antena
externa ubicada en la parte trasera de la
radio.
2. Presione el botón de encendido para
encender la radio.
3. Presione el botón de modo para
seleccionar la banda FM.
4. Mantenga presionado el botón de menú
para entrar al menú de FM.
5. Gire el control de sintonización para
seleccionar “SCAN” (escanear). Presione
el botón de seleccionar para que la radio
busque desde las frecuencias bajas a
las altas. Cuando encuentre una emisora
lo suficientemente fuerte, la frecuencia
parpadeará durante 6 segundos en la
pantalla y la radio continuará escaneando
tras 6 segundos. Para sintonizar la
emisora o detener el escaneo, presione
el botón de seleccionar.
6. En pantalla se mostrará la frecuencia
de la señal encontrada. Si la señal es lo
suficientemente fuerte y hay información
RDS, la radio mostrará el nombre de la
emisora.
7. Cuando se llegue al final de una
frecuencia de banda, la radio recomenzará
la sintonización por el extremo opuesto de
la frecuencia de banda.
8. Presione los botones de subir / bajar
volumen para ajustar el volumen según
desee.
9. Para apagar la radio, presione el botón
de encendido.
Sintonización manual - FM
1. Estando en el modo FM, gire el control
de sintonización para sintonizar una
emisora.
2. Presione los botones de subir / bajar
volumen para ajustar el volumen según
desee.
Ajuste de la sensibilidad
del escaneo - FM
La radio incluye las opciones local / lejana
para la función de escaneo automático.
Estableciendo la radio a la opción de
escaneo “ocal”, las señales más débiles
de trasmisores más lejanos pueden ser
ignoradas por la radio, haciendo que la
señales más fuertes sean más fáciles de
encontrar.
1. Estando en el modo FM, mantenga
presionado el botón de menú para entrar
al menú FM.
2. Gire el control de sintonización para
seleccionar “FM Scan Zone” (zona de
escaneo FM). Presione el botón de
seleccionar para entrar al modo de ajuste
de la sensibilidad del escaneo. El ajuste
actual aparecerá con un asterisco.
3. Gire el control de sintonización para
seleccionar la opción “Local” (solo
emisoras con señal fuerte) o “Distant”
(lejana). La opción “Lejana” permitirá a
la radio encontrar señales más débiles al
escanear.
4. Presione el botón de seleccionar para
confirmar la selección. El ajuste se
guardará en la radio y permanecerá
vigente hasta que se cambie o se
restablezca el sistema.
Presintonizar emisoras en
los modos DAB y FM
Hay 10 presintonías para la radio DAB y
otras 10 para la radio FM. Se usan de la
misma forma en ambos modos.
1. Presione el botón de encendido para
encender la radio.

31
GB
F
E
NL
D
I
2. Sintonice la emisora de radio deseada tal
y como se ha descrito anteriormente.
3. Mantenga presionado el botón de
menú. A continuación, gire el control de
sintonización para seleccionar “Favorite
Station” (emisora favorita). Presione el
botón de seleccionar para entrar a los
ajustes.
4. Gire el control de sintonización para
seleccionar “Preset Station” (presintonizar
emisora). Presione el botón de
seleccionar.
5. Gire el control de sintonización para
recorrer la lista de presintonías hasta que
encuentre una presintonía vacía o una
que quiera cambiar.
6. Presione el botón de seleccionar para
guardar la presintonía. En pantalla por
ejemplo se mostrará el mensaje “Preset
2 saved” (presintonía 2 guardada).
Repita este procedimiento para las
presintonías restantes. Las emisoras que
ya están guardadas en las presintonías,
pueden sobrescribirse de este modo.
NOTA:
Las presintonías de emisoras de la radio se
conservan en memoria cuando se apaga la
radio.
Seleccionar una presintonía
en los modos DAB y FM
1. Presione el botón de encendido para
encender la radio.
2. Seleccione el modo de uso deseado
usando el botón de modo.
3. Mantenga presionado el botón de
menú. A continuación, gire el control de
sintonización para seleccionar “Favorite
Station” (emisora favorita). Presione el
botón de seleccionar para entrar a los
ajustes.
4. Gire el control de sintonización para
seleccionar “Recall Station” (seleccionar
emisora). Presione el botón de seleccionar.
5. Gire el control de sintonización para
seleccionar la presintonía de emisora
deseada. Presione el botón de
seleccionar. La radio sintonizará la
emisora guardada en la memoria de la
presintonía seleccionada. El número de
presintonía elegido también se mostrará
en pantalla, por ejemplo como “P2”.
Opciones de visualización -
DAB / FM / Bluetooth
La radio tiene diferentes opciones de
visualización cuando está en los modos
DAB, FM y Bluetooth:
● Presione el botón de información para
recorrer las diversas opciones.
Opciones de visualización DAB
En modo DAB, la radio puede mostrar lo
siguiente:
Texto deslizante, tipo de programa, nombre
del multiplex, hora y fecha, frecuencia,
tasa de bits y tipo de audio, información de
codificación, texto DL Plus, intensidad de
señal.
Para el texto DL Plus, algunas emisoras
pueden ofrecer otra información relacionada
con el programa para la pantalla, además
del texto normal. Si no hay nada disponible,
se mostrará el mensaje “no info” (no hay
información).
Opciones de visualización FM
En modo FM, la radio puede usar el RDS
(Radio Data System – Sistema de datos de
radio) para mostrar el nombre de la emisora
de radio y texto adicional, cuando sean
proporcionados por la emisora y cuando la
señal de radio sea lo sucientemente clara.
En modo FM la radio puede mostrar lo
siguiente:
32
GB
F
E
NL
D
I
Texto de la radio, tipo de programa, hora y
fecha, frecuencia.
Opciones de visualización
Bluetooth
Si el dispositivo conectado puede
proporcionar información de la pista que
está siendo reproducida, la radio puede
mostrar lo siguiente en modo Bluetooth:
Nombre del dispositivo, título, artista, álbum.
Tenga en cuenta que la disponibilidad de
la información depende del formato del
contenido multimedia especíco.
Escuchar música vía
retransmisión por Bluetooth
Necesitará emparejar su dispositivo
Bluetooth con su DDR-7 antes de poder
autoenlazarlos para reproducir / retransmitir
música por Bluetooth en su DDR-7. El
emparejamiento creará un ‘enlace’ de modo
que ambos dispositivos puedan reconocerse
mutuamente.
Vincular y reproducir el
dispositivo Bluetooth por
primera vez
1. Con la radio encendida, presione el botón
de modo para seleccionar la función
Bluetooth. “Bluetooth Pairing” (vinculación
Bluetooth) se mostrará en pantalla. El
indicador LED Bluetooth de la radio
parpadeará rápidamente en color azul
para mostrar que la radio es visible.
2. Active la función Bluetooth en su
dispositivo y enlácelo con la radio,
siguiendo lo especificado en su manual
de instrucciones. Acceda a la lista de
dispositivos Bluetooth y seleccione
el dispositivo “DDR-7” (en algunos
smartphones equipados con versiones
anteriores a BT2.1, podría necesitar
introducir la clave “0000”).
3. Una vez conectado, habrá un tono de
sonido de confirmación y el nombre
del dispositivo Bluetooth conectado
se mostrará en pantalla. El indicador
LED Bluetooth se volverá de color azul.
Ahora puede simplemente seleccionar
y reproducir cualquier música desde el
dispositivo fuente.
4. El volumen podrá ser ajustado desde su
dispositivo o directamente desde la radio.
Utilice los controles en su dispositivo con
funcionalidad Bluetooth o los de la radio
para reproducir / pausar y navegar por
pistas.
NOTA:
● Si 2 dispositivos Bluetooth se intentaran
emparejar por primera vez y ambos
buscaran su radio, ésta se mostrará
disponible en ambos dispositivos. Sin
embargo, si un dispositivo se enlazase
con esta unidad primero, entonces el otro
dispositivo Bluetooth no la encontrará en
el listado.
● Si moviera el dispositivo fuera del alcance
de Bluetooth, la conexión a su radio se
desconectará temporalmente. Su radio
se reconectará automáticamente si el
dispositivo al que estuviera conectado
volviese a estar dentro del radio de
alcance. Tenga en cuenta que durante
el periodo de desconexión, ningún otro
dispositivo Bluetooth podrá emparejarse o
enlazarse con su radio.
● Si se mostrase ‘DDR-7’ en su listado
de dispositivos Bluetooth pero su
dispositivo no pudiera conectarse a
él, elimine el elemento de la lista y
empareje el dispositivo de nuevo con
la radio siguiendo los pasos descritos
anteriormente.
● El radio de alcance operativo entre el
sistema y el dispositivo emparejado es de
aproximadamente 10 metros (30 pies).
Cualquier obstáculo entre el sistema y
el dispositivo podría reducir el rango de
alcance.
33
GB
F
E
NL
D
I
● El funcionamiento de la conexión
Bluetooth podría variar dependiendo de
los dispositivos Bluetooth conectados. Por
favor, consulte las capacidades Bluetooth
de su dispositivo antes de conectarlo
a su radio. Todas las funcionalidades
podrían no ser compatibles en algunos
dispositivos Bluetooth emparejados.
● En algunos teléfonos móviles, hacer
/ recibir llamadas, mensajes de texto,
correos electrónicos o cualquier
otra actividad no relacionada con la
retransmisión de audio podría silenciar
la retransmisión de audio por Bluetooth
o incluso desconectarse temporalmente
de su dispositivo. Este tipo de
comportamiento es una función del
dispositivo conectado y no indica ningún
fallo de funcionamiento de su DDR-7.
Reproducir ficheros de audio
en modo Bluetooth
Una vez haya conectado satisfactoriamente
su radio con el dispositivo Bluetooth
deseado, podrá comenzar a reproducir
música utilizando los controles de su
dispositivo Bluetooth.
1. Cuando la reproducción haya comenzado,
ajuste el volumen al nivel deseado
utilizando los controles de volumen de
su radio o bien, los de su dispositivo
Bluetooth.
2. Utilice los controles en su dispositivo
Bluetooth para reproducir / pausar y
navegar por pistas.
Alternativamente, controle la reproducción
usando el control de sintonización de la
radio.
Gire el control de sintonización en sentido
de las agujas del reloj para reproducir la
siguiente pista.
Gire el control de sintonización en
sentido contrario a las agujas del reloj
para reproducir la pista anterior.
NOTA:
No todas las aplicaciones de reproducción o
dispositivos podrían responder a todos estos
controles.
Reconectar a un dispositivo
Bluetooth emparejado
anteriormente
El DDR-7 puede memorizar hasta 8
dispositivos Bluetooth emparejados, cuando
la memoria exceda esta cantidad, se
sobrescribirá el dispositivo emparejado más
antiguo.
Si su dispositivo Bluetooth ya hubiera sido
emparejado anteriormente con el DDR-7, la
unidad memorizará su dispositivo Bluetooth
e intentará reconectarse con el dispositivo
Bluetooth al que se conectó por última vez.
Si el último dispositivo Bluetooth conectado
no estuviera disponible, el DDR-7 intentará
conectarse al penúltimo dispositivo.
Desconectar el dispositivo
Bluetooth
1. Mantenga presionado el botón de menú
para entrar al menú de Bluetooth.
2. Gire el control de sintonización para
seleccionar “Cancel Pairing” (cancelar
vinculación). A continuación, presione el
botón de seleccionar.
3. Para desconectar el dispositivo Bluetooth,
gire el control de sintonización para
seleccionar “Yes” (sí) y a continuación,
presione el botón de seleccionar. Habrá
un tono de sonido de confirmación y
el indicador LED Bluetooth de la radio
parpadeará rápidamente en color azul
para mostrar que la radio está disponible
para vincularse de nuevo. Seleccionar
“No” o “Back” (atrás) le llevará a la
pantalla del menú anterior. Presione el
botón de seleccionar para confirmar su
elección.
34
GB
F
E
NL
D
I
4. Alternativamente, puede presionar
el botón de modo para seleccionar
cualquier otro modo que no sea el de
Bluetooth o puede apagar el Bluetooth en
el dispositivo Bluetooth para deshabilitar
la conexión.
Borrar la memoria de dispositivos
Bluetooth vinculados
1. Mantenga presionado el botón de menú
para entrar al menú de Bluetooth.
2. Gire el control de sintonización para
seleccionar “Clear Pairing” (borrar
vinculaciones). A continuación, presione
el botón de seleccionar.
3. Para borrar la memoria de todos los
dispositivos conectados, gire el control
de sintonización para seleccionar “Yes”
(sí). A continuación, presione el botón de
seleccionar. Seleccionar “No” o “Back”
(atrás) le llevará a la pantalla del menú
anterior. Presione el botón de seleccionar
para confirmar su elección.
Temporizador de apagado
automático
La radio puede configurarse para que
se apague transcurrido un tiempo
preestablecido. El temporizador del apagado
automático puede ajustarse de 15 a 120
minutos en incrementos.
1. Con la radio encendida, mantenga
presionado el botón de menú para
acceder al menú del modo actual.
2. Gire el control de sintonización
para seleccionar “System Setup”
(configuración del sistema). Presione el
botón de seleccionar para entrar al menú
de los ajustes del sistema.
3. Gire el control de sintonización para
seleccionar “Sleep” (suspender).
Presione el botón de seleccionar para
entrar a los ajustes.
4. Gire el control de sintonización para
seleccionar el tiempo de apagado
automático deseado. El tiempo de
apagado automático puede establecerse
entre 15 y 120 minutos o “Sleep off”
(suspensión desactivada). Presione el
botón de seleccionar para confirmar los
ajustes.
5. Un temporizador activo se indicará
mostrando un indicador de apagado
automático en la pantalla. Para ver el
tiempo restante de un temporizador
activo mantenga presionado el botón de
menú y a continuación, gire el control de
sintonización para seleccionar “System
Setup” (configuración del sistema).
Presione el botón de seleccionar. Gire el
control de sintonización para seleccionar
“Sleep” (suspender). Presione el botón de
seleccionar para ver el tiempo restante
de un temporizador activo en pantalla.
6. Para cancelar la función de apagado
automático antes de que el tiempo
preestablecido haya transcurrido y apagar
la radio, presione el botón de encendido
para apagar la radio manualmente.
Para cancelar la función de
apagado automático y dejar la radio
reproduciéndose, vuelva a los ajustes de
apagado automático (los pasos anteriores
del 1 al 4) y selección la opción “Sleep
o” (suspensión desactivada) en el paso
4. Presione el botón de seleccionar para
conrmar los ajustes.
Contraste
El contraste de la pantalla puede ajustarse.
1. Con la radio encendida, mantenga
presionado el botón de menú para
acceder al menú del modo actual.
2. Gire el control de sintonización
para seleccionar “System Setup”
(configuración del sistema). Presione el
botón de seleccionar para entrar al menú
35
GB
F
E
NL
D
I
de los ajustes del sistema.
3. Gire el control de sintonización para
seleccionar “Contrast” (contraste).
Presione el botón de seleccionar para
entrar a los ajustes.
4. Gire el control de sintonización para
ajustar el contraste. El indicador de nivel
de contraste en pantalla cambiará a la
vez. Una vez encuentre la configuración
que le proporcione la mejor legibilidad
para la ubicación en la que se usa la
radio, presione el botón de seleccionar
para confirmar los ajustes.
Actualización automática
del reloj
La radio se actualizará cada vez que la
encienda y sintonice una emisora de radio
DAB+ o una emisora FM que transmita
la hora vía RDS. La hora parpadeará
como 00:00 durante unos segundos y a
continuación, mostrará la hora cuando
reciba la señal de hora de DAB+ o FM.
Puede especicar que la radio establezca su
reloj de transmisiones de radio DAB o FM.
1. Con la radio encendida, mantenga
presionado el botón de menú para
acceder al menú del modo actual.
2. Gire el control de sintonización
para seleccionar “System Setup”
(configuración del sistema). Presione el
botón de seleccionar para entrar al menú
de los ajustes del sistema.
3. Gire el control de sintonización para
seleccionar “Time update” (actualización
de la hora). Presione el botón de
seleccionar para entrar a los ajustes.
4. Gire el control de sintonización para
seleccionar una opción de entre “DAB”,
“FM” o “Any” (cualquiera). Presione el
botón de seleccionar para confirmar su
elección.
Selección de idioma
Por defecto, la radio mostrará todos los
menús y mensajes en inglés. Usted puede
elegir su idioma preferido.
1. Con la radio encendida, mantenga
presionado el botón de menú para
acceder al menú del modo actual.
2. Gire el control de sintonización para
seleccionar “System Setup” (ajustes
del sistema). Presione el botón de
seleccionar para entrar al menú de los
ajustes del sistema.
3. Gire el control de sintonización para
seleccionar “Language” (idioma).
Presione el botón de seleccionar para
entrar al menú de ajustes.
4. Gire el control de sintonización para
seleccionar el idioma deseado. Presione
el botón de seleccionar para confirmar los
ajustes. La pantalla cambiará al idioma
seleccionado.
Restablecer valores de
fábrica
Si desea restablecer completamente la
radio a su estado inicial, puede hacerlo
siguiendo este procedimiento. Al restablecer
los valores de fábrica, todos los ajustes
introducidos por el usuario se borrarán.
1. Con la radio encendida, mantenga
presionado el botón de menú para
acceder al menú del modo actual.
2. Gire el control de sintonización para
seleccionar “System Setup” (ajustes
del sistema). Presione el botón de
seleccionar para entrar al menú de los
ajustes del sistema.
3. Gire el control de sintonización para
seleccionar “Factory Reset” (restablecer
valores de fábrica). Presione el botón de
seleccionar para entrar a los ajustes.
36
GB
F
E
NL
D
I
4. Gire el control de sintonización para
seleccionar “Yes” (sí) o “No”. Si no
desea llevar a cabo un restablecimiento
del sistema, seleccione “No” y a
continuación, presione el botón de
seleccionar para confirmar los ajustes.
O seleccione “Back” (atrás) para ir a la
pantalla del menú anterior. Presione el
botón de seleccionar para confirmar su
elección.
5. Con “Yes” (sí)seleccionado, presione el
botón de seleccionar para restablecer
la radio. Esto borrará todos los ajustes
y presintonías de emisoras guardadas.
Todos los ajustes volverán a los valores
de fábrica.
Visualización de la versión
del software
La visualización de la versión del software
es para referencia y servicio de atención al
cliente, y no se puede cambiar.
1. Con la radio encendida, mantenga
presionado el botón de menú para
acceder al menú del modo actual.
2. Gire el control de sintonización para
seleccionar “System Setup” (ajustes
del sistema). Presione el botón de
seleccionar para entrar al menú de los
ajustes del sistema.
3. Gire el control de sintonización para
seleccionar “SW Version” (versión
del software). Presione el botón de
seleccionar para mostrar la versión del
software.
4. Presione el botón de menú según
necesite para salir.
Toma de entrada auxiliar
En la parte trasera de la radio se encuentra
una toma de entrada auxiliar estéreo de
3,5mm para permitir la entrada de una señal
de audio en la unidad desde un dispositivo
de audio externo, como un iPod o un
reproductor de MP3 o de CD.
1. Con la radio encendida, presione el botón
de modo hasta que se muestre “Aux”
(auxiliar).
2. Conecte una fuente de audio externa
(por ejemplo, un iPod o un reproductor
de MP3 o de CD) a la toma de entrada
auxiliar.
3. Ajuste el volumen en el iPod o en el
reproductor de MP3 o CD para asegurarse
de que haya un nivel de señal adecuado
desde su dispositivo. A continuación,
ajuste el volumen en la radio según
necesite.

37
GB
F
E
NL
D
I
Especicaciones
Cobertura de frecuencia
FM 87.5-108 MHz
DAB 174.928-239.200 MHz
Amplicador
Potencia de salida 1,6W 10% de T.H.D. (distorsión armónica) a 100Hz
Entrada auxiliar
Sensibilidad de entrada Entrada 400mV Salida 1,6W a 100Hz
Altavoz
Altavoz 1 de 40mm y 4ohmios
Altavoz pasivo 74,2X36,7 mm
Bluetooth
Especicación Bluetooth Bluetooth
®
versión 4.1
Perl soportado A2DP
Códec de audio Bluetooth SBC
Potencia de transmisión Especicación Power Class 2
Alcance 10metros / 30pies
Frecuencia y potencia máxima
transmitida
2402MHz ~ 2480MHz: 3.81dBm (Bluetooth EDR)
Batería integrada
Batería
Batería de iones de litio recargable 18650 de 3,65V y
2600mAh
Duración de la batería
Salida de altavoz de 10mW. La duración de la batería
es de aproximadamente 20 horas, durante 4 horas al
día a un nivel de volumen normal.
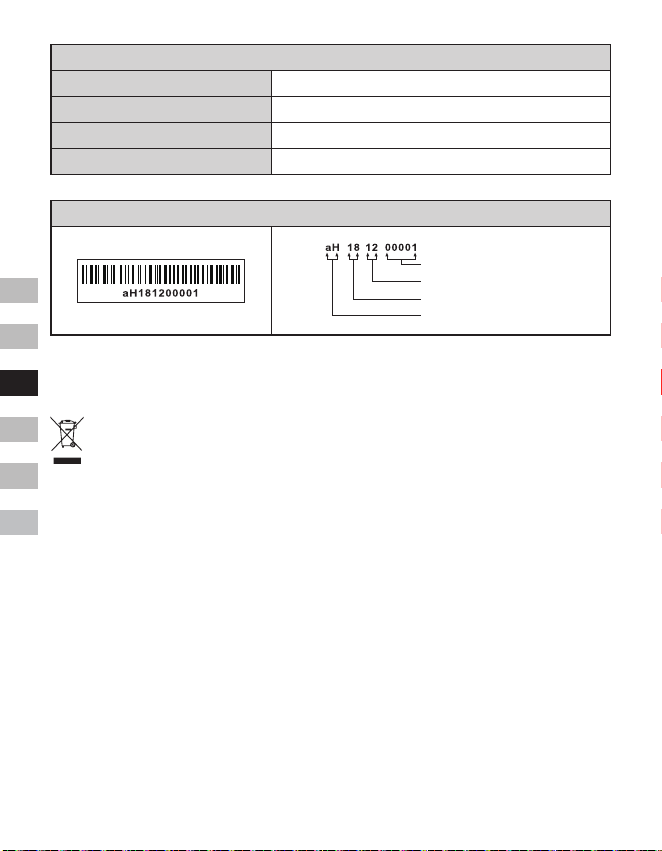
38
GB
F
E
NL
D
I
General
Entrada CC Toma microUSB de 5V 1A
Corriente de carga 500mA
Tiempo de carga Aproximadamente 6 horas
Temperatura de funcionamiento De 0°C a + 35°C
※
Elcódigodebarrasenelproductosedenedelasiguientemanera:
Número de serie
Mes de producción
Año de producción
Código del producto
Sangean se reserva el derecho de modicar las especicaciones sin previo aviso.
RECICLAJE - Este producto lleva el símbolo de clasicación selectiva de Residuos de
aparatos eléctricos y electrónicos (RAEE). Esto significa que este producto debe
manipularse de acuerdo con la directiva europea 2012/19/UE para ser reciclado o
desmontado para minimizar su impacto en el medio ambiente.
39
GB
F
E
NL
D
I
De Bluetooth
®
markering en logo’s
zijn geregistreerde handelsmerken die
eigendom zijn van Bluetooth SIG, Inc. en elk
gebruik van deze merken door SANGEAN
ELECTRONICS INC. is onder licentie.
Belangrijke
veiligheidsinstructies
1. Niet installeren in de buurt van
warmtebronnen, zoals radiatoren,
kachels of andere apparaten (inclusief
versterkers) die warmte produceren.
2. Gebruik alleen accessoires / hulpstukken
die door de fabrikant zijn gespecificeerd.
3. Stel het apparaat niet bloot aan regen
of vocht om het risico van brand of
elektrische schok te voorkomen.
4. Het apparaat mag niet worden
blootgesteld aan druppend of spattend
water en er mogen geen voorwerpen
gevuld met vloeistof op het apparaat
worden geplaatst.
5. De batterijen mogen niet worden
blootgesteld aan extreme warmte zoals
zonlicht, vuur en dergelijke.
6. Wijzigingen of aanpassingen die niet
uitdrukkelijk zijn goedgekeurd door de partij
verantwoordelijk voor naleving kunnen
ertoe leiden tot de bevoegdheid van de
gebruiker om dit apparaat te bedienen en
de garantie komen te vervallen.
7. LET OP: Explosiegevaar indien batterij
wordt vervangen door een batterij van
een onjuist type.
8. Stel uw radio niet bloot aan water,
stoom of zand.
9. Laat uw radio niet achter
op plaatsen waar
extreme warmte schade
kan veroorzaken.
10. Indien veiligheid relevant is, moet de
volgende informatie worden opgenomen
voor zover van toepassing:
● minimale afstanden rond het
apparaat voor voldoende ventilatie;
● de ventilatie mag niet worden
belemmerd door ventilatieopeningen
te bedekken met voorwerpen zoals
kranten, tafelkleden, gordijnen, etc.;
● er mogen geen voorwerpen met open
vlam, zoals brandende kaarsen, op
het apparaat worden geplaatst;
● er moet aan het milieu worden
gedacht bij de verwijdering van
batterijen;
● het gebruik van het apparaat in
tropische en / of gematigde klimaten.
11. LET OP: Explosiegevaar indien de
batterij onjuist wordt vervangen.
Vervang alleen door hetzelfde of
soortgelijk type.
12. Indien een apparaat wordt geleverd met
een vervangbare lithiumbatterij, geldt
het volgende:
● als de batterij door de gebruiker moet
worden vervangen, moet er een
waarschuwing dicht bij de batterij of
in zowel de gebruiksinstructies als de
onderhoudsinstructies staan;
● als de batterij niet moet worden
vervangen door de gebruiker, moet er
een waarschuwing dicht bij de batterij
of in de onderhoudsinstructies staan.
Waarschuwing:
Probeer de ingebouwde lithiumbatterij
niet te verwijderen of te vervangen.
Ongeautoriseerde vervangingen kunnen ook
de garantie ongeldig maken.
Bedieningselementen
1
Luidspreker
2
Batterij-indicator
40
GB
F
E
NL
D
I
3
Bluetooth-indicator
4
OLED-display
5
Volume hoger-knop
6
Volume lager-knop
7
Afstemknop / Select / Info / Menu-knop
8
Mode-knop
9
Power-knop
10
DC IN 5V / 1A USB-oplaadpoort
11
Aux-ingang
12
Externe antenneaansluiting
13
Passieve luidspreker
De radio opladen
De radio werkt op een ingebouwde lithium-
ionbatterij die kan worden opgeladen
met behulp van de USB-oplaadpoort of
met behulp van een USB-netadapter
(niet meegeleverd) met een nominale
uitgangsspanning / -stroom van DC 5V,
1000mA. Een verminderd vermogen,
‘stotterende’ geluiden of een batterij-indicator
die aangeeft dat de batterij bijna leeg is
zijn allemaal tekenen dat de batterij moet
worden opgeladen.
Voordat u de radio voor het eerst gebruikt
moet de batterij volledig worden opgeladen.
OPMERKING:
U kunt de radio beginnen te gebruiken
tijdens het opladen. Zorg er echter wel
voor dat u in dit geval gebruik maakt van
een USB-voedingsbron die een elektrische
stroom van 5V 1A levert. Als dit niet het
geval is, kan dit leiden tot schade aan de
USB-voedingsbron.
● Sluit de (meegeleverde) micro-USB-
stekker aan op de micro-USB-oplaadpoort
op de achterkant van het apparaat.
● Sluit het uiteinde met de standaard USB-
stekker van de (meegeleverde) kabel
aan op een stroom leverende USB-
poort van een computer of ander USB-
oplaadapparaat. Als de batterij wordt
opgeladen, zal de batterij-indicator continu
rood branden. De rode batterij-indicator
zal uitschakelen nadat de batterij volledig
is opgeladen.
Uw radio bedienen - DAB
1. Steek de stekker van de (meegeleverde)
externe antenne in de aansluiting voor de
externe antenne op de achterkant van uw
radio.
2. Druk op Power om uw radio in te
schakelen.
3. Als dit de eerste keer is dat de radio
wordt gebruikt, wordt er een snelle scan
op de Band III-DAB-kanalen uitgevoerd.
Als de radio al eerder is gebruikt, wordt
de laatst gebruikte zender geselecteerd.
4. Tijdens het scanproces zal de zenderteller
worden opgehoogd als er zenders
worden gevonden en de zenders worden
toegevoegd aan de lijst die is opgeslagen
in de radio. De weergegeven balk geeft de
voortgang van de scan aan.
5. Als het scannen is voltooid, zal de eerste
zender (in alfanumerieke volgorde
0...9...A....Z) worden geselecteerd.
6. Als de zenderlijst na de scan nog altijd
leeg is, zal uw radio de melding “No
Service” tonen. Als er geen signalen
worden gevonden, dan moet u uw radio
mogelijk verplaatsen naar een plek met
betere ontvangst.
Een zender selecteren - DAB
1. Druk op Power om uw radio in te
schakelen.
2. Druk op Mode om de DAB-radiomodus te
selecteren.

41
GB
F
E
NL
D
I
3. Draai aan de Afstemknop om door de lijst
met beschikbare zenders te bladeren.
4. Druk op Select om de gewenste te
selecteren en af te stemmen op de
zender.
5. Gebruik Volume hoger / Volume lager
om het geluidsniveau naar wens in te
stellen. U kunt de zenderlijst ook met
behulp van het DAB-menu openen. Dit
doet u door Menu ingedrukt te houden en
daarna aan de Afstemknop te draaien om
het item ‘Station List’ te selecteren. Druk
vervolgens ter bevestiging op Select.
OPMERKING:
Als de radio na het selecteren van een
zender niet afstemt op de zender, dan is
het mogelijk dat u uw radio op een andere
positie moet plaatsen voor betere ontvangst.
Secundaire diensten - DAB
Sommige DAB-zenders hebben één of meer
secundaire diensten. Als een radiozender
secundaire diensten heeft, dan zullen
deze onmiddellijk na de hoofdzender
verschijnen als u aan de Afstemknop draait.
Druk op Select om af te stemmen op de
geselecteerde dienst.
Nieuwe zenders zoeken -
DAB
Er kunnen van tijd tot tijd nieuwe zenders
beschikbaar komen of u bent mogelijk met
uw radio verhuisd In een ander deel van het
land. In dit geval moet u uw radio mogelijk
laten scannen naar nieuwe zenders.
1. Zorg ervoor dat de radio in de DAB-
modus staat en houd Menu ingedrukt om
het DAB-menu te openen.
2. Draai aan de Afstemknop om “Full Scan”
te selecteren.
3. Druk op Select. Uw radio voer nu een
scan uit op de Band III-DAB-kanalen.
Als er nieuwe radiozenders worden
gevonden, zal de zenderteller op het
display worden opgehoogd en de
radiozender wordt toegevoegd aan de
lijst die is opgeslagen in de radio.
Handmatig afstemmen -
DAB
U kunt met behulp van handmatig afstemmen
rechtstreeks afstemmen op de verschillende
Band III-DAB-kanalen (5A tot 13F).
1. Zorg ervoor dat de radio in de DAB-
modus staat en houd Menu ingedrukt om
het DAB-menu te openen.
2. Draai aan de Afstemknop om “Manual
tune” te selecteren.
3. Druk op Select om de optie handmatig
afstemmen te openen.
4. Draai aan de Afstemknop om het
gewenste DAB-kanaal te selecteren.
5. Druk op Select om de radio af te laten
stemmen op het geselecteerde kanaal.
De zendervolgorde instellen
- DAB
Uw radio heeft 3 instellingen voor de
zendervolgorde waaruit u kunt kiezen. De
instellingen voor de zendervolgorde zijn
alphanumeric (alfanumeriek), ensemble en
valid (geldig).
1. Zorg ervoor dat de radio in de DAB-
modus staat en houd Menu ingedrukt om
het DAB-menu te openen.
2. Draai aan de Afstemknop om “Station
order” te selecteren.
3. Druk op Select om de instelmodus voor
de zendervolgorde te openen.
4. Draai aan de Afstemknop om
“Alphanumeric”, “Ensemble” of “Valid” te
selecteren.

42
GB
F
E
NL
D
I
“Alphanumeric” - sorteert de lijst
alfanumeriek 0...9...A....Z.
“Ensemble” - sorteert de zenderlijst op
DAB-multiplex.
“Valid” - toont alleen zenders waarvoor
een signaal kan worden gevonden.
5. Druk op Select ter bevestiging van de
gewenste zendervolgorde.
Instellen Dynamic Range
Control - DAB
Dynamic Range Control (ook wel DRC)
kan zachte geluiden eenvoudiger hoorbaar
maken wanneer uw radio wordt gebruikt in
een lawaaiige ruimte door het dynamisch
bereik van het audiosignaal te verlagen.
1. Zorg ervoor dat de radio in de DAB-
modus staat en houd Menu ingedrukt om
het DAB-menu te openen.
2. Draai aan de Afstemknop om “DRC
Value” te selecteren.
3. Druk op Select om de DRC-instelmodus
te openen.
4. Draai aan de Afstemknop om de gewenste
DRC-instelling te selecteren (standaard
ingesteld op Off (uitgeschakeld)).
O - DRC is uitgeschakeld, uitgezonden
DRC wordt genegeerd.
Low – DRC-niveau is ingesteld op 1 /
2 van het niveau uitgezonden door de
zender.
High - DRC is ingesteld zoals verzonden
door zender.
5. Druk ter bevestiging van de instelling op
Select.
OPMERKING:
Niet alle DAB-uitzendingen maken gebruik
van de DRC-functie. Als de uitzending geen
ondersteuning biedt aan DRC, dan zal
de DRC-Instelling op de radio geen effect
hebben.
Niet-beschikbare zenders
verwijderen - DAB
Als u bent verhuisd naar een ander
deel van het land, dan is het mogelijk
dat bepaalde zenders in de zenderlijst
niet meer beschikbaar zijn. Ook kunnen
bepaalde DAB-diensten van tijd tot tijd
stoppen met uitzenden, of veranderen
van locatie of frequentie. Zenders die niet
gevonden kunnen worden of die erg lang
niet zijn ontvangen worden in de zenderlijst
gemarkeerd met een vraagteken. De
verwijderfunctie zal de gemarkeerde DAB-
zenders uit uw zenderlijst verwijderen.
1. Zorg ervoor dat de radio in de DAB-
modus staat en houd Menu ingedrukt om
het DAB-menu te openen.
2. Draai aan de Afstemknop om “Prune
Station” te selecteren.
3. Druk op Select om de instelmodus te
openen.
4. U kunt de functie voor het verwijderen
van niet beschikbare zenders activeren
door aan de Afstemknop te draaien om
“Yes” (Ja) te selecteren en vervolgens
ter bevestiging op Select te drukken.
Als u niet beschikbare zenders niet wilt
verwijderen, selecteer dan “No” (Nee)
of “Back” (Terug) om terug te gaan
naar de weergave van het voorgaande
menu. Druk op Select om uw keuze te
bevestigen.
OPMERKING:
Als u uw radio heeft verplaatst naar een
ander deel van het land, dan moet u ook
opnieuw een scan naar nieuwe zenders
uitvoeren (zie de paragraaf ‘Nieuwe zenders
zoeken’).
Uw radio bedienen - FM
1. Steek de stekker van de (meegeleverde)
externe antenne in de aansluiting voor de

43
GB
F
E
NL
D
I
externe antenne op de achterkant van uw
radio.
2. Druk op Power om uw radio in te
schakelen.
3. Druk op Mode om de FM-band te
selecteren.
4. Houd Menu ingedrukt om het FM-menu
te openen.
5. Draai aan de Afstemknop om “SCAN”
te selecteren. Druk op Select om uw
radio van een lage frequentie naar een
hoge frequentie te laten zoeken. Als de
radio een zender met een voldoende
sterk signaal vindt, zal de frequentie 6
seconden knipperen op het display. Na
deze 6 seconden zal de radio doorgaan
met scannen. Als u af wilt stemmen op
een zender of het scannen wilt stoppen,
druk dan op Select.
6. Het display toont de frequentie van het
gevonden signaal. Als het signaal sterk
genoeg is en er RDS-gegevens aanwezig
zijn, dan geeft de radio de zendernaam
weer.
7. Als het uiteinde van de golfband wordt
bereikt, zal uw radio verder gaan met
afstemmen vanaf het andere uiteinde van
de golfband.
8. Druk op Volume hoger / Volume lager om
het geluidsniveau naar wens in te stellen.
9. U kunt de radio uitschakelen door op
Power te drukken.
Handmatig afstemmen - FM
1. Draai in de FM-modus aan de
Afstemknop om af te stemmen op een
zender.
2. Druk op Volume hoger / Volume lager om
het geluidsniveau naar wens in te stellen.
Instellen scangevoeligheid
- FM
Uw radio heeft een optie voor het zoeken
naar lokale / verre zenders met de
automatische scanfunctie. Door de optie
in te stellen op lokaal scannen (“Local”),
kunnen zwakkere signalen van zenders die
verder weg zijn worden genegeerd door de
radio, waardoor sterke signalen eenvoudiger
gevonden kunnen worden.
1. Zorg ervoor dat de radio in de FM-modus
staat en houd Menu ingedrukt om het
FM-menu te openen.
2. Draai aan de Afstemknop om “FM Scan
Zone” te selecteren. Druk op Select
om de modus voor het instellen van de
scangevoeligheid te openen. De huidige
instelling is gemarkeerd met een asterisk.
3. Draai aan de afstemknop om “Local”
(lokaal, alleen zenders met sterk
signaal) of “Distant” (ver, alle zenders) te
selecteren. De optie “Distant” zorgt ervoor
dat de radio ook zenders met zwakkere
signalen kan vinden tijdens het scannen.
4. Druk op Select om uw keuze te
bevestigen. De instelling wordt
opgeslagen in de radio en blijft van kracht
totdat deze wordt veranderd of er een
systeemreset wordt uitgevoerd.
Voorkeurzenders instellen
in DAB- en FM-modus
De radio beschikt over 10 voorkeurzenders
voor elk DAB- en FM-radio. Voorkeurzenders
worden op dezelfde manier gebruikt in de
beide gebruiksmodi.
1. Druk op Power om uw radio in te
schakelen.
2. Stem zoals eerder beschreven af op de
gewenste radiozender.
44
GB
F
E
NL
D
I
3. Houd Menu ingedrukt. Draai vervolgens
aan de Afstemknop om “Favorite Station”
te selecteren. Druk op Select om de
instelling te openen.
4. Draai aan de Afstemknop om “Preset
Station” te selecteren. Druk op Select.
5. Draai aan de Afstemknop om door de
lijst met voorkeurzenders te bladeren
tot u een ongebruikte voorkeurzender of
voorkeurzender die u wilt wijzigen heeft
bereikt.
6. Druk op Select om de voorkeurzender op
te slaan. Er wordt nu een melding, bijv.
‘Preset 2 saved’, weergegeven op het
display.
Herhaal deze procedure indien gewenst
voor de resterende voorkeurzenders.
U kunt opgeslagen voorkeurzenders
overschrijven door de bovenstaande
procedure te volgen.
OPMERKING:
De voorkeurzenders worden in het geheugen
bewaard als de radio wordt uitgeschakeld.
Een voorkeurzender
oproepen in DAB- en FM-
modus
1. Druk op Power om uw radio in te
schakelen.
2. Selecteer de gewenste gebruiksmodus
met behulp van de knop Mode.
3. Houd Menu ingedrukt. Draai vervolgens
aan de Afstemknop om “Favorite Station”
te selecteren. Druk op Select om de
instelling te openen.
4. Draai aan de Afstemknop om “Recall
Station” te selecteren. Druk op Select.
5. Draai aan de Afstemknop om de
gewenste voorkeurzender te selecteren.
Druk op Select. Uw radio stemt nu af
op de zender die is opgeslagen in het
voorkeurzendergeheugen. Het gekozen
voorkeurzendernummer wordt tevens
getoond op het display, bijv. “P2”.
Weergave-opties - DAB / FM
/ Bluetooth
Uw radio heeft verschillende weergave-
opties in de DAB-, FM- en Bluetooth-modus:
● Druk op Info om door de verschillende
opties te bladeren.
DAB-weergaveopties
Uw radio kan de volgende informatie
weergeven in de DAB-modus:
Scrollende tekst, Programmatype, Multiplex-
naam, Tijd / Datum, Frequentie, Bitrate en
audiotype, Coderingsinformatie, DL Plus-
tekst, Signaalsterkte
Sommige zenders bieden met DL Plus-tekst
aanvullende, gerelateerde informatie die kan
worden weergegeven. Als er geen informatie
beschikbaar is, wordt de melding ‘no info’
weergegeven.
Weergave-opties FM-modus
Uw radio kan in de FM-modus gebruik
maken van het Radio Data System (RDS)
om de zendernaam en aanvullende
tekst weer te geven indien deze worden
verstrekt door de zender en het radiosignaal
voldoende sterk is.
Uw radio kan de volgende informatie tonen
in de FM-modus:
Radiotekst, Programtype, Tijd / Datum,
Frequentie
Weergave-opties Bluetooth-
modus
Als het apparaat waarmee u bent verbonden
informatie kan verstrekken over de track die
wordt afgespeeld, kan uw radio de volgende
informatie tonen in de Bluetooth-modus:
45
GB
F
E
NL
D
I
Apparaatnaam, Titel, Artiest, Album.
Houd er rekening mee dat de beschikbaarheid
van informatie afhankelijk is van het
specieke mediaformaat.
Luisteren naar muziek via
Bluetooth-streaming
U moet uw Bluetooth-apparaat koppelen met
de radio voordat u automatisch verbinding
kunt maken en Bluetooth-muziek kunt
afspelen / streamen via uw DDR-7. Koppelen
creëert een ‘band’, zodat twee apparaten
elkaar kunnen herkennen.
Voor het eerst koppelen met uw
Bluetooth-apparaat en afspelen
van het apparaat
1. Zorg ervoor dat uw radio is ingeschakeld
en druk vervolgens op Mode om de
Bluetooth-functie te selecteren. De
melding “Bluetooth Pairing” wordt
getoond op het display. De Bluetooth-
indicator op de radio knippert snel blauw
om aan te geven dat de radio kan worden
gedetecteerd.
2. Activeer Bluetooth op uw bronapparaat
volgends de handleiding van dit apparaat.
Ga op het bronapparaat naar de lijst
met Bluetooth-apparaten en selecteer
het apparaat met de naam ‘DDR-7’. (Bij
sommige bronapparaten die zijn uitgerust
met een Bluetooth-versie ouder dan
Bluetooth 2.1 is het mogelijk dat er om
een pincode wordt gevraagd. Als dit het
geval is, voer dan ‘0000’ in).
3. Zodra de apparaten zijn verbonden, klikt
er een bevestigingstoon en de naam van
het verbonden Bluetooth-apparaat wordt
getoond op het display. De Bluetooth-
indicator blijft continue blauw branden. U
kunt nu simpelweg muziek selecteren en
afspelen vanaf uw bronapparaat.
4. Het volume kan worden ingesteld op uw
bronapparaat of rechtstreeks op de radio.
Gebruik de bedieningselementen op uw
Bluetooth-apparaat of op de radio om het
afspelen te starten / stoppen of om de
gewenste track te selecteren.
OPMERKING:
● Als er voor de eerste keer wordt
gekoppeld en er 2 Bluetooth-apparaten
naar uw radio zoeken, dan wordt de
radio op beide apparaten als beschikbaar
getoond. Als er echter één apparaat
verbinding maakt met de radio, zal het
andere Bluetooth-apparaat de radio niet
meer vinden in de lijst.
● Als het Bluetooth-apparaat buiten het
Bluetooth-bereik van de radio wordt
verplaatst, dan zal de Bluetooth-
verbinding met de radio tijdelijk worden
verbroken. Uw radio zal automatisch
opnieuw verbinding maken met het
Bluetooth-apparaat als het weer binnen
bereik komt. Houd er rekening mee
dat er in de periode dat de verbinding
is verbroken geen andere Bluetooth-
apparaten mogen koppelen of verbinden
maken met de radio.
● Als ‘DDR-7’ wordt getoond in de lijst
met Bluetooth-apparaten, maar u geen
verbinding kunt maken met de radio,
verwijder het item dan uit de lijst en
koppel het apparaat nogmaals met de
radio door de eerder beschreven stappen
te volgen.
● Het effectieve bereik tussen het systeem
en het gekoppelde apparaat is ongeveer
10 meter (30 voet). Eventuele obstakels
tussen het systeem en het apparaat
kunnen het bereik reduceren.
● De prestaties van Bluetooth-connectiviteit
kunnen variëren, afhankelijk van de
verbonden Bluetooth-apparaten. Bekijk de
Bluetooth-mogelijkheden die uw apparaat
biedt voordat u verbinding maakt met
de radio. Het is mogelijk dat niet alle
functies worden ondersteund op sommige
gekoppelde Bluetooth-apparaten.
46
GB
F
E
NL
D
I
● Het is bij gebruik van bepaalde mobiele
telefoons mogelijk dat het geluid van
de Bluetooth-audiostream tijdelijk wordt
gedempt of dat de verbinding met het
apparaat zelfs tijdelijk wordt verbroken
tijdens het verzenden / ontvangen van
oproepen, sms-berichten, e-mails of
andere activiteiten die niet in verband
staan met het streamen van audio.
Dergelijk gedrag is een functie van het
Bluetooth-bronapparaat en duidt niet op
een probleem met uw DDR-7.
Audiobestanden afspelen in de
Bluetooth-modus
Als u uw radio succesvol heeft verbonden
met het gekozen Bluetooth-apparaat, dan
kunt u het afspelen van muziek starten met
behulp van de bedieningselementen van het
verbonden Bluetooth-apparaat.
1. Zodra het afspelen is gestart, kunt u het
volume naar wens instellen met behulp
van de volumeregeling op uw radio of uw
Bluetooth-bronapparaat.
2. Gebruik de bedieningselementen op
uw Bluetooth-bronapparaat om het
afspelen te starten / pauzeren en naar de
gewenste track te gaan.
Als alternatief kunt u het afspelen
bedienen met behulp van de Afstemknop
op uw radio.
Draai de Afstemknop met de klok mee
om de volgende track af te spelen.
Draai de Afstemknop tegen de klok in om
de vorige track af te spelen.
OPMERKING:
Het is mogelijk dat niet alle
afspeelapplicaties of apparaten reageren op
alle bedieningselementen.
Opnieuw verbinding maken met
een Bluetooth-bronapparaat
waarmee eerder is gekoppeld
De DDR-7 kan tot 8 Bluetooth-bronapparaten
onthouden waarmee eerder is gekoppeld.
Als er met meer dan 8 bronapparaten is
gekoppeld, dan zal het eerste bronapparaat
waarmee is gekoppeld worden overschreven
in het geheugen.
De radio onthoudt de Bluetooth-
bronapparaten waarmee eerder is gekoppeld
en zal automatisch proberen om te koppelen
met het apparaat waarmee het laatst
verbinding is gemaakt. Als dit apparaat niet
beschikbaar is, probeert de DDR-7 verbinding
te maken met het apparaat waarmee het een-
na-laatst verbinding is gemaakt.
De verbinding met uw
Bluetooth-apparaat verbreken
1. Houd Menu ingedrukt om het Bluetooth-
menu te openen.
2. Draai aan de Afstemknop om “Cancel
Pairing” te selecteren en druk vervolgens
op Select.
3. Draai om de verbinding met uw
Bluetooth-apparaat te verbreken aan de
Afstemknop om “Yes” (Ja) te selecteren
en druk daarna op Select. Er klinkt
een bevestigingstoon en de Bluetooth-
indicator op de radio knippert snel
blauw om aan te geven dat de radio
weer gedetecteerd kan worden voor
koppelen. U kunt ook “No” (Nee) of “Back”
(Terug) selecteren om terug te gaan
naar de weergave van het voorgaande
menu. Druk op Select om uw keuze te
bevestigen.
4. U kunt de verbinding ook verbreken door
op Mode te drukken en een willekeurige
modus anders dan de Bluetooth-modus
te selecteren of door Bluetooth uit te
schakelen op uw Bluetooth-apparaat.
47
GB
F
E
NL
D
I
Het geheugen met apparaten
waarmee eerder is gekoppeld
verwijderen
1. Houd Menu ingedrukt om het Bluetooth-
menu te openen.
2. Draai aan de Afstemknop om “Clear
Pairing” te selecteren en druk vervolgens
op Select.
3. Draai, om het geheugen van alle
apparaten waarmee eerder is gekoppeld
te wissen, aan de Afstemknop om “Yes”
(Ja) te selecteren en druk daarna op
Select.
U kunt ook “No” (Nee) of “Back”
(Terug) selecteren om terug te gaan
naar de weergave van het voorgaande
menu. Druk op Select om uw keuze te
bevestigen.
Slaaptimer
Uw radio kan worden ingesteld om
automatisch uit te schakelen nadat een
vooraf ingestelde tijd is verstreken. De
slaaptimerinstelling kan in stappen worden
ingesteld op een waarde tussen 15 en 120
minuten.
1. Zorg ervoor dat uw radio is ingeschakeld
en houd Menu ingedrukt om het menu
voor de huidige modus te openen.
2. Draai aan de Afstemknop om
“System Setup” te selecteren en druk
vervolgens op Select om het menu met
systeeminstellingen te openen.
3. Draai aan de Afstemknop om “Sleep”
te selecteren. Druk op Select om de
instelling te openen.
4. Draai aan de Afstemknop om de gewenste
slaaptijd te selecteren. De slaaptimer kan
worden ingesteld op een waarde tussen
15 en 120 minuten, of op “Sleep off”
(Slaaptimer uitschakelen). Druk op Select
om uw keuze te bevestigen.
5. Een actieve slaaptimer wordt op de
afspeelschermen getoond met behulp
van een slaaptimer-indicator. U kunt de
resterende tijd van een actieve slaaptimer
bekijken door Menu ingedrukt te houden,
vervolgens aan de Afstemknop te draaien
om “System Setup” te selecteren en
op Select te drukken. Draai aan de
Afstemknop om “Sleep” te selecteren en
druk daarna op Select om de resterende
tijd van een actieve slaaptimer weer te
geven op het display.
6. U kunt een slaaptimer annuleren voordat
de vooraf ingestelde tijd is verstreken
door de radio uit te schakelen. Druk op
Power om de radio handmatig uit te
schakelen.
Als u de slaaptimer wilt annuleren, maar
het afspelen wilt voortzetten, ga dan
opnieuw naar de slaaptimerinstellingen
(stappen 1 tot en met 3 hierboven) en
selecteer vervolgens de optie “Sleep o”
(Slaaptimer uitschakelen) in step 4. Druk
op Select om uw keuze te bevestigen.
Contrast
Het contrast van het display kan worden
aangepast.
1. Zorg ervoor dat uw radio is ingeschakeld
en houd Menu ingedrukt om het menu
voor de huidige modus te openen.
2. Draai aan de Afstemknop om
“System Setup” te selecteren en druk
vervolgens op Select om het menu met
systeeminstellingen te openen.
3. Draai aan de Afstemknop om “Contrast”
te selecteren en druk op Select om de
instelling te openen.
4. Draai aan de Afstemknop om het contrast
aan te passen. De indicatie van het
contrastniveau op het display verandert
terwijl u het contrast aanpast. Druk op
Select om de instelling te bevestigen
48
GB
F
E
NL
D
I
wanneer u de beste instelling, of de
instelling die de beste leesbaarheid geeft
op uw huidige locatie, heeft gevonden.
De klok automatisch
bijwerken
Telkens als u uw radio inschakelt en afstemt
op een DAB+ zender of FM-zender die de
tijd uitzendt via RDS, zal uw radio de klok
automatisch bijwerken. De tijd zal een paar
seconden als 00:00 worden weergegeven
en knipperen en daarna de klok instellen op
de tijd die wordt ontvangen van het DAB+
of FM-RDS-signaal. U kunt instellen dat de
radio de klok instelt met behulp van DAB- of
FM-uitzendingen.
1. Zorg ervoor dat uw radio is ingeschakeld
en houd Menu ingedrukt om het menu
voor de huidige modus te openen.
2. Draai aan de Afstemknop om
“System Setup” te selecteren en druk
vervolgens op Select om het menu met
systeeminstellingen te openen.
3. Draai aan de Afstemknop om “Time
update” te selecteren en druk op Select
om de instelling te openen.
4. Draai aan de Afstemknop om een optie
voor het bijwerken te selecteren. U kunt
de optie naar wens instellen op “DAB”,
“FM” of “Any (beide). Druk op Select om
uw keuze te bevestigen.
Selecteren taal
Uw radio zal standaard alle menu’s en
berichten in het Engels weergeven. U kunt
uw voorkeurstaal kiezen.
1. Schakel de radio in en houd Menu
ingedrukt om het menu van de huidige
modus te openen.
2. Draai aan de Afstemknop om “System
Setup” te selecteren. Druk op Select om
het menu met systeeminstellingen te
openen.
3. Draai aan de Afstemknop om “Language”
te selecteren. Druk op Select om het
instellingenmenu te openen.
4. Draai aan de Afstemknop om de
gewenste taal te selecteren. Druk op
Select om de instelling te bevestigen. De
tekst op het display wordt nu getoond in
de gekozen taal.
Fabrieksreset
Als u uw radio volledig wilt resetten naar de
oorspronkelijke staat, dan kunt u dit doen
door de volgende procedure te volgen. Alle
door de gebruiker ingevoerde instellingen
worden gewist door het uitvoeren van een
fabrieksreset.
1. Zorg ervoor dat uw radio is ingeschakeld
en houd Menu ingedrukt om het menu
voor de huidige modus te openen.
2. Draai aan de Afstemknop om “System
Setup” te selecteren. Druk op Select om
het menu met systeeminstellingen te
openen.
3. Draai aan de Afstemknop om “Factory
Reset” te selecteren. Druk op Select om
de instelling te openen.
4. Draai aan de Afstemknop om “Yes” (ja)
of “No” (nee) te selecteren. Als u geen
fabrieksreset wilt uitvoeren, selecteer
dan “No” (nee) en druk ter bevestiging
van de instelling op Select. Of selecteer
“Back” (Terug) om terug te gaan naar
de weergave van het voorgaande
menu. Druk op Select om uw keuze te
bevestigen.
5. Druk, als “Yes” (Ja) is geselecteerd, op
Select om de radio te resetten. De radio
wist nu alle opgeslagen instellingen
en het voorkeurzendergeheugen. Alle
instellingen worden hersteld naar de
fabrieksinstellingen.
49
GB
F
E
NL
D
I
Weergave softwareversie
De weergave van de softwareversie
is bedoeld voor referentie en
klantenondersteuning en kan niet worden
gewijzigd.
1. Schakel de radio in en houd Menu
ingedrukt om het menu van de huidige
modus te openen.
2. Draai aan de Afstemknop om “System
Setup” te selecteren. Druk op Select om
het menu met systeeminstellingen te
openen.
3. Draai aan de Afstemknop om “SW
Version” te selecteren. Druk op Select om
de softwareversie weer te geven.
4. Druk indien gewenst op Menu om te
verlaten.
Aux-ingang
Er zit een 3,5mm aux-ingang op de
achterkant van uw radio die het mogelijk
maakt een audiosignaal te ontvangen van
een extern audioapparaat zoals een iPod,
MP3- of CD-speler.
1. Zorg ervoor dat uw radio is ingeschakeld
en druk op Mode tot “Aux In” wordt
weergegeven.
2. Sluit een externe audiobron (bijv. iPod,
MP3- of CD-speler) aan op de aux-
ingang.
3. Stel het volume in op uw iPod, MP3- of
CD-speler en zorg ervoor dat uw radio
een adequaat signaalniveau ontvangt van
het apparaat. Stel vervolgens het volume
naar wens in op de radio om comfortabel
te kunnen luisteren.
Specicaties
Frequentiebereik
FM 87.5-108 MHz
DAB 174.928-239.200 MHz
Versterker
Vermogen 1,6W 10%T.H.D. @ 100Hz
Aux-ingang
Ingangsgevoeligheid IN 400mV Output 1,6W @ 100Hz
Luidspreker
Luidspreker 40mm 4ohm x 1
Passieve luidspreker 74,2X36,7 mm
Bluetooth
Bluetooth-specicatie Bluetooth
®
Ver 4.1
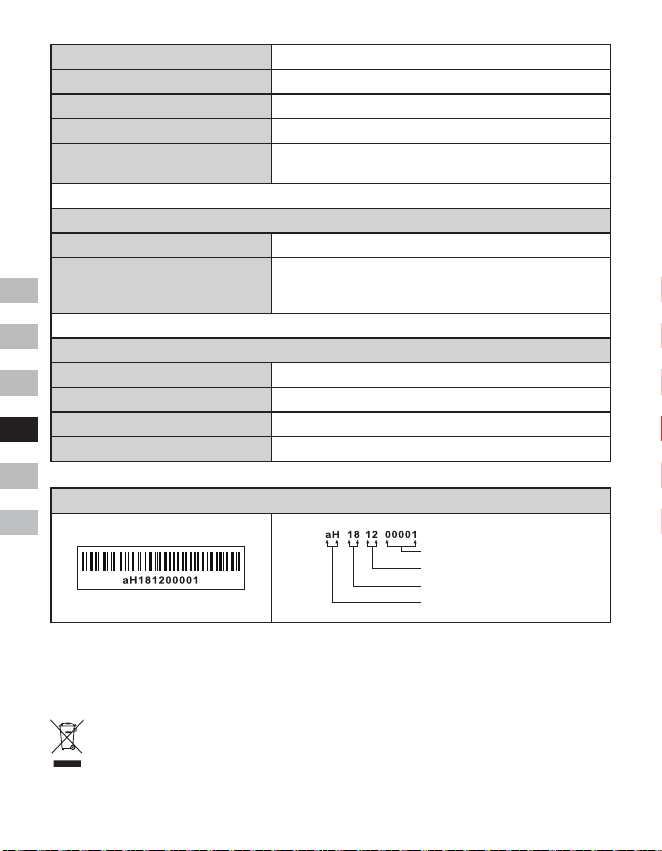
50
GB
F
E
NL
D
I
Ondersteund proel A2DP
Bluetooth-audiocodec SBC
Zendvermogen Specicatie Vermogensklasse 2
Bereik in rechte lijn 10meter / 30voet
De frequentie en het maximale
uitgezonden vermogen
2402MHz ~ 2480MHz: 3.81dBm (Bluetooth EDR)
Ingebouwde batterij
Batterij Oplaadbare lithium-ionbatterij 18650 3,65V 2600mAh
Batterijduur
Bij gebruik luidspreker 10mW, is de batterijduur ca.20
uur bij gebruiksperiode van 4 uur per dag op normaal
volume.
Algemeen
DC-IN Micro-USB-aansluiting 5V 1A
Laadstroom 500mA
Laadtijd ca. 6,0 uur
Bedrijfstemperatuurbereik 0°C tot + 35°C
※
De streepjescode op het product is als volgt opgebouwd:
Serienummer
Productiemaand
Productiejaar
Productcode
Sangean behoudt zich het recht voor de specicaties zonder voorafgaande kennisgeving te
wijzigen.
RECYCLING Dit product is voorzien van het selectieve sorteersymbool voor afgedankte
elektrische en elektronische apparatuur (WEEE). Dit houdt in dat het product bij het
recycleren of ontmantelen ervan behandeld moet worden in overeenstemming met de
Europese richtlijn 2012/19/EU om de inwerking van deze operatie op het milieu te
minimaliseren.
51
GB
F
E
NL
D
I
Die Wortmarke und Logos von Bluetooth
®
sind eingetragene Handelszeichen der
Bluetooth SIG, Inc. und werden von
SANGEAN ELECTRONICS INC. unter
Lizenz verwendet.
Wichtige
Sicherheitshinweise
1. Stellen Sie das Gerät nicht in der Nähe
von Hitzequellen, wie z. B. Heizungen,
Herden oder anderen Geräten die Hitze
produzieren (z. B. Verstärker) auf.
2. Verwenden Sie lediglich vom Hersteller
angegebenes Zubehör.
3. Um Feuer und elektrischen Schlägen
vorzubeugen, vermeiden Sie es
das Gerät Regen oder Feuchtigkeit
auszusetzen.
4. Dieses Gerät darf keinen Wassertropfen
und -spritzern ausgesetzt werden.
Gegenstände die mit Flüssigkeiten
gefüllt sind dürfen nicht auf das Gerät
gestellt werden.
5. Die Batterien dürfen niemals starker
Hitze, wie z. B. Sonnenlicht, Feuer o. Ä.
ausgesetzt werden.
6. Änderungen oder Modifizierungen,
die nicht ausdrücklich von der für
die Einhaltung der Vorschriften
verantwortlichen Partei genehmigt
wurden, können dazu führen, dass die
Berechtigung zum Betrieb des Geräts
und die Gewährleistung erlöschen.
7. VORSICHT: Explosionsgefahr, wenn
die Batterie durch einen falschen Typ
ersetzt wird.
8. Radio nicht Wasser, Dampf oder Sand
aussetzen.
9. Lassen Sie Ihr Radio
nicht an Orten, an denen
übermäßige Hitze Schäden
verursachen kann.
10. Soweit es zutreffend und für die
Sicherheit relevant ist, sind die
nachfolgenden Informationen
einzubeziehen:
● Mindestabstände um das Gerät
herum für die ausreichende
Belüftung;
● Die Belüftung darf nicht durch
Abdeckung der Ventilationsöffnungen
mit Gegenständen wie Zeitungen,
Tischdecken, Gardinen usw.
behindert werden;
● Es darf kein offenes Feuer, wie z.B.
angezündete Kerzen, auf das Gerät
gestellt werden;
● Bei der Entsorgung von Batterien
sind Umweltaspekte zu beachten;
● Verwendung des Geräts in tropischen
und / oder moderaten Klimazonen.
11. VORSICHT: Es besteht Explosionsgefahr,
falls Batterien falsch eingelegt werden.
Nur durch Batterien des gleichen oder
gleichwertigen Typs ersetzen.
12. Falls ein Gerät über eine austauschbare
Lithium-Batterie verfügt, gelten folgende
Vorschriften:
● Falls die Batterie vom Nutzer
auszutauschen ist, muss eine
entsprechende Warnung neben der
Batterie angebracht oder sowohl
in die Bedienungs- als auch in die
Wartungsanleitung eingefügt werden;
● Falls die Batterie nicht vom
Nutzer auszutauschen muss eine
entsprechende Warnung neben
der Batterie angebracht bzw. in die
Wartungsanleitung eingefügt werden.
Warnung:
Versuchen Sie nicht, die integrierte Lithium-
Batterie zu entfernen oder zu ersetzen. Bei
nicht autorisiertem Austausch der Batterie
wird die Garantie nichtig.
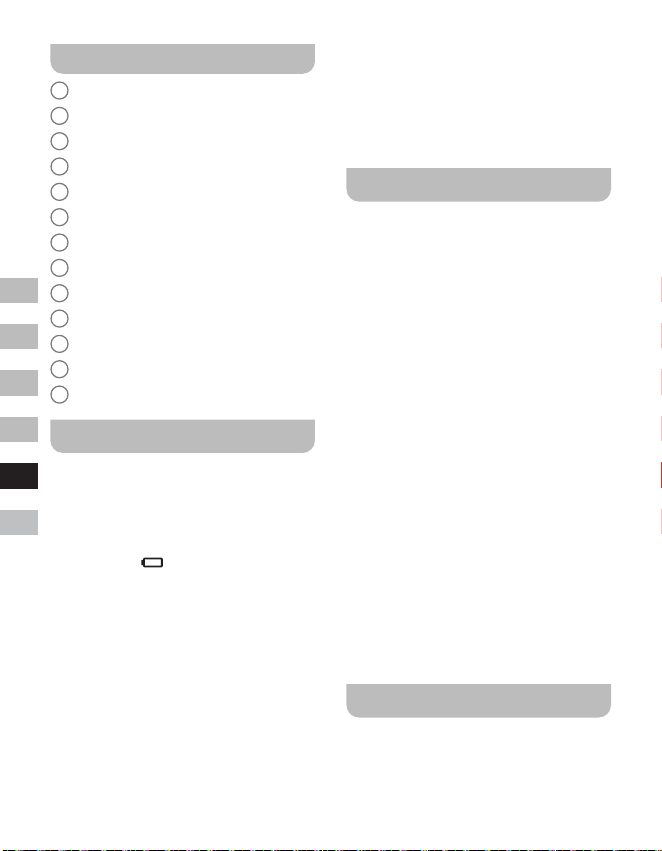
52
GB
F
E
NL
D
I
Tasten und Anschlüsse
1
Lautsprecher
2
Batterieladeanzeige
3
Bluetooth-LED-Anzeige
4
OLED
5
Lautstärke erhöhen
6
Lautstärke reduzieren
7
Tuning-Regler / Auswahl / Menü
8
Modus-Taste
9
Betriebstaste
10
DC IN 5V / 1A USB-Ladeanschluss
11
Aux-Eingang
12
Externe Antennenbuchse
13
Passiver Lautsprecher
Radioauaden
Das Radio wird über eine integrierte Lithium-
Ion-Batterie betrieben, die entweder via
USB-Ladeanschluss oder via DC 5V,
1000mA Netzteil (nicht enthalten) aufgeladen
werden kann. Eine reduzierte Leistung,
Störungen, Klirrgeräusche sowie eine niedrige
Batterieanzeige
sind alles Anzeichen dafür,
dass die Batterie aufgeladen werden muss.
Laden Sie die Batterie vor dem erstmaligen
Gebrauch vollständig auf.
HINWEIS:
Fangen Sie an, indem Sie das Radio
aufladen. Bitte stellen Sie sicher, dass die
USB-Stromquelle einen Ladestrom von 5V
1A bereitstellen kann. Anderenfalls würde
die USB-Stromquelle beschädigt.
● Schließen Sie den Micro-USB-Stecker
des (mitgelieferten) Kabels an den Micro-
USB-Ladeanschluss an der Rückseite des
Geräts an.
● Schließen Sie den herkömmlichen
USB-Stecker des Kabels an den USB-
Port eines Computers oder anderen
Ladegeräts an. Während der Aufladung
leuchtet die Batterieladeanzeige rot. Nach
dem vollständigen Aufladen der Batterie
erlischt die rote Batterieladeanzeige.
Radiobetrieb - DAB
1. Schließen Sie den Stecker der
(mitgelieferten) externen Antenne an die
Antennenbuchse an der Rückseite des
Radios an.
2. Schalten Sie das Radio mit der
Betriebstaste ein.
3. Bei der erstmaligen Verwendung des
Radios führt das System eine Suche
nach Band III DAB-Radiosendern durch.
Falls das Radio bereits zu einem früheren
Zeitpunkt verwendet wurde, schaltet das
Radio den zuletzt angehörten Sender ein.
4. Sobald während der Sendersuche ein
neuer Sender gefunden wird, erhöht sich
der Zähler entsprechend und der neue
Sender wird zur Senderliste hinzugefügt.
Der Balken weise auf den Fortschritt der
Sendersuche hin.
5. Nach Abschluss der Sendersuche wird
der erste Sender (alphanumerische
Reihenfolge 0...9...A....Z) wiedergegeben.
6. Falls die Senderliste nach der
Sendersuche noch immer leer ist,
erscheint die Anzeige „No Service“. Falls
keine Signale gefunden wurden, stellen
Sie das Radio im Hinblick auf einen
besseren Empfang ggf. um.
Sender auswählen - DAB
1. Schalten Sie das Radio mit der
Betriebstaste ein.
2. Drücken Sie die Modus-Taste zur
Auswahl des DAB-Modus.
53
GB
F
E
NL
D
I
3. Drehen Sie den Tuning-Regler, um durch
die Liste der verfügbaren Sender zu
scrollen.
4. Drücken Sie die Auswahl-Taste, um einen
Sender auszuwählen und einzuschalten.
5. Mit den Lautstärke-Tasten können Sie
die Lautstärke je nach Bedarf erhöhen
bzw. reduzieren. Alternativ dazu können
Sie auch die Senderliste über das DAB-
Menü aufrufen. Halten Sie die Menü-
Taste gedrückt und drehen Sie dann den
Tuning-Regler zur Auswahl von „Station
List“. Drücken Sie die Auswahl-Taste.
HINWEIS:
Falls sich ein ausgewählter Sender
nicht finden lässt, ist es möglicherweise
erforderlich, das Radio für einen besseren
Empfang umzustellen.
Zusatzdienste - DAB
Einige Radiosender übertragen zusätzliche
Dienste. Sofern solche Dienste verfügbar
sind, werden diese unmittelbar nach dem
dazugehörigen Hauptsender angezeigt,
wenn Sie den Tuning-Regler drehen. Um
den ausgewählten Dienst einzuschalten,
drücken Sie die Auswahl-Taste.
Sendersuche - DAB
Mit der Zeit werden neue Sender verfügbar
sein, insbesondere wenn Sie in eine andere
Stadt umziehen. In solch einem Fall müssen
Sie eine erneute Sendersuche durchführen.
1. Halten Sie im DAB-Modus die Menü-
Taste gedrückt, um das DAB-Menü zu
öffnen.
2. Drehen Sie den Tuning-Regler zur
Auswahl von „Full Scan“.
3. Drücken Sie die Auswahl-Taste. Das
Radio führt dann die Suche nach Band III
DAB-Radiosendern durch.
Mit jedem neu gefundenen Radiosender
erhöht sich der Zähler im Display und
die gefundenen Sender werden zur
Wiedergabeliste des Radios hinzugefügt.
Manuelle Sendersuche - DAB
Mit dieser Funktion können Sie direkt nach
Band III DAB-Sendern suchen (5A bis 13F).
1. Halten Sie im DAB-Modus die Taste
Menü gedrückt, um das DAB-Menü zu
öffnen.
2. Drehen Sie den Tuning-Regler zur
Auswahl der Option „Manual tune“.
3. Drücken Sie die Auswahl-Taste, um die
manuelle Suchfunktion auszuwählen.
4. Drehen Sie den Tuning-Regler zur
Auswahl des gewünschten DAB-Senders.
5. Drücken Sie die Auswahl-Taste, um den
ausgewählten Sender einzuschalten.
Senderreihenfolge - DAB
Ihr Radio unterstützt 3 Einstellungen zur
Anordnung von Sendern: Alphanumerisch,
Ensemble, Verfügbar.
1. Halten Sie im DAB-Modus die Taste
Menü gedrückt, um das DAB-Menü zu
öffnen.
2. Drehen Sie den Tuning-Regler zur
Auswahl der Option „Station order“.
3. Drücken Sie die Auswahl-Taste, um die
Einstellungen für die Senderreihenfolge
aufzurufen.
4. Drehen Sie den Tuning-Regler zur
Auswahl von „Alphanumeric“, „Ensemble“
oder „Valid“.
„Alphanumeric“ – sortiert die Senderliste
in alphanumerischer Reihenfolge 0...9
A....Z.
„Ensemble“ – sortiert die Sender nach
DAB-Multiplex.
54
GB
F
E
NL
D
I
„Valid“ – zeigt nur Sender an, für die ein
Signal gefunden werden konnte.
5. Drücken Sie die Auswahl-Taste zum
Übernehmen der ausgewählten Einstellung.
Dynamikbereichsteuerung
- DAB
Die Dynamikbereichsteuerung (oder kurz
DRC) kann leisere Töne lauter wiedergeben,
wenn das Radio in lauten Umgebungen
verwendet wird, indem der Dynamikbereich
des Audiosignals reduziert wird.
1. Halten Sie im DAB-Modus die Menü-Taste
gedrückt, um das DAB-Menü aufzurufen.
2. Drehen Sie den Tuning-Regler zur
Auswahl der Option „DRC Value“.
3. Drücken Sie die Auswahl-Taste, um den
DRC-Einstellungsmodus auszuwählen.
4. Drehen Sie den Tuning-Regler und
markieren Sie die gewünschte DRC-
Einstellung (Standardeinstellung: Off).
Off – DRC ist deaktiviert; übertragene
DRC-Einstellungen werden ignoriert.
Low – DRC-Einstellung entspricht der Hälfte
der vom Sender übertragenen Einstellung.
High – DRC-Einstellung entspricht der
vom Sender übertragenen Einstellung.
5. Drücken Sie die Auswahl-Taste zum
Bestätigen Ihrer Auswahl.
HINWEIS:
Nicht alle DAB-Sender nutzen die DRC-
Funktion. Wenn die Sendung die DRC-
Funktion nicht unterstützt, hat die DRC-
Einstellung des Radios keinen Eekt.
Nicht gefundenen Sender -
DAB
Wenn Sie in einen anderen Teil Ihres Landes
ziehen, kann es passieren, dass einige
der Sender in der Senderliste nicht mehr
verfügbar sind. Unter Umständen können
DAB-Sender auch geschlossen werden oder
Standort bzw. Frequenz ändern. Sender, die
nicht gefunden oder die nicht für lange Zeit
nicht empfangen werden können, werden
in der Senderliste mit einem Fragezeichen
dargestellt. Mit dieser Funktion können Sie
auf diese Weise markierte DAB-Sender aus
der Senderliste löschen.
1. Halten Sie im DAB-Modus die Menü-
Taste gedrückt, um das DAB-Menü zu
öffnen.
2. Drehen Sie den Tuning-Regler zur
Auswahl von „Prune Station“.
3. Drücken Sie die Auswahl-Taste, um den
Einstellungsmodus aufzurufen.
4. Um die Funktion zu aktivieren, drehen
Sie den Tuning-Regler zur Auswahl der
Option „Yes“ und bestätigen Sie durch
Drücken der Auswahl-Taste. Falls Sie die
Sender nicht löschen möchten, wählen
Sie „No“ oder „Back“, um zum vorherigen
Menü zurückzukehren. Bestätigen Sie mit
der Auswahl-Taste.
HINWEIS:
Falls Sie in eine andere Stadt umgezogen
sind, wird empfohlen, eine neue
Sendersuche durchzuführen (siehe Abschnitt
„Neue Sender suchen“).
Radiobetrieb - UKW
1. Schließen Sie den Stecker der
(mitgelieferten) externen Antenne an die
Antennenbuchse an der Rückseite des
Radios an.
2. Schalten Sie das Radio mit der
Betriebstaste ein.
3. Drücken Sie die Modus-Taste zur
Auswahl des UKW-Modus.
4. Halten Sie die Menü-Taste gedrückt, um
das UKW-Menü zu öffnen.

55
GB
F
E
NL
D
I
5. Drehen Sie den Tuning-Regler zur
Auswahl der Option „SCAN“. Drücken
Sie die Auswahl-Taste, um die Suche
von der niedrigen zur höheren Frequenz
zu starten. Wenn ein Sender mit
ausreichender Stärke gefunden wurde,
blinkt die Frequenz 6 Sekunden im
Display und das Radio setzt nach diesen
6 Sekunden die Sendersuche fort. Um
den gefundenen Sender einzuschalten
oder die Sendersuche zu beenden,
drücken Sie die Auswahl-Taste.
6. Im Display wird die Frequenz des
gefundenen Signals angezeigt. Sofern
das Signal stark genug ist und RDS-
Daten übertragen werden, wird der
Sendername angezeigt.
7. Am Ende des Wellenbands setzt
das Radio die Sendersuche in
entgegengesetzter Richtung fort.
8. Mit den Lautstärketasten können Sie die
Lautstärke je nach Bedarf erhöhen oder
reduzieren.
9. Drücken Sie die Betriebstaste, um das
Radio auszuschalten.
Manuelle Sendersuche - FM
1. Drehen Sie im UKW-Modus den Tuning-
Regler zum Einschalten eines Senders.
2. Mit den Lautstärketasten können Sie die
Lautstärke je nach Bedarf erhöhen oder
reduzieren.
Empndlichkeitder
Sendersuche - UKW
Ihr Radio bietet für die automatische
Sendersuche eine Option für lokale und
entfernte Sender an. Bei Auswahl der
lokalen Funktion werden die schwächeren
Signale weiter entfernter Rundfunkanstalten
ignoriert, damit die stärkeren Signale besser
gefunden werden können.
1. Halten Sie im UKW-Modus die Menü-
Taste gedrückt, um das UKW-Menü zu
öffnen.
2. Drehen Sie den Tuning-Regler zur
Auswahl der Option „FM Scan Zone“.
Drücken Sie die Auswahl-Taste,
um den Modus zur Einstellung der
Suchempfindlichkeit aufzurufen. Die
aktuelle Einstellung ist mit einem
Sternchen markiert.
3. Drehen Sie den Tuning-Regler zur
Auswahl von „local“ (nur Sender
mit stärkerem Signal) oder „Distant“
(alle Sender). Die Option „Distant“
ermöglicht die Suche nach Sendern mit
schwächerem Signal.
4. Drücken Sie die Auswahl-Taste
zum Bestätigen Ihrer Auswahl. Ihre
Einstellung bleibt im Radio gespeichert,
bis Sie diese erneut ändern oder eine
Systemrückstellung durchführen.
Radiosender im DAB- oder
UKW-Modus speichern
Das Radio verfügt über jeweils 10 DAB- und
UKW-Speicherplätze. Die Vorgehensweise
zum Speichern von Sendern ist in beiden
Modi identisch.
1. Schalten Sie das Radio mit der
Betriebstaste ein.
2. Schalten Sie wie oben beschrieben einen
Radiosender ein.
3. Halten Sie die Menü-Taste gedrückt.
Drehen Sie dann den Tuning-Regler zur
Auswahl der Option „Favorite Station“.
Drücken Sie die Auswahl-Taste, um den
Speichermodus aufzurufen.
4. Drehen Sie den Tuning-Regler zur
Auswahl von „Preset Station“ und
drücken Sie dann die Auswahl-Taste.
5. Drehen Sie den Tuning-Regler, um
durch die Liste der Speicherplätze zu
56
GB
F
E
NL
D
I
scrollen, bis Sie einen leeren oder einen
zu ändernden Speicherplatz gefunden
haben.
6. Drücken Sie die Auswahl-Taste, um
den eingeschalteten Radiosender zu
speichern. Im Display erscheint dann z.B.
die Anzeige „Preset 2 saved“.
Wiederholen Sie diese Vorgehensweise,
um Sender auf den anderen Plätzen
zu speichern. Bereits auf einem
Speicherplatz gespeicherte Sender
werden durch diese Vorgehensweise
überschrieben.
HINWEIS:
Die gespeicherten Radiosender bleiben auch
nach dem Ausschalten des Radios erhalten.
Gespeicherte Radiosender
im DAB- oder UKW-Modus
aufrufen
1. Schalten Sie das Radio mit der
Betriebstaste ein.
2. Schalten Sie mit der Modus-Taste den
gewünschten Modus ein.
3. Halten Sie die Menü-Taste gedrückt.
Drehen Sie dann den Tuning-Regler zur
Auswahl der Option „Favorite Station“.
Drücken Sie die Auswahl-Taste, um die
Einstellung zu öffnen.
4. Drehen Sie den Tuning-Regler zur
Auswahl von „Recall Station“ und drücken
Sie dann die Auswahl-Taste.
5. Drehen Sie den Tuning-Regler
zur Auswahl des gewünschten
Speicherplatzes und drücken Sie die
Auswahl-Taste. Das Radio schaltet
den auf diesem Platz gespeicherten
Radiosender ein. Im Display wird
die Speicherplatznummer (z.B „P2“)
angezeigt.
Anzeigeoptionen - DAB /
UKW / Bluetooth
Das Radio unterstützt in den Modi DAB,
UKW und Bluetooth eine Vielzahl von
Anzeigeoptionen:
● Drücken Sie die Taste Info, um durch die
unterschiedlichen Optionen zu scrollen.
Anzeigeoptionen im DAB-Modus
Im DAB-Modus kann das Radio folgende
Informationen anzeigen:
Lauftext, Programm-Typ, Multiplex-Name,
Uhrzeit / Datum, Frequenz, Bitrate und
Audio-Typ, Verschlüsselungsdaten, DL Plus
Text, Signalstärke.
Für die Option DL Plus Text bieten
einige Sender zusätzlich zum normalen
Text möglicherweise noch andere
sendungsbezogene Informationen an.
Falls keine Informationen verfügbar sind,
erscheint im Display die Anzeige „no info“.
UKW-Anzeigeoptionen
Im UKW-Modus zeigt das Radio anhand
der RDS-Funktion (Radio Data System)
den Sendernamen und zusätzliche
Textinformationen an, sofern diese von der
Rundfunkanstalt bereitgestellt werden und
das Signal stark genug ist.
Das Radio kann im UKW-Modus folgende
Informationen anzeigen:
Radiotext, Programm-Typ, Uhrzeit / Datum,
Frequenz.
Bluetooth-Anzeigeoptionen
Falls das verbundene Gerät in der
Lage ist, Informationen bzgl. des aktuell
wiedergegebenen Titels bereitzustellen, kann
das Radio im Bluetooth-Modus folgende
Informationen anzeigen:
Gerätename, Titel, Künstler, Album.
57
GB
F
E
NL
D
I
Bitte beachten Sie, dass die Verfügbarkeit
der Informationen von dem jeweils
spezischen Medienformat abhängig ist.
Musikwiedergabe via
Bluetooth-Übertragung
Bevor Sie mit dem DDR-7 Musik via
Bluetooth-Übertragung abspielen können,
müssen Sie Ihr externes Bluetooth-Gerät
zunächst mit dem DDR-7 koppeln. Durch
die Kopplung entsteht eine „Verbindung“,
anhand derer sich die zwei Geräte
gegenseitig identizieren können.
Erstmalige Kopplung und
Wiedergabe Ihres Bluetooth-
Geräts
1. Drücken Sie, wenn das Radio
eingeschaltet ist, die Modus-Taste zur
Auswahl der Bluetooth-Funktion. Im
Display erscheint die Anzeige „Bluetooth
Pairing“. Die Bluetooth-LED-Anzeige am
Radio blinkt zügig blau und weist somit
darauf hin, dass das Radio verfügbar ist.
2. Aktivieren Sie die Bluetooth-Funktion
an Ihrem externen Gerät (siehe
Bedienungsanleitung des externen Geräts).
Öffnen Sie die Liste mit den Bluetooth-
Geräten und wählen Sie das Gerät mit
dem Namen „DDR-7“ aus. (Bei einiben
Smartphones mit Bluetooth-Versionen älter
als BT2.1 ist gegebenenfalls die Eingabe
eines Passworts erforderlich. Geben Sie in
solch einem Fall „0000“ ein).
3. Nach der erfolgreichen Verbindung ertönt
ein Bestätigungston und der Name des
verbundenen Bluetooth-Geräts erscheint
im Display. Die Bluetooth-LED-Anzeige
leuchtet dann stetig blau. Sie können nun
am externen Gerät Musik auswählen und
abspielen.
4. Die Lautstärke können Sie am externen
Gerät oder direkt am Radio einstellen.
Verwenden Sie die entsprechenden
Tasten am Bluetooth-Gerät, um die
Wiedergabe zu starten, zu unterbrechen,
oder um Titel auszuwählen.
HINWEIS:
● Falls 2 Bluetooth-Geräte das erste Mal
gekoppelt werden, suchen beide Geräte
nach dem Radio; die Verfügbarkeit des
Radios wird an beiden Geräten angezeigt.
Sobald jedoch ein Gerät die Verbindung
mit dem Radio hergestellt hat, wird das
Radio nicht in der Geräte-Liste des
zweiten Bluetooth-Geräts erscheinen.
● Falls das externe Gerät umgestellt wird
und dadurch die Reichweite verlässt,
wird die Verbindung vorübergehend
getrennt. Das Radio stellt die Verbindung
automatisch wieder her, sobald das
externe Gerät wieder in Reichweite ist.
Bitte beachten Sie, dass während dieser
Zeit der Trennung kein anderes Bluetooth-
Gerät mit dem Radio gekoppelt oder
verbunden werden kann.
● Falls „DDR-7“ in der Geräte-Liste des
externen Geräts erscheint, die Verbindung
jedoch nicht hergestellt werden kann,
löschen Sie den Namen aus der Liste und
koppeln Sie das Radio erneut anhand
oben erläuterter Vorgehensweise.
● Die effektive Reichweite zwischen dem
Radio und dem gekoppelten Gerät beträgt
ungefähr 10 Meter (30 Fuß). Hindernisse
zwischen beiden Geräten können die
Reichweite reduzieren.
● Die Leistungsfähigkeit der Bluetooth-
Verbindung kann je nach verbundenem
Bluetooth-Gerät variieren. Informieren
Sie sich über die Bluetooth-Fähigkeiten
Ihres externen Geräts, bevor Sie dieses
verbinden. Nicht alle Bluetooth-Geräte
unterstützen alle Bluetooth-Funktionen.
● Bei einigen Handys ist es möglich,
dass die Bluetooth-Übertragung
stummgeschaltet oder die Verbindung
vorübergehend unterbrochen
wird, während Sie Anrufe tätigen /
entgegennehmen, Textnachrichten

58
GB
F
E
NL
D
I
oder E-Mails senden / empfangen
oder andere Funktionen, die nicht im
Zusammenhang mit der Audioübertragung
stehen, durchführen. Dies ist abhängig
vom verbundenen Gerät und keine
Fehlfunktion des DDR-7.
Wiedergabe von Audiodateien
im Bluetooth-Modus
Nach der erfolgreichen Verbindung des
Radios mit Ihrem externen Bluetooth-Gerät
können Sie die Musikwiedergabe mit den
Tasten des Bluetooth-Geräts starten.
1. Während der Wiedergabe können Sie
Lautstärke anhand der Lautstärkeregler
am Radio oder am verbundenen
Bluetooth-Gerät entsprechend einstellen.
2. Verwenden Sie die Tasten am Bluetooth-
Gerät, um die Wiedergabe zu starten / zu
unterbrechen bzw. um Titel auszuwählen.
Alternativ dazu können Sie die
Wiedergabe mit dem Tuning-Regler am
Radio steuern.
Drehen Sie den Tuning-Regler im
Uhrzeigersinn, um den nächsten Titel
abzuspielen.
Drehen Sie den Tuning-Regler entgegen
dem Uhrzeigersinn, um den vorherigen
Titel abzuspielen.
HINWEIS:
Nicht alle Anwendungen oder Geräte
unterstützen die Steuerung mit diesen
Tasten.
Erneute Verbindung eines früher
gekoppelten Bluetooth-Geräts
Das DDR-7 kann bis zu 8 gekoppelte
Bluetooth-Geräte speichern. Bei
Überschreitung dieses Werts wird das
jeweils älteste gespeicherte Gerät vom
neuen Gerät überschrieben.
Falls Sie Ihr Bluetooth-Gerät bereits zu einem
früheren Zeitpunkt mit dem DDR-7 gekoppelt
hatten, erkennt Ihr Radio das Bluetooth-
Gerät. Das Radio wird immer versuchen,
die Verbindung mit dem jeweils zuletzt
verbundenen Bluetooth-Gerät herzustellen.
Falls dieses Gerät nicht verfügbar ist, wird
das DDR-7 versuchen, die Verbindung mit
dem davor verbundenen Bluetooth-Gerät
herzustellen.
Trennung des Bluetooth-Geräts
1. Halten Sie die Menü-Taste gedrückt, um
den Bluetooth-Modus einzuschalten.
2. Drehen Sie den Tuning-Regler zur
Auswahl von „Cancel Pairing“ und
drücken Sie dann die Auswahl-Taste.
3. Um Ihr Bluetooth-Gerät zu trennen,
drehen Sie den Tuning-Regler zur
Auswahl von „Yes“ und drücken Sie
die Auswahl-Taste. Es ertönt ein
Bestätigungston und die Bluetooth-LED-
Anzeige blinkt zügig blau und weist somit
darauf hin, dass das Radio wieder für
die Kopplung verfügbar ist. Wählen Sie
„No“ oder „Back“, um zum vorherigen
Menü zurückzukehren. Drücken Sie die
Auswahl-Taste zum Bestätigen.
4. Drücken Sie alternativ dazu die Modus-
Taste, um einen anderen als den
Bluetooth-Modus auszuwählen, oder
deaktivieren Sie die Bluetooth-Funktion
an Ihrem Bluetooth-Gerät, um die
Verbindung zu trennen.
Löschung gekoppelter
Bluetooth-Geräte
1. Halten Sie die Menü-Taste gedrückt, um
den Bluetooth-Modus einzuschalten.
2. Drehen Sie den Tuning-Regler zur
Auswahl von „Clear Pairing“ und drücken
Sie dann die Auswahl-Taste.
3. Um die Liste mit den gekoppelten
Geräten zu löschen, drehen Sie den
Tuning-Regler zur Auswahl von „Yes“ und
drücken Sie dann die Auswahl-Taste.
59
GB
F
E
NL
D
I
Wählen Sie „No“ oder „Back“, um zum
vorherigen Menü zurückzukehren.
Drücken Sie die Auswahl-Taste zum
Bestätigen.
Sleep-Timer
Sie können das Radio so programmieren,
dass es sich nach Ablauf einer bestimmten
Zeit automatisch ausschaltet. Stellen Sie
diesen Sleep-Timer mit einer Zeit zwischen
15 und 120 Minuten ein.
1. Halten Sie, wenn das Radio eingeschaltet
ist, die Menü-Taste gedrückt, um
das Menü für den aktuellen Modus
aufzurufen.
2. Drehen Sie den Tuning-Regler zur
Auswahl von „System Setup“ und
drücken Sie die Auswahl-Taste, um das
Menü mit den Systemeinstellungen zu
öffnen.
3. Drehen Sie den Tuning-Regler zur
Auswahl der Option „Sleep“ und
drücken Sie die Auswahl-Taste, um die
Einstellungen zu öffnen.
4. Drehen Sie den Tuning-Regler zur
Auswahl der gewünschten Einstellung.
Wählen Sie eine Zeit zwischen 15
und 120 Minuten, oder wählen Sie die
Einstellung „Sleep off“. Bestätigen Sie
Ihre Auswahl mit der Auswahl-Taste.
5. Ein aktivierter Sleep-Timer wird im
Display mit einem entsprechenden Icon
angezeigt. Um die verbleibende Dauer
bis zur automatischen Abschaltung
anzuzeigen, halten Sie die Menü-Taste
gedrückt und drehen Sie dann den
Tuning-Regler zur Auswahl von „System
Setup“. Drücken Sie die Auswahl-Taste,
und drehen Sie dann den Tuning-Regler
zur Auswahl der Option „Sleep“. Drücken
Sie die Auswahl-Taste erneut. Im
Display wird die verbleibende Dauer des
aktivierten Sleep-Timers angezeigt.
6. Um den Sleep-Timer vor Ablauf der
eingestellten Zeit zu deaktivieren und
das Radio auszuschalten, drücken Sie
die Betriebstaste, um das Radio manuell
auszuschalten.
Um den Sleep-Timer zu deaktivieren und
das Radio weiterlaufen zu lassen, önen
Sie die Einstellungen des Sleep-Timers
erneut (Schritte 1 bis 4 oben) und wählen
Sie unter Schritt 4 die Option „Sleep
off“. Bestätigen Sie durch Drücken der
Auswahl-Taste.
Kontrast
Sie können den Kontrast der Displayanzeige
einstellen.
1. Halten Sie, wenn das Radio eingeschaltet
ist, die Menü-Taste gedrückt, um
das Menü für den aktuellen Modus
aufzurufen.
2. Drehen Sie den Tuning-Regler zur
Auswahl von „System Setup“ und
drücken Sie die Auswahl-Taste, um das
Menü mit den Systemeinstellungen zu
öffnen.
3. Drehen Sie den Tuning-Regler zur
Auswahl der Option „Contrast“ und
drücken Sie die Auswahl-Taste, um die
Einstellungen zu öffnen.
4. Drehen Sie den Tuning-Regler zur
Auswahl einer Einstellung; der Kontrast
der Anzeige ändert sich zeitgleich.
Sobald Sie die Einstellung im Hinblick auf
eine optimale Lesbarkeit des Displays
gefunden haben, drücken Sie die
Auswahl-Taste zum Bestätigen dieser
Einstellung.
Automatische
Aktualisierung der Uhrzeit
Das Radio aktualisiert die Uhrzeit
automatisch, wenn Sie das Radio

60
GB
F
E
NL
D
I
einschalten und einen DAB+ Sender
oder einen UKW-Sender, der RDS-Daten
überträgt, abspielen. Im Display blinkt
einige Sekunden lang die Anzeige 00:00,
und sofern ein DAB+ oder UKW RDS-
Uhrzeitsignal empfangen wird, wird dann die
Uhrzeit angezeigt. Sie können einstellen, ob
die Uhrzeit via DAB- oder UKW-Übertragung
aktualisiert werden soll.
1. Halten Sie, wenn das Radio eingeschaltet
ist, die Menü-Taste gedrückt, um
das Menü für den aktuellen Modus
aufzurufen.
2. Drehen Sie den Tuning-Regler zur
Auswahl von „System Setup“ und
drücken Sie die Auswahl-Taste, um das
Menü mit den Systemeinstellungen zu
öffnen.
3. Drehen Sie den Tuning-Regler zur
Auswahl der Option „Time Update“ und
drücken Sie die Auswahl-Taste, um die
Einstellungen zu öffnen.
4. Drehen Sie den Tuning-Regler zur
Auswahl der Option „DAB“, „FM“ oder
„Any“. Drücken Sie die Auswahl-Taste
zum Bestätigen.
Sprache einstellen
Per Werkseinstellung werden alle Menüs
und Mitteilungen in Englisch angezeigt. Sie
können jedoch eine andere Sprache für die
Anzeige auswählen.
1. Halten Sie, wenn das Radio eingeschaltet
ist, die Taste Menü gedrückt, um das
Menü für den aktuellen Modus zu öffnen.
2. Drehen Sie den Tuning-Regler zur
Auswahl von „System Setup“ und
drücken Sie die Auswahl-Taste, um das
Menü der Systemeinstellungen zu öffnen.
3. Drehen Sie den Tuning-Regler zur
Auswahl der Option „Sprache“ und
drücken Sie die Auswahl-Taste, um die
Einstellungen zu öffnen.
4. Wählen Sie mit dem Tuning-Regler eine
Sprache aus und bestätigen Sie mit der
Auswahl-Taste. Die Displayinformationen
werden dann in der ausgewählten
Sprache angezeigt.
Rückstellung
Sie können wie folgt vorgehen, um das
Radio vollständig auf die Werkseinstellungen
zurückzusetzen. Bitte beachten Sie,
dass bei der Rückstellung alle von Ihnen
vorgenommenen Einstellungen gelöscht
werden.
1. Halten Sie, wenn das Radio eingeschaltet
ist, die Taste Menü gedrückt, um das
Menü für den aktuellen Modus zu öffnen.
2. Drehen Sie den Tuning-Regler zur
Auswahl von „System Setup“ und
drücken Sie die Auswahl-Taste, um das
Menü der Systemeinstellungen zu öffnen.
3. Drehen Sie den Tuning-Regler zur
Auswahl der Option „Factory Reset“ und
drücken Sie die Auswahl-Taste, um die
Einstellungen zu öffnen.
4. Drehen Sie den Tuning-Regler zur
Auswahl von „Yes“ oder „No“. Falls
Sie die Systemrückstellung nicht
durchführen möchten, wählen Sie „No“
und drücken Sie die Auswahl-Taste zum
Bestätigen. Oder wählen Sie „Back“, um
zum vorherigen Menü zurückzukehren.
Bestätigen Sie durch Drücken der
Auswahl-Taste.
5. Drücken Sie nach der Auswahl von
„Yes“ die Auswahl-Taste, um das Radio
zurückzustellen. Es werden alle von
Ihnen vorgenommenen Einstellungen
und gespeicherten Radiosender gelöscht.
Alle Einstellungen werden auf die
Werkseinstellungen zurückgesetzt.
61
GB
F
E
NL
D
I
Anzeige der Software-Version
Die Anzeige der Software-Version dient
lediglich Referenzzwecken und kann nicht
geändert werden.
1. Halten Sie, wenn das Radio eingeschaltet
ist, die Menü-Taste gedrückt, um das
Menü für den aktuellen Modus aufzurufen.
2. Drehen Sie den Tuning-Regler zur
Auswahl von „System Setup“ und
drücken Sie die Auswahl-Taste, um das
Menü der Systemeinstellungen zu öffnen.
3. Drehen Sie den Tuning-Regler zur
Auswahl von „SW Version“ und drücken
Sie die Auswahl-Taste, um die Software-
Version anzuzeigen.
4. Drücken Sie ggf. die Taste Menü, um die
Anzeige zu verlassen.
Aux-Eingang
An der Rückseite des Radios befindet
sich ein 3,5mm Aux-Stereoeingang für
den Anschluss und die Wiedergabe eines
externen Audiogeräts, wie z.B. iPod, MP3-
oder CD-Player.
1. Drücken Sie, wenn das Radio
eingeschaltet ist, die Modus-Taste, bis im
Display die Anzeige „Aux In“ erscheint.
2. Schließen Sie ein externes Audiogerät
(z.B. iPod, MP3- oder CD-Player) an den
Aux-Eingang an.
3. Stellen Sie die Lautstärke an Ihrem iPod,
MP3- oder CD-Player und anschließend
ggf. am Radio entsprechend ein.
Technische Daten
Frequenzbereich
UKW 87,5-108 MHz
DAB 174,928-239,200 MHz
Verstärker
Ausgangsleistung 1,6W 10%T.H.D. @ 100Hz
Aux-Eingang
Eingangsempndlichkeit Eingabe 400mV Ausgabe 1,6W @ 100Hz
Lautsprecher
Lautsprecher 40mm 4ohm x 1
Passiver Lautsprecher 74,2X36,7 mm
Bluetooth
Bluetooth-Spezikationen Bluetooth
®
Ver 4.1

62
GB
F
E
NL
D
I
Unterstütztes Prol A2DP
Bluetooth Audio-CODEC SBC
Übertragungsleistung Spezikation Power Class 2
Reichweite (im Freien) 10Meter / 30Fuß
Frequenzbereich und
Übertragungsleistung
2402MHz ~ 2480MHz: 3.81dBm (Bluetooth EDR)
Integrierte Batterie
Batterie
Wiederauadbare Lithium-Ion-Batterie 18650 3,65V
2600mAh
Wiedergabedauer Batterie
Lautsprecherwiedergabe 10mW, ca. 20 Stunden für 4
Stunden pro Tag bei normaler Lautstärke.
Allgemein
DC-IN Micro-USB-Port 5V 1A
Ladestrom 500mA
Ladedauer ca. 6 h
Betriebstemperatur 0°C bis + 35°C
※
Folgender Barcode ist am Gerät angebracht:
Seriennummer
Herstellungsmonat
Herstellungsjahr
Produktcode
Sangean behält sich das Recht vor, die technischen Daten ohne Vorankündigung zu ändern.
RECYCLING Dieses Produkt ist mit dem Symbol für die getrennte Entsorgung von
elektrischen und elektronischen Geräten (WEEE) gekennzeichnet. Dies bedeutet, dass
das Produkt gemäß der Europäischen Richtlinie 2012/19/EU entsorgt wird, damit es
recycelt und demontiert und die Auswirkungen auf die Umwelt minimiert werden können.
63
GB
F
E
NL
D
I
Il marchio e i loghi Bluetooth
®
sono marchi
registrati di proprietà di Bluetooth SIG, Inc.
e qualsiasi uso di tali marchi da parte di
SANGEAN ELECTRONICS INC. è concesso
in licenza.
Importanti istruzioni di
sicurezza
1. Non installare vicino a fonti di calore
come radiatori, termoregolatori,
stufe o altri apparecchi (compresi gli
amplificatori) che producono calore.
2. Utilizzare solo gli accessori specificati
dal produttore.
3. Per ridurre il rischio di incendio o
scosse elettriche, non esporre questo
apparecchio a pioggia o umidità.
4. L’apparecchio non deve essere esposto
a gocce o spruzzi e nessun oggetto
contenente liquidi deve essere collocato
sopra di esso.
5. Le batterie non devono essere esposte
a calore eccessivo come ad esempio al
sole, fuoco o simili.
6. Qualsiasi cambiamento o modifica
non espressamente approvata dal
responsabile della conformità potrebbe
invalidare il diritto dell’utente a utilizzare
attrezzatura e garanzia.
7. ATTENZIONE: Rischio di esplosione
se la batteria viene sostituita con una di
tipo non corretto.
8. Non esporre la radio ad acqua, vapore
o sabbia.
9. Non esporre la radio
a fonti di calore
eccessive che
potrebbero causare
danni.
10. Se rilevanti per la sicurezza, le seguenti
informazioni dovrebbero essere incluse,
per quanto applicabili:
● distanze minime attorno
all’apparecchio per una sufficiente
ventilazione;
● la ventilazione non deve essere
impedita coprendo le apposite
aperture con oggetti come giornali,
tovaglie, tende, ecc;
● non collocare sull’apparecchio
fiamme esposte (come ad esempio
candele accese);
● prestare attenzione agli aspetti
ambientali di smaltimento delle
batterie;
● l’uso dell’apparecchio in climi tropicali
e / o moderati.
11. ATTENZIONE: Pericolo di esplosione
se la batteria viene sostituita in modo
errato. Sostituire solo con una dello
stesso tipo o equivalente.
12. Se un apparecchio è dotato di una
batteria al litio sostituibile, si applica
quanto segue:
● se la batteria deve essere sostituita
dall’utente, ci deve essere
un’avvertenza in prossimità di essa
o nelle istruzioni per l’uso e per la
manutenzione;
● se la batteria non deve essere
sostituita dall’utente, ci deve
essere un’avvertenza in prossimità
della batteria o nelle istruzioni di
manutenzione.
Avvertenza:
Non tentare di rimuovere o sostituire la
batteria al litio integrata. Le sostituzioni non
autorizzate potrebbero anche inficiare la
garanzia.
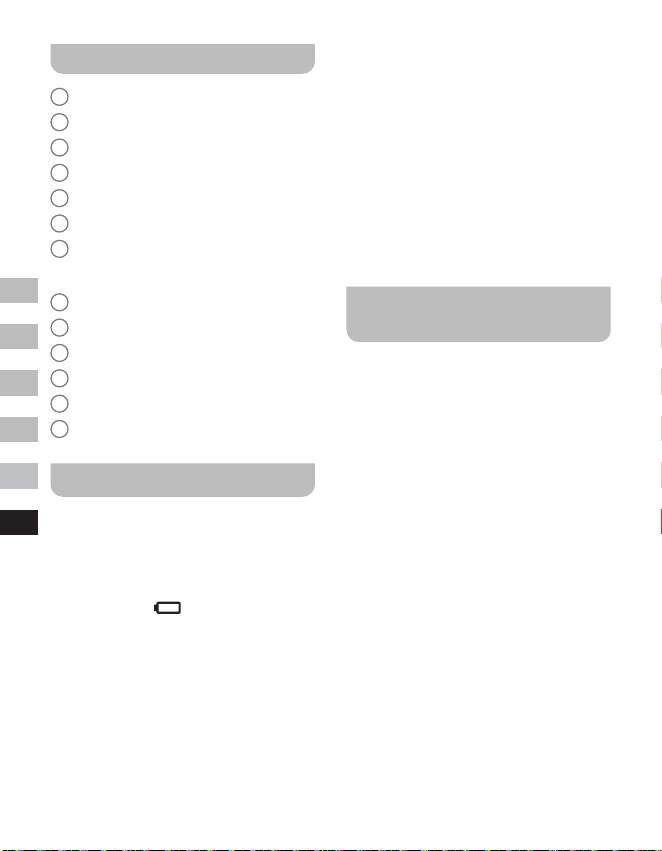
64
GB
F
E
NL
D
I
Comandi
1
Altoparlante
2
Indicatore di carica della batteria
3
Indicatore LED Bluetooth
4
Display OLED
5
Tasto del volume su
6
Tasto Volume giù
7
Manopola di comando della
sintonizzazione / tasto Select / Info /
Menu
8
Pulsante di modalità
9
Pulsante di accensione
10
DC IN 5V / 1A presa di ricarica USB
11
Presa d’ingresso ausiliaria
12
Presa d’antenna esterna
13
Altoparlante passivo
Ricarica della radio
La radio funziona con una batteria integrata
agli ioni di litio che può essere ricaricata
utilizzando la porta di ricarica USB o da
un adattatore di alimentazione USB (non
incluso) con una potenza nominale di DC 5V,
1000mA. Riduzione di potenza, distorsione,
suoni interrotti,
lenti o indicatore di
potenza della batteria in esaurimento sono
tutti segnali che la batteria deve essere
ricaricata.
Prima di far funzionare la radio per la prima
volta, caricare completamente la batteria.
NOTA:
È possibile iniziare a utilizzare la radio
durante la carica. Assicurarsi in questo caso
che la fonte di alimentazione USB possa
fornire 5V 1A di corrente elettrica. In caso
contrario, la fonte di alimentazione USB
potrebbere danneggiarsi.
● Collegare il micro connettore USB (in
dotazione) alla porta di ricarica USB sul
retro dell’unità.
● Collegare l’estremità della spina USB
standard (in dotazione) del cavo a
una porta USB di alimentazione su
un computer o su un altro dispositivo
di ricarica USB. Quando la batteria è
in carica, l’indicatore luminoso della
batteria sarà rosso. Quando la batteria è
completamente carica, l’indicatore rosso
di carica della batteria si spegne.
Funzionamento della radio -
DAB
1. Inserire la spina dell’antenna esterna
(in dotazione) nella presa dell’antenna
esterna situata sul retro della vostra
radio.
2. Premere il pulsante Power per accendere
la radio.
3. Se è la prima volta che la radio viene
usata, verrà effettuata una rapida
scansione dei canali DAB della Banda
III. Se la radio è già stata utilizzata in
precedenza, verrà selezionata l’ultima
stazione usata.
4. Durante il processo di scansione, man
mano che vengono rilevate nuove
stazioni, vengono aggiunte alla lista
memorizzata dalla radio. Il grafico a barre
indica il procedimento della scansione.
5. Al termine della scansione verrà
selezionata la prima stazione (in ordine
numerico-alfa 0...9...A. Z).
6. Se la lista delle stazioni è ancora vuota
dopo la scansione, la vostra radio
mostrerà “No Service”. Se non viene
rilevato alcun segnale, potrebbe essere
necessario riposizionare la radio in un
punto che dia una migliore ricezione.
65
GB
F
E
NL
D
I
Selezione di una stazione -
DAB
1. Premi il pulsante Power per accendere la
radio.
2. Premere il pulsante Mode per selezionare
la modalità radio DAB.
3. Ruotare la manopola di comando della
sintonizzazione per scorrere la lista delle
stazioni disponibili.
4. Premere il pulsante Select per
selezionare e sintonizzarsi sulla stazione
desiderata.
5. Usare il pulsante Volume su / giù per
impostare il livello del suono desiderato.
In alternativa, per accedere all’elenco
delle stazioni utilizzando il menu DAB,
tenere premuto il pulsante Menu e poi
ruotare la manopola di comando della
sintonizzazione per scegliere Station
List’. Premere il pulsante Select.
NOTA:
Se dopo aver selezionato una stazione,
questa non si sintonizza, potrebbe essere
necessario riposizionare la radio in una
punto che dia una migliore ricezione.
Servizi secondari - DAB
Alcune stazioni radio possono avere una
o più trasmissioni aggiuntive associate
ad esse. Se queste sono disponibili,
appariranno immediatamente dopo
la stazione principale mentre ruotate
la manopola di sintonizzazione. Per
sintonizzarsi sulla trasmissione desiderata,
premere il pulsante Select.
Trovare nuove stazioni -
DAB
Con il passare del tempo nuove stazioni
potrebbero diventare disponibili o potreste
aver spostato la radio in un’altra zona del
paese. In questo caso potrebbe essere
necessario fare in modo che la radio cerchi
nuove stazioni.
1. In modalità DAB, tenere premuto il
pulsante Menu per entrare nel menu
DAB.
2. Ruotare la manopola di comando per
selezionare “Full Scan”.
3. Premere il pulsante Select. La radio
eseguirà una scansione dei canali DAB
della Banda III.
Man mano che vengono trovate nuove
stazioni radio, il contatore delle stazioni
sul display aumenta e le stazioni radio
vengono aggiunte alla lista memorizzata
nella radio.
Sintonizzazione manuale -
DAB
La sintonizzazione manuale permette di
sintonizzarsi direttamente sui vari canali
DAB di banda III (da 5A a 13F).
1. In modalità DAB, tenere premuto il
pulsante Menu per entrare nel menu
DAB.
2. Ruotare la manopola di comando della
sintonizzazione per selezionare “Manual
Tune”.
3. Premere il pulsante Select per entrare
nell’opzione di sintonizzazione manuale.
4. Ruotare la manopola di comando della
sintonizzazione per scegliere il canale
DAB desiderato.
5. Premere il pulsante Select per far sì che
la radio si sintonizzi sul canale scelto.
Impostazione dell’ordine
delle stazioni - DAB
La radio ha 3 impostazioni per l’ordine
66
GB
F
E
NL
D
I
delle stazioni tra cui potete scegliere. Le
impostazioni dell’ordine delle stazioni sono
in ordine alfabetico, per gruppi e valide.
1. In modalità DAB, tenere premuto il
pulsante Menu per entrare nel menu
DAB.
2. Ruotare la manopola di comando della
sintonizzazione per selezionare “Station
Order”.
3. Premere il pulsante Select per accedere
alla modalità di regolazione dell’ordine
delle stazioni.
4. Ruotare la manopola di comando
della sintonizzazione per scegliere
“Alfanumerico”, “Gruppi” e “Valide”.
“Alfanumerico” - ordina la lista delle
stazioni in modo alfa-numerico 0...9
A...Z.
“Gruppo” - organizza la lista delle stazioni
per multiplex DAB.
“Valide” - mostra solo le stazioni per le
quali è possibile trovare un segnale.
5. Premere il tasto Select per confermare
l’ordine della stazione desiderato.
Impostazioni di controllo
della gamma dinamica -
DAB
Il controllo della gamma dinamica (noto
anche come DRC) può rendere i suoni bassi
più facili da sentire quando la vostra radio è
usata in un ambiente rumoroso, riducendo la
gamma dinamica del segnale audio.
1. In modalità DAB, tenere premuto il
pulsante Menu per entrare nel menu
DAB.
2. Ruotare la manopola di comando per
selezionare “DRC Value”.
3. Premere il pulsante Select per entrare
nella modalità di regolazione DRC.
4. Ruotare la manopola di controllo per
definire l’impostazione DRC desiderata
(l’impostazione predefinita è Off).
O - Il DRC è disattivato, la trasmissione
DRC sarà ignorata.
Low - Il livello DRC è impostato a 1 / 2 di
quello inviato dall’emittente.
Alto - Il DRC è impostato come inviato
dall’emittente.
5. Premere il pulsante Select per
confermare l’impostazione.
NOTA:
Non tutte le trasmissioni DAB usano la
funzione DRC. Se la trasmissione non
fornisce informazioni DRC, l’impostazione
DRC nella radio non avrà alcun eetto.
La funzione Prune station -
DAB
Se ti sposti in un’altra zona del paese,
alcune delle stazioni elencate potrebbero
non essere più disponibili. Inoltre, di tanto
in tanto, alcuni servizi DAB potrebbero
smettere la loro trasmissione, o possono
cambiare posizione o frequenza. Le stazioni
non trovate o che non sono state ricevute
per molto tempo, mostrano un punto
interrogativo. La funzione Prune stations
cancellerà dall’elenco queste stazioni DAB
contrassegnate.
1. In modalità DAB, tenere premuto il
pulsante Menu per entrare nel menu
DAB.
2. Ruotare la manopola di comando della
sintonizzazione per selezionare la “Prune
Station”.
3. Premere il pulsante Select per entrare
nella modalità di regolazione.
4. Per attivare la funzione Prune, ruotare
la manopola di sintonizzazione per
selezionare “Yes”. Premere il pulsante
67
GB
F
E
NL
D
I
Select per confermare l’impostazione.
Se non si vogliono eliminare le stazioni,
scegliendo “No” o “Back”, tornerete alla
visualizzazione del menu precedente.
Premete il pulsante Select per
confermare la vostra scelta.
NOTA:
Se avete spostato la radio in un’altra zona
del paese, dovreste anche effettuare una
nuova ricerca di stazioni (vedere la sezione
“Finding new stations”).
Funzionamento della radio -
FM
1. Inserite la spina dell’antenna esterna
(in dotazione) nella presa dell’antenna
esterna situata sul retro della vostra
radio.
2. Premi il pulsante Power per accendere la
radio.
3. Premere il pulsante Mode per selezionare
la banda FM.
4. Tenere premuto il pulsante Menu per
entrare nel menu FM.
5. Ruotare la manopola di comando
della sintonizzazzione per selezionare
“SCAN”. Premere il pulsante Select per
far sì che la radio effettui una ricerca
dalla frequenza bassa a quella alta.
Quando trova una stazione di potenza
sufficiente, la frequenza lampeggerà
per 6 secondi sul display e la radio
continuerà la scansione dopo 6 secondi.
Per sintonizzarsi sulla stazione o fermare
la scansione, premere il pulsante Select.
6. Il display mostrerà la frequenza del
segnale trovato. Se il segnale è
abbastanza forte e sono presenti dati
RDS, la radio mostrerà il nome della
stazione.
7. Quando viene raggiunta la fine della
lunghezza d’onda, la vostra radio
ricomincerà a sintonizzarsi dalla parte
opposta della banda.
8. Premere il pulsante Volume su / giù per
regolare il livello del suono desiderato.
9. Per spegnere la vostra radio, premete il
pulsante Power.
Sintonizzazione manuale -
FM
1. In modalità FM, ruotare la manopola
di comando per sintonizzarsi su una
stazione.
2. Premere il pulsante Volume su / giù per
regolare il livello del suono desiderato.
Impostazione della
sensibilità di scansione -
FM
La radio include un’opzione local / distant
per la funzione di scansione automatica.
Impostando la radio sull’opzione di
scansione “local”, i segnali più deboli di
trasmettitori più lontani possono essere
ignorati dalla radio, rendendo i segnali più
forti facili da trovare.
1. In modalità FM, tenere premuto il
pulsante Menu per accedere al menu FM.
2. Ruotare la manopola di comando della
sintonizzazione per selezionare “FM Scan
Zone”. Premere il pulsante Select per
entrare nella modalità di regolazione della
sensibilità di scansione. L’impostazione
corrente sarà contrassegnata da un
asterisco.
3. Ruotare la manopola di sintonizzazione
per selezionare “Local” (solo stazioni forti)
o “Distant” (tutte le stazioni). L’opzione
“Distant” permetterà alla radio di trovare
segnali più deboli durante la scansione.
4. Premere il pulsante Select per

68
GB
F
E
NL
D
I
confermare la selezione. L’impostazione
viene memorizzata nella radio e rimane in
vigore fino a quando non viene modificata
o fino a quando non viene effettuato un
reset del sistema.
Preimpostazione delle
stazioni in modalità DAB e
FM
Ci sono 10 preimpostazioni ciascuna per la
radio DAB e FM. Vengono usate allo stesso
modo per ogni modalità di funzionamento.
1. Premi il pulsante Power per accendere la
tua radio.
2. Sintonizzatevi sulla stazione radio
desiderata come descritto in precedenza.
3. Tenere premuto il pulsante Menu. Quindi
ruotare la manopola di comando della
sintonizzazione per selezionare “Favorite
Station”. Premere il pulsante Select per
accedere all’impostazione.
4. Ruotare la manopola di comando della
sintonizzazione per selezionare “Preset
Station”. Premere il pulsante Select.
5. Ruotare la manopola di comando della
sintonizzazione per scorrere l’elenco
delle preimpostazioni fino a raggiungerne
una inutilizzata o una che si desidera
cambiare.
6. Premere il pulsante Select per
memorizzare la preimpostazione. ‘Preset
2 saved’ è un esempio di quello che verrà
mostrato sul display.
Ripetete questa procedura
secondo necessità per le restanti
preimpostazioni. Le stazioni già
memorizzate nei preset possono
essere sovrascritte seguendo la
procedura sopra.
NOTA:
Le preimpostazioni delle stazioni radio
vengono mantenute in memoria quando la
radio è spenta.
Richiamare un preset in
modalità DAB e FM
1. Premere il pulsante Power per accendere
la radio.
2. Selezionare la modalità desiderata
usando il pulsante Mode.
3. Tenere premuto il pulsante Menu. Quindi
ruotare la manopola di sintonizzazione
per selezionare “Favorite Station”.
Premere il pulsante Select per accedere
all’impostazione.
4. Ruotare la manopola sintonizzazione per
selezionare “Recall Station”. Premere il
pulsante Select.
5. Ruotare la manopola di sintonizzazione
per selezionare la stazione preselezionata
desiderata. Premere il pulsante Select. La
radio si sintonizzerà quindi sulla stazione
memorizzata nella lista di preselezione.
Il numero di preselezione scelto viene
visualizzato sul display, ad esempio “P2”.
Opzioni del display - DAB /
FM / Bluetooth
La tua radio ha una serie di opzioni di
visualizzazione nelle modalità DAB, FM e
Bluetooth:
● Premere il pulsante Info per scorrere le
varie opzioni.
Opzioni del display DAB
La radio può visualizzare quanto segue in
modalità DAB:
Testo scorrevole, Tipo di programma, Nome
del Multiplex, Ora / Data, Frequenza, Bit rate
e tipo di audio, Informazioni sulla codifica,
Testo DL Plus, Potenza del segnale. Per
69
GB
F
E
NL
D
I
il testo DL Plus, alcune stazioni possono
fornire altre informazioni relative al
programma per il display in aggiunta al testo
normale. Se nessuna è disponibile, viene
visualizzato il messaggio ‘no info’.
Opzioni del display FM
In modalità FM la radio può utilizzare il
Radio Data System (RDS) per visualizzare il
nome della stazione radio e testo aggiuntivo
se fornito dall’emittente e se il segnale radio
è sucientemente chiaro.
La radio può visualizzare quanto segue in
modalità FM:
Testo radio, Tipo di programma, Ora / Data,
Frequenza.
Opzioni del display Bluetooth
Se il dispositivo connesso è in grado di
fornire informazioni sul brano in riproduzione,
la radio può visualizzare quanto segue in
modalità Bluetooth: Nome del dispositivo,
Titolo, Artista, Album.
Si prega di notare che la disponibilità delle
informazioni dipende dallo specico formato
multimediale.
Ascoltare musica tramite
streaming Bluetooth
È necessario associare il dispositivo
Bluetooth con il DDR-7 prima di poter
effettuare il collegamento automatico per
riprodurre / trasmettere musica Bluetooth
attraverso il DDR-7. L’associazione crea
un “legame” in modo che i due dispositivi
possano riconoscersi.
Associazione e riproduzione
del dispositivo Bluetooth per la
prima volta
1. Con la radio accesa, premere il pulsante
Mode per selezionare la funzione
Bluetooth. Sul display apparirà “Bluetooth
Pairing”. L’indicatore LED Bluetooth della
radio lampeggerà in blu per mostrare che
la radio è rilevabile.
2. Attivare il Bluetooth sul dispositivo
secondo il manuale d’uso del dispositivo
per collegarlo alla radio. Individuare
l’elenco dei dispositivi Bluetooth e
selezionare quello denominato “DDR-7”
(con alcuni smartphone dotati di versioni
precedenti al BT2.1, potrebbe essere
necessario inserire il codice di accesso
“0000”).
3. Una volta connesso, verrà emesso
un suono di conferma e il nome del
dispositivo Bluetooth collegato verrà
visualizzato sul display. L’indicatore
LED Bluetooth diventerà blu. Puoi
semplicemente selezionare e riprodurre
qualsiasi musica dal tuo dispositivo
sorgente.
4. Il controllo del volume può essere
regolato dal dispositivo sorgente o
direttamente dalla radio. Utilizzare i
controlli sul dispositivo Bluetooth o sulla
radio per riprodurre / mettere in pausa e
navigare tra i brani.
NOTA:
● Se 2 dispositivi Bluetooth si
associano per la prima volta, entrambi
cercheranno la radio la quale mostrerà
la sua disponibilità su entrambi i
dispositivi. Tuttavia, se un dispositivo
si collega prima a questa unità, l’altro
dispositivo Bluetooth non lo troverà
nell’elenco.
● Se il dispositivo sorgente è fuori
portata, la connessione con la
vostra radio verrà temporaneamente
interrotta. La vostra radio si
riconnetterà automaticamente se il
dispositivo sorgente viene riportato nel

70
GB
F
E
NL
D
I
raggio d’azione. Tenere presente che
durante il periodo di disconnessione,
nessun altro dispositivo Bluetooth può
associarsi o collegarsi alla radio.
● Se “DDR-7” appare nell’elenco dei
dispositivi Bluetooth ma il dispositivo
non riesce a connettersi con esso,
eliminare la voce dall’elenco e
associare nuovamente il dispositivo
alla radio seguendo i passaggi descritti
in precedenza.
● Il raggio d’azione effettivo tra il sistema
e il dispositivo associato è di circa 10
metri (30 piedi). Qualsiasi ostacolo tra
il sistema e il dispositivo può ridurre il
raggio d’azione.
● Le prestazioni della connettività
Bluetooth possono variare a seconda
dei dispositivi Bluetooth collegati.
Si prega di fare riferimento alle
funzionaliltà Bluetooth del dispositivo
prima di collegarsi alla radio. Non
tutte le funzioni potrebbero essere
supportate da alcuni dispositivi
Bluetooth associati.
● Con alcuni telefoni cellulari, fare /
ricevere chiamate, messaggi di
testo, e-mail o qualsiasi altra attività
non correlata allo streaming audio
potrebbe disattivare lo streaming
audio Bluetooth o disconnettersi
temporaneamente dal dispositivo. Tale
comportamento è una funzione del
dispositivo collegato e non indica un
difetto del DDR-7.
Riproduzione di file audio in
modalità Bluetooth
Dopo aver collegato correttamente la radio
con il dispositivo sorgente Bluetooth scelto,
è possibile iniziare a riprodurre musica
usando i comandi sul dispositivo Bluetooth
connesso.
1. Una volta iniziata la riproduzione,
regolare il volume all’impostazione
desiderata usando il comando del volume
sulla radio o sul dispositivo sorgente
Bluetooth abilitato.
2. Usa i comandi del dispositivo sorgente
Bluetooth per riprodurre / mettere in
pausa e navigare tra le tracce.
In alternativa, controlla la riproduzione
usando la manopola di comando della
sintonizzazione sulla radio.
Ruotare la manopola di comando
Tuning in senso orario per riprodurre
la traccia successiva.
Ruotare la manopola di comando
in senso antiorario per riprodurre la
traccia precedente.
NOTA:
Non tutte le applicazioni o i dispositivi del
lettore possono rispondere a tutti questi
comandi.
Ricollegare un dispositivo
sorgente Bluetooth
precedentemente associato
Il DDR-7 può memorizzare fino a 8 serie
di dispositivi sorgente Bluetooth associati,
quando la memoria supera questa quantità, il
primo dispositivo collegato sarà sovrascritto
dal dispositivo.
Se il dispositivo sorgente Bluetooth è già
stato associato al DDR-7 in precedenza,
l’unità memorizza il dispositivo sorgente
Bluetooth e tenta di riconnettersi con un
dispositivo sorgente Bluetooth in memoria
che è stato collegato per ultimo. Se l’ultimo
dispositivo sorgente Bluetooth collegato
non è disponibile, il DDR-7 cercherà di
connettersi al penultimo dispositivo sorgente
Bluetooth.
71
GB
F
E
NL
D
I
Scollegare il dispositivo
Bluetooth
1. Tenere premuto il pulsante Menu per
entrare nel menu Bluetooth.
2. Ruotare la manopola di comando della
sintonizzazione per selezionare “Cancel
Pairing”. Poi premere il pulsante Select.
3. Per disconnettere il dispositivo Bluetooth,
ruotare la manopola di comando per
selezionare “Yes” e poi premere il
pulsante Select. Verrà emesso un
segnale di conferma e l’indicatore LED
Bluetooth sulla radio lampeggerà in blu
per mostrare che la radio è di nuovo
associabile. Scegliendo “No” o “Back”
si tornerà alla visualizzazione del menu
precedente. Premere il pulsante Select
per confermare la scelta.
4. In alternativa, è possibile premere il
pulsante Mode per selezionare qualsiasi
altra modalità o disattivare il Bluetooth sul
dispositivo Bluetooth per disabilitare la
connessione.
Cancellazione della memoria
dei dispositivi Bluetooth
associati
1. Tenere premuto il pulsante Menu per
entrare nel menu Bluetooth.
2. Ruotare la manopola di comando della
sintonizzazione per selezionare “Clear
Pairing”. Poi premere il pulsante Select.
3. Per cancellare la memoria di tutti i
dispositivi associati, ruotare la manopola
di comando per selezionare “Yes”. Poi
premere il pulsante Select.
Scegliendo “No” o “Back” si torna alla
visualizzazione del menu precedente.
Premete il tasto Select per confermare
la scelta.
Timer di spegnimento
E’ possibile impostare lo spegnimento
della radio dopo che è trascorso un tempo
prestabilito. L’impostazione del timer di
spegnimento può essere regolata tra 15 e
120 minuti in incrementi.
1. Con la radio accesa, tenere premuto il
pulsante Menu per accedere al menu
della modalità corrente.
2. Ruotare la manopola di comando per
selezionare “System Setup”. Premere
il pulsante Select per entrare nel menu
delle impostazioni del sistema.
3. Ruotare la manopola di comando per
selezionare “Sleep”. Premere il pulsante
Select per accedere all’impostazione.
4. Ruotare la manopola di comando per
selezionare il tempo di sonno desiderato.
Il timer di spegnimento può essere
impostato tra 15 e 120 minuti o su “Sleep
off”. Premere il pulsante Select per
confermare l’impostazione.
5. Uno sleep timer attivo viene mostrato
tramite un indicatore sui display di
comando. Per visualizzare il tempo
rimanente, tenere premuto il pulsante
Menu e quindi ruotare la manopola di
comando per selezionare “System Setup”.
Premere il pulsante Select. Ruotare la
manopola di comando di sintonizzazione
per selezionare “Sleep”. Premere il
pulsante Select per visualizzare sul
display il tempo rimanente.
6. Per annullare il tempo di spegnimento
prima che il tempo preimpostato sia
trascorso e per spegnere la radio,
premere il pulsante Power per spegnere
la radio manualmente.
Per annullare lo sleep timer e lasciare
la radio in funzione, tornare alle
impostazioni dello sleep timer (passi da 1
a 4 sopra) e selezionare l’opzione “Sleep
o” al passo 4. Premere il pulsante Select

72
GB
F
E
NL
D
I
per confermare l’impostazione.
Contrasto
Il contrasto del display può essere regolato.
1. Con la radio accesa, tenere premuto il
pulsante Menu per accedere al menu
della modalità corrente.
2. Ruotare la manopola di comano per
selezionare “System Setup”. Premere
il pulsante Select per entrare nel menu
delle impostazioni del sistema.
3. Ruotare la manopola di comando per
selezionare “Contrast”. Premere il pulsante
Select per accedere all’impostazione.
4. Ruotare la manopola di controllo della
sintonizzazione per regolare il contrasto.
L’indicazione del livello di contrasto sullo
schermo cambierà contemporaneamente.
Quando viene trovata l’impostazione che
dà la migliore leggibilità per la posizione
in cui viene usata la radio, premete
il pulsante Select per confermare
l’impostazione.
Aggiornamento automatico
dell’orologio
La radio si aggiornerà automaticamente ogni
volta che la si accende e ci si sintonizza su
una stazione radio DAB+ o FM che trasmette
l’ora tramite RDS. Il display dell’ora mostrerà
00:00 per alcuni secondi e poi visualizzerà
l’ora quando riceverà il segnale orario
DAB+ o FM-RDS. È possibile specificare
che la radio imposti il suo orologio dalle
trasmissioni radio DAB o FM.
1. Con la radio accesa, tenere premuto il
pulsante Menu per accedere al menu
della modalità corrente.
2. Ruotare la manopola di controllo per
selezionare “System Setup”. Premere
il pulsante Select per entrare nel menu
delle impostazioni del sistema.
3. Ruotare la manopola di comando
per selezionare “Time update”.
Premere il pulsante Select per inserire
l’impostazione.
4. Ruotare la manopola di controllo della
sintonizzazione per scegliere un’opzione
di aggiornamento tra “DAB”, “FM” o
“Any”. Premere il pulsante Select per
confermare la scelta.
Selezione della lingua
In automatico, la radio visualizza menu e
messaggi in inglese. E’ possibile scegliere
una lingua preferita.
1. Con la radio accesa, tenere premuto il
pulsante Menu per accedere al menu
della modalità corrente.
2. Ruotare la manopola di comando per
selezionare “System Setup”. Premere
il pulsante Select per entrare nel menu
delle impostazioni del sistema.
3. Ruotare la manopola di comando per
selezionare “Language”. Premere il
pulsante Select per entrare nel menu di
impostazione.
4. Ruotare la manopola di comando per
selezionare la lingua desiderata. Premere
il pulsante Select per confermare
l’impostazione. Il display passerà alla
lingua scelta.
Reset di fabbrica
Se si desidera resettare completamente
la radio allo stato iniziale, è possibile farlo
seguendo questa procedura. Eseguendo
un reset di fabbrica, tutte le impostazioni
inserite dall’utente saranno cancellate.
1. Con la radio accesa, tenere premuto il
pulsante Menu per accedere al menu
della modalità corrente.
73
GB
F
E
NL
D
I
2. Ruotare la manopola di comando per
selezionare “System Setup”. Premere
il pulsante Select per entrare nel menu
delle impostazioni del sistema.
3. Ruotare la manopola di comando per
selezionare “Factory Reset”. Premere
il pulsante Select per accedere
all’impostazione.
4. Ruotare la manopola di comando per
selezionare “Yes” o “No”. Se non si
desidera eseguire un reset del sistema,
selezionate “No” e poi premete il pulsante
Select per confermare l’impostazione.
Oppure scegliendo “Back” si torna alla
visualizzazione del menu precedente.
Premere il pulsante Select per
confermare la scelta.
5. Con “Yes” selezionato, premere il
pulsante Select per resettare la radio.
Verranno cancellate tutte le impostazioni
salvate e le stazioni di memoria
preimpostate. Tutte le impostazioni
torneranno alle impostazioni di fabbrica.
Visualizzazione della
versione del software
L’indicazione della versione del software
viene fornita a scopo di riferimento e di
supporto al cliente e non può essere
modicata.
1. Con la radio accesa, tenere premuto il
pulsante Menu per accedere al menu
della modalità corrente.
2. Ruotare la manopola di comando per
selezionare “System Setup”. Premere
il pulsante Select per entrare nel menu
delle impostazioni del sistema.
3. Ruotare la manopola di comando per
selezionare “SW Version”. Premere
il pulsante Select per visualizzare la
versione del software.
4. Premere il pulsante Menu per uscire.
Presa d’ingresso ausiliaria
Sul retro della radio è presente una presa
d’ingresso ausiliaria stereo da 3,5mm per
consentire l’ingresso di un segnale audio
nell’unità da un dispositivo audio esterno
come un iPod, un MP3 o un lettore CD.
1. Con la vostra radio accesa, premete
il pulsante Mode finché non viene
visualizzato “Aux In”.
2. Collegare una sorgente audio esterna
(per esempio, iPod, MP3 o lettore CD)
alla presa di ingresso ausiliaria.
3. Regolare l’impostazione del volume
sull’iPod, MP3 o lettore CD per garantire
un livello adeguato del segnale dal suo
dispositivo. Quindi regolare il volume
della radio per un ascolto confortevole.
74
GB
F
E
NL
D
I
Speciche
Copertura di frequenza
FM 87.5-108 MHz
DAB 174.928-239.200 MHz
Amplicatore
Potenza di uscita 1.6W 10%T.H.D. @ 100Hz
Aux In
Sensibilità di ingresso IN 400mV Uscita 1.6W @ 100Hz
Altoparlante
Altoparlante 40mm 4ohm x 1
Altoparlante passivo 74.2X36.7 mm
Bluetooth
Speciche Bluetooth Bluetooth
®
Ver 4.1
Supporto del prolo A2DP
Bluetooth Audio CODEC SBC
Potenza di trasmissione Speciche Classe di potenza 2
Linea del campo visivo 10metri / 30piedi
Frequenza e
massima potenza trasmessa
2402MHz ~ 2480MHz:3.81dBm (Bluetooth EDR)
Batteria incorporata
Batteria
Batteria ricaricabile agli ioni di litio 18650 3.65V
2600mAh
Durata della batteria
Uscita altoparlante 10mW, la durata della batteria è
di circa 20 ore per 4 ore al giorno a volume normale.
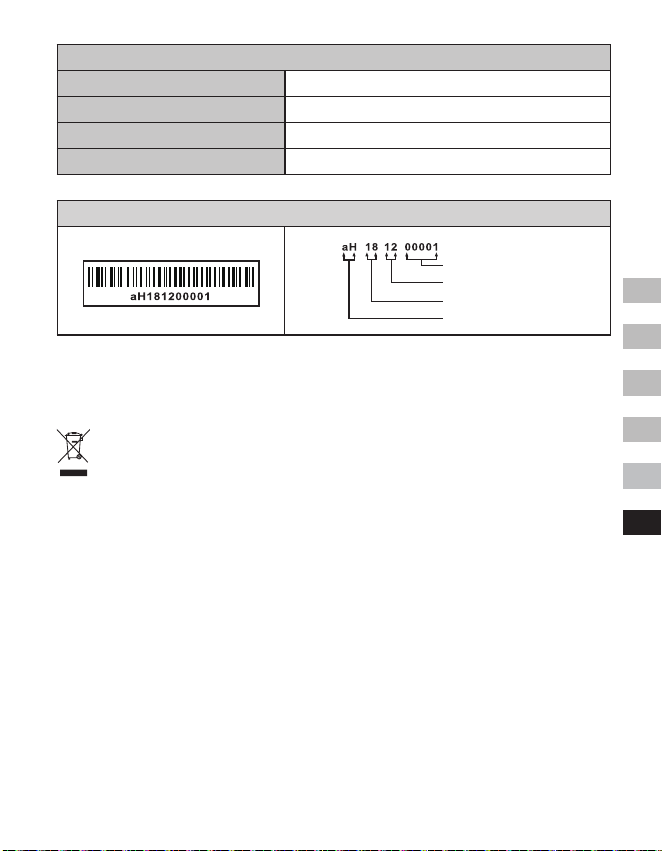
75
GB
F
E
NL
D
I
Generale
DC-IN Presa micro USB 5V 1A
Corrente di carica 500mA
Tempo di ricarica circa 6 ore
Intervallo di temperatura da 0°C a + 35°C
※
L’etichettadelcodiceabarresulprodottoèdenitacomesegue:
L’azienda si riserva il diritto di modicare le speciche senza preavviso.
Se in qualsiasi momento in futuro si dovesse avere necessità di smaltire questo
prodotto, si prega di notare che: I riuti di prodotti elettrici non devono essere
smaltiti con i rifiuti domestici. Si prega di riciclare nelle apposite strutture.
Verificare presso le autorità locali o con il rivenditore consigli sul riciclaggio.
(Direttiva sui riuti di apparecchiature elettriche ed elettroniche)
Numero di serie
Mese di produzione
Anno di produzione
Codice prodotto
