USER MANUAL
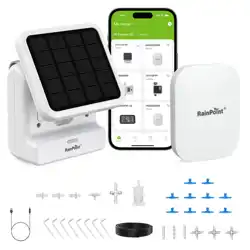
Smart Solar Irrigation System
Model No. HTP115FRF
Welcome to the RAINPOINT family! Please read the manual before using to
learn about the features and functions.
Contents
1. Contents in the box
2. Introduction
2.1 Product Oveiew
2.2 Specication
2.3 Product Features
3. Connection and Installation
3.1 Sensor Connection
3.2 Sensor Installation
4. App Features and Functions
4.1 Device Home Page
4.2 Basic Setting
4.3 Plan Setting
4.4 Manual Watering
4.5 Solar Charging Notice
5. Trouble Shooting
6. Precautions
7. Warranty Policy
8. FCC Statement
9. Customer Suppo
01
02
02
02
03
03
04
08
10
10
11
12
15
16
17
18
19
20
21
EN
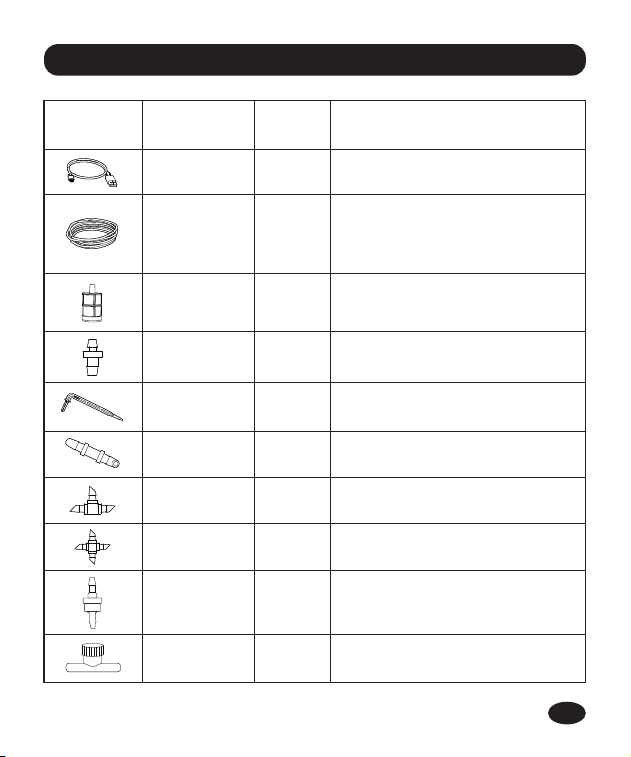
1. Contents in the box
Accessories
Included
Name
USB Cable 1
Tubing
Filter
1
1
Tubing End
Caps
3
Micro Drip
Emitters
10
Straight Barb
Fitting
3
T Barb Fitting 10
PCS
Function
Charge the batte
Filtering impurities from water
Stop water ow at the end
of the pipe
Inseed into the soil to water
the plant root directly
Connecting water pipes
Split water and connect pipes
Split water and connect pipes
Prevents water from backing up in
the pipes back to the pump
Len:10m/32.8 Ft
lnner diameter of pipe:0.17"( > 1/6")
Outside diameter of pipe: 1/4"
3
Cross Barb
Fitting
1Check Valve
Adjust or shut o water ow in tubing
runs
15
Adjustable
Valve
-01-
EN
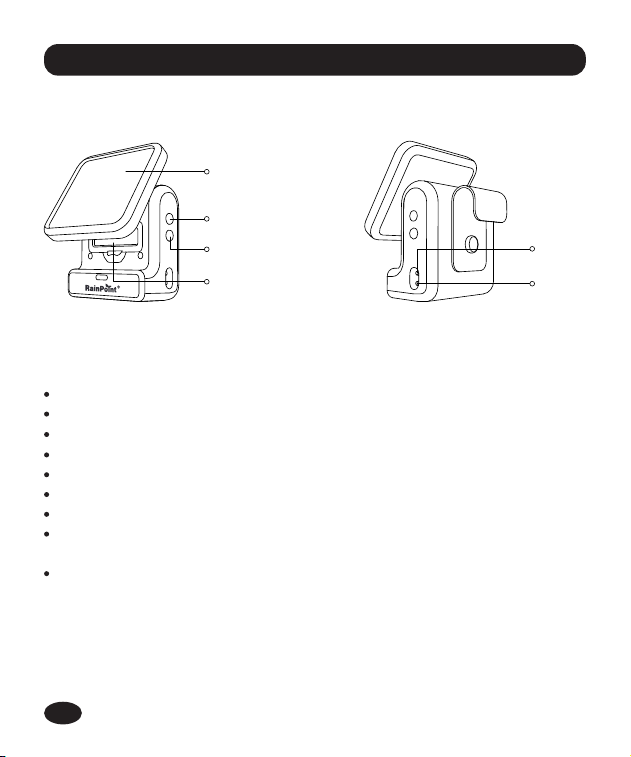
2.1 Product Oveiew
2.2 Specication
Outlet
Inlet
Flow Rate: 30L/H (7.93 GAL/H)
Pumping Head≥3 M
Working Pressure≥0.3 bar (4.3 PSI)
Working Temperature: 3℃~50℃ (37℉~ 122℉)
Work with 2.4G Wi or dual band Wi-Fi
Waterproof Level: IP54
Inlet and Outlet are suitable for 4 mm pipe
2600mAh rechargeable 18650 lithium batte, charging by USB
charging cable or top solar panel.
5V 1.5W Solar Panel
Solar Panel
Set Button
Manual Watering
Rechargeable
Batte
2. Introduction
-02-
EN
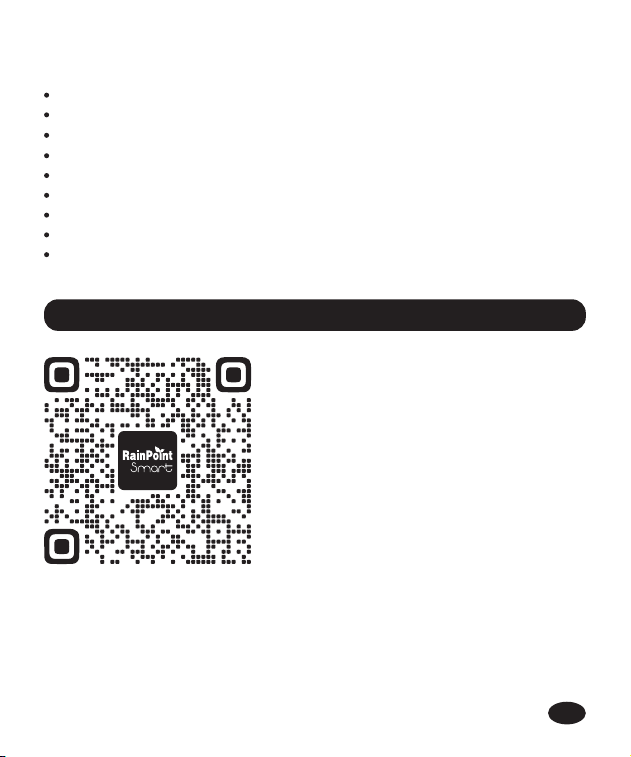
Tips: Please scan the QR code or search
the link to access the video to easily and
quickly view the operational details of the
device.
Video Address:
https://www.youtube.com/
watch?v=OLDCvBNOz_0&t=4s
2.3 Product Features
Real-time to set and view irrigation plan by remote control via APP.
Build-in water pump for automatic watering.
24h delayed irrigation function.
Ecient solar power supply.
Water shoage ale.
No water tap needed.
Waters up to 10 plants.
Flexible micro-drip irrigation system.
Full DIY irrigation system, coming with dierent accessories.
3. Connection And Installation
-03-
EN
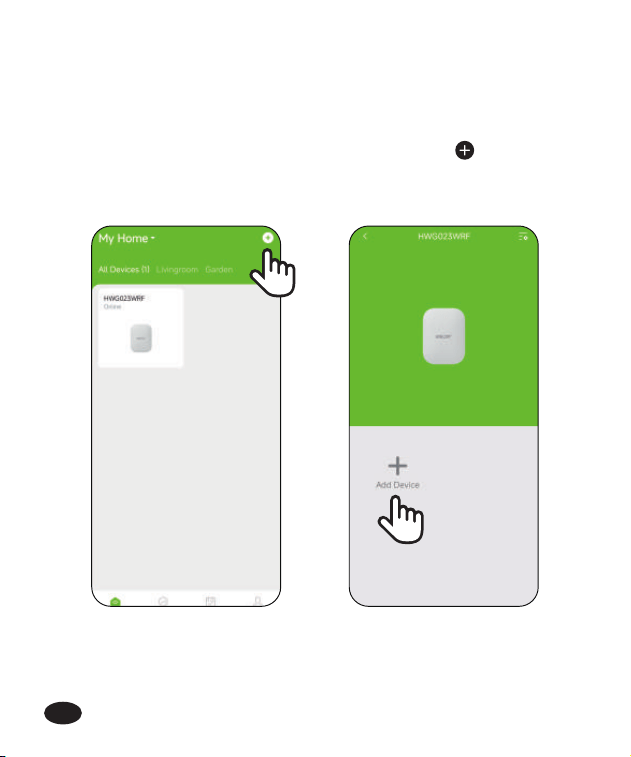
3.1 Pump Connection
After the hub is successfully connected. select the button on the
top right corner of the APP home page to add device, or you can go to
the hub’s home page and use"Add Devices" to add devices.
This device is a sub-device, please connect the hub of Rainpoint Sma
+
series before connecting this device.
1.
-04-
EN
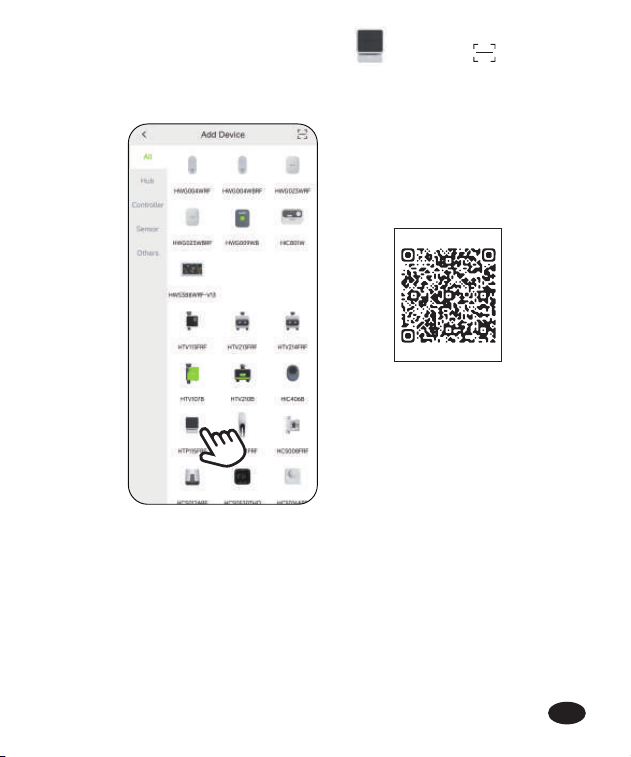
Enter the "Add Device" page, click on , or click on in the
upper right corner, scan theQR code inbottom of the manual or on
the device to connect to network.
2.
-05-
EN
0240115300
Scan to connect
-06-
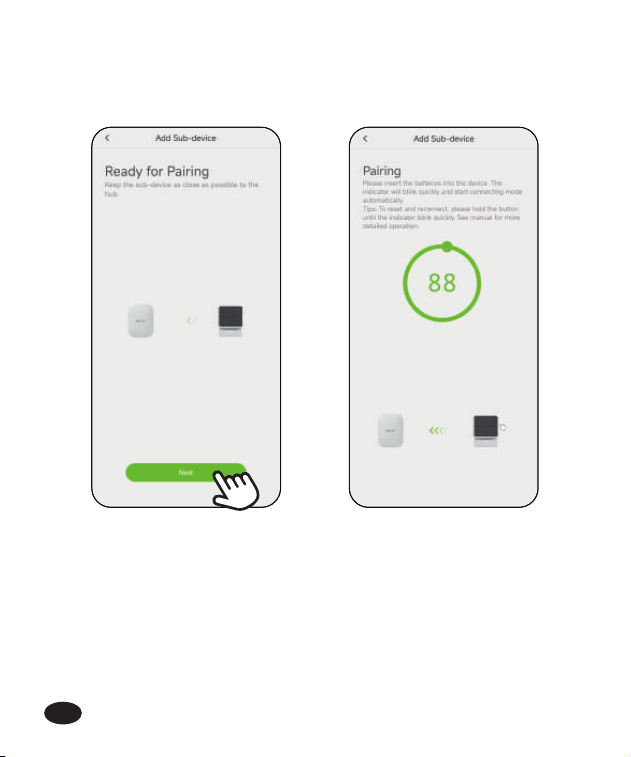
Hold the "SET" button on the side of the pump until the red LED
light quickly blinking. Then select "Next" on the APP to sta
searching device.
3.
EN
-07-
Keep the device and the hub close to each other so they can connect
automatically.
Besides that, you can also hold the button to reset and reconnect if
you fail to connect for the rst time.
4.
5.
EN
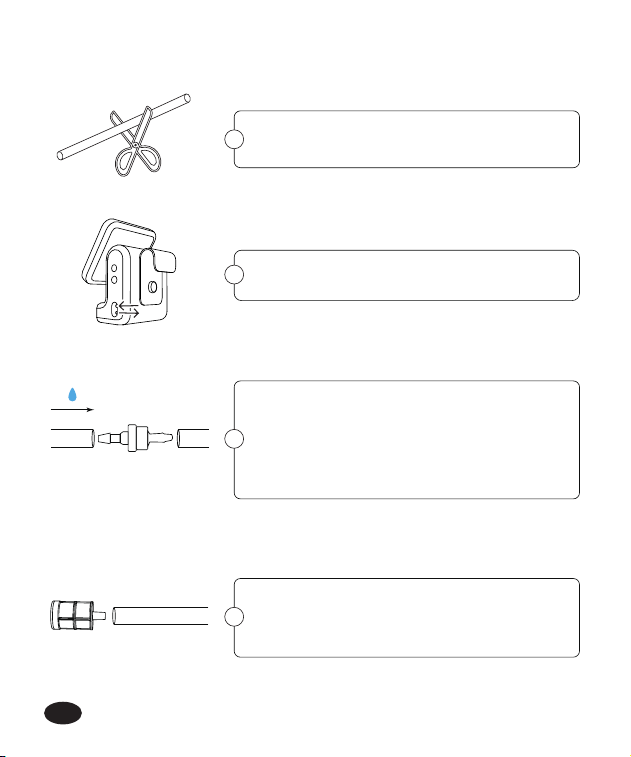
3.2 Pump Installation
Cut the hose according to the distance of
the device the plant or you need.
1
Connect the check valve to the water outlet
near the pump. Using a check valve may
reduce water pressure. (The check valve
must be installed correctly in accordance
with the ow direction)
3
Connect the hose to water inlet and outlet.
2
-08-
Inse the other end of the hose connected
to the water inlet of the pump with the
lter, and then put it into the container.
4
EN
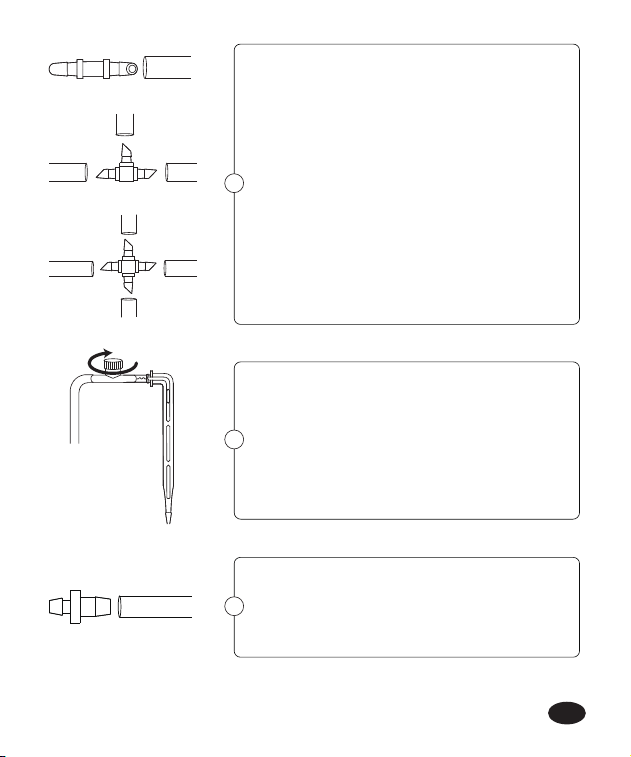
Connect the switch valve, you can adjust
water ow rate for dierent plants. When
water needs to be delivered to the soil, you
need to use the micro drip emitters.
Tips: Loosen the soil rst, then inse the
drips at least 3 inches deep, which will help
water enter the plant roots.
6
5
Connecting the suitable barb tting:
1) If only the hose needs to be connected,
you can use straight barb tting.
2) When you need to connect the hose
while splitting to two ways, you can use
the"T" barb tting.
3) When you need to connect a hose while
splitting to other 3 ways, you can use the
cross barb tting.
Please install Tubing End Caps after water
ows out from the end of the pipe to avoid
air in the pipe so that the water can not
ow smoothly to the end of the pipe.
7
-09-
EN
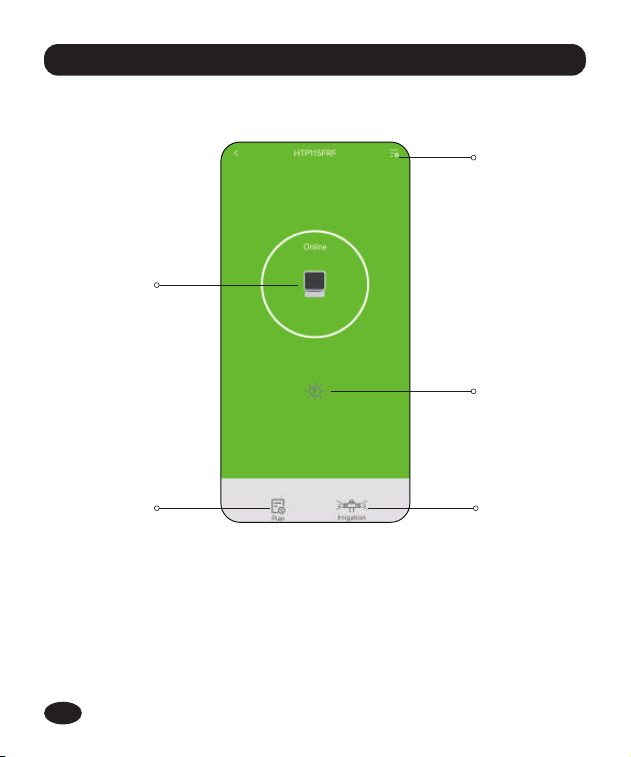
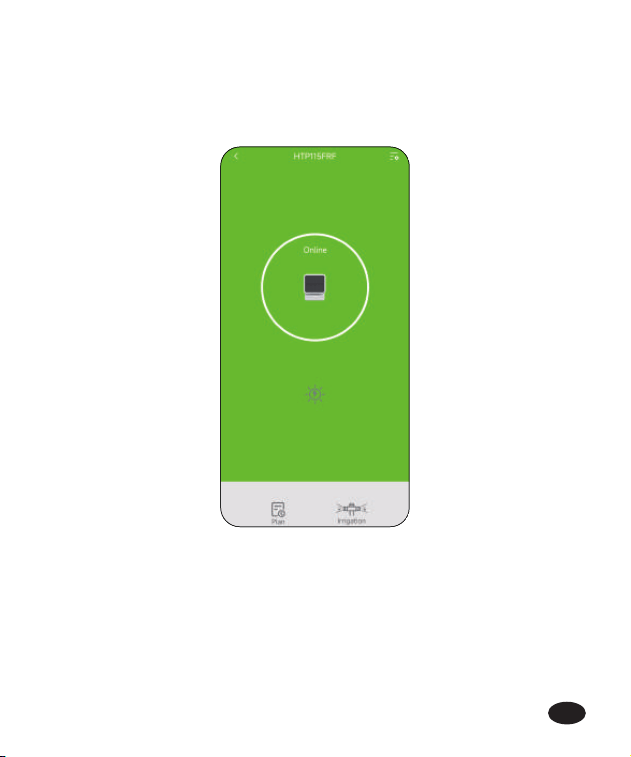
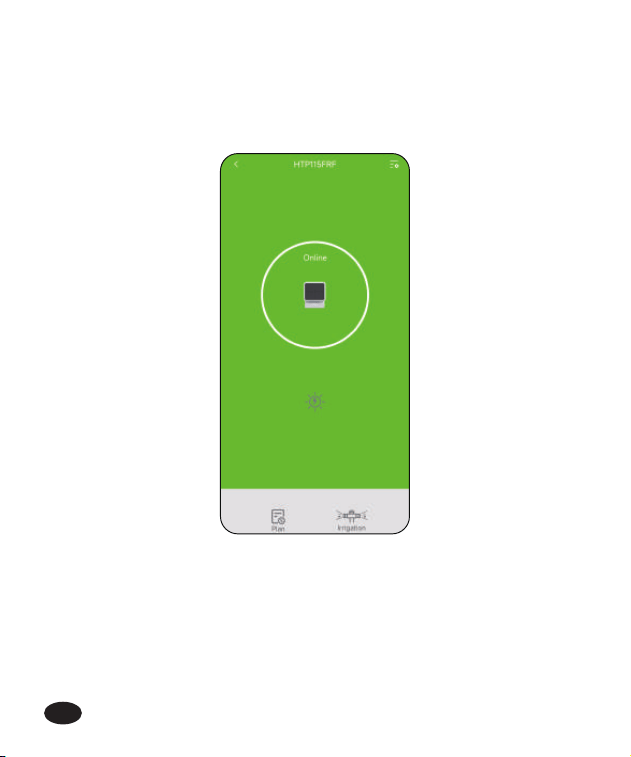
4.1 Device Home Page
Setting: Basic settings for the timing pump.
Pump Status Icon: Show the pump working status.
Solar indicator: Show the solar charging status.
Plan: To create and manage watering plans.
Irrigation: Manual watering.
-10-
4. APP Features And Functions
2
4
1
3
1.
2.
3.
4.
5.
5
EN
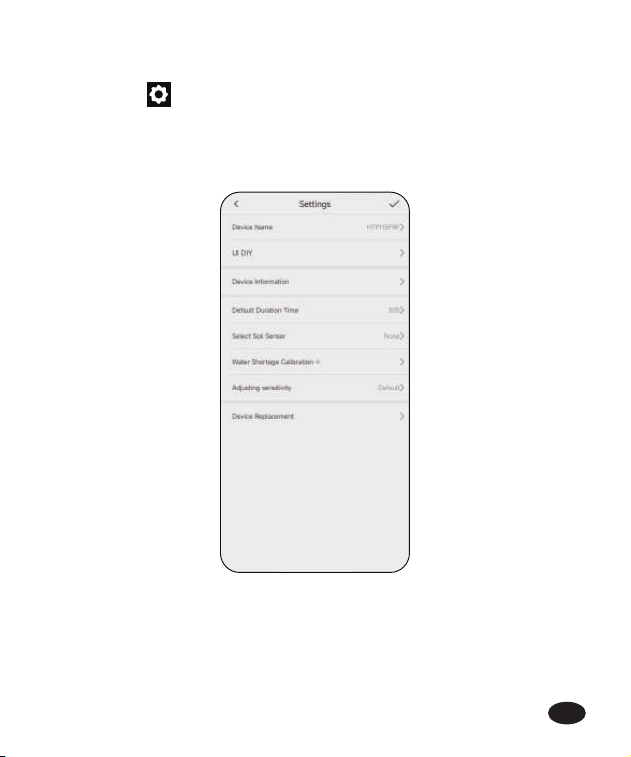
4.2 Basic Setting
Find the icon on the top right corner of the APP home page to
"Settings " page. In the basic settings, you can check and manage the
device information, such as name, inteace and description. There are also
some advanced settings you can set up for the specic functions:
-11-
EN
Default Duration Time: Set default watering duration for manual irrigation.
Pair the Soil Sensor: Pair with a soil sensor to display the data on the home
page and activate the Stop irrigation plan humidity function.
Stop irrigation plan humidity: Set stop watering value of the soil moisture
to protect the plants from over watering. All the plans will be stopped once
the soil moisture gets over the value, and will go back to work when the
moisture return below the value.
Water Shoage Calibration: Calibrate the current water state of the pump
as the water shoage level.
Sensitivity of Water Shoage Detection: Adjust the sensitivity level if the
water shoage alarm is too sensitive or not sensitive enough.
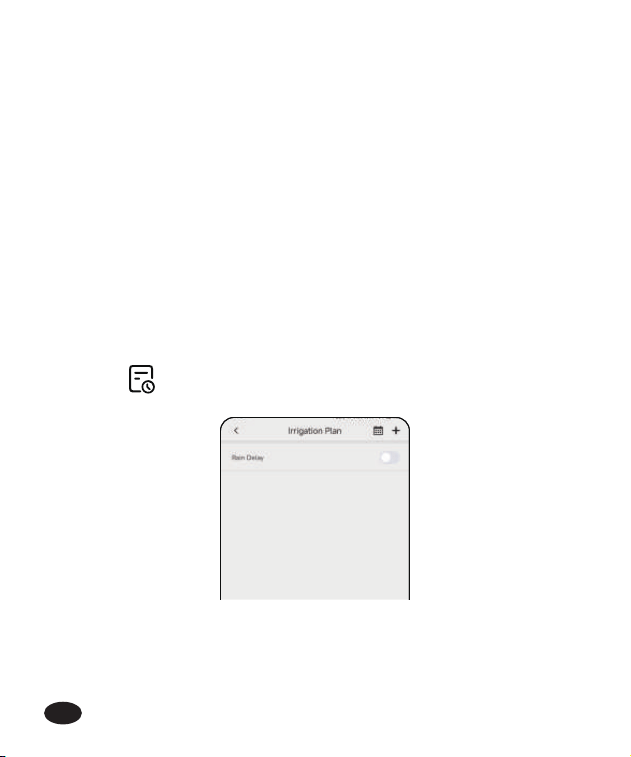
4.3 Plan Setting
Select Plan and sta to create a new auto-watering plan.
-12-
EN
Set a watering mode rst:
Press the icon on the top right corner of the "Irrigation Plan" page to
set irrigation plan.
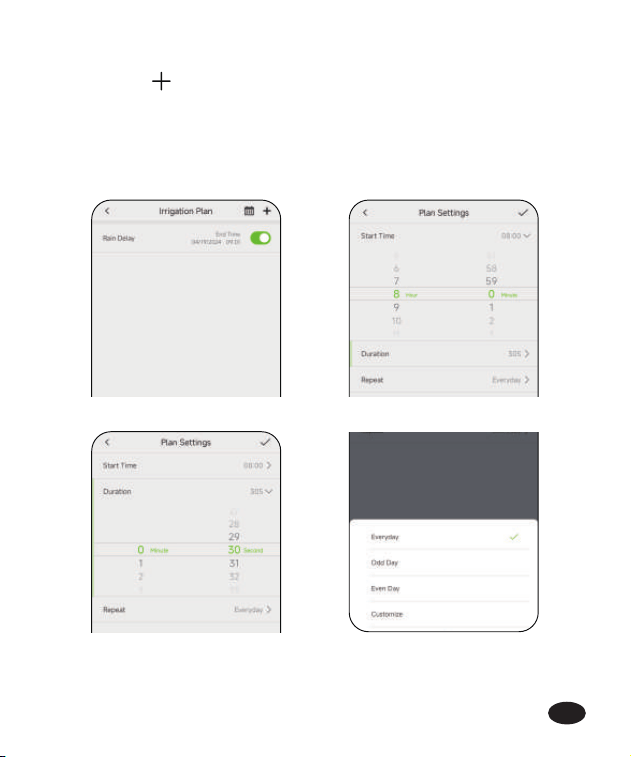
Sta Time: Set the time when to sta the plan.
Duration: Set how long to water for the watering plan.
Repeat: Set the watering frequency for the plan.
-13-
EN
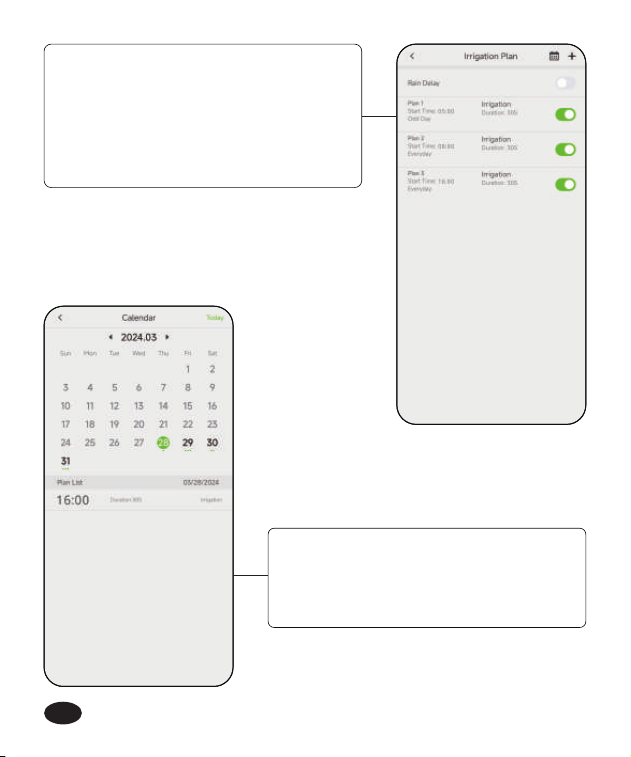
After nish setting, press the top right
button save your plan and you will see
a plan oveiew appears in the list. Use
the button on the right to turn on or o
the plan. Up to SIX plans that can be
created.
There is also a Plan Calendar for
checking the oveiew of all the plans’
schedule.
-14-
EN
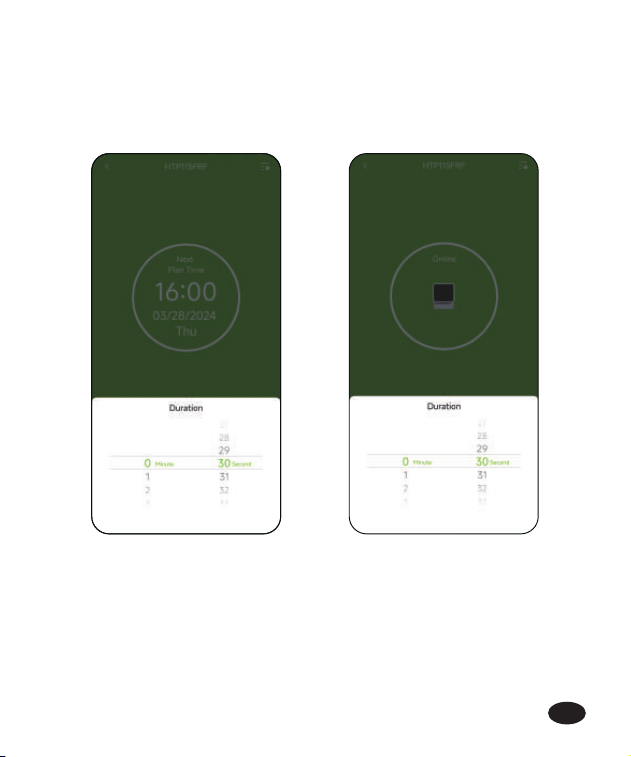
4.4 Manual Watering
Select Irrigation in the home page to manually turn on a tempora
irrigation plan with a settable time.
Note: When you turn on manual watering, if there is a plan running now or
there will be a plan staing during your manual water time, the schedule
will be skipped for this time.
-15-
EN
4.5 Solar Charging Notice
When the timing pump is getting charged by solar power, the solar
indicator on the app will turn on as yellow.
-16-
EN

-17-
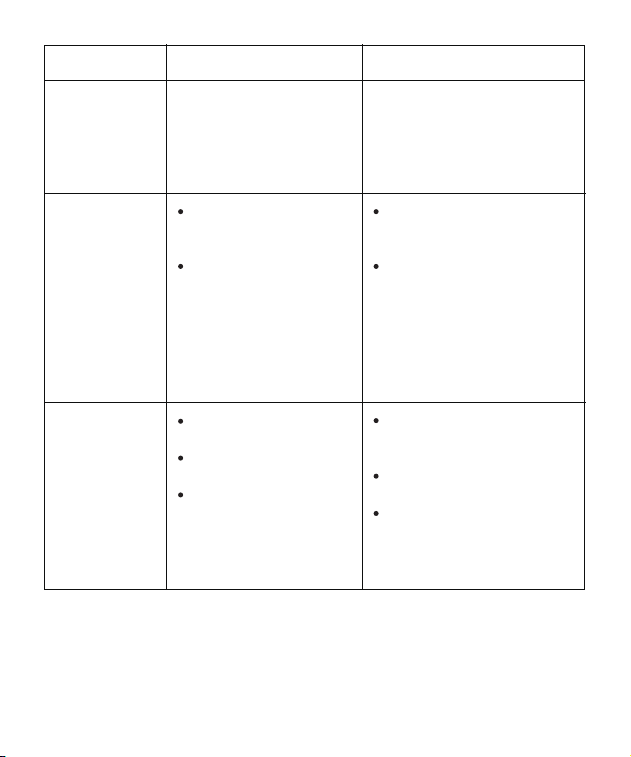
5. Trouble Shooting
Problem Possible Factors Some Solutions
Pump can’t
connect with
hub
Too far from the hub
or too many
obstructions between
pump and hub.
Miss the searching
time during
connecting.
The hub software low
version.
Stay close with the hub
when connecting the
pump.
T to sta the device
searching again rst, and
then hold the set button
after the searching
staing count down until
red light blinking.
Go to basic setting on
the top right corner of
the hub’s home page,
and then check for the
new versions in the
device information.
Pump no
working or
can’t pump
water from
container
Impurities get into
the pump and
damage the pump.
Pump broken due to
falling or during
transpoation.
If the pump can’t work, or
can’t pumping water, please
contact customer seice
from where you buy in the
warranty time.
EN
Problem Possible Factors Some Solutions
Water
leakage from
the pump
inlet or outlet
The pipe is not tightly
inseed or not fully
inseed.
Re-install the water pipe to
make sure the pipe end is
fully and tightly inse to
the inlet and outlet.
Weak water
ow comes
out
Too far away from
pots and water
containers.
Air left in the end of
pipe section.
Move the pump closer
to the plants and reduce
the pipe length.
When install the
watering system, t to
put on the pipe end caps
when the water have
fully ll the whole
pipeline.
Hub can’t
connect
Not using 2.4GHz
Wi-Fi.
Incorrect Wi-Fi
password.
Too far from the
router or too many
obstructions that
blocks the signal.
Check and use 2.4GHz or
dual band Wi-Fi to
connect.
Check again the pass-
word when connecting
T to stay close with the
router when connecting
the hub.
-18-

RAINPOINT provides a 1-year limited warranty on this product against
manufacturing defects in materials and workmanship.
-19-
7. Warranty Policy
Please make sure to use 2.4GHz band Wi-Fi to connect to this product.
Ensure that the solar pump can be fully illuminated for not less than
one hour per day.
Please tighten the pipe to the inlet and outlet when installing to avoid
leakage.
T to place the pump higher than the water source to avoid siphon
phenomenon.
6. Precautions
EN

-20-
This device complies with Pa 15 of the FCC Rules. Operation is subject to
the following two conditions:
1. This device may not cause harmful inteerence.
2. This device must accept any inteerence received, including
inteerence that may cause undesired operation.
FCC Warning: Any changes or modications not expressly approved by
the pay responsible for compliance could void the user’s authority to
operate this equipment.
Note: This equipment has been tested and found to comply with the limits
for a Class B digital device, pursuant to Pa 15 of the FCC Rules. These
limits are designed to provide reasonable protection against harmful
inteerence in a residential installation. This equipment generates, uses,
and can radiate radio frequency energy, if not installed and used in
accordance with the instructions, may cause harmful inteerence to radio
communications. However, there is no guarantee that inteerence will not
occur in a paicular installation. If this equipment does cause harmful
inteerence to radio or television reception, which can be determined by
turning the equipment o and on, the user is encouraged to t to correct
the inteerence by one of the following measures:
Reorient or relocate the receiving antenna.
Increase the separation between the equipment and the receiver.
Connect the equipment into an outlet on a circuit dierent from that
to which the receiver is connected.
Consult the dealer or an experienced radio/TV technician for help.
Note: The manufacturer is not responsible for any radio or TV inteerence
caused by unauthorized modications to this equipment. Such modica-
tions could void the user’s authority to operate the equipment.
8. FCC Statement (FCC ID:2AWDBHTP115FRF)
EN
Made in China
This paper
box is recyclable
and reusable
18650 Lithium lon
Rechargeable Batte
(3.7V 2600mAh)
-21-
9. Customer Suppo
If you nd it dicult to set up and want to watch the setting tutorial video,
please subscribe to our channel RainPoint on YouTube.
Or scan the QR code to visit the RainPoint
channel on YouTube quickly.
If the app and the user manual don’t have what you’re looking for, and
need some help about Rainpoint, please contact us by
LOT NO.: XXXXXX (on the back of the device)
EN
Need Help ?
or Email:
suppo@rainpointonline.com
Scan the QR code for more help.
