KBS-52143
Safety Information 02
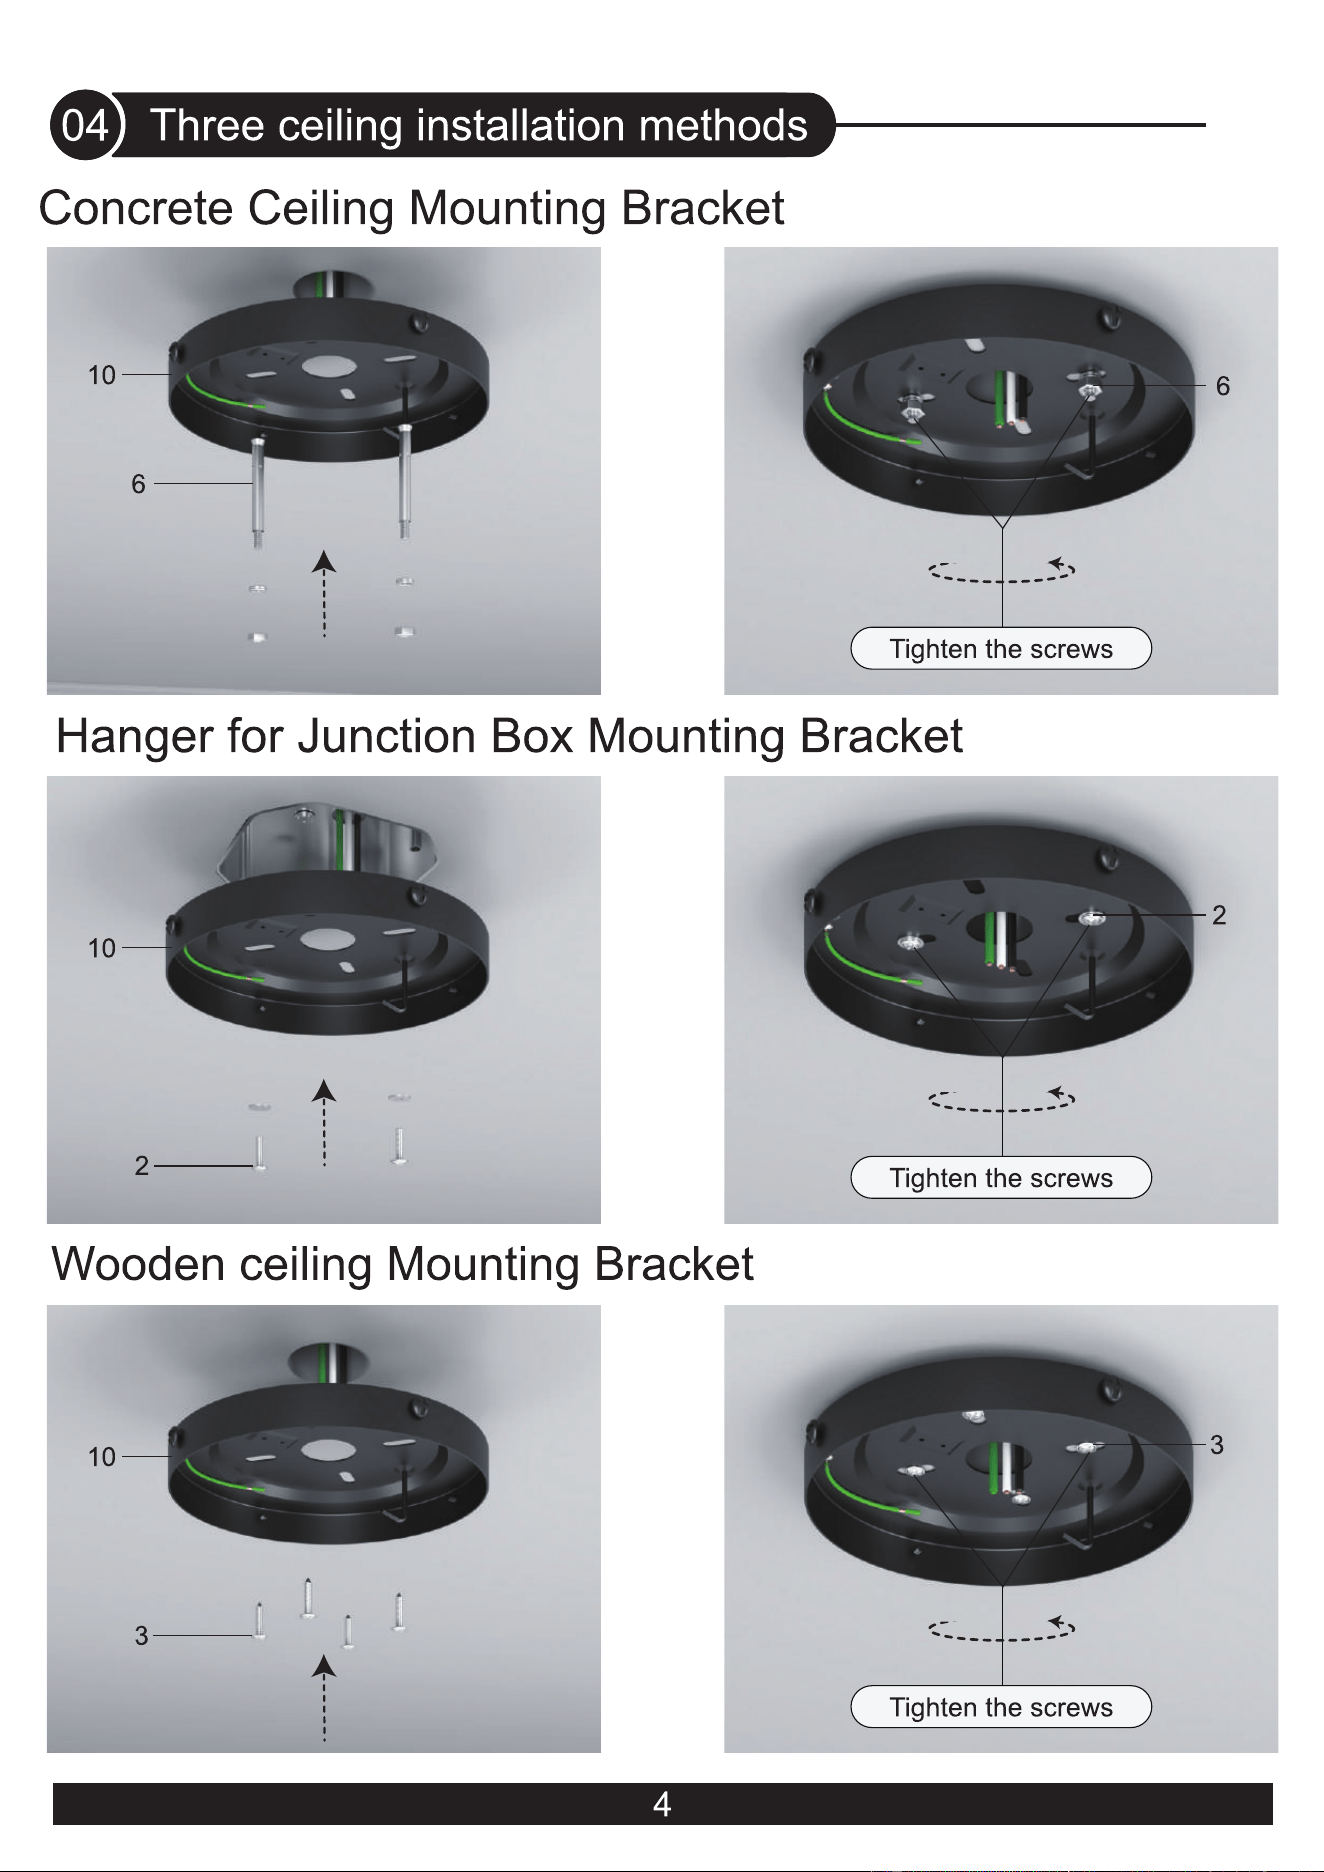
04
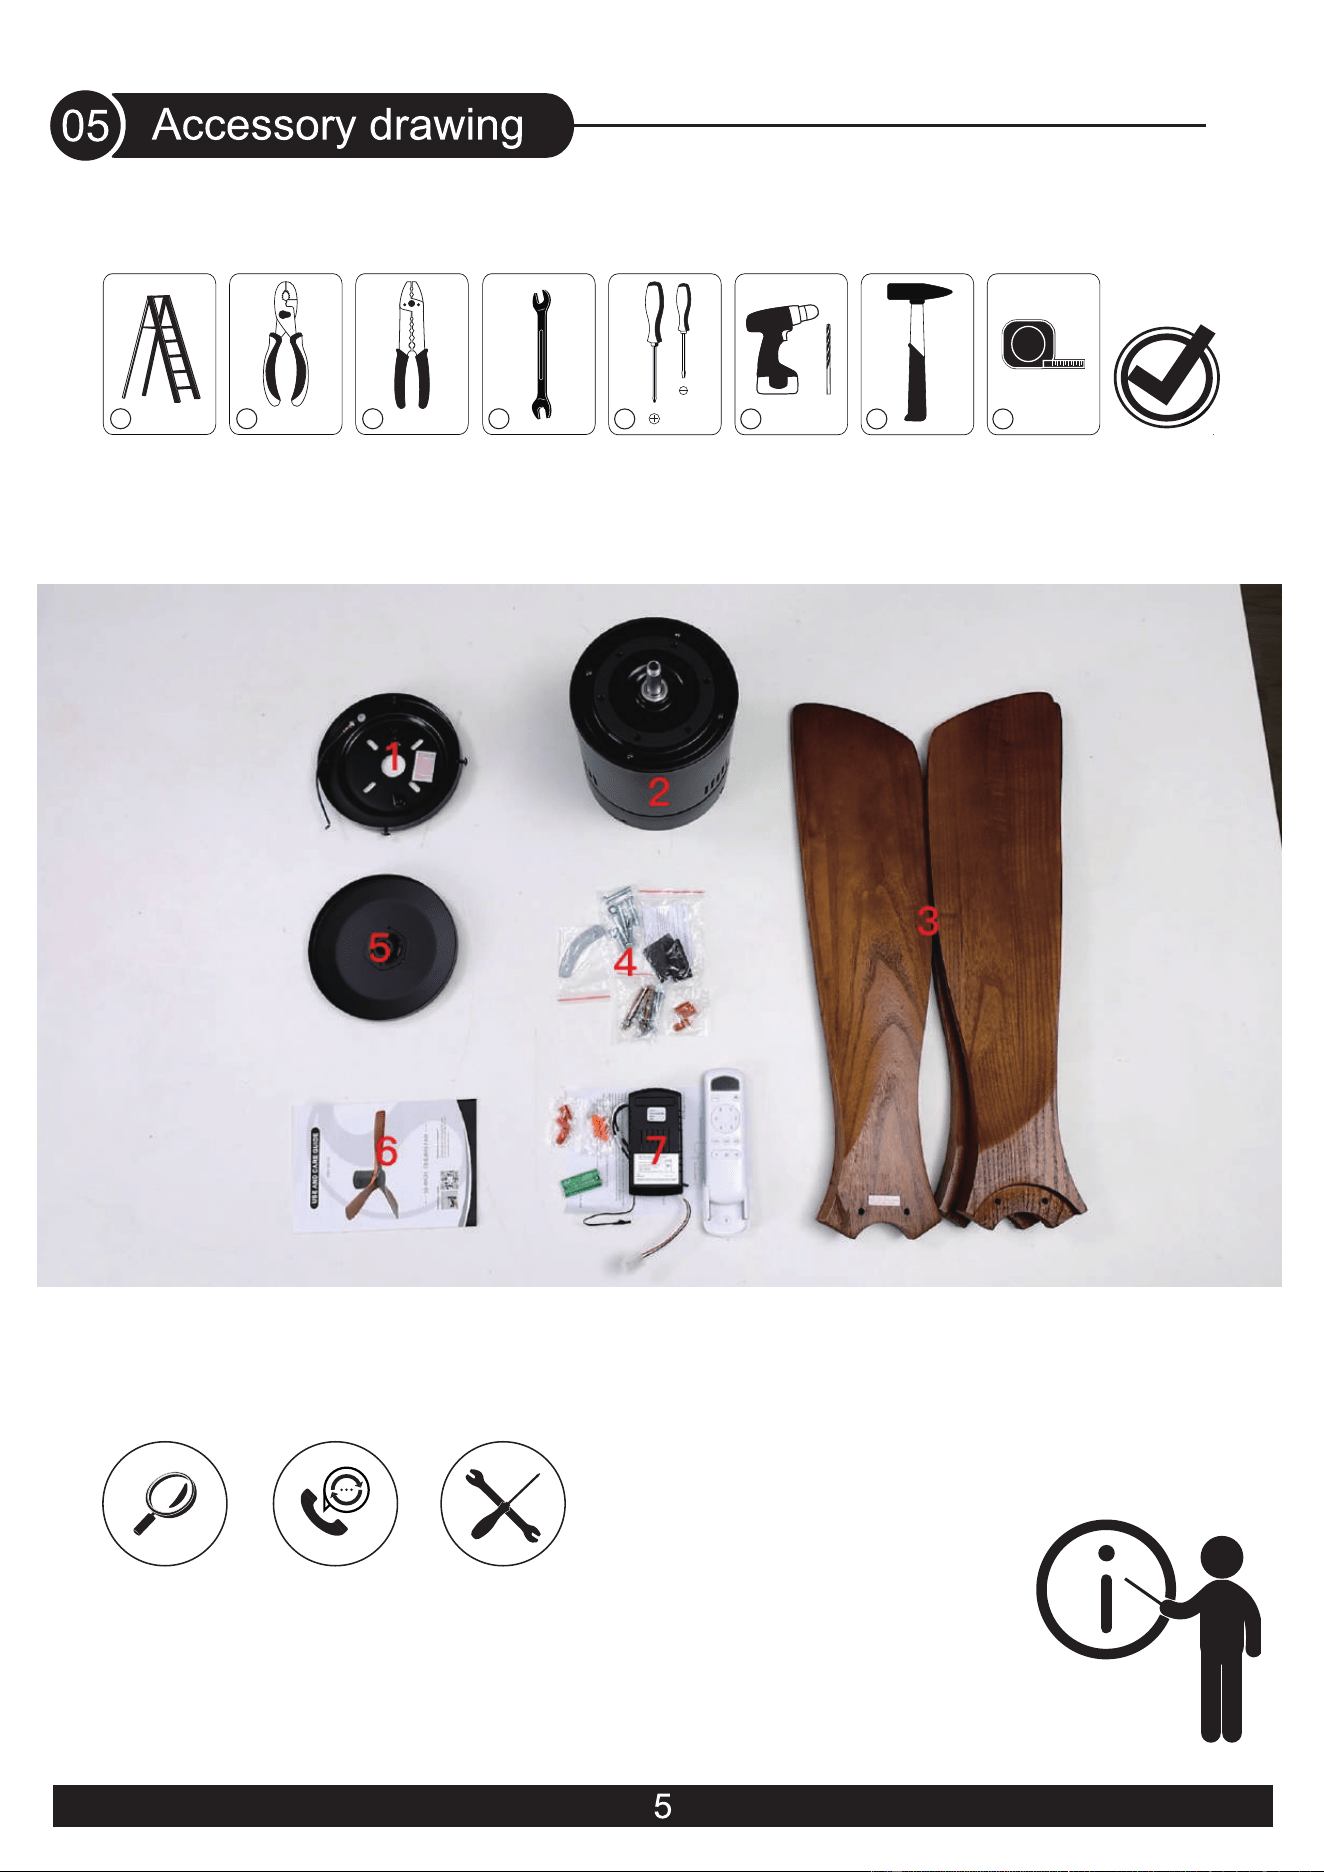
05
06
Warranty 03
07
09
10
11
08
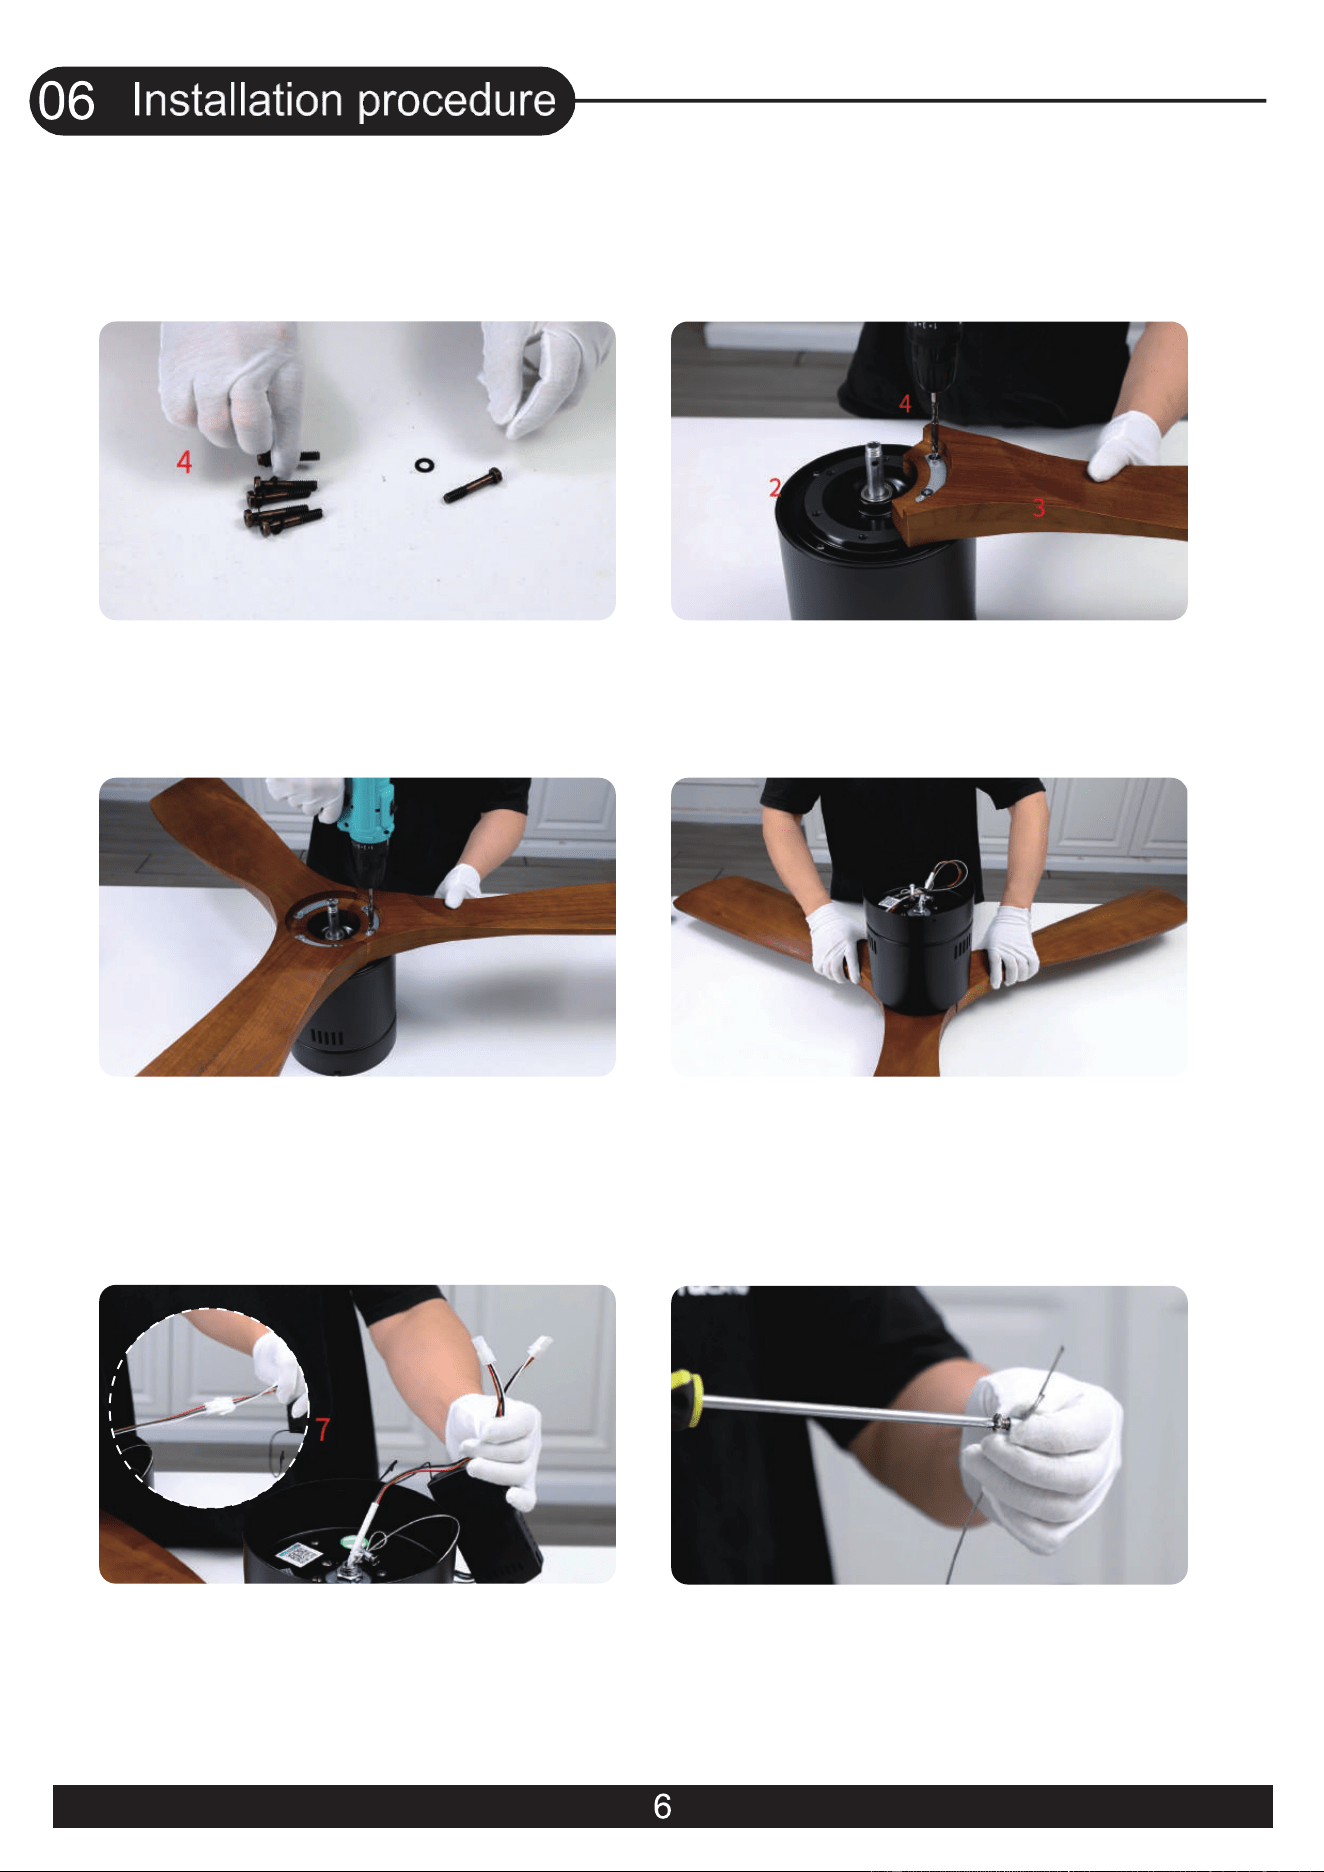
1. Fit the gasket over the screw.
2. Place the blade gasket onto the blade,
align it with the screw hole, and tighten
the screw.
4.
Turn the fan over
6. Tighten the screw.
5. Connect the wire from the ceiling fan
to the receiver(Red,White and Black wires).
3. Repeat install the remaining blades,
and tighten all the blade screws.
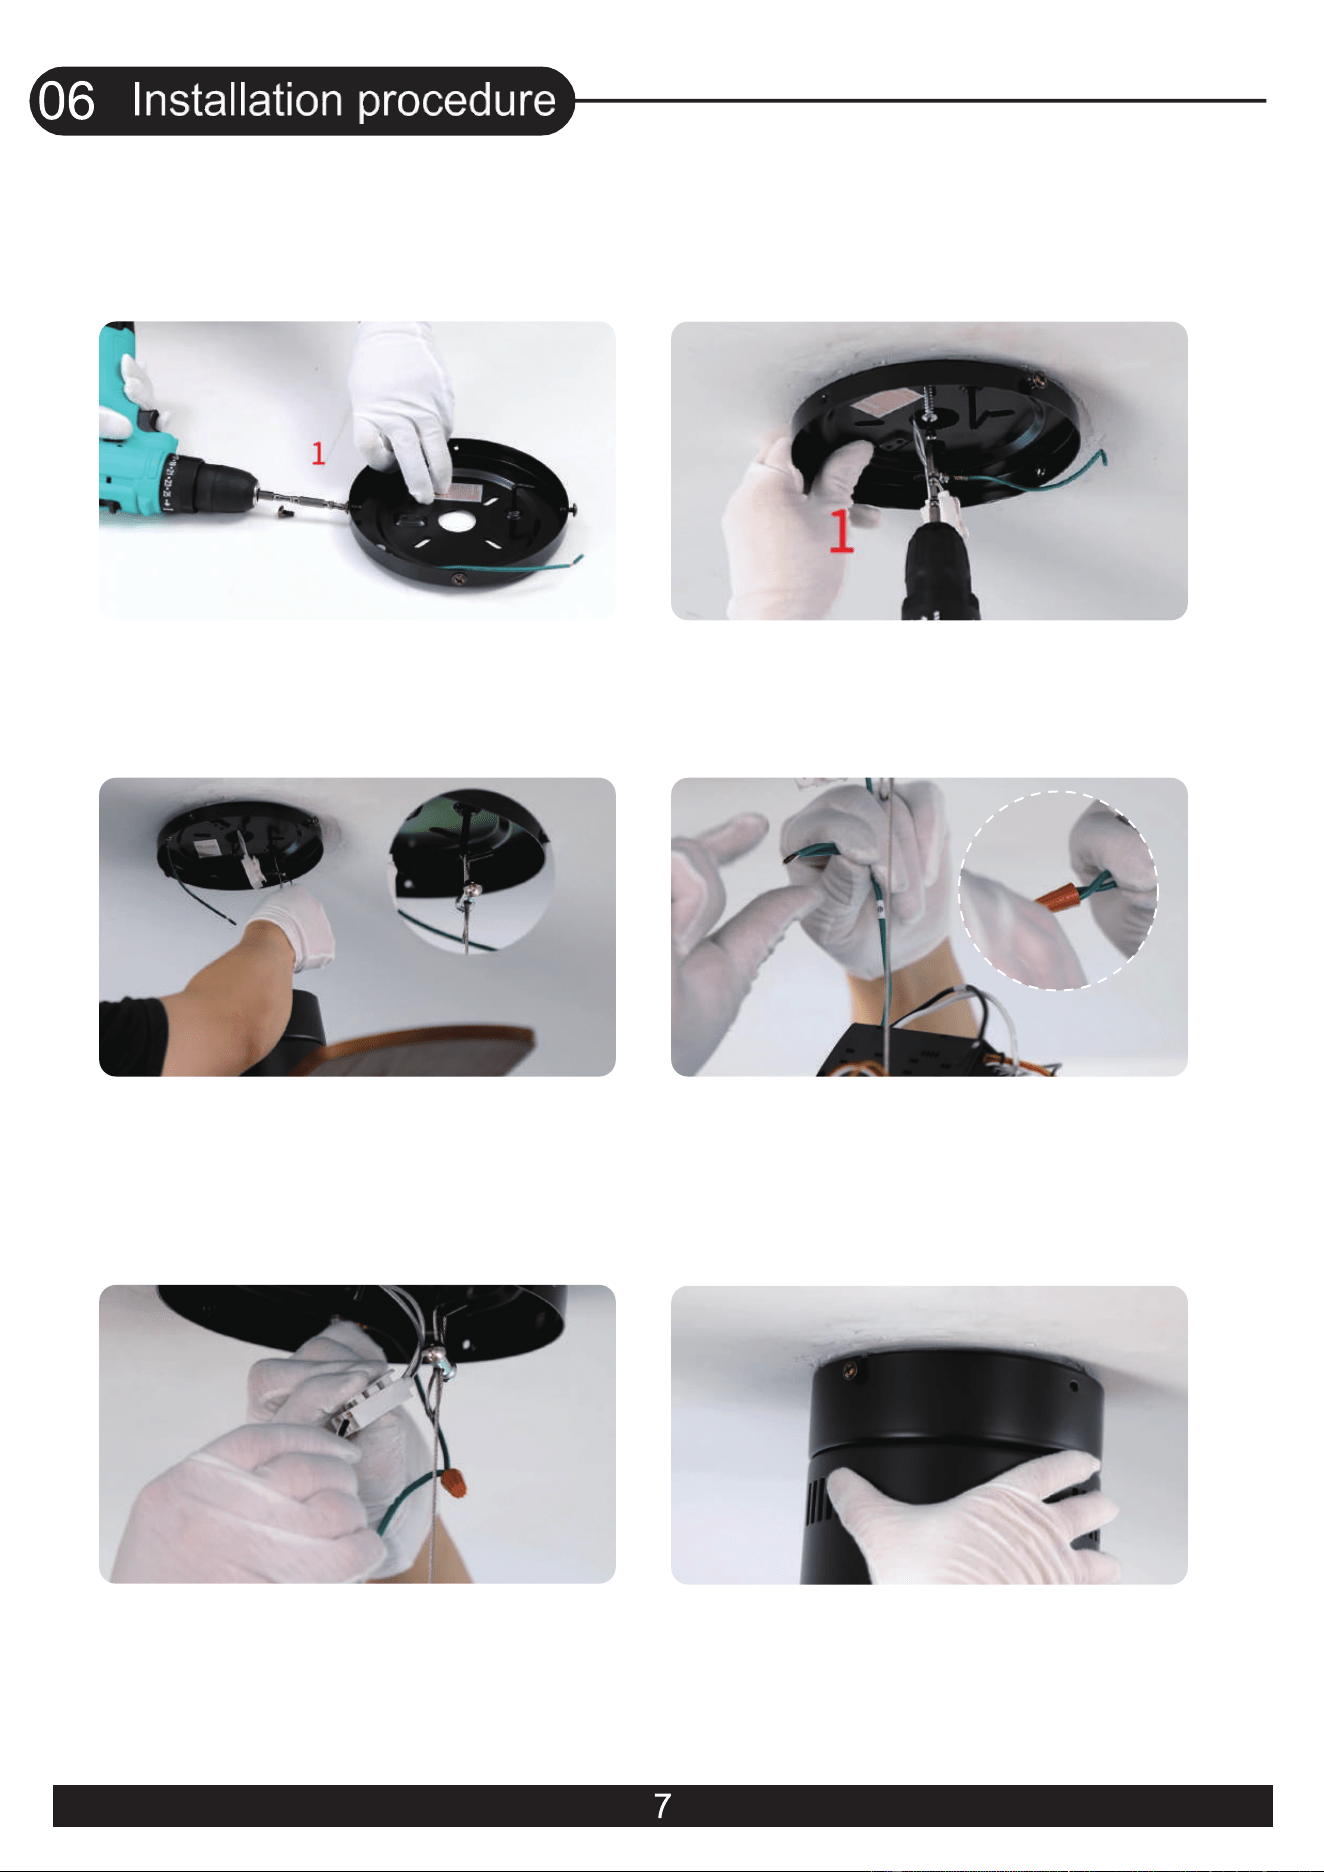
7. Loosen and remove the 4 screws on
the mounting bracket
(Do not remove them all).
8. Place the mounting bracket on the
wood ceiling and tighten the screws.
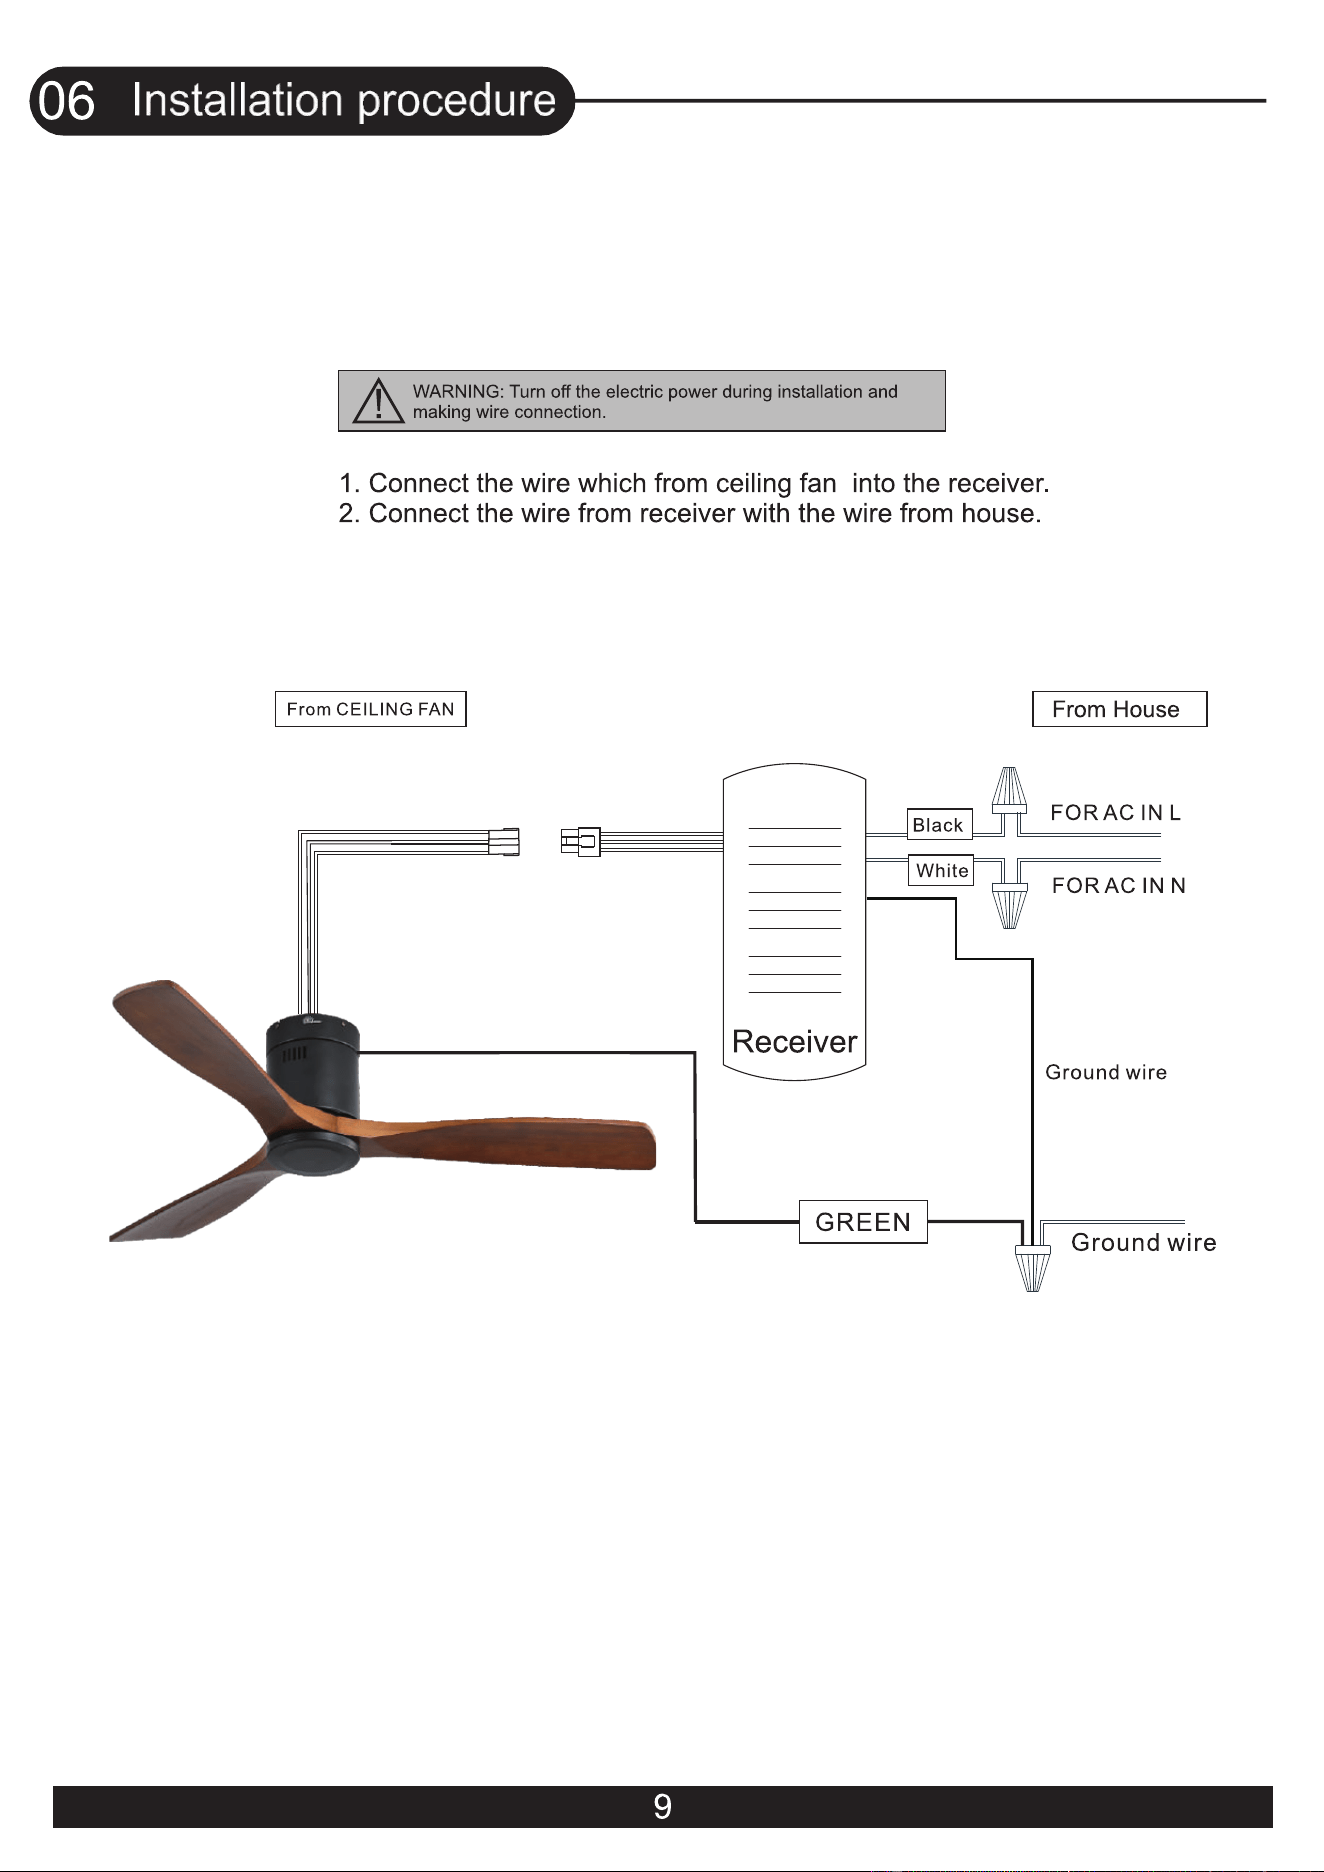
10. Use wire connecting nuts to connect
the ground wires(Green).
12.
Attach housing onto mounting bracket,
aligning the keyhole slots on the housing
with the screws on mounting bracket and
twist clockwise till tight.
11.
Connect the fan live wire (black) to
your house live wire; Connect the fan neutral
wire (white) to your house neutral wire.
9. Hook the wire rope into the hook of
the mounting bracket.Tighten the rope.
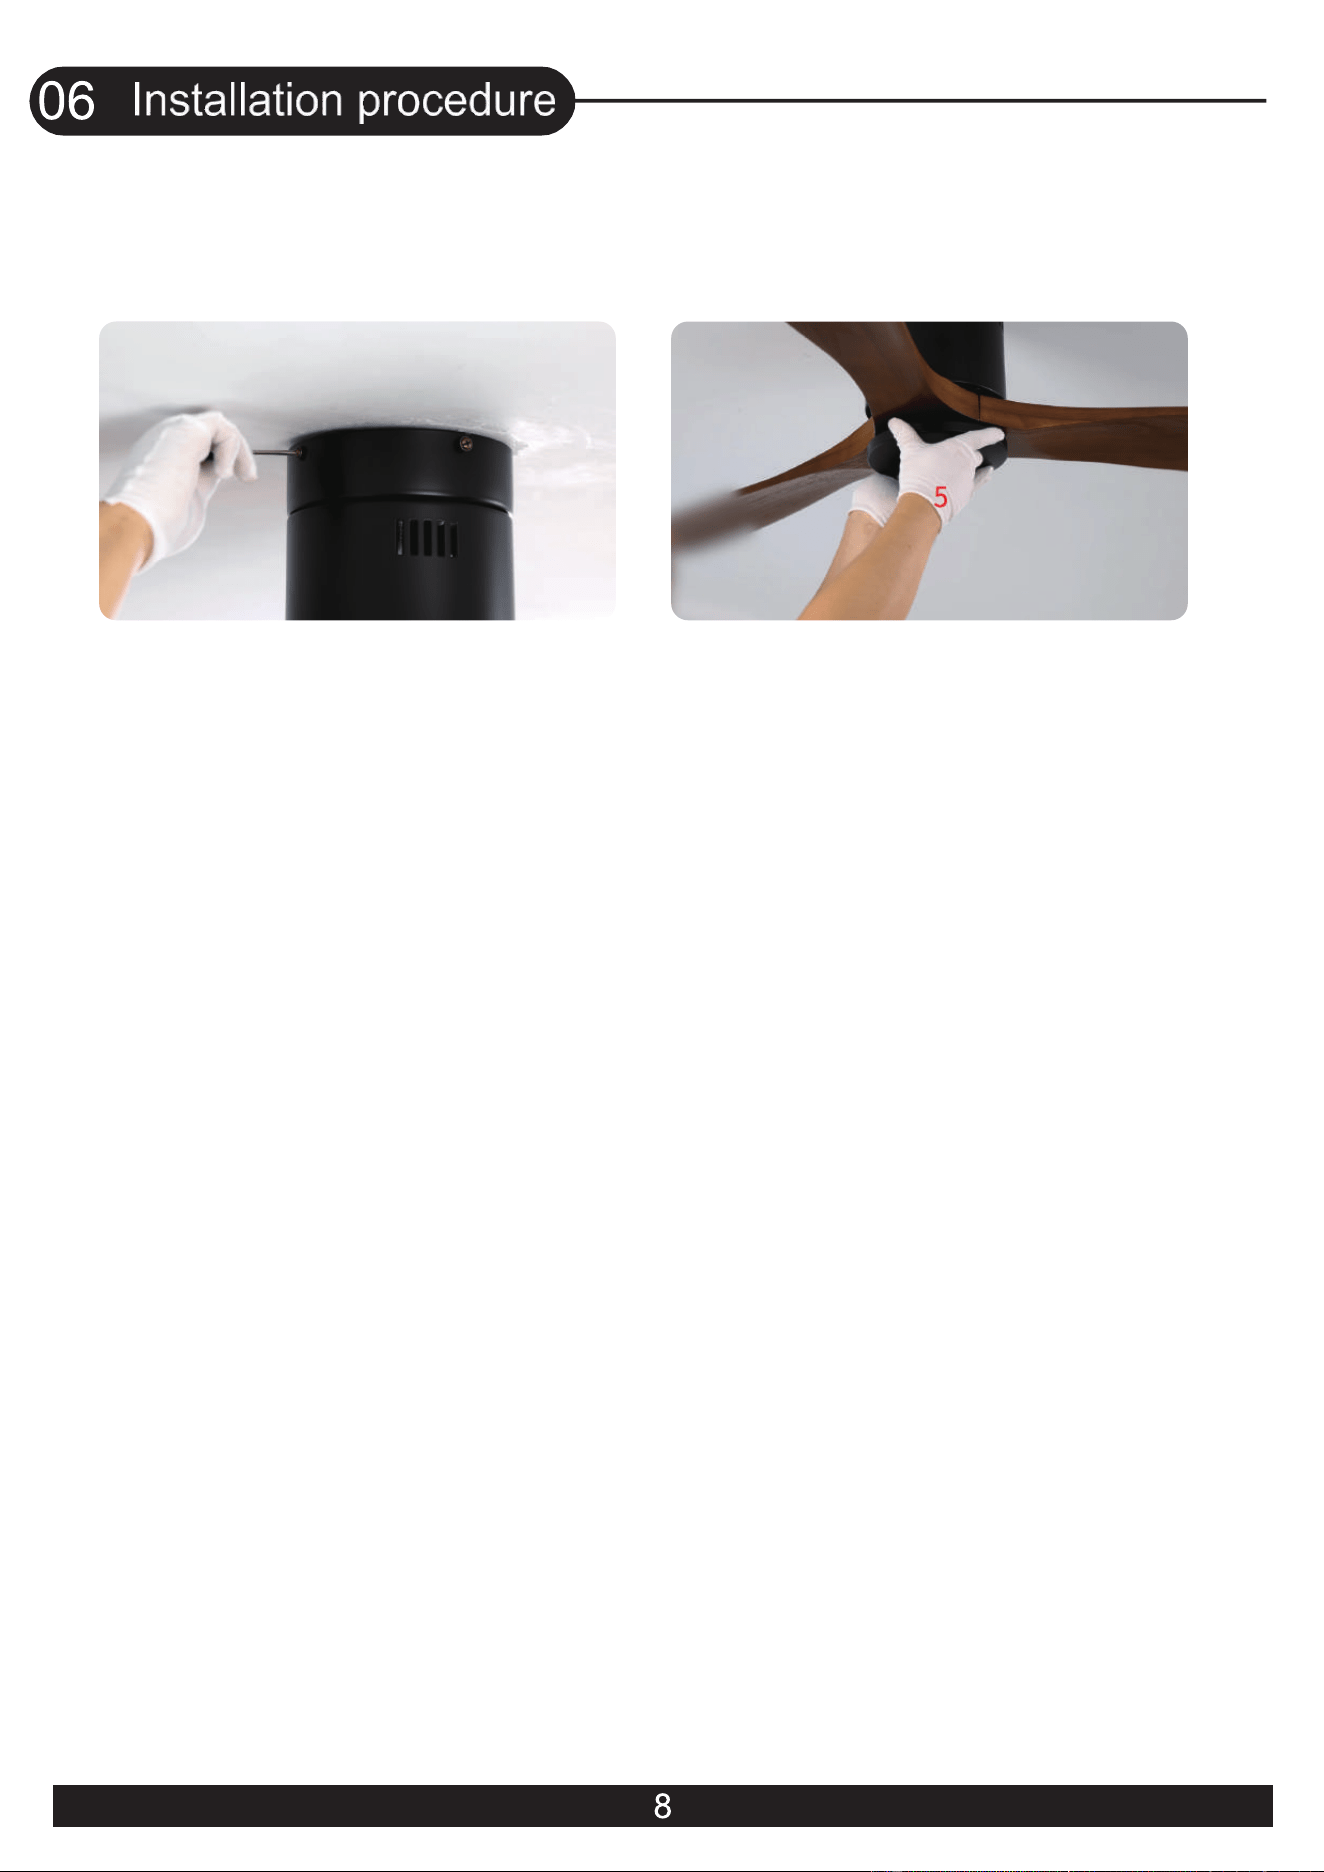
13. Tighten the screws.
14. Install the non-light-cover and rotate it
to lock.
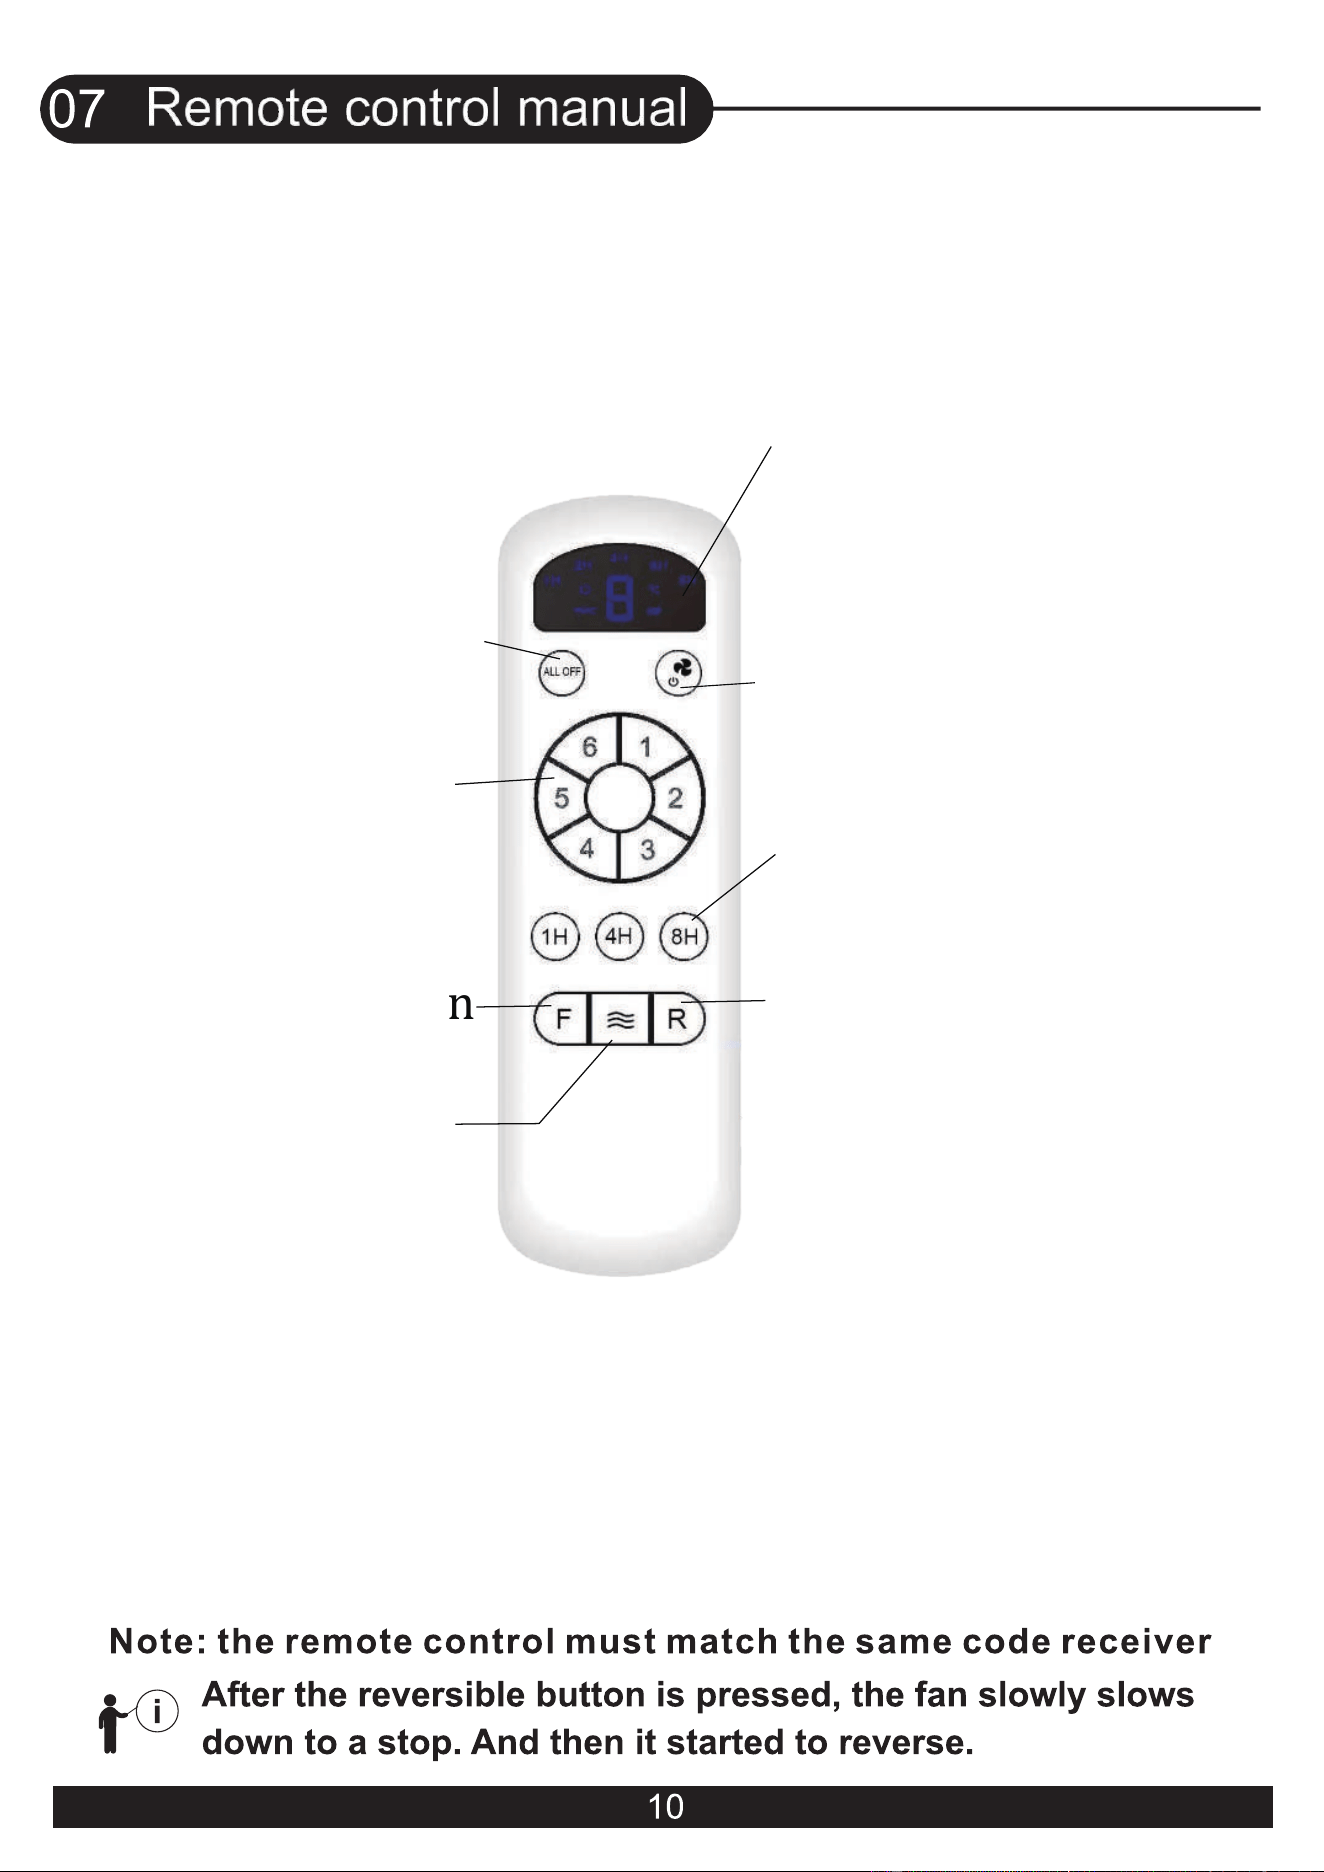
Direction of the fan
Turn OFF the Fan
Fan speed
Natural wind
Timing control of
the Fan & Light
Fan speed /
Timing time indicator
Fan OFF /
Remote control pairing
Direction of the fan
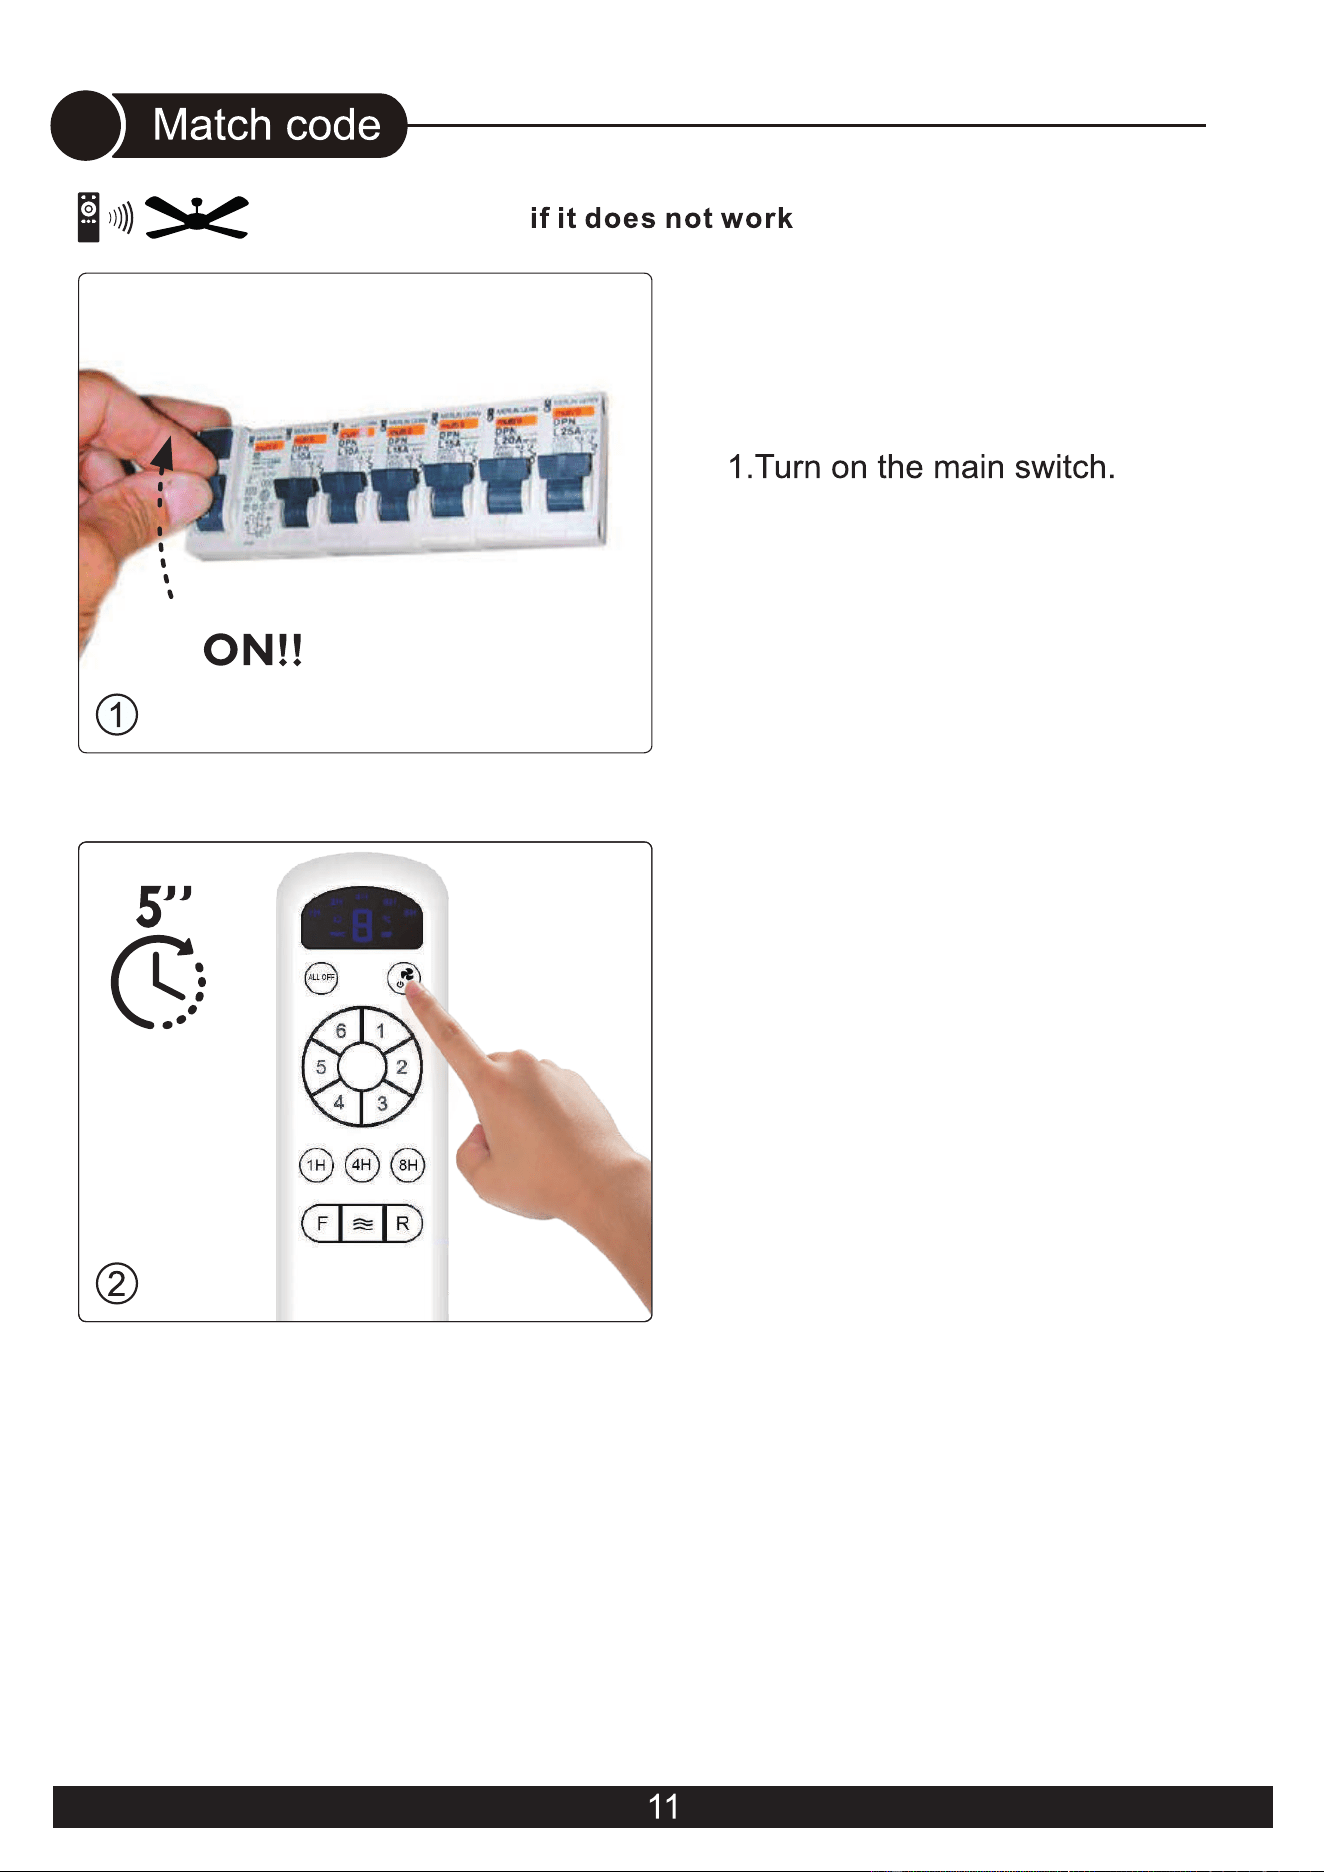
2.when AC power on, press and hold the key
for 3-5 seconds,
then finish the remote control pairing.
Notice:
The remote controller only needs to be paired once.
After the paired product,
the controller will have memory.
The products have been paired before leaving
the factory. When the remote control is damaged
or lost, it is necessary to implement remote
control pairing before using a new remote control.
08
09
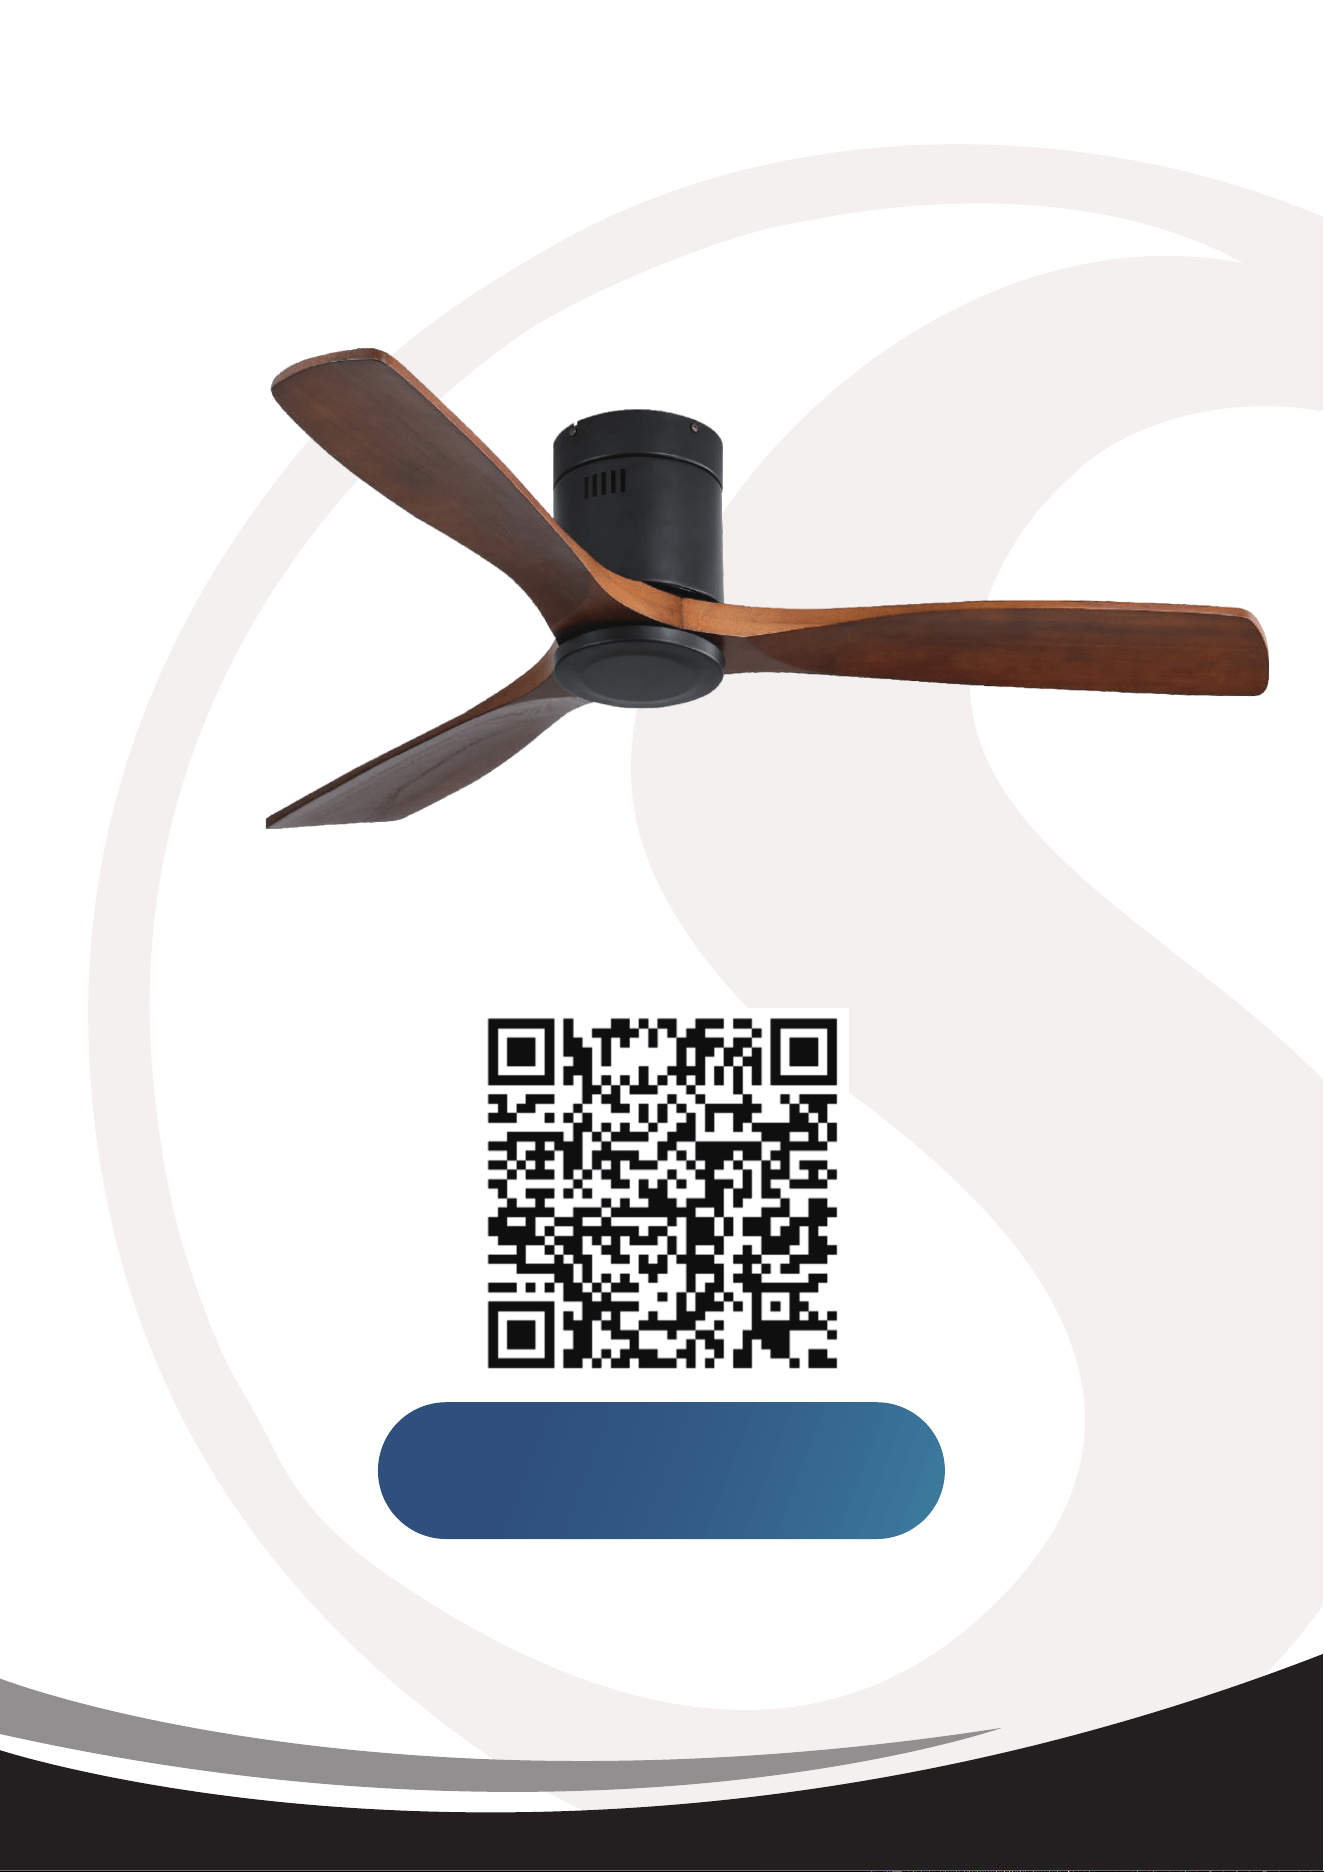
Register for Extended
2 Years Warranty+2 Year Warranty
Within the First 7 days
Scan QR code with your phone

