
1
Rigel3 Pro
User Manual
SHENZHEN GREENJOY TECHNOLOGY CO.,LTD

1
content
User Manual ..................................................................................................................1
1 Overview .....................................................................................................................2
1.1 System Description ...............................................................................................................2
1.2 Product Scope ....................................................................................................................... 3
2 Product Specification .................................................................................................. 3
3 Product introduction ....................................................................................................4
3.1 Launch monitor .....................................................................................................................4
3.2 Status light ............................................................................................................................ 4
3.3 Infrared light ......................................................................................................................... 5
3.4 Camera .................................................................................................................................. 5
3.5 Instruction ............................................................................................................................. 6
4 User Guide .................................................................................................................. 7
4.1 Connecting to PC simulator for use ......................................................................................7
4.2 Upgrade .................................................................................................................................8
5 Special Notes .............................................................................................................. 8
6 Contact ........................................................................................................................ 9
2
1 Overview
Overhead Golf Launch Monitor is one of best Golf Launch monitors
with the high-speed camera.It is equipped with original imported
high-order control chips and sensor chips, with powerful image
processing capabilities and computational performance.It can be
connected to both mobile apps and PC terminal for use.Overhead Golf
Launch Monitor the product model
:
Rigel3 Pro
。
Rigel3 Pro is mainly used in indoor golf system, by collecting and
analyzing the flight data of the ball hit by the golfer and the head data of
the swing, and projecting the actual flight trajectory of the hit ball onto
the screen, to present customers with an immersive golf environment.
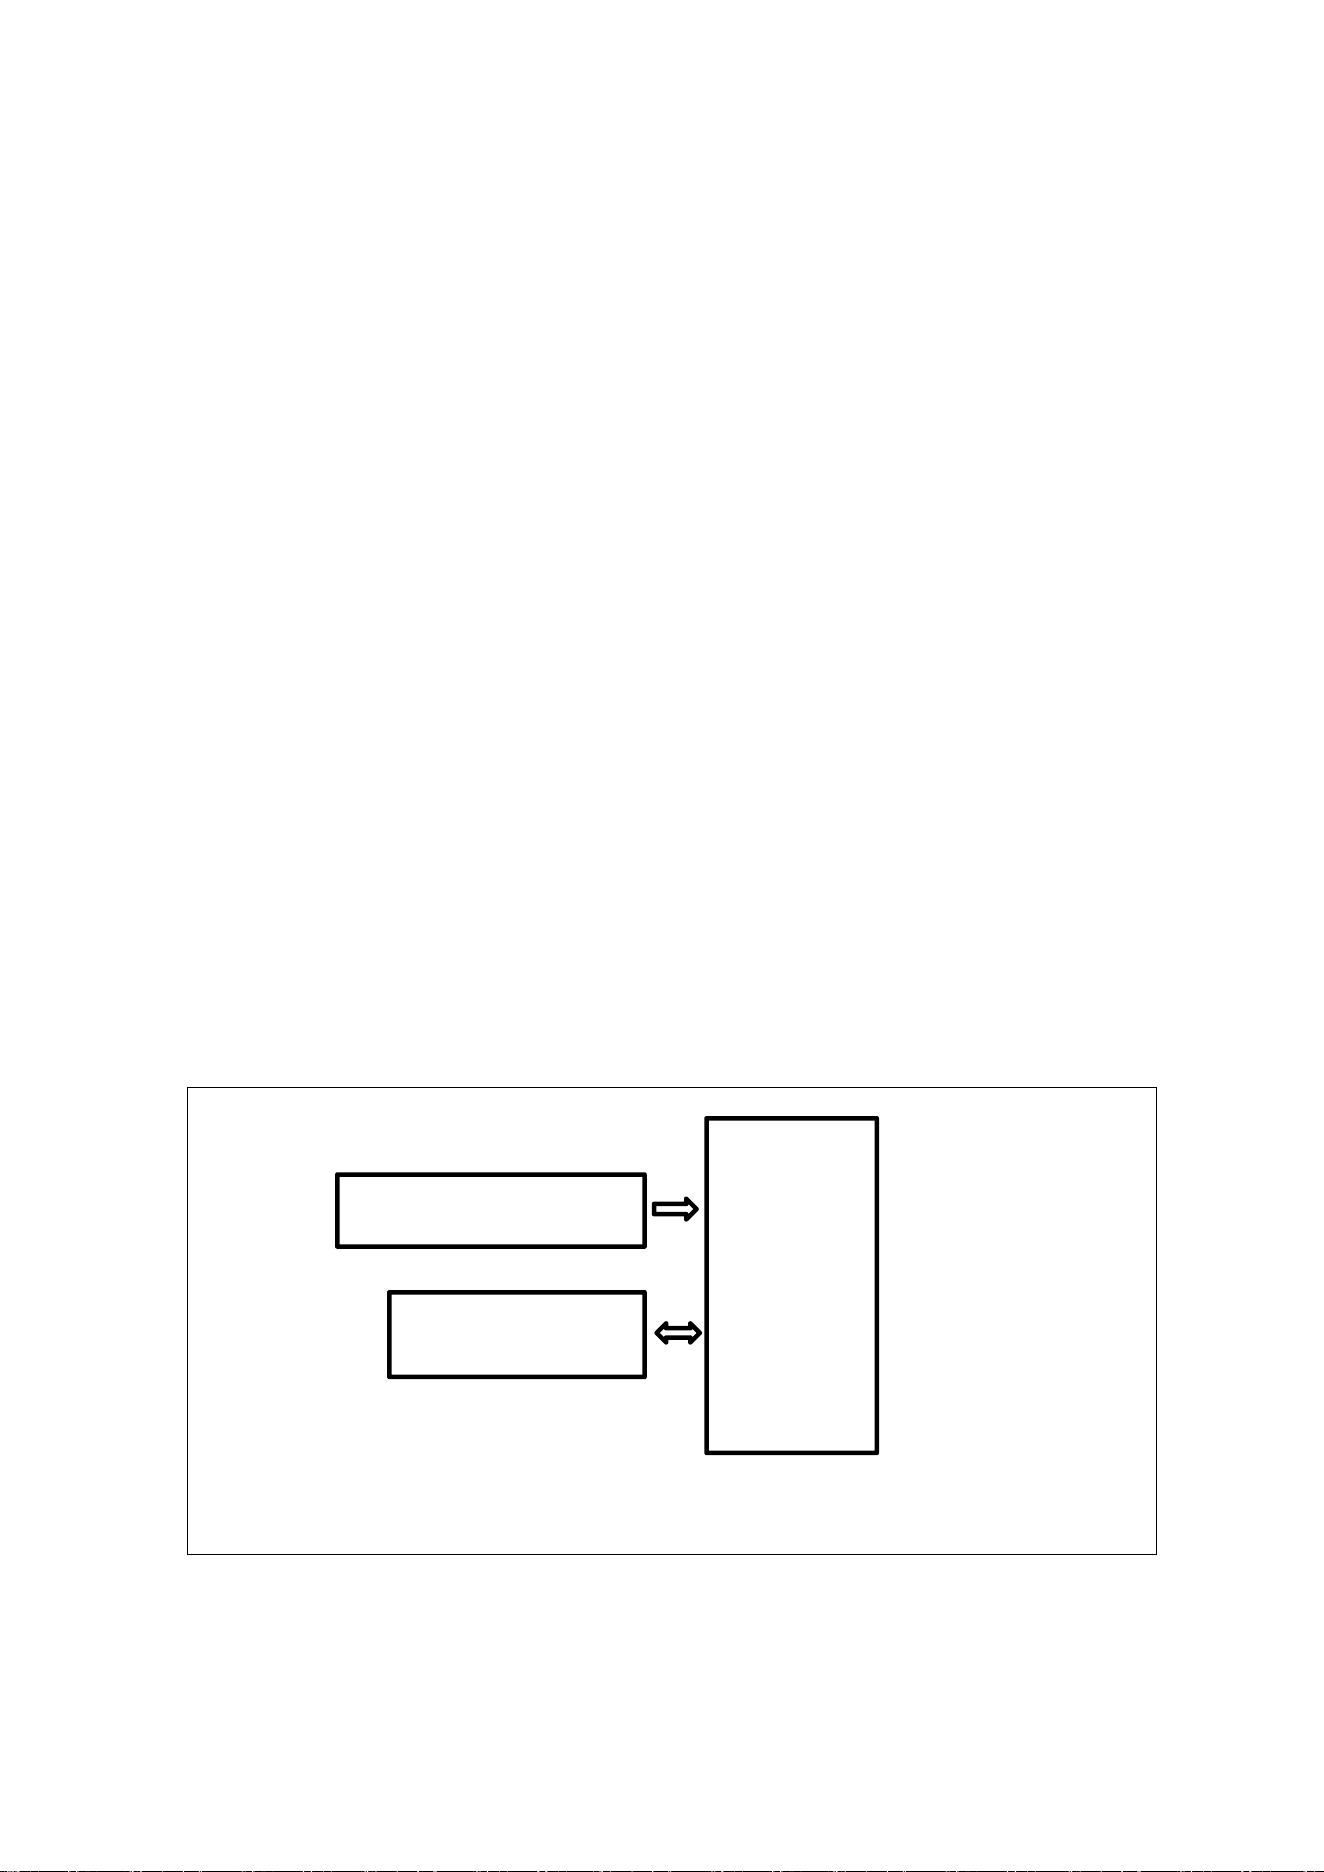
1.1 System Description
Rigel3 Pro System Block Diagram
Rigel3 Pro
24V/3.75A power adapter
PC/APP

3
1.2 Product Scope
Indoor Golf System
2 Product Specification
Models
Rigel3 Pro
CPU
Quad-core ARM Cortex-A53 MPCore up to 1.5GH,9200D
MIPS,16nm
Storage
DDR4 stores data, 2GB
Image Sensor
onsemi Sensor
Supply Current
DC 24V/3.75A
Network
1000M(RJ45)
Working Power
48W
Working Temperature
-10℃ ~ 45℃
Storage Temperature
-20℃ ~ 70℃
Humidity
20% ~ 70%
Expected Use of Altitude
3000m
Adapter
Input: 100-240VAC 50/60Hz,2.5A
Output: 24VDC ,3.75A 90W
Operation Frequency
2.4G WIFI:2400MHz ~ 2483.5MHz
5.2G WIFI:5150MHz ~5250MHz
5.8G WIFI:5725MHz ~5850MHz
Output Power
2.4G WIFI:16.83dBm
5.2G WIFI:16.68dBm
5.8G WIFI:15.51dBm
BLE:0.72dBm
Modulation technology
DSSS, OFDM,GFSK
Antenna type
Integrated Antenna
Antenna gain
2.4G WIFI:1.12dBi
5G WIFI:2.03dBi
BLE:1.12dBi
4
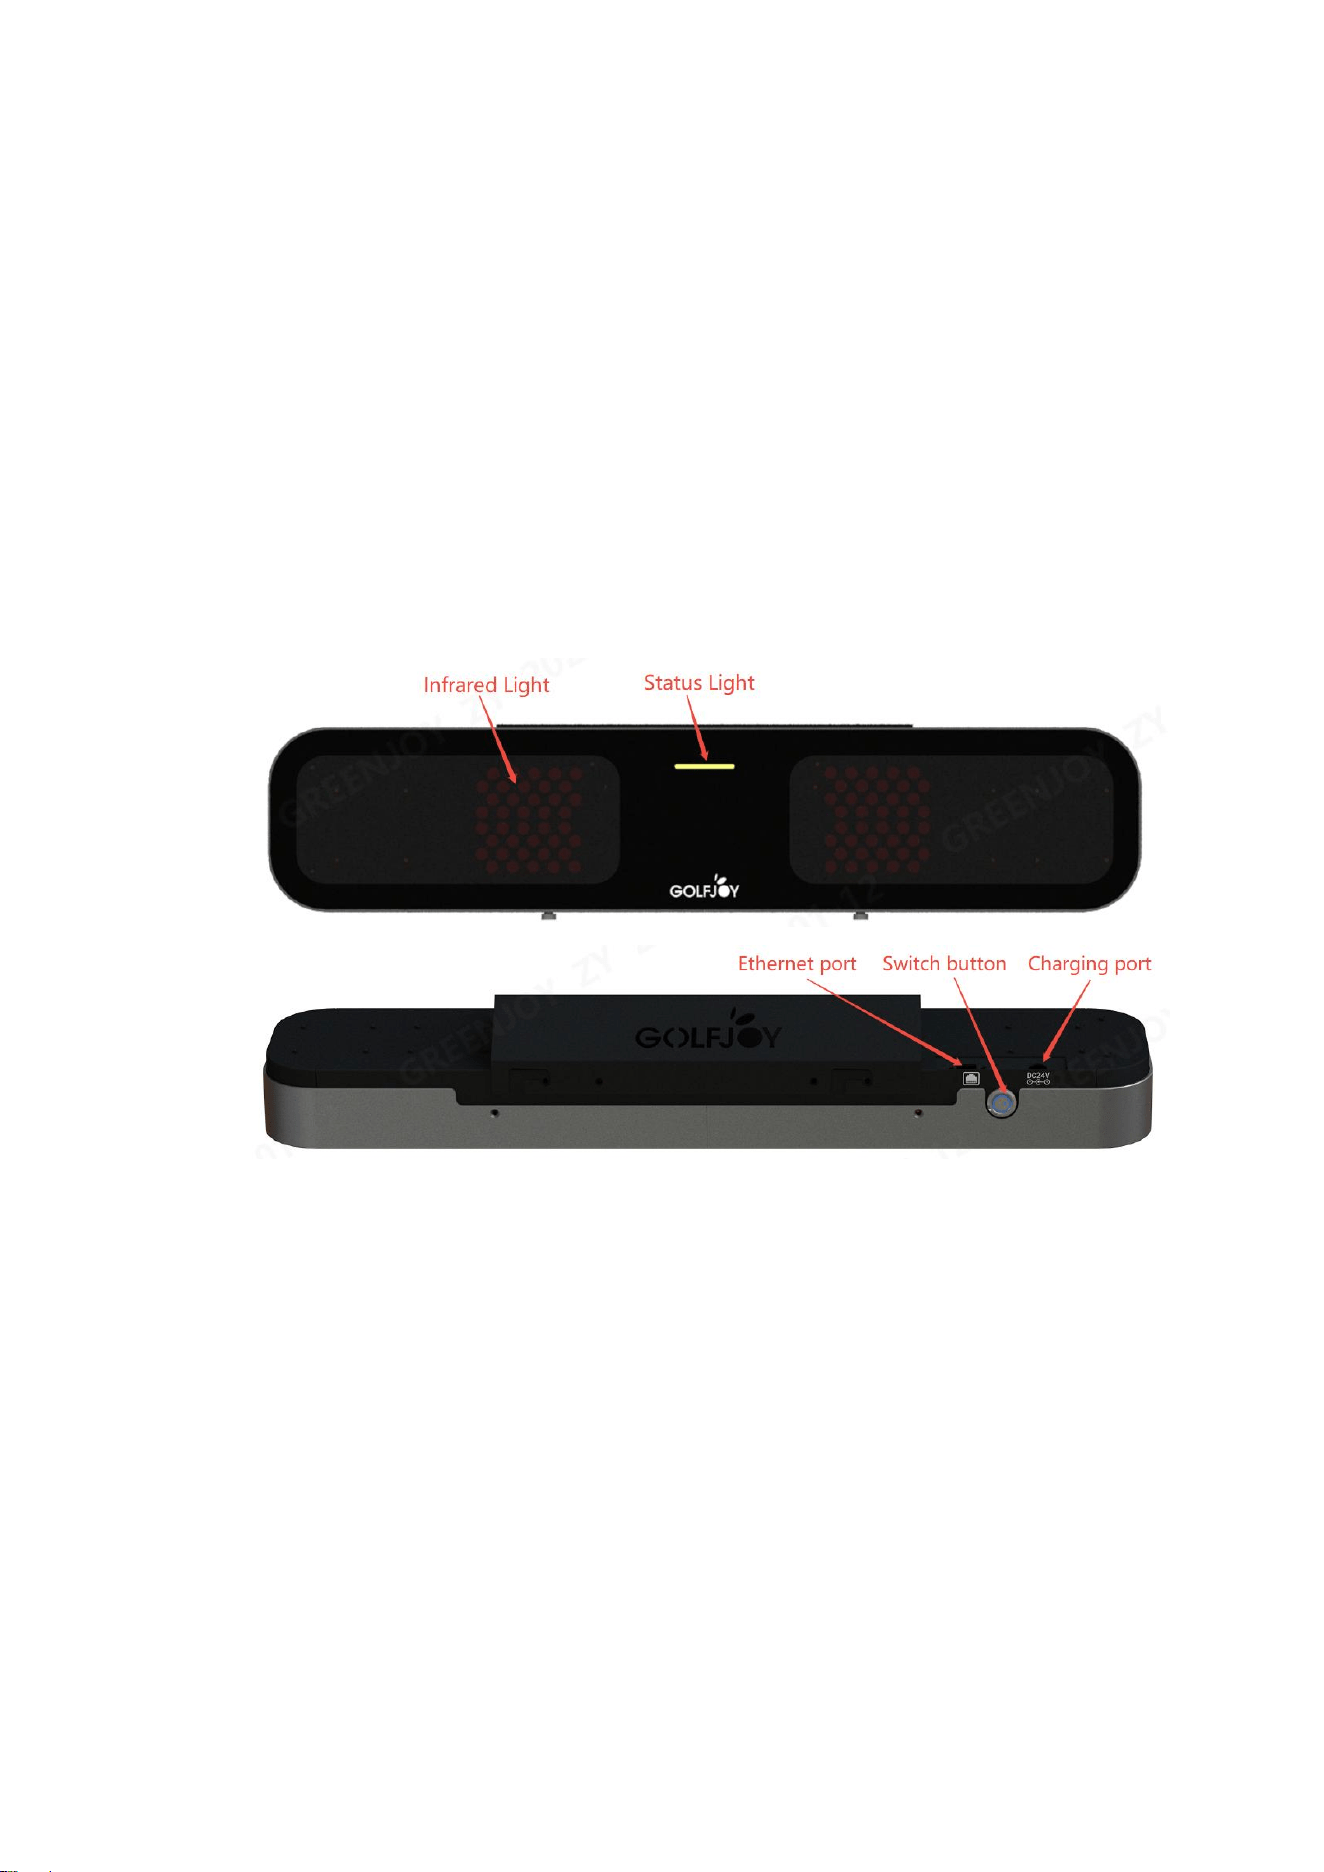
3 Product introduction
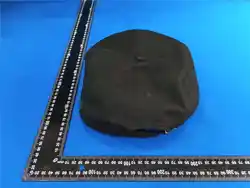
3.1 Launch monitor
Rigel 3
3.2 Status light
When the monitor is powered on, the blue light flashes;
After the startup is completed, for about 60 seconds, the blue lights will
remain on;
When connected to an application or PC software, the green lights remain

5
on after recognizing the ball;
After the ball is hit, the green light goes out, and the blue lights come on;
When the monitor is faulty, the red lights will remain on.
3.3 Infrared light
1ST step, after successfully connecting to the APP or PC terminal, the
first gear is always on (only visible with a mobile camera)
2nd step, after recognizing the ball (with a green status light),the second
gear is always on (visible to the naked eye).
3.4 Camera
It is one of most important functional modules positioning balls.
It should not be obstructed during the process of hitting balls and the
exterior of the lens should be kept clean and tidy for a long time.
6
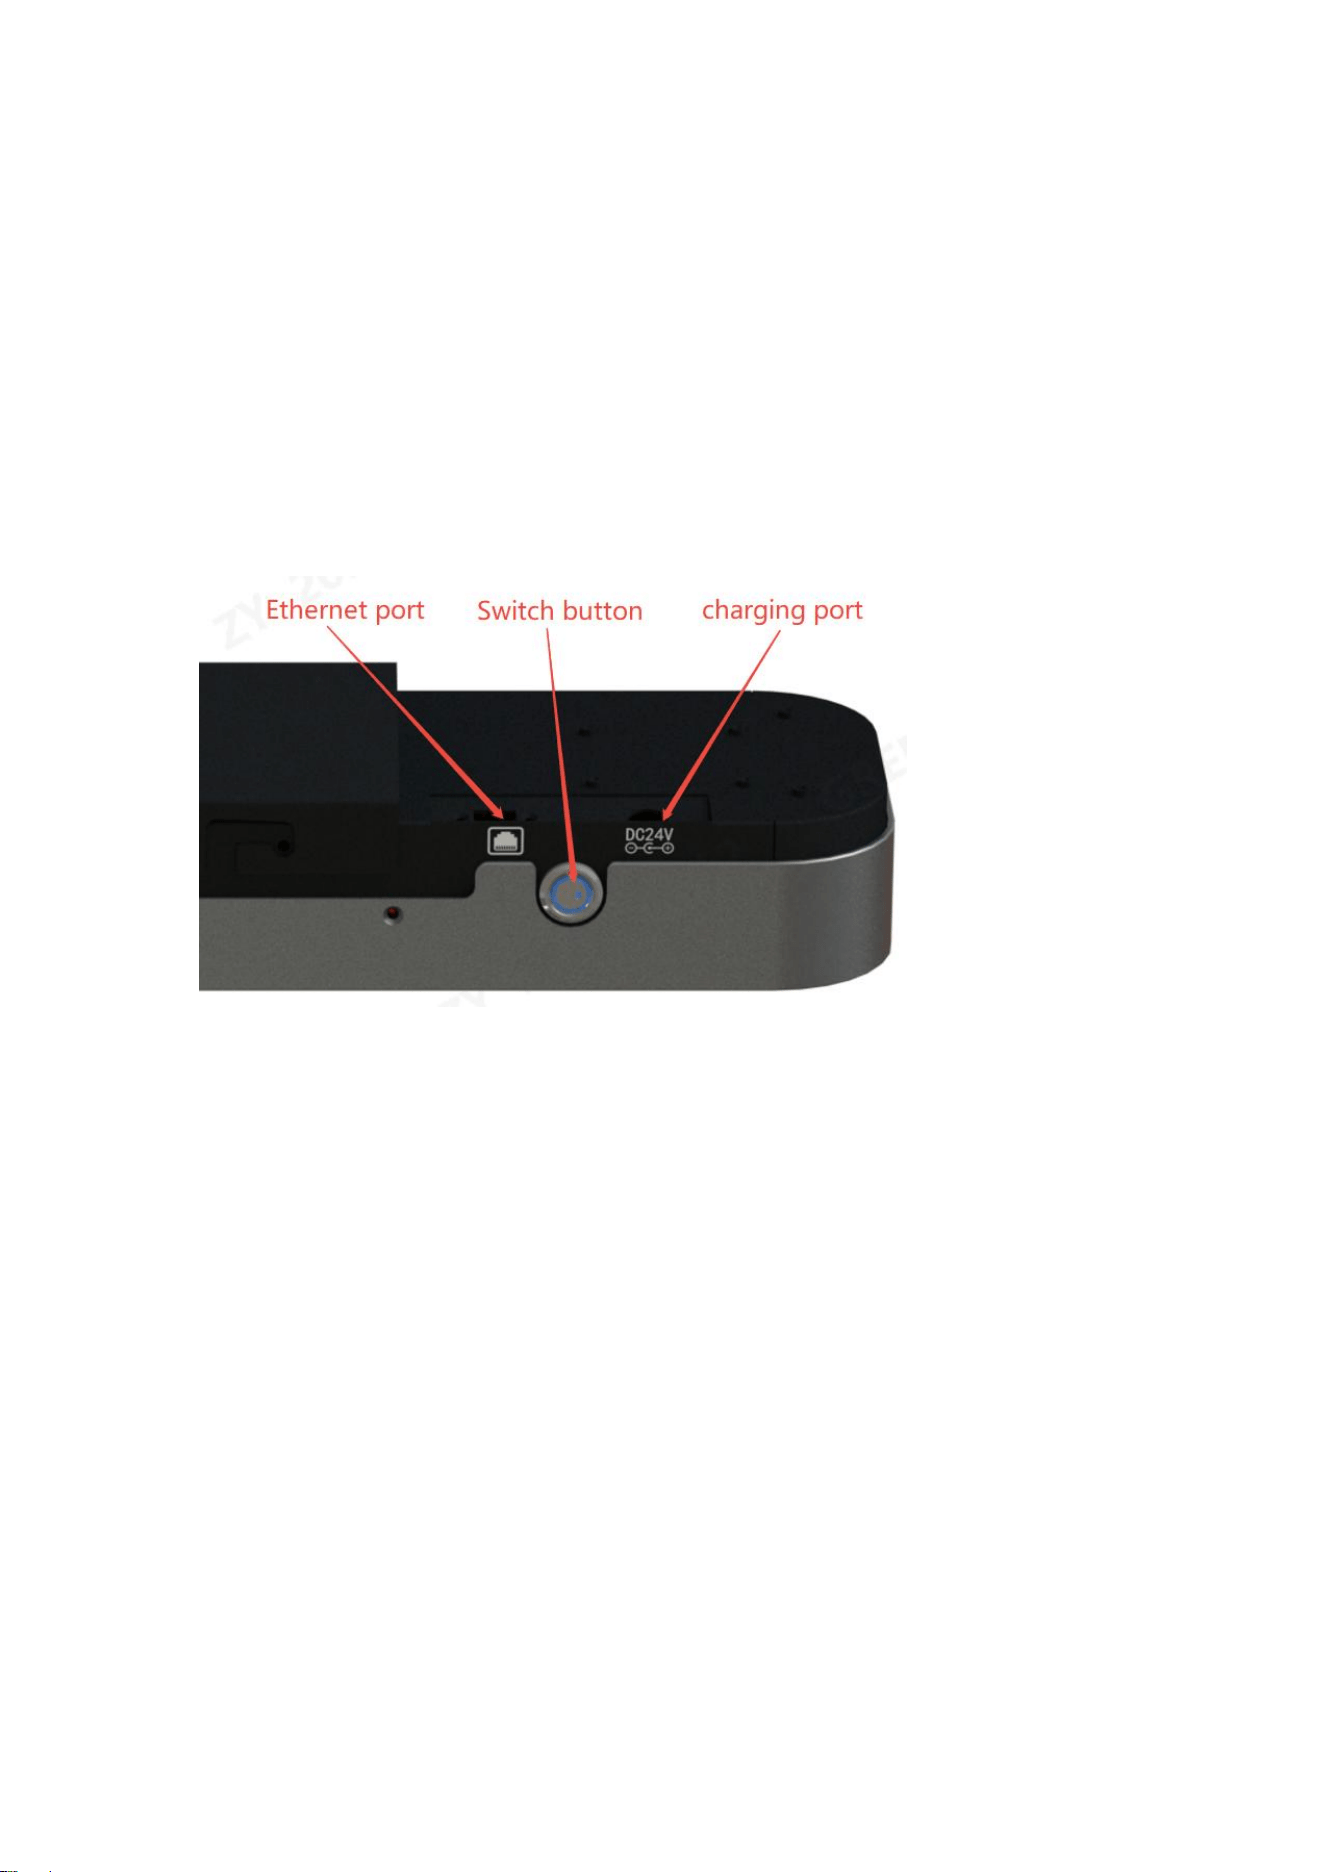
3.5 Instruction
Rigel3 Pro
Switch button: It’s a latching switch.When the switch button is pressed, it
indicates power-on, and the blue light on the switch will come on.When
pressed again, the switch will spring back, indicating a power-off, and the
blue light will go out.
Charging port: To charge the monitor, it connects to a 24V adapter.
Ethernet port: Connecting a gigabit network cable and a network port for
monitor calibration and playing golf.
7
4 User Guide
4.1 Connecting to PC simulator for use
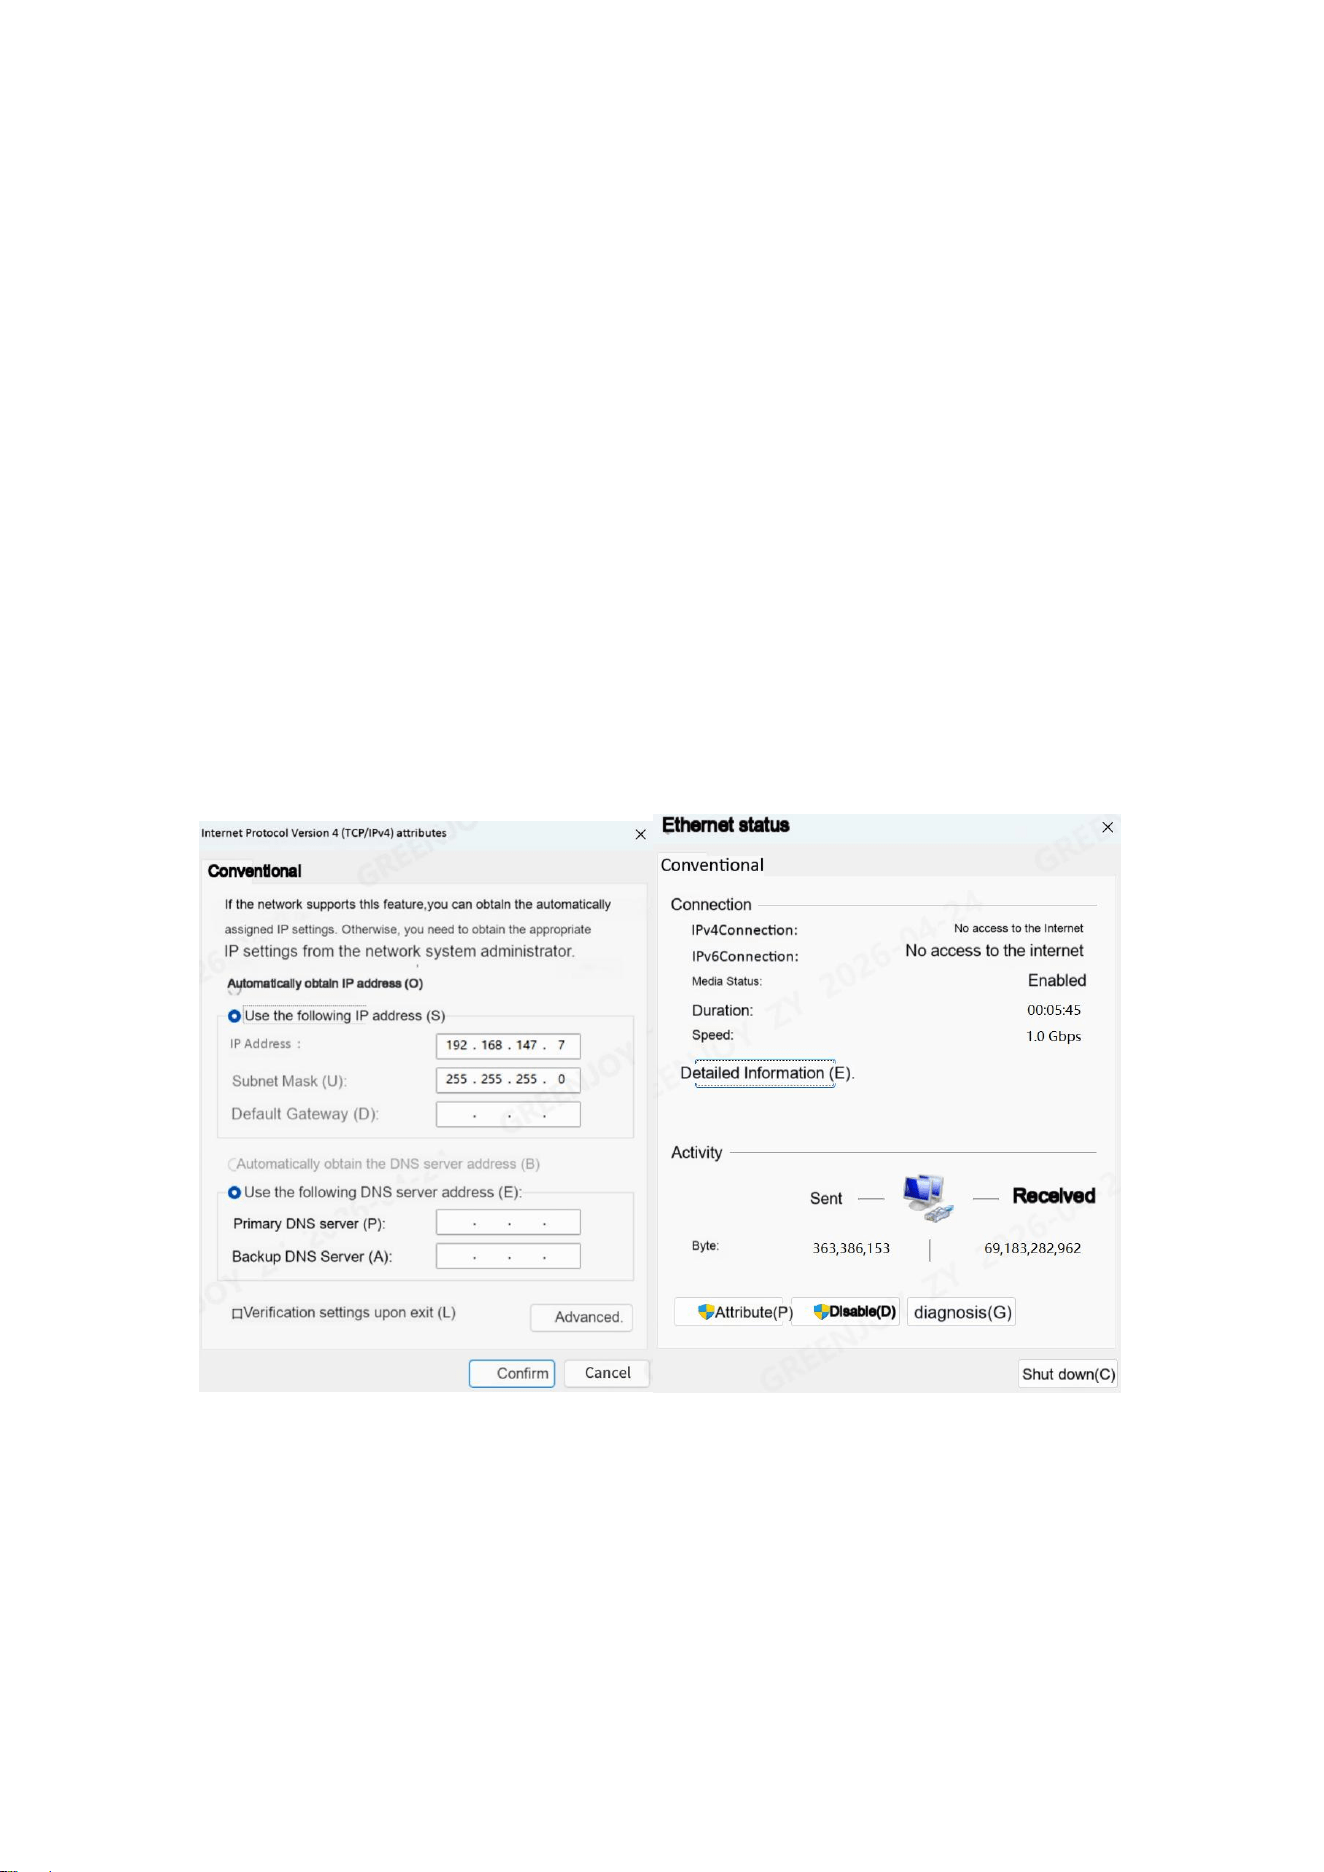
4.1.1. The default factory IP of the monitor of the Rigel3 Pro is
"192.168.147.147", connect the monitor directly to the computer, and
then set the computer IP to the same network segment "192.168.147.***"
through the TCP/IPv4 attribute of the Ethernet attribute (*** is a value
other than the monitor IP, as shown in Figure 1). Also pay attention to
whether the following is a Gigabit network connection.
Figure 1
4.1.2. Open the calibration program, and the License will be displayed in
the calibration program. Enter the sensor IP number (factory default is
192.168.147.147) and click the "Connect" button. The status window will
display "Connected Sensor". Click "② Activate the camera". After it is
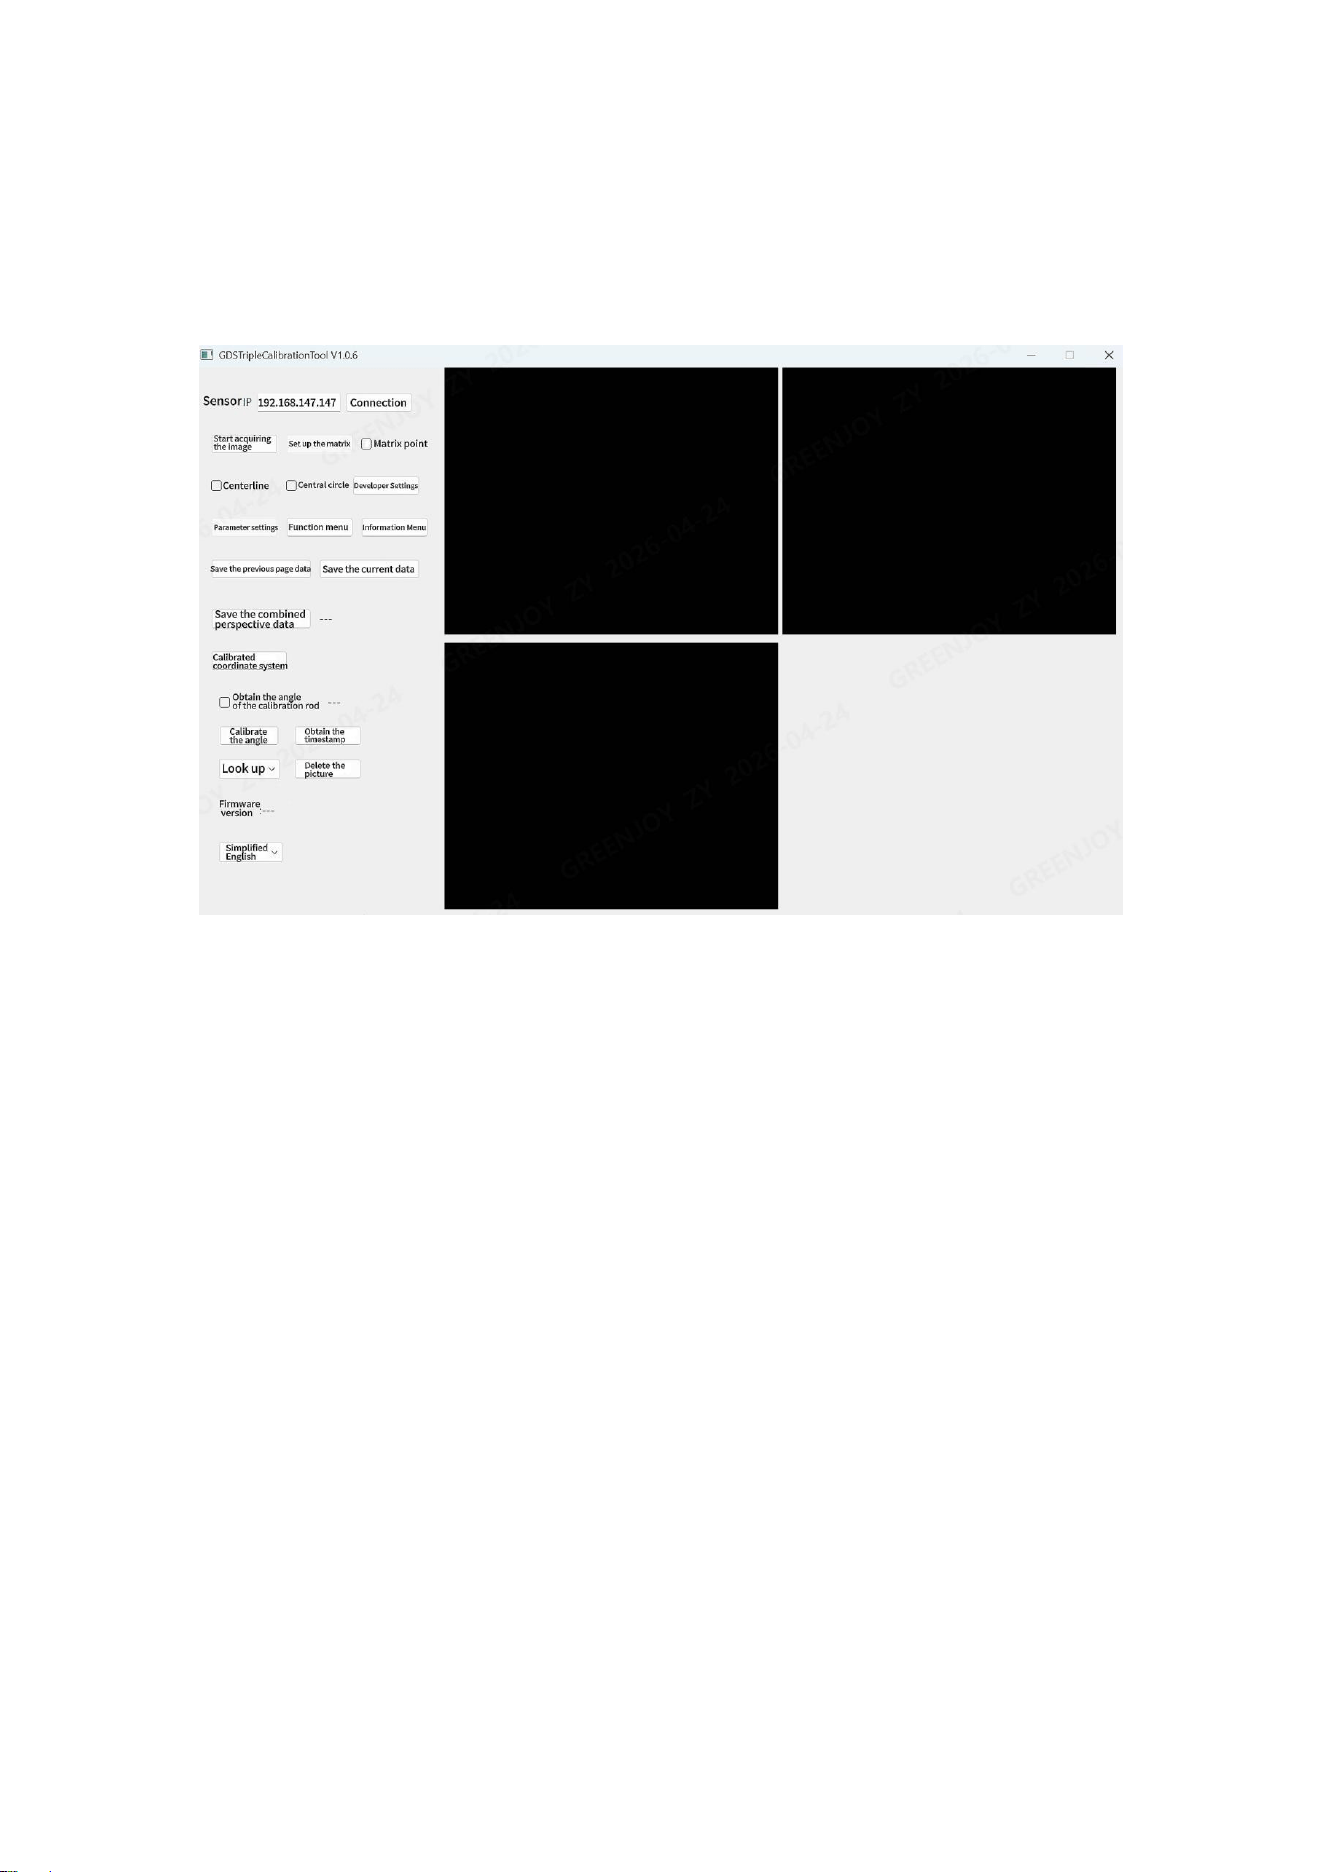
8
successfully activated, the left and right images will be displayed (Figure
2).
Figure 2
4.2 Upgrade
When there are new features added to the monitor, a new firmware
version will be iteratively upgraded.
There are 2 ways to upgrade: one is to self upgrade through the APP; The
second is to upgrade through self-service prompts on the PC terminal.
5 Special Notes
1. Please ensure that this product is used within the officially specified voltage range.
2. When repairing products, please repair them at qualified repair points or institutions,
and do not repair them privately to avoid danger.
3. Do not put the main body into water or other liquids.
4. Do not use dry velvet, abrasive Sexual cleansing or corrosive liquid (such as

9
gasoline or acetone) to clean this product.
5. Before replacing components or touching moving parts, turn off the power switch
and disconnect the power supply.
6.The GREENJOY brand warranty service period is 24 months. If you have any quest
ions about the product, you can contact the customer service staff of your purchase ch
annel. We will have a special staff at 12-24 Reply to the question within an hour.
The GREENJOY brand has been firmly committed to continuously improving produc
ts, services and user experience.
Thank you for choosing GREENJOY.
6 Contact
SHENZHEN GREENJOY TECHNOLOGY CO., LTD
Address:A2604/Room #2606 Block 11A, Eco- Park, Gaoxin South 9 road, Nanshan D
istrict, Shenzhen, China
Phone:0755-27272587
Website:www.golfonline.cn
Contact person:
Qinghua wang,

FCC STATEMENT
This device complies with Part 15 of the FCC Rules. Operation is subject to the following two
conditions:
(1) this device may not cause harmful
interference, and
(2) this device must accept any interference received, including interference that may cause undesired
operation.
Note: This equipment has been tested and found to comply with the limits for a Class B digital device,
pursuant to part 15 of the FCC Rules. These limits are designed to provide reasonable protection
against harmful interference in a residential installation. This equipment generates, uses and can radiate
radio frequency energy and, if not installed and used in accordance with the instructions, may cause
harmful interference to radio communications. However, there is no guarantee that interference will not
occur in a particular installation. If this equipment does cause harmful interference to radio or
television reception, which can be determined by turning the equipment off and on, the user is
encouraged
to try to correct the interference by one or more of the following measures:
- Reorient or relocate the receiving antenna.
- Increase the separation between the equipment and receiver.
- Connect the equipment into an outlet on a circuit different from that to which the receiver is
connected.
- Consult the dealer or an experienced radio/TV technician for help.
FCC Radiation Exposure Statement
This projector complies with FCC RF radiation exposure limits set forth for an uncontrolled
environment. This device should be installed and
operated with a minimum distance of 20cm between the radiator and user body. This transmitter must
not be co-located or operating in conjunction with any other antenna or transmitter.
FCC WARNING:
This equipment may generate or use radio frequency energy. Changes or modifications to this
equipment may cause harmful interference unless the modifications are expressly approved in the
instruction manual. The user could lose the authority to operate this equipment if an unauthorized
change or modification is made.
Déclaration ISED
English: This device contains licence-exempt transmitter(s)/receiver(s) that comply
with Innovation, Science and Economic Development Canada’s licence-exempt
RSS(s). Operation is subject to the following two conditions:
(1) This device may not cause interference.
(2) This device must accept any interference, including interference that may cause
undesired operation of the device.
The digital apparatus complies with Canadian CAN ICES-3 (B)/NMB-3(B).
– Français : L'appareil est conforme aux normes CNR de l'industrie.

Les dispositifs radio canadiens exemptés de licence sont autorisés à être exploités sous deux
conditions :
(1) L'appareil ne doit pas provoquer de confusion, et
(2) L'utilisateur de l'appareil doit accepter toute confusion ou erreur électronique ou radiophonique qui
pourrait survenir.
Le brouillage peut compromettre…
Fonctionnement. Appareil numérique conformément aux normes canadiennes.
Peut - 3 (b) / nmb - 3 (b).
Cet appareil est conforme à l'exemption des limites d'évaluation courante prévues à la section 2.5 du
CNR-102 et à la norme RSS 102 en matière d'exposition aux ondes radio. Les utilisateurs peuvent ainsi
obtenir des données canadiennes sur l'exposition aux champs radio et la
Conformité.
Cet équipement est conforme aux limites canadiennes d'exposition aux rayonnements, établies pour un
environnement non contrôlé. Il doit être installé et utilisé à une distance minimale de 20 cm entre le
radiateur et le corps.
Cet équipement doit être installé et utilisé à une distance minimale de 20 cm entre le radiateur et le
dispositif EV.
Votre corps