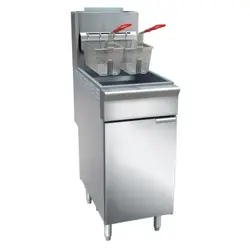
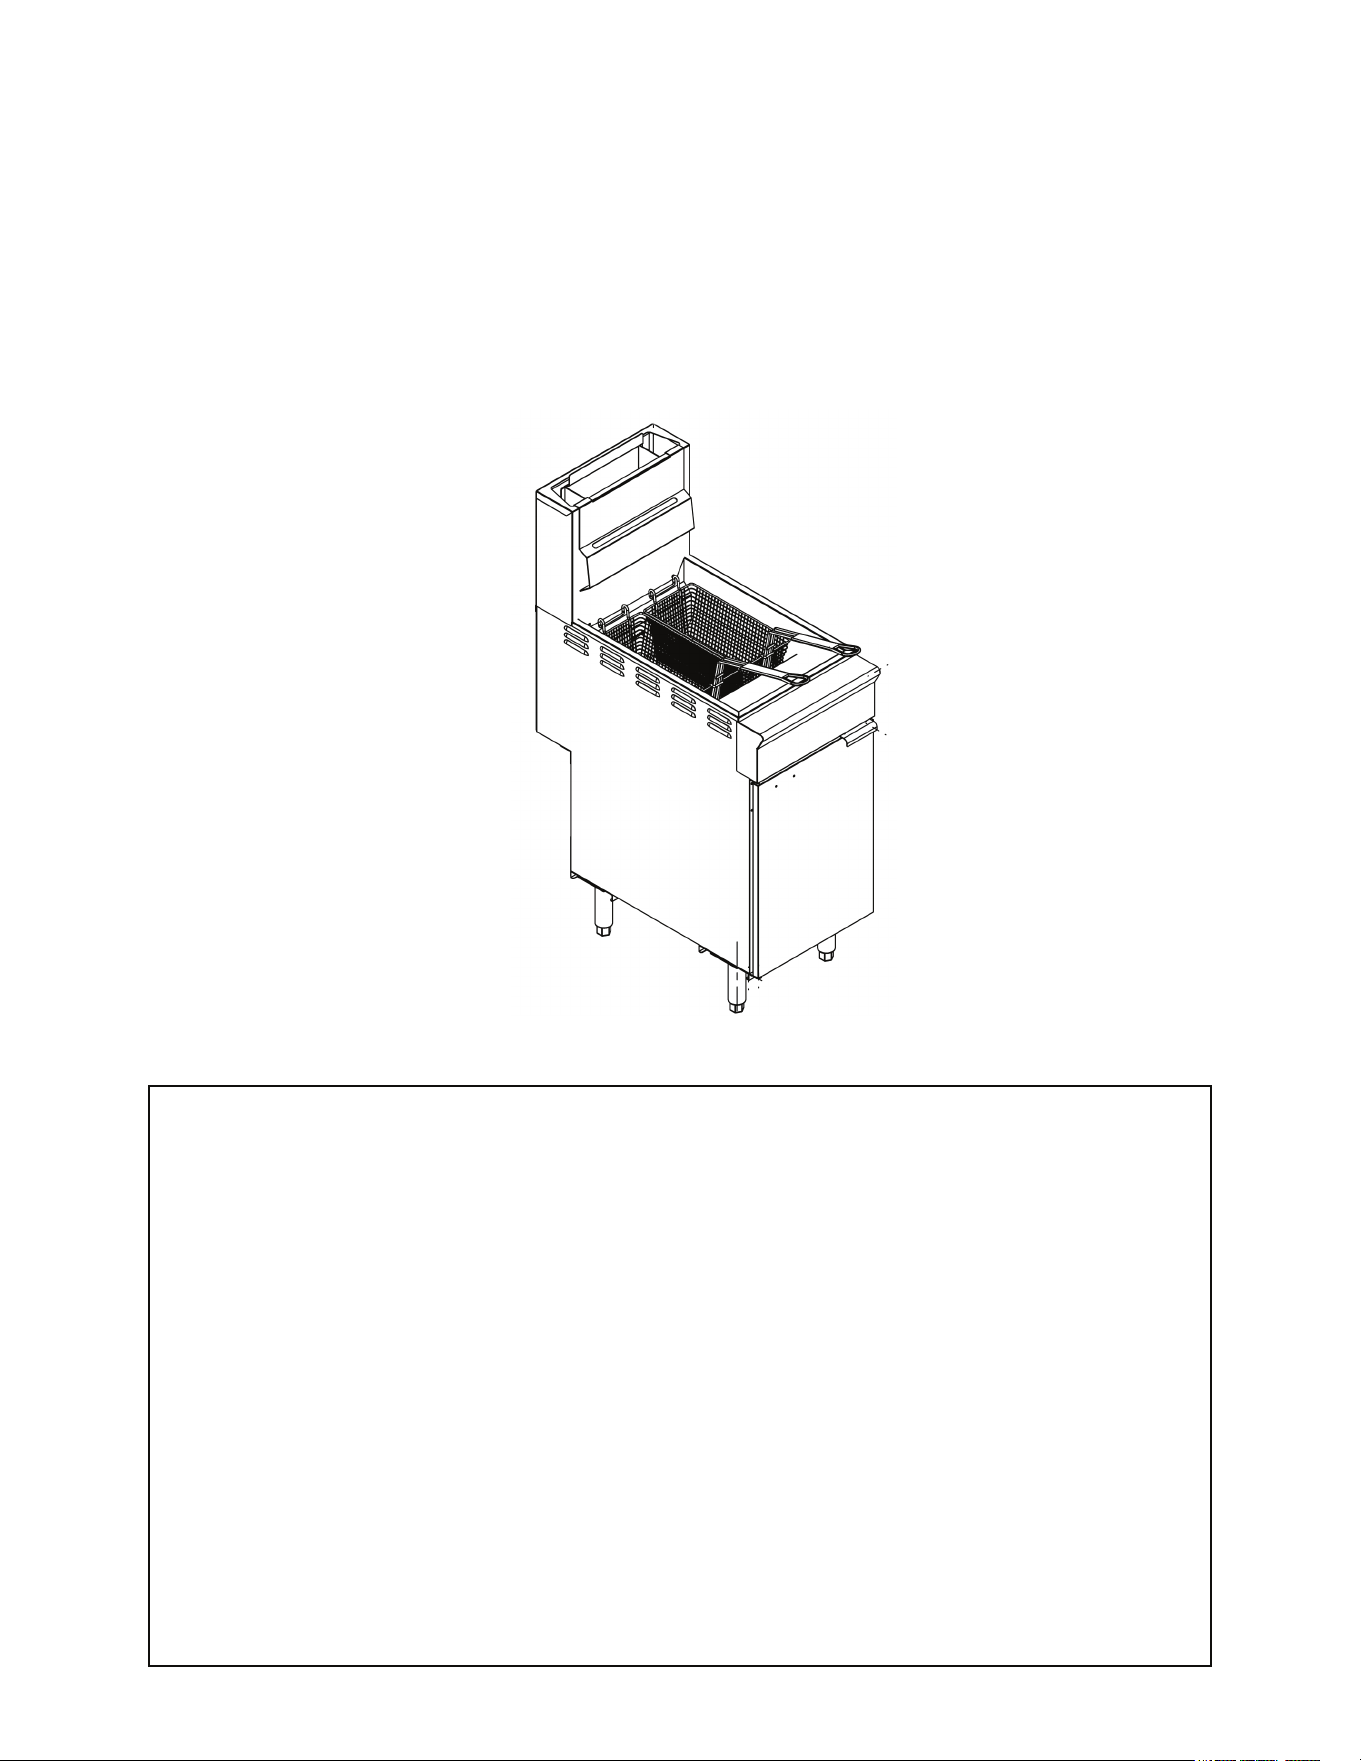
INSTRUCTION MANUAL
35 lb. Floor Standing Gas Fryer
Energy Star Rated
WARNING
This manual contains important information regarding your unit. Please read this manual
thoroughly prior to equipment set-up, operation and maintenance. Failure to comply with
regular maintenance guidelines outlined in this manual may void the warranty.
If you smell gas, follow the instructions provided by the gas supplier. Do not try to light the
burner; do not use a telephone within close proximity.
FOR YOUR SAFETY
Do not store or use gasoline or other ammable vapors or liquids in the vicinity of this or
any other equipment
WARNING
Improper installation, adjustment, alteration, service or maintenance can cause damage,
injury or death. Read this installation, operating and maintenance instructions thoroughly
before installing or servicing this equipment.

WARNINGS
• Do not touch any hot surfaces
• Do not immerse unit in liquid at any time
• Do not operate unattended
• Do not use this unit for anything other than intended use
• Do not use outdoors
• Always use on a rm, dry and level surface at least 12” from walls or any other obstruction
• Keep children and animals away from unit
• Any incorrect installation, alterations, adjustments and/or improper maintenance can lead to property loss and
injury. All repairs should be done by authorized professionals only.
• If gas odor is detected, shut unit down at main shutoff valve and contact service company
• Do not store or use gasoline or other ammable vapors or liquids in the vicinity of this appliance
• Do not ship or store upside down
• This unit should be stored in a well ventilated area that contains no corrosive gases.
• Do not get this unit wet
• This product is for commercial use only
BEFORE INSTALLATION
• Installation of this device should be operated by professional technicians
• This device is suitable for an area whose altitude is 0-2,000 ft. If it is higher than this altitude, please contact the
manufacturer.
• Installation of this unit should conform to provisions of gas safety, installation and usage
• This device should be kept at a minimum clearance of 4” away from non-combustible objects on both sides and 8”
at the back (e.g. walls, windows etc.). Do not install on a ammable oor or around other combustible objects.
• This item is intended to sit on a solid and level oor
TO INSTALL
1. Level the device with a level gauge.
2. Screw the 4 feet into the bottom of the unit. The height can be adjusted with the adjustable feet.
3. The mounting position should be well-ventilated with proper hood exhaust system that will ensure that all the burnt
gases produced during use are completely disposed of.
4. After installation, level the device and keep stable. Do not sway or tilt during operation.
5. A quick-acting gas shut off valve should be installed near the device where it’s easily reached.
6. Make sure you are using the correct gas supply that is specied for this model. If the gas supply is not intended for
this model, do not proceed with installation.
7. This unit is applicable to low pressure regulating valves only. High pressure regulating valves and medium pressure
regulating valves are not to be used.
8. Check to make sure the connection pipe to the unit has no leaks
9. If the connecting pipe pressure is 10% higher or lower than the rated pressure, please install a pressure regulator.
10. After connecting the appliance to the gas system, check for leaks at joints and pipe ttings; to do so, use soapy
water or a specic leak detector (spray).
11. Check the gas supply pressure after installation.
12. Gas supply pressure can be measured with a liquid-lled pressure gauge (e.g. a U-shaped pressure gauge, minimum
scale division 0.1mbar) or a digital gauge. Procedure as follows:
• Remove the panel and unscrew the screw on the pressure port
• Place the pressure gauge
• Start up the appliance by following the instructions in this owner’s manual
• Check supply pressure
• After the check, remove the pressure gauge
• Replace the sealing screw
June 2024
CODES AND STANDARDS
This item must be installed in accordance with:
In the United States:
State and local codes, or in the absence of local codes, with:
National Fuel Gas Code, ANSI-Z223.1/NFPA #54 (latest edition). Copies may be obtained from The American Gas
Association Accredited Standards Committee Z223, @ 400 N. Capital St. NW, Washington, DC 20001 or the Secretary
Standards Council, NFPA, 1 Batterymarch Park Quincy, MA 02169-7471.
NFPA Standard #96 Vapor Removal from Cooking Equipment, latest edition, available from the National Fire Protection
Association, Batterymarch Park, Quincy, MA. In the commonwealth of Massachusetts, all gas appliances vented through
a ventilation hood or exhaust system with a damper or with a power means of exhaust shall comply with 248 CMR.
In Canada:
• All liquid propane fryers must have a pressure step-down regulator on the incoming gas line for safe and efcient
Local codes:
CAN/CSA-B149.1 Natural Gas Installation (latest edition).
CAN/CSA-B149.2 Propane Installation Code (latest edition), available from the Canadian Gas Association 178 Rexdale
Blvd., Etobicoke, Ontario Canada M9W 1R3.
The installer of this unit should be aware of state, county or local code for connecting this equipment to determine if an
external regulator is required.
EXTERNAL STEP DOWN PRESSURE REGULATOR:
operation.
• Prior to connecting the regulator, check the incoming line pressure. The regulator can only withstand a maximum
pressure of ½ PSI (14” WC). If the line pressure is beyond this limit, a step down the regulator will be required. The
arrow on the bottom shows gas ow direction and should point downstream to the equipment.
FILLING TANK WITH SHORTENING
Solid shortening must NOT be used with fryers. Melting solid shortening will damage the tank and void your warranty.
1. Close the drain valve.
2. Fill the fryer tank with liquid shortening to the oil level line marked on the tank.
3. Shortening will expand when heated. Do not ll the fryer tank past the line.
June 2024

LIGHTING THE PILOT
1. Open the door.
2. The thermostat is located behind the door. Turn the thermostat OFF.
3. Push the gas control valve knob and turn to OFF. Wait 5 minutes for unburned gas to vent.
4. Push and turn gas control valve knob to the “L” in PILOT.
5. While still holding the knob in, light the pilot with a lit ame. Continue to depress the knob until pilot remains lit when knob is
released. If the pilot does not remain lit, repeat step 3 through 5.
6. Depress and turn gas control knob to ON.
7. If gas supply is interrupted, repeat steps 2 through 6.
TURNING ON THE FRYER
1. Set the temperature knob to desired temperature.
2. After the set temperature has been reached, the thermostat shuts off the gas ow to burners.
3. The pilot remains lit. The burners will cycle on and off, maintaining the set temperature.
TURNING OFF THE FRYER
1. Turn the thermostat OFF.
2. To keep the pilot lit, turn the gas valve to “L” in Pilot.
3. To shut off all gas to the system, including the pilot, turn the gas valve knob to OFF.
WARNINGS - HIGH TEMPERATURE SHUTDOWN
If the shortening becomes overheated, a high-temperature shutoff device will turn the gas valve off and extinguish the pilot. If the
fryer shuts down due to overheating, DO NOT relight the pilot until the shortening temperature is below 300°F.
EXTENDED SHUTDOWN
1. Turn the thermostat knob to OFF.
2. Push in the pilot knob and turn to OFF.
3. Thoroughly drain the fryer. Refer to DRAINING THE OIL for complete instructions.
4. Clean the fryer according to CLEANING.
5. Turn off the main gas shutoff valve.
EXTENDING SHORTENING LIFE
Shortening life can be extended by the following guidelines:
1. Do not salt foods over the fryer.
2. Use good-quality shortening.
3. Filter shortening daily (at a minimum).
4. Replace shortening if it becomes poorly avored.
5. Keep equipment and surroundings clean. Use tank covers when not in use.
6. Set thermostat correctly.
7. Remove excess moisture and particles from food products before placing in fryer.
8. Use a tted tank cover to keep oil covered from light and oxygen.
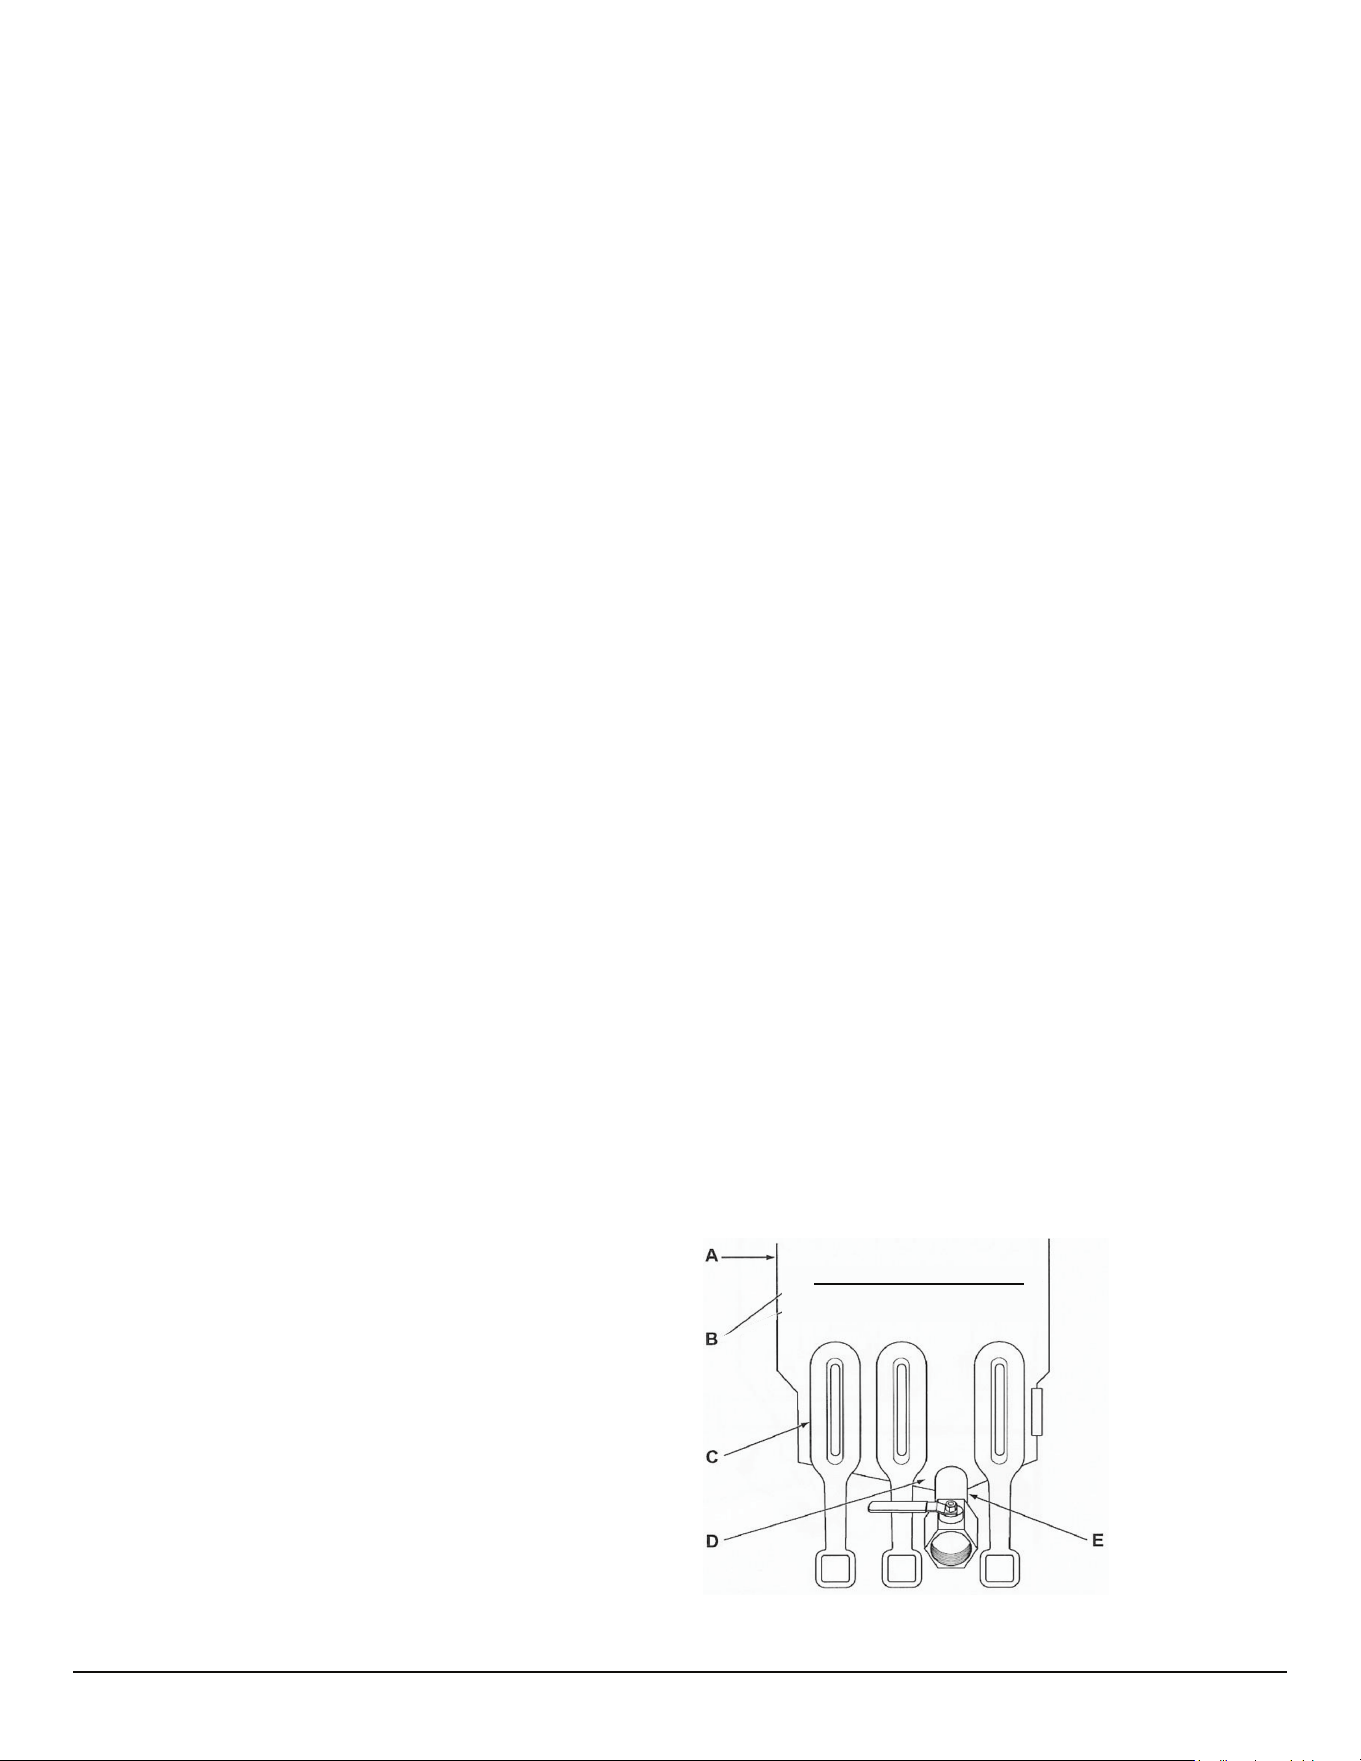
DRAINING THE OIL
Hot oil and hot parts can cause burns. Use care when operating, cleaning, and servicing the fryer.
1. Turn the thermostat knob to the OFF position.
2. Insert the drain extension into the drain valve. Tighten only hand tight.
3. Direct the drain extension into the mobile ltering device or bucket that you want to use.
4. Slowly open the drain valve to allow oil to ow from the fry tank to the lter pan. Then open the drain valve all the way.
5. When fry tank is empty use the tank brush to remove any additional debris.
6. Close the drain valve.
7. Fill tank with new shortening. Fill to a minimum of the MIN level but no higher than halfway between MIN and MAX. Oil will
expand as it is heated.
8. After the fry tank is lled with new oil, turn the thermostat knob to the desired set temperature. The burners will come on and
will heat the oil.
June 2024

FRY BASKET CAPACITY:
Recommended pounds per basket are 1.5 lbs. (0.7 kg).
CLEANING - NOTE: It is important to clean and maintain the unit daily. Checking the unit daily can help avoid serious
accidents. Stop using if there are problems with the unit. Check the condition of the unit before and after each use.
Before using: Is the machine tilted?
Is the control panel damaged?
During use: Is there a strange smell or noise?
Is the ame color normal?
Any light back or ameout?
1. Before cleaning, please turn off all gas valves.
2. It is important to clean the burners and drip tray(s) regularly.
3. Clean the stainless steel surface with warm soapy water daily and rinse it dry. During cleaning, do not clean the stain-
less steel surface with abrasive detergent, brush or scraper etc. The residual iron scale may cause rusting.
4. Do not clean the surface with a chlorine cleanser (bleach, hydrochloric acid etc.). Do not clean the oor where the unit is
installed with corrosive substances (e.g. KCL).
5. Clean off the dirt and debris on the burners and bafe regularly.
6. Do not modify the ventilation volume needed during combustion.
7. Accumulation of the iron substance (e.g. Material that formed by iron rust dissolving in water in the pipe, especially when
the device is not used for a long time.). Therefore, to avoid accumulation of such substance, clean the food swill that is
difcult to clean with stainless steel scraper or a brush containing no iron substances instead of steel brush.
8. Keep substances containing acidic ingredients (vinegar, lemon juice, spices, salt, etc.) away from the stainless steel
components. Acidic vapor from these solutions will damage the surface of the device.
9. A complete cleaning every day will ensure good usage and extend the life of the unit. Clean the unit with a wet towel
containing suds or a detergent, rinse it with water and dry it with a clean cloth. Do not clean the device with steel brush,
which may cause rust. Keep parts that are made of iron dry or will rust.
10. Cleaning the stainless steel surface: grease stains can be wiped away with sponge.
11. To avoid rusting of the unit, please make sure that the residual salt inside or outside the device is cleared away.
12. After cleaning, to avoid short-time incomplete combustion, the re hole of the burner should be clear.
13. Turn off the main gas valve if item is not going to be used for an extended period of time.
14. If item is not going to be used for an extended period of time, it is best to clean fully and store in a well ventilated area.
BOIL OUT PROCEDURE:
1. Drain the tank as described under DRAINING THE OIL.
2. Once the shortening has been drained, ush out scraps and sediment using the provided tank brush.
3. Close the drain valve and ll tank water. Use a low foaming cleaner/degreaser to clean the fry tank. Follow the
instructions on the side of the package.
4. Solution level must be between the MIN and MAX levels on the fryer tank.
5. Set the temperature knob to 200°F or for the recommended solution being used. Allow solution to simmer for about 15
to 20 minutes.
6. Drain the cleaning solution from the tank.
7. Close the drain valve and rell the tank with water. Add 1 cup (1/4 L) of vinegar to neutralize alkaline left by the cleaner.
Solution level must be between the MIN and MAX level on the fryer tank.
8. Bring the solution to a simmer only, turn the thermostat off. Allow to stand for a few minutes.
9. Drain the tank according to DRAINING THE OIL. Rinse thoroughly with clear, hot water. All traces of cleaner must be
removed. Dry the tank thoroughly.
10. Close the drain valve and add shortening. Follow the FILLING TANK WITH SHORTENING procedure in this manual. The
fryer is now ready for use.
June 2024
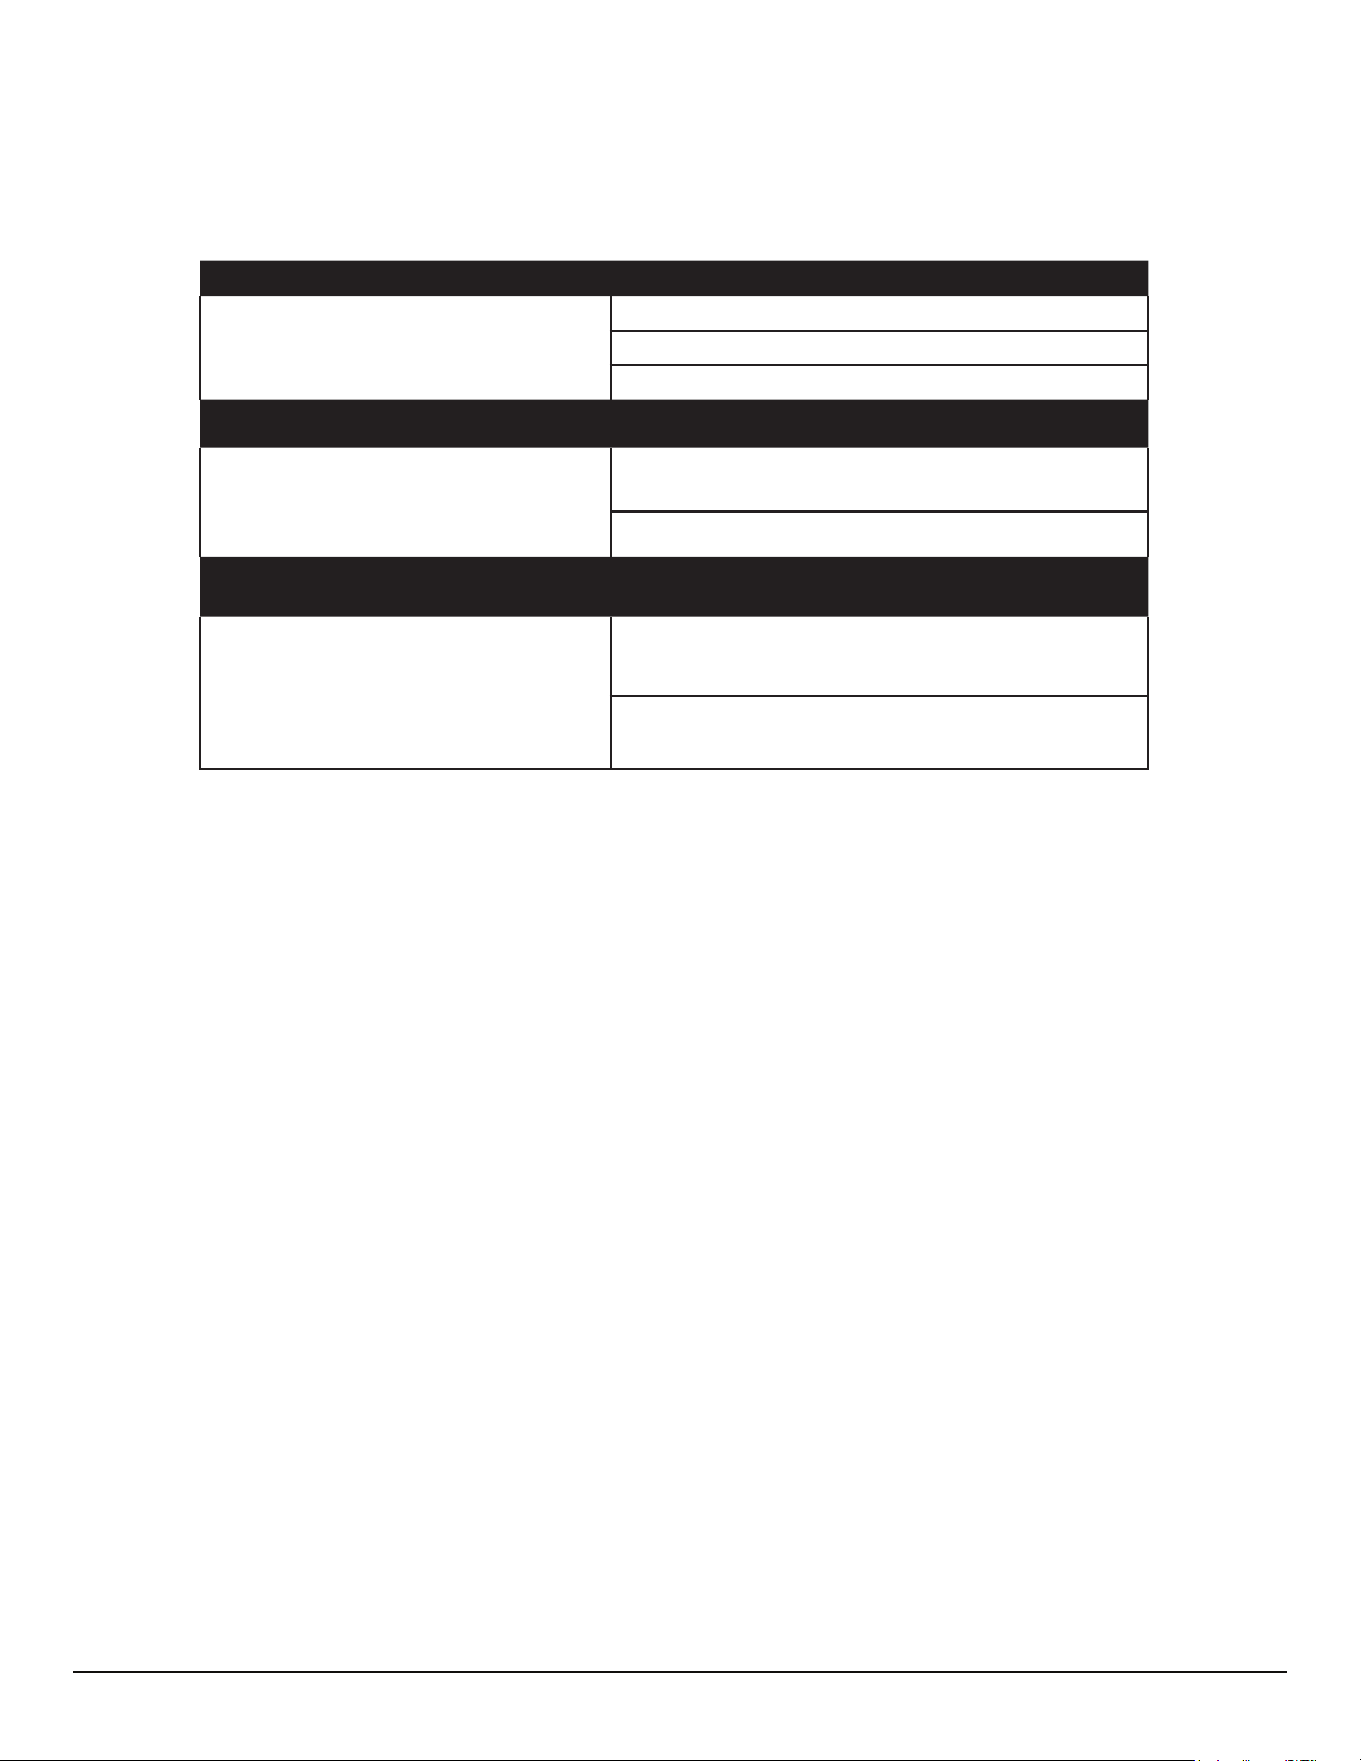
Problem Possible Causes
No Heat
Thermostat dial not turned on. Pilot not lit.
Gas supply not turned on.
Wire connections loose (call service)
Problem Possible Causes
Insufcient or too much heat
Thermostat dial not set to desired temperature.
High limit tripped (call service)
Temperature probe (call service)
Problem Possible Causes
Tank will not drain
Shortening too cold
Drain pipe clogged with debris
TROUBLESHOOTING
Before requesting any service on the unit, please check the following chart. Service calls resulting
from lack of maintenance or misuse is not covered under the warranty and may also void the warranty.
Please note that this guide serves only as a reference for solutions to common problems.
June 2024
Admiral Craft Equipment Corp.
www.admiralcraft.com
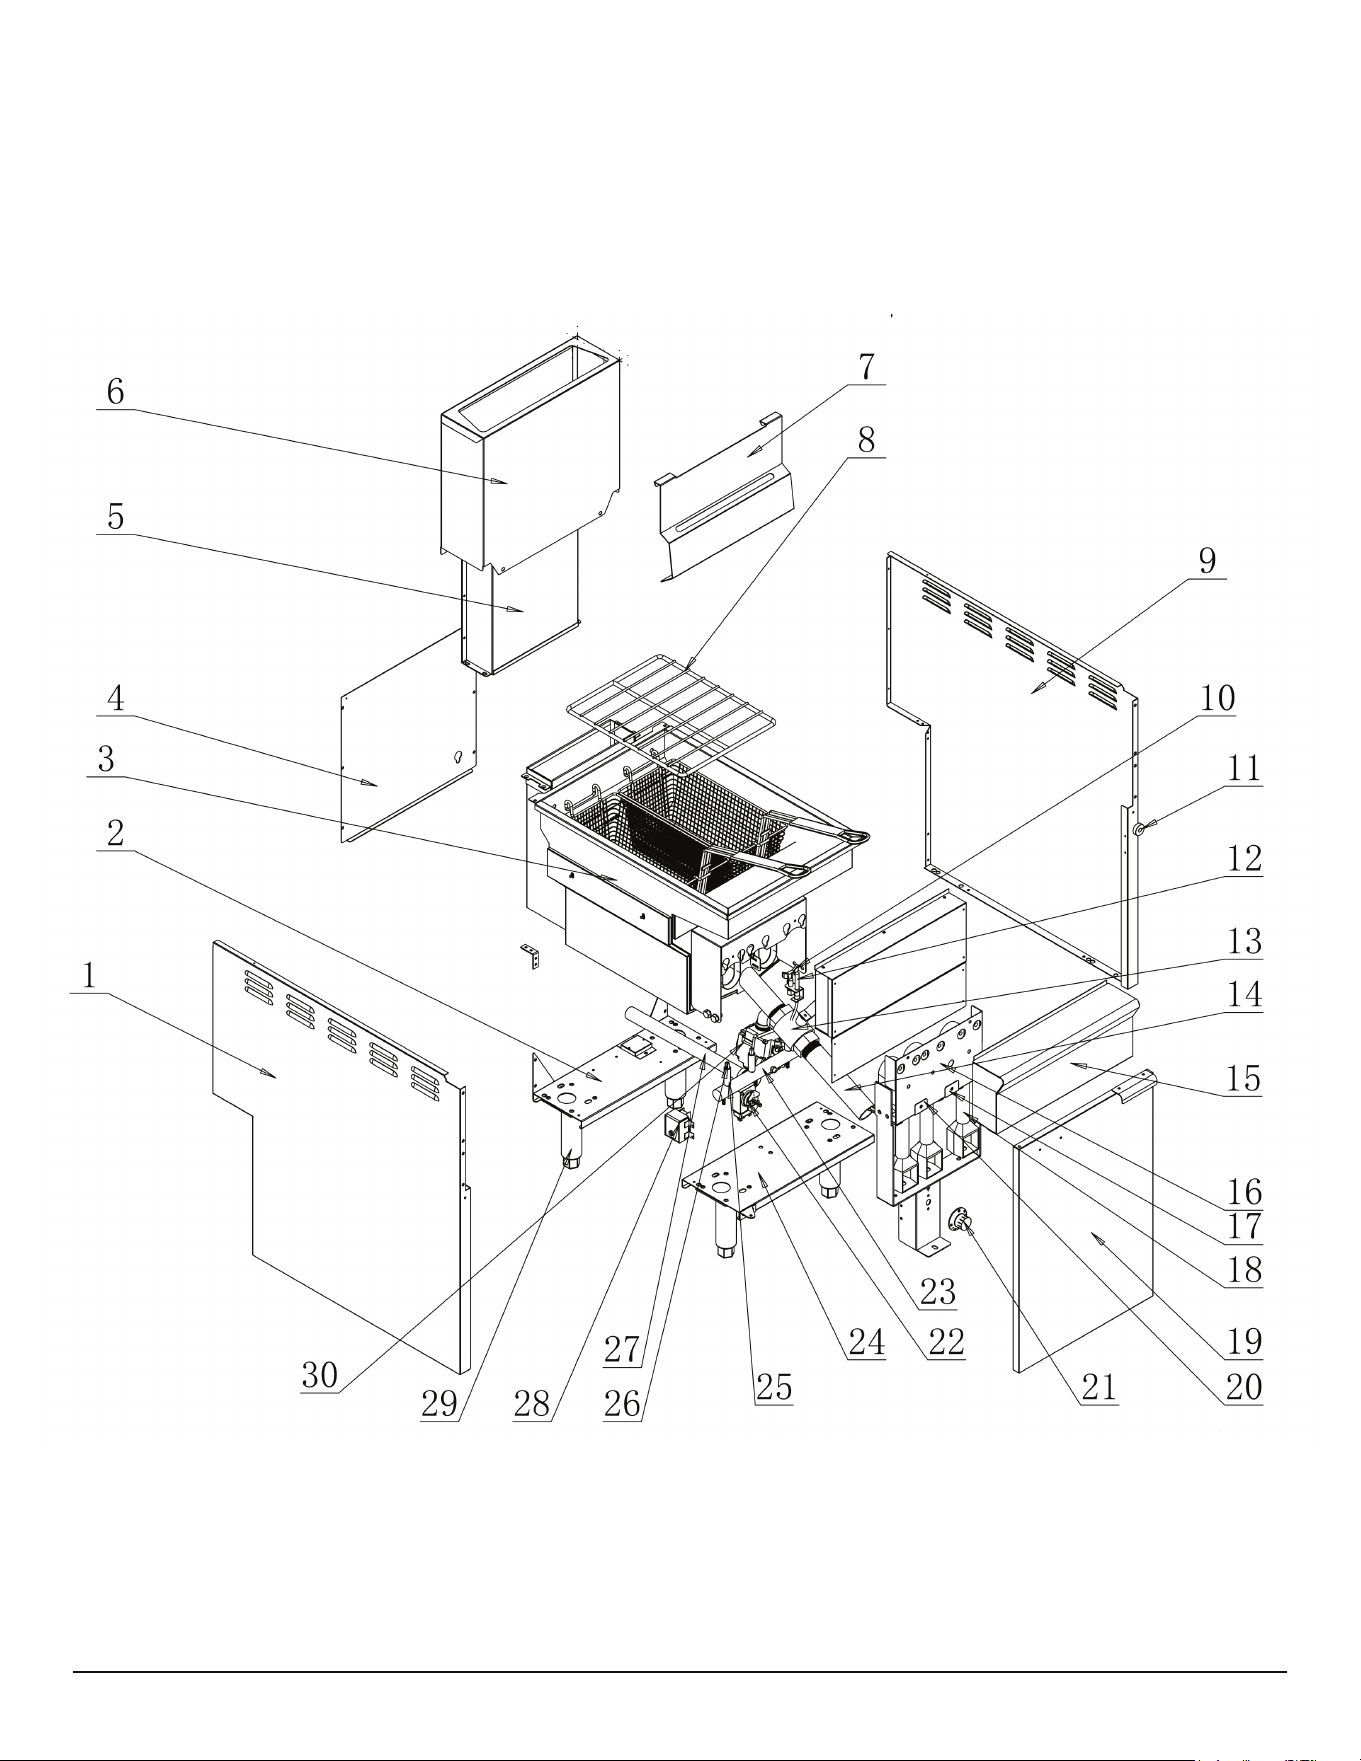
35# Fryer - 3 Burner
June 2024
Diagram Number Part Description Quantity
1 Left side plate 1
2 Rear lower beam 1
3 Oil tank assembly 1
4 Rear sealing plate 1
5 Flue extension assembly 1
6 Back apron 1
7 Basket hanger 1
8 Rack 1
9 Right side plate 1
10 NG pilot 1
10 LPG pilot 1
11 Door magnet 1
12 Thermocouple 1
13 Oil drainage valve 1
14 Oil drainage extension pipe 1
15 Front decoration assembly 1
16 Burner air bafe 1
17 Burner air bafe(3) 1
18 Burner 3
19 Door assembly 1
20 Burner air bafe(2) 1
21 Thermostat knob 1
22 Thermostat 1
23 Gas distributing pipe 1
24 Front lower beam 1
25 Orice holder 3
26 NG orice 3
26 LPG orice 3
27 Gas inlet pipe 1
28 High-limit 1
29 6'' adjustable leg 4
30 NG valve 1
30 LPG valve 1
35# Fryer - 3 Burner
June 2024

Admiral Craft Equipment Corp. (the “Company”) warrants this product (the “Product”) will be free from
failures in material and workmanship for one (1) year from the date of original purchase with proof of purchase,
provided that the Product is operated and maintained in conformity with the Owner’s Manual. This Limited
Warranty is non-transferable. During this period, your exclusive remedy is repair or replacement without
charge of the Product or any component found to be defective at the Company’s discretion. If the Product or
any component is no longer available, the Company will replace it with a similar one of equal or greater value.
This Limited Warranty is void if the Product is used with voltage other than 120 Volts. THIS WARRANTY IS
IN LIEU OF ALL IMPLIED WARRANTIES, INCLUDING WARRANTIES OF MERCHANTABILITY, FITNESS
FOR A PARTICULAR PURPOSE, PERFORMANCE, OR OTHERWISE, WHICH ARE HEREBY EXCLUDED.
IN NO EVENT SHALL THE COMPANY BE LIABLE FOR ANY DAMAGES, WHETHER DIRECT, INDIRECT,
INCIDENTAL, FORSEEABLE, CONSEQUENTIAL, OR SPECIAL ARISING OUT OF OR IN CONNECTION
WITH THIS PRODUCT INCLUDING DAMAGES ARISING FOR FOOD OR BEVERAGE SPOILAGE CLAIMS.
You may have other legal rights depending upon where you live. Some States or Provinces do not allow
limitations on warranties so the foregoing may not apply to you.
Warranty Exclusions
IMPROPER ELECTRICAL CONNECTIONS:
The Company is not responsible for the repair or replacement of failed or damaged components resulting
from electrical power failure, the use of extension cords, low voltage, or voltage spikes to the Product.
IMPROPER USAGE:
This Limited Warranty does not cover failure or other damages to the Product resulting from (i) improper
usage or installation or failure to clean and/or maintain the Product as set forth in the Owner’s Manual; or (ii)
accident, misuse, abuse, negligence, or modication or alteration of the Product.
CONSUMABLES:
This Limited Warranty does not include consumables or wear-and-tear items such as legs, feet, plastic
component parts, splash shields, lters, gaskets, and non-stick cooking surfaces.
ADJUSTMENTS & CALIBRATIONS:
Leveling, tightening of fasteners, or utility connections normally associated with the original installation are
the responsibility of the dealer, installer, or the end user and not the responsibility of the Company and will
not be considered warranty issues.
If you think the Product has failed, or requires service, within its warranty period, please contact the Company’s
Customer Care Department through our website at: www.admiralcraft.com
“Service” > “Technical Support Request”. A receipt proving the original purchase date will be required for
all warranty claims, handwritten receipts are not accepted. You may also be required to return the Product
for inspection and evaluation. Return shipping costs are not refundable. The Company is not responsible for
returns lost in transit.
This Limited Warranty is Valid only in the USA and Canada.
1-Year Limited Warranty