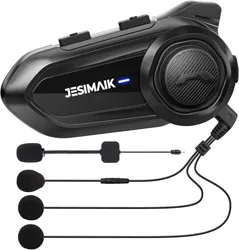
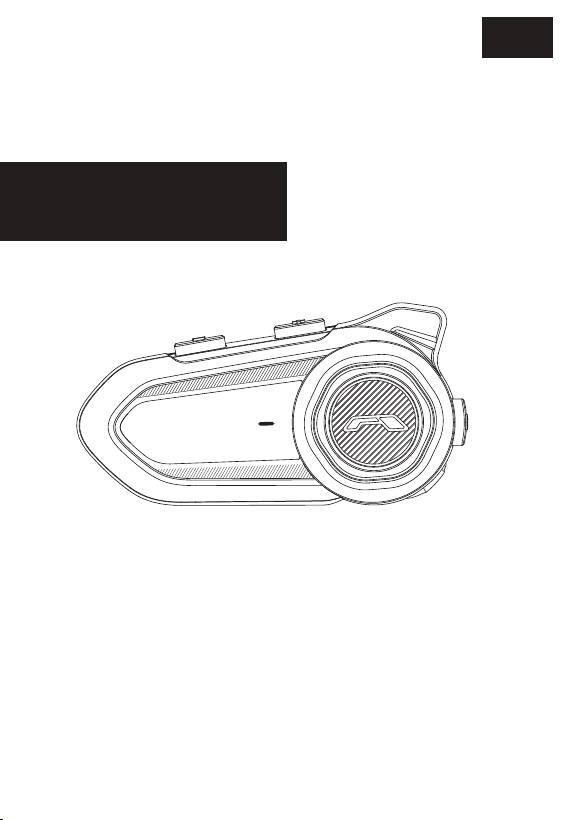
USER GUIDE AND MANUAL
EN
R18 Lite

Support Intercom mode
Compatibility with other brands
Phone voice assistant activation
Phone answering
Built-in ENC, DSP, and CVC noise reduction
Music Sharing
FM Radio
CAUTION
1. Please use a standard USB charger with 5V/1A power for charging.
(This product does not include a charging AC adapter.) Do not charge in wet areas.
2. Before installing the Headset, please connect your phone according to the
instructions and test the volume and sound. If there is a significant difference in
volume when installed on the helmet, adjust the position of the helmet's
internal speakers.
3.This product is an electronic product for motorcycles. When using this
product on the road, please comply with local traffic laws.
4.Please turn off the product near medical equipment. Do not use near medical
devices such as pacemakers.
5.Please pay attention to the volume while driving. When using this product for calls,
pay attention to your surroundings and keep the call time as short as possible.
6.When driving, do not turn the volume up louder than the surrounding environment
to avoid causing harm to others and yourself.
7. Please do not attempt to disassemble this product without authorization.
There are many electronic components inside the product, and non-professionals
should not attempt to do so.
8.Do not put metal, liquids, flammable substances, medicines, etc., inside this product.
FUNCTION
Product Video Demonstration
Installation
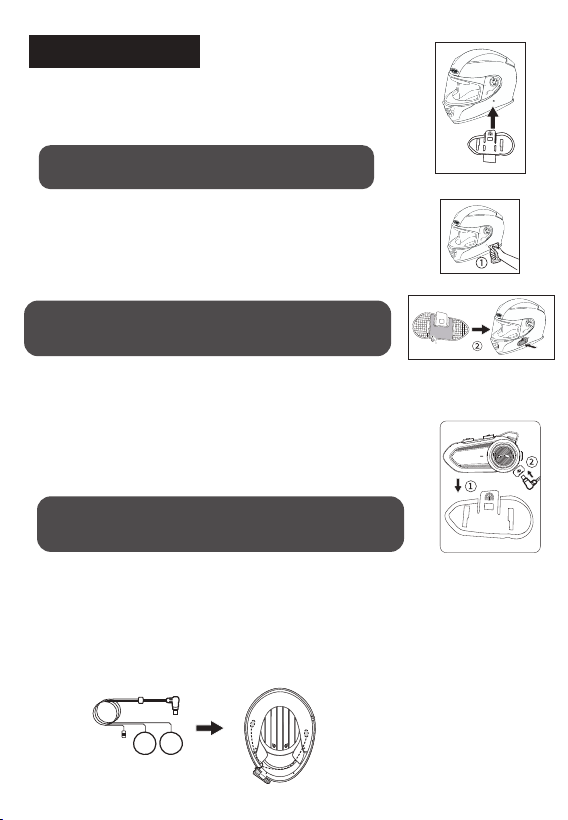
※Before installing the bracket, please select a suitable position.
①. For clip-type mounting brackets, place the clip close to the
edge of the helmet during installation, and insert the clip into
the side of the helmet after spreading it open.
Note: Damage, loss, or malfunction due to detachment is
Not covered by the warranty, so please install carefully.
②. For adhesive-type mounting brackets,
1.Wipe off any dirt or oil stains from the helmet installation area.
2.Peel off the film on the back of the mounting bracket.
3.Stick it firmly to the installation area of the helmet and press firmly.
Note: Do not apply pressure to the bracket within 24 hours after
sticking. Damage, loss, or malfunction due to detachment is not
covered by the warranty, so please install carefully.
※ Main unit installation
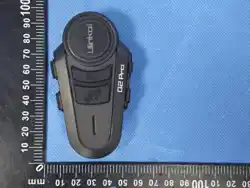
① Align the reserved holes on the bracket with the holes on the
Back of the main unit, push down until you hear a "click".
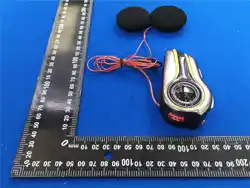
② Insert the speaker and microphone jack into the headphone port.
① Select the installation position inside the helmet and stick
The fluffy Velcro sticker at that position.
② Stick the speaker to the position of the fluffy Velcro sticker.
Note: To improve waterproofing, the product adopts a two-stage
insertion design. Please insert the speaker and microphone
plugs completely into the headphone port.
※ Installation of speakers and microphone
CHUANYUE
Button Instruction
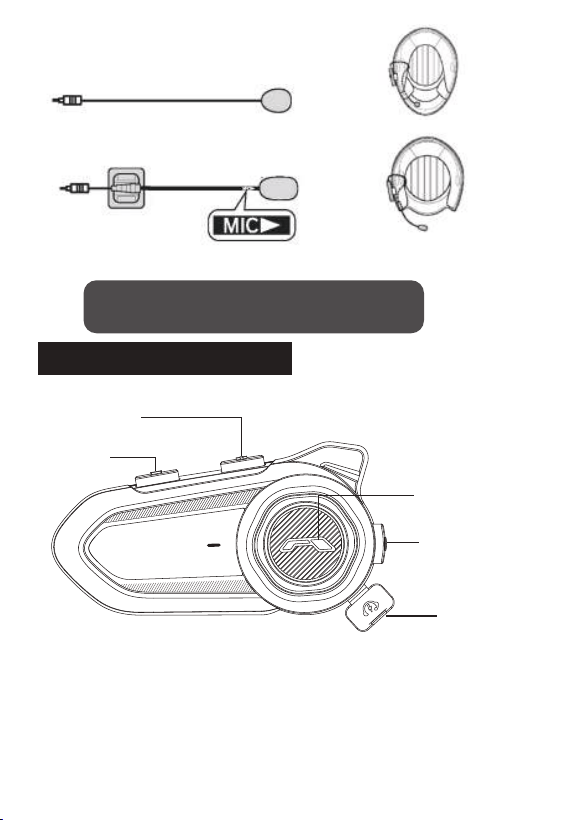
※Microphone installation
Full-face helmet microphone
Flip-face helmet microphone
Stick the microphone near the inner side of the helmet's mouth area.
Note: For flip-face helmet microphones,
Please ensure the white arrow is facing towards the mouth;
Do not remove the microphone protection cotton.
※ Note Even slight changes in the speaker's position can result in differences in sound.
Before installing the product, please connect to your smartphone and check the audio volume.
We recommend installing the speakers in the easiest-to-hear location.
Volume +
Volume -
Power Button
Phone Button
Charging Port
Audio Port
Intercom Button
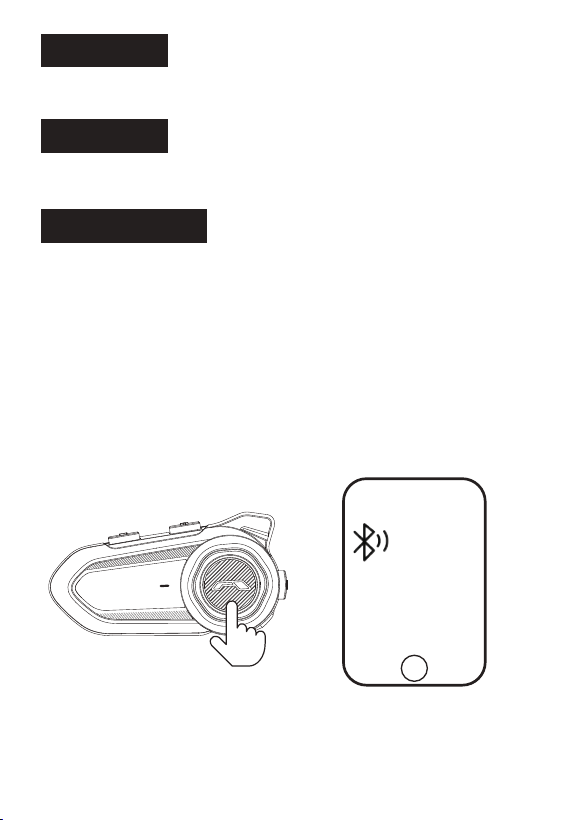
Power ON
Power OFF
Long press the Power button for 3 seconds to power on
(blue light flashing, voice prompt indicating the battery power remaining).
Long press the Power button for 3 seconds to power off
(red light flashing for 1 second)
Phone Pairing
When the device is powered off, long press the phone button for 5 seconds to enter
Bluetooth pairing mode (red and blue lights flashing).
Open your phone's Bluetooth settings,
Tap on the Bluetooth name: CHUANYUE R18Lite
Successfully connected if the blue light is flashing
(If your phone prompts you to enable Bluetooth permissions, please grant Bluetooth permissions).
Bluetooth
Pairing
CHUANYUE R18Lite
CHUANYUE

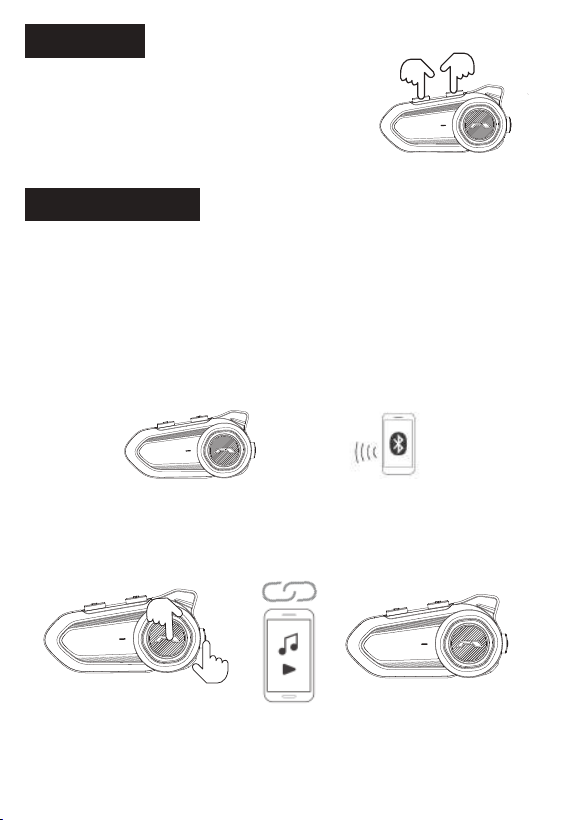
Reconnect to your phone
Phone Button Function
Music
When the device and phone are disconnected,
single-click the phone button to reconnect.
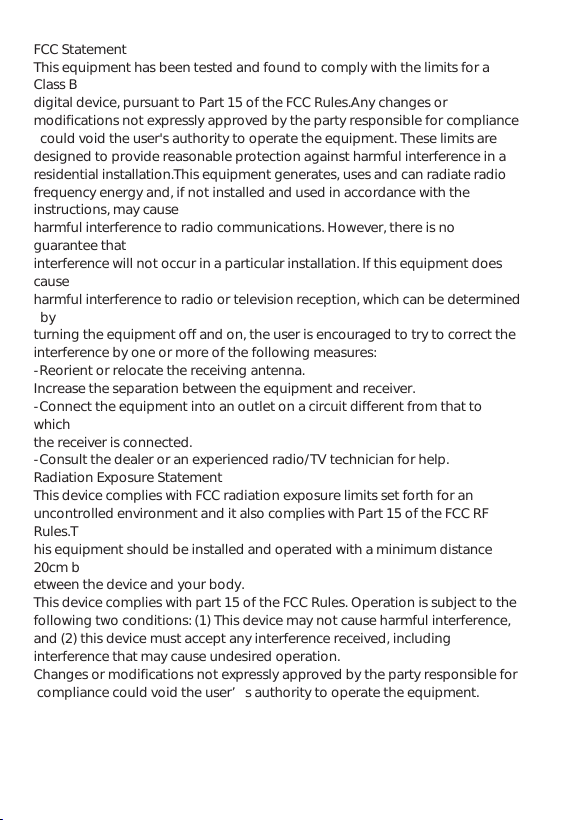
Answer call: When receiving a call, single-click the [Phone Button] to answer.
End call: During a call, single-click the [Phone Button] to hang up.
Reject a call: When a call comes in, double-click the [Phone Button] to reject the call.
AUTO ANSWER ON/OFF (this feature is off by default): In standby mode, In standby mode,
single-click the [Phone Button] and the [volume -] at the same time to turn auto answer on/off.
(On: blue light blinks for 1 second, Off: red light blinks for 1 second)
Phone Voice Assistant: Double-click the [Phone Button] to wake up the voice assistant
Last Number Redial:In standby mode, click the [Phone Button] and [volume+] at the same time.
Play/pause music: Single-click the [Phone Button] .
Volume up/down: Single-click the [volume +/- button] to adjust the volume.
Previous/next song: Double-click the [volume +/- button] to skip to the previous or next song.
Music EQ switch: Press [Volume +] and [Volume -] and [Phone Button] simultaneously for 1 second
(four modes to switch in a cycle: default, bass, rock, pop)
Restore Default Settings
After the device is turned on, press and hold the [Volume +] and [Volume -] for 4 seconds
at the same time, and the Purple light will flash and the device will turn off.
FM Radio
Radio ON/OFF: Press [volume+] and[volume-] once at the same time.
Next channel: Double-click the [volume+]
Previous channel: Double-click the [volume-]
Volume: Single-click the [volume+]/[volume-]
Music Sharing
Use this feature for the first time, the two devices need to be connected for intercom.
After hanging up the intercom mode. Perform the following operations
Product 1 connect with the phone
(Only for two units of the same model, the device needs to be connected to the cell phone)
Press and hold 2 seconds
[intercom Button + Phone Button]
② Product
waiting to receive music
Play Music
Press once at the same time
Make sure that the intercom is operated between the two products
① Product
1、Product No. 1 connects to a mobile phone to play music
2、Product No. 1 long presses [Intercom button] + [Phone button] for 2 seconds
3、Product No. 2 waits to receive music
4、Operate again to cancel the music sharing function (No. 1 or No. 2)
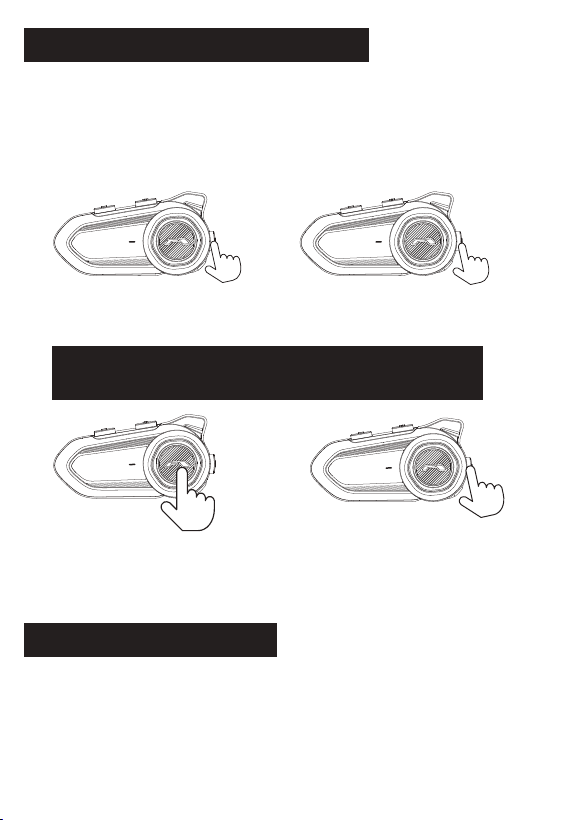
Pairing for 2-Person Intercom
Turn on the device, press and hold the [Intercom Button] for 2 seconds on both devices
to enter the intercom pairing state (red/blue light flashes quickly).
The two devices will automatically complete the pairing. After the pairing is successful,
they will enter the call state and the purple indicator light will flash.
(Note: If you operate the pairing function multiple times, please reset the product before proceeding)
Compatibility Pairing
Please refer to the pairing operation for two people.
Press the "Intercom button" to enter pairing mode (red and blue lights flashing).
Automatic pairing, after successful pairing,
it will enter the call state, the purple indicator light will flash
① Product
② Product
To turn off intercom:
Click the [Phone Button]
To turn on intercom:
Click the [Intercom button]
If you are pairing with a sena product, switch sena to universal pairing mode.
If you are pairing with a cardo product, pair directly using the app.
If it is another brand, please confirm whether the other party has a compatible pairing function.
CHU
ANYUE
CHUANYUE

Other Four Pairing Methods (Suitable for pairing multiple devices)
Pairing Method 3
1. Turn on both Intercom and confirm that the LED light is flashing blue.
2. Press and hold the volume "-" button on the R18Lite device you want to pair for 3 seconds. The LED light
Will flash red/blue, and the speaker will play the "Pairing" voice prompt before entering pairing mode.
3. After pairing is complete, the speaker will play the "Bluetooth Intercom started" prompt,
and the LED light will flash purple. It will then enter Intercom communication mode.
4. To disconnect pairing, press the power button once; to reconnect, press the Intercom button four times.
Pairing Method 4
1. Turn on both Intercom and confirm that the LED light is flashing blue.
2. Press and hold the volume "-" button and the Intercom button on the R18Lite device you
Want to pair simultaneously for 3 seconds. The LED light will flash red/blue,
And the speaker will play a "pairing" prompt tone before entering pairing mode.
3. After pairing is complete, the speaker will play a "Bluetooth intercom activated" prompt tone,
and the LED light will flash purple. It will then enter intercom call mode.
4. To disconnect pairing, press the power button once; to reconnect, press the intercom button five times.
Pairing Method 1
1. Turn on both Intercom and confirm that the LED light is flashing blue.
2. Press and hold the volume "+" button on the R18Lite device you want to pair for 3 seconds.The LED light
will flash red/blue, and the speaker will play the "Pairing" voice prompt before entering pairing mode.
3. After pairing is complete, the speaker will emit a "Bluetooth Intercom started" prompt,
and the LED light will flash purple. It will then enter walkie-talkie communication mode.
4. To disconnect pairing, press the power button once; to reconnect, press the walkie-talkie button twice.
Pairing Method 2
1. Turn on both Intercom and confirm that the LED light is flashing blue.
2. Press and hold the volume "+" button and the Intercom button on the R18Lite device you
Want to pair simultaneously for 3 seconds. The LED light will flash red/blue, and the speaker will play
The "Pairing" prompt before entering pairing mode.
3. After pairing is complete, the speaker will emit a "Bluetooth Intercom started" prompt,
And the LED light will flash purple. It will then enter Intercom communication mode.
4. To disconnect pairing, press the power button once; to reconnect, press the Intercom button three times.
After four devices are paired, intercom A can freely communicate with any of B, C, or D.
When switching calls, you must first end the current call. For example: when switching from
an AB call to an AC call, first end the AB call, then double-click the intercom button on either
intercom A or intercom C to initiate a call between intercom A and intercom C.
Please note: This operation only allows intercom A to communicate with B/C/D individually;
B, C, and D cannot communicate with each other.
*This device is intended for use only when mounted on a motorcycle helmet
FCC Statement
This equipment has been tested and found to comply with the limits for a
Class B
digital device, pursuant to Part 15 of the FCC Rules.Any changes or
modifications not expressly approved by the party responsible for compliance
could void the user's authority to operate the equipment. These limits are
designed to provide reasonable protection against harmful interference in a
residential installation.This equipment generates, uses and can radiate radio
frequency energy and, if not installed and used in accordance with the
instructions, may cause
harmful interference to radio communications. However, there is no
guarantee that
interference will not occur in a particular installation. lf this equipment does
cause
harmful interference to radio or television reception, which can be determined
by
turning the equipment off and on, the user is encouraged to try to correct the
interference by one or more of the following measures:
-Reorient or relocate the receiving antenna.
Increase the separation between the equipment and receiver.
-Connect the equipment into an outlet on a circuit different from that to
which
the receiver is connected.
-Consult the dealer or an experienced radio/TV technician for help.
Radiation Exposure Statement
This device complies with FCC radiation exposure limits set forth for an
uncontrolled environment and it also complies with Part 15 of the FCC RF
Rules.T
his equipment should be installed and operated with a minimum distance
20cm b
etween the device and your body.
This device complies with part 15 of the FCC Rules. Operation is subject to the
following two conditions: (1) This device may not cause harmful interference,
and (2) this device must accept any interference received, including
interference that may cause undesired operation.
Changes or modifications not expressly approved by the party responsible for
compliance could void the user’s authority to operate the equipment.

The warranty period for this product is one year from the date of purchase.
Specifications of this product are subject to change without prior notice
We apologize for any inconvenience. Due to the discontinuation of electronic
component manufacturing, production and sales of this product may cease. 。
To ensure prompt response to customer inquiries,
please confirm the following information before contacting us:
1、Product name
2、Purchase address and order number
3、Manufacturing serial number on the label attached to the back of the main body
4、Description of the issue (please provide detailed information, and when contacting us via email,
Please attach photos or videos of the malfunction symptoms)
Warranty Period and Contact Information