1Spytec GL300 Tracker - User Manual
Spytec GPS
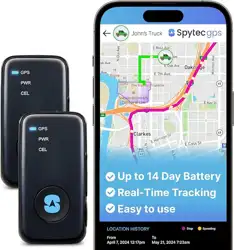
GL300 Tracker
User Manual

2Spytec GL300 Tracker - User Manual
In the Box
• Tracker with SIM card installed
• USB Type-C charging cable
• AC adapter
• Screwdriver with two screws
(User does not typically need
to open SIM compartment)
Step 1: Charging
1. Plug in wall charger, then connect charger to GL300.
2. Power LED will flash red while charging, and will turn solid red when fully charged.
3. Charge for at least 8 hours, or until the red LED turns solid.
4. Disconnect from charger. Red LED will go out.
POWER BUTTON
GPS (BLUE)
BATTERY (RED)
CELLULAR (GREEN)
SIM CARD SLOT
USB TYPE-C CHARGING PORT
EMERGENCY BUTTON

3Spytec GL300 Tracker - User Manual
Step 2: Locate your IMEI
• Locate the International Mobile Equipment Identity (IMEI) number on the bottom of
your tracker. The number is 15 characters long. You will need to enter it to set up
your account.
POWER BUTTON
GPS (BLUE)
BATTERY (RED)
CELLULAR (GREEN)
SIM CARD SLOT
USB TYPE-C CHARGING PORT
EMERGENCY BUTTON
Step 3: Create an Account & Login
1. From a browser on a computer or smartphone, go to:
www.spytec.com/gps-activation.
2. Click on the “Activate a new tracker” tile.
3. Fill out the entire multi-screen form.
4. Your login details will be emailed to you. Please allow up to 24 hours for your tracker
to be activated.
5. Once you log into your account, you will see the mapping platform where your
GL300 will show its location.
Step 4: Placement of the Tracker
• The GL300 needs to have as much access to the open sky as possible to retain its
connection to the GPS satellites.
• Tracker cannot be surrounded by metal since it will block GPS signals. DO
NOT hide the GL300 in metal enclosures. DO NOT place it in the middle of the
undercarriage, the engine compartment, wheel wells, metal bumpers, the trunk,
glove compartment, or in any closed/lidded compartment. The best position for the
device within a vehicle is under the driver or passenger seat.

4Spytec GL300 Tracker - User Manual
• When placing the GL300 under a vehicle, position it on a flat part of the frame
towards the edge of the vehicle with the LEDs on the face of the device facing the
pavement. When you get low to the ground, you should be able to see the device.
Important Facts
• Standard programming for the GL300 is to update every 3 hours when not moving
and once a minute when moving.
• The more frequently the device is set to update, the faster the battery will be
depleted. For example, 1-minute updates will result in approximately 2.5 weeks of
battery life, while 30-second updates will result in approximately 14 days of battery
life.
• When the device is on, the green LED will flash once every 3 seconds.
• When powering off, the red LED will remain on for up to 2 minutes, then power
down.

5Spytec GL300 Tracker - User Manual
Troubleshooting
Q
: GPS platform says the device is in New Jersey (or was last read 1000 days
ago). This isn’t accurate.
A
: Make sure the green light is blinking once every 3 seconds and take it out for
a drive that lasts at least 10 minutes.
Q
: GPS platform shows a blue screen or the coast of Africa.
A
: This means the device has not yet locked onto a GPS signal. Take it outside for
a 10-minute walk or drive, and its location should update.
Q
: What should I do if my device says “last updated X days ago,” even if it’s been
in use?
A
: Verify that the green light is blinking every 3 seconds and the device is
properly positioned. If the problem persists, email support@spytec.com
Q
: My device has been turned on for some time, but it is not updating. Why?
A
: If the green LED is blinking once every 3 seconds, take it out for a 10-15 minute
drive. If the unit is still not updating on the platform, contact Tech Support.

6Spytec GL300 Tracker - User Manual
Specifications
INTERFACES
Digital inputs 2
Digital output 1
Buttons Power on/off, function for emergency alert or instant geo-fence
Power/configuration connector USB Type-C
RF connector MMCX for external GPS antenna
LED indicators GSM, GPS and battery status
ENVIRONMENTAL
Operating temperature -4°F ~ 131°F (-20°C ~ 55°C)
Water resistance IPX5 compliant
ELECTRICAL
Charging voltage 5V DC
External battery voltage 3.5 V to 4.2 V DC
Battery Lithium-polymer 2600 mAh
Standby time without reporting 5
-
25 days, depending on usage
PHYSICAL
Dimensions 1.635” x 3.15” x 1.145”
Weight 3.28 oz (93 g)
USB charging cable length 50˝ (1.3 m)

7Spytec GL300 Tracker - User Manual
Help
Thank you for purchasing a Spytec GPS product. We appreciate your business and
strive to make your experience the best possible. If you have any issues with your
product, contact us at the following addresses:
Email tech support questions to: support@spytec.com
Email billing questions to: support@spytec.com
To download user manuals—including the one for the Spytec GPS platform software
that you’ll use to track your GPS device from a phone, tablet or computer, go to: http://
www.spytec.com/manuals
Log into your tracker at: app.spytec.com
Warranty
This Unconditional Lifetime Warranty applies to the GL300 GPS Tracker sold by Spytec GPS. This
warranty covers any manufacturing defects to the device or accessories encountered during normal
use, with an active Spytec GPS subscription. This warranty does NOT cover damages resulting from
improper use of the device (including the use of incompatible accessories such as chargers, storage
devices, etc.), unauthorized modifications to the device, negligence, any environmental or natural
disasters, or loss or theft. This warranty does NOT cover water damage. This warranty requires proof
of sale of the device from Spytec GPS or approved resellers only.
Devices that are covered will be repaired or replaced at the discretion of Spytec GPS. Devices
requiring replacement will be fulfilled with a new or refurbished unit, or a similar unit if the original unit
is no longer available.
To take advantage of our warranty, go to http://www.spytec.com/pages/returns and review our
Returns Policy. If your device meets the above guidelines as well as the guidelines on our website,
please click the button to proceed to the Return Authorization Form. In the event that our online
guidelines change, this warranty will supersede any newer changes. Once you have filled out the
Return Merchant Authorization Form, please wait for instructions.