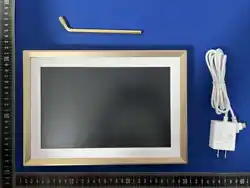

PF1006
Digital Photo Frame
User Manual

TABLE OF CONTENTS
Frame Overview
Initial Setup
Download the AiMOR App on Your Phone
Connecting to a Frame
Sharing Photos/Videos
Quick Menu
Detailed Settings Menu
Warranty & Contact Us
1
3
4
5
6
7
10
10
11
12
12
13
14
14
14
15
15
Frame
Manage
Friends
Display
Slideshow
Wi-Fi
Notifications
Backup
Help & About
Digital Photo Frame
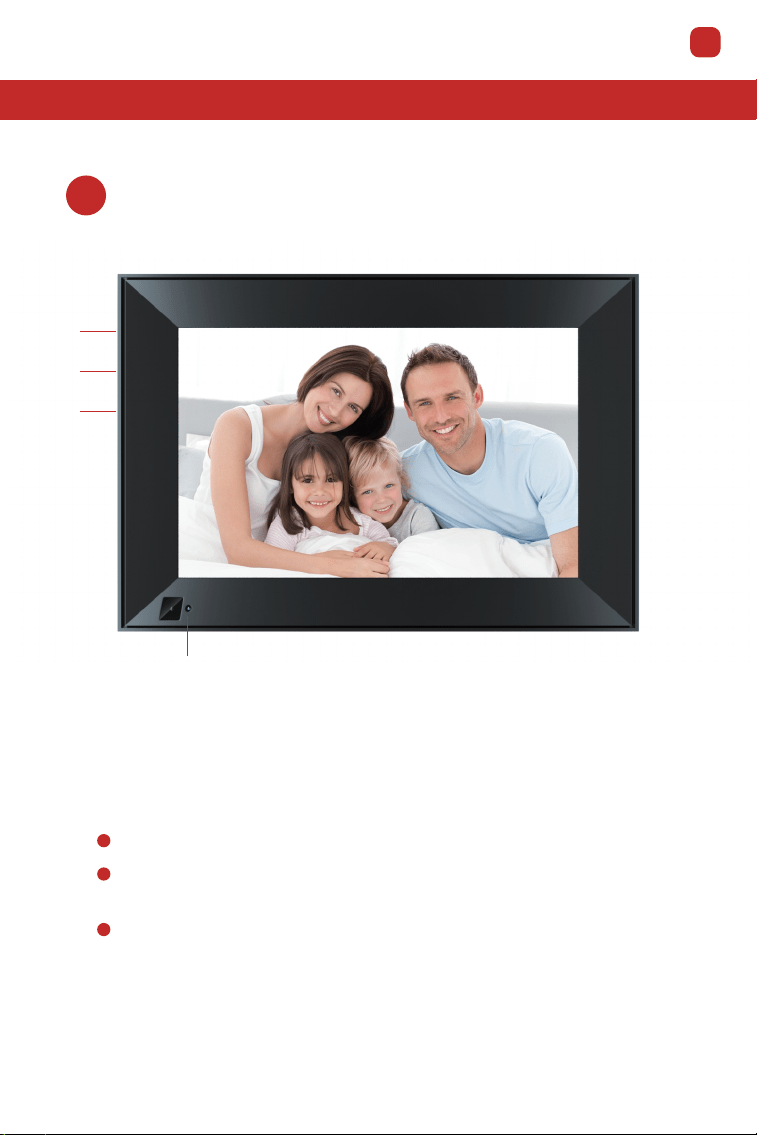
Frame Overview
- 01 -
01
Hold the power button for about 5 seconds to power on the frame.
When the frame is on, press the power button once to turn the screen
on or o.
Hold the power button for about 2 seconds to power o the device.
EN
1.Power Button
2.Volume+
3.Volume-
4.Light Sensor
1
2
3
4
EN
- 02 -
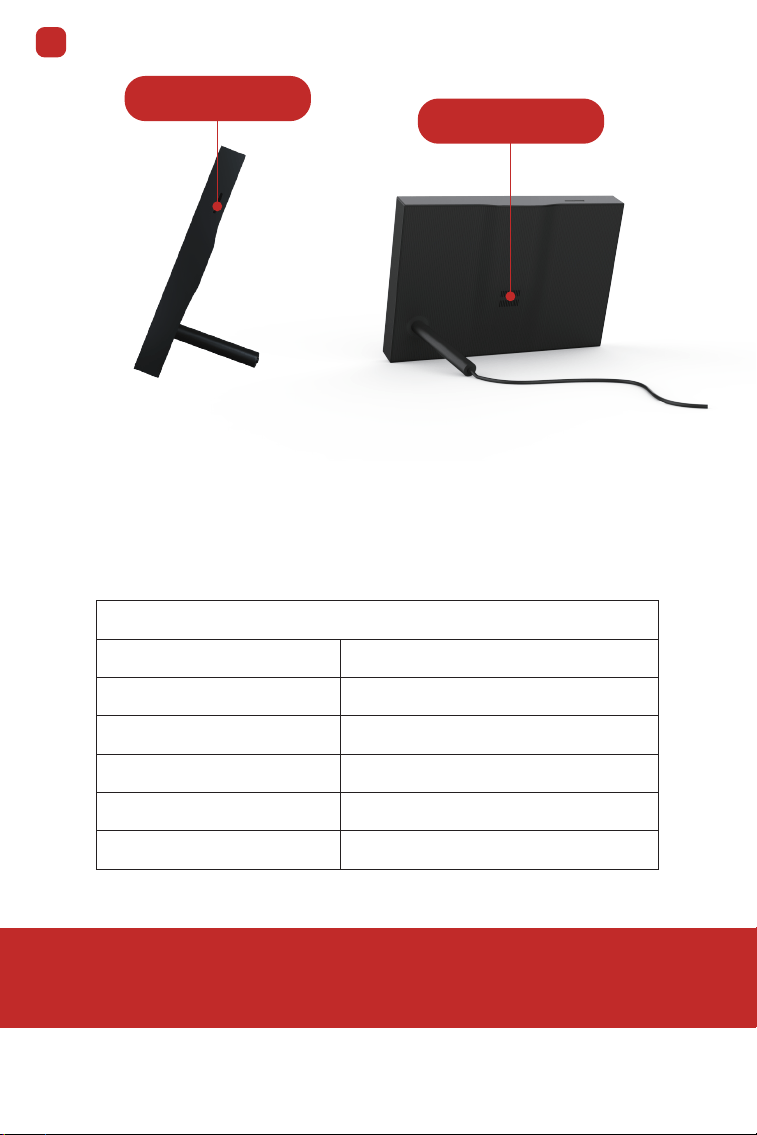
Specifications
Screen 10.1" Touchscreen (16:10)
Resolution
Built-in Speakers
Storage*
Wi-Fi
CPU
1280*800 IPS HD Display
1 x 2W
8GB
2.4GHz
Dual-core Cortex TM-A7
SD cards can be used to import photos to the frame. Photos can
also be exported to a SD card from the frame to make a backup or
move to a computer, etc. Note that photos cannot be displayed directly
from a SD card. Please ensure that your SD card is using FAT32 or NTFS
file system. If not, you can reformat the card to one of these file systems.
* Storage specifications refer to capacity before formatting. Actual formatted
capacity will be less.
SD Card Slot
Speaker
EN
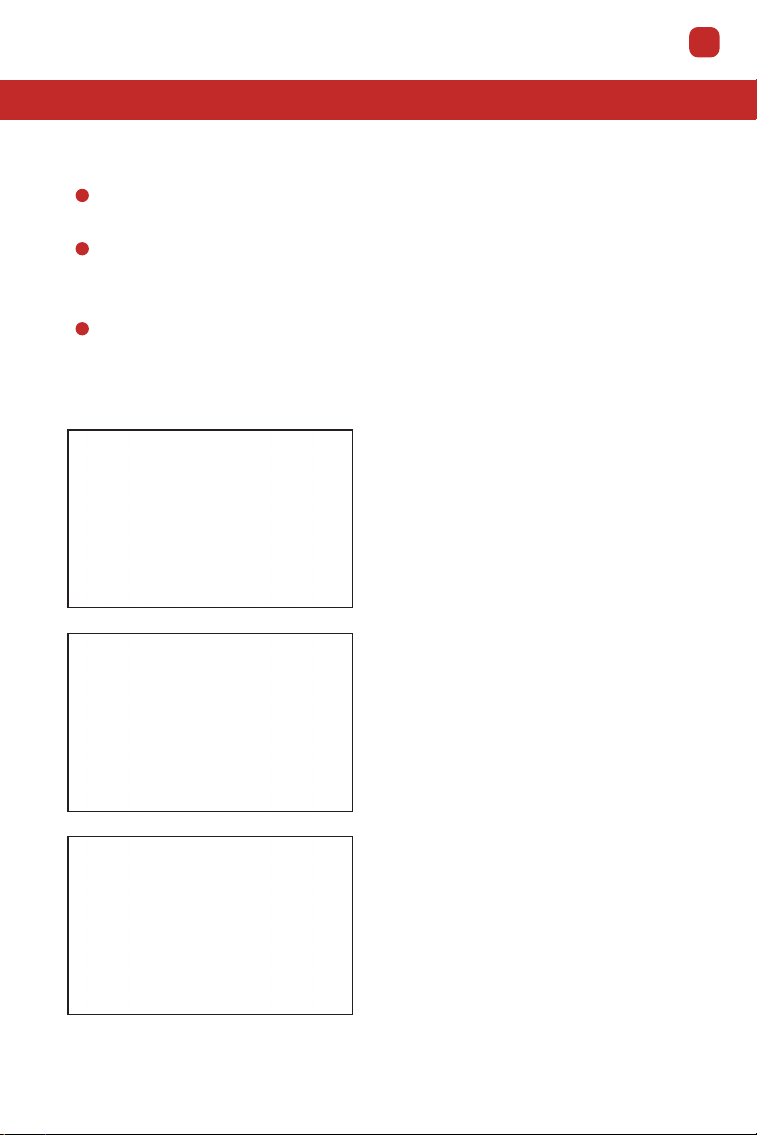
Plug in the power adapter included in the box to turn on the frame.
You may need to wait for up to 15 seconds as the AiMOR system is
loading.
Follow the prompts to set up the frame. You can use the touchscreen
to navigate through the setup menus.
- 03 -
Frame Initial Setup
Enter your name and the location where
you will place the frame (e.g. “John
Smith” and “Living room,” “Kitchen,” or
“Oce.”) Finally, set the time zone you
are in.
First start by selecting a language. This
will be used as the system language
and in all menus.
Connect your frame to the internet by
selecting a Wi-Fi network and entering
the password.
EN
- 04 -
Download the AiMOR App on Your Phone
To share your special moments with compatible digital photo frames from
anywhere in the world, start by downloading the free app AiMOR on
your mobile device.
Search “AiMOR” in the App Store (iOS) or on Google Play (Android) to
download AiMOR.
EN
- 05 -
Connecting to a Frame
Enter the code in
the AiMOR app
You can now send photos
from your phone to the frame
In order to send pictures to a frame, you need to connect to the
frame using the AiMOR App. Follow the steps below to connect:
Download the AiMOR
app on your phone
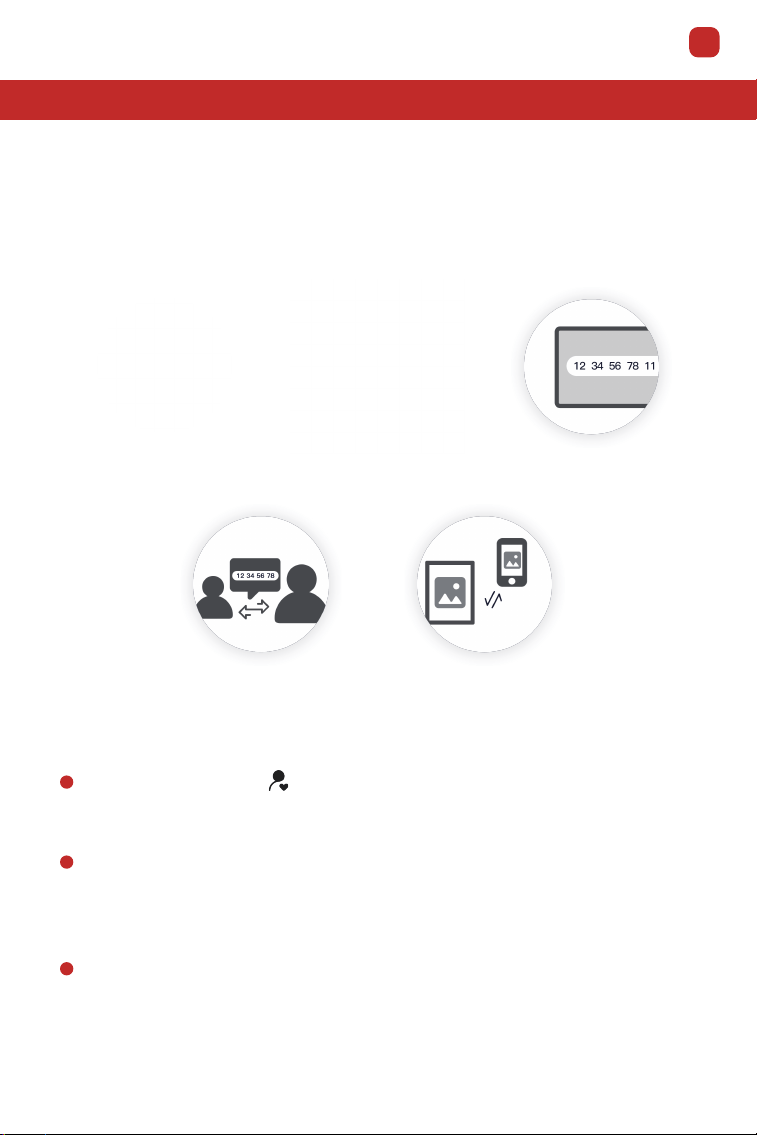
Click the add friend
icon on your frame
Share the code
Tap the add friend icon on your frame. A box will appear with a unique
code which is valid for 12 hours.
Now go to the AiMOR app on your phone and click the plus icon under
the device tab, then enter the code from the frame and click. Your mobile
app is now connected to the frame.
Share the frame code with your friends or family. They can add the frame
and start sharing photos to the frame. There is no limit to the number of
mobile users that can connect to the frame.
EN
- 06 -
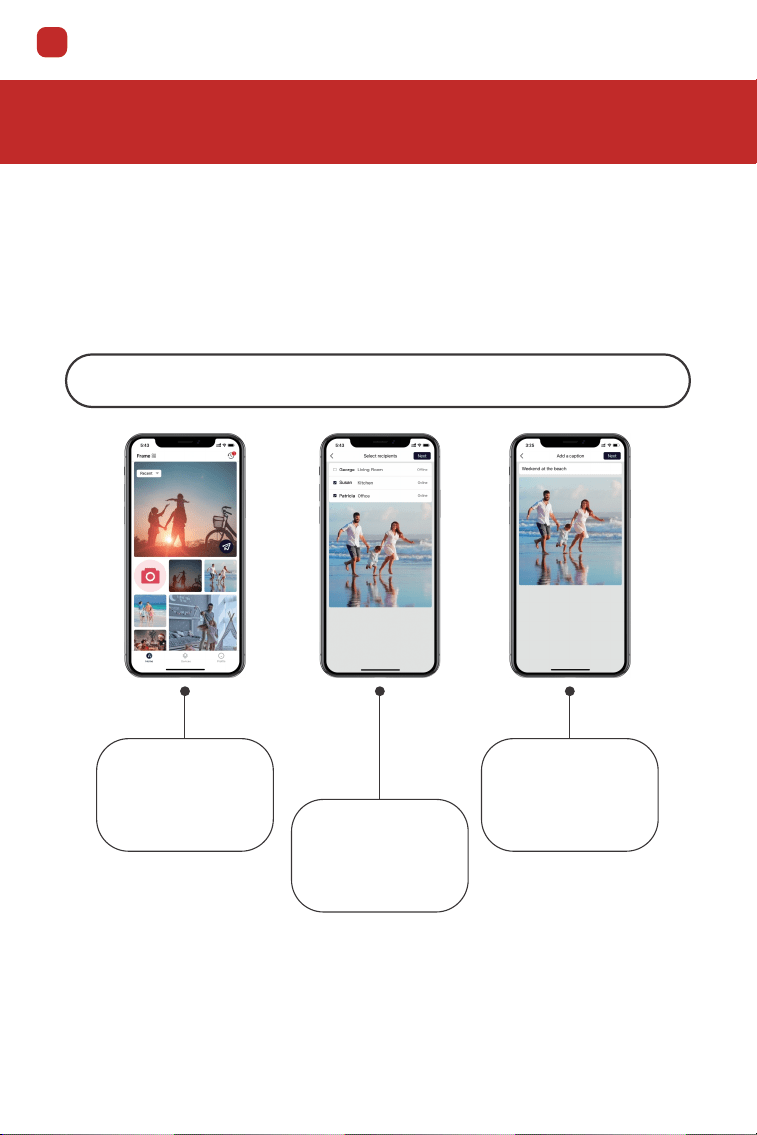
The AiMOR App
Write a caption to
send with the
image
Choose one or
more recipients
Take a photo or
video or select one
or more from your
albums
Sharing Photos & Videos from AiMOR to a
Frame
Once you have connected to a frame on the mobile app, you can select
photos and videos to share to the frame. If sharing from your gallery, you
can send up to 9 photos at a time or send one short video (up to 15
seconds). You can also take photos or video directly in the app.
EN
- 07 -
Quick Menu
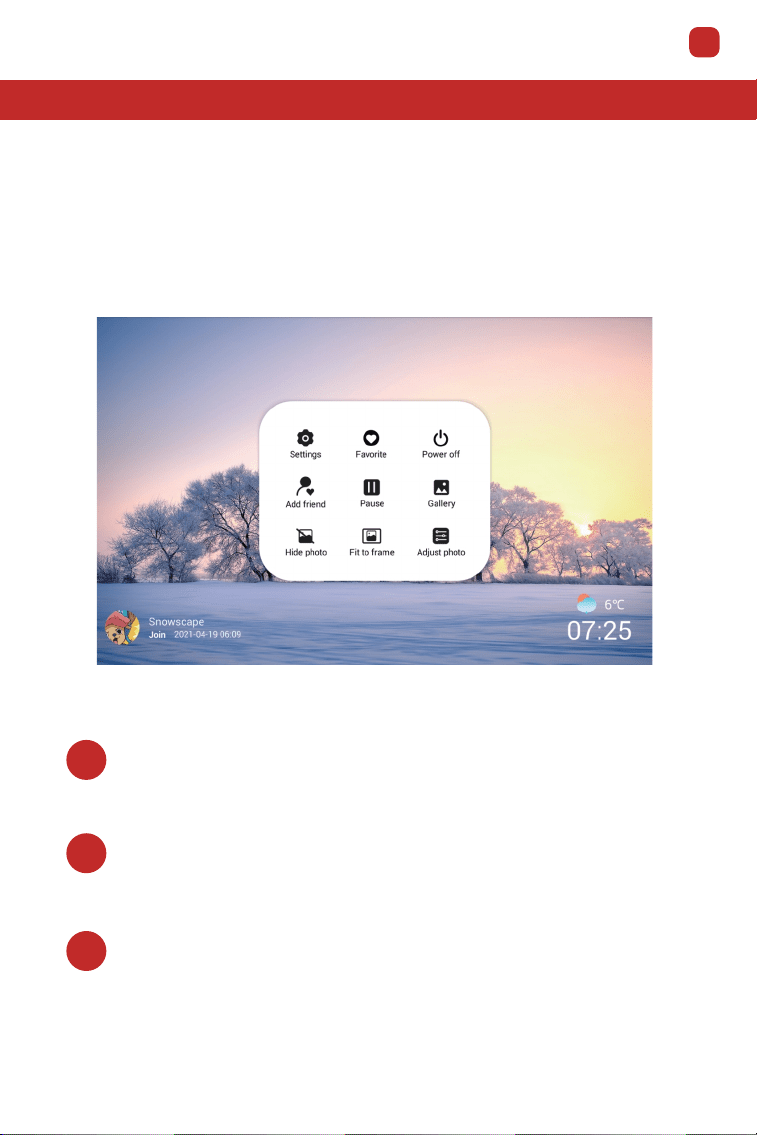
Simply tap the screen once, and the quick menu will appear. You can use
this menu to adjust/hide the current photo and to access the gallery or
other settings.
03 Power O
Tap this icon to have the frame power o, restart, or sleep.
02 Favorite
Tap this icon to add the current photo or video to your favorites.
01 Settings
Enter the detailed settings menu.

EN
- 08 -
10 Adjust Photo
Adjust which part of the photo is displayed while using fill frame
mode.
09 Fill Frame
The photo will be cropped to fully fill the screen in either orientation.
This only applies to the current photo. (Note: you can set the default
display mode for all photos in Settings - Slideshow)
08 Fit to Frame
The photo will be fully displayed on the frame in either orientation.
Extra background space will be blurred out. This only applies to the
current photo.
07 Hide Photo
Tap this to make the current photo no longer appear in the slideshow.
The photo will not be deleted.
06 Gallery
Tap the gallery icon to view all photos and videos stored in your frame.
The favorites switch lets you alternate between seeing all files and
just those which you have favorited.
05 Pause/Play
By default, pictures in your slideshow will automatically advance
after the time designated in slideshow settings. Tap this icon to
pause the slideshow on one photo. Tap again to resume normal
playback.
04 Add Friend
Generate a code for your frame to share with friends.
EN
- 09 -
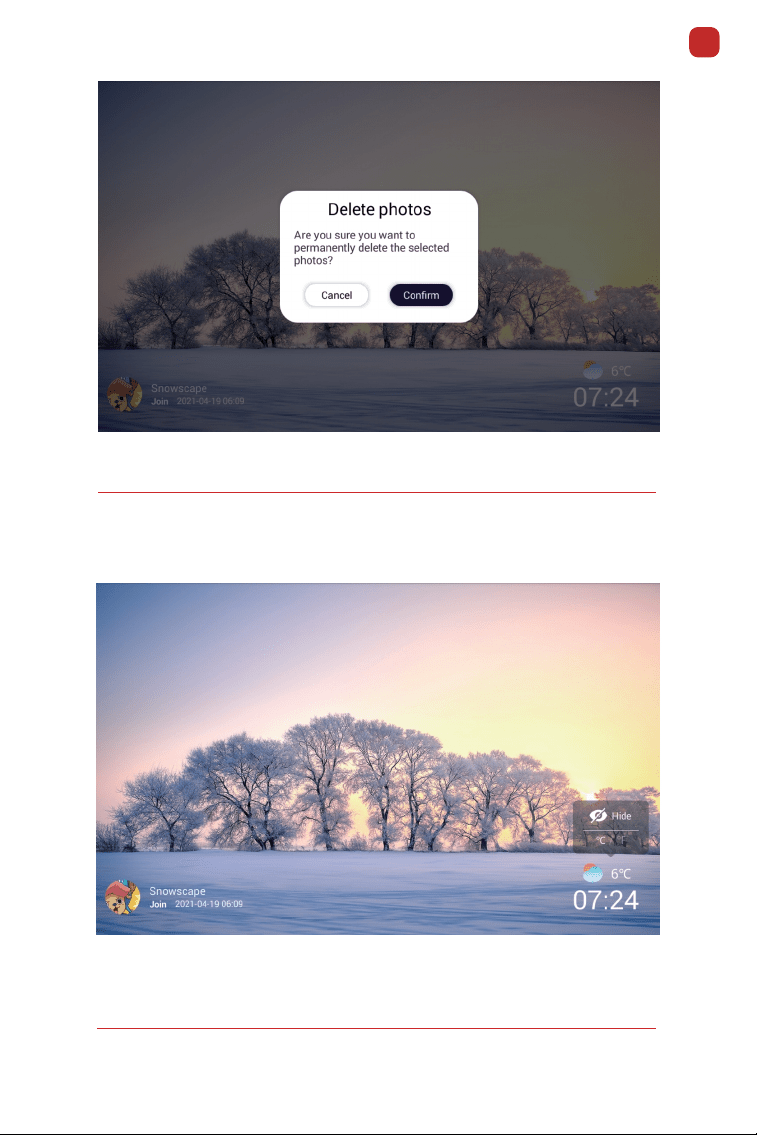
Press and hold a thumnail to bring up the delete options.
Press and hold the time/temperature to bring up display options for
these features. You can also turn them on or o in Settings - Display.

EN
- 10 -
Detailed Settings Menu
Tap the screen to access the quick menu, then tap the Settings icon to
view detailed settings and options for the frame. In settings, you can
personalize your frame to meet your needs.
01 Frame
Frame Location
Changes the listed location of your frame. This location is displayed
on your friends' and family's list of connected frames to help
distinguish them from each other.
Frame Name
Changes the name of your frame. This name will also be seen by
friends and family in their list of connected frames in the AiMOR app.

EN
- 11 -
02 Manage
Export Photos
You can use an SD card to export photos from the frame to external
storage.
Import Photos
You can import photos from an SD card. Insert the SD card , then
select the photos that you want to import to your frame. Use to
select or deselect all. Then click the import button in the top right
corner to start importing. At this time, videos cannot be imported
from external storage.
Delete Photos
Select photos that you want to permanently delete from your frame
by clicking them once. Use to select or deselect all. Then click
the trash can icon in the top right corner to permanently delete.
Show/hide Photos
Select which photos to hide by clicking them once. Hidden photos
will not be displayed in the slideshow, however, they will not be
deleted and can always be unhidden for future use. Use to hide
or show all photos.
Photos Stored
Shows total number of photos/videos on the frame and amount of
available storage space.
Time Zone
Sets the time zone that will be used on your frame for features like
sleep mode. The tablet adopts 24-hour format, you can choose to
turn it on or o.
Set Language
Sets the system language used throughout your frame.

EN
- 12 -
04 Display
03 Friends
This page contains a list of all people that are allowed to send photos
to your frame.
Friend Settings
Here you can give permission for the friend to share the frame code
with others. You can also delete a friend if you no longer want to
receive photos from them.
Delete Friend
To remove a person from your friends list, tap delete friend. They
will no longer have permission to send photos to your frame. You
also have the option to delete all photos from this person at the
same time.
Add Friend
To allow a new person to send you photos, simply tap the add friend
button and share the frame code with that person. They will be
added automatically once they connect to the frame through the
mobile app.
Brightness Level
Adjust the brightness level of the screen.
Time & Temperature
By default, your local time and temperature will be displayed on the
slideshow. Toggle this switch to hide this display.
Automatic brightness on/o

EN
- 13 -
Your frame is not powered down while sleep mode is on, so it will not aect
your ability to receive photos.
Sleep Mode
Sleep mode allows you to reduce power consumption by
automatically turning o and waking up the device at set times. The
default setting turns o the screen at 11:00 pm and wakes it up at
7:00 am. You can adjust the start/end time as desired.
05 Slideshow
Timer
Define the duration each photo is displayed.
Show Caption
Friends can add captions to photos when they send them from the
app. Check this option to display captions in the slideshow. Uncheck
to hide captions.
Fill Frame
You can choose between two modes as the default way to display
photos.
Fill frame: Photos will be cropped to fully fifill the screen in either
orientation.
Fit to frame: Photos will be fully displayed on the frame in either
orientation. Extra background space will be blurred out.
Photo Display Order
You can choose to display photos ordered by date or shued.
Videos
You can adjust video volume, turn on/o autoplay, and change video
playback mode.

EN
Automatic Backup
If checked, your frame will automatically make a backup within 30
hours of you receiving new photos or making changes on your frame.
- 14 -
Note: Any existing backup on the SD card will be overridden!
Select a Wi-Fi network to connect to. If you are connecting to a
network with a captive portal, a web browser icon should appear in
top right corner of the screen. Click it to open abrowser where you
can enter credentials to access the network.
Turn on/o notifications for a variety of items and adjust notification
volume.
08 Backup
07 Notifications
06 Wi-Fi
Back up frame to external storage To back up the photos
on the frame to an SD card, follow the below steps:
1: Insert SD card into the SD card slot.
2: Tap the screen and go to “Settings”
3: Go to “Backup ”
4: Tap“Back up the contents of this photo frame”
When complete,
you will see“Last backup time: (Date & Time)”

EN
- 15 -
Factory Reset
Removes all data from your frame. This will permanently remove all
your photos/videos, friends, and settings.
Warranty & Contact Us
09 Help & About
Feedback
We strive to continuously improve our product and user experience.
If you have any questions, comments, or suggestions, please reach
out to us by email or through the support feature in the AiMOR app.
User Guide
Opens the quick start guide that is shown during initial setup of the
frame.
Check for Updates
Check for available software updates and download/install them on
your frame.
Limited One-Year Warranty
We oer a one-year quality warranty on all products, valid from
the date of purchase, and subject to the following terms and
conditions:
If a quality defect is discovered within the warranty period, the
manufacturer is responsible for repairing or replacing the device
at no charge to the customer.

EN
Contact Us
Thanks for choosing our digital photo frame. If you have any
questions or problems with our products, feel free to contact our
customer support team at customservicare@outlook.com or call
1-888-880-0815. We typically respond within 24 hours. Your
satisfaction is our priority.
- 16 -
This warranty does not apply to damages caused by improper use,
accident, exposure to water, or if the product was altered or repaired
by anyone other than the Manufacturer’s Service Center.
The manufacturer shall not be liable for any incidental or
consequential damages arisingfrom the use, misuse, or mounting
of the photo frame.
All information in this manual is based on the latest information
available at the time of publication. We reserve the right to make
changes at any time without notice.