© Copyright 2022
MOEN INCORPORATED
Printed in U.S.A.
MT240A August 2022
MOEN INCORPORATED, 25300 Al Moen Drive, North Olmsted, OH. 44070, U.S.A.
MT240A
INSTALLATION INSTRUCTIONS
THESE INSTRUCTIONS MUST BE
LEFT WITH HOME OWNER
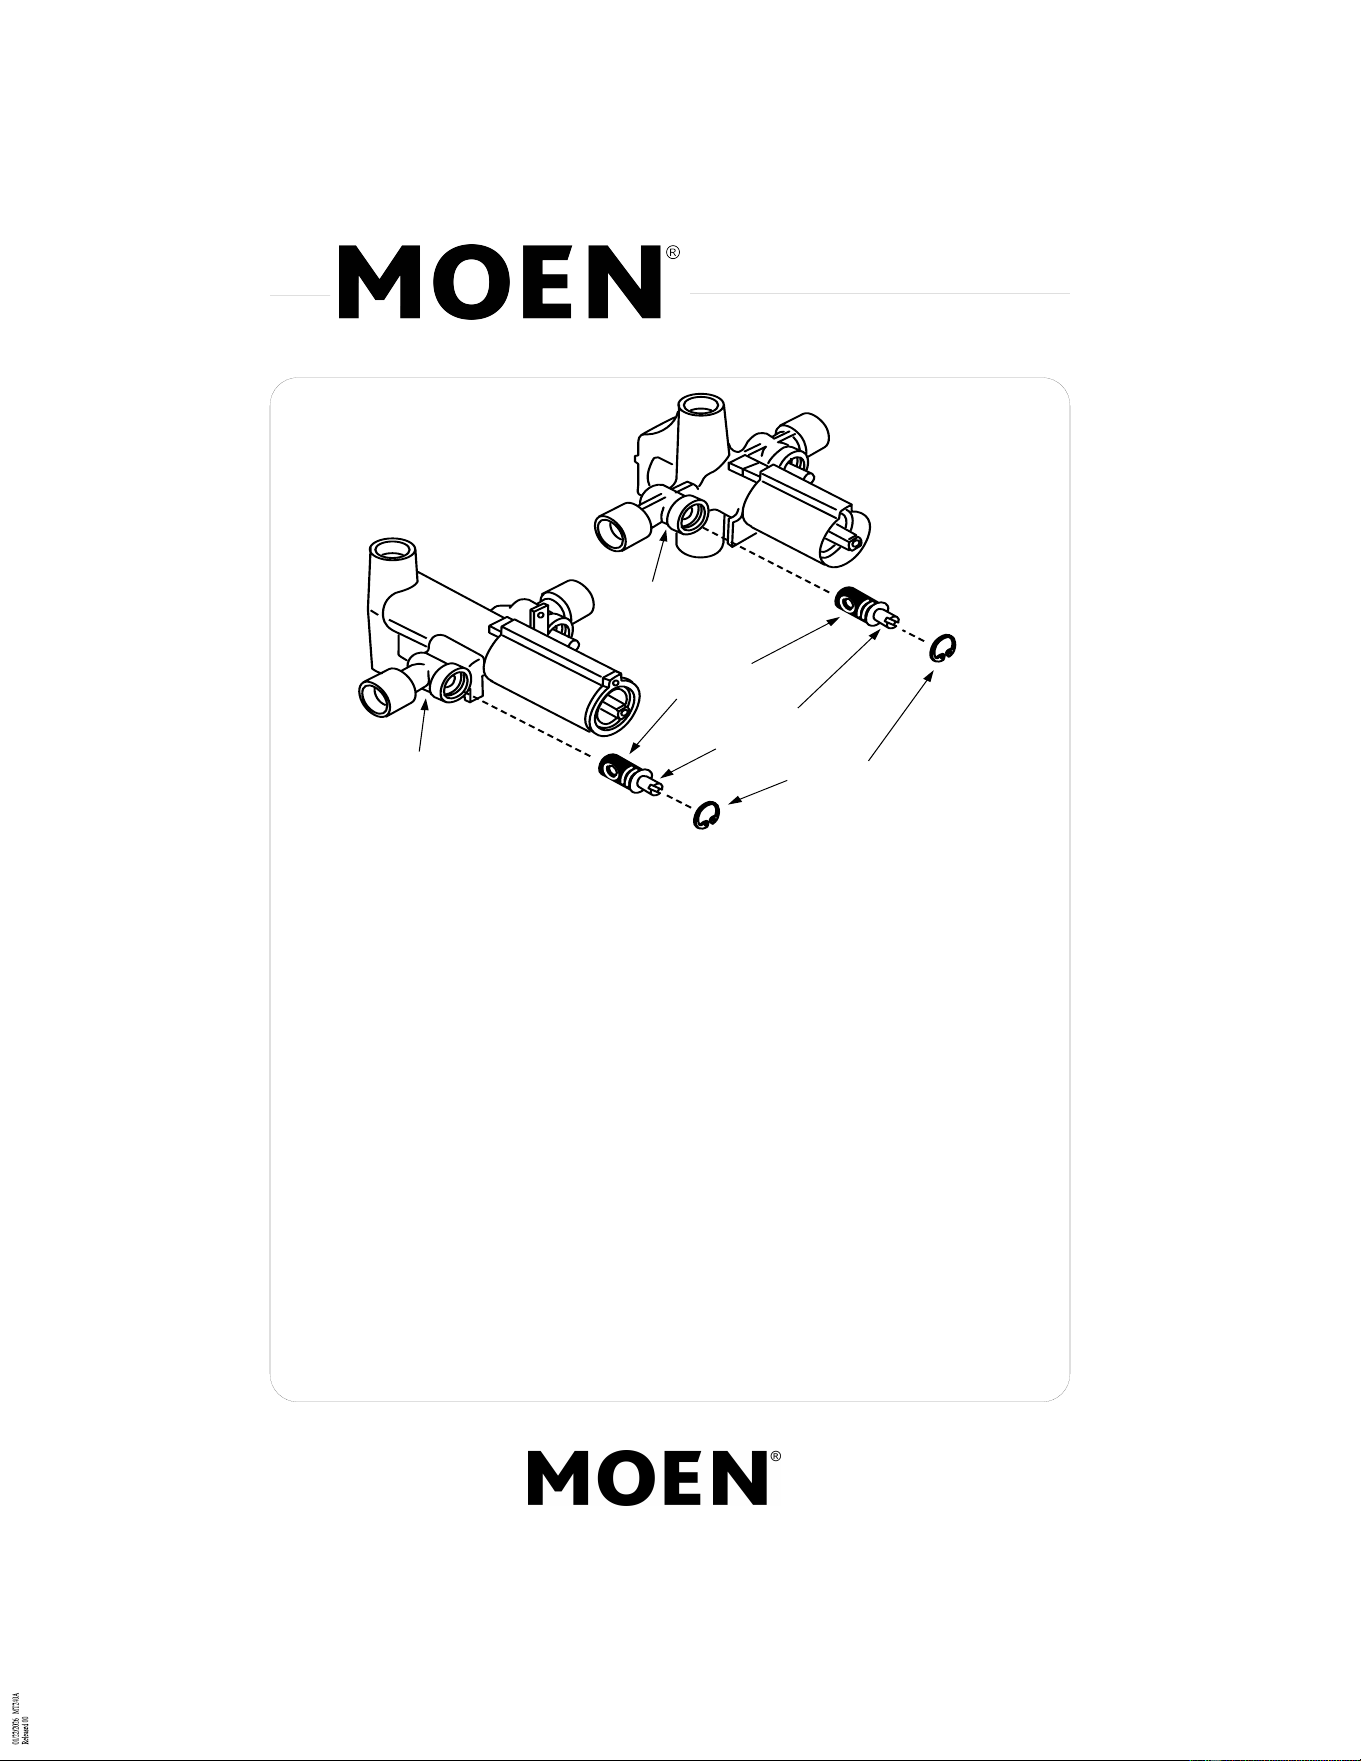
VAVLE BODY
RUBBER
PLUG
STOP VALVE
STEM
RETAINING RING
VALVE BODY
TO REMOVE STOP VALVE
Always turn water supply OFF before disassembly. Open faucet to alleviate sus-
tained pressure.
Removal of stop valve:
1. Remove knob and escutcheon (pry off handle cap and remove handle screw).
2. Using snap ring pliers, remove retaining ring from valve body.
3. Grip stop valve stem with pliers and rotate slightly to remove from valve body.
Re-Installation of new stop valve:
1. Check to be sure that stop valve stem is fully seated in plug.
2. Insert stop valve until fully seated beyond retaining ring groove in valve body.
3. Using snap ring pliers, place retaining ring in valve body, making sure that ring is
fully seated.
4. Check orientation of stop valve for water flow. (Stop is in the off position when
screwdriver slot is vertical).
5. Turn water supply on.
Not for use with Moentrol valves.