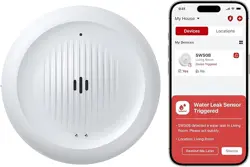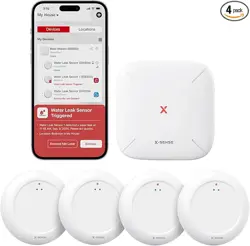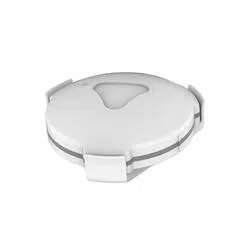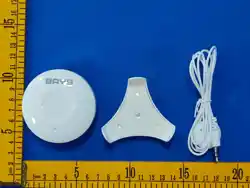
Wi-Fi 09 Water Immersion Device User Manual
Product Configuration
Product Specifications
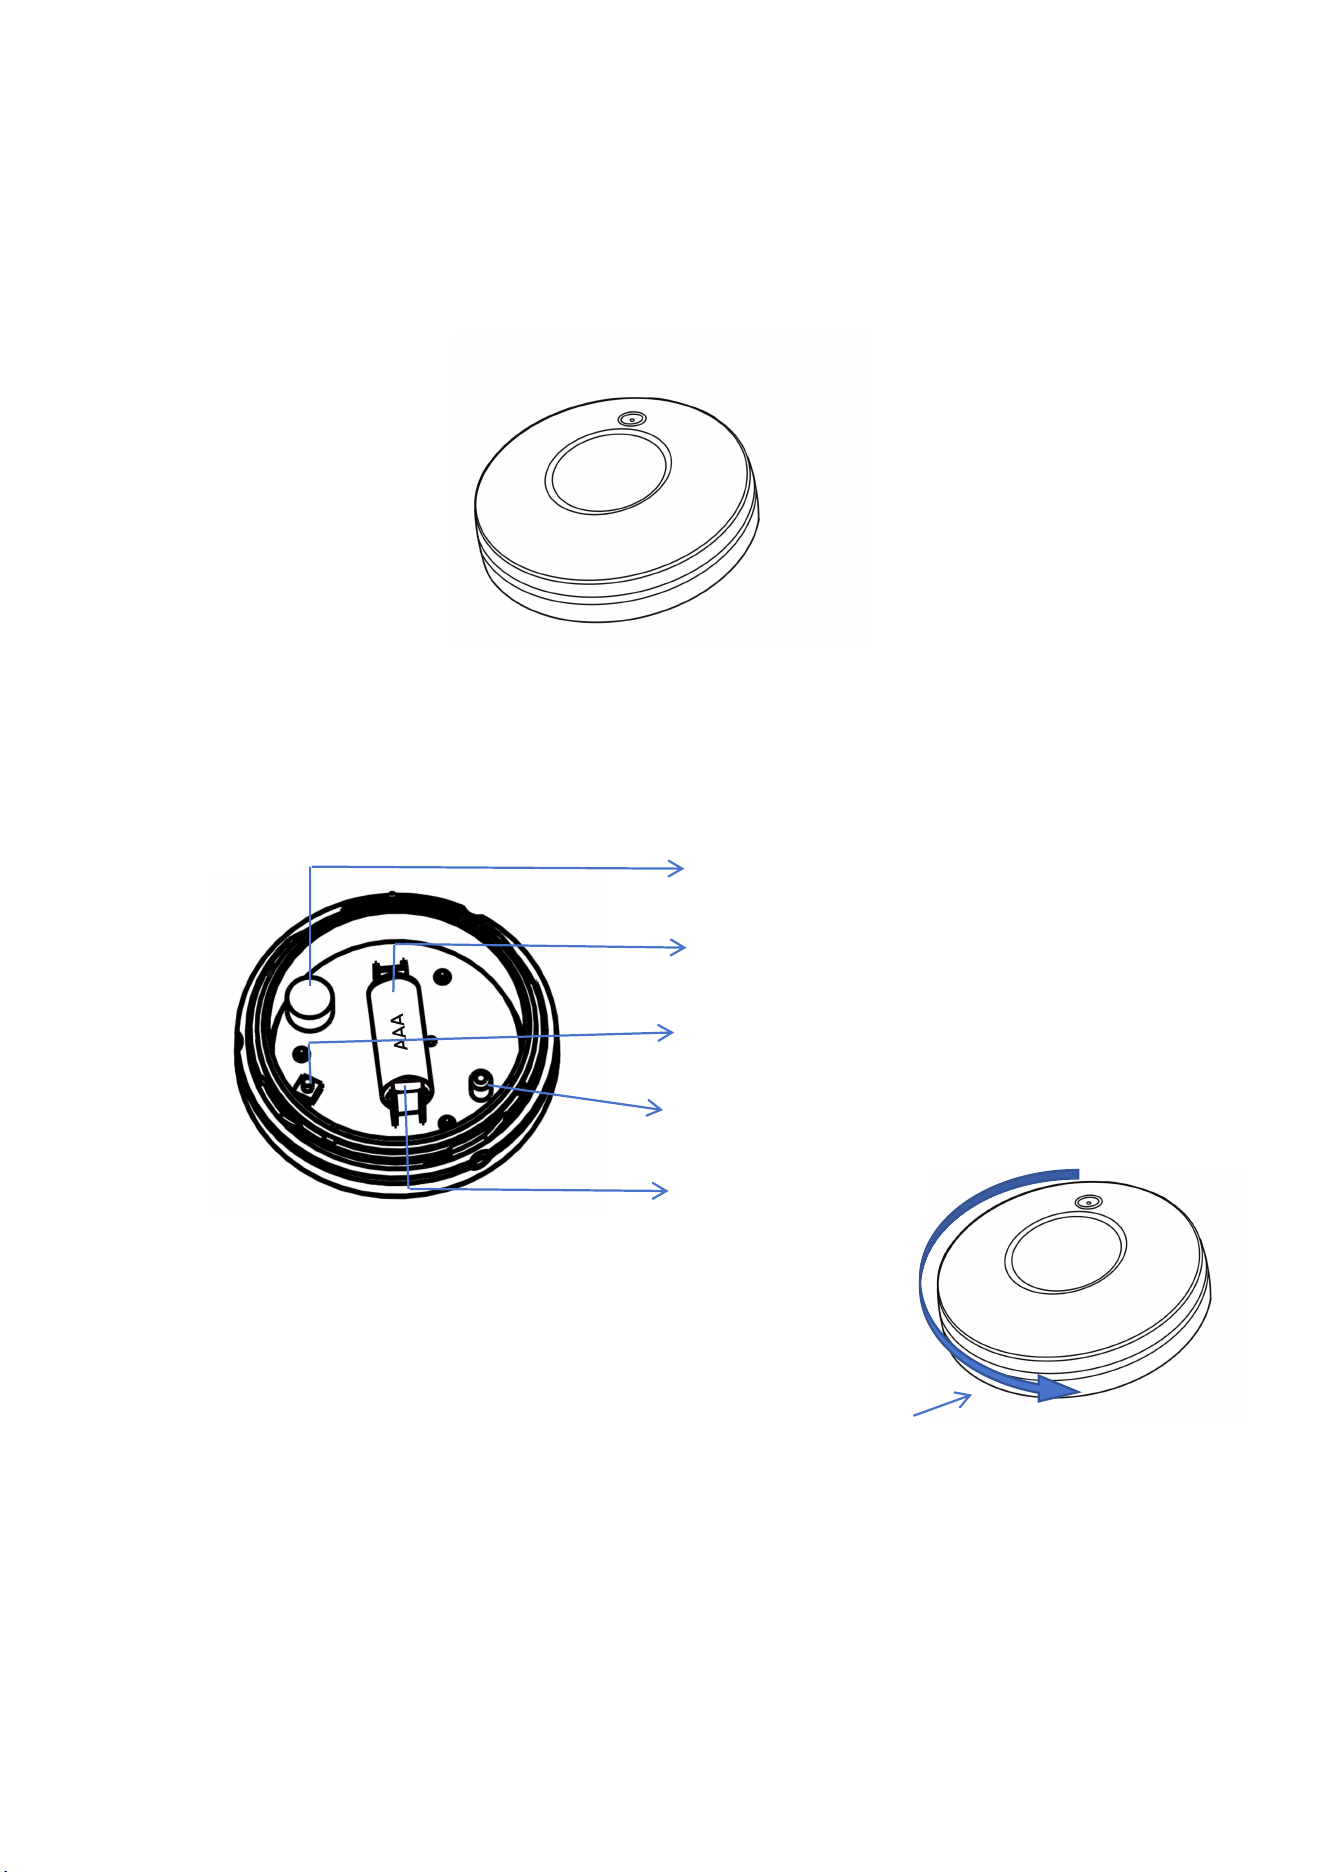
Buzzer
Reset button
Indicator light
Rotate the top cover
counterclockwise to open
the case; replace the
battery or reset the device
Battery
Battery insulating sheet
Device Name: Wi-Fi Soaker
Battery: AAA LR03 1.5V * 1 Replaceable
Sleep Current: 10uA
Operating Temperature: 0℃ ~ 50℃
Operating Humidity: 1% ~ 95%
Wireless Type: 2.4GHz
Maximum Distance: 300M
Status Indicator Light: 1 LED (Red)
Dimensions: 67mm x 67mm x 24mm
Indicator Light Corresponding Device Status
Water Immersion Device Status
Indicator Light Status
Reset
Press and hold the reset button for 7 seconds
Add Status
Short press the reset button for 1 second to
wake up the device, the indicator light stays
on for 1 second
Not Connected to Network Status
Short press the reset button for 1 second, the
indicator light flashes twice
Connected to Network Status
Short press the reset button for 1 second, the
indicator light flashes once
Offline
The indicator light flashes quickly 5 times
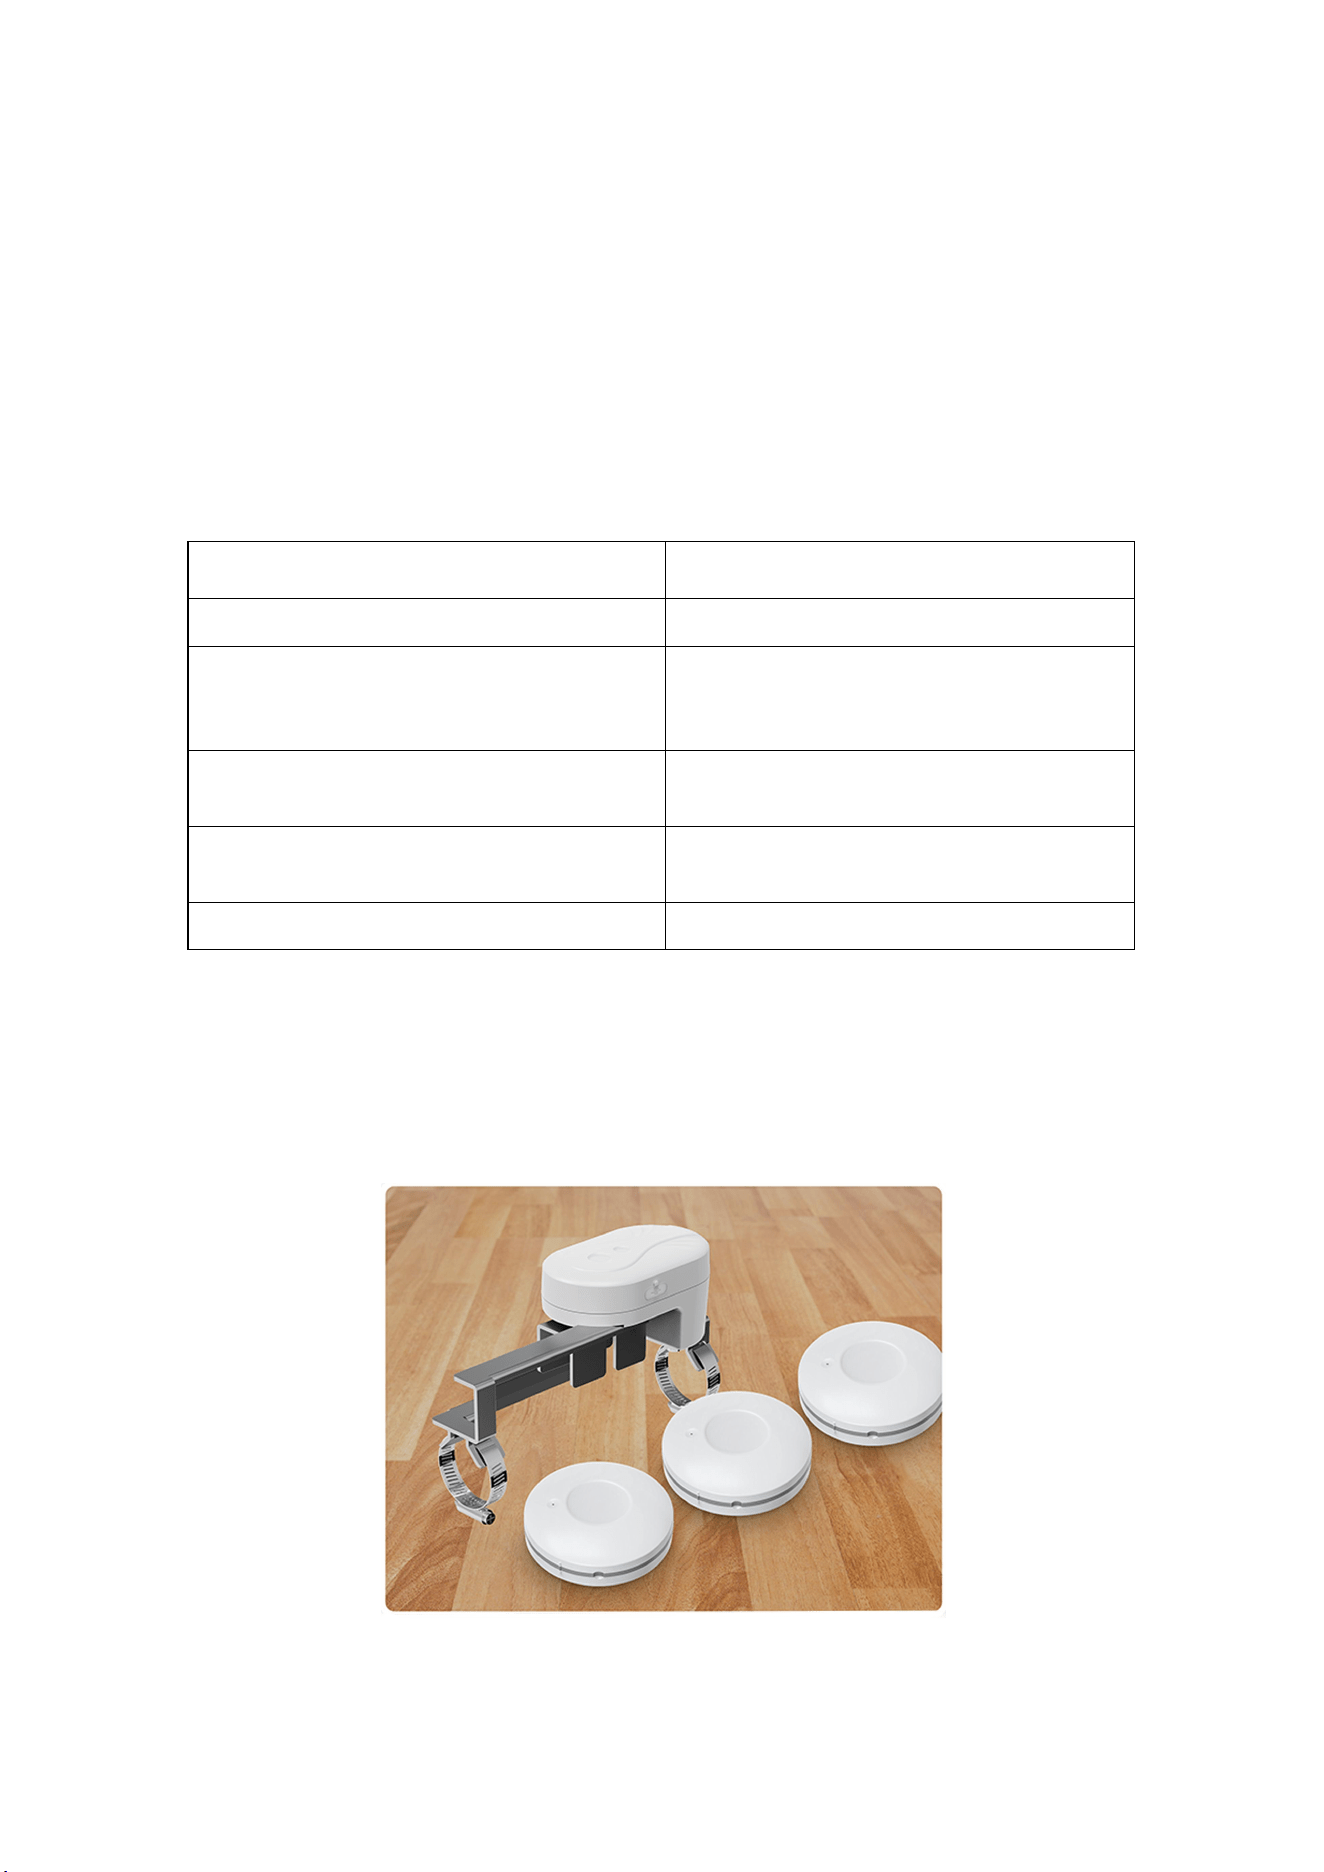
Add Immersion Heater Linkage to Different Hosts
1. Linkage with 10 Water Valves
Single Water Immersion Device Linked to a Single Water Valve
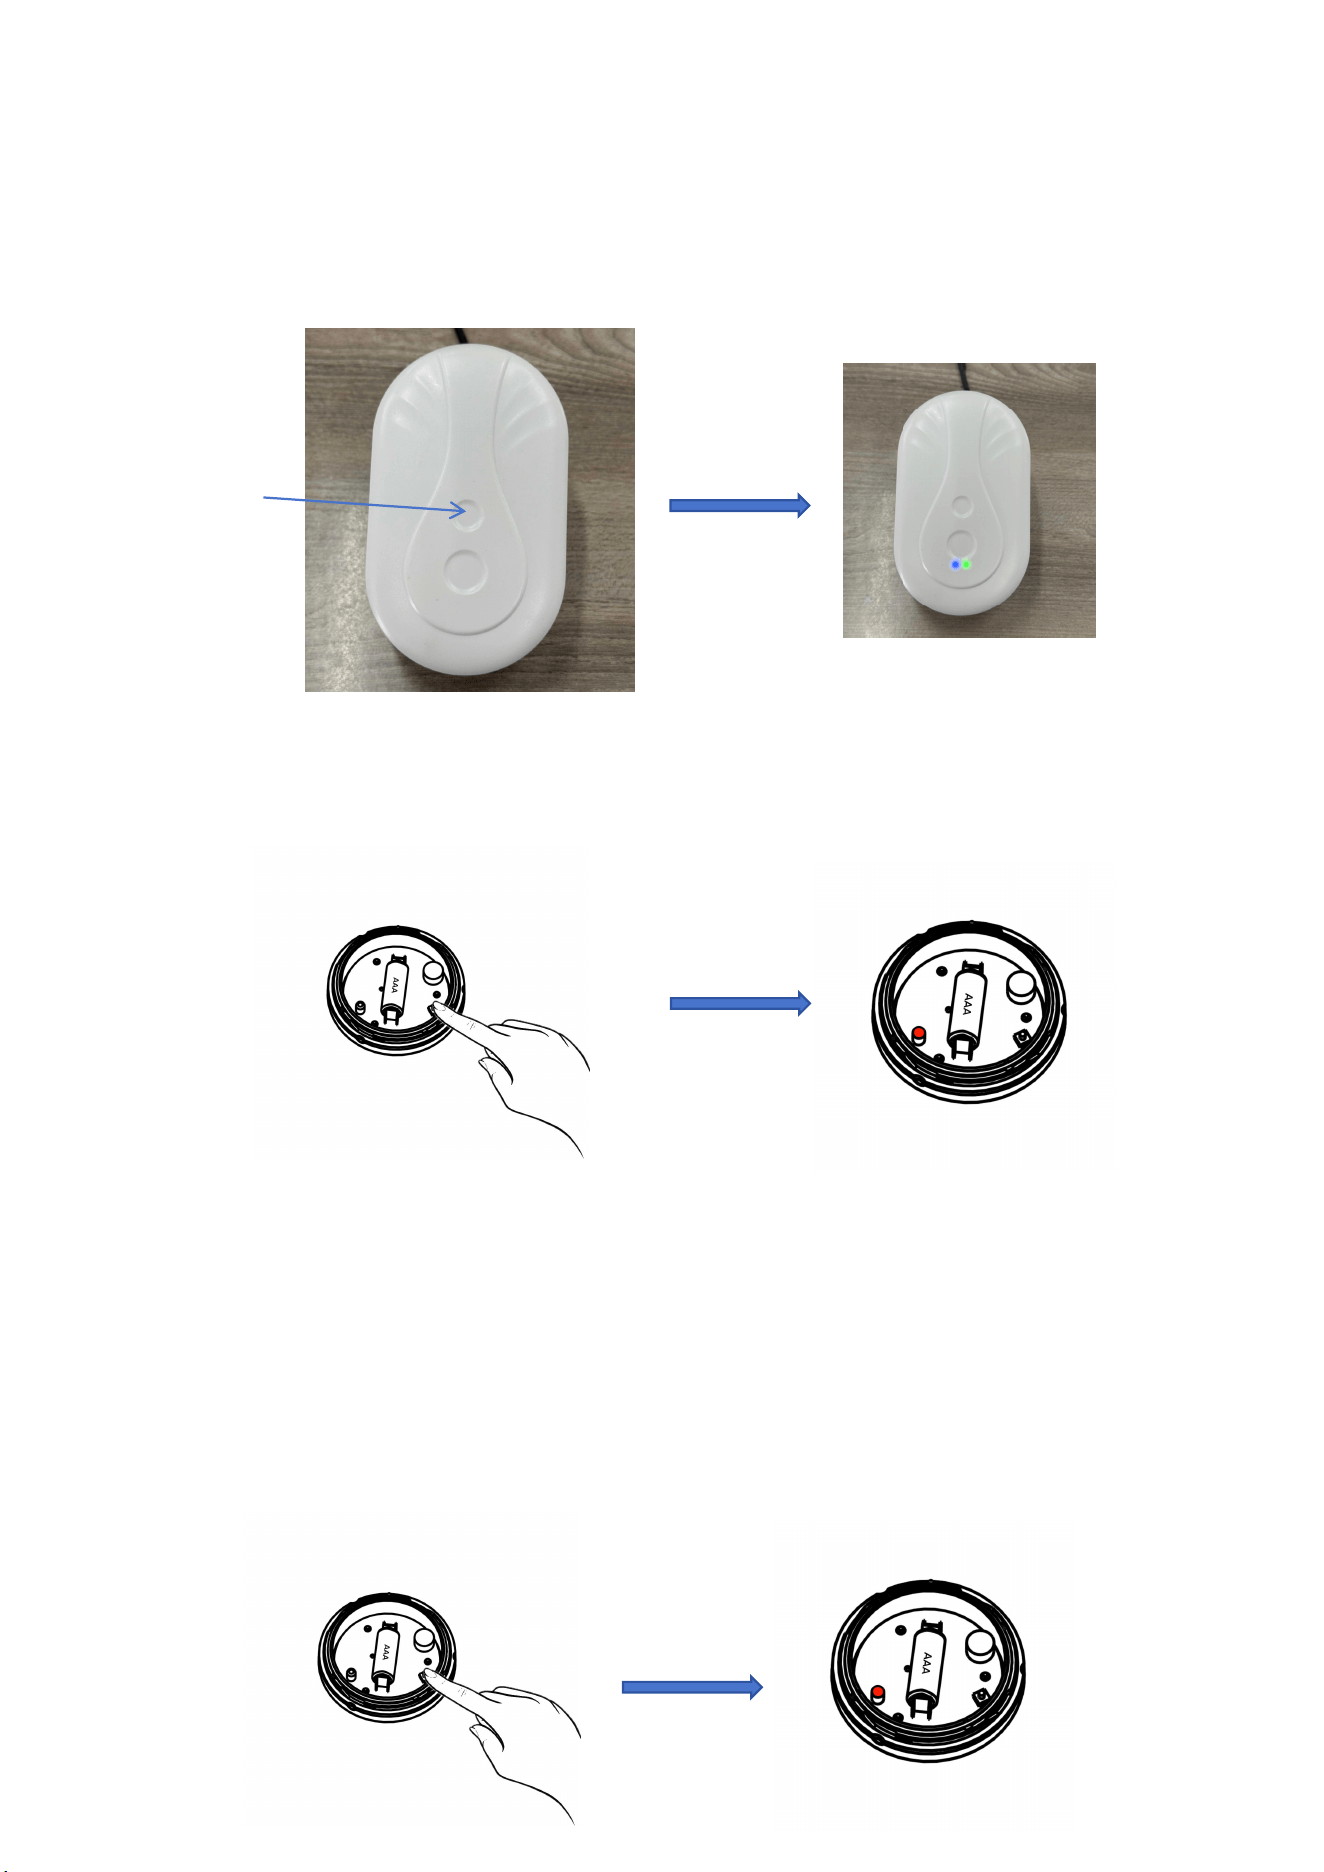
Press and hold the water valve network pairing button for 3 seconds. The blue
indicator light on the water valve will start to flash slowly. At this time, the
water valve has entered pairing mode.
(2) Press and hold the water immersion device reset button for 3 seconds. After the
buzzer beeps once, the device enters pairing standby mode, and the red indicator
light flashes slowly.
(3) Pairing successful, the water immersion device indicator light stops flashing
A single Water Immerser Controls Multiple Water Valves
(1) Add both water valve A and water valve B to the gateway at the same time (read
the sync word of water valve A and write it into water valve B).
(2) Press and hold the reset button on the water immerser for 3 seconds. After the
buzzer beeps once, the device enters pairing standby mode, and the red indicator
light flashes slowly.
Distribution Network Key
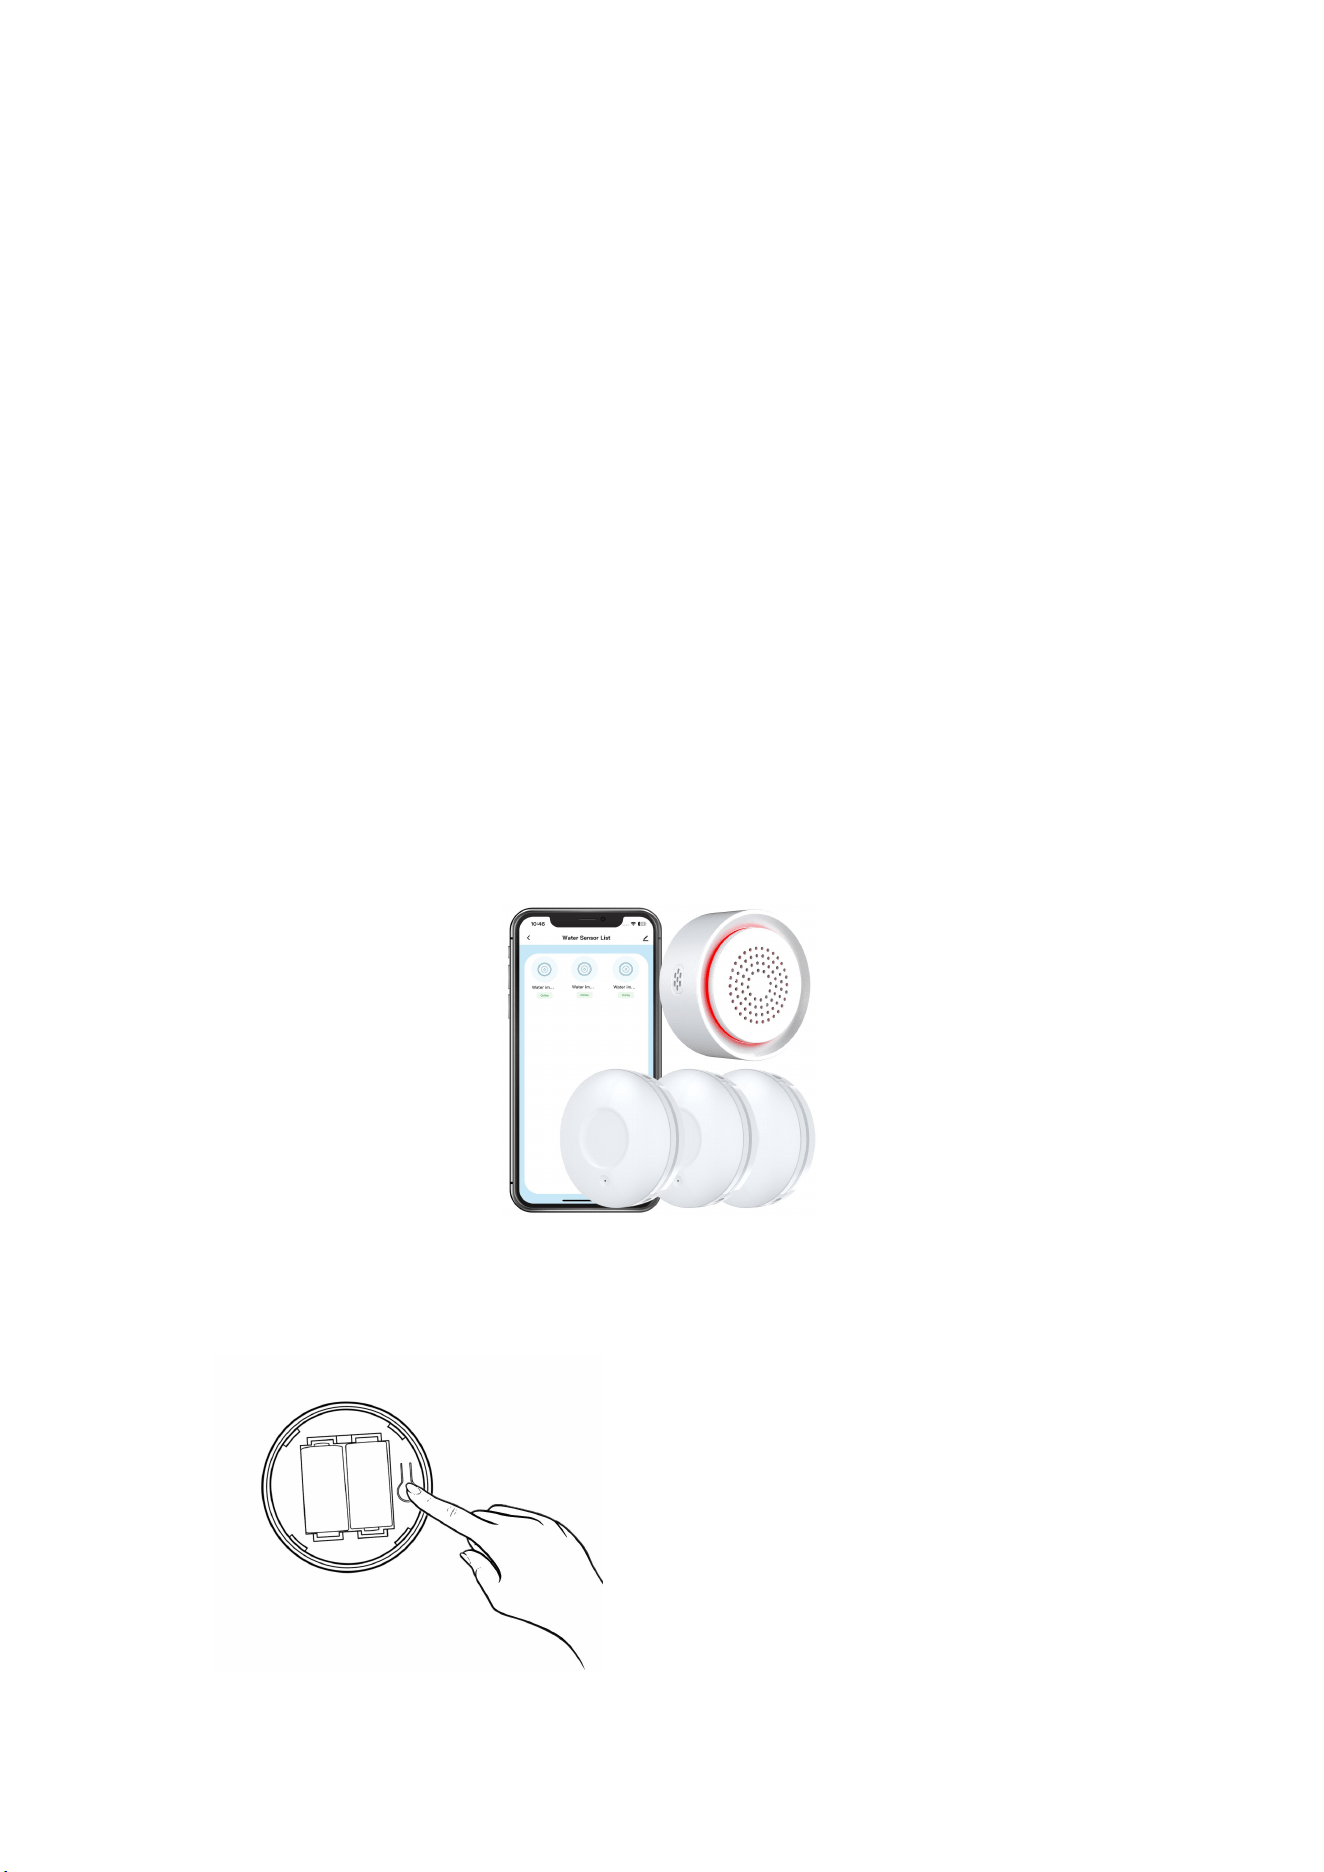
(1) First, add the water immersion detector to Water Valve A. After the sub-device
is successfully added, press and hold the network configuration button on Water Valve
A for 3 seconds to make Water Valve A exit the sub-device pairing mode.
(2) Press and hold the network configuration button on Water Valve B for 3 seconds
to make Water Valve B enter the add sub-device mode, then add the water immersion
detector to Water Valve B.
Note:
(1) When the water valve exits the sub-device pairing mode, the sub-device indicator
flashes quickly three times.
(2) After the water immersion detector triggers an alarm, the low-power water valve
will have a delay (5~10 seconds) in executing the valve closure, while the
constant-power version has no delay.
2. Link with the Audible and Visual Alarm
The audible and visual alarm has been paired with the water immersion sub-device
at the factory. You only need to reconfigure the Wi-Fi network for the alarm to use it
directly.
1、Press and hold the sound and light alarm reset button for 6 seconds until the
buzzer sounds and the indicator light starts flashing, then add the device through the
APP (the specific adding process can refer to the device adding instructions below).
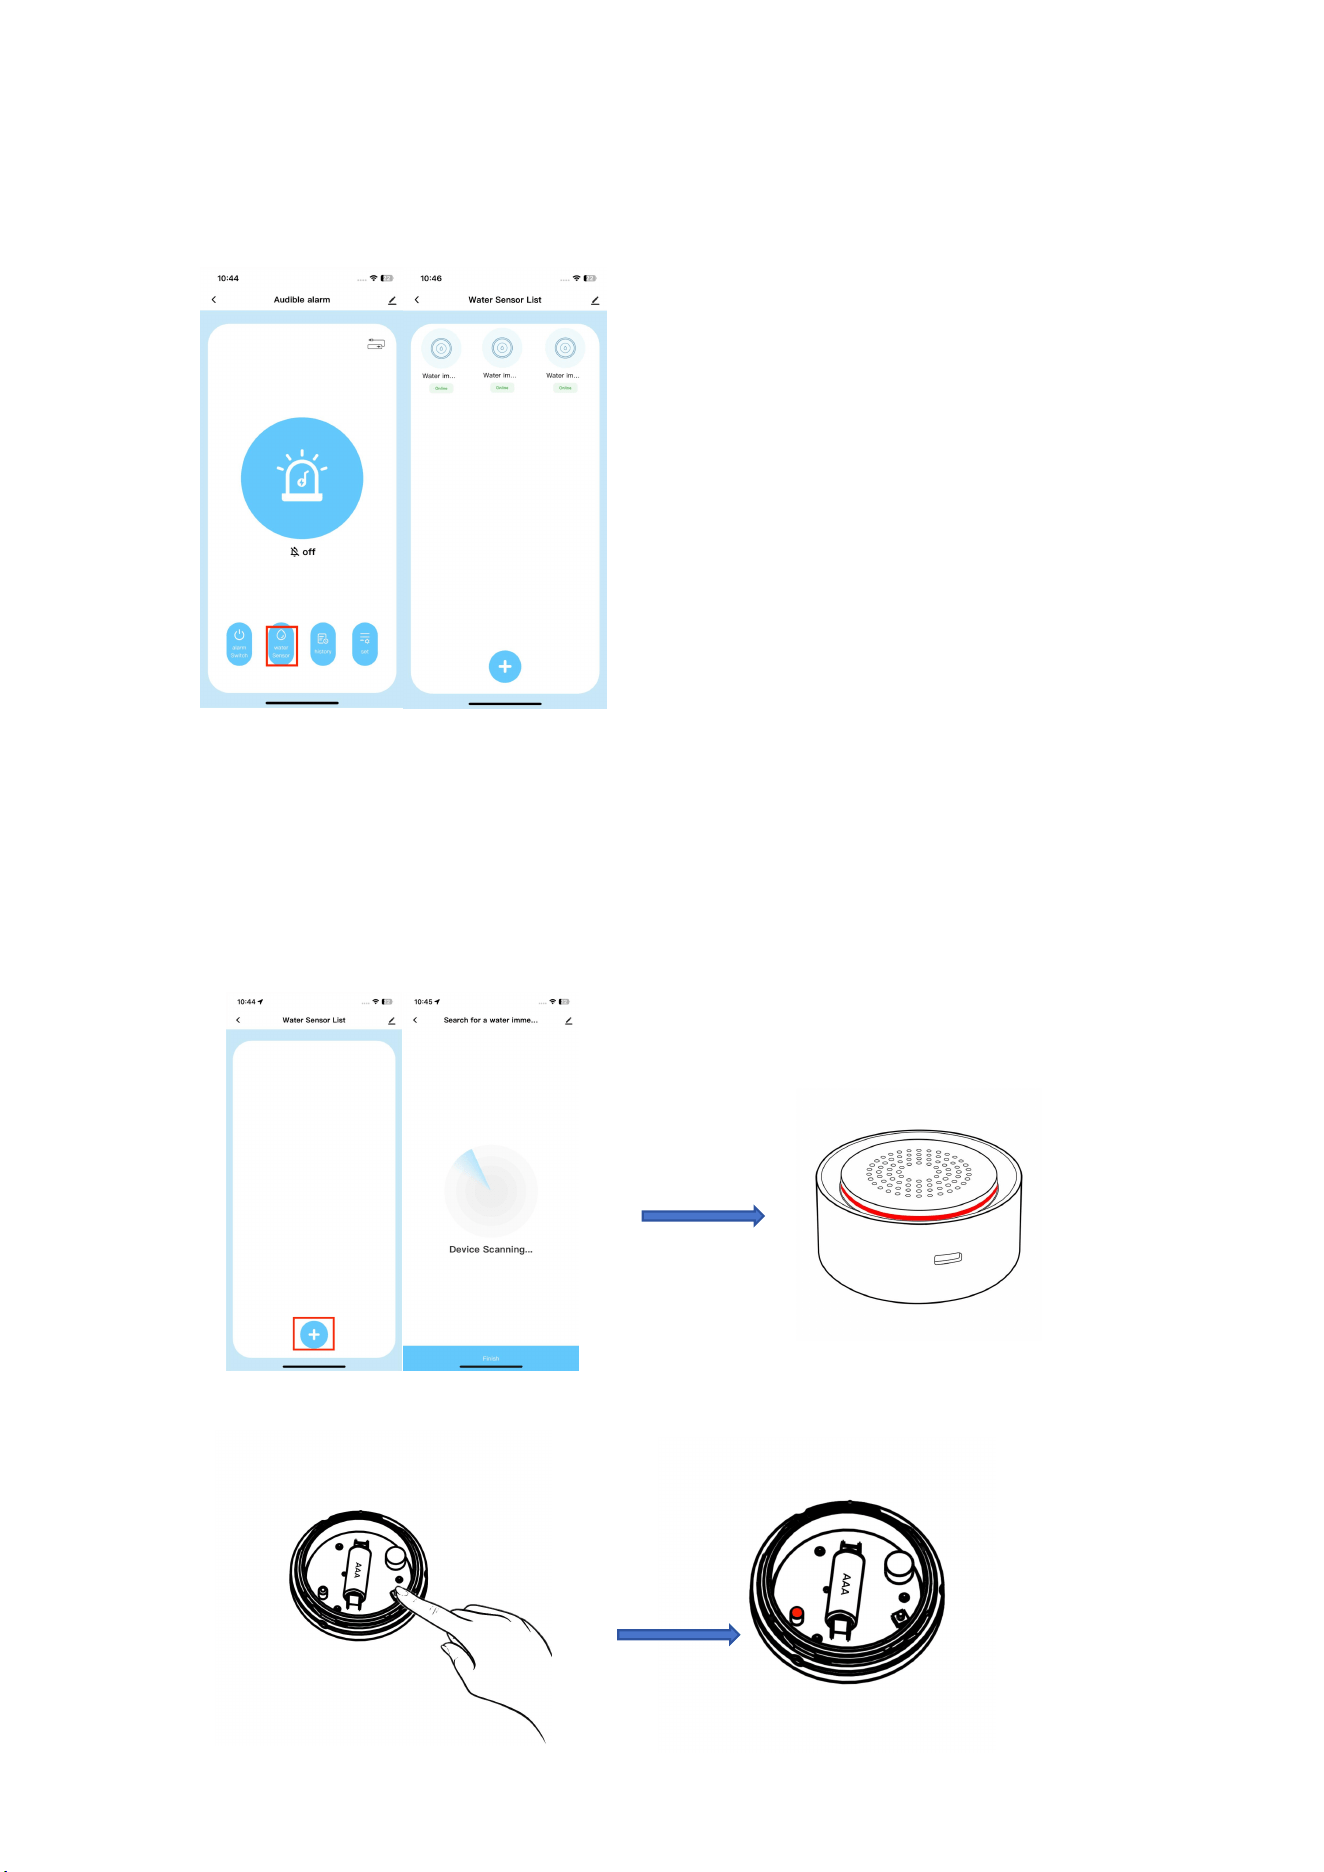
2、After successfully adding, click on the water immersion sensor to see
the three sub-devices that have been pre-configured from the factory.
If you need to add more sub-devices, you can refer to the following two methods:
1. Method One: Add via APP
(1) Click the add button to enter the scanning interface for the immersion
device. At this time, the alarm indicator light starts flashing.
(2) Press the water immersion device reset button briefly for 1 second to wake up
the device; the indicator light of the water immersion device will flash once.
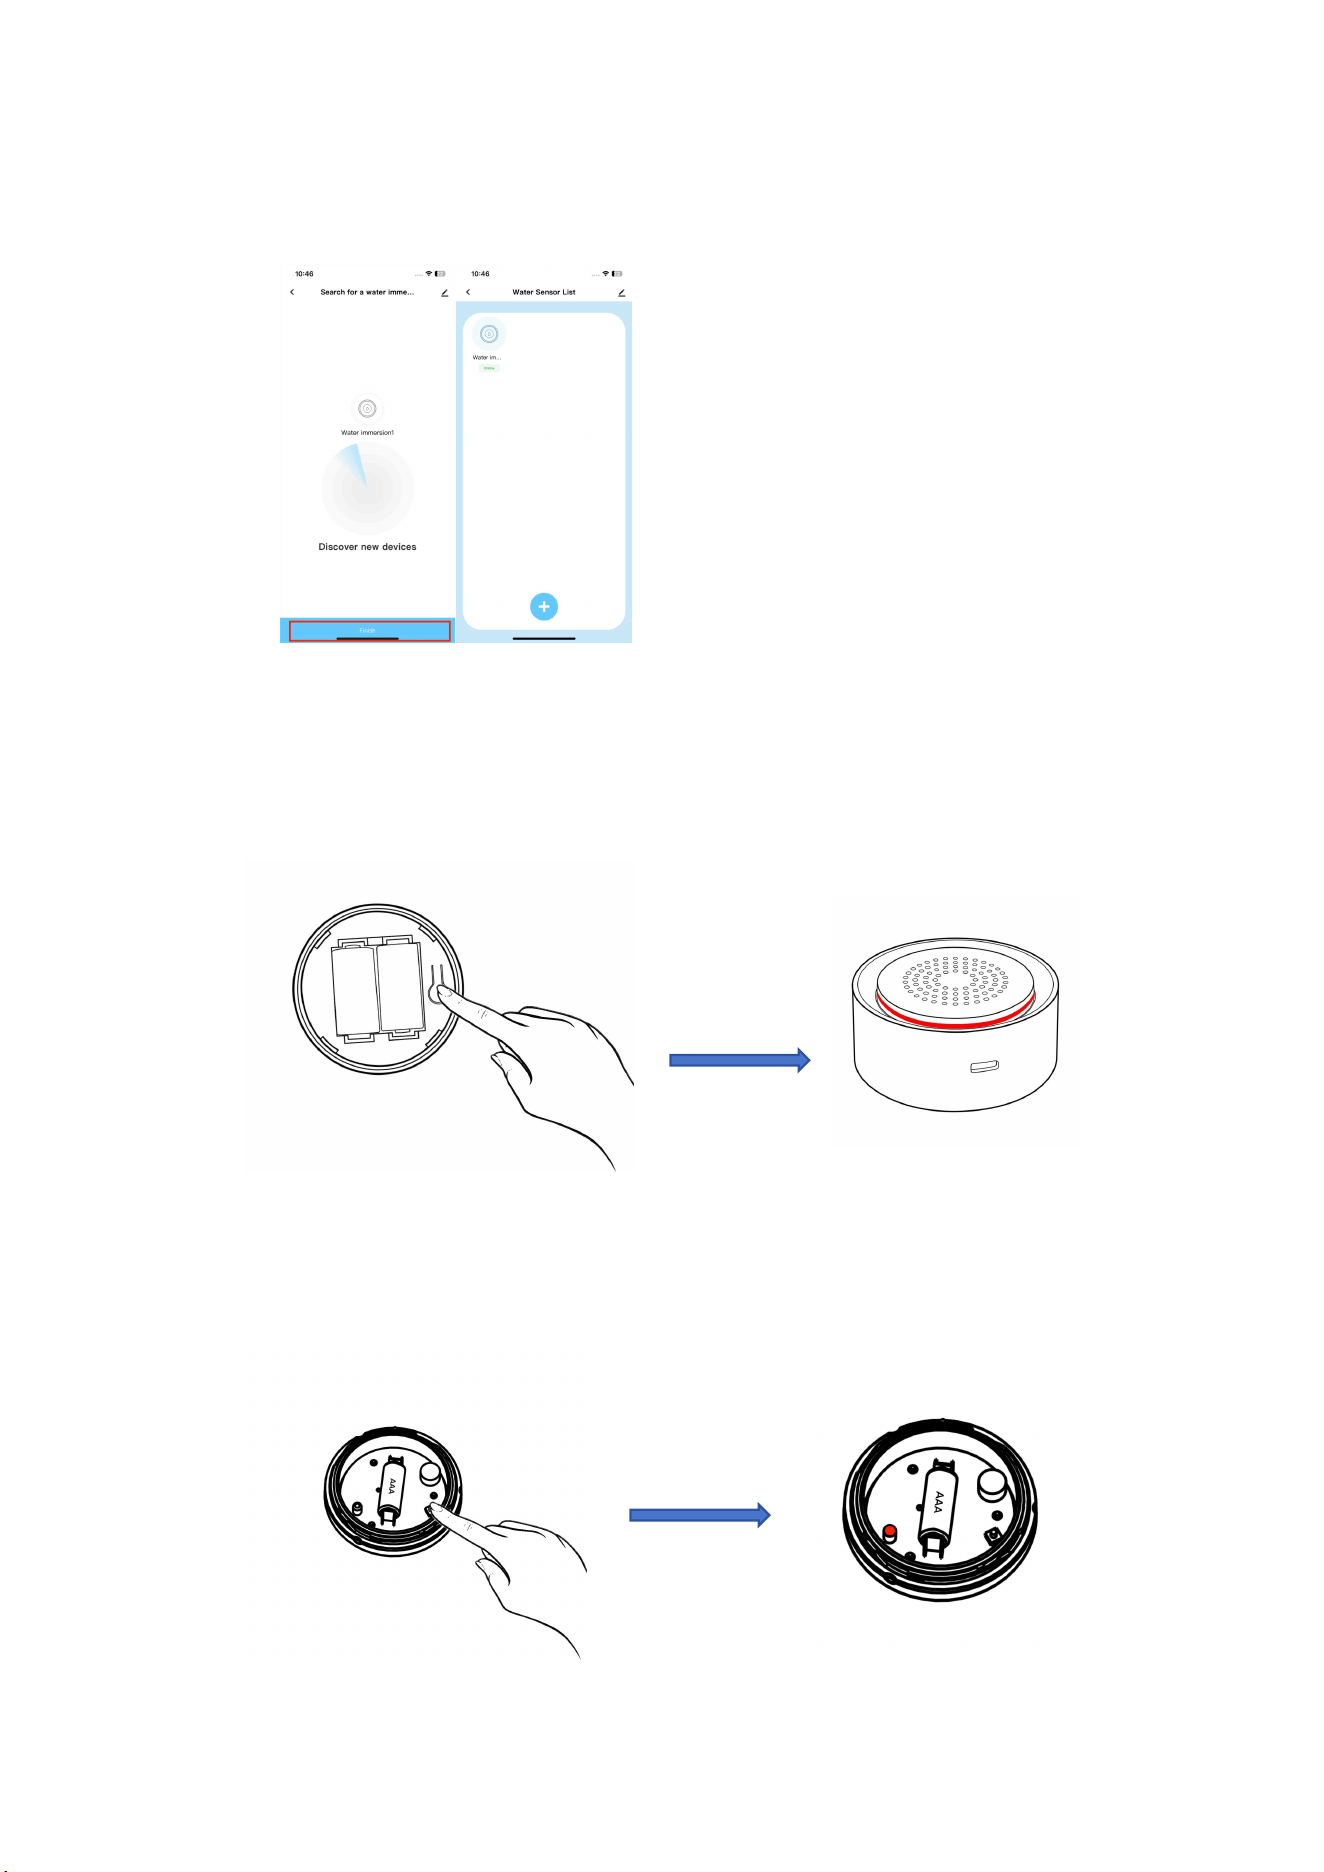
(4) Successfully search for the sub-device of the water immersion device within the
APP, click the Done button, and the water immersion device is added successfully
2、Method 2: Local Addition of Audible and Visual Alarm
(1) Press the reset button on the audible and visual alarm briefly for
1 second. The alarm indicator light begins to flash, indicating that the
alarm has entered pairing mode.
(2) Press the water immersion device reset button briefly for 1 second to wake up
the device; the indicator light on the water immersion device will flash once.
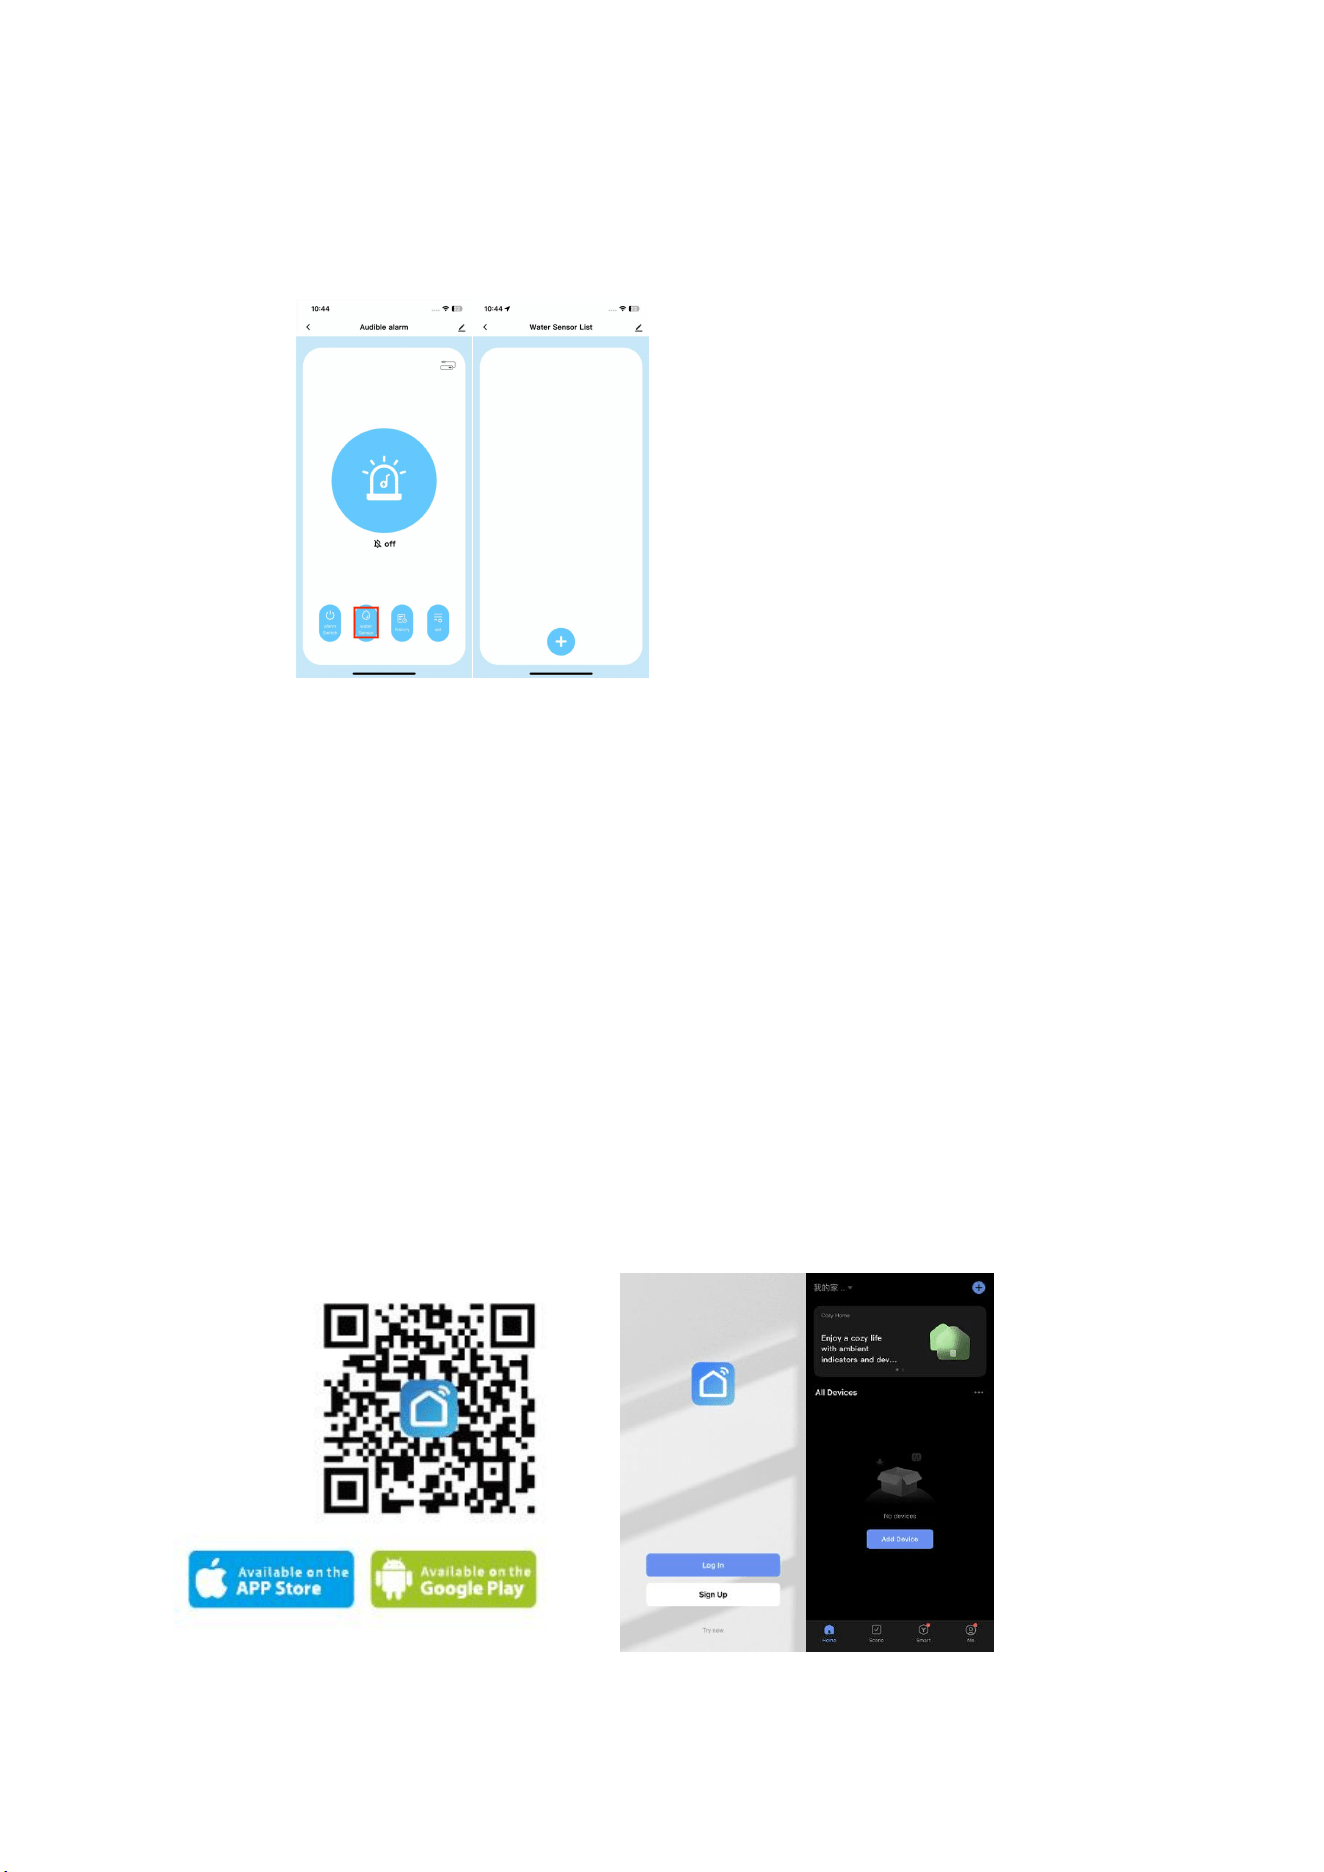
(3)Open the app, it shows that the water immersion device has been added
successfully.
Note:
(1) When the sound and light alarm is in scanning mode, briefly press the alarm reset
button for 1 second to manually turn off the scanning mode.
(2) When the sound and light alarm enters scanning mode, the networked water
immersion devices may go offline briefly (the indicator light will flash 5 times
when pressing the reset button); after the alarm exits scanning mode, the networked
water immersion devices will return to online status.
Download the APP
1. Android system: Download the 'Smart Life' APP from Google Play
2. iOS system: Download the 'Smart Life' APP from the App Store
3. Run the APP, register, and log in to your account
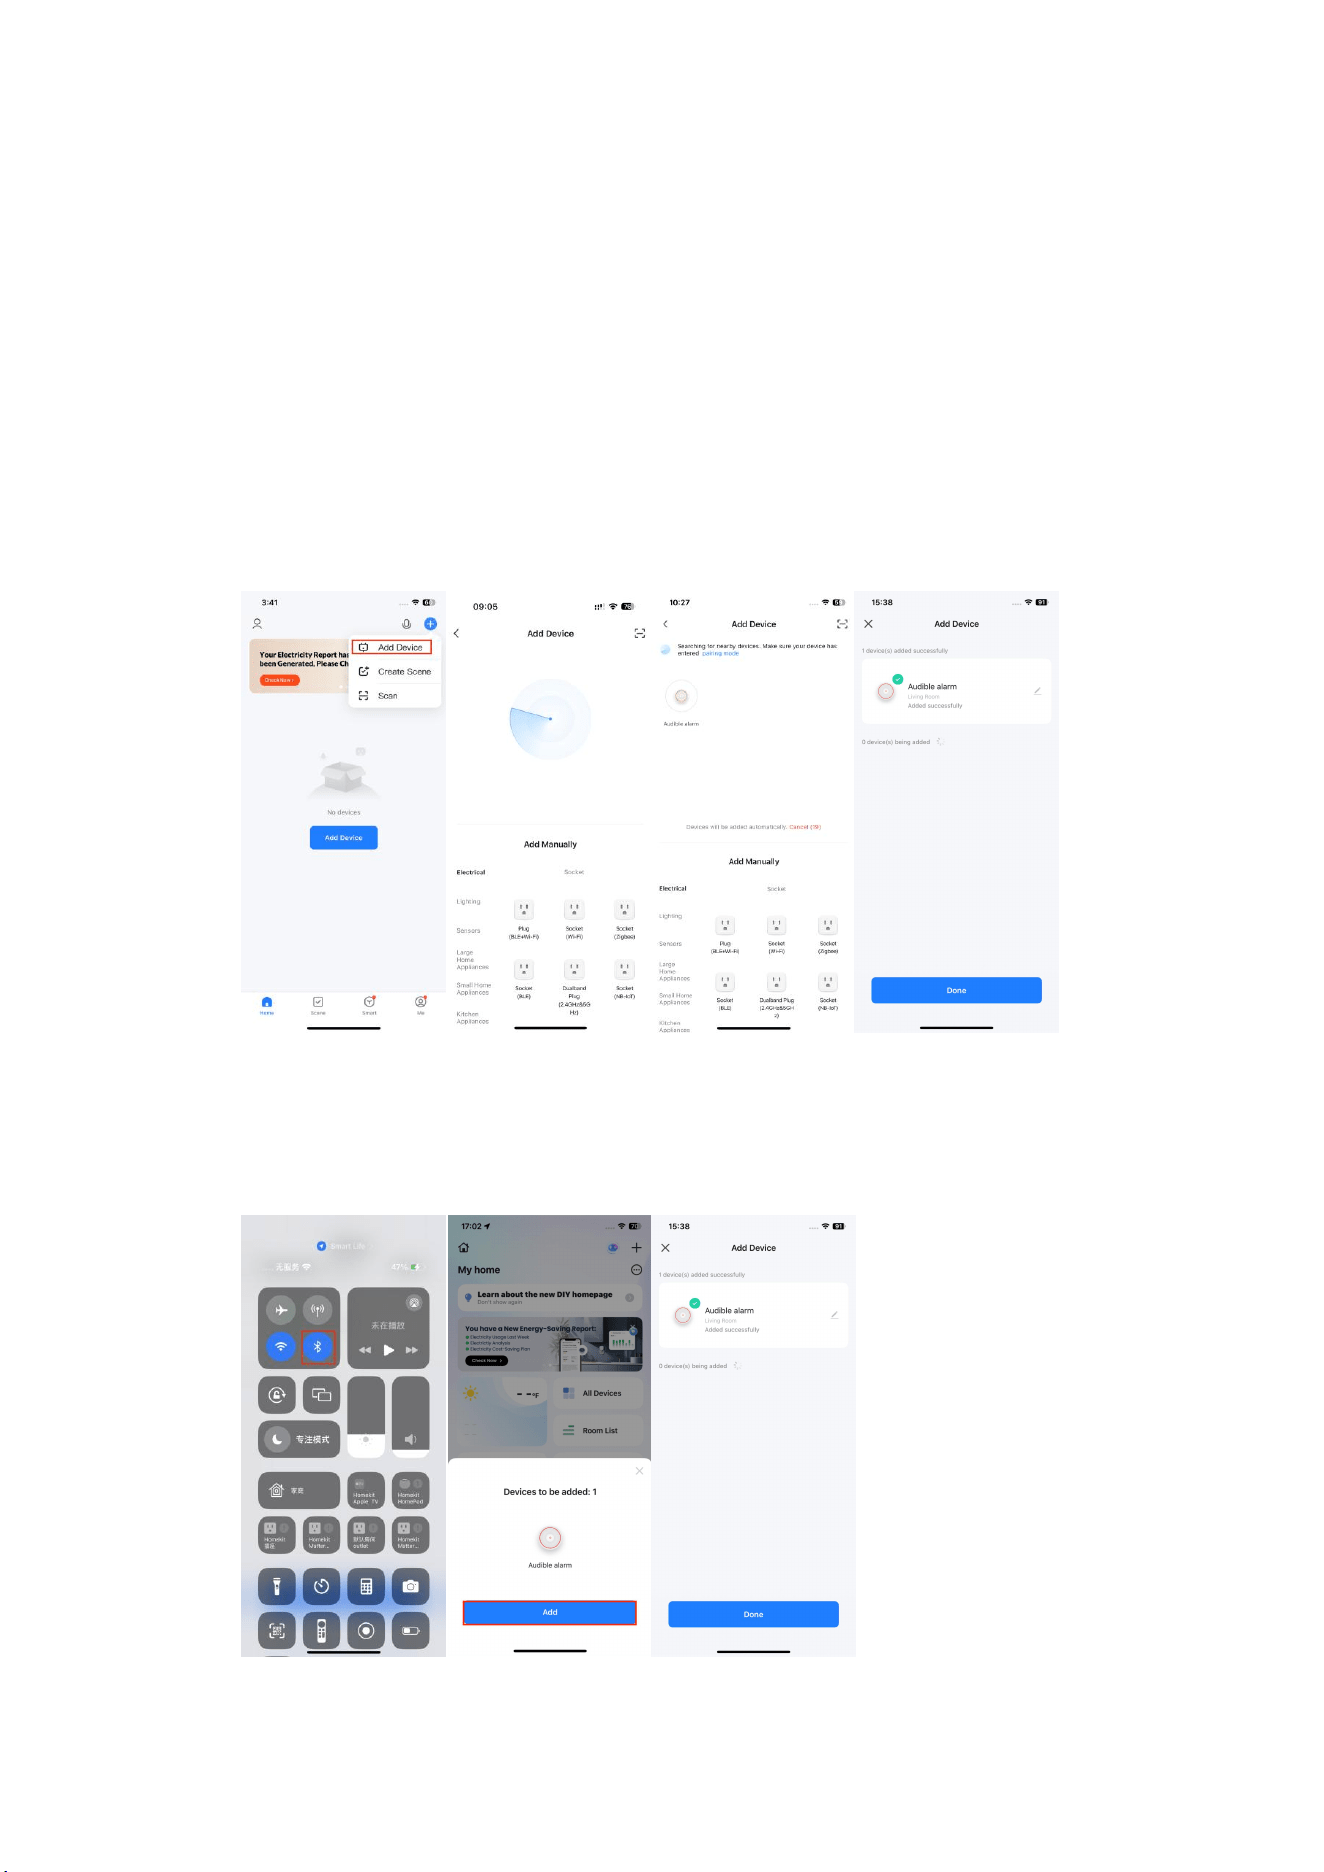
Add Device
Please add the audio-visual alarm host first. The water immersion sensor cannot be
connected to the network independently and can only be added as a sub-device under
the audio-visual alarm.
1. Add the audio-visual alarm host (this manual uses Bluetooth addition
as an example)
Press and hold the reset button on the audio-visual alarm until the indicator
light starts flashing.
(1) Method 1: Turn on Bluetooth on your phone and add the device via Bluetooth mode
(2) Method 2: After turning on Bluetooth, enter the APP interface and the device
will automatically be discovered by Bluetooth, then just click add.
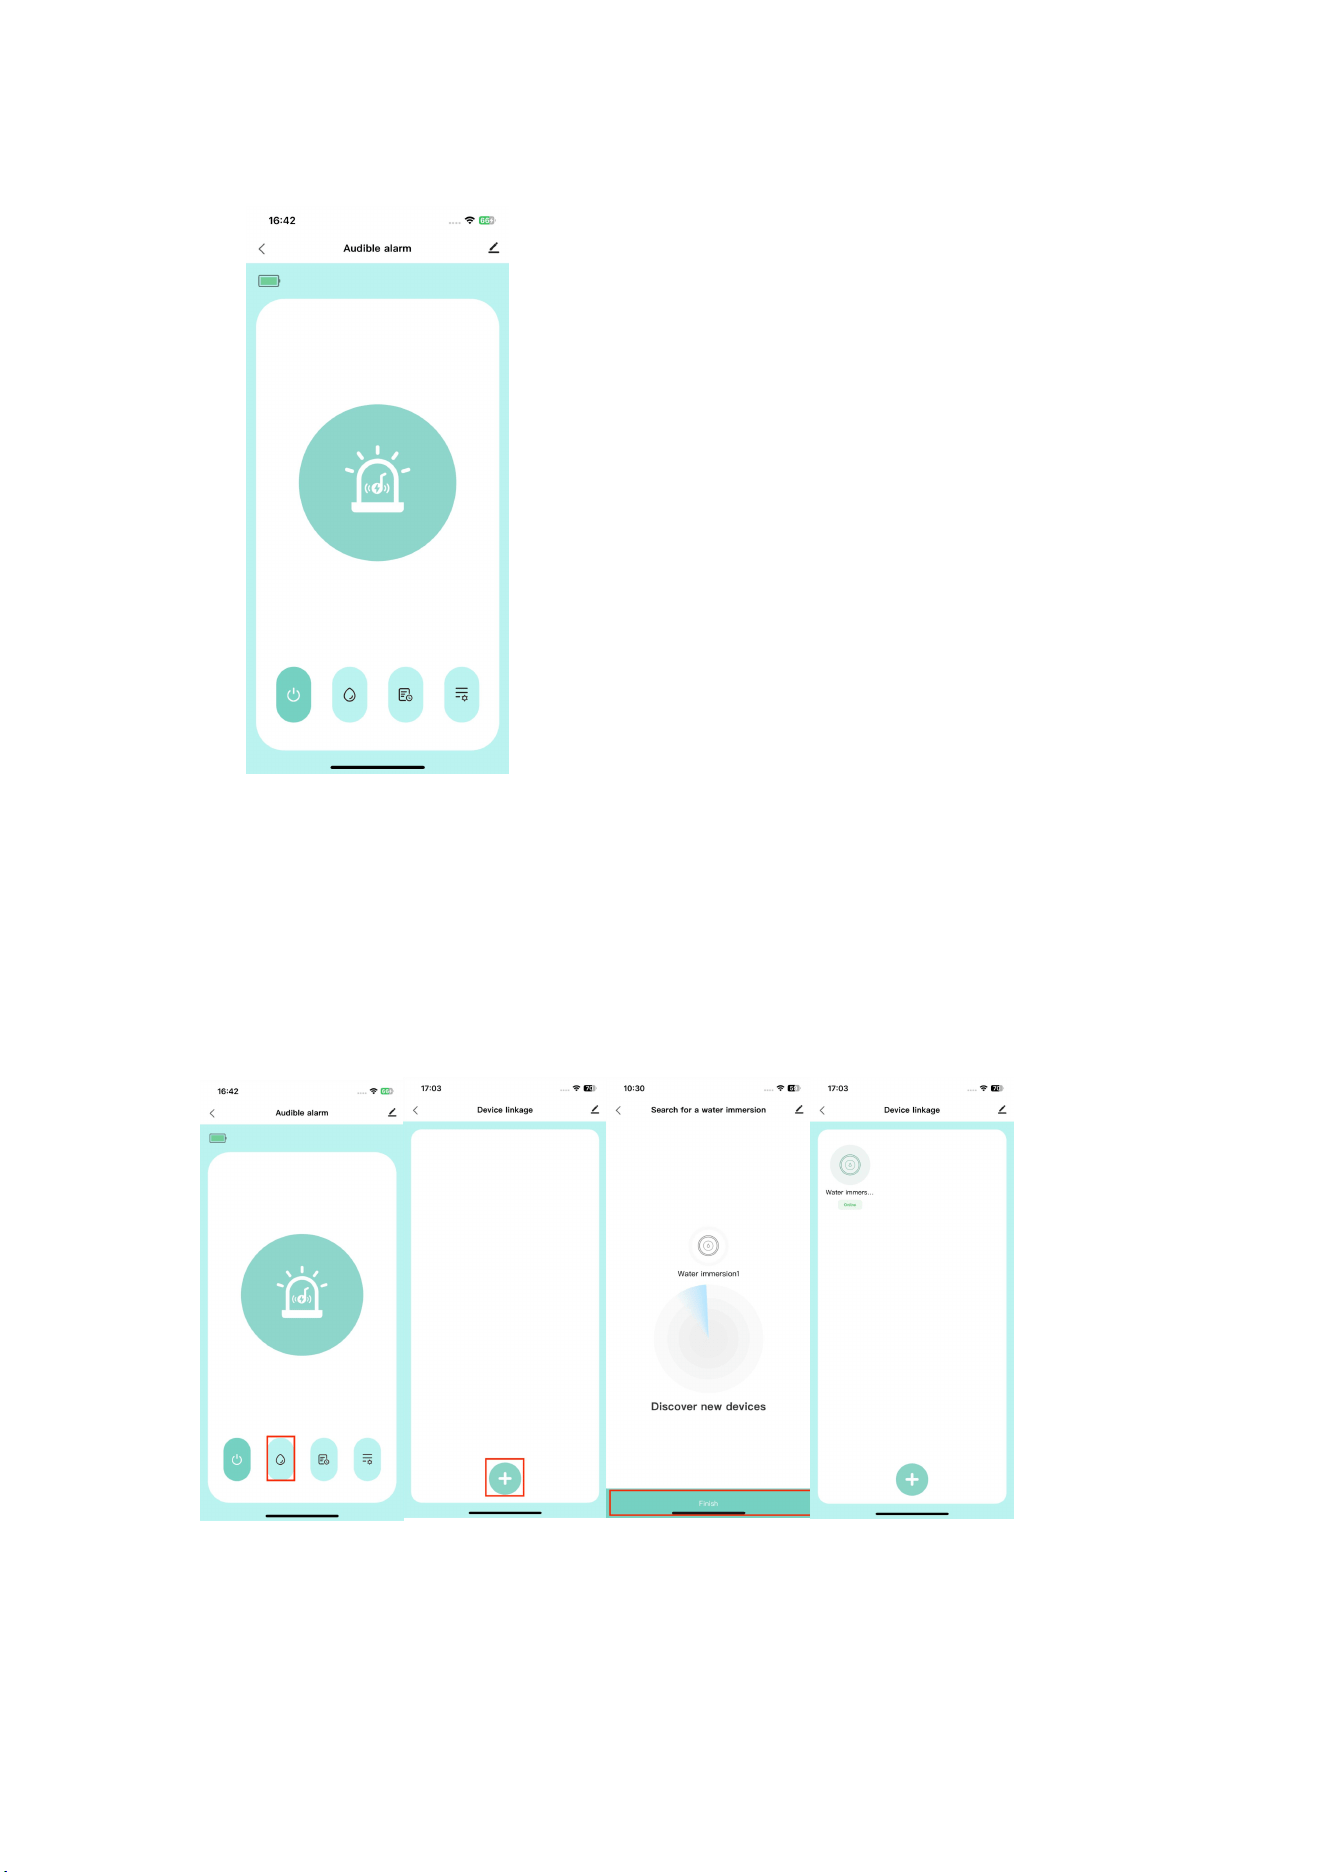
App Main Interface
Function Settings
1.Add the Water Immersion Device (up to 15 can be added)
(1) Add the water immersion device (after clicking the add button, briefly
press the immersion device reset button for 1 second to wake up the device
for addition)
(2) Main interface of the water immersion device (click the water
immersion device icon to enter the main interface of the water immersion
device)
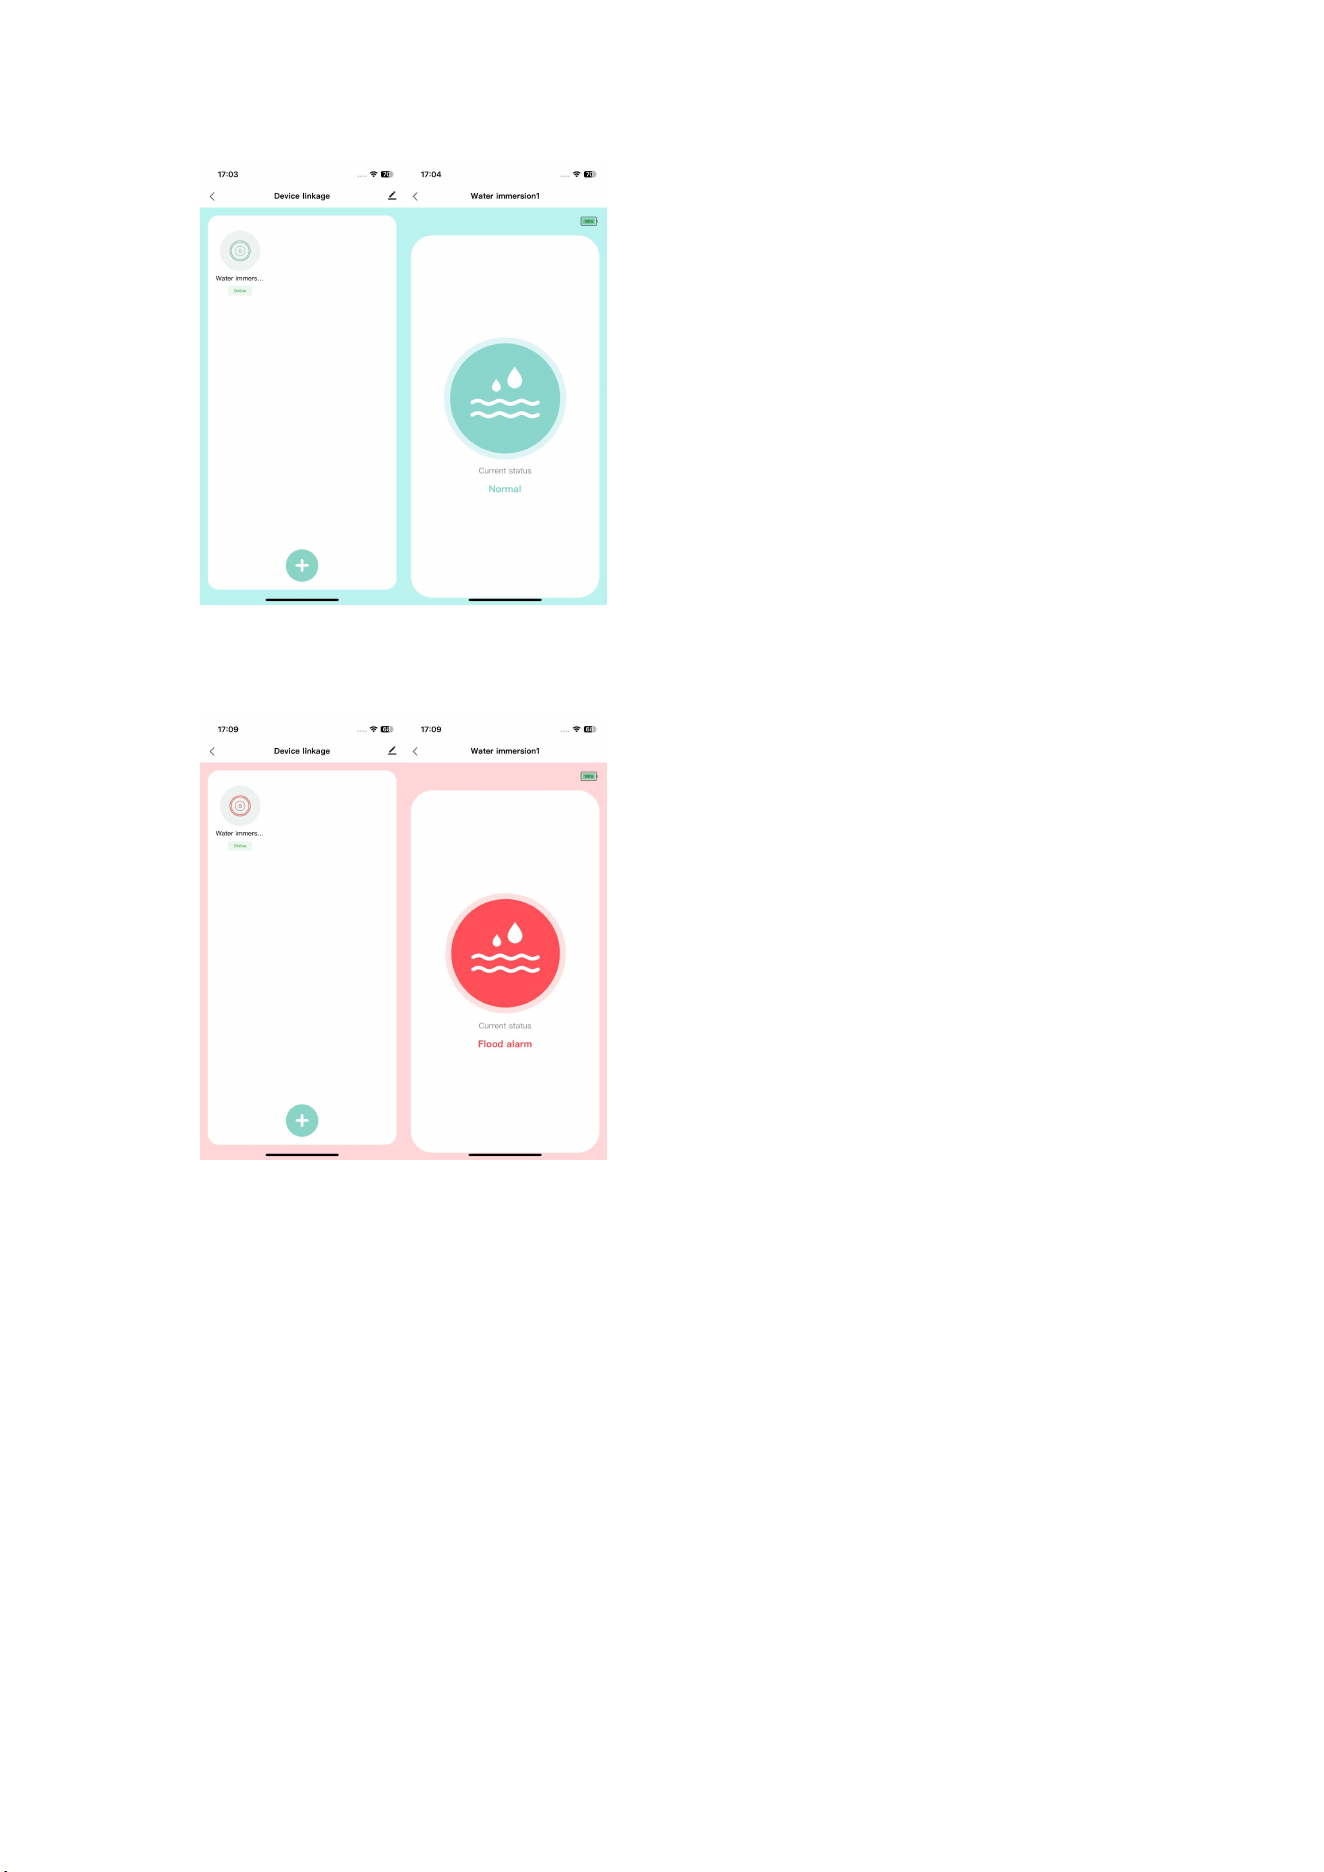
(3) Detect water leakage
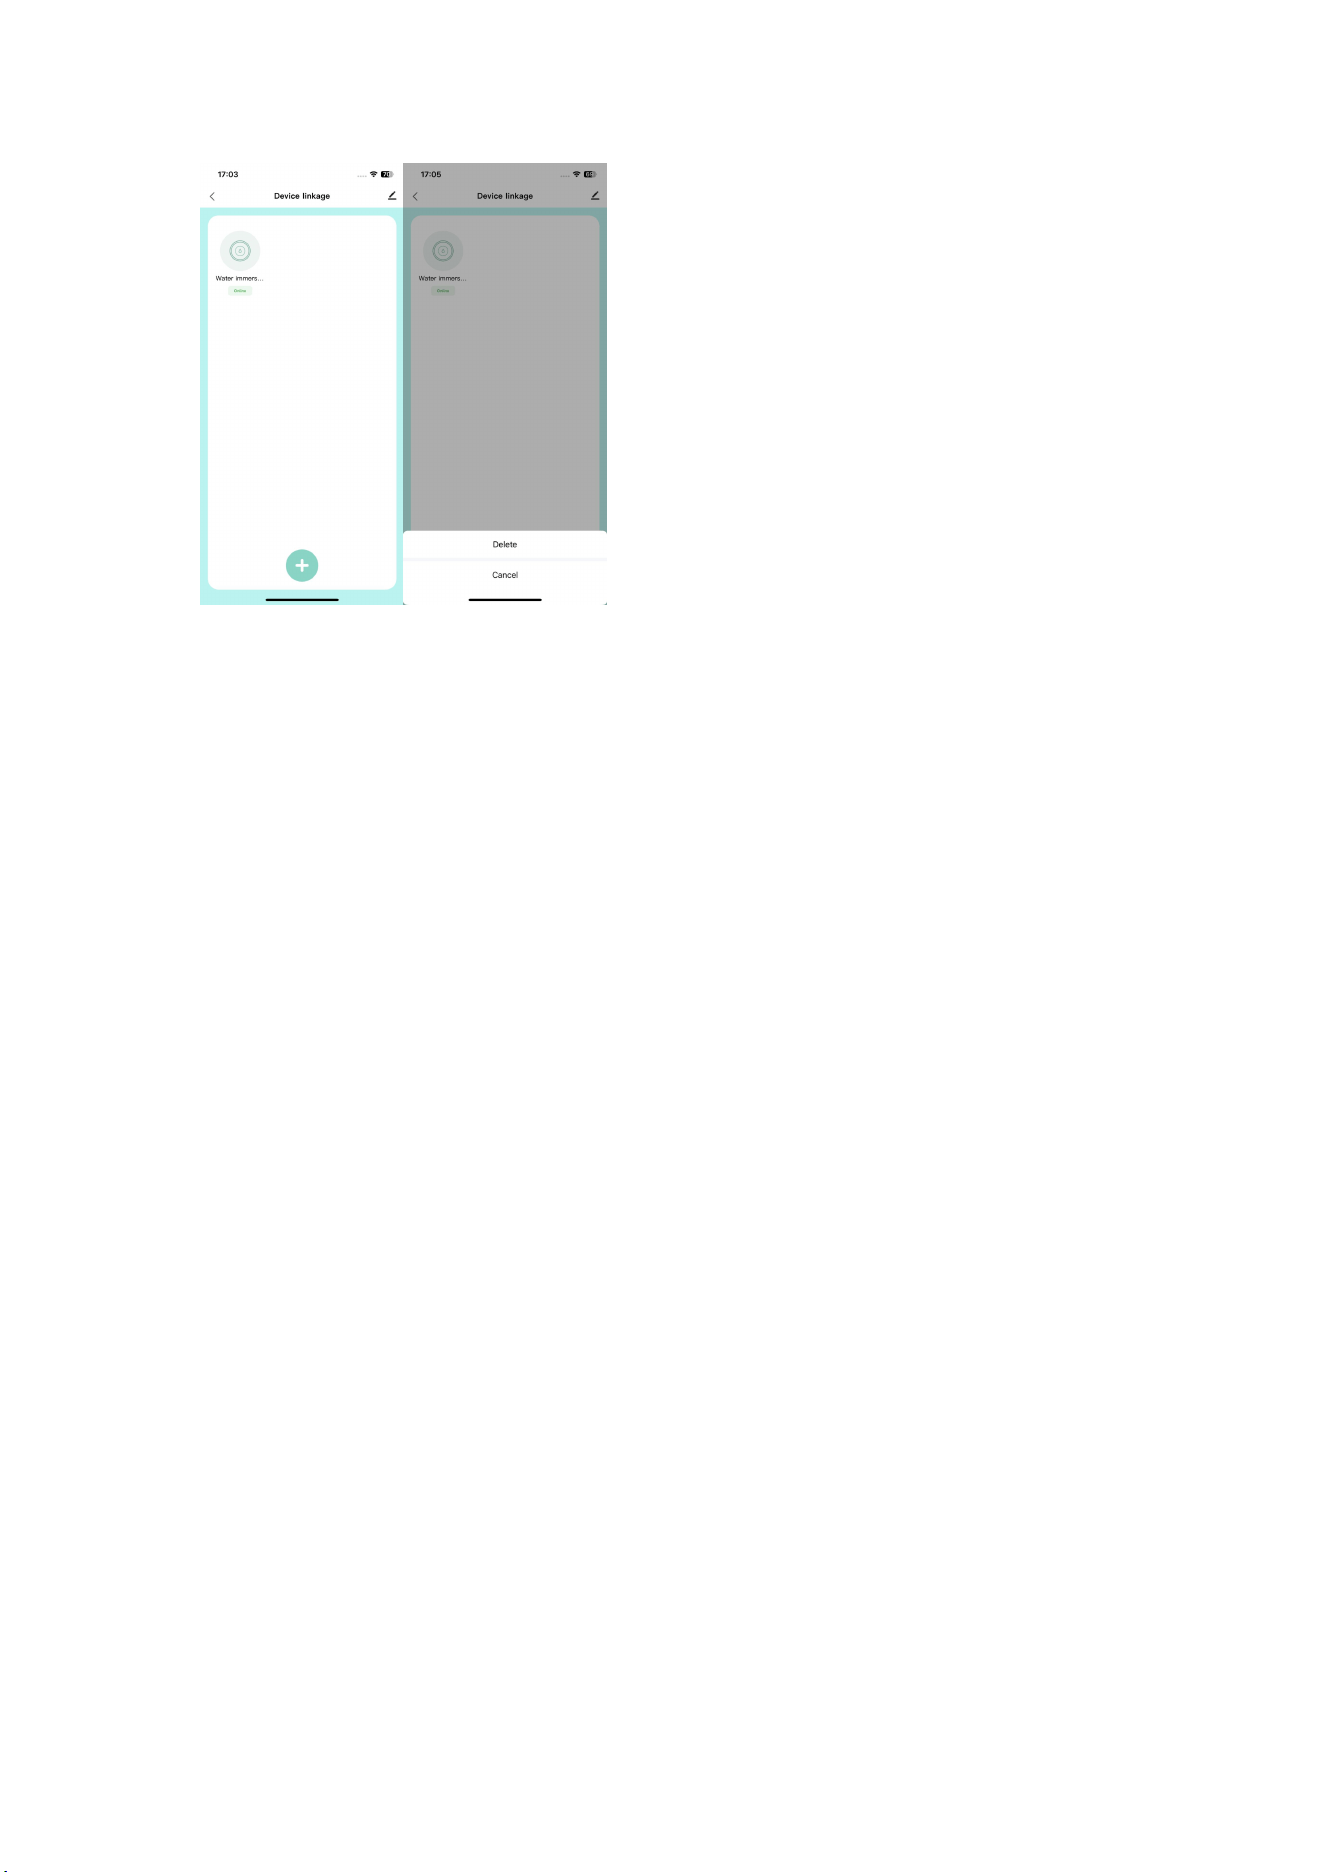
(4)
Remove the water immersion device (long press the water immersion
device icon)
FAQ
1、Can the sub-device water immersion sensor be used independently on the
network?
Answer: The water immersion sensor can only be added as a sub-device under the
sound and light alarm and cannot be networked independently.
2、Can the sound and light alarm main unit connect to multiple sub-devices
at the same time?
Answer: Yes, up to 15 water immersion sub-devices can be added simultaneously
through the APP.
3、What is the maximum effective connection distance between the sound
and light alarm main unit and the water immersion sensor?
Answer: The maximum trigger distance between the water immersion sensor and the
main unit is 300 meters. However, please note that the signal strength in actual
use may be affected by obstacles such as walls and furniture; to ensure optimal
connection performance, it is recommended to place the device in an area free
from obstructions.

FCC Statement
This device complies with part 15 of the FCC rules. Operation is subject to the following two
conditions: (1) this device may not cause harmful interference, and (2) this device must accept
any interference received, including interference that may cause undesired operation.
Changes or modifications not expressly approved by the party responsible for compliance could
void the user's authority to operate the equipment.
NOTE: This equipment has been tested and found to comply with the limits for a Class B digital
device, pursuant to part 15 of the FCC Rules. These limits are designed to provide reasonable
protection against harmful interference in a residential installation. This equipment generates
uses and can radiate radio frequency energy and, if not installed and used in accordance with the
instructions, may cause harmful interference to radio communications. However, there is no
guarantee that interference will not occur in a particular installation. If this equipment does
cause harmful interference to radio or television reception, which can be determined by
turning the equipment off and on, the user is encouraged to try to correct the interference by
one or more of the following measures:
• Reorient or relocate the receiving antenna.
• Increase the separation between the equipment and receiver.
• Connect the equipment into an outlet on a circuit different from that to which the receiver is
connected.
• Consult the dealer or an experienced radio/TV technician for help.
This equipment complies with FCC radiation exposure limits set forth for an uncontrolled
environment. This equipment should be installed and operated with minimum distance 20cm
between the radiator & your body.