User Manual
Water Leak Sensor
Replaceable Battery
F800004000171 V1.1
SWS0B
X-Sense Electronics Co., Ltd.
Email
:
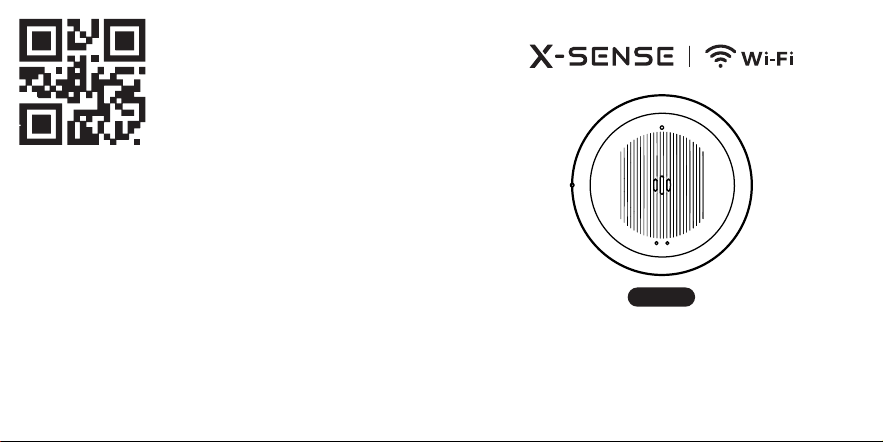
Scan the QR code to view the product model.

1 Introduction 01
2 Product Overview 02
3 Package Contents 03
4 Device Setup 03
5 Installing Your Device 05
6 Battery Replacement 10
7 Maintenance 11
8 Technical Specifications 12
9 Troubleshooting 14
10 Battery Warning 19
11 FCC Statement 21
12 Manufacturer and Service Information 23
01 02
English
This user manual contains important information about your water
leak sensor’s operation. To ensure proper use and trouble-free
operation, please read this manual carefully and store it in a safe place
for future reference.
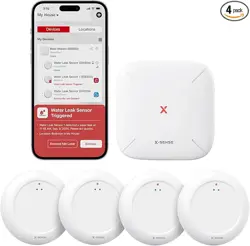
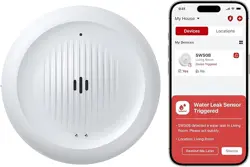
1 Introduction
This water leak sensor sounds an alarm as soon as it comes into
contact with water. Place it near common household water sources
like a dishwasher, water heater, or washing machine. With 2.4 GHz
Wi-Fi, it connects directly to the X-SENSE Home Security App.
Whenever the device detects a leak or low temperature, you’ll
instantly receive a push notification on your smartphone so you can
take action right away.
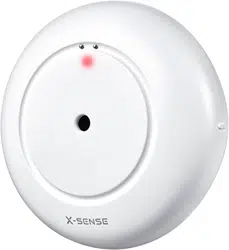
2 Product Overview
Water Leak Sensor CR123A Battery
(Pre-installed)
User Manual
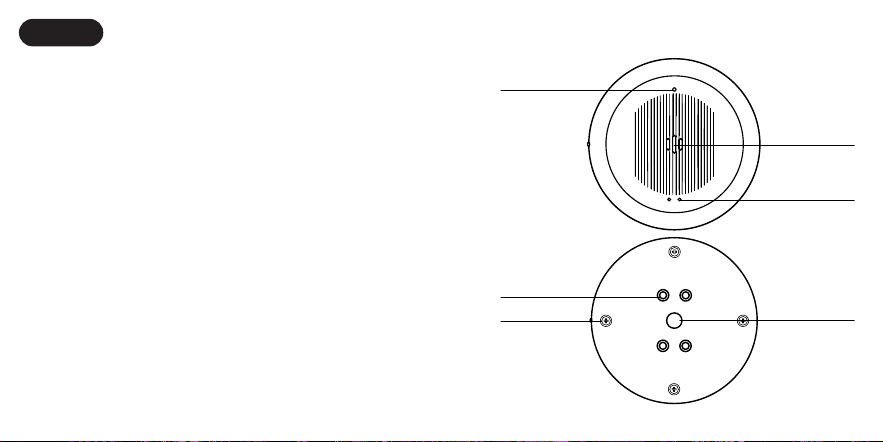
Buzzer
Download on the
Apple App Store
GET IT ON
Google Play
Sensor Probe
Sensor Probe
Test/Silence/
Pair Button
LED Indicator
Screw
03 04
3 Package Contents
Water Leak Sensor CR123A Battery
(Pre-installed)
User Manual
Buzzer
Download on the
Apple App Store
GET IT ON
Google Play
Sensor Probe
Sensor Probe
Test/Silence/
Pair Button
LED Indicator
Screw
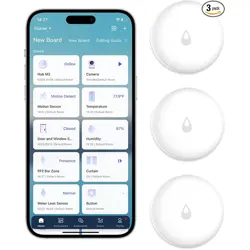
4 Device Setup
Download the X-SENSE Home Security App
Water Leak Sensor CR123A Battery
(Pre-installed)
User Manual
Buzzer
Download on the
Apple App Store
GET IT ON
Google Play
Sensor Probe
Sensor Probe
Test/Silence/
Pair Button
LED Indicator
Screw
To download the app, search for “X-SENSE Home Security” in the
Apple App Store or Google Play, or simply scan the QR code. Create an
account using a valid email address. If you already have an account,
make sure it is updated to the latest version.
NOTE: Make sure your smartphone supports iOS 11 and higher, or
Android 8.0 and higher.
Before connecting devices, make sure that:
1. You know your Wi-Fi network name and password.
2. You are connecting your device using a 2.4 GHz Wi-Fi network
(incompatible with 5 GHz Wi-Fi network).
3. Make sure the Bluetooth on your phone is turned on.
NOTE: When the device is configured via Wi-Fi, make sure your mobile
phone and devices are as close to the router as possible, which can
speed up device configuration.
Add a Water Leak Sensor to the Network
1. Tap “
㊉
” and select "Water Leak Sensors" in the product list. Select
"Wi-Fi Water Leak Sensor (Standalone, working without Base
Station)", then select “SWS0B”. Create a name for your device and
choose its location. Finally, tap “Next” to enter the next page.
2. Follow the prompts on the page by pressing and holding the Test/
Silence/Pair button more than 3 seconds until its LED indicator
flashes blue rapidly, indicating the device is waiting to connect to
the Wi-Fi.
3. Tap “Operation Confirmed”, then tap “Next”. The page will display
“Searching for nearby Bluetooth devices”.
4. Select a Wi-Fi network and enter the password. Tap "Next." Make
sure the Wi-Fi password you entered is correct.

05 06
5. Once connected successfully, the device will beep once and the
LED indicator will stop flashing blue. The “Device Added” page will
appear. Tap “Finish” to proceed to “Installation & Setup” and complete
the installation and signal test.
6. Then you will find the water leak sensor in your device list.
NOTE: If you fail to add the water leak sensor to the network within
120 seconds, the device will automatically exit the network
configuration. To re-enter the network configuration, you need to
repeat the above steps.
5 Installing Your Device
Installation Location
You can use the device near places where water leaks are likely to
occur such as near water pipes, basement sump pumps, dishwashers,
washing machines, toilets, water heaters, window wells, etc.
Installation Method
This sensor can simply be placed on a flat surface.
NOTES:
1. Do not place the device upright, otherwise no alarm will be
triggered.
2. Do not place the device on uneven surfaces as this may cause false
alarms.
Water Leak Sensor CR123A Battery
(Pre-installed)
User Manual
Buzzer
Download on the
Apple App Store
GET IT ON
Google Play
Sensor Probe
Sensor Probe
Test/Silence/
Pair Button
LED Indicator
Screw
Wi-Fi Signal Test
After completing network pairing, the app will suggest the optimal
installation location. Then, follow the app prompts to double press the
Test/Silence/Pair button on the water leak sensor. Then the LED will
flash green slowly, indicating it is entering the Wi-Fi signal test mode.
Make sure the device is placed in the intended installation location.
Then tap the Wi-Fi Signal Test button in the app to start the Wi-Fi
signal test. The device will automatically check the Wi-Fi signal:

07 08
1. Normal signal: The LED stops flashing green, the device enters
standby mode, and the app indicates that the status is normal. You
can continue with the installation.
2. Weak signal: The LED stops flashing green, the device enters
standby mode, and the app indicates that the Wi-Fi signal is weak at
this location and not suitable for installation. Try moving the device
to another location and retest in the app.
3. No signal or test failed: The LED stops flashing green, the device
enters standby mode, and the app indicates that test failed. Check
your Wi-Fi coverage or move the device to another location and
retest.
4. Test not completed or failed: Double-press the Test/Silence/Pair
button on the device to start the Wi-Fi signal test again.
5. Canceling the test: During testing, single-press the Test/Silence/
Pair button to exit the Wi-Fi signal test. The LED will stop flashing
green.
Water Leak Detection
When a water leak is detected, the device will sound 3 beeps every
1.6 seconds, paired with the LED flashing red 3 times. This alarm
pattern continues for 10 minutes. After 10 minutes, the alarm beeps
once every 60 seconds, while the LED keeps flashing red to indicate
the device is still alerting.
You can press the Test/Silence/Pair button on the device or the Silence
button in the app to stop the alarm sound and LED immediately. A
push notification will appear confirming the alarm has been muted.
If the device remains in water after muting, it will not sound another
alarm or send repeated notifications.
When the device status changes, such as when the water is cleared,
the alarm will stop, and you will receive a notification in the app that
the alert has ended.
Low Temperature Detection
When the ambient temperature drops below 39°F (4°C), the device
will sound 2 beeps every 1.6 seconds, paired with the LED flashing
red twice. This alarm pattern continues for 10 minutes. After
10 minutes, the alarm beeps once every 60 seconds, while the LED
keeps flashing red to indicate the device is still alerting.
You can press the Test/Silence/Pair button on the device or the Silence
button in the app to stop the alarm sound and LED immediately. A
push notification will appear confirming the alarm has been muted.
If the device remains at or below39°F (4°C) after muting, it will not
sound another alarm or send repeated notifications.
When the temperature rises to 43°F (6°C)or above, the low-
temperature alarm stops, and you will receive a notification in the app
that the alert has ended.
NOTE: If no action is taken when a water leak or low temperature is
detected, the device will keep sounding an alarm until the battery runs out.
09 10
Remind Me Later
When the device is triggered, the app will show a “Remind Me Later”
option on your phone. You can use this button to temporarily silence
the device for a set period (10 minutes, 30 minutes, 2 hours, 6 hours,
or 12 hours).
1. If the timer ends and the sensor still detects a water leak or the
temperature remains below 39°F (4°C), the device will send alerts
again.
2. If the water leak stops or the temperature rises above 43°F (6°C)
while the timer is running, you will also receive an app notification.
The “Remind Me Later” function can be disabled at any time. This
feature allows you to postpone alerts while you resolve water leaks or
low-temperature issues.
NOTES:
1. The Silence and “Remind Me Later” functions for water leak and
low-temperature alarms work independently and do not affect each
other.
2. You cannot cancel the “Remind Me Later” timer from the app. It will
automatically end when the set time expires or the alarm condition
is resolved.
Test Mode
Short press the Test/Silence/Pair button on the bottom of the device.
The alarm will beep 3 times with the LED flashing red 3 times, then
switch to rapid blue flashing. The LED will automatically stop flashing
after the test is completed. You will receive a push notification on your
smartphone, indicating that the device is functioning properly.
Low Battery Mode
When the battery is low, the LED indicator will flash red once every
60 seconds paired with one beep. Your app will warn you with a low
battery notification.
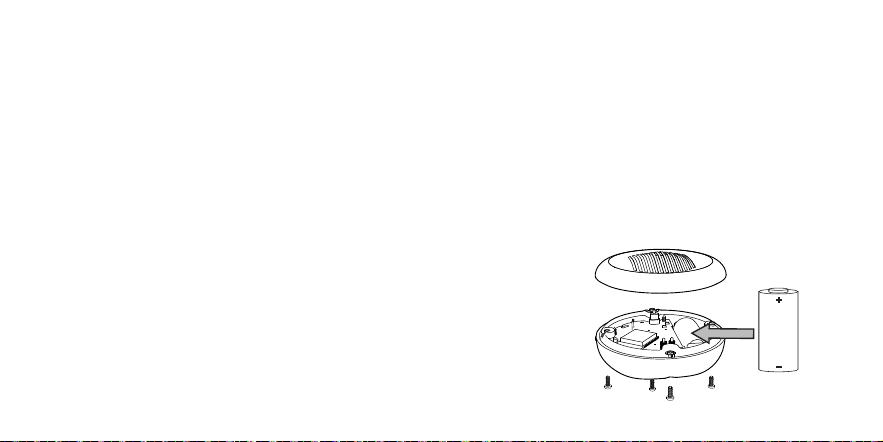
6 Battery Replacement
When the battery is low, the LED will flash red once every 60 seconds
paired with one beep to remind the user to replace the battery. You
will receive a low-battery notification on your phone via the app. To
replace the battery, remove all screws, take out the used battery, and
replace it with one new CR123A battery. Then, reinstall the screws and
test the device.
Water Leak Sensor CR123A Battery
(Pre-installed)
User Manual
Buzzer
Download on the
Apple App Store
GET IT ON
Google Play
Sensor Probe
Sensor Probe
Test/Silence/
Pair Button
LED Indicator
Screw

11 12
NOTE: After replacing the battery, you need to align the positioning
points of the upper and lower shells to close the cover and then screw
the device closed.
Water Leak Sensor CR123A Battery
(Pre-installed)
User Manual
Buzzer
Download on the
Apple App Store
GET IT ON
Google Play
Sensor Probe
Sensor Probe
Test/Silence/
Pair Button
LED Indicator
Screw
7 Maintenance
Please shake the device on your hand a few times after it has sounded
an alarm to remove any water that may have collected in the buzzer
opening. Clean the top and bottom contact probes with a dry cloth
and paper towel, then put the device back in its place. This will ensure
that the device consistently performs well.
WARNING
1. Keep the device operating
at a temperature between
32–122°F(0–50°C) and
humidity below 100% RH.
2. Do not disassemble the device
by force. Otherwise, the device
may become damaged.
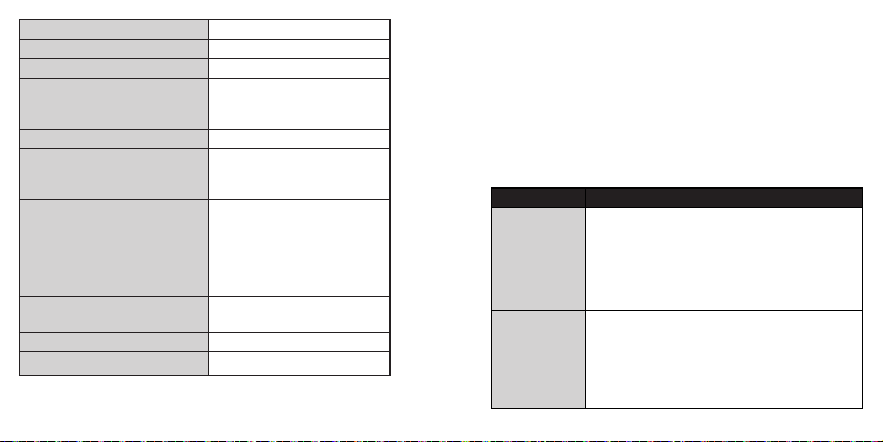
8 Technical Specifications
Product Name Water Leak Sensor
Model SWS0B
Power Supply
3 V (
⎓
) CR123A lithium battery
× 1 (replaceable)
Battery Life 2 years
Maximum Service Life 5 years
Sensor Type
Water sensor probe
Temperature sensor
Low Temperature Alarm Threshold ≤ 39°F (4°C)
13 14
Low Temperature Alarm Accuracy ±1.8°F (±1°C)
Operating Temperature 32–122°F (0–50°C)
Operating Relative Humidity ≤ 100% RH (non-condensing)
Storage and Transport
This apparatus should be stored
at 14-122°F (-10-50°C), 5%-95%
RH (non-condensing)
Waterproof Rating IP66
Band
2400-2483.5 MHz
(incompatible with 5 GHz Wi-Fi
network)
Number of Allowed Devices
One app account can create
up to 5 houses. Each house can
add 1 base station and 49 Wi-Fi
products. The Wi-Fi products can
include this product as well as
other X-Sense Wi-Fi products.
App
X-SENSE Home Security (both
Android and iOS supported)
Wi-Fi Transmission Range Within the router’s coverage area
Wireless Protocol
IEEE 802.11b/g/n
NOTES:
1. Battery life is calculated on the current ratings in the standby mode
with weekly testings. If its operation mode changes to an alarming
condition, the battery life will be decreased accordingly.
2. The water leak sensor functions between 32 and 122°F (0 and 50°C).
Prolonged exposure to temperatures outside of this range can
reduce battery life and affect accuracy. We do not recommend
operating the device outside of this range.
9 Troubleshooting
Problem Solution
The device does
not respond
when the
Test/Silence/
Pair button is
pressed.
Cause 1: The device is not activated.
Solution: Press and hold the Test/Silence/Pair
button for 3 seconds to activate the device.
Cause 2: The battery ran out.
Solution: Replace the battery.
The device does
not sound when
there is a water
leak.
Cause 1: The battery ran out.
Solution: Replace the battery.
Cause 2: The device is placed on an unlevel
surface.
Solution: Place the device on a level surface.

15 16
The
temperature
dropped, but
the device didn’t
sound a low
temperature
alarm right
away.
Cause 1: The device wasn’t in the cold for long
enough.
Solution: The device needs to stay in a low-
temperature environment for a while before the
alarm goes off. Depending on how cold it is and
the surroundings, it may take from a few minutes
to several tens of minutes to trigger.
Cause 2: The ambient temperature isn’t low
enough.
Solution: The device will only trigger a low
temperature alarm if the temperature stays at or
below 39°F (4°C) for a certain period.
A false alarm
occurs.
Cause 1: The device is triggered by water or metal
objects.
Possible reasons:
1. Touching a pair of top or bottom sensor probes
with your hand will cause an alarm (touching
just one sensor probe will not)
2. Some water spills, such as while washing hands,
can cause an alarm, especially when using the
device in a bathroom.
3. High humidity may cause a false alarm.
4. A metal object connecting the two probes will
cause an alarm.
Cause 2: The device triggered a low temperature
alarm, but the environment is not actually too cold.
Possible reasons:
1. The device is installed near doors, windows, or
air vents, where direct cold airflow causes the
temperature sensor to cool down rapidly.
2. The device is mounted on an exterior wall or
placed near cold water pipes or a refrigerator,
leading to false alarms due to a lower
surrounding temperature.
3. Sudden temperature changes (such as opening
a door or switching on/off an air conditioner
or heater) may cause a temporary drop in
temperature, triggering the alarm.
The alarm sound
is low.
Cause 1: Water entered the buzzer.
Solution: The device itself is waterproof, and water
that goes into the buzzer will not cause damage to
the product. Please take the device in your hand
and shake it a few times to remove the water from
the alarm opening until the alarm sound returns to
normal. Then, put the device back.
Cause 2: The battery level is low.
Solution: Replace the battery.

17 18
The water leak
sensor failed to
connect to the
network.
Cause 1: The Wi-Fi name and/or password entered
are wrong.
Solution: Enter the correct Wi-Fi name and
password.
Cause 2: The device is not connected to 2.4 GHz
Wi-Fi.
Solution: This device works with 2.4 GHz Wi-Fi (not
compatible with 5 GHz networks).
Cause 3: The phone's Bluetooth is not turned on.
Solution: Turn on the phone’s Bluetooth.
Cause 4: The water leak sensor is not entering
pairing mode.
Solution: Press and hold the device’s Test/Silence/
Pair button for more than 3 seconds, and the LED
will flash blue rapidly, indicating that the device
has entered Wi-Fi pairing mode.
The app push
notification is
delayed or there
are no push
alerts.
Cause 1: The battery ran out.
Solution: Replace the battery.
Cause 2: The app push notification permission is
disabled.
Solution: Turn on the push notification permission
on the phone.
Cause 3: The communication between the water
leak sensor and router is not stable or they are too
far apart.
Solution: Reduce the obstacles between the
water leak sensor and router, and ensure that the
water leak sensor is within the router’s coverage
area.
Cause 4: The network connection of the router
and the mobile phone is abnormal.
Solution: Make sure the network connection of
the router and the mobile phone is normal.

19 20
10 Battery Warning
WARNING
1. KEEP NEW OR OLD USED
BATTERIES OUT OF REACH OF
CHILDREN.
2. In the event of a battery
leaking, do not allow the liquid
to come into contact with the
skin or eyes. If contact has
been made, wash the aected
area with copious amounts of
water and seek medical advice
immediately.
3. NEVER charge a battery unless
it is a rechargeable battery.
4. Do not mix alkaline, standard
(carbon-zinc) or rechargeable
(Ni-Cd; Ni-MH) batteries.
5. Dierent types of batteries or
new and used old batteries
are not to be mixed. Do not
mix batteries of dierent
manufacturers, capacities, or
sizes.
6. Batteries must be inserted
with the correct polarity.
Replacement of a battery with

21 22
an incorrect type can defeat
the safeguard. There will be
a risk of re or explosion if
a battery is replaced by an
incorrect type.
7. Test the water leak sensor for
correct operation using the test
facility, whenever the battery is
replaced.
11 FCC Statement
1. This device complies with part 15 of the FCC Rules. Operation is
subject to the following two conditions:
(1) This device may not cause harmful interference.
(2) This device must accept any interference received, including
interference that may cause undesired operation.
2. Note: This equipment has been tested and found to comply with
the limits for a Class B digital device. These limits are designed to
provide reasonable protection against harmful interference in a
residential installation. This equipment generates, uses and can
radiate radio frequency energy and, if not installed and used in
accordance with the instructions, may cause harmful interference
to radio communications. However, there is no guarantee that
interference will not occur in a particular installation. If this
equipment does cause harmful interference to radio or television
reception, which can be determined by turning the equipment off
and on, the user is encouraged to try to correct the interference by
one or more of the following measures:
—Reorient or relocate the receiving antenna.
—Increase the separation between the equipment and receiver.
—Connect the equipment to an outlet on a circuit different from that
to which the receiver is connected.
—Consult the dealer or an experienced radio/TV technician for help.
3. Changes or modifications not expressly approved by the party
responsible for compliance could void your authority to operate the
equipment.
4. The distance between user and products should be no less than
20 cm.
Environmental Protection
The crossed-out wheeled-bin symbol on your product, literature, or
packaging reminds you that all electrical and electronic products,
batteries, or accumulators must be taken to designated collection

23
locations at the end of their working life. Do not dispose of these
products as unsorted municipal waste. Dispose of them according to
the laws and rules in your area.
12 Manufacturer and Service
Information
X-Sense Electronics Co., Ltd.
Address: Room 402, Building 4, No. 9, Jinshagang 1st Road, Shixia
Village, Dalang Town, Dongguan City, 523750 Guangdong, P.R. China
Email: [email protected]
Website: www.x-sense.com