©2022 Hangzhou Hikvision Digital Technology Co., Ltd. All rights reserved.
About this Manual
The Manual includes instruc�ons for using and managing the Product. Pictures, charts, images and all other informa�on hereina�er are for descrip�on and explana�on only. The informa�on contained in the Manual is subject to change,
without no�ce, due to rmware updates or other reasons. Please nd the latest version of this Manual at the Hikvision website (h�ps://www.hikvision.com/).
Please use this Manual with the guidance and assistance of professionals trained in suppor�ng the Product.
and other Hikvision's trademarks and logos are the proper�es of Hikvision in various jurisdic�ons. Other trademarks and logos men�oned are the proper�es of their respec�ve owners.
Disclaimer
TO THE MAXIMUM EXTENT PERMITTED BY APPLICABLE LAW, THIS MANUAL AND THE PRODUCT DESCRIBED, WITH ITS HARDWARE, SOFTWARE AND FIRMWARE, ARE PROVIDED “AS IS” AND “WITH ALL FAULTS AND ERRORS”. HIKVISION MAKES
NO WARRANTIES, EXPRESS OR IMPLIED, INCLUDING WITHOUT LIMITATION, MERCHANTABILITY, SATISFACTORY QUALITY, OR FITNESS FOR A PARTICULAR PURPOSE. THE USE OF THE PRODUCT BY YOU IS AT YOUR OWN RISK. IN NO EVENT WILL
HIKVISION BE LIABLE TO YOU FOR ANY SPECIAL, CONSEQUENTIAL, INCIDENTAL, OR INDIRECT DAMAGES, INCLUDING, AMONG OTHERS, DAMAGES FOR LOSS OF BUSINESS PROFITS, BUSINESS INTERRUPTION, OR LOSS OF DATA, CORRUPTION OF
SYSTEMS, OR LOSS OF DOCUMENTATION, WHETHER BASED ON BREACH OF CONTRACT, TORT (INCLUDING NEGLIGENCE), PRODUCT LIABILITY, OR OTHERWISE, IN CONNECTION WITH THE USE OF THE PRODUCT, EVEN IF HIKVISION HAS BEEN
ADVISED OF THE POSSIBILITY OF SUCH DAMAGES OR LOSS.
YOU ACKNOWLEDGE THAT THE NATURE OF INTERNET PROVIDES FOR INHERENT SECURITY RISKS, AND HIKVISION SHALL NOT TAKE ANY RESPONSIBILITIES FOR ABNORMAL OPERATION, PRIVACY LEAKAGE OR OTHER DAMAGES RESULTING FROM
CYBER-ATTACK, HACKER ATTACK, VIRUS INSPECTION, OR OTHER INTERNET SECURITY RISKS; HOWEVER, HIKVISION WILL PROVIDE TIMELY TECHNICAL SUPPORT IF REQUIRED.
YOU AGREE TO USE THIS PRODUCT IN COMPLIANCE WITH ALL APPLICABLE LAWS, AND YOU ARE SOLELY RESPONSIBLE FOR ENSURING THAT YOUR USE CONFORMS TO THE APPLICABLE LAW. ESPECIALLY, YOU ARE RESPONSIBLE, FOR USING THIS
PRODUCT IN A MANNER THAT DOES NOT INFRINGE ON THE RIGHTS OF THIRD PARTIES, INCLUDING WITHOUT LIMITATION, RIGHTS OF PUBLICITY, INTELLECTUAL PROPERTY RIGHTS, OR DATA PROTECTION AND OTHER PRIVACY RIGHTS. YOU
SHALL NOT USE THIS PRODUCT FOR ANY PROHIBITED END-USES, INCLUDING THE DEVELOPMENT OR PRODUCTION OF WEAPONS OF MASS DESTRUCTION, THE DEVELOPMENT OR PRODUCTION OF CHEMICAL OR BIOLOGICAL WEAPONS, ANY
ACTIVITIES IN THE CONTEXT RELATED TO ANY NUCLEAR EXPLOSIVE OR UNSAFE NUCLEAR FUEL-CYCLE, OR IN SUPPORT OF HUMAN RIGHTS ABUSES.
IN THE EVENT OF ANY CONFLICTS BETWEEN THIS MANUAL AND THE APPLICABLE LAW, THE LATER PREVAILS.
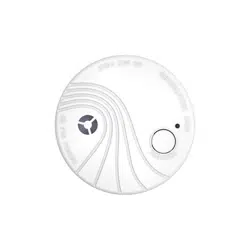
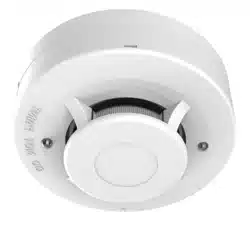
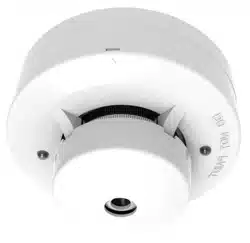
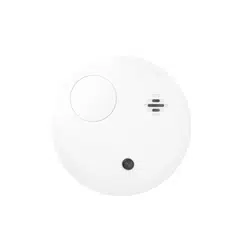
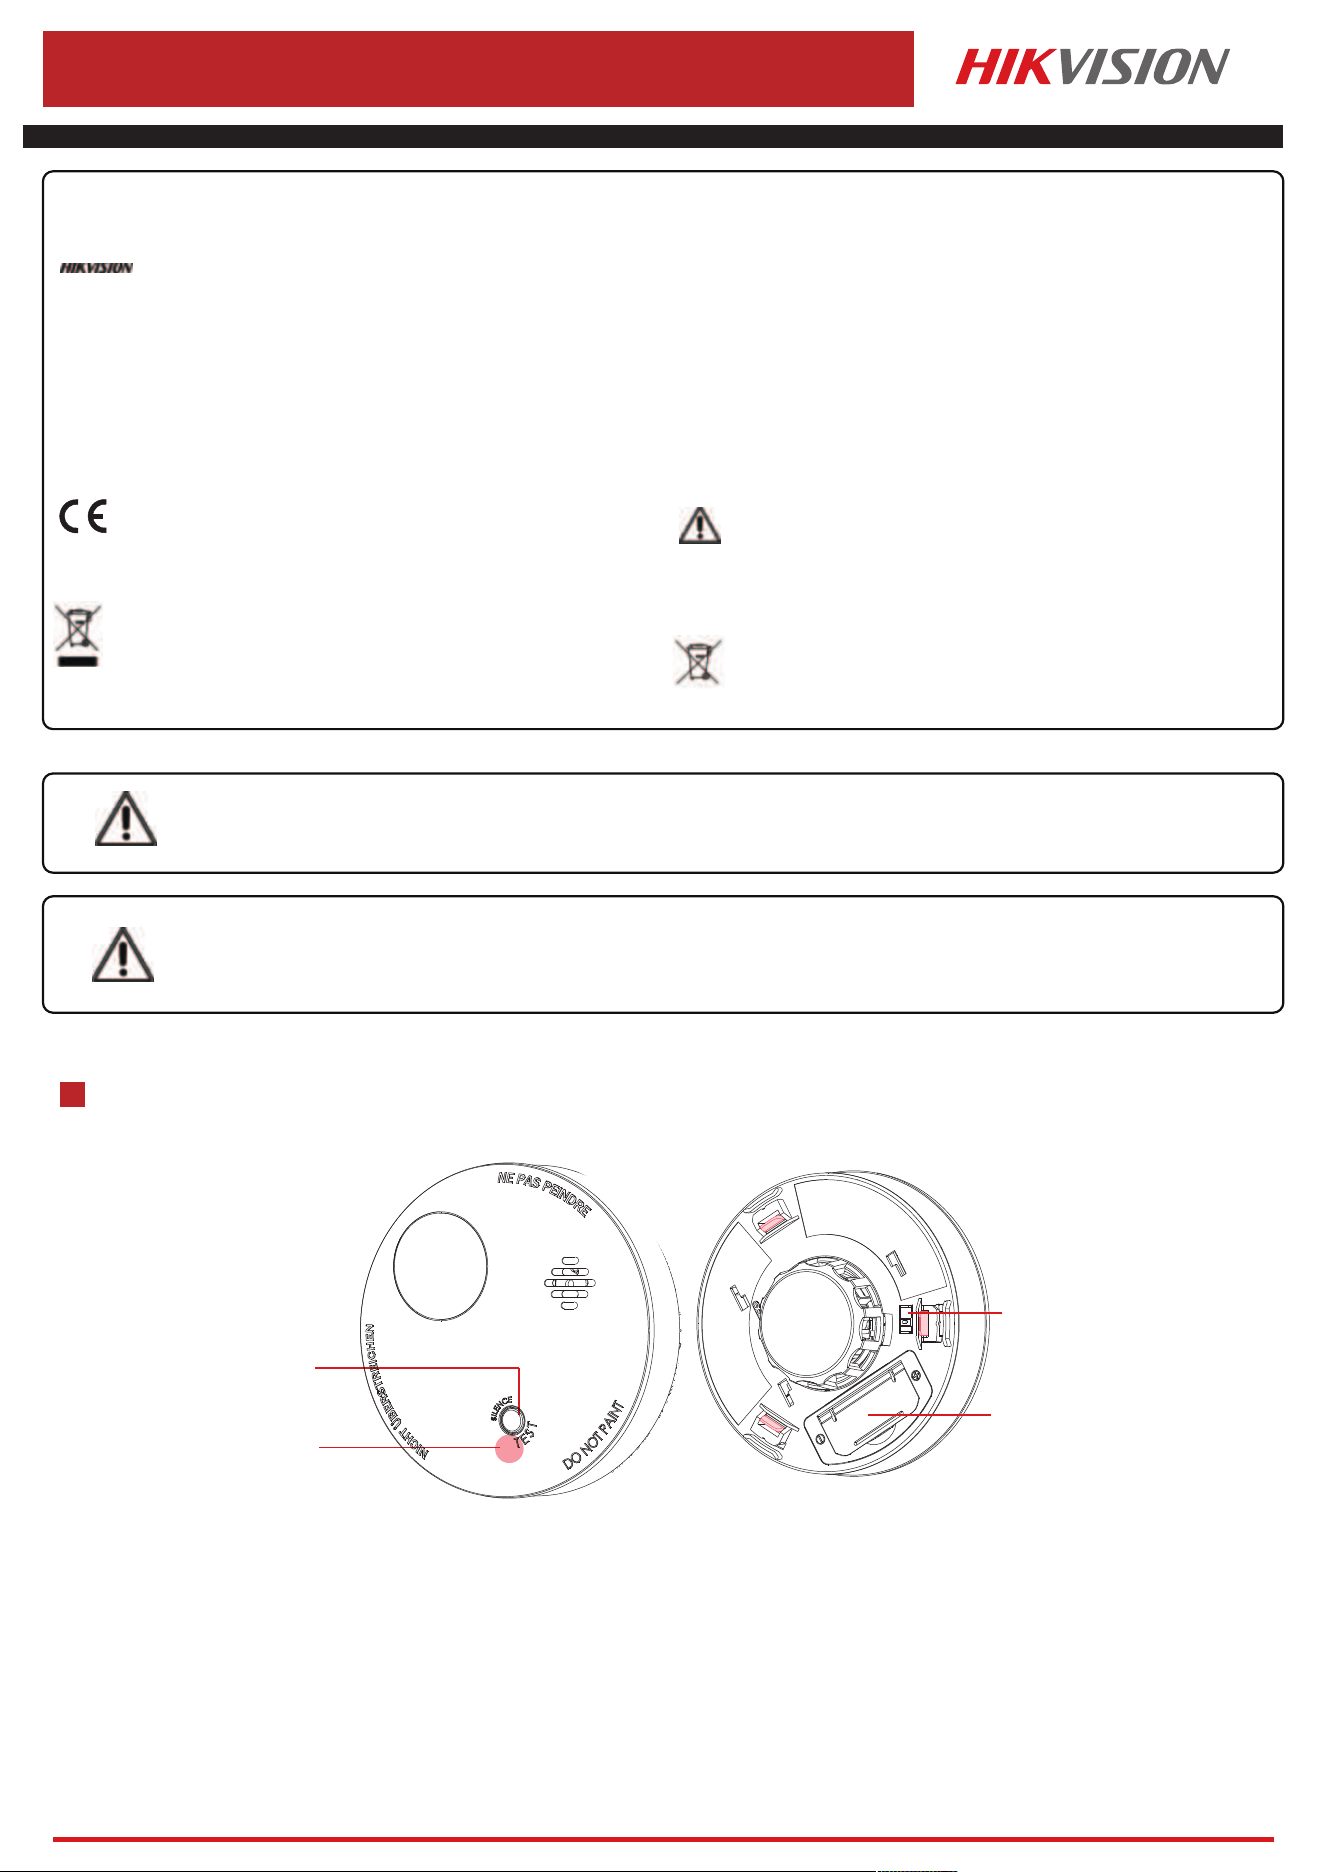
Appearance
1
1
Hangzhou Hikvision Digital Technology CO.,Ltd. No.555 Qianmo Road, Binjiang District, Hangzhou 310052, China
Wireless Smoke Detector
DS-PDSMK-E-WE/WB
1. Do not ingest ba�ery, Chemical Burn Hazard
2. Keep new and used ba�eries away from the children.
3. If the ba�ery compartment does not close securetyly, stop using the product and keep it away from children.
4. This product contains a coin / bu�on cell ba�ery. If the coin / bu�on cell ba�ery is swallowed, it can cause severe internal burns in just 2 hours and lead to death.
5. If you think ba�eries might have been swallowed or placed inside any part of the body, seek immediate medical a�en�on.
Warning
Cau�on
1. Risk of re or explosion if the ba�ery is replaced by an incorrect type.
2. Improper replacement of the ba�ery with an incorrect type may defeat a safeguard (for example, in the case of some lithium ba�ery types).
3. Do not dispose of the ba�ery into re or a hot oven, or mechanically crush or cut the ba�ery, which may result in an explosion.
4. Do not leave the ba�ery in an extremely high temperature surrounding environment, which may result in an explosion or the leakage of ammable liquid or gas.
5. Do not subject the ba�ery to extremely low air pressure, which may result in an explosion or the leakage of ammable liquid or gas.
6. Dispose of used ba�eries according to the instruc�ons
Ba�ery + - Mark
+ iden�es the posi�ve terminal(s) of equipment which is used with, or generates direct current.
- iden�es the nega�ve terminal(s) of equipment which is used with, or generates direct current.
This product and - if applicable - the supplied accessories too are
marked with "CE" and comply therefore with the applicable harmonized
European standards listed under the EMC Direc�ve 2014/30/EU, RE
Direc�ve 2014/53/EU, the RoHS Direc�ve 2011/65/EU.
replacement of a ba�ery with an incorrect type that can defeat a
safeguard (for example, in the case of some lithium ba�ery types);
– disposal of a ba�ery into re or a hot oven, or mechanically crushing or
cu�ng of a ba�ery, that can result in an explosion;
– leaving a ba�ery in an extremely high temperature surrounding
environment that can
result in an explosion or the leakage of ammable liquid or gas; and
– a ba�ery subjected to extremely low air pressure that may result in an
explosion or the leakage of ammable liquid or gas
2012/19/EU (WEEE direc�ve): Products marked with this symbol
cannot be disposed of as unsorted municipal waste in the European
Union. For proper recycling, return this product to your local supplier
upon the purchase of equivalent new equipment, or dispose of it at
designated collec�on points. For more informa�on see:
www.recyclethis.info
2006/66/EC (ba�ery direc�ve): This product contains a ba�ery that cannot
be disposed of as unsorted municipal waste in the European Union. See the
product documenta�on for specic ba�ery informa�on. The ba�ery is
marked with this symbol, which may include le�ering to indicate cadmium
(Cd), lead (Pb), or mercury (Hg). For proper recycling, return the ba�ery to
your supplier or to a designated collec�on point. For more informa�on
see:www.recyclethis.info
Test/Silence Bu�on
Power Switch
Ba�ery Holder
Alarm/Test/Signal Indicator
2
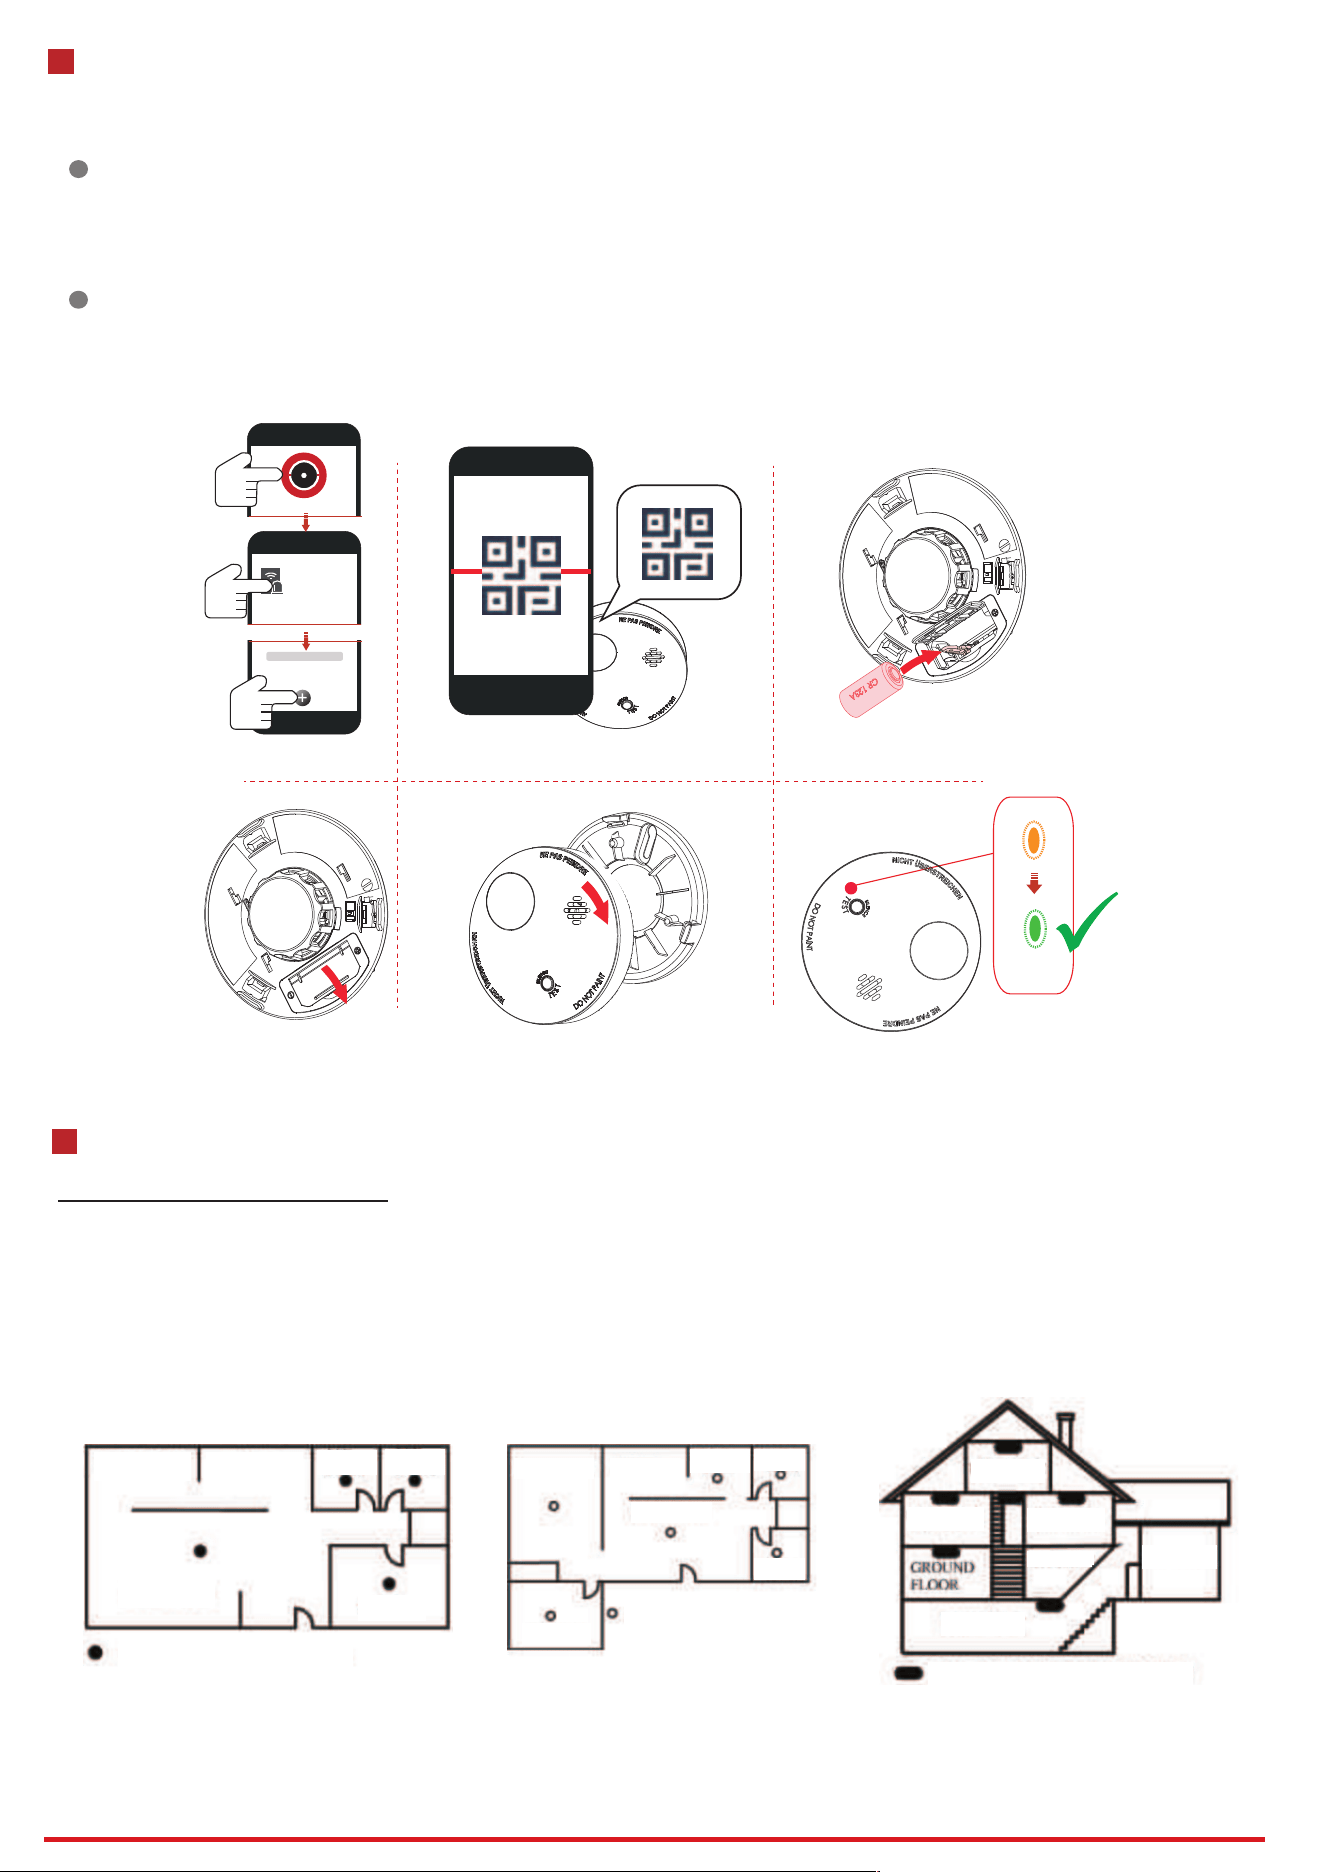
Enrollment
1
Enroll the Peripheral Locally
2
Enroll the Peripheral with QR and serial No.
1. Download and install the App from the APP Store.
2. Power on the security control panel.
3. Log in the APP and tap the icon "+" . Scan the QR code or input the control panel serial No. to add the control panel.
1. In the APP, tap the "Enrollment Mode" bu�on on the control panel page to make the control
panel enter the enrollment status.
2. Remove the rear panel, install the battery, and turn clockwise to install the front panel back.
3. Power on the peripheral, and it will be automa�cally enrolled to the control panel.
1. In the APP, tap the icon "+"and scan the QR code or serial No. on the peripheral.
2. Remove the rear panel, install the battery, and turn clockwise to install the front panel back.
3. Power on the peripheral, and it will be automa�cally enrolled to the control panel.
2
Hangzhou Hikvision Digital Technology CO.,Ltd. No.555 Qianmo Road, Binjiang District, Hangzhou 310052, China
xxxx
Device
3
Installa�on Locations
Locations To Install Detectors
Smoke detectors should be installed in accordance with the NFPA Standard 72 (National Fire Protection Association, Battery march Park,
Quincy, MA 02169). For complete coverage in residential units, smoke detectors should be installed in all rooms, halls, storage areas,
basements, and attics in each family living unit. Minimum coverage is one detector on each floor and one in each sleeping area.
• Install one separate smoke detector in every bedroom and one smoke detector in the floor as a minimum protection. Install a separate
smoke detector in each separate room and exit way except kitchen, as shown in Figure 1 and Figure 2.
• Install a smoke detector on every floor of a multi-floor home or apartment, as shown in Figure 3.
• Install a minimum of two detectors in any household.
• Install a smoke detector inside every bedroom.
• Install smoke detectors at both ends of a bedroom hallway if the hallway is more than 40 feet (12 meters) long.
• Install basement smoke detector at the bottom of the basement stairwell.
• Install second-floor smoke detectors at the top of the first-to-second floor stairwell.
Bedroom Bedroom
Bedroom
Figure 1 One separate smoke detector in every
bedroom and one smoke detector in the floor for
minimum security.
Figure 2 One separate smoke detector in every
room, except kitchen for more security.
Figure 3 Location for placing smoke detector for a
multi-floor residence
Living Room
Detector for minimum security
Detector for minimum security
Detector for more security
Dining Room Kitchen
BedroomBedroom
Bedroom
Bedroom
Family room
Living room
Kitchen
Bedroom
Garage
Bedroom
Bedroom
Basement
Kitchen
7 Times

3
Hangzhou Hikvision Digital Technology CO.,Ltd. No.555 Qianmo Road, Binjiang District, Hangzhou 310052, China
• Install additional smoke detectors in your living room, dining room, family room, attic, utility and storage rooms.
• Install smoke detectors as close to the center of the ceiling as possible. If this is not practical, put the detector on the ceiling, no closer than 20
inches (50 cm) from any wall or corner, as shown in Figure 4.
• If ceiling mounting is not possible and wall mounting is permitted by your local and state codes, put wall-mounted detectors between 4 and 6 inches
(10 ~ 15 cm) from the ceiling, also see Figure 4.
• If some of your rooms have sloped, peaked, or gabled ceilings. The distance between the peak and the mounting point of the smoke detector on
peaked ceilings (>20°) is minimum 0.5 m to maximum 1 m measured along the peaked ceiling as shown in Figure 5.
Figure 4 Recommended best and acceptable
locations to mount smoke detectors
Figure 5 Recommended location to mount smoke
detectors in rooms with sloped, gabled, or peaked ceiling
Figure 6 Recommended smoke detectors locations to
avoid air streams with combustion particles
Locations Not To Install Detectors
Nuisance alarms take place when smoke detectors are installed where they will not work properly. To avoid nuisance alarms, do not install smoke
detectors in the following situations:
• Combustion particles are the by-products of something that is burning. Thus, in or near areas where combustion particles are present you do not
install the smoke detectors to avoid nuisance alarms, such as kitchens with few windows or poor ventilation, garages where there may be vehicle
exhaust, near furnaces, hot water heaters, and space heaters.
• Do not install smoke detectors less than 20 feet (6 meters) away from places where combustion particles are normally present, like kitchens. If a 20-
foot distance is not possible, e.g. in a mobile home, try to install the detector as far away from the combustion particles as possible, preferably on
the wall. To prevent nuisance alarm detectors, provide good ventilation in such places.
• When air streams passing by kitchens, the way how an smoke detector can sense combustion particles in normal air-flow paths is graphically shown
in Figure 6, which indicates the correct and incorrect smoke detector locations concerning this problem.
• In damp or very humid areas, or near bathrooms with showers. Moisture in humid air can enter the sensing chamber, then turns into droplets upon
cooling, which can cause nuisance alarms. Install smokedetectors at least 10 feet (3 meters) away from bathrooms.
• In very dusty or dirty areas, dirt and dust can build up on the detector’s sensing chamber, to make it overly sensitive. Additionally, dust or dirt can
block openings to the sensing chamber and keep the detector from sensing smoke.
• Near fresh air vents or very drafty areas like air conditioners, heaters or fans, fresh air vents and drafts can drive smoke away from smoke detectors.
• In insect-infested areas. If insects enter an alarm’s sensing chamber, they may cause a nuisance alarm. Where bugs are a problem, get rid of them
before putting up an alarm.
• Near fluorescent lights, electrical “noise” from fluorescent lights may cause nuisance alarms. Install smoke detectors at least 5 feet (1.5 meters) from
such lights.
WARNING: Never remove battery from Smoke detector to stop a nuisance alarm. Open a window or fan the air around the Smoke detector to get rid of
the smoke. The alarm will turn itself off when the smoke is gone. If nuisance alarms persist, attempt to clean the Smoke detector as described in this
User’s Manual.
WARNING: Do not stand close to the smoke detector when the alarm is sounding. The alarm is loud in order to wake you in an emergency. Too much
exposure to the horn at close range may be harmful to your hearing.
4
Hangzhou Hikvision Digital Technology CO.,Ltd. No.555 Qianmo Road, Binjiang District, Hangzhou 310052, China
1. Check Signal Strength
Enter the signal checking mode by opera�ng on the control panel.
Strong Signal - Good for installa�on
Medium Signal - Ok for installa�on
Weak Signal - Not proper for installa�on
Lost Signal - Not proper for installa�on
4
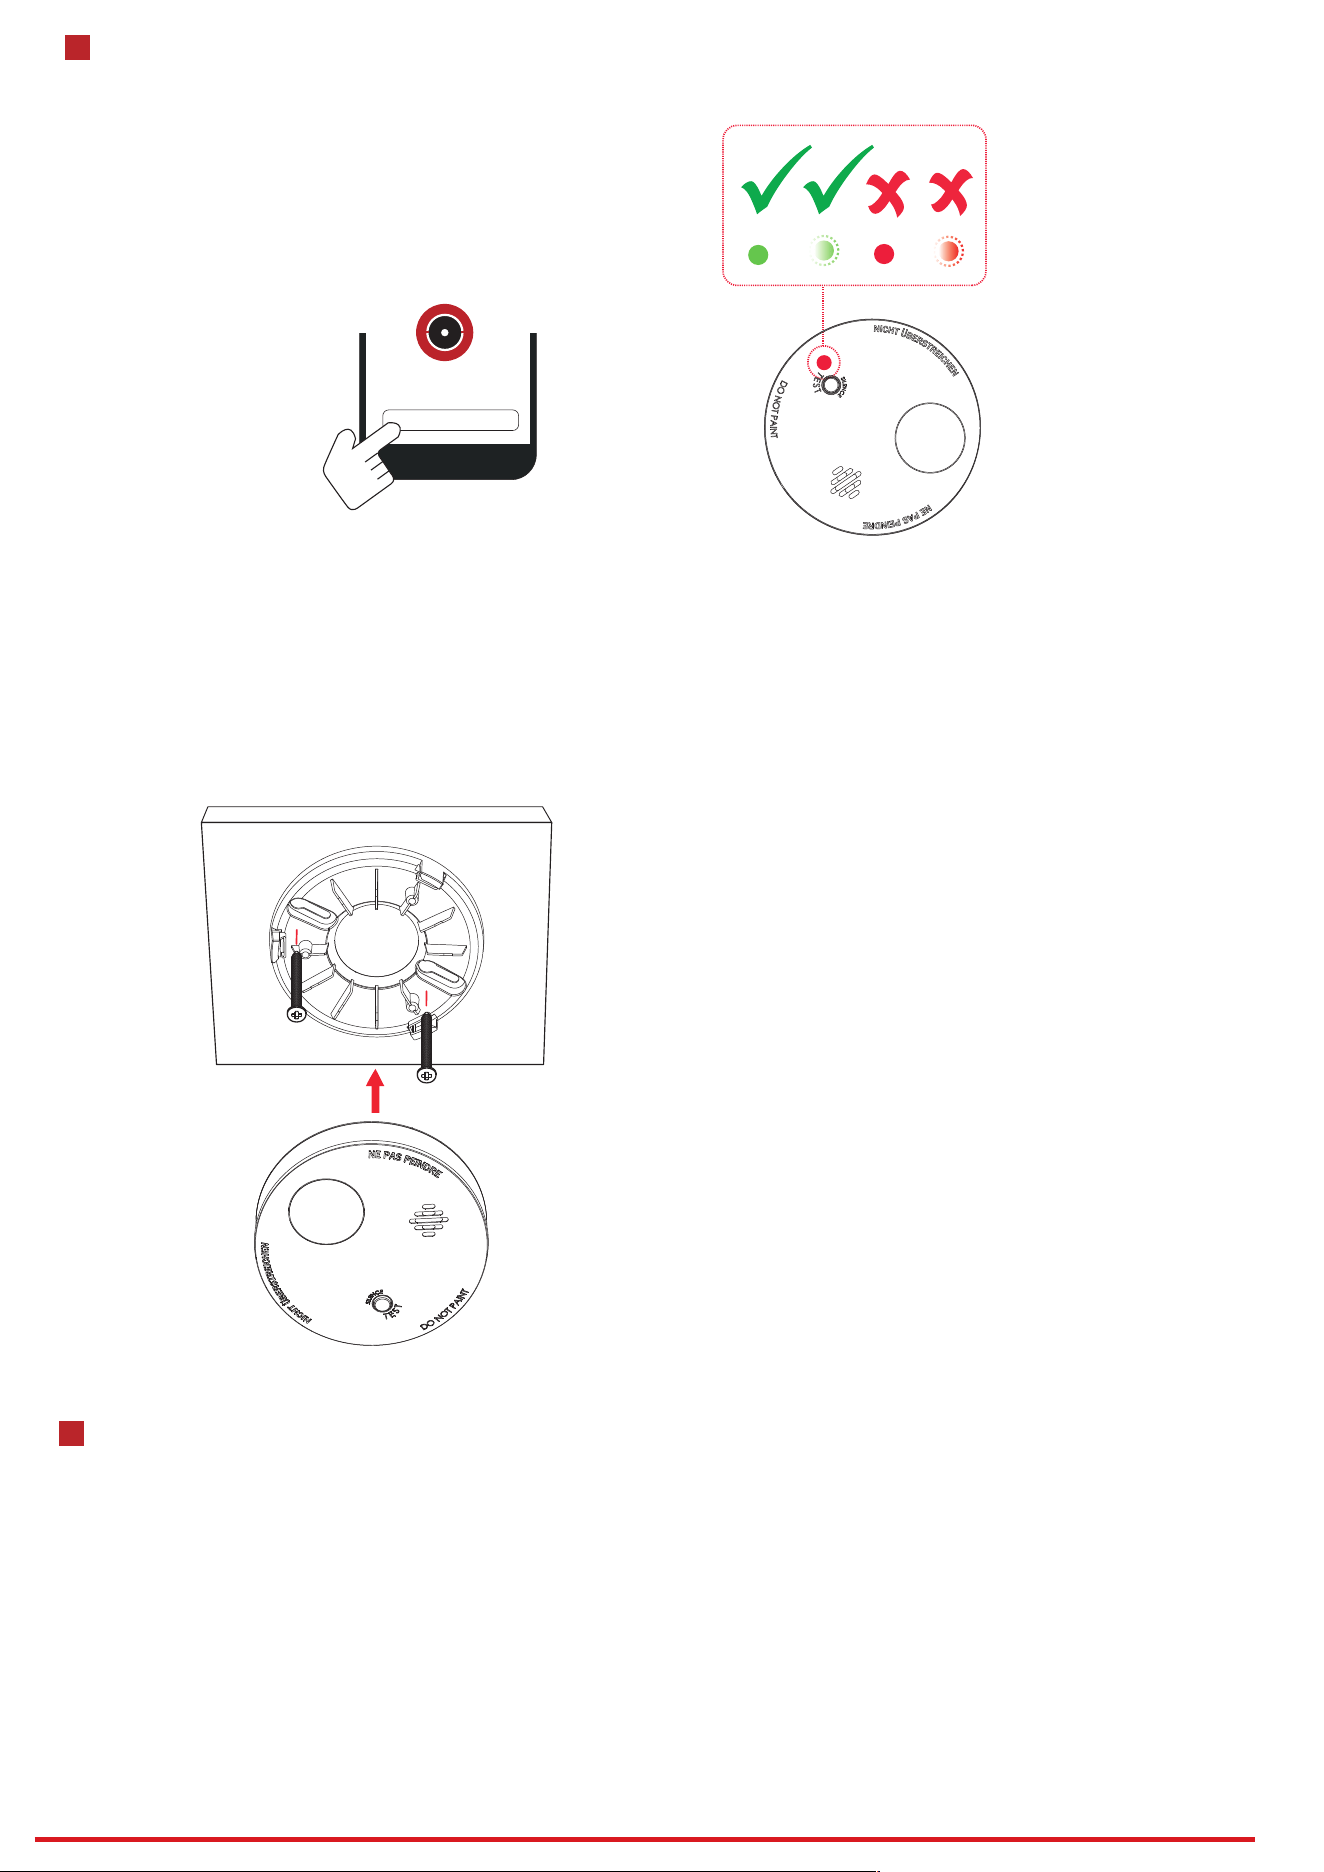
Installa�on
Signal Strength Test
2. Install the Detector.
Secure the moun�ng plate on the wall with supplied screws.
Using the two screws and plastic wall plugs (all supplied), attach the bracket to the wall.
Line up the slot of the bracket and the smoke detector. Push the smoke detector onto the mounting bracket and turn it clockwise to fix it into place. Pull
onward on the smoke detector to make sure it is securely attached to the mounting bracket.
CAUTION: This smoke detector comes with cover latches that
will prevent the smoke detector cover from closing if battery is
not installed. This tells you that the smoke detector will not
work until a new battery is properly installed.
NOTE: Alarm horn will beep once with Green LED flashing 1
times after the detector is installed with battery and mounted
with bracket 2 seconds. This means the smoke detector is
working normally and also indicates that the battery is
positioned properly. Close cover, and then press the test
button. The horn should sound a loud, pulsating alarm. This
means the unit is working properly.
5
Features
STANDBY MODE
Green LED flashing once 48 seconds means that smoke detector in Standby mode. When pressing the test button of smoke detector in standby mode,
Red LED flashing once a second and temporal three tone, it means the smoke detector can be normally operated.
ALARM MODE
Smoke Alarm:
Red LED flashing 3 times and horn emit 3 tones every 4 second.
SILENCE FEATURE
The silence features can temporarily mute an alarm for up to 8 minutes. To use this feature, press test/silence button of smoke detector when it alarms.
However, if the temperature is still at alarming level after 8 minutes of silence, the unit will re-alarm immediately.
HUSH FEATURE
The hush features can temporarily mute a warning of malfunction for up to 1 hour. To use this feature, when smoke detector occurs warning
(malfunction), press test button can be mute 1 hour.
In hush warning press test button, the smoke detector back audible warning.

7
5
Hangzhou Hikvision Digital Technology CO.,Ltd. No.555 Qianmo Road, Binjiang District, Hangzhou 310052, China
Set Up with App
You can view the device status including temperature, signal intensity, ba�ery level, lid, etc.,on the device page.
Tap the bu�on to enter the se�ngs page.
6
Test
1 S
……
……
Test the smoke detector weekly by pressing firmly on the test
button with your finger for around 1 seconds until the horn
sounds, the sound pattern is 3 tone, pause, and then 3 tone with
red LED flashing continuously and rapidly. If the smoke detector
“beeps” with yellow LED flashing in 48 seconds, it indicates the
smoke detector is not working properly, it requires to be repaired
or serviced.
WARNING: Never use an open flame of any kind to test your
smoke detector. You may set fire to damage the alarm, as well as
your home. The built-in test button accurately tests all functions
as required by Underwriters’ Laboratories. They are the only
correct ways to test the unit.
WARNING: When you are not testing the unit and the alarm horn
sounds, this means the smoke detector has sensed high
temperature. Be sure that the alarm horn is a warning of a
possible serious situation, which requires your immediate
attention.
The alarm could be caused by a nuisance situation. Cooking
smoke or a dusty furnace, sometimes called “friendly fires” can
cause the alarm to sound. If this happens, open a window or fan
the air to remove the smoke or dust. The alarm will turn off as
soon as the air is completely clear.
NOTE: Do not disconnect the power or remove the battery from
the smoke detector. This will remove your protection from fires.
MALFUNCTION (ERROR) SIGNAL
If you hear “beep” with yellow LED flashing once 48 seconds, it indicates that the detector doesn’t work properly, please have it repaired or serviced.
“Beep” 3 times with yellow LED flashing 1 times means that smoke trouble.
“Beep” 1 times with yellow LED flashing 1 times means that detector battery low voltage.
CLEAN ME AND LOW SENSITIVITY SIGNAL
In the case of Clean me and Low sensitive signals, please clean smoke chamber, if signal still, please have it repaired or serviced.
“Beep” 2 times with yellow LED flashing 2 times means that “Clean me”.
“Beep” 2 times with yellow LED flashing 1 times means that “Low sensitivity”.
LOW BATTERY WARNING SIGNAL
If the smoke detector horn begins to beep once every 48 seconds with yellow LED flashing, this signal means that the smoke detector’s battery is weak.
8
Opera�on Cau�on and Device Maintenance
- All the electronic opera�on should be strictly compliance with the electrical safety regula�ons, re preven�on regula�ons and other related
regula�ons in your local region.
- Do not drop the device or subject it to physical shock, and do not expose it to high electromagne�sm radia�on. Avoid the equipment
installa�on on vibra�ons surface or places subject to shock (ignorance can cause equipment damage).
- Please make sure that the power has been disconnected before you wire, install or dismantle the device.
- If smoke, odors or noise rise from the device, turn o the power at once and unplug the power cable, and then please contact the service
center.
- Do not drop the device or subject it to physical shock, and do not expose it to high electromagne�sm radia�on. Avoid the equipment
installa�on on vibra�ons surface or places subject to shock (ignorance can cause equipment damage).
- Do not place the device in extremely hot (refer to the specica�on of the device for the detailed opera�on temperature), cold, dusty or
damp loca�ons, and do not expose it to high electromagne�c radia�on.
- The device for indoor use shall be kept from rain and moisture.
Exposing the equipment to direct sun light, low ven�la�on or heat source such as heater or radiator is forbidden (ignorance can cause re
danger).
- Do not aim the device at the sun or extra bright places. A blooming or smear may occur otherwise (which is not a malfunc�on however), and
aec�ng the endurance of sensor at the same �me.
- Improper use or replacement of the ba�ery may result in hazard of explosion. Replace with the same or equivalent type only. Dispose of
used ba�eries according to the instruc�ons provided by the ba�ery manufacturer.
- Do not expose the device to the corrosive gas. Otherwise the equipment damage may occur.
- Do not expose the device to the explosive situa�on.
- Open the cover and vacuum the dust off the Smoke detector’s sensing chamber at least once a month.
Remove battery before cleaning. To clean smoke detector, use soft brush attachment to your vacuum. Carefully remove any dust on smoke
detector components, especially on the openings of the sensing chamber. Replace battery after cleaning. Test the smoke detector to make sure
battery is working correctly. Never use water, cleaners as they may damage the unit.

6
Hangzhou Hikvision Digital Technology CO.,Ltd. No.555 Qianmo Road, Binjiang District, Hangzhou 310052, China
8
Specica�on
Detection method Chamber With Photoelectric Sensor
Tamper protection Rear
Environment temperature indicator Support
Signal strength indicator Support
self-health check Support
alarm sound interlink Support
Power switch Power Up Enrolling
LED indicator Red (Alarm)
Buzzer ≥ 85dB @ 3 m
Transmission technology Two-Way RF Wireless
Transmission frequency 433/868 MHz
Transmission security AES-128 Encryption
Transmission range(free space)
WB: 1 Km
WE: 1.6 Km
Enrolling method Power up, Remote ID, QR Code
Standard battery life
10 years for standalone sensor
5 years for RF wireless
Power supply Battery Powered
Battery type
Replaceable CR123A x 1 for RF Wireless
Typical voltage 3V
Operation temperature -10 °C to 50 °C (14 °F to 122 °F)
(0~49 °C certified)
Storage temperature -20 °C to 60 °C (-4 °F to 140 °F)
Operation humidity 5% to 90%
Dimension (D × D) φ120 × 48 mm
Weight 190.5 g
Mounting method Ceiling
Application scenario Indoor