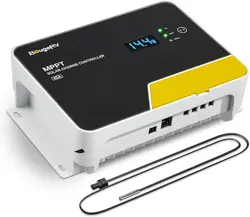
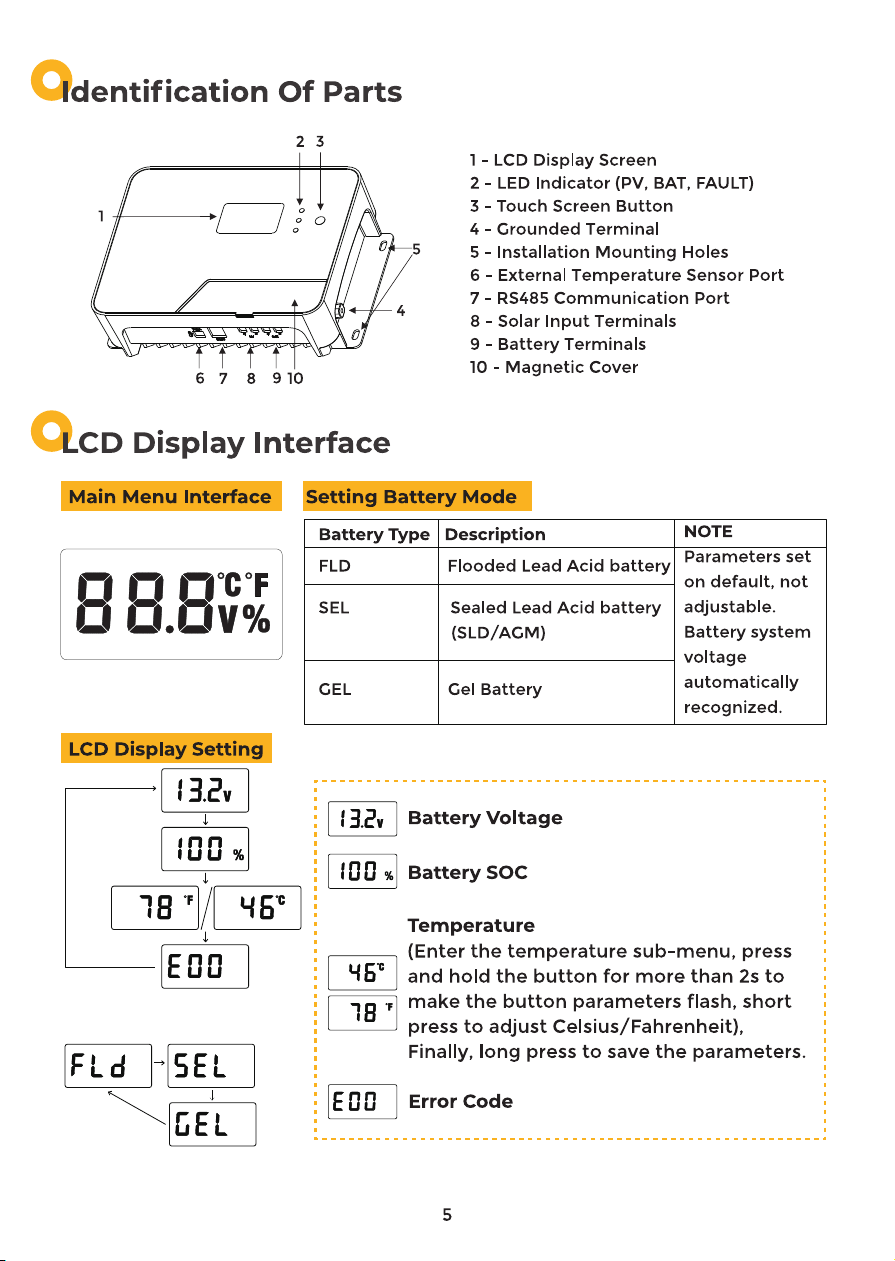
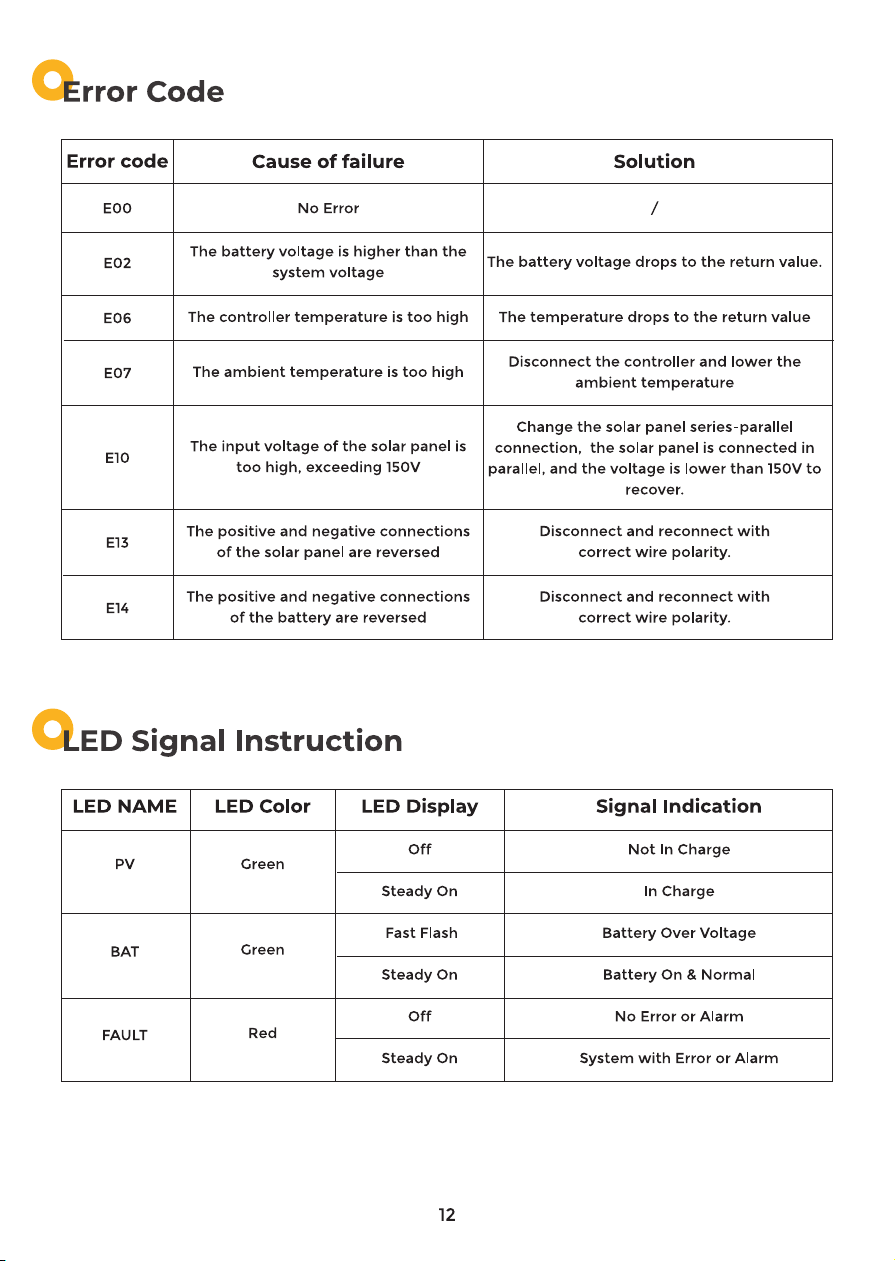
PV
BATT
FAULT

Controller Key Operation
2
3
4
5
5
6
6
7
8
9
10
11
11
12
12
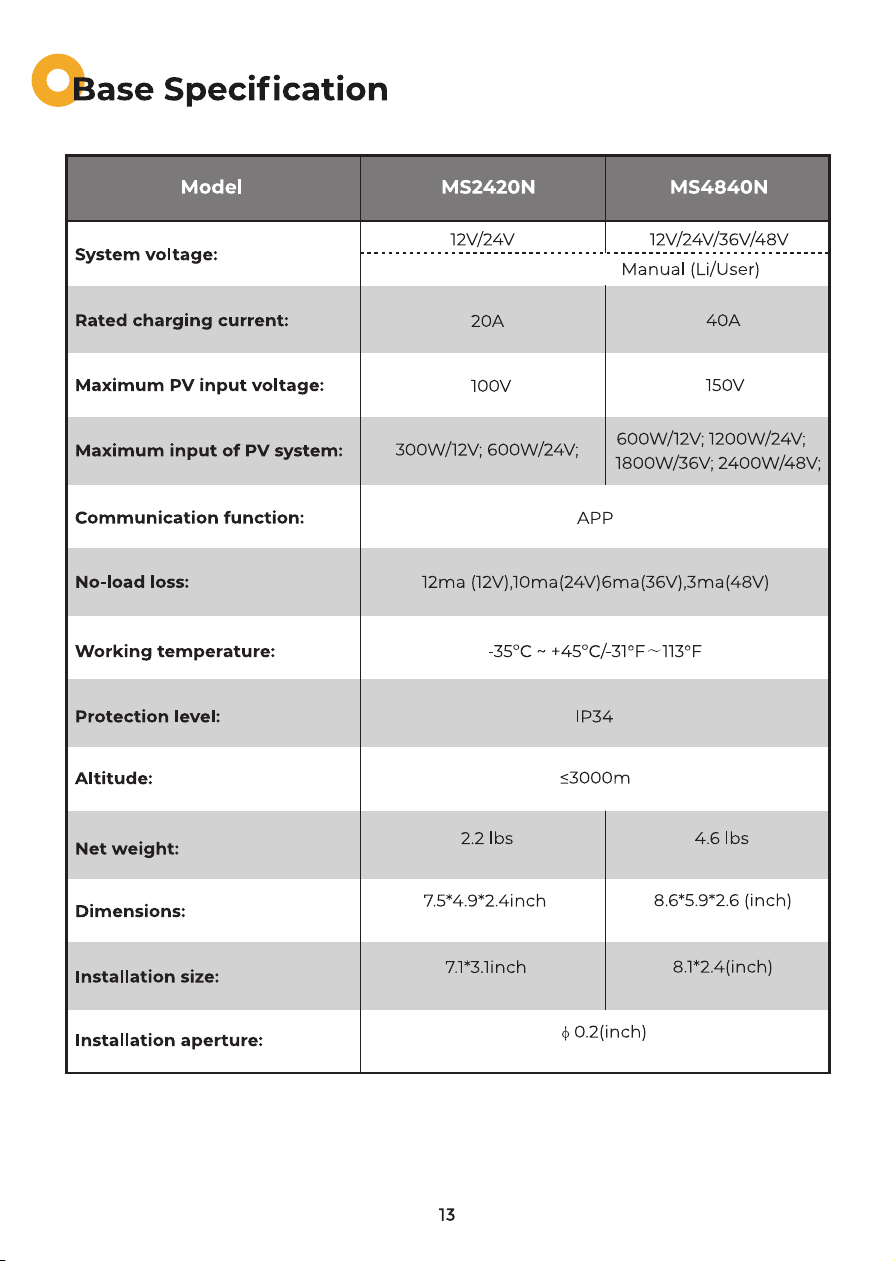
13
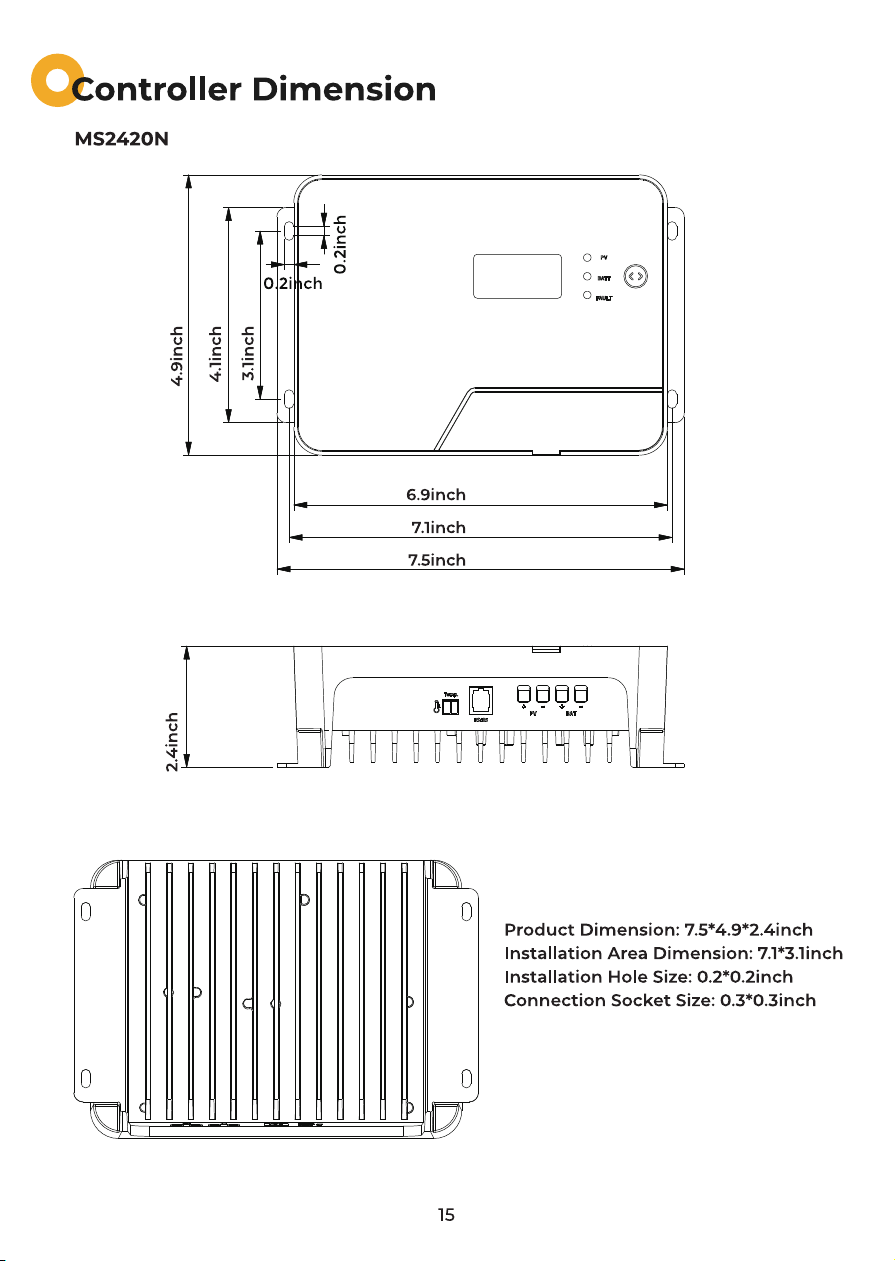
14
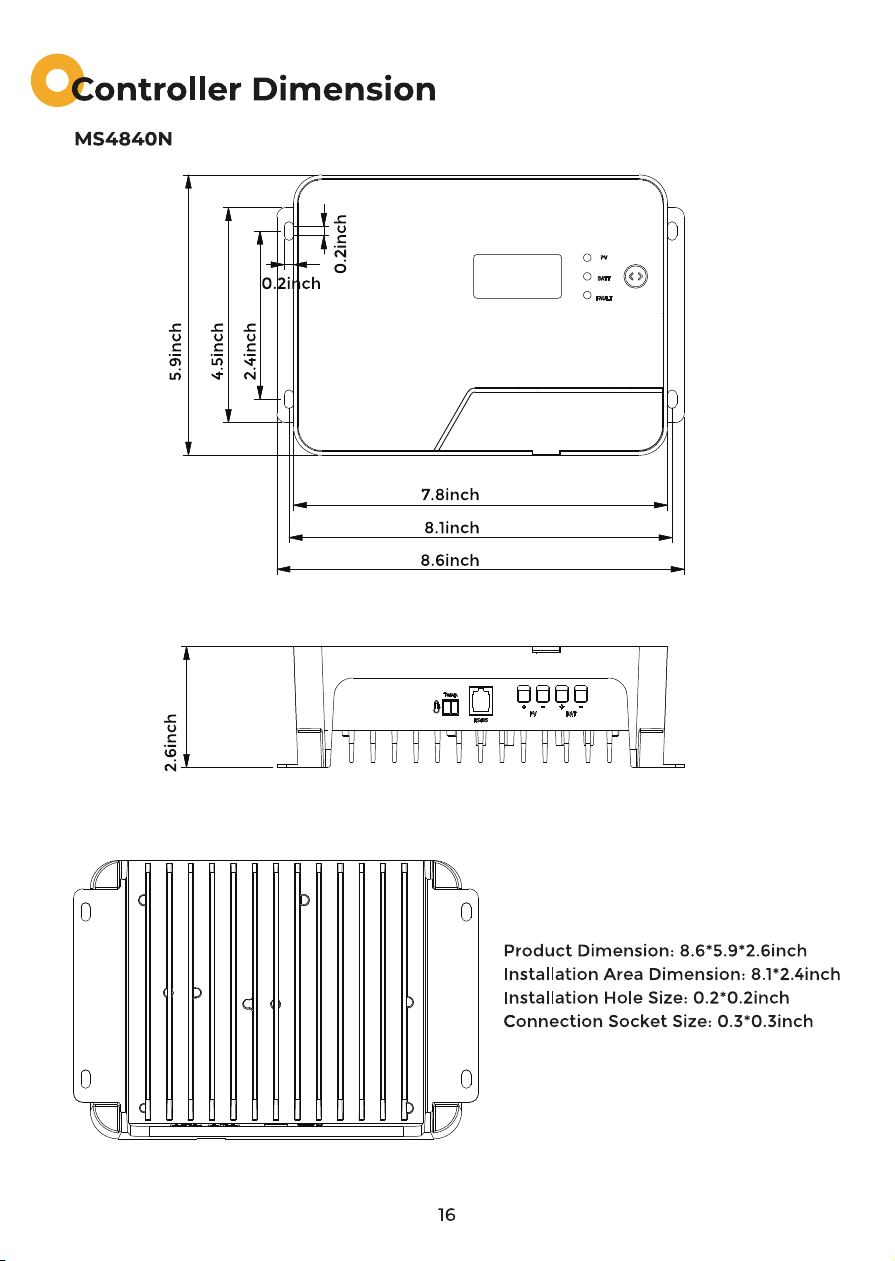
15
17
4. Compatible with lead-acid batteries and lithium batter-
ies, support 12V/24V/36V/48V battery system(20A control-
ler only support 12V and 24V), and can automatically iden-
tify the voltage of lead-acid batteries.
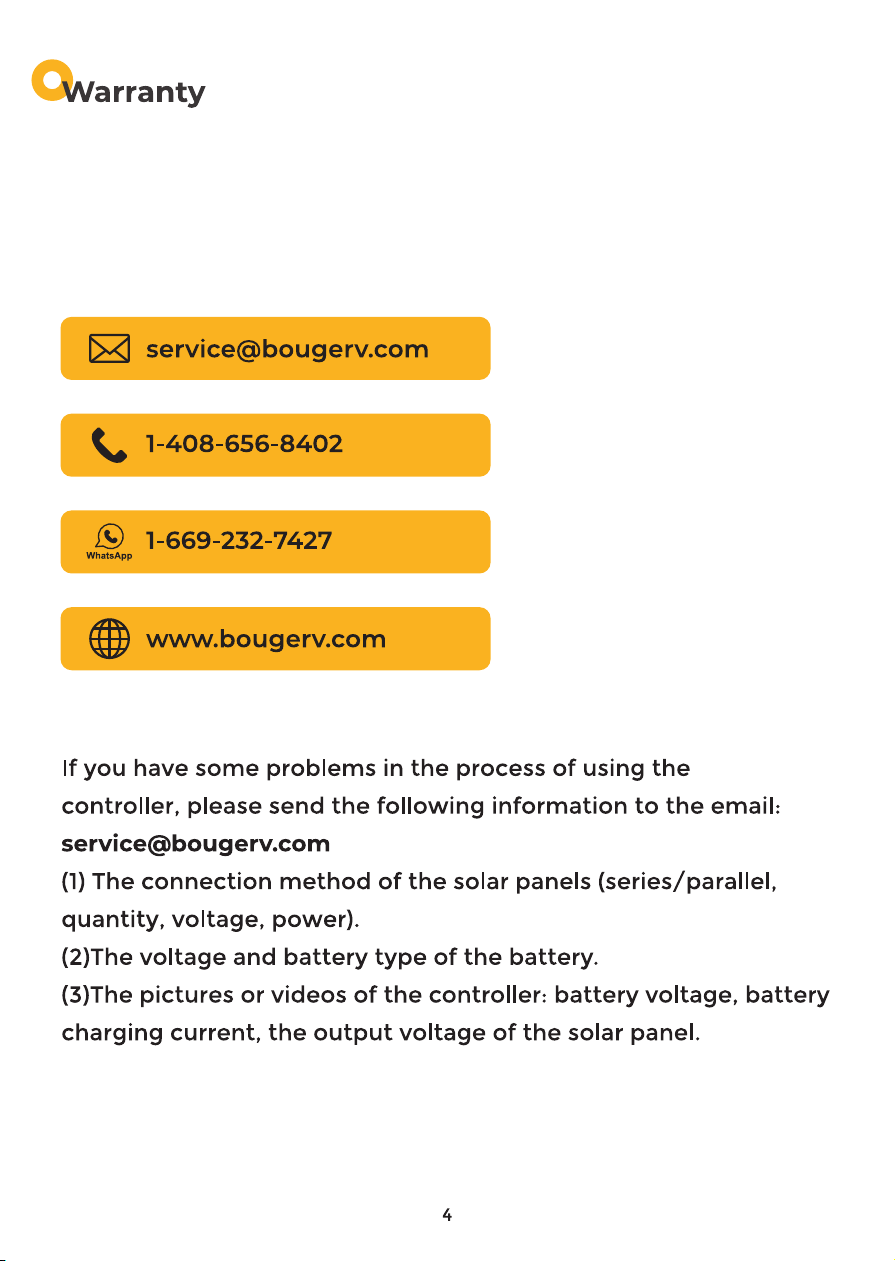
BougeRV provides 1-on-1 Solar Solution.
If you have any questions during use, please feel free to
contact us:
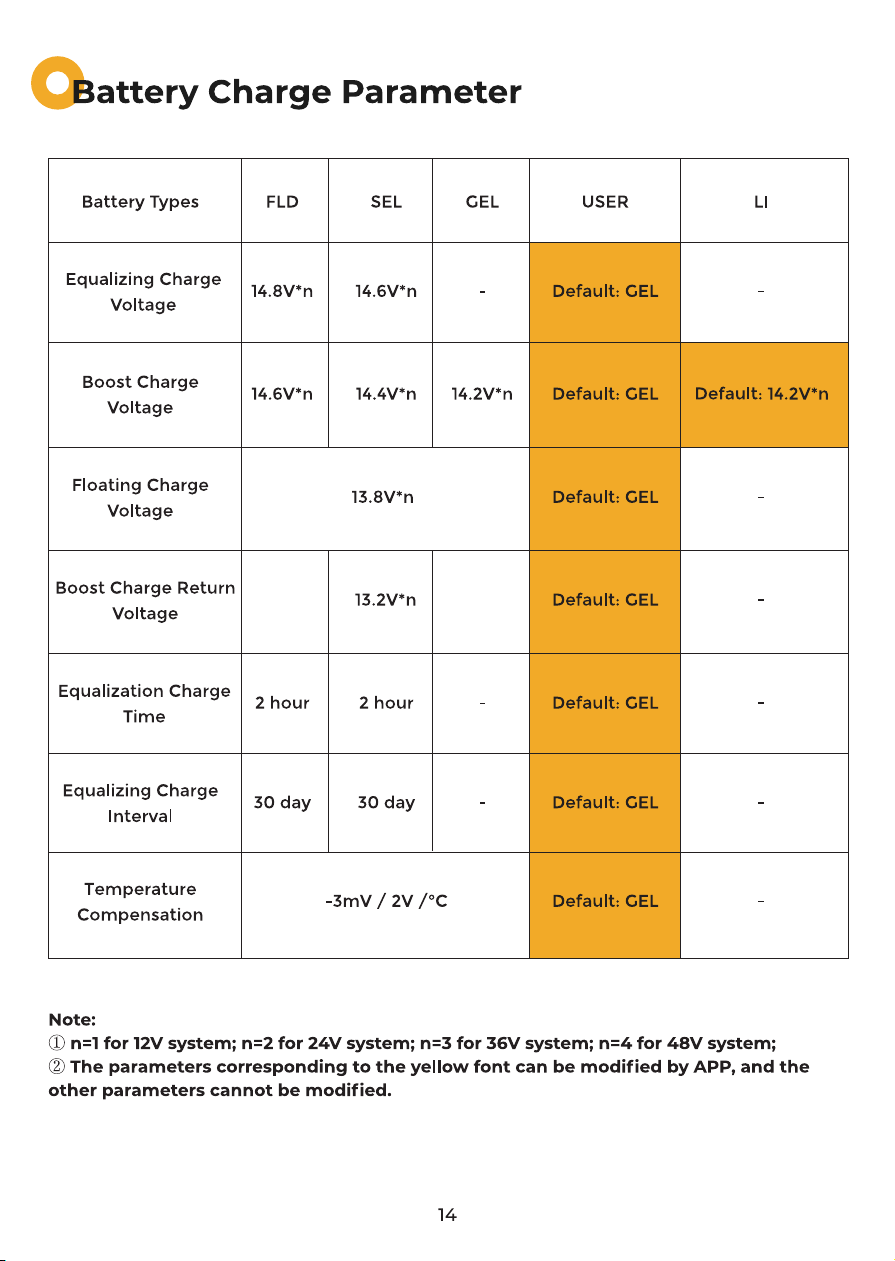
NOTE:①The above lead-acid battery types can be adjusted through the buttons of the
controller, and the default system voltage is automatically recognized.
②Lithium battery and user battery type can only be set through APP, system voltage
needs to be adjusted manually, and some parameters can be adjusted.
Controller Key Operation
1. Short press the button to switch the sub-menu, long press the button for more than 2
seconds to enter the setting mode, and the parameter flashes and short press the button
to set the parameter. After the setting is completed, long press the button for more than 2
seconds, which means the parameter setting is successful.
2. In the current menu, press and hold any one of the three interfaces of [Battery Voltage],
[Battery SOC], and [Error Code] to enter the battery type setting. (Only lead-acid battery
type can be set)
Users need to select USE or LI battery mode, and they can only operate through APP.
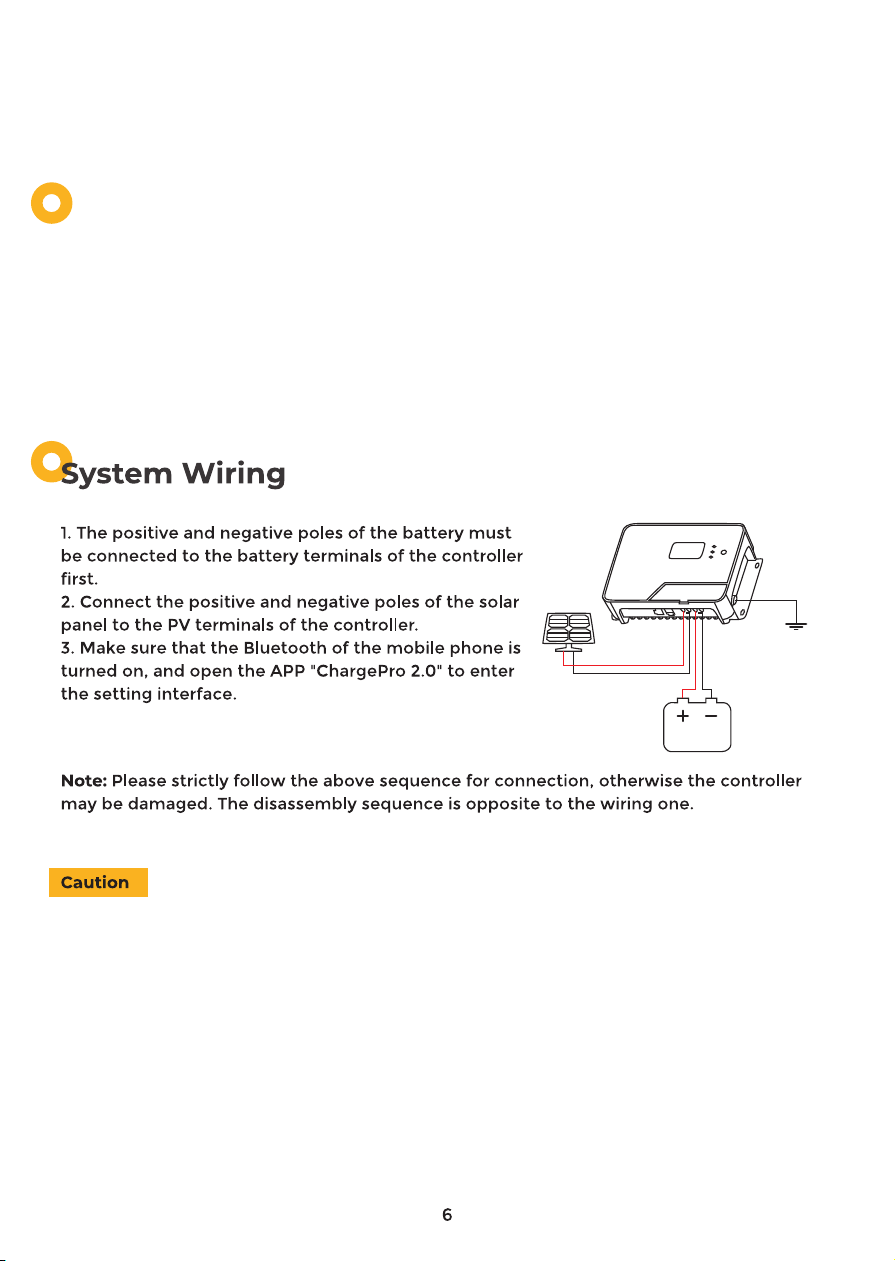
1. First make sure your battery system is 12V/24V/36V/48V(20A only
support 12V and 24V).(Lead-acid batteries can automatically identify the battery
voltage, if you use lithium batteries, you must manually adjust the voltage to ensure
that the battery voltage is consistent with the system voltage)
2.Ensure that the maximum open-circuit voltage of the solar system does not exceed
150V.
3. Ensure that the maximum output current of the solar panel does not exceed the
rated current.
4. Ensure that the voltage of the solar panel is higher than the battery voltage.
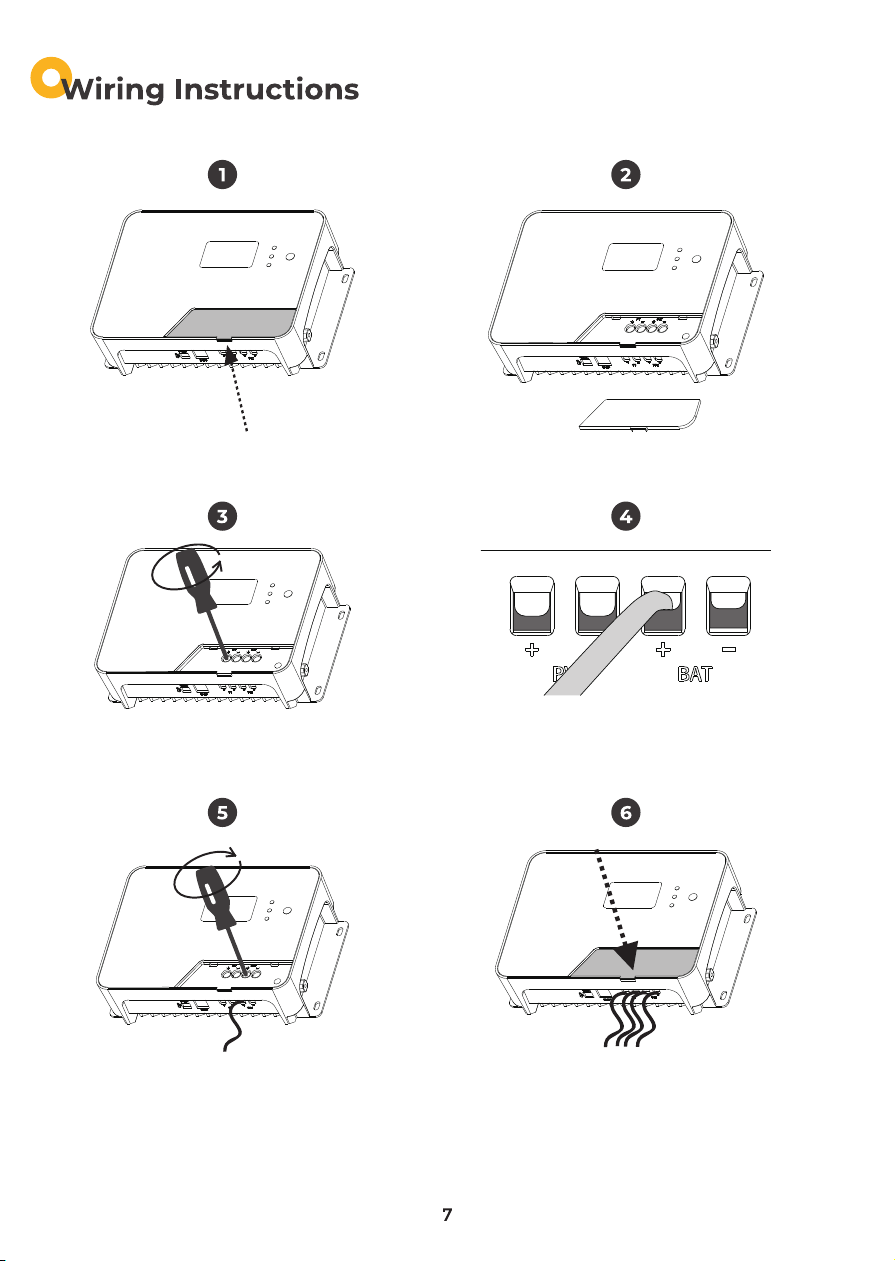
1.Remove the magnetic cover.(Pick up) 2.Put the magnetic cover aside.
3.Unscrew the screws. (Counterclockwise) 4.Plug the cable into the correct port.
5. Tighten the screws. (Clockwise) 6.Check the wiring condition and put the
magnetic cover back.

190*125*60mm 218*150*65mm
180*80mm
1kg 2.1kg
205*60mm
5mm
Auto (FLD/GEL/SEL)
(175mm)
(180mm)
(190mm)
(5mm)
(5mm)
(125mm)
(105mm)
(80mm)
(60mm)
(200mm)
(205mm)
(218mm)
(5mm)
(5mm)
(150mm)
(115mm)
(60mm)
(65mm)
18