MAINTENANCE
Proper cleaning of the unit is required. When rubbing or scouring, always move gently in the direction of the polish lines(grains).
A Scotch-Brite™ general purpose pad may be used. DO NOT USE STEEL WOOL.
MAINTENANCE FOR LAMINATES
Laminate surfaces should be cleaned with warm water and mild soaps. Non-abrasive cleaners may also be used. Cleaning products
containing bleaching agents should not be used, large quantities of these agents or extended periods of time of exposure to them can
cause discoloration.
CAUTION:
1. This equipment is designed and sold for commercial use only by personnel trained and experienced in its operation and is not sold
for consumer use in and around the home nor for use directly by the general public in food service locations.
2. Do not immerse unit in water.
3. All repairs should be done by an authorized service center.
4. Unit should be turned off when not in use. It is recommended that unit be disconnected from power supply by removing plug from
receptacle or shutting off power disconnect supply to the unit.
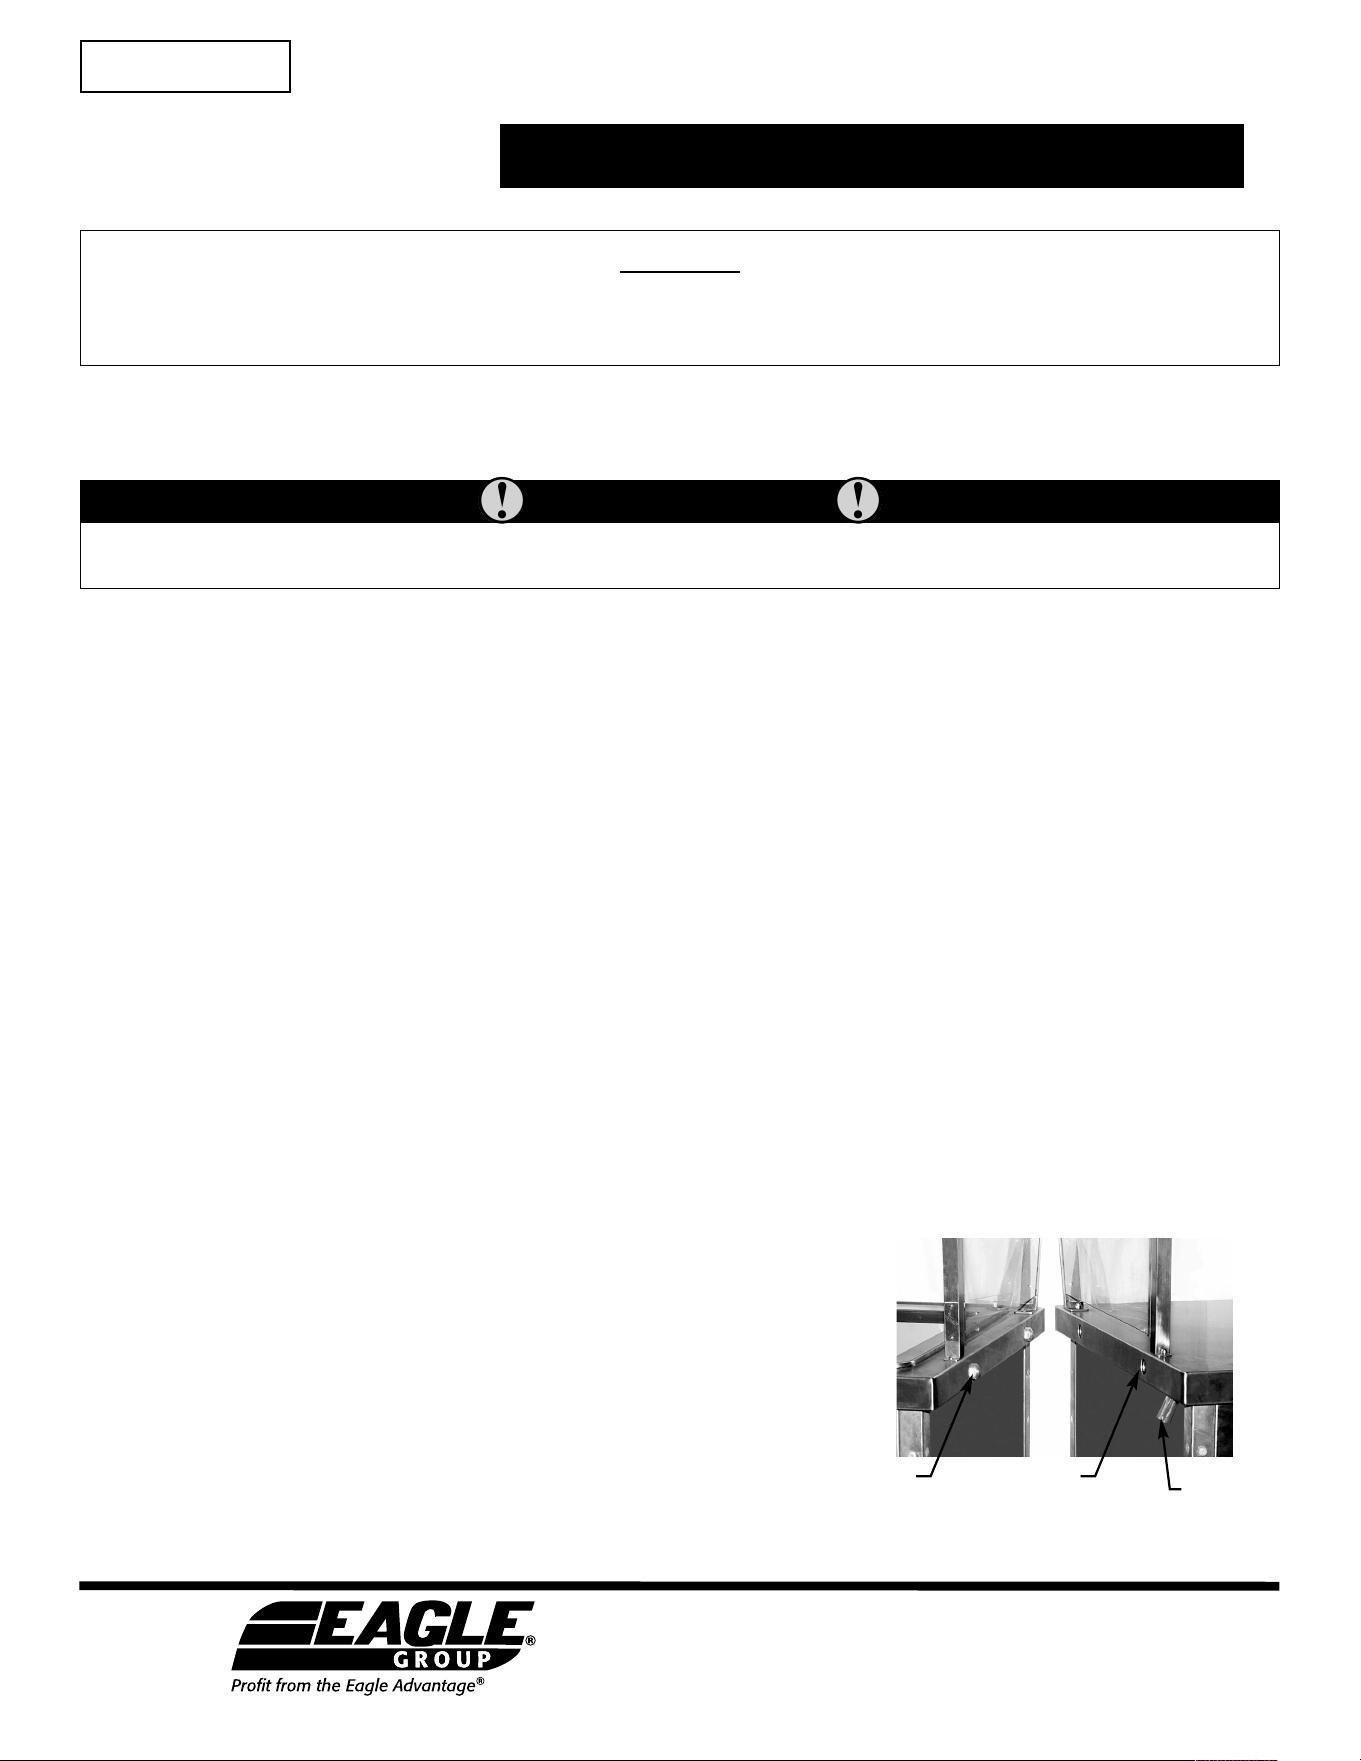
DOCKING DEVICE
The device comprises of two sub-assemblies: a male bullet catch and a female receiver with a locking plate.
1. Align the units so that the bullet catch and receivers line up.
2. Pull the lever and push the two units together so that the bullet catch
is pushed all the way into the receiver.
3. Release the lever and the two units are now securely docked together.
4. To release the two units, pull the lever and slowly push the two units
apart. Release the lever and now your units are separate.
OPERATIONS MANUAL & INSTRUCTIONS
Director’s Choice
®
Dish/Cup Dispenser Unit
EG10084 Revised 10/23
bullet catch
receiver
lever
For Heated Units: Disconnect unit from power supply prior to cleaning.
WARNING
CAUTION
INSPECT CONTENTS IMMEDIATELY AND FILE CLAIM WITH DELIVERING
CARRIER FOR ANY DAMAGE. SAVE YOUR BOX AND ALL PACKING MATERIALS.
YOU ARE RESPONSIBLE FOR DAMAGE TO YOUR UNIT IF RETURNED IMPROPERLY PACKED.
Retain this manual
for future reference.
INSTRUCTION SHEET
#366759
Eagle Foodservice Equipment, Eagle MHC, and SpecFAB
®
are divisions of Eagle Group. ©2023 by the Eagle Group
• 100 Industrial Boulevard, Clayton, Delaware 19938-8903 U.S.A.
• Phone: 302/653-3000 • 800/441-8440 • Fax: 302/653-2065
• www.eaglegrp.com • www.eaglegrpnews.com • www.eaglemhc.com
SPRING ADJUSTMENT
ADJUSTING DISPENSING HEIGHT
2
Director’s Choice
®
Dish/Cup Dispenser Unit
Adjustables are factory set to an average rate. However, you may need to adjust the springs to obtain best dispensing
rate for your dinnerware.
To Adjust for Rate of Rise
:
1) Lift the tube out of shield.
2) Place approximately 4 inches of dinnerware into the tube and note the height of the dinnerware above the tube.
3) Load the tube until it is approximately 3/4 full and again note the height of the dinnerware above the tube. If the
height is the same as in step 1, the rate is correct.
4) If the height is higher
than in step 2, unhook one spring from the bottom of the spring hanger and repeat step 2
and 3. Continue disconnecting springs from the bottom hanger until you find the proper spring combination for
your dinnerware.
5) If the height is lower
than in step 2, unhook one spring from the storage bars behind the uprights and hook it
onto the moveable head. Again, try to balance colors and number of springs on all sides of tube. Repeat steps 2
and 3 until a consistent dispensing rate is obtained, adding more springs as necessary.
NOTE: The wire head must be centered about the spring hanger or the mechanism will bind and not move smoothly
to dispense the plates.
Raise or lower the height of the top dish above the tube by connecting or disconnecting springs or replacing a lighter
spring with a stronger one or vice-versa.
TEMPERATURE ADJUSTMENT (HEATED ONLY)
Remove the tube from the shield and adjust the thumbwheel located about 3 inches below the indicator light. Turn
wheel up to raise the temperature and down to decrease it.
NOTE:
1. It is not necessary to replace the tube in shield to place dinnerware on the tube, leave the shield off until you find the proper
adjustment.
2. Balance color and number of springs on all sides of the tube to provide smoothest operation.
3. On unheated tubes, yellow springs are stronger than silver (yellow are rated at 4 ounces and silver are rated at 2
1
⁄2 ounces). On
heated tubes, black springs are stronger than gray springs (black are rated at 4 ounces and gray are rated at 2
1
⁄2 ounces).
4. Unit should be operated with legs provided to prevent overheating of surfaces below.
5. Check cord and plug, if provided, appearance for damage, cracking or deterioration. If visible, have replaced by an authorized
service agency.
3
EQUIPMENT PREPARATION
ADJUSTING FOR VARIABLE CHINA SIZES
ELECTRICAL CONNECTIONS
Clean the unit before using. Wipe body and inside of unit with a hot, wet cloth to remove any shipping dust or
protective oil.
WARNING
Check the data plate on unit to determine what voltage unit is wired for and what voltage service to use.
IMPROPER GROUNDING COULD RESULT IN ELECTRICAL SHOCK! Unit is equipped with a three prong (grounded) plug for
your protection against electrical shock hazard and should be plugged directly into a properly grounded three prong receptacle.
Do not cut or remove the grounding prong from this plug.
WARNING
This unit is not intended to hold potentially hazardous food such as un-cooked or un-preserved meats and sausages.
WARNING
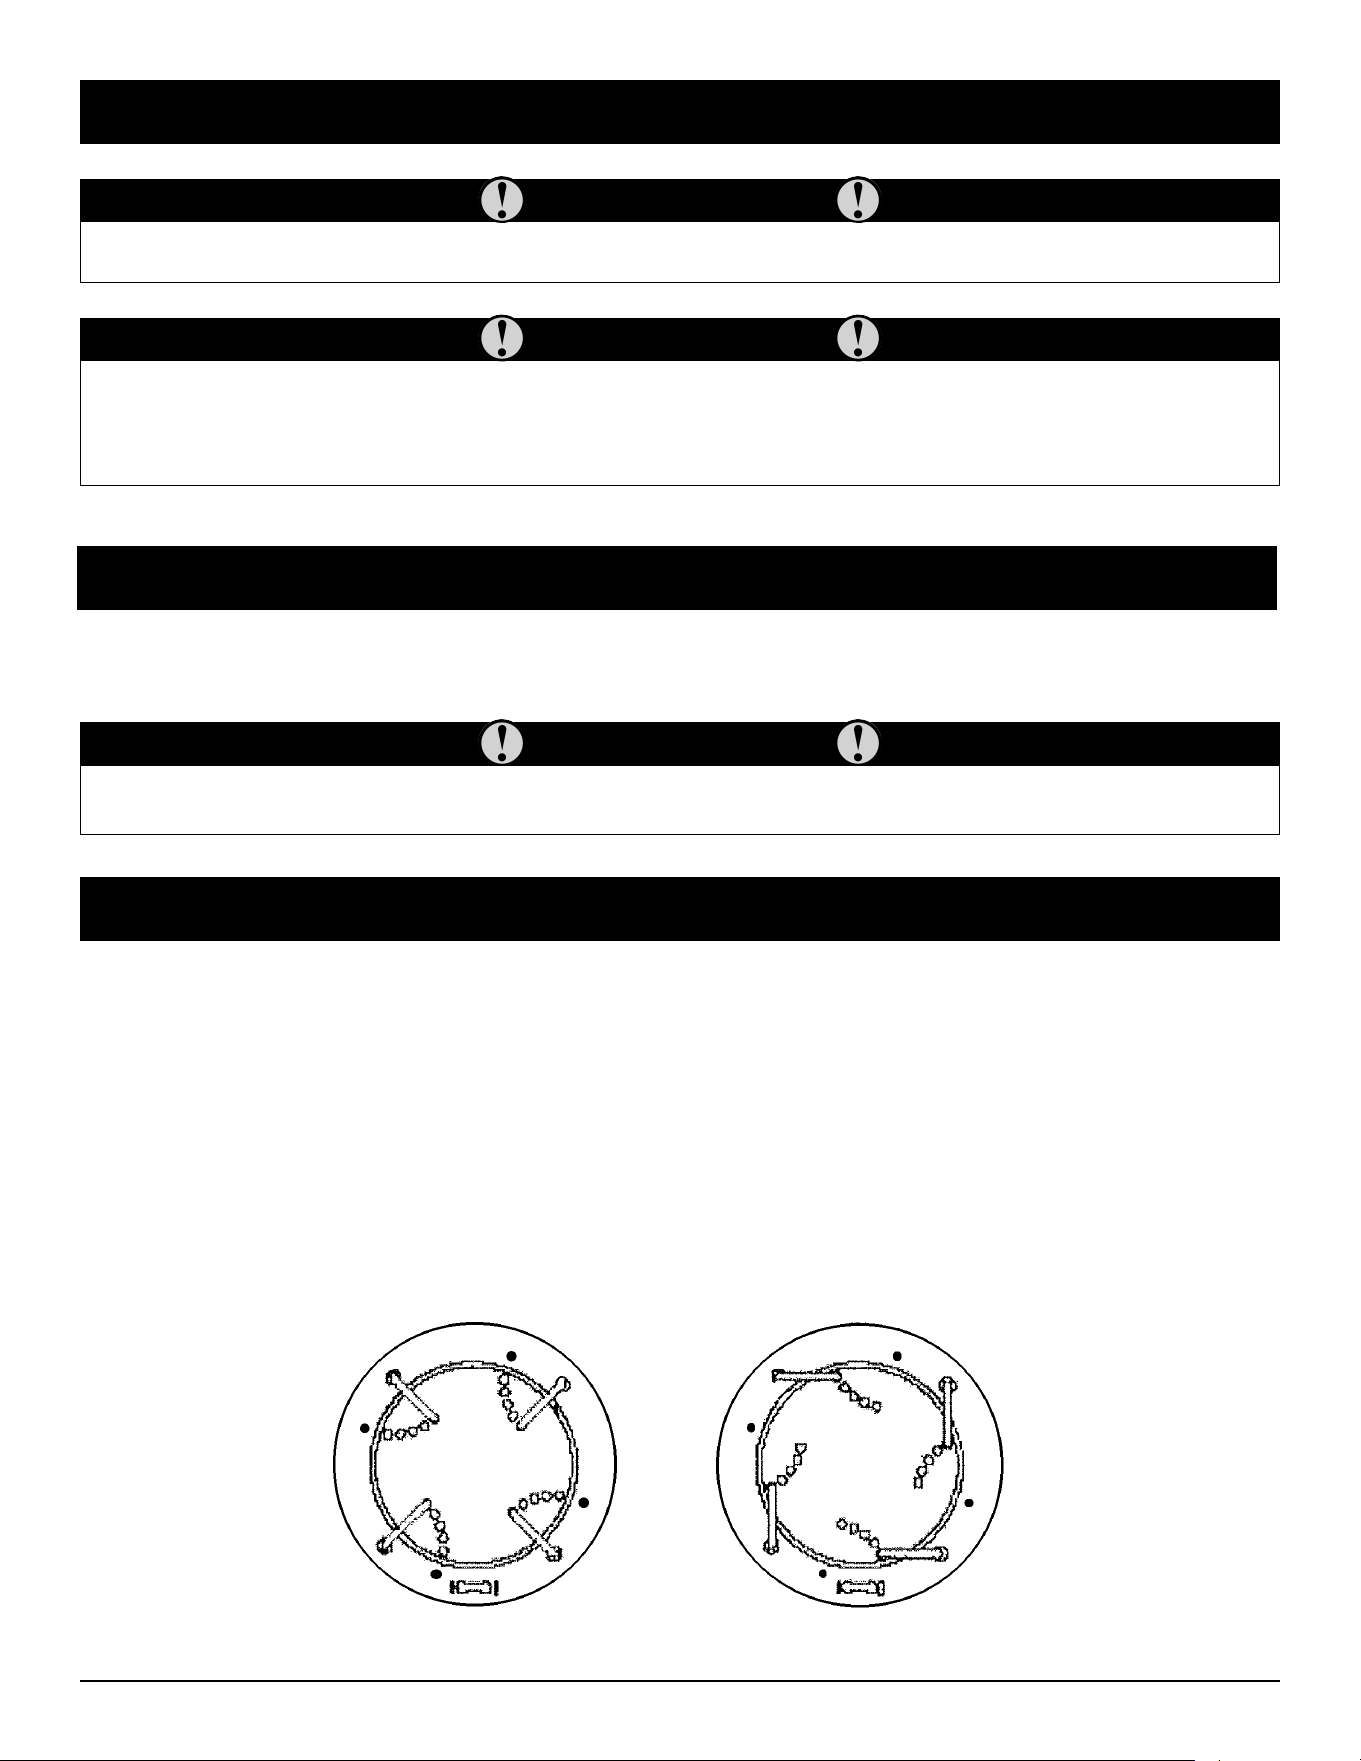
INSTRUCTIONS:
6
1
⁄2˝ to 9
3
⁄4˝ china:
Align outermost hole in tube head with the storage hole as shown in Figure 1 below. Insert rods into desired
setting and securely screw down rod stops.
10
3
⁄4˝ china:
Rotate tube head to position shown in figure 2. Insert rods through unit so they pass inside the black head
weldment below and outside the offset ring weldment to which the springs are attached. Securely screw down
rod stops. This will allow for greater stability and improved rod alignment at the 10
3
⁄4˝ china size.
Figure #1
Figure #2
ASSEMBLY INSTRUCTIONS
Director’s Choice
®
Dish/Cup Dispenser Unit
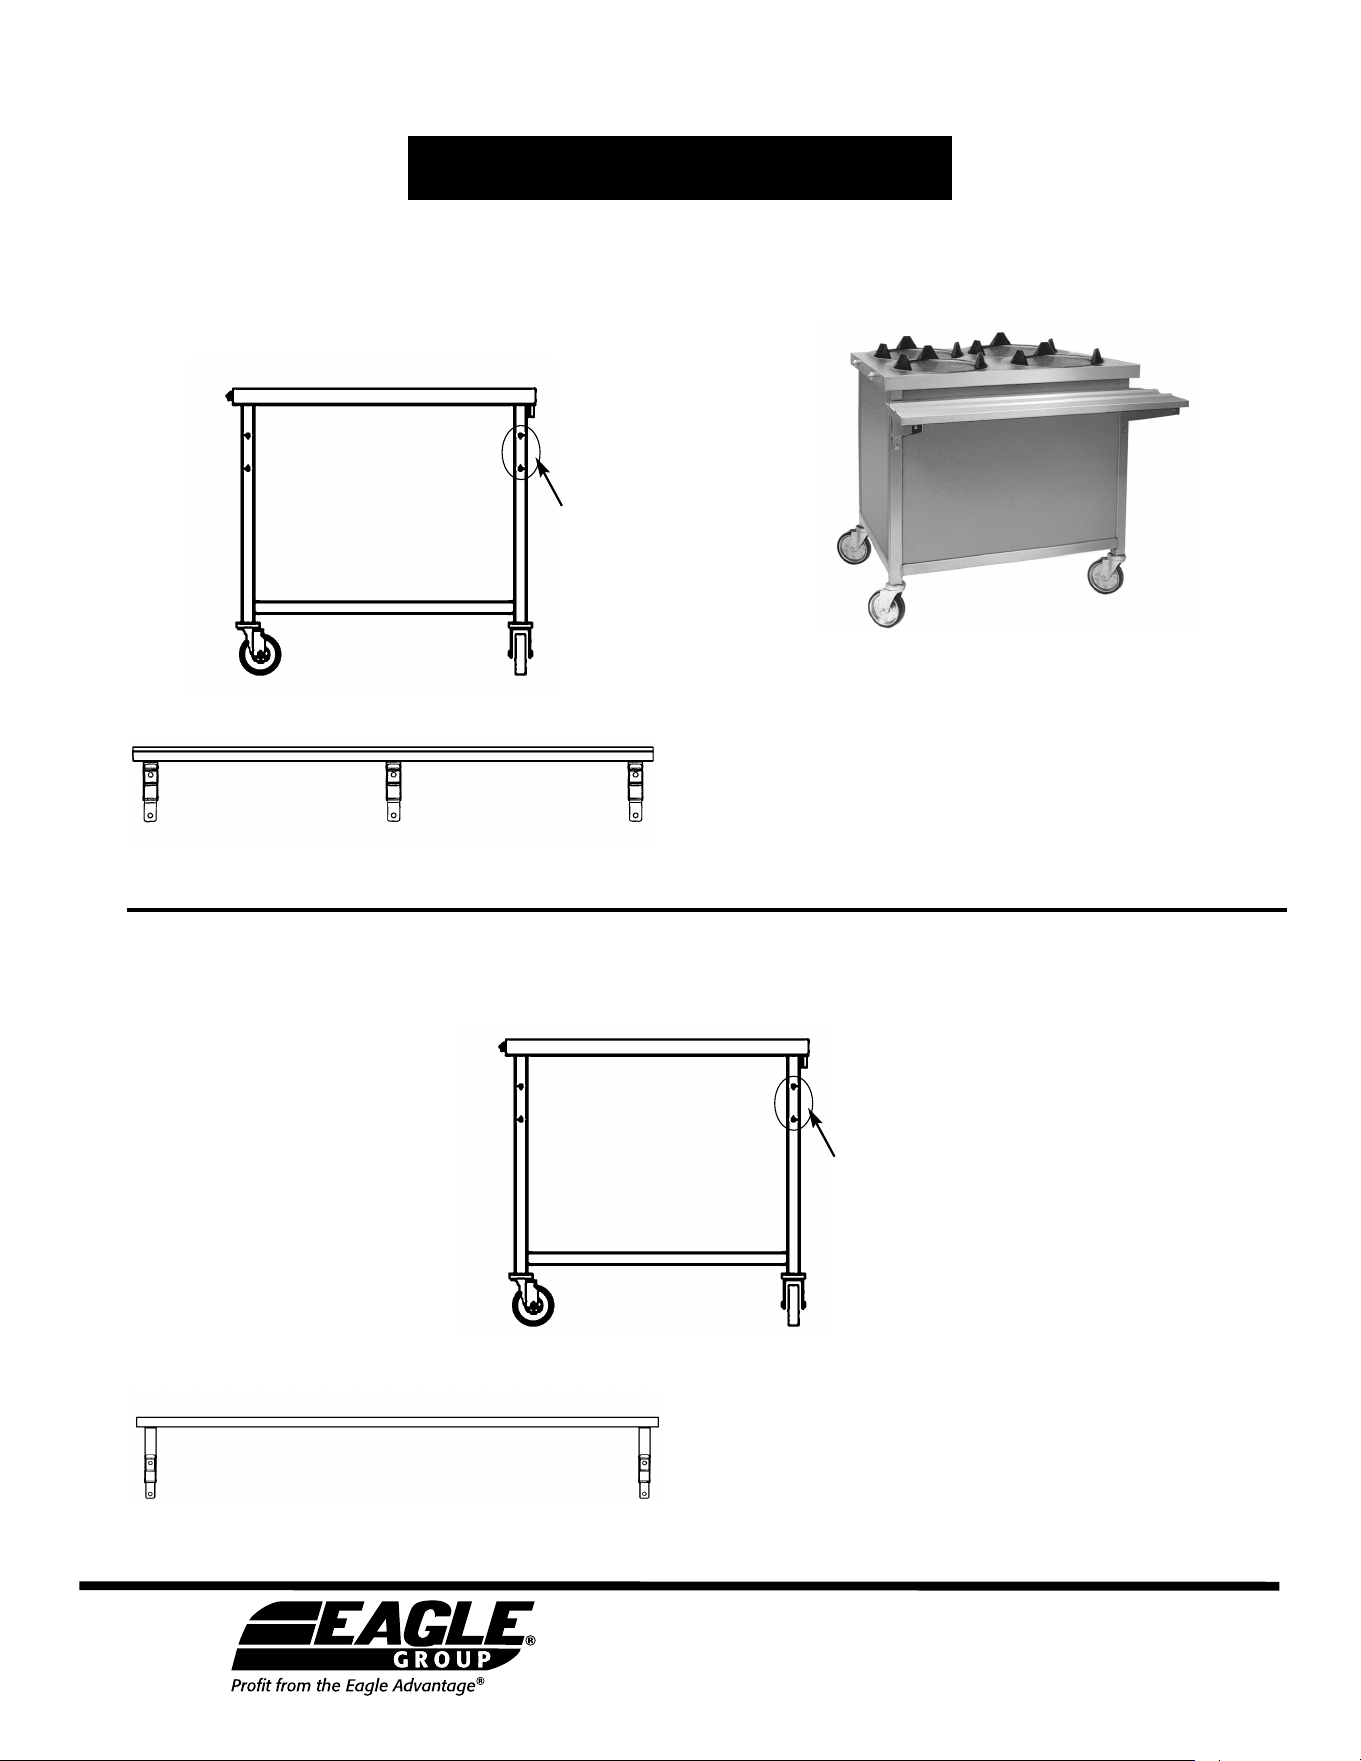
Work Shelves
1. Remove screws from the front of the unit.
2. Hold tray slide up to unit and align the
holes with the predrilled screw holes in
the unit.
3. Tighten screws and make sure tray slide
is securely mounted on unit.
1. Remove screws from the front of the unit.
2. Hold work shelf up to unit and align the
holes with the predrilled screw holes in
the unit.
3. Tighten screws and make sure work shelf
is securely mounted on unit.
location of
screws
location of
screws
Tray Slides
Eagle Foodservice Equipment, Eagle MHC, and SpecFAB
®
are divisions of Eagle Group. ©2023 by the Eagle Group
• 100 Industrial Boulevard, Clayton, Delaware 19938-8903 U.S.A.
• Phone: 302/653-3000 • 800/441-8440 • Fax: 302/653-2065
• www.eaglegrp.com • www.eaglegrpnews.com • www.eaglemhc.com