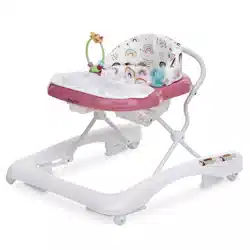

Parts
Manual instruction
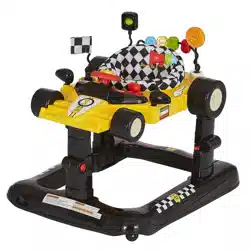
Item No.:#510
Top section x1
Seat pad x1
Frame supporter x3
Flag & Horn
toy bar x1
Front wheels x2
Base section x1
Pushing bar x1
Mirror x2
Toy tray x1
rear
front
Lollipop ball &
Cresset toy bar x1
Rear wheels x2
Scan the QR code to register your product
https://dreamonme.com/customercare/registration/
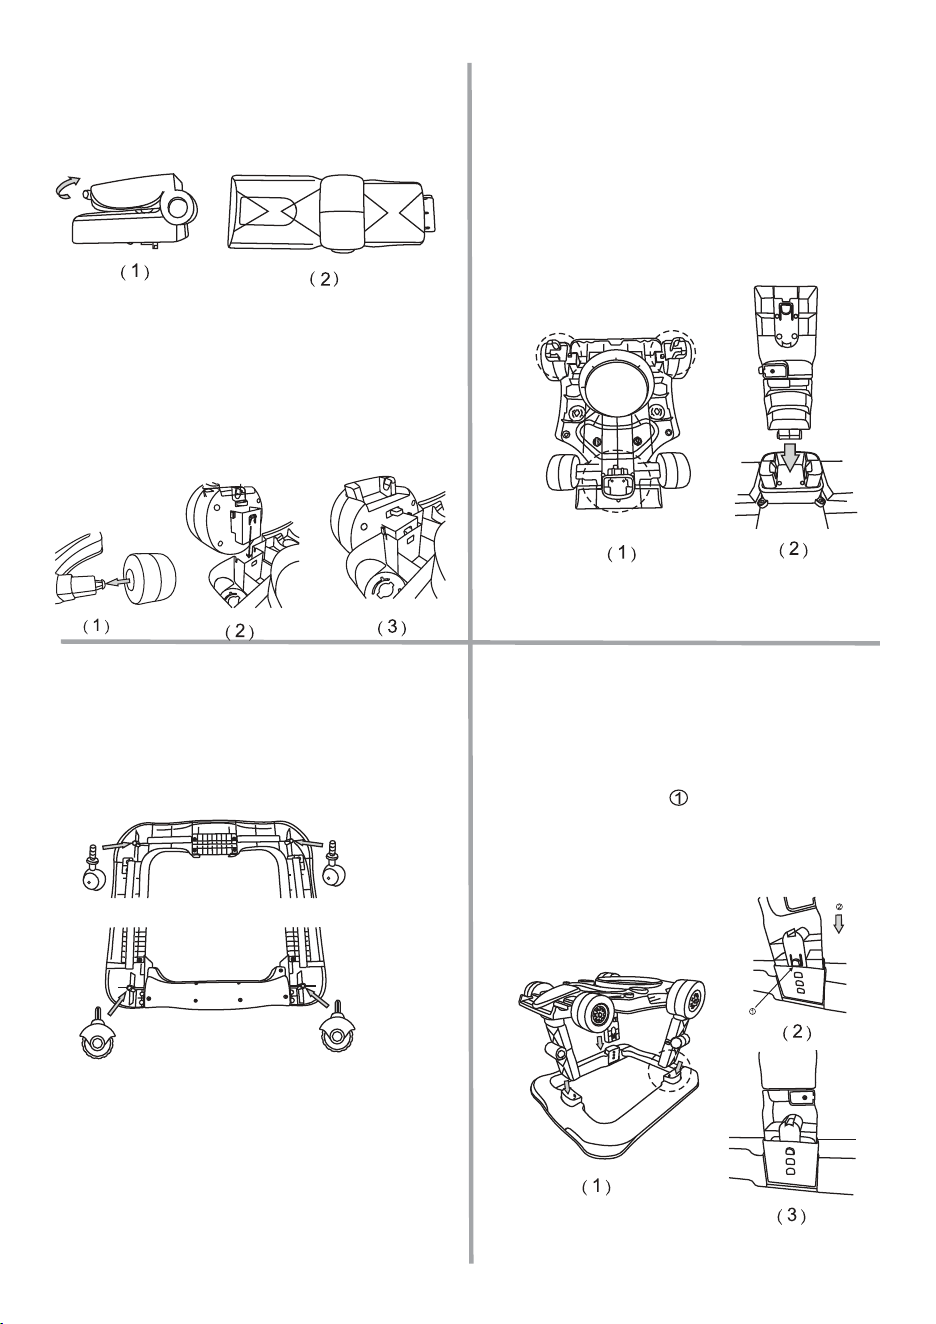
Open frame supporters
1.
Turn one side of frame supporter outward (1)
until you hear the frame supporter lock into
position (2).
To attach top tray car wheels
2. Attach the front wheels to the side of the
top tray. Press inward the wheels until hear
“click”. jpg (1)
Insert the rear wheels into the groove under
the walker tray up. jpg (2) Press the wheels
until hear “click”. jpg (3)
To assemble and install the frame
supporters into top section
3.Place the top section upside down on the
floor. Slot the top of the frame supporters
onto the holes. Using moderate force, push
the frame supporter in the top section.
Ensure that the supporters are fully inserted
before proceeding.
To attach the wheels
4.Insert the wheels into the moulded socket in
the direction indicated by the arrow. Then
push firmly until clicks into place.
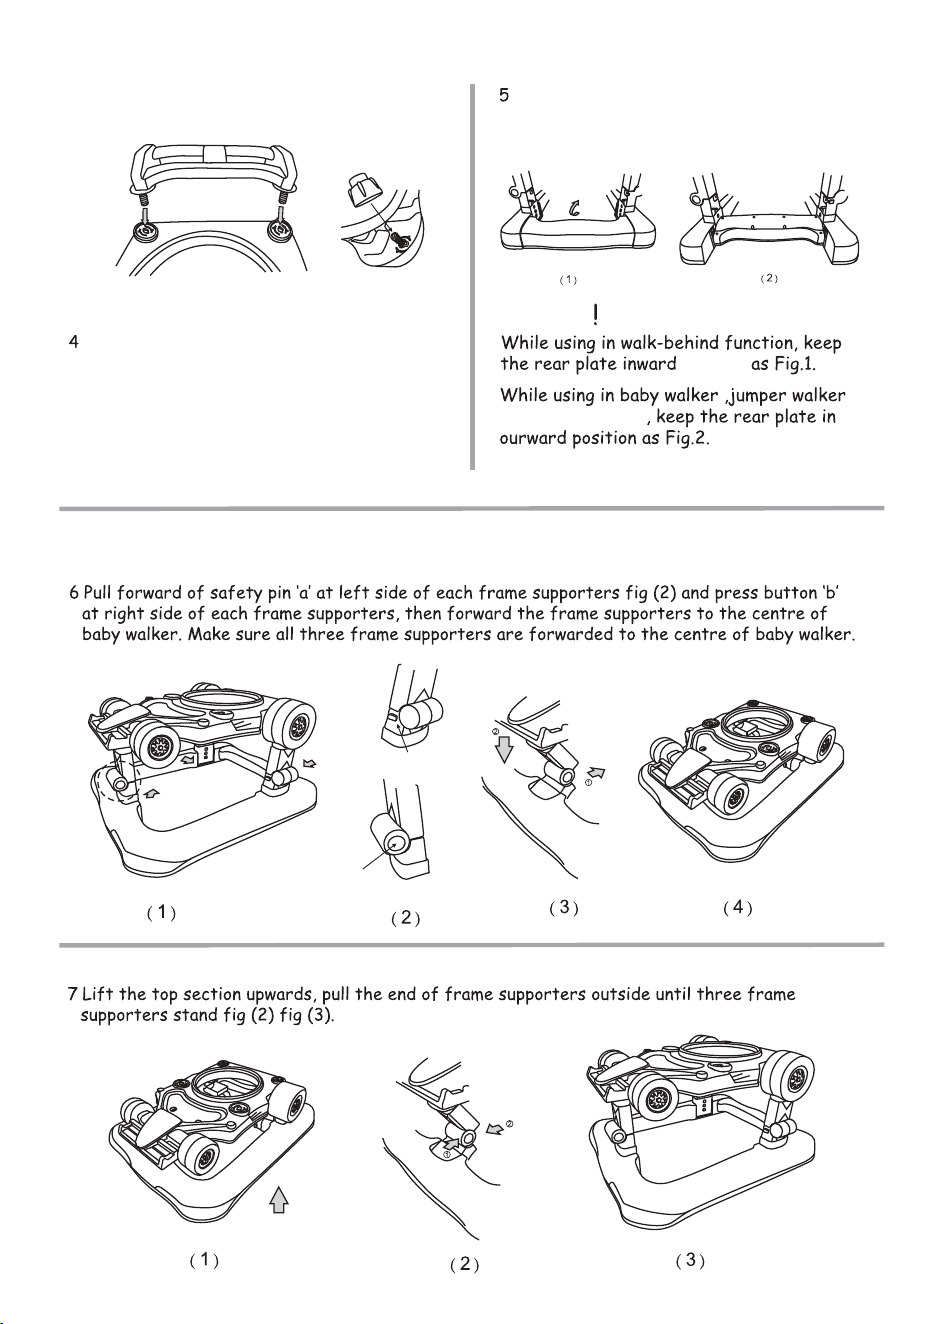
To assemble top and base section
5.
Place the base section on the floor, slot the
end of frame supporters into the holes
indicated in the drawing (1).
Press the button in and push the frame
supporters downward to adjust the height to
your wish position. 3 positions optionale. See
jpg (2) jpg (3).
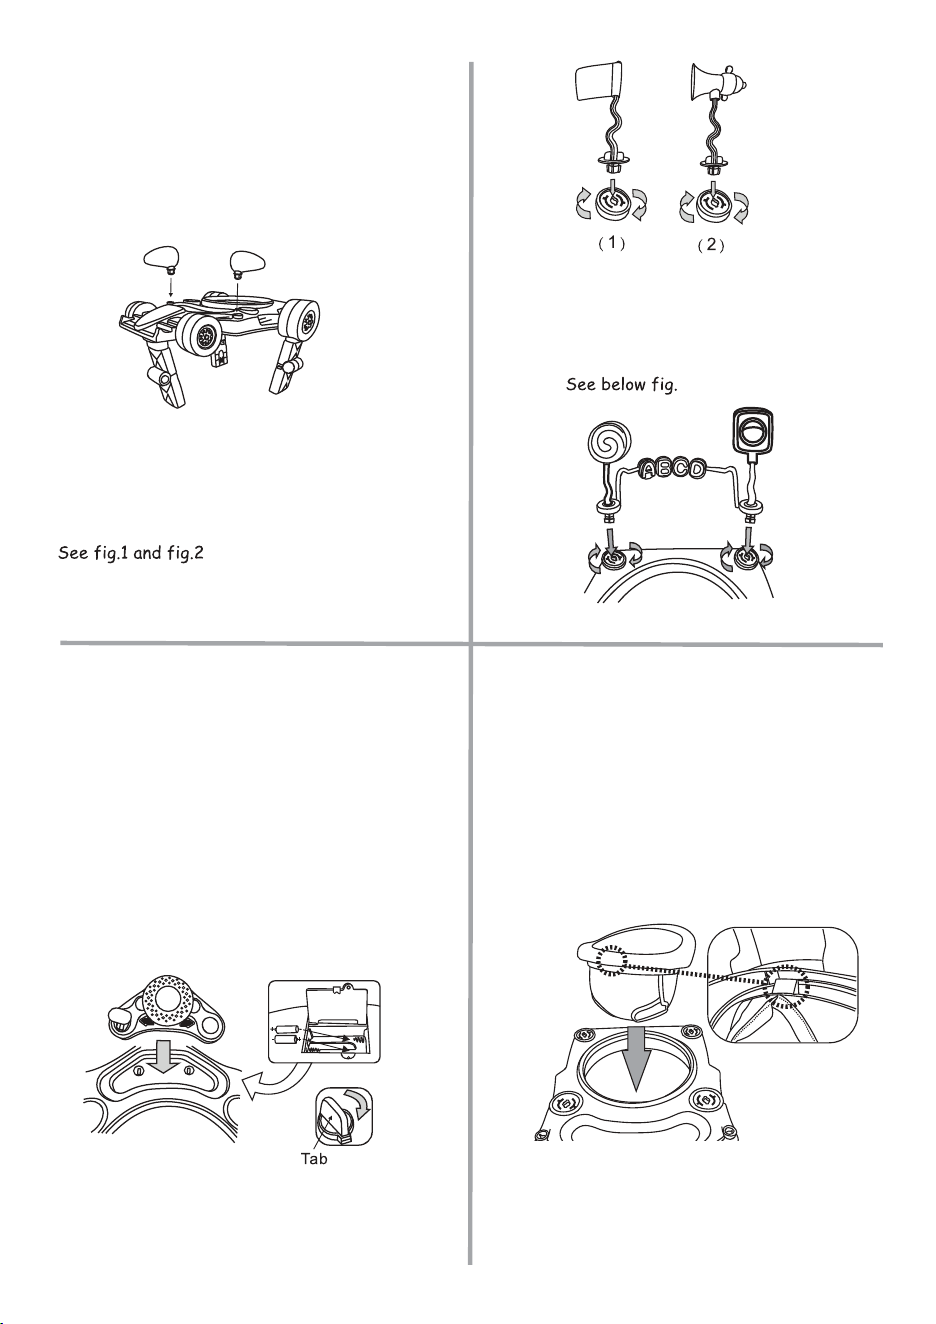
To install the side mirrors
6.
Insert the mirrors into the circular
buttonholes on the upper tray as the arrow
indicated.
(Pay attention to the left and right directions
when installing)
Eusure the mirrors can 360° rotate in two
directions.
To attach the flag and horn toy bar
7.
Position the flag and horn toy bar over the
slots in the front up tray and turn them in a
clockwise direction until they lock into place.
To attach the lollipop toy bar and cresset ball
8. Position the lollipop toy bar and cresset ball
over the slots in the rear up tray and turn them
in a clockwise direction until they lock into
place.
To attach the toy tray
9.2XAA size alkaline batteries are needed for
the toy tray (not included). Put the batteries
into the battery box under the toy tray base.
Place the toy tray into position. Pushing the
locking keys located on the underside of the
walker tray up and turn around to secure the
toy tray to the walker.
Fitting the seat pad
10. Position the seat pad into the top section.
Using moderate force push downwards
until it locks in the top section.

To release the frame supporters
1 .
The button”a”is on the right side which can
lock the frame supporters not to jump when
using as baby walker.Push the button”a”to
the left side to release the frame supporters.
Then baby walker can change to jumper walker.
Please make sure that the jump function must be
locked when use as baby walker.
Jumper walker
(1)When the product is being used as an
Activity Centre, all the wheels on the base must
be removed as Stationary status (pic 2).
(2)Press button “1” and pull the lever “2” outwards
to unlock the seat (pic1).
(3)While using the product as an activity center,
rolate the rear plate outward and keep its position
same as pic2, and the jump function should be
released or locked during the activity center.
Locking the swivel seat when use as
baby walker
1 .(1) Rotate the seat so that it is facing the front
part of the walker (pic1).(2) Press button “1” on the
rotation locking device,located under the top, and
push the locking lever “2” inwards (pic1).
Make sure that the lever is locked properly in the
appropriate slot.
A click will indicate that it is attached correctly.
Unlocking the swivel seat when us as activity
cent
Pic1
Pic2
.
To attach the hand rail
1 .Detach the toy bar.
Position the hand rail over the slots in the
rear up tray. Attach the locking cover to
end of toy bar and turn around to secure
the hand rail to the walker.
walk-behind
1 .
Turn the rear plate inward in 180
degree.
b
a
To store the baby walker
1 .
To open the baby walker
1 .
or activity center
Caution
position
Before assembling and using this product ,read and understand the instructions . Incorrect
assembly may make the product unsafe.Do not use t
he product if any part is broken,torn or
missing. Keep these instructions in a safe place for future reference .
n
used that
ntended to be
of the baby's face and mouth.
Email: info@dreamonme.com
www.dreamonme.com
To prolong the life of your nursery product keep it clean and do not leave it in the direct sun light
for extended periods of time.
Removable fabric covers and trims must only be cleaned using warm water with a household soap
or mild detergent. Allow it to dry fully, preferably away from direct sunlight.
grip pads regularly, using warm water with household soap or mild detergent to maintain
stopping performance .
Do not fold or store the product if it is damp or wet to avoid mold or mildew occurring.Always
store the product in a well ventilated area.
parts regularly for tightness of screws, nuts and other fasteners, tighten if required.To
maintain the safety of your nursery product, seek prompt repairs for bent,torn,worn
or broken parts.Use only parts and accessories approved by Dream On Me.
If the wheels squeak use a silicon based spray ensuring it
penetrates the wheel and axle assembly.
Care and maintenance
Do not mix old and new batteries .
Do not mix alkaline, standard (carban·zlnc) or rechargeable lnickle-cadm.
Do not charge non-rechargeable balleries.
Adult supervision is required when charging rechargeable battenes ,
Always remove flat or exhausted batteries from the toy .
Do not short circuit the supply terminals.
Recommended batteries, 2X 1.5V, ‘AA’ / SUM3 / LR6.
BATTERY INFORMATION:
DO NOT place items with a string around child’s neck, such as hood strings or pacifier cords.
DO NOT suspend strings over product or attach strings to toys. Always keep child in view while in product.
While using as a activity center, it should be used by a child who can sit unaided(approximately from 6
months).It should be not used by a child who weighing more than 12kgs.
WARNING:
Never use near stair.
To avoid tip over, place product on a flat, level surface.
WARNING:
Enter our monthly giveaway!
Simply scan the QRcode to register.
Chat with us!
For any questions or concerns or feedback.
1532, S. Washington Avenue
Piscataway, NJ 08854
E-mail: [email protected]
www.dreamonme.com
Follow us on
to get your nursery featured on our social media.
@dreamonmeinc
@dreamonmeinc