
ContentsContents
Features and Benefits ...................................... 3FeaturesandBenefits......................................3
Use, Care and Maintenance ............................ 4Use,CareandMaintenance............................4
Quick Reference Guide ..................................... 5QuickReferenceGuide.....................................5
Warranty ................................................................ 6Warranty................................................................6
Recipes .................................................................. 8Recipes..................................................................8
ImportantImportant
SafeguardsSafeguards
When using an electrical appliance, especially whenWhenusinganelectricalappliance,especiallywhen
children are present, basic safety precautions shouldchildrenarepresent,basicsafetyprecautionsshould
always be taken, including the following:alwaysbetaken,includingthefollowing:
WARNING: Read all safety warnings and instructions.WARNING:Readallsafetywarningsandinstructions.
Failure to follow the warnings and instructions mayFailuretofollowthewarningsandinstructionsmay
result in electric shock, fire and/or serious injury.resultinelectricshock,fireand/orseriousinjury.
1. READ ALL INSTRUCTIONS.1.READALLINSTRUCTIONS.
2. To protect against electric shock, do not put the2.Toprotectagainstelectricshock,donotputthe
motor housing of this Cordless RechargeablemotorhousingofthisCordlessRechargeable
Blender in water or other liquids while unit isBlenderinwaterorotherliquidswhileunitis
charging. Other than the travel cup with blade (andcharging.Otherthanthetravelcupwithblade(and
lid), never submerge any other portion of this unitlid),neversubmergeanyotherportionofthisunit
in liquids. If the compact blender base falls intoinliquids.Ifthecompactblenderbasefallsinto
liquid, remove immediately. Carefully remove,liquid,removeimmediately.Carefullyremove,
clean, and dry unit thoroughly before continuing.clean,anddryunitthoroughlybeforecontinuing.
3. This appliance is not intended for use by children3.Thisapplianceisnotintendedforusebychildren
or by persons with reduced physical, sensory, ororbypersonswithreducedphysical,sensory,or
mental capabilities, or lack of experience andmentalcapabilities,orlackofexperienceand
knowledge. Close supervision is necessary whenknowledge.Closesupervisionisnecessarywhen
any appliance is used near children. Childrenanyapplianceisusednearchildren.Children
should be supervised to ensure that they do notshouldbesupervisedtoensurethattheydonot
play with the appliance.playwiththeappliance.
4. Do not operate in the presence of explosive and/or4.Donotoperateinthepresenceofexplosiveand/or
flammable fumes.flammablefumes.
5. To avoid the possibility of personal injury, always5.Toavoidthepossibilityofpersonalinjury,always
unplug the unit from the USB cable beforeunplugtheunitfromtheUSBcablebefore
attaching or removing blades and/or attachmentsattachingorremovingbladesand/orattachments
for cleaning or any other purpose.forcleaningoranyotherpurpose.
6. Illuminated lights indicate unit is ready to operate.6.Illuminatedlightsindicateunitisreadytooperate.
7. When blending jar is attached to base avoid any7.Whenblendingjarisattachedtobaseavoidany
contact with blades or movable parts.contactwithbladesormovableparts.
8. Keep hands, hair, clothing, as well as spatulas and8.Keephands,hair,clothing,aswellasspatulasand
other utensils away from attachments andotherutensilsawayfromattachmentsand
blending jar during operation to reduce risk ofblendingjarduringoperationtoreduceriskof
injury to persons, and/or damage to the appliance.injurytopersons,and/ordamagetotheappliance.
A spatula may be used, but must be used onlyAspatulamaybeused,butmustbeusedonly
when the unit is not operating.whentheunitisnotoperating.
9. BLADES ARE SHARP. HANDLE CAREFULLY.9.BLADESARESHARP.HANDLECAREFULLY.
10. Never leave your blender unattended while it is10.Neverleaveyourblenderunattendedwhileitis
running. Injury can result if moving bladerunning.Injurycanresultifmovingblade
accidentally becomes exposed.accidentallybecomesexposed.
11. Damaged or leaking blending jar must be replaced.11.Damagedorleakingblendingjarmustbereplaced.
12. USB power adapter and USB cable should be12.USBpoweradapterandUSBcableshouldbe
plugged into an electrical outlet away from sink orpluggedintoanelectricaloutletawayfromsinkor
hot surface.hotsurface.
13. Do not use an extension cord.13.Donotuseanextensioncord.
14. Do not attempt to use this USB cable with other14.DonotattempttousethisUSBcablewithother
products.products.
15. Do not charge batteries with charger plugged into15.Donotchargebatterieswithchargerpluggedinto
an outdoor outlet.anoutdooroutlet.
16. Do not operate any appliance with a damaged16.Donotoperateanyappliancewithadamaged
cord or plug, or after the appliance hascordorplug,oraftertheappliancehas
malfunctioned or has been dropped or damagedmalfunctionedorhasbeendroppedordamaged
in any way, or is not operating properly. Contactinanyway,orisnotoperatingproperly.Contact
the manufacturer at their customer servicethemanufacturerattheircustomerservice
telephone number for information on examination,telephonenumberforinformationonexamination,
repair, or adjustment.repair,oradjustment.
17. The use of attachments or accessories not17.Theuseofattachmentsoraccessoriesnot
recommended by Cuisinart may cause fire, electricrecommendedbyCuisinartmaycausefire,electric
shock or risk of injury.shockorriskofinjury.
18. Make sure the appliance is off and the motor/18.Makesuretheapplianceisoffandthemotor/
blade attachment has stopped completely beforebladeattachmenthasstoppedcompletelybefore
putting on or taking off attachments, and beforeputtingonortakingoffattachments,andbefore
cleaning.cleaning.
19. This appliance is intended for household use only19.Thisapplianceisintendedforhouseholduseonly
and is not for commercial or outdoor use.andisnotforcommercialoroutdooruse.
20. Do not use this blender for other than its20.Donotusethisblenderforotherthanits
intended use of preparing foods and beverages.intendeduseofpreparingfoodsandbeverages.
21. To reduce the risk of fire or electric shock, do not21.Toreducetheriskoffireorelectricshock,donot
operate any heating appliance beneath or near theoperateanyheatingappliancebeneathornearthe
motor base.motorbase.
22. Do not mount or store unit over or near a portion22.Donotmountorstoreunitoverornearaportion
of a heating or cooking appliance, or a sink orofaheatingorcookingappliance,orasinkor
washbasin.washbasin.
28. Unplug the USB power adapter from the outlet28.UnplugtheUSBpoweradapterfromtheoutlet
before attempting any routine cleaning of thebeforeattemptinganyroutinecleaningofthe
charger.charger.
29. Do not operate with a damaged USB power29.DonotoperatewithadamagedUSBpower
adapter. Have damaged USB power adapteradapter.HavedamagedUSBpoweradapter
replaced immediately.replacedimmediately.
30. Do not incinerate the blender, even if it is severely30.Donotincineratetheblender,evenifitisseverely
damaged. The batteries can explode in a fire.damaged.Thebatteriescanexplodeinafire.
31. This product contains lithium batteries which31.Thisproductcontainslithiumbatterieswhich
must be recycled at the end of the life of themustberecycledattheendofthelifeofthe
blender and disposed of properly. Do notblenderanddisposedofproperly.Donot
incinerate or compost batteries, as they willincinerateorcompostbatteries,astheywill
explode at high temperatures.explodeathightemperatures.
32. Leaks from battery cells can occur under extreme32.Leaksfrombatterycellscanoccurunderextreme
conditions. If the liquid gets on the skin, (1) washconditions.Iftheliquidgetsontheskin,(1)wash
22

quickly with soap and water or (2) neutralize withquicklywithsoapandwateror(2)neutralizewith
mild acid such as lemon juice or vinegar. If themildacidsuchaslemonjuiceorvinegar.Ifthe
liquid gets into eyes, flush them immediately withliquidgetsintoeyes,flushthemimmediatelywith
clean water for a minimum of 10 minutes. Seekcleanwaterforaminimumof10minutes.Seek
medical attention.medicalattention.
33. Recharge only with the USB power adapter33.RechargeonlywiththeUSBpoweradapter
specified by the manufacturer. A USB powerspecifiedbythemanufacturer.AUSBpower
adapter that is suitable for one type of batteryadapterthatissuitableforonetypeofbattery
pack may create a risk of fire when used withpackmaycreateariskoffirewhenusedwith
another battery pack. The USB charger must beanotherbatterypack.TheUSBchargermustbe
listed Class 2 power supply or certified ITE powerlistedClass2powersupplyorcertifiedITEpower
supply, rated output 5V/3A MAX. Do not usesupply,ratedoutput5V/3AMAX.Donotuse
unapproved sources.unapprovedsources.
34. Use appliances only with specifically designated34.Useappliancesonlywithspecificallydesignated
battery packs. Use of any other battery packs maybatterypacks.Useofanyotherbatterypacksmay
create a risk of injury and fire.createariskofinjuryandfire.
35. Do not use a battery pack or appliance that is35.Donotuseabatterypackorappliancethatis
damaged or modified. Damaged or modifieddamagedormodified.Damagedormodified
batteries may exhibit unpredictable behaviorbatteriesmayexhibitunpredictablebehavior
resulting in fire, explosion or risk of injury.resultinginfire,explosionorriskofinjury.
36. Do not expose a battery pack or appliance to fire36.Donotexposeabatterypackorappliancetofire
or excessive heat. Exposure to fire ororexcessiveheat.Exposuretofireor
temperatures above 265°F/130°C may cause antemperaturesabove265°F/130°Cmaycausean
explosion.explosion.
37. Have servicing performed by a qualified repair37.Haveservicingperformedbyaqualifiedrepair
person using only identical replacement parts.personusingonlyidenticalreplacementparts.
This will ensure that the safety of the product isThiswillensurethatthesafetyoftheproductis
maintained.maintained.
38. Recommended ambient charging temperature:38.Recommendedambientchargingtemperature:
50°F·104°F50°F·104°F
39. Recommended storage temperature: 50°F·104°F39.Recommendedstoragetemperature:50°F·104°F
(10°C·40°C).(10°C·40°C).
40. Any other servicing should be performed by an40.Anyotherservicingshouldbeperformedbyan
authorized service representative.authorizedservicerepresentative.
41. Do not operate your appliance in an appliance41.Donotoperateyourapplianceinanappliance
garage or under a wall cabinet. When storing in angarageorunderawallcabinet.Whenstoringinan
appliance garage, always unplug the unit from theappliancegarage,alwaysunplugtheunitfromthe
electrical outlet. Not doing so could create a riskelectricaloutlet.Notdoingsocouldcreatearisk
of fire, especially if the appliance touches theoffire,especiallyiftheappliancetouchesthe
walls of the garage or the door touches the unit aswallsofthegarageorthedoortouchestheunitas
it closes.itcloses.
42. Use only USB cable supplied with this product.42.UseonlyUSBcablesuppliedwiththisproduct.
43. Do not use outdoors.43.Donotuseoutdoors.
44. CAUTION! NEVER USE carbonated beverages in44.CAUTION!NEVERUSEcarbonatedbeveragesin
the travel cup.thetravelcup.
45. Do not blend hot liquids in the travel cup45.Donotblendhotliquidsinthetravelcup
(10°C·55°C).(10°C·55°C).
Save TheseSaveThese
InstructionsInstructions
For HouseholdForHousehold
Use OnlyUseOnly
33
11
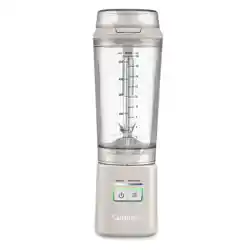
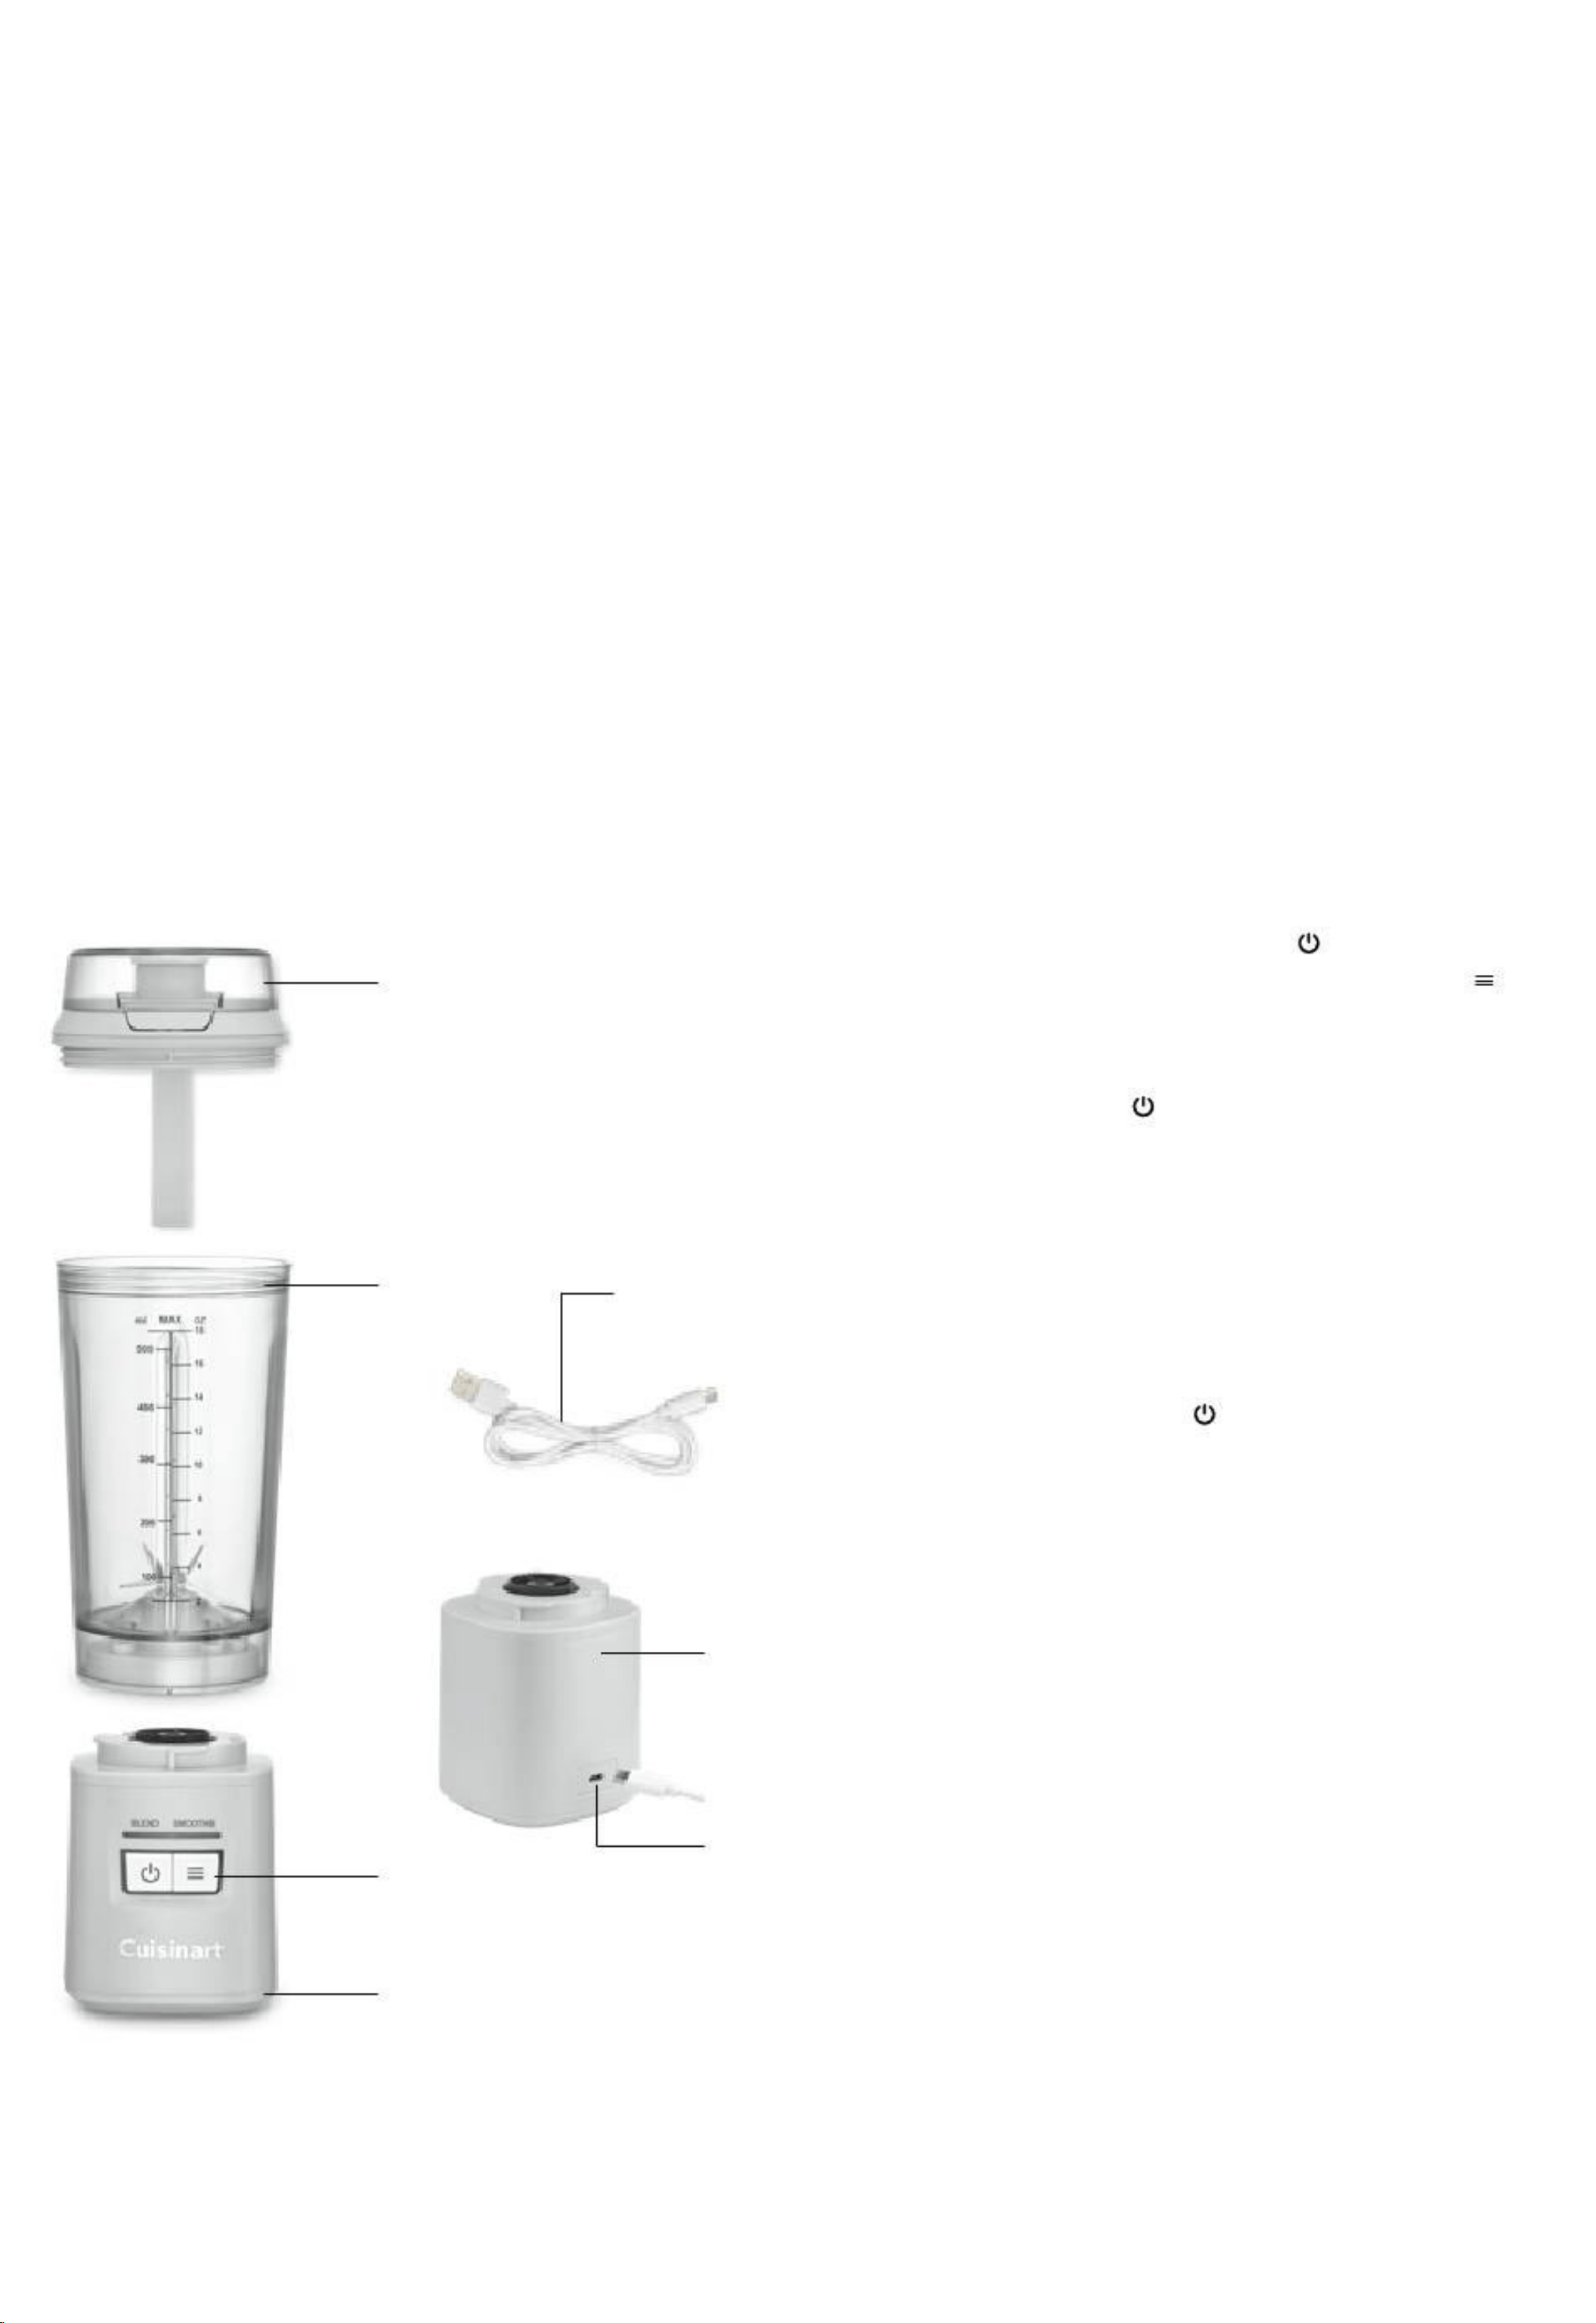
. Single 18oz. travel cup with lid and blade assembly.Single18oz.travelcupwithlidandbladeassembly
(permanently mounted in travel cup) allows you to(permanentlymountedintravelcup)allowsyouto
blend your favorite drinks: smoothies, protein,blendyourfavoritedrinks:smoothies,protein,
health, diet drinks, and more!health,dietdrinks,andmore!
2. Two Buttons: Power On/Off (icon) and Function2.TwoButtons:PowerOn/Off(icon)andFunction
(icon)(icon)
3. Rechargeable blender base, run by 11.1 volts, is3.Rechargeableblenderbase,runby11.1volts,is
sturdy, stable, and easy to handle.sturdy,stable,andeasytohandle.
4. Slip-resistant base prevents movement during use.4.Slip-resistantbasepreventsmovementduringuse.
5. Charger port:5.Chargerport:
To plug USB cable into unit.ToplugUSBcableintounit.
6. USB Power Cable6.USBPowerCable
7. White/Green/Yellow LED Indicator Lights7.White/Green/YellowLEDIndicatorLights
White: Function Indicator LightsWhite:FunctionIndicatorLights
Blue: Power on LightsBlue:PoweronLights
Green: Charge level Indicator LightsGreen:ChargelevelIndicatorLights
Yellow: Unassembled Indicator LightsYellow:UnassembledIndicatorLights
1.1.
11
66
2.2.
4.4.
Read all instructions completely for detailedReadallinstructionscompletelyfordetailed
operating procedures.operatingprocedures.
CHARGING YOUR COMPACT BLENDER/BATTERY LIFECHARGINGYOURCOMPACTBLENDER/BATTERYLIFE
The batteries in your Cordless Compact Blender haveThebatteriesinyourCordlessCompactBlenderhave
not been fully charged.notbeenfullycharged.
Before the first use of this appliance, the batteriesBeforethefirstuseofthisappliance,thebatteries
must be charged until the LED green bar aroundmustbechargeduntiltheLEDgreenbararound
buttons is fully illuminated. With a full charge, yourbuttonsisfullyilluminated.Withafullcharge,your
compact blender will run for approximately 20compactblenderwillrunforapproximately20
minutes, depending on load. Your compact blenderminutes,dependingonload.Yourcompactblender
will be fully charged in approximately 2 hours (whenwillbefullychargedinapproximately2hours(when
charged at room temperature below 30°C/86°F).chargedatroomtemperaturebelow30°C/86°F).
OPERATION INSTRUCTIONSOPERATIONINSTRUCTIONS
1. Put ingredients into the travel cup, place lid and1.Putingredientsintothetravelcup,placelidand
twist clockwise to lock.twistclockwisetolock.
2. With the base unit stable, place the assembled2.Withthebaseunitstable,placetheassembled
travel cup onto the base and turn clockwise untiltravelcupontothebaseandturnclockwiseuntil
locked into place (a snap sound will be heard).lockedintoplace(asnapsoundwillbeheard).
3. Pressing the Power button once3.PressingthePowerbuttononce
go into Ready-Mode. Press "Function" buttongointoReady-Mode.Press"Function"button
select "Blend" or "Smoothie" function. Theselect"Blend"or"Smoothie"function.The
corresponding white LED light will illuminate.correspondingwhiteLEDlightwillilluminate.
4. Press Power Button4.PressPowerButton
5. Once blending or smoothie cycle is complete,5.Onceblendingorsmoothiecycleiscomplete,
blender will automatically turn off.blenderwillautomaticallyturnoff.
Note: The default blending cycle is 30 seconds. If youNote:Thedefaultblendingcycleis30seconds.Ifyou
wish for an additional cycle, press power buttonwishforanadditionalcycle,presspowerbutton
(icon) a second time.(icon)asecondtime.
Note: If you wish to stop the blender anytime duringNote:Ifyouwishtostoptheblenderanytimeduring
the cycle, press the powerthecycle,pressthepower
6. Remove the travel cup from the base by twisting6.Removethetravelcupfromthebasebytwisting
counterclockwise and lifting.counterclockwiseandlifting.
NOTE: Do not fill with ingredients/liquid past the maxNOTE:Donotfillwithingredients/liquidpastthemax
fill line.fillline.
NOTE: Maximum runtime of a single blending cycle isNOTE:Maximumruntimeofasingleblendingcycleis
3.3.
30 seconds30seconds
5.5.
44
, the blender will,theblenderwill
to start the blender.tostarttheblender.
button.button.
toto

Operating andOperatingand
Safety TipsSafetyTips
· Always use the blender on a clean, sturdy, and dry surface.·Alwaysusetheblenderonaclean,sturdy,anddrysurface.
· Always operate the blender with the lid installed on travel·Alwaysoperatetheblenderwiththelidinstalledontravel
cupcup
· Don't remove travel cup while unit is running.·Don'tremovetravelcupwhileunitisrunning.
· Don't store food or liquids in your travel cup.·Don'tstorefoodorliquidsinyourtravelcup.
· Don't overload travel cup.·Don'toverloadtravelcup.
· CAUTION: NEVER use carbonated beverages in the·CAUTION:NEVERusecarbonatedbeveragesinthe
travel cup.travelcup.
· Don't blend hot liquids in travel cup.·Don'tblendhotliquidsintravelcup.
· Don't use any container or accessories not recommended·Don'tuseanycontaineroraccessoriesnotrecommended
by CuisinartbyCuisinart
. Doing so may result in injury..Doingsomayresultininjury.
®®
· The travel cup should never be used in a microwave.·Thetravelcupshouldneverbeusedinamicrowave.
Cleaning andCleaningand
MaintenanceMaintenance
The base and parts are made of corrosion-resistantThebaseandpartsaremadeofcorrosion-resistant
materials that are easy to clean. Before first use andmaterialsthatareeasytoclean.Beforefirstuseand
after every use, clean travel cup and lid in warm,aftereveryuse,cleantravelcupandlidinwarm,
soapy water. Travel cup and lid is top rack dishwashersoapywater.Travelcupandlidistoprackdishwasher
safe.safe.
(Note: Base should be wiped clean only. Do not(Note:Baseshouldbewipedcleanonly.Donot
submerge or subject to running water.) Periodicallysubmergeorsubjecttorunningwater.)Periodically
check all parts before reassembly.checkallpartsbeforereassembly.
DO NOT USE if any part is damaged, or the cup isDONOTUSEifanypartisdamaged,orthecupis
chipped or cracked.chippedorcracked.
NEVER TOUCH THE BLADE ITSELF.NEVERTOUCHTHEBLADEITSELF.
CAUTION: The blades are SHARP and may causeCAUTION:ThebladesareSHARPandmaycause
injury.injury.
DO NOT attempt to remove blades from travel cup.DONOTattempttoremovebladesfromtravelcup.
Tip: You may wish to clean your travel cup as follows:Tip:Youmaywishtocleanyourtravelcupasfollows:
Squirt a small amount of dishwashing liquid intoSquirtasmallamountofdishwashingliquidinto
travel cup and fill halfway withwarm water. Attach lidtravelcupandfillhalfwaywithwarmwater.Attachlid
on travel cup, the attach travel cup to base. Run forontravelcup,theattachtravelcuptobase.Runfor
15 seconds. Repeat, using clean tap water. Carefully15seconds.Repeat,usingcleantapwater.Carefully
disassemble parts and empty cup. Rinse and dry alldisassemblepartsandemptycup.Rinseanddryall
parts thoroughly. Finally, wipe the motor base cleanpartsthoroughly.Finally,wipethemotorbaseclean
with a damp cloth to remove any residue, and drywithadampclothtoremoveanyresidue,anddry
thoroughly.thoroughly.
Never submerge the motor base in water or otherNeversubmergethemotorbaseinwaterorother
liquids, or place in a dishwasher.liquids,orplaceinadishwasher.
Any other servicing should be performed by anAnyotherservicingshouldbeperformedbyan
authorized service representative.authorizedservicerepresentative.
· When using your travel cup, ingredients are put in·Whenusingyourtravelcup,ingredientsareputin
the following order: Always put the liquids in firstthefollowingorder:Alwaysputtheliquidsinfirst
then the softest ingredients into the travel cupthenthesoftestingredientsintothetravelcup
(non-frozen banana/fruits), and finish with the(non-frozenbanana/fruits),andfinishwiththe
harder ingredients (Ice and frozen fruits)harderingredients(Iceandfrozenfruits)
· It is recommended that most foods be cut into·Itisrecommendedthatmostfoodsbecutinto
½-inch pieces to achieve the most uniform result.½-inchpiecestoachievethemostuniformresult.
· If food jams or sticks to the sides of the travel cup·Iffoodjamsorstickstothesidesofthetravelcup
when blending (red LED will flash), stop the blender,whenblending(redLEDwillflash),stoptheblender,
Remove travel cup from the base before removingRemovetravelcupfromthebasebeforeremoving
lid, and carefully scrape down the food, replace lip,lid,andcarefullyscrapedownthefood,replacelip,
reattached assembled travel cup to base and blendreattachedassembledtravelcuptobaseandblend
again to combine.againtocombine.
· When blending thicker mixtures, lightly hold down·Whenblendingthickermixtures,lightlyholddown
the top of travel cup to prevent unnecessarythetopoftravelcuptopreventunnecessary
movement.movement.
· This blender is equipped with an overloaded·Thisblenderisequippedwithanoverloaded
protection that automatically shuts down the motorprotectionthatautomaticallyshutsdownthemotor
in case of overheating. A red LED light will flash. Letincaseofoverheating.AredLEDlightwillflash.Let
the unit rest until lights stop flashing about 30theunitrestuntillightsstopflashingabout30
seconds to 10 minutes.secondsto10minutes.
· If the blade becomes locked by ingredients (red LED·Ifthebladebecomeslockedbyingredients(redLED
will flash), it is recommended to reduce the amountwillflash),itisrecommendedtoreducetheamount
of ingredients inside the cup, (refer to third bulletofingredientsinsidethecup,(refertothirdbullet
NUMBER).NUMBER).
· After finishing a blending cycle, it is recommended·Afterfinishingablendingcycle,itisrecommended
to let the unit to rest for at least a minute beforetolettheunittorestforatleastaminutebefore
starting next blending cycle to avoid overheating ofstartingnextblendingcycletoavoidoverheatingof
unit.unit.
55

LIMITEDLIMITED
WARRANTYWARRANTY
Subject to the exclusions and limitations containedSubjecttotheexclusionsandlimitationscontained
herein, Conair LLC dba Cuisinart ("Cuisinart") war-herein,ConairLLCdbaCuisinart("Cuisinart")war-
rants that the CuisinartrantsthattheCuisinart
("Product") will be free from material defects in materi-("Product")willbefreefrommaterialdefectsinmateri-
als and workmanship under normal home use condi-alsandworkmanshipundernormalhomeusecondi-
tions for a period of THREE (3) years beginning on thetionsforaperiodofTHREE(3)yearsbeginningonthe
date the Product was purchased in its original, sealeddatetheProductwaspurchasedinitsoriginal,sealed
packaging, unless otherwise specified in this Limitedpackaging,unlessotherwisespecifiedinthisLimited
Warranty. This Limited Warranty is only for U.S. con-Warranty.ThisLimitedWarrantyisonlyforU.S.con-
sumers (defined herein as purchasers at retail for per-sumers(definedhereinaspurchasersatretailforper-
sonal, family, or household use) who originally purchasesonal,family,orhouseholduse)whooriginallypurchase
the Product from Cuisinart or an authorized CuisinarttheProductfromCuisinartoranauthorizedCuisinart
reseller (if you are unsure whether a retailer or otherreseller(ifyouareunsurewhetheraretailerorother
point of sale is an authorized or unauthorized CuisinartpointofsaleisanauthorizedorunauthorizedCuisinart
reseller, contact Cuisinart).reseller,contactCuisinart).
This Limited Warranty does NOT cover:ThisLimitedWarrantydoesNOTcover:
· Normal wear and tear;·Normalwearandtear;
· Any Product purchased by commercial purchasers·AnyProductpurchasedbycommercialpurchasers
or for commercial or nonhousehold uses;orforcommercialornonhouseholduses;
· Accessories, parts, or software added to the Product·Accessories,parts,orsoftwareaddedtotheProduct
after the system is shipped from Cuisinart;afterthesystemisshippedfromCuisinart;
· Any costs associated with the replacement·Anycostsassociatedwiththereplacement
or repair of the Product, including labor, installation,orrepairoftheProduct,includinglabor,installation,
or other costs incurred by you without priororothercostsincurredbyyouwithoutprior
Cuisinart approval;Cuisinartapproval;
· Damage to the Product, defective conditions, or·DamagetotheProduct,defectiveconditions,or
nonconformities due to: (1) external causes, includ-nonconformitiesdueto:(1)externalcauses,includ-
ing shipping, accidents, problems with electricalingshipping,accidents,problemswithelectrical
power (Product designed only for use with 120-voltpower(Productdesignedonlyforusewith120-volt
outlets), abnormal conditions (such as mechanicaloutlets),abnormalconditions(suchasmechanical
or environmental); (2) usage not in accordance withorenvironmental);(2)usagenotinaccordancewith
Product instructions; (3) misuse, neglect, unauthor-Productinstructions;(3)misuse,neglect,unauthor-
ized alteration, unauthorized repair; and (4) acts ofizedalteration,unauthorizedrepair;and(4)actsof
God or other events beyond Cuisinart's control;GodorothereventsbeyondCuisinart'scontrol;
· Damage caused by you or any unauthorized third·Damagecausedbyyouoranyunauthorizedthird
party, even though necessary repairs and mainte-party,eventhoughnecessaryrepairsandmainte-
nance might be performed by any company.nancemightbeperformedbyanycompany.
· Damage caused by accessories or replacement parts·Damagecausedbyaccessoriesorreplacementparts
not specifically authorized by Cuisinart; andnotspecificallyauthorizedbyCuisinart;and
· Any Product where the original Product identification·AnyProductwheretheoriginalProductidentification
markings (trademark or serial number) have beenmarkings(trademarkorserialnumber)havebeen
removed, altered, or obliterated.removed,altered,orobliterated.
It is recommended that you visit the website, https://Itisrecommendedthatyouvisitthewebsite,https://
www.cuisinart.com/register-your-product.html, for awww.cuisinart.com/register-your-product.html,fora
fast, efficient way to complete your Product registra-fast,efficientwaytocompleteyourProductregistra-
tion. However, Product registration does not eliminatetion.However,Productregistrationdoesnoteliminate
the need for the consumer to maintain the originaltheneedfortheconsumertomaintaintheoriginal
proof of purchase in order to obtain the warrantyproofofpurchaseinordertoobtainthewarranty
Portable Personal BlenderPortablePersonalBlender
®®
benefits. In the event that you do not have proof ofbenefits.Intheeventthatyoudonothaveproofof
purchase date, the purchase date for purposes of thispurchasedate,thepurchasedateforpurposesofthis
Limited Warranty will be the date of manufacture.LimitedWarrantywillbethedateofmanufacture.
HASSLE-FREE WARRANTYHASSLE-FREEWARRANTY
If the Product that is the subject of this LimitedIftheProductthatisthesubjectofthisLimited
Warranty fails during the warranty period for reasonsWarrantyfailsduringthewarrantyperiodforreasons
covered by this Limited Warranty, Cuisinart will, at itscoveredbythisLimitedWarranty,Cuisinartwill,atits
option, repair the Product, replace the Product withoption,repairtheProduct,replacetheProductwith
another identical or reasonably equivalent product, oranotheridenticalorreasonablyequivalentproduct,or
if Cuisinart is unable to repair or replace the Product,ifCuisinartisunabletorepairorreplacetheProduct,
refund the purchase price, less the amount directlyrefundthepurchaseprice,lesstheamountdirectly
attributable to the consumer's prior usage of theattributabletotheconsumer'spriorusageofthe
Product. To obtain a return shipping label, email usProduct.Toobtainareturnshippinglabel,emailus
at https://www.cuisinart.com/customer-care/product-athttps://www.cuisinart.com/customer-care/product-
assistance/product-inquiry/, or call our Consumerassistance/product-inquiry/,orcallourConsumer
®®
Service Center toll-free at 1-800-726-0190 to speakServiceCentertoll-freeat1-800-726-0190tospeak
with a representative.witharepresentative.
Upon receipt of the Product, Cuisinart will inspect theUponreceiptoftheProduct,Cuisinartwillinspectthe
Product and, if required under this Limited Warranty,Productand,ifrequiredunderthisLimitedWarranty,
attempt to repair, replace, or refund the Product withinattempttorepair,replace,orrefundtheProductwithin
thirty (30) days. However, there may be delays beyondthirty(30)days.However,theremaybedelaysbeyond
Cuisinart's control, in which case that time period mayCuisinart'scontrol,inwhichcasethattimeperiodmay
be extended as reasonably necessary.beextendedasreasonablynecessary.
IMPORTANT: If the nonconforming Product is to beIMPORTANT:IfthenonconformingProductistobe
serviced by someone other than Cuisinart's AuthorizedservicedbysomeoneotherthanCuisinart'sAuthorized
Service Center, please remind the servicer to call ourServiceCenter,pleaseremindtheservicertocallour
Consumer Service Center at 1-800-726-0190 to ensureConsumerServiceCenterat1-800-726-0190toensure
that the problem is properly diagnosed, the Product isthattheproblemisproperlydiagnosed,theProductis
serviced with the correct parts, and the Product is stillservicedwiththecorrectparts,andtheProductisstill
under warranty.underwarranty.
CALIFORNIA RESIDENTS ONLYCALIFORNIARESIDENTSONLY
The THREE (3) year Limited Warranty period beginsTheTHREE(3)yearLimitedWarrantyperiodbegins
on the date the Product was delivered, which may beonthedatetheProductwasdelivered,whichmaybe
different than the date the Product was purchased.differentthanthedatetheProductwaspurchased.
California residents also have the option of obtainingCaliforniaresidentsalsohavetheoptionofobtaining
the benefits of this Limited Warranty by bringing thethebenefitsofthisLimitedWarrantybybringingthe
Product to (A) the store where it was purchased orProductto(A)thestorewhereitwaspurchasedor
(B) another retail store that sells Cuisinart products of(B)anotherretailstorethatsellsCuisinartproductsof
the same type. The retail store shall then, accordingthesametype.Theretailstoreshallthen,according
to its preference, either repair the Product, refer thetoitspreference,eitherrepairtheProduct,referthe
consumer to an independent repair facility, replace theconsumertoanindependentrepairfacility,replacethe
Product with another identical or reasonably equivalentProductwithanotheridenticalorreasonablyequivalent
product, or refund the purchase price less the amountproduct,orrefundthepurchasepricelesstheamount
directly attributable to the consumer's prior usage ofdirectlyattributabletotheconsumer'spriorusageof
the Product. California residents may also, accordingtheProduct.Californiaresidentsmayalso,according
to their preference, return nonconforming Productstotheirpreference,returnnonconformingProducts
directly to Cuisinart for repair or, if necessary, replace-directlytoCuisinartforrepairor,ifnecessary,replace-
ment with another identical or reasonably equivalentmentwithanotheridenticalorreasonablyequivalent
Product by calling our Consumer Service Center toll-ProductbycallingourConsumerServiceCentertoll-
free at 1-800-726-0190. Cuisinart will be responsible forfreeat1-800-726-0190.Cuisinartwillberesponsiblefor
66

the cost of such repair, replacement, and/or shippingthecostofsuchrepair,replacement,and/orshipping
and handling for such nonconforming Products underandhandlingforsuchnonconformingProductsunder
warranty.warranty.
THIS LIMITED WARRANTY GIVES YOU SPECIFIC LEGALTHISLIMITEDWARRANTYGIVESYOUSPECIFICLEGAL
RIGHTS, AND YOU MAY ALSO HAVE OTHER RIGHTS THATRIGHTS,ANDYOUMAYALSOHAVEOTHERRIGHTSTHAT
VARY FROM STATE TO STATE OR BY JURISDICTION. INVARYFROMSTATETOSTATEORBYJURISDICTION.IN
THE EVENT THIS LIMITED WARRANTY IS BREACHED,THEEVENTTHISLIMITEDWARRANTYISBREACHED,
YOU MAY HAVE CLAIMS FOR REPLACEMENT, DAMAGES,YOUMAYHAVECLAIMSFORREPLACEMENT,DAMAGES,
OR OTHER PENALTIESOROTHERPENALTIES
LIMITATIONS OF LIABILITY/ADDITIONAL LIMITATIONSLIMITATIONSOFLIABILITY/ADDITIONALLIMITATIONS
AND EXCLUSIONSANDEXCLUSIONS
ALL EXPRESS AND IMPLIED WARRANTIES AREALLEXPRESSANDIMPLIEDWARRANTIESARE
LIMITED IN DURATION TO THE LIMITED WARRANTYLIMITEDINDURATIONTOTHELIMITEDWARRANTY
PERIOD. NO WARRANTIES APPLY AFTER THAT PERIOD.PERIOD.NOWARRANTIESAPPLYAFTERTHATPERIOD.
SOME STATES (OR JURISDICTIONS) DO NOT ALLOWSOMESTATES(ORJURISDICTIONS)DONOTALLOW
LIMITATIONS ON HOW LONG AN IMPLIED WARRANTYLIMITATIONSONHOWLONGANIMPLIEDWARRANTY
LASTS, SO THIS LIMITATION MAY NOT APPLY TOLASTS,SOTHISLIMITATIONMAYNOTAPPLYTO
YOU. CUISINART'S RESPONSIBILITY UNDER THIS ORYOU.CUISINART'SRESPONSIBILITYUNDERTHISOR
ANY OTHER WARRANTY, IMPLIED OR EXPRESS, ISANYOTHERWARRANTY,IMPLIEDOREXPRESS,IS
LIMITED TO REPAIR, REPLACEMENT, OR REFUND, ASLIMITEDTOREPAIR,REPLACEMENT,ORREFUND,AS
SET FORTH ABOVE. THESE REMEDIES ARE THE SOLESETFORTHABOVE.THESEREMEDIESARETHESOLE
AND EXCLUSIVE REMEDIES FOR ANY BREACH OFANDEXCLUSIVEREMEDIESFORANYBREACHOF
WARRANTY. TO THE MAXIMUM EXTENT PERMITTEDWARRANTY.TOTHEMAXIMUMEXTENTPERMITTED
BY LAW, CUISINART IS NOT RESPONSIBLE FORBYLAW,CUISINARTISNOTRESPONSIBLEFOR
ANY DIRECT, INDIRECT, SPECIAL, INCIDENTAL, ORANYDIRECT,INDIRECT,SPECIAL,INCIDENTAL,OR
CONSEQUENTIAL DAMAGES RESULTING FROM ANYCONSEQUENTIALDAMAGESRESULTINGFROMANY
BREACH OF WARRANTY, OR UNDER ANY OTHER LEGALBREACHOFWARRANTY,ORUNDERANYOTHERLEGAL
THEORY (INCLUDING, BUT NOT LIMITED TO, LOSTTHEORY(INCLUDING,BUTNOTLIMITEDTO,LOST
PROFITS, DOWNTIME, LOSS OF GOODWILL, DAMAGEPROFITS,DOWNTIME,LOSSOFGOODWILL,DAMAGE
TO OR REPLACEMENT OF EQUIPMENT AND PROPERTY,TOORREPLACEMENTOFEQUIPMENTANDPROPERTY,
AND ANY COSTS OF RECOVERING, REPROGRAMMING,ANDANYCOSTSOFRECOVERING,REPROGRAMMING,
OR REPRODUCING ANY PROGRAM OR DATA STOREDORREPRODUCINGANYPROGRAMORDATASTORED
IN OR USED WITH A SYSTEM CONTAINING THEINORUSEDWITHASYSTEMCONTAININGTHE
PRODUCT), EVEN IF CUISINART HAS BEEN ADVISED OFPRODUCT),EVENIFCUISINARTHASBEENADVISEDOF
THE POSSIBILITY OF SUCH DAMAGES. SOME STATESTHEPOSSIBILITYOFSUCHDAMAGES.SOMESTATES
(OR JURISDICTIONS) DO NOT ALLOW THE EXCLUSION(ORJURISDICTIONS)DONOTALLOWTHEEXCLUSION
OR LIMITATION OF INCIDENTAL OR CONSEQUENTIALORLIMITATIONOFINCIDENTALORCONSEQUENTIAL
DAMAGES, SO THE ABOVE LIMITATIONS OR EXCLUSIONSDAMAGES,SOTHEABOVELIMITATIONSOREXCLUSIONS
MAY NOT APPLY TO YOU. ALL EXPRESS AND IMPLIEDMAYNOTAPPLYTOYOU.ALLEXPRESSANDIMPLIED
WARRANTIES ARE LIMITED IN DURATION TO THEWARRANTIESARELIMITEDINDURATIONTOTHE
LIMITED WARRANTY PERIOD. NO WARRANTIESLIMITEDWARRANTYPERIOD.NOWARRANTIES
APPLY AFTER THAT PERIOD. SOME STATES (ORAPPLYAFTERTHATPERIOD.SOMESTATES(OR
JURISDICTIONS) DO NOT ALLOW LIMITATIONS ONJURISDICTIONS)DONOTALLOWLIMITATIONSON
HOW LONG AN IMPLIED WARRANTY LASTS, SO THISHOWLONGANIMPLIEDWARRANTYLASTS,SOTHIS
LIMITATION MAY NOT APPLY TO YOU.LIMITATIONMAYNOTAPPLYTOYOU.
This Limited Warranty is issued by:ThisLimitedWarrantyisissuedby:
Conair LLCConairLLC
1 Cummings Point Road1CummingsPointRoad
Stamford, CT 06902Stamford,CT06902
1-800-726-01901-800-726-0190
77

RecipesRecipes
Gluten-Free Banana Muffins .............................. 8Gluten-FreeBananaMuffins..............................8
Lemon-Thyme Shortbread .................................. 9Lemon-ThymeShortbread..................................9
Edible Cookie Dough ............................................ 9EdibleCookieDough............................................9
FPOFPO
Ginger Cookies ......................................................10GingerCookies......................................................10
Pavlova with Blood OrangePavlovawithBloodOrange
and Pomegranate ................................................10andPomegranate................................................10
Chocolate Cream Pie ............................................11ChocolateCreamPie............................................11
Yellow Buttermilk Sheet CakeYellowButtermilkSheetCake
with Fluffy Chocolate Frosting .........................12withFluffyChocolateFrosting.........................12
Creamy Mashed Potatoes ..................................12CreamyMashedPotatoes..................................12
Buffalo Chicken Dip .............................................13BuffaloChickenDip.............................................13
Pimento Cheese Spread ...................................13PimentoCheeseSpread...................................13
Gluten-Free Banana MuffinsGluten-FreeBananaMuffins
Makes 12 muffinsMakes12muffins
Nonstick cooking sprayNonstickcookingspray
22
cups gluten-free, all-purpose flourcupsgluten-free,all-purposeflour
½½
cup whole rolled oats (not quick cooking)cupwholerolledoats(notquickcooking)
¹·³¹·³
cup granulated sugarcupgranulatedsugar
¹·³¹·³
cup packed light brown sugarcuppackedlightbrownsugar
1½1½
teaspoons baking powderteaspoonsbakingpowder
¼¼
teaspoon baking sodateaspoonbakingsoda
½½
teaspoon kosher saltteaspoonkoshersalt
½½
teaspoon xanthan gum (optional; use only ifteaspoonxanthangum(optional;useonlyif
flour blend does not include it)flourblenddoesnotincludeit)
½½
teaspoon ground cinnamonteaspoongroundcinnamon
1½1½
cups mashed, very ripe bananas (about 3cupsmashed,veryripebananas(about3
medium bananas)mediumbananas)
½½
cup vegetable oilcupvegetableoil
22
large eggs, room temperaturelargeeggs,roomtemperature
½½
teaspoon pure vanilla extractteaspoonpurevanillaextract
1. Preheat the oven to 375°F with the rack in the1.Preheattheovento375°Fwiththerackinthe
middle position. Lightly coat a regular 12-cupmiddleposition.Lightlycoataregular12-cup
muffin pan with nonstick cooking spray; reserve.muffinpanwithnonstickcookingspray;reserve.
2. Put the flour, oats, sugars, baking powder, baking2.Puttheflour,oats,sugars,bakingpowder,baking
soda, salt, xanthan gum (if using), and cinnamonsoda,salt,xanthangum(ifusing),andcinnamon
into a mixing bowl. Using the beaters, mix onintoamixingbowl.Usingthebeaters,mixon
Speeds 1 to 2 until fully combined, about 30Speeds1to2untilfullycombined,about30
seconds.seconds.
3. In a separate, large mixing bowl, combine the3.Inaseparate,largemixingbowl,combinethe
bananas, oil, eggs, and vanilla extract on Speed 3bananas,oil,eggs,andvanillaextractonSpeed3
until smooth and creamy, 1 to 2 minutes. Add theuntilsmoothandcreamy,1to2minutes.Addthe
dry ingredients and mix on Speed 2 until fullydryingredientsandmixonSpeed2untilfully
combined.combined.
4. Divide evenly among the prepared muffin cups.4.Divideevenlyamongthepreparedmuffincups.
Bake until the tops of the muffins spring back toBakeuntilthetopsofthemuffinsspringbackto
the touch, about 16 to 18 minutes. Transfer pan tothetouch,about16to18minutes.Transferpanto
a wire rack. Enjoy muffins warm or at roomawirerack.Enjoymuffinswarmoratroom
temperature.temperature.
Lemon-Thyme ShortbreadLemon-ThymeShortbread
Makes about 3 dozen cookiesMakesabout3dozencookies
Cookie Dough:CookieDough:
1¾1¾
cups unbleached, all-purpose flourcupsunbleached,all-purposeflour
½½
teaspoon kosher saltteaspoonkoshersalt
1616
tablespoons (2 sticks; ½ pound) European-style,tablespoons(2sticks;½pound)European-style,
unsalted butter, cut into 8 pieces, roomunsaltedbutter,cutinto8pieces,room
temperaturetemperature
¹·³¹·³
cup granulated sugarcupgranulatedsugar
¹·³¹·³
cup confectioners' sugar, siftedcupconfectioners'sugar,sifted
22
large egg yolks, room temperaturelargeeggyolks,roomtemperature
1 to 2 tablespoons fresh thyme leaves1to2tablespoonsfreshthymeleaves
22
tablespoons grated lemon zesttablespoonsgratedlemonzest
Lemon Icing:LemonIcing:
½½
cup confectioners' sugar, siftedcupconfectioners'sugar,sifted
22
tablespoons heavy creamtablespoonsheavycream
22
teaspoons fresh lemon juiceteaspoonsfreshlemonjuice
Pinch fine sea saltPinchfineseasalt
88

1. Put the flour and salt into a medium mixing bowl.1.Puttheflourandsaltintoamediummixingbowl.
Using the beaters, mix on Speed 1 to fullyUsingthebeaters,mixonSpeed1tofully
combine, about 30 seconds. Reserve.combine,about30seconds.Reserve.
2. Put the butter into a large mixing bowl. Mix on2.Putthebutterintoalargemixingbowl.Mixon
Speeds 2 to 3 until creamy, then add the sugars.Speeds2to3untilcreamy,thenaddthesugars.
Mix on Speeds 2 to 3 until light, then add the eggMixonSpeeds2to3untillight,thenaddtheegg
yolks, and beat until combined. Add the dryyolks,andbeatuntilcombined.Addthedry
ingredients, and mix on Speed 2 until evenlyingredients,andmixonSpeed2untilevenly
combined. Add the thyme and lemon zest, andcombined.Addthethymeandlemonzest,and
gently mix into dough.gentlymixintodough.
3. Divide dough into two disks. Place each piece of3.Dividedoughintotwodisks.Placeeachpieceof
dough between two separate pieces ofdoughbetweentwoseparatepiecesof
parchment. Roll each out to ¼-inch thickness.parchment.Rolleachoutto¼-inchthickness.
Transfer the dough to a baking sheet and coverTransferthedoughtoabakingsheetandcover
tightly with plastic wrap. Refrigerate overnight.tightlywithplasticwrap.Refrigerateovernight.
4. Preheat the oven to 350°F with racks in the lower4.Preheattheovento350°Fwithracksinthelower
and upper thirds of the oven. Line two rimmedandupperthirdsoftheoven.Linetworimmed
baking sheets with parchment paper.bakingsheetswithparchmentpaper.
5. Take the dough out of the refrigerator. Use a5.Takethedoughoutoftherefrigerator.Usea
1½-inch round cutter to form small disks. Transfer1½-inchroundcuttertoformsmalldisks.Transfer
to the prepared baking sheets. Chill for about 10tothepreparedbakingsheets.Chillforabout10
minutes. Repeat with remaining dough, reformingminutes.Repeatwithremainingdough,reforming
and rerolling the scraps as necessary.andrerollingthescrapsasnecessary.
6. Bake the chilled dough until just browned around6.Bakethechilleddoughuntiljustbrownedaround
the edges, about 12 minutes, rotating the pans iftheedges,about12minutes,rotatingthepansif
necessary. Cool the cookies completely.necessary.Coolthecookiescompletely.
7. While cookies are cooling, prepare the icing. Put7.Whilecookiesarecooling,preparetheicing.Put
the sugar, cream, lemon juice, and salt into athesugar,cream,lemonjuice,andsaltintoa
medium mixing bowl, and then mix on Speed 1mediummixingbowl,andthenmixonSpeed1
until very smooth and spreadable. If the icinguntilverysmoothandspreadable.Iftheicing
seems too thick, add more cream, 1 teaspoon at aseemstoothick,addmorecream,1teaspoonata
time. If it seems too thin, add more confectioners'time.Ifitseemstoothin,addmoreconfectioners'
sugar, 1 teaspoon at a time. Spread on top of thesugar,1teaspoonatatime.Spreadontopofthe
cooled cookies.cooledcookies.
Edible Cookie DoughEdibleCookieDough
Makes about 3½ cupsMakesabout3½cups
88
tablespoons (1 stick) unsalted butter, cut into 4tablespoons(1stick)unsaltedbutter,cutinto4
pieces, room temperaturepieces,roomtemperature
··
cup packed light brown sugarcuppackedlightbrownsugar
··
cup granulated sugarcupgranulatedsugar
22
tablespoons milk (any fat variety or nondairytablespoonsmilk(anyfatvarietyornondairy
alternative)alternative)
11
tablespoon pure vanilla extracttablespoonpurevanillaextract
1·1·
cups unbleached, all-purpose flour (you cancupsunbleached,all-purposeflour(youcan
substitute a gluten-free, all-purpose floursubstituteagluten-free,all-purposeflour
blend)*blend)*
½½
teaspoon kosher saltteaspoonkoshersalt
11
cup semisweet chocolate chipscupsemisweetchocolatechips
1. Put the butter and sugars into a large mixing bowl.1.Putthebutterandsugarsintoalargemixingbowl.
Mix on Speeds 2 to 4 until very light and creamy,MixonSpeeds2to4untilverylightandcreamy,
about 2 minutes. Stop to scrape down the bowl asabout2minutes.Stoptoscrapedownthebowlas
needed.needed.
2. While mixing on Speed 2, add the milk and vanilla2.WhilemixingonSpeed2,addthemilkandvanilla
extract. Add the flour and salt, and mix on Speedextract.Addtheflourandsalt,andmixonSpeed
2 until completely combined. Add the chips and2untilcompletelycombined.Addthechipsand
mix on Speed 2.mixonSpeed2.
3. Scoop the dough into desired-size pieces. While3.Scoopthedoughintodesired-sizepieces.While
the dough can be eaten immediately, it is bestthedoughcanbeeatenimmediately,itisbest
chilled. Store in the refrigerator for up to 1 weekchilled.Storeintherefrigeratorforupto1week
or in the freezer for up to 1 month.orinthefreezerforupto1month.
* It is important to precook flour before using to*Itisimportanttoprecookflourbeforeusingto
avoid consuming a raw product. It is simple to doavoidconsumingarawproduct.Itissimpletodo
in your own home oven. Spread the flour that youinyourownhomeoven.Spreadtheflourthatyou
will be using on a rimmed baking pan. Put into awillbeusingonarimmedbakingpan.Putintoa
350°F oven and cook for about 5 minutes, stirring350°Fovenandcookforabout5minutes,stirring
halfway through. The flour needs to reach 160°F tohalfwaythrough.Theflourneedstoreach160°Fto
be sure that it is safe to eat.besurethatitissafetoeat.
Ginger CookiesGingerCookies
Makes about 2½ dozen cookiesMakesabout2½dozencookies
2¼ cups unbleached, all-purpose flour2¼cupsunbleached,all-purposeflour
11
teaspoon baking sodateaspoonbakingsoda
11
tablespoon ground gingertablespoongroundginger
11
teaspoon ground cinnamonteaspoongroundcinnamon
½½
teaspoon ground allspiceteaspoongroundallspice
¾¾
teaspoon kosher saltteaspoonkoshersalt
¼¼
cup finely chopped crystallized gingercupfinelychoppedcrystallizedginger
1212
tablespoons (1½ sticks) unsalted butter, cut intotablespoons(1½sticks)unsaltedbutter,cutinto
1-inch pieces, room temperature1-inchpieces,roomtemperature
¼¼
cup molassescupmolasses
¾¾
cup packed light brown sugarcuppackedlightbrownsugar
¼¼
cup granulated sugarcupgranulatedsugar
11
large egg, room temperaturelargeegg,roomtemperature
11
teaspoon pure vanilla extractteaspoonpurevanillaextract
¹·³¹·³
cup turbinado sugar, for rollingcupturbinadosugar,forrolling
1. Preheat the oven to 350°F with racks in the lower1.Preheattheovento350°Fwithracksinthelower
99

and upper thirds of the oven. Line two bakingandupperthirdsoftheoven.Linetwobaking
sheets with parchment paper.sheetswithparchmentpaper.
2. Put the flour, baking soda, spices, and salt into a2.Puttheflour,bakingsoda,spices,andsaltintoa
medium mixing bowl. Using the beaters, mix onmediummixingbowl.Usingthebeaters,mixon
Speed 1 to fully combine, at least 30 seconds. AddSpeed1tofullycombine,atleast30seconds.Add
the chopped ginger and mix on Speed 1 to coat;thechoppedgingerandmixonSpeed1tocoat;
reserve.reserve.
3. Put the butter and molasses into a large mixing3.Putthebutterandmolassesintoalargemixing
bowl. Mix, starting at Speed 2 and increasing tobowl.Mix,startingatSpeed2andincreasingto
Speed 4, until smooth, about 2 minutes. ScrapeSpeed4,untilsmooth,about2minutes.Scrape
down the bowl and then add the sugars. Mix ondownthebowlandthenaddthesugars.Mixon
Speeds 2 to 4 until very light and the sugar hasSpeeds2to4untilverylightandthesugarhas
dissolved into the butter and molasses, about 2dissolvedintothebutterandmolasses,about2
minutes. Add the egg, mixing on Speeds 2 to 3,minutes.Addtheegg,mixingonSpeeds2to3,
and then the vanilla extract. Add the dryandthenthevanillaextract.Addthedry
ingredients and mix on Speed 2 until justingredientsandmixonSpeed2untiljust
combined.combined.
4. Put the turbinado sugar into a shallow bowl or4.Puttheturbinadosugarintoashallowbowlor
baking pan.bakingpan.
5. Scoop the dough into golfball-size pieces. Roll in5.Scoopthedoughintogolfball-sizepieces.Rollin
the turbinado sugar and then place on thetheturbinadosugarandthenplaceonthe
prepared baking sheets. Gently flatten each piecepreparedbakingsheets.Gentlyflatteneachpiece
of dough with the bottom of a clean glass.ofdoughwiththebottomofacleanglass.
6. Bake until just set at the edges, 12 to 15 minutes.6.Bakeuntiljustsetattheedges,12to15minutes.
Allow pans to cool between batches of cookies.Allowpanstocoolbetweenbatchesofcookies.
Pavlova with Blood OrangePavlovawithBloodOrange
and PomegranateandPomegranate
Makes 12 servingsMakes12servings
Meringue:Meringue:
44
large egg whiteslargeeggwhites
Pinch cream of tartarPinchcreamoftartar
Pinch kosher saltPinchkoshersalt
11
cup granulated sugarcupgranulatedsugar
22
teaspoons cornstarch, siftedteaspoonscornstarch,sifted
11
teaspoon white vinegarteaspoonwhitevinegar
¼¼
teaspoon pure vanilla extractteaspoonpurevanillaextract
½½
teaspoon grated citrus zestteaspoongratedcitruszest
Topping:Topping:
22
blood oranges, peeled and segmentedbloodoranges,peeledandsegmented
33
tablespoons pomegranate seedstablespoonspomegranateseeds
½½
cup granulated sugarcupgranulatedsugar
½½
cup watercupwater
11
cup blood orange juice (for a pink-red syrup,cupbloodorangejuice(forapink-redsyrup,
substitute with pomegranate juice; bloodsubstitutewithpomegranatejuice;blood
orange makes a dark orange-colored syrup)orangemakesadarkorange-coloredsyrup)
¾¾
cup heavy creamcupheavycream
¼¼
cup sifted confectioners' sugarcupsiftedconfectioners'sugar
11
teaspoon pure vanilla extractteaspoonpurevanillaextract
Finely grated citrus zest, for garnish (optional)Finelygratedcitruszest,forgarnish(optional)
1. Preheat the oven to 350°F with the rack in the1.Preheattheovento350°Fwiththerackinthe
middle position. Line a cookie sheet withmiddleposition.Lineacookiesheetwith
parchment paper. (If your baking pan is rimmed,parchmentpaper.(Ifyourbakingpanisrimmed,
invert it so you are using the bottom. This willinvertitsoyouareusingthebottom.Thiswill
make transferring the meringue easier once it hasmaketransferringthemeringueeasieronceithas
baked.)baked.)
2. Prepare the meringue. Put the egg whites, cream2.Preparethemeringue.Puttheeggwhites,cream
of tartar, and salt into a large mixing bowl (makeoftartar,andsaltintoalargemixingbowl(make
sure it is spotlessly clean). Using the whisk, startsureitisspotlesslyclean).Usingthewhisk,start
mixing on Speed 1 and very gradually increase tomixingonSpeed1andverygraduallyincreaseto
Speed 3. Whip until the whites form soft peaks.Speed3.Whipuntilthewhitesformsoftpeaks.
With the mixer running, gradually add theWiththemixerrunning,graduallyaddthe
granulated sugar. Increase to Speed 5 and whipgranulatedsugar.IncreasetoSpeed5andwhip
until stiff peaks form, about 8 minutes. Add theuntilstiffpeaksform,about8minutes.Addthe
cornstarch, vinegar, vanilla, and zest, and gentlycornstarch,vinegar,vanilla,andzest,andgently
mix on Speed 2 to combine.mixonSpeed2tocombine.
3. Transfer the meringue to the parchment-lined3.Transferthemeringuetotheparchment-lined
baking pan. Shape into an 8-inch circle and, usingbakingpan.Shapeintoan8-inchcircleand,using
a spatula or knife, scrape the sides upward, fromaspatulaorknife,scrapethesidesupward,from
the bottom of the meringue to the top, to createthebottomofthemeringuetothetop,tocreate
smooth edges along the sides of the meringuesmoothedgesalongthesidesofthemeringue
and little peaks at the top.andlittlepeaksatthetop.
4. Transfer to the oven and then immediately reduce4.Transfertotheovenandthenimmediatelyreduce
the temperature to 200°F.thetemperatureto200°F.
5. Bake for 1½ hours, until the edges and top are dry;5.Bakefor1½hours,untiltheedgesandtoparedry;
the meringue should be very pale. At the end ofthemeringueshouldbeverypale.Attheendof
baking time, turn off the oven, but leave thebakingtime,turnofftheoven,butleavethe
meringue in the oven until it has cooledmeringueintheovenuntilithascooled
completely, about 1 hour.completely,about1hour.
6. While the meringue is cooling, prepare the6.Whilethemeringueiscooling,preparethe
topping. Be sure that the oranges have no visibletopping.Besurethattheorangeshavenovisible
white pith on the segments. Reserve on a platewhitepithonthesegments.Reserveonaplate
with the pomegranate seeds.withthepomegranateseeds.
7. Prepare the orange syrup. Put the sugar and water7.Preparetheorangesyrup.Putthesugarandwater
into a heavy-bottomed saucepan. Cook overintoaheavy-bottomedsaucepan.Cookover
medium heat until the sugar has dissolved, thenmediumheatuntilthesugarhasdissolved,then
add the juice. Cook until the mixture thickens andaddthejuice.Cookuntilthemixturethickensand
coats the bottom of the pan, 20 to 25 minutes.coatsthebottomofthepan,20to25minutes.
Reserve and cool. NOTE: If the syrup seems tooReserveandcool.NOTE:Ifthesyrupseemstoo
thick to use, you can thin it with hot water, addingthicktouse,youcanthinitwithhotwater,adding
a teaspoon at a time.ateaspoonatatime.
8. Once the meringue is fully cool, prepare the8.Oncethemeringueisfullycool,preparethe
whipped cream. Put the cream into a large mixingwhippedcream.Putthecreamintoalargemixing
bowl. Using the whisk, start whipping the creambowl.Usingthewhisk,startwhippingthecream
on Speed 1, gradually increasing to Speed 3, foronSpeed1,graduallyincreasingtoSpeed3,for
1010

about 1 minute, so that the cream has some body.about1minute,sothatthecreamhassomebody.
Add the sugar and vanilla extract, and continue toAddthesugarandvanillaextract,andcontinueto
whip to Speed 4 until cream forms soft peaks.whiptoSpeed4untilcreamformssoftpeaks.
9. Assemble the pavlova. Put the meringue on a9.Assemblethepavlova.Putthemeringueona
serving plate. Fill with the whipped cream andservingplate.Fillwiththewhippedcreamand
then, using a slotted spoon, top the whippedthen,usingaslottedspoon,topthewhipped
cream with the fruit. Drizzle the syrup around thecreamwiththefruit.Drizzlethesyruparoundthe
plate. You may garnish with grated zest as well.plate.Youmaygarnishwithgratedzestaswell.
10. Serve immediately.10.Serveimmediately.
Chocolate Cream PieChocolateCreamPie
Makes about 12 servingsMakesabout12servings
Crust:Crust:
2½ cups chocolate cookie crumbs (from about 242½cupschocolatecookiecrumbs(fromabout24
chocolate sandwich cookies)chocolatesandwichcookies)
55
tablespoons unsalted butter, meltedtablespoonsunsaltedbutter,melted
Filling:Filling:
¼¼
cup packed light brown sugarcuppackedlightbrownsugar
¼¼
cup granulated sugarcupgranulatedsugar
33
tablespoons unsweetened cocoa powdertablespoonsunsweetenedcocoapowder
2½ tablespoons cornstarch2½tablespoonscornstarch
¼¼
teaspoon kosher saltteaspoonkoshersalt
33 cups half-and-halfcupshalf-and-half
33
large eggs, lightly beatenlargeeggs,lightlybeaten
44
ounces semisweet chocolate, choppedouncessemisweetchocolate,chopped
33
tablespoons unsalted butter, cut into small dicetablespoonsunsaltedbutter,cutintosmalldice
Topping:Topping:
22
cups heavy cream, well-chilledcupsheavycream,well-chilled
¼¼
cup plus 2 tablespoons granulated sugarcupplus2tablespoonsgranulatedsugar
Chocolate curls, for garnishChocolatecurls,forgarnish
1. Make the crust. Preheat the oven to 350°F with1.Makethecrust.Preheattheovento350°Fwith
the rack in the middle position.therackinthemiddleposition.
2. Put the cookie crumbs and melted butter into a2.Putthecookiecrumbsandmeltedbutterintoa
medium mixing bowl. Using the beaters, mix onmediummixingbowl.Usingthebeaters,mixon
Speeds 1 to 2 to fully combine. Transfer the crumbSpeeds1to2tofullycombine.Transferthecrumb
mixture to a 9-inch pie plate. Press evenly into themixturetoa9-inchpieplate.Pressevenlyintothe
bottom and sides.bottomandsides.
3. Bake for 10 to 15 minutes, until fully set. Cool3.Bakefor10to15minutes,untilfullyset.Cool
completely while preparing the filling.completelywhilepreparingthefilling.
4. Put the sugars, cocoa powder, cornstarch, and4.Putthesugars,cocoapowder,cornstarch,and
salt into a large, wide saucepan (NOTE: DO NOT USEsaltintoalarge,widesaucepan(NOTE:DONOTUSE
THE CUISINARTTHECUISINART HAND MIXER WITH NONSTICKHANDMIXERWITHNONSTICK
®®
COOKWARE). Using the beaters, mix on Speed 1 toCOOKWARE).Usingthebeaters,mixonSpeed1to
combine. While still mixing on Speed 1, gradually addcombine.WhilestillmixingonSpeed1,graduallyadd
the half-and-half and then the eggs, and continue tothehalf-and-halfandthentheeggs,andcontinueto
mix until completely smooth.mixuntilcompletelysmooth.
5. Place the pan over medium-low heat. Mix5.Placethepanovermedium-lowheat.Mix
occasionally on Speeds 1 to 2 to prevent the mixtureoccasionallyonSpeeds1to2topreventthemixture
from sticking to the bottom of the pan (do not leavefromstickingtothebottomofthepan(donotleave
the pan unattended).thepanunattended).
6. Cook the mixture, continuing to mix on Speed 1,6.Cookthemixture,continuingtomixonSpeed1,
until just about boiling and thickened, and thenuntiljustaboutboilingandthickened,andthen
remove from the heat. Using a heatproof spatula orremovefromtheheat.Usingaheatproofspatulaor
spoon, stir in the chopped chocolate and butter byspoon,stirinthechoppedchocolateandbutterby
hand until completely incorporated. Strain the fillinghanduntilcompletelyincorporated.Strainthefilling
through a fine-mesh strainer into a medium bowl,throughafine-meshstrainerintoamediumbowl,
and then transfer the filling into the cooled crust.andthentransferthefillingintothecooledcrust.
Cover the filling directly with waxed paper or plasticCoverthefillingdirectlywithwaxedpaperorplastic
wrap to prevent a skin from forming. Transfer to thewraptopreventaskinfromforming.Transfertothe
refrigerator, and chill until set.refrigerator,andchilluntilset.
7. After the filling is set, prepare the whipped cream.7.Afterthefillingisset,preparethewhippedcream.
Put the cream into a large mixing bowl. Using thePutthecreamintoalargemixingbowl.Usingthe
whisk, start whipping the cream on Speed 1,whisk,startwhippingthecreamonSpeed1,
gradually increasing to Speed 3, for about 1 minutegraduallyincreasingtoSpeed3,forabout1minute
so that the cream has some body. Add the sugar andsothatthecreamhassomebody.Addthesugarand
continue to whip to Speed 4 until the cream formscontinuetowhiptoSpeed4untilthecreamforms
medium-stiff peaks.medium-stiffpeaks.
8. Top the pie evenly with the whipped cream.8.Topthepieevenlywiththewhippedcream.
Garnish with chocolate curls prior to serving.Garnishwithchocolatecurlspriortoserving.
Yellow Buttermilk Sheet CakeYellowButtermilkSheetCake
with Fluffy Chocolate FrostingwithFluffyChocolateFrosting
Makes one 13x9-inch sheet cake (16 servings)Makesone13x9-inchsheetcake(16servings)
Cake:Cake:
Nonstick cooking sprayNonstickcookingspray
33
cups cake flour (not self-rising)cupscakeflour(notself-rising)
1¾1¾
cups granulated sugarcupsgranulatedsugar
11
tablespoon baking powdertablespoonbakingpowder
¾¾
teaspoon kosher saltteaspoonkoshersalt
1½1½
cups buttermilk, room temperaturecupsbuttermilk,roomtemperature
22
large eggs, room temperaturelargeeggs,roomtemperature
22
large egg yolks, room temperaturelargeeggyolks,roomtemperature
22
teaspoons pure vanilla extractteaspoonspurevanillaextract
11
cup vegetable oilcupvegetableoil
1111

Chocolate Frosting:ChocolateFrosting:
44
cups confectioners' sugar, siftedcupsconfectioners'sugar,sifted
44
ounces unsweetened chocolate, melted andouncesunsweetenedchocolate,meltedand
cooledcooled
22
ounces semisweet chocolate, melted andouncessemisweetchocolate,meltedand
cooledcooled
88
tablespoons (1 stick) unsalted butter, cut intotablespoons(1stick)unsaltedbutter,cutinto
½-inch pieces, room temperature½-inchpieces,roomtemperature
22
teaspoons pure vanilla extractteaspoonspurevanillaextract
¼¼
teaspoon fine sea saltteaspoonfineseasalt
10 to 12 tablespoons milk or cream10to12tablespoonsmilkorcream
1. Preheat the oven to 350°F with the rack in the1.Preheattheovento350°Fwiththerackinthe
middle position. Spray a 13x9-inch cake pan withmiddleposition.Spraya13x9-inchcakepanwith
nonstick cooking spray and line the bottom withnonstickcookingsprayandlinethebottomwith
parchment paper. Reserve.parchmentpaper.Reserve.
2. Put the flour, sugar, baking powder, and salt into a2.Puttheflour,sugar,bakingpowder,andsaltintoa
large mixing bowl. Using the beaters, mix onlargemixingbowl.Usingthebeaters,mixon
Speed 1 to fully combine, at least 30 seconds.Speed1tofullycombine,atleast30seconds.
Reserve.Reserve.
3. Put the buttermilk, eggs, yolks, and vanilla extract3.Putthebuttermilk,eggs,yolks,andvanillaextract
into a medium bowl. Mix on Speed 3.intoamediumbowl.MixonSpeed3.
4. Reduce to Speed 2. Gradually add the oil to the4.ReducetoSpeed2.Graduallyaddtheoiltothe
wet ingredients, and mix until combined, thenwetingredients,andmixuntilcombined,then
increase to Speeds 3 to 4 and mix until smooth,increasetoSpeeds3to4andmixuntilsmooth,
about 1½ minutes.about1½minutes.
5. Gradually add add the liquid mixture to the cake5.Graduallyaddaddtheliquidmixturetothecake
batter, mixing on, mixing on Speed 2 untilbatter,mixingon,mixingonSpeed2until
completely combined.completelycombined.
6. Pour the batter evenly into the prepared cake pan.6.Pourthebatterevenlyintothepreparedcakepan.
Tap gently on the countertop to remove anyTapgentlyonthecountertoptoremoveany
bubbles, and then place in the oven. Bake untilbubbles,andthenplaceintheoven.Bakeuntil
the center springs back to the touch and a cakethecenterspringsbacktothetouchandacake
tester comes out clean when inserted in thetestercomesoutcleanwheninsertedinthe
center, about 25 minutes.center,about25minutes.
7. Remove from the oven. Put the pan on a wire rack7.Removefromtheoven.Putthepanonawirerack
until cool to the touch, then transfer the cake to auntilcooltothetouch,thentransferthecaketoa
wire cooling rack to cool completely beforewirecoolingracktocoolcompletelybefore
frosting.frosting.
8. While cake is cooling, prepare the frosting. Put the8.Whilecakeiscooling,preparethefrosting.Putthe
sugar, chocolates, butter, and vanilla extract into asugar,chocolates,butter,andvanillaextractintoa
large mixing bowl. Using the whisk, mix on Speedlargemixingbowl.Usingthewhisk,mixonSpeed
2 for 2 minutes. Add 10 tablespoons of the milk.2for2minutes.Add10tablespoonsofthemilk.
Increase speed to 4 and beat until smooth andIncreasespeedto4andbeatuntilsmoothand
fluffy, scraping down the bowl as needed, about 4fluffy,scrapingdownthebowlasneeded,about4
minutes. If the frosting seems thick or stiff, addminutes.Ifthefrostingseemsthickorstiff,add
milk, 1 tablespoon at a time, until easilymilk,1tablespoonatatime,untileasily
spreadable.spreadable.
Creamy Mashed PotatoesCreamyMashedPotatoes
Makes about 6 cupsMakesabout6cups
2½ pounds Yukon Gold potatoes, peeled and cut2½poundsYukonGoldpotatoes,peeledandcut
into 1-inch piecesinto1-inchpieces
½½
cup whole milk, room temperaturecupwholemilk,roomtemperature
33
tablespoons unsalted butter, cut into 1-inchtablespoonsunsaltedbutter,cutinto1-inch
pieces, room temperaturepieces,roomtemperature
¾¾
teaspoon kosher saltteaspoonkoshersalt
½½
teaspoon freshly ground black pepperteaspoonfreshlygroundblackpepper
½½
cup mascarpone cheese or crème fraîche, roomcupmascarponecheeseorcrèmefraîche,room
temperaturetemperature
1. Put the potatoes into a medium to large nonstick1.Putthepotatoesintoamediumtolargenonstick
stockpot; add cold water to cover by 2 inches. Setstockpot;addcoldwatertocoverby2inches.Set
over medium-high heat. Bring to a boil, and thenovermedium-highheat.Bringtoaboil,andthen
reduce to simmer until the potatoes are very soft,reducetosimmeruntilthepotatoesareverysoft,
10 to 15 minutes.10to15minutes.
2. Drain the potatoes and then return to the pot.2.Drainthepotatoesandthenreturntothepot.
Using the beaters, mix on Speeds 1 to 2 to mashUsingthebeaters,mixonSpeeds1to2tomash
to desired consistency, about 30 seconds. Add thetodesiredconsistency,about30seconds.Addthe
remaining ingredients and mix on Speed 2 untilremainingingredientsandmixonSpeed2until
fully incorporated.fullyincorporated.
3. Taste and adjust seasoning according to3.Tasteandadjustseasoningaccordingto
preference.preference.
Buffalo Chicken DipBuffaloChickenDip
Makes about 6 cupsMakesabout6cups
Nonstick cooking spray or olive oilNonstickcookingsprayoroliveoil
11
whole roasted chicken, warm, about 3½ to 4wholeroastedchicken,warm,about3½to4
poundspounds
1616
ounces (2 standard packages) cream cheese,ounces(2standardpackages)creamcheese,
each package cut into 4 pieces, roomeachpackagecutinto4pieces,room
temperaturetemperature
11
celery stalk, dicedcelerystalk,diced
11
teaspoon kosher saltteaspoonkoshersalt
½½
teaspoon freshly ground black pepperteaspoonfreshlygroundblackpepper
6 to 8 tablespoons hot sauce*6to8tablespoonshotsauce*
11
cup crumbled blue cheesecupcrumbledbluecheese
Cut veggies, bread pieces, or tortilla chips, forCutveggies,breadpieces,ortortillachips,for
servingserving
1212

1. Preheat the oven to 375°F with the rack in the1.Preheattheovento375°Fwiththerackinthe
middle position. Lightly coat the inside of amiddleposition.Lightlycoattheinsideofa
1½-quart baking dish with cooking spray. Reserve.1½-quartbakingdishwithcookingspray.Reserve.
2. Remove all meat from the roasted chicken,2.Removeallmeatfromtheroastedchicken,
discarding the skin and bones. Put the chickendiscardingtheskinandbones.Putthechicken
meat into a large mixing bowl. Using the beaters,meatintoalargemixingbowl.Usingthebeaters,
mix on Speed 2 to shred the chicken, about 30mixonSpeed2toshredthechicken,about30
seconds. Once shredded, add the cream cheese,seconds.Onceshredded,addthecreamcheese,
celery, salt, pepper, and hot sauce. Continue tocelery,salt,pepper,andhotsauce.Continueto
mix on Speed 2 until ingredients are wellmixonSpeed2untilingredientsarewell
combined, about 1 minute.combined,about1minute.
3. Transfer the dip to the prepared baking dish and3.Transferthediptothepreparedbakingdishand
top with the crumbled blue cheese. Bake until hottopwiththecrumbledbluecheese.Bakeuntilhot
and bubbling, about 40 minutes.andbubbling,about40minutes.
4. Serve hot with cut veggies, bread pieces, or4.Servehotwithcutveggies,breadpieces,or
tortilla chips.tortillachips.
* We developed this recipe to be on the milder side,*Wedevelopedthisrecipetobeonthemilderside,
so either adjust the hot sauce accordingly or servesoeitheradjustthehotsauceaccordinglyorserve
with some hot sauce on the side, for those whowithsomehotsauceontheside,forthosewho
like it extra spicy.likeitextraspicy.
Pimento Cheese SpreadPimentoCheeseSpread
Makes about 2 cupsMakesabout2cups
44
ounces cream cheese, cut into 1-inch pieces,ouncescreamcheese,cutinto1-inchpieces,
room temperatureroomtemperature
¼¼
cup mayonnaisecupmayonnaise
22
cups shredded sharp CheddarcupsshreddedsharpCheddar
11
jar (7 ounces) pimentos, drainedjar(7ounces)pimentos,drained
½½
teaspoon onion powderteaspoononionpowder
¼¼
teaspoon kosher saltteaspoonkoshersalt
Pinch freshly ground black pepperPinchfreshlygroundblackpepper
22
dashes hot saucedasheshotsauce
1. Put the cream cheese into a medium mixing bowl.1.Putthecreamcheeseintoamediummixingbowl.
Using the beaters, mix on Speed 3 until softened,Usingthebeaters,mixonSpeed3untilsoftened,
about 30 seconds. Add remaining ingredients andabout30seconds.Addremainingingredientsand
mix on Speed 2 to fully combine, about 20mixonSpeed2tofullycombine,about20
seconds.seconds.
2. Serve immediately.2.Serveimmediately.
1313

©2025 Cuisinart©2025Cuisinart
Glendale, AZ 85307Glendale,AZ85307
Printed in ChinaPrintedinChina
25CE20071325CE200713
IB-18905IB-18905