Eagle Foodservice Equipment, Eagle MHC, and SpecFAB
®
are divisions of Eagle Group. ©2022 by the Eagle Group
• 100 Industrial Boulevard, Clayton, Delaware 19938-8903 U.S.A.
• Phone: 302/653-3000 • 800/441-8440 • Fax: 302/653-2065
• www.eaglegrp.com • www.eaglegrpnews.com • www.eaglemhc.com
INSTALLATION INSTRUCTIONS
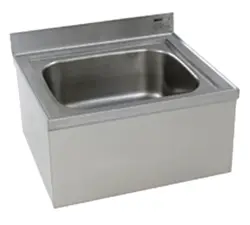
Mop Sink
EG10014 Revised 12/22
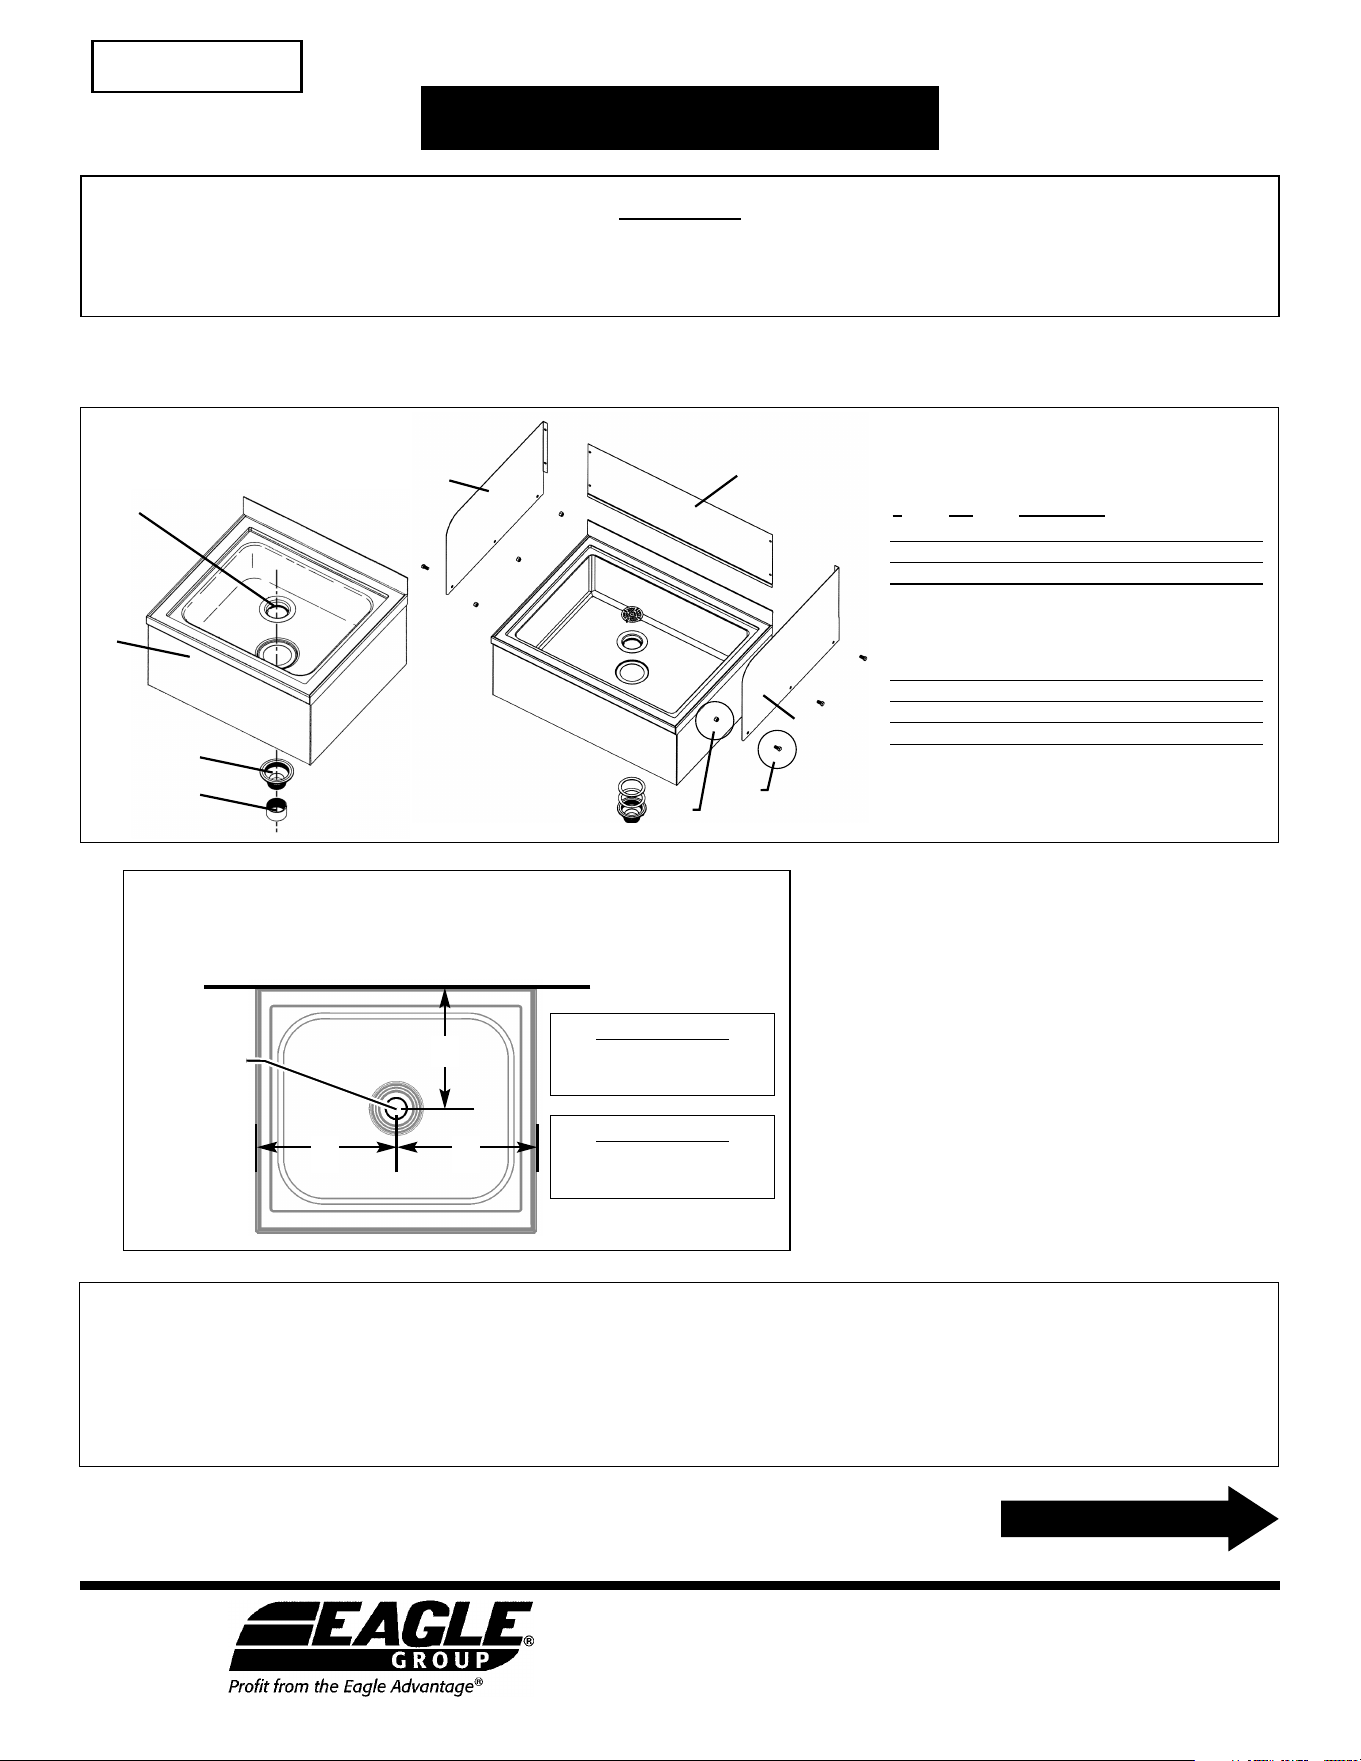
Parts List
Tools needed
# qty description
#1 1 drain - top assembly
#2 1 sink
#3 1 drain - bottom assembly
#4 1 coupling (supplied by others)
#5 * left end splash
#6 * right end splash
#7 1 rear splash
#8 6 3/8˝-20 lock nut
#9 6 3/8˝-16 x 3/4˝ bolt
For Splash Kit included with Mop Sink:
• Drill, with 3/8˝ drill bit
• 9/16˝ wrench or socket
• Driver for hardware (not included) running
through splashes and into wall
• RTV silicone
For retrofitting Splash Kit:
• Drill, with #1 drill bit
• Driver for 1/4˝-diameter sheet metal screws
(not included)
• Driver for hardware (not included) running
through splashes and into wall
• RTV silicone
For installing Mop Sink to floor:
• Pipe wrench, as needed (for coupling not included)
• Caulk or Plumbers Putty
* Varies per order
For sinks with 16˝ rear and/or end splashes:
#1
#3
#2
#5
#8
#9
#6
#7
#4
(continued on next page)
center of sink’s
drain hole
BACK OF SINK / ADJACENT WALL
C
L
C
L
Dimension “A”
10-5/8˝ on #F1916 sinks
12-3/8˝ on #F2820 sinks
Dimension “B”
12-5/16˝ on #F1916 sinks
16-1/4˝ on #F2820 sinks
B
A
B
Dimensions for plumbing rough-ins
Complete plumbing rough-ins, following applicable dimensions listed at right
of illustration.
INSTRUCTION SHEET
#346306
CAUTION
INSPECT CONTENTS IMMEDIATELY AND FILE CLAIM WITH DELIVERING
CARRIER FOR ANY DAMAGE. SAVE YOUR BOX AND ALL PACKING MATERIALS.
YOU ARE RESPONSIBLE FOR DAMAGE TO YOUR UNIT IF RETURNED IMPROPERLY PACKED.
Thank you for your purchase. Before assembly, read this instruction sheet carefully.
After reading, be sure to store this instruction in a safe place, should it be needed for future reference.
BEFORE INSTALLATION, PLEASE NOTE:
• If your mop sink came with 16˝-high Splash Kit (consisting of backsplash and/or end splashes), it is recommended to affix splashes onto
mop sink BEFORE mop sink installation. Proceed to Step 1 (page 2).
• If your mop sink did not come with 16˝-high Splash Kit, skip to Step 2 (pages 2 and 3).
• If you are retrofitting backsplash and/or end splash(es) to pre-installed mop sink, go to back page.
INSTALLATION INSTRUCTIONS
Mop Sink
2
(continued on Page 3)
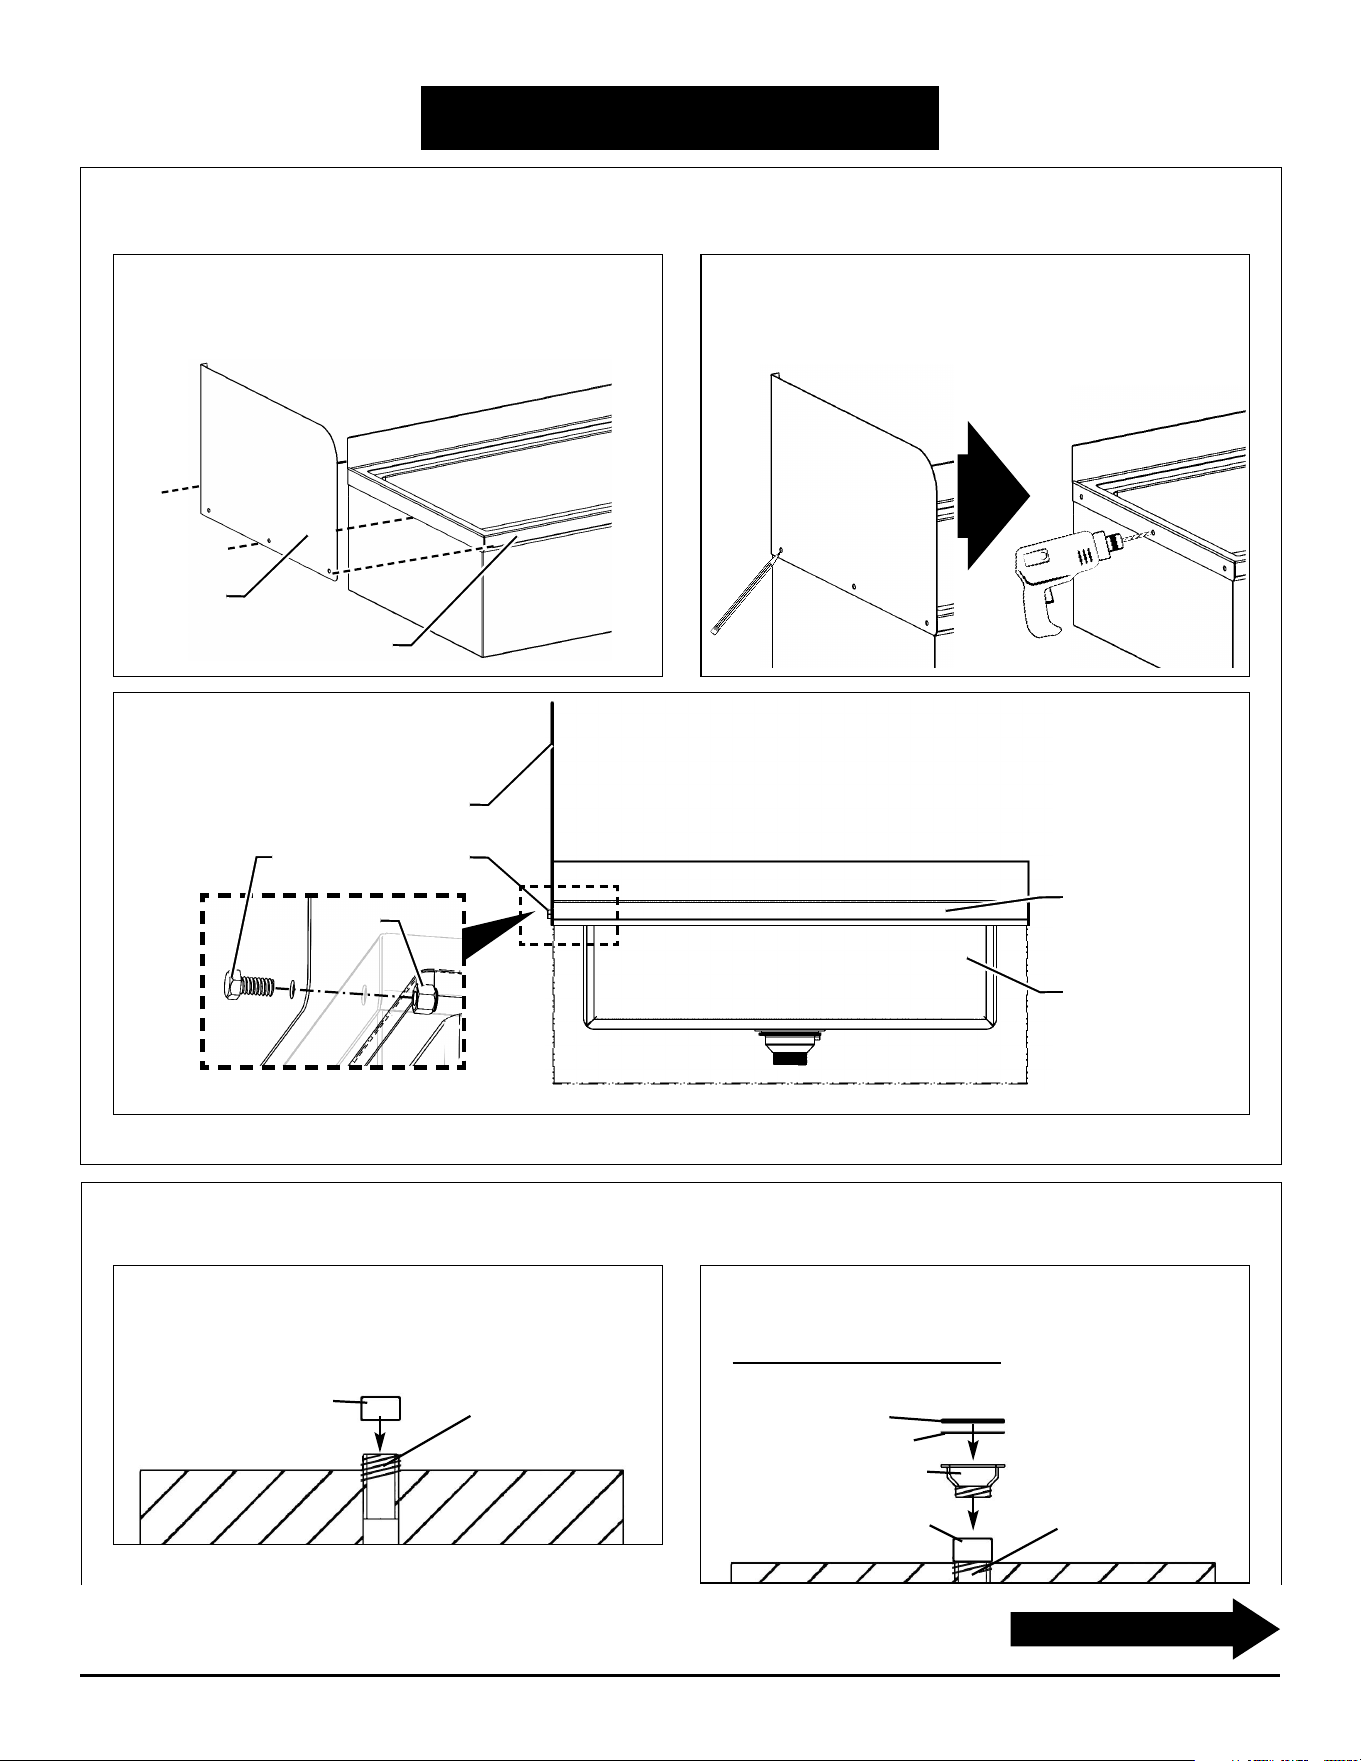
1b - Mark and drill holes.
Use holes in end splash to mark hole locations onto mop sink
edge, remove end splash, then drill holes using 3/8˝ drill bit.
Step 1 - Affix end splash(es) to mop sink.
If your sink did not come with 16˝-high Splash Kit, skip to Step 2.
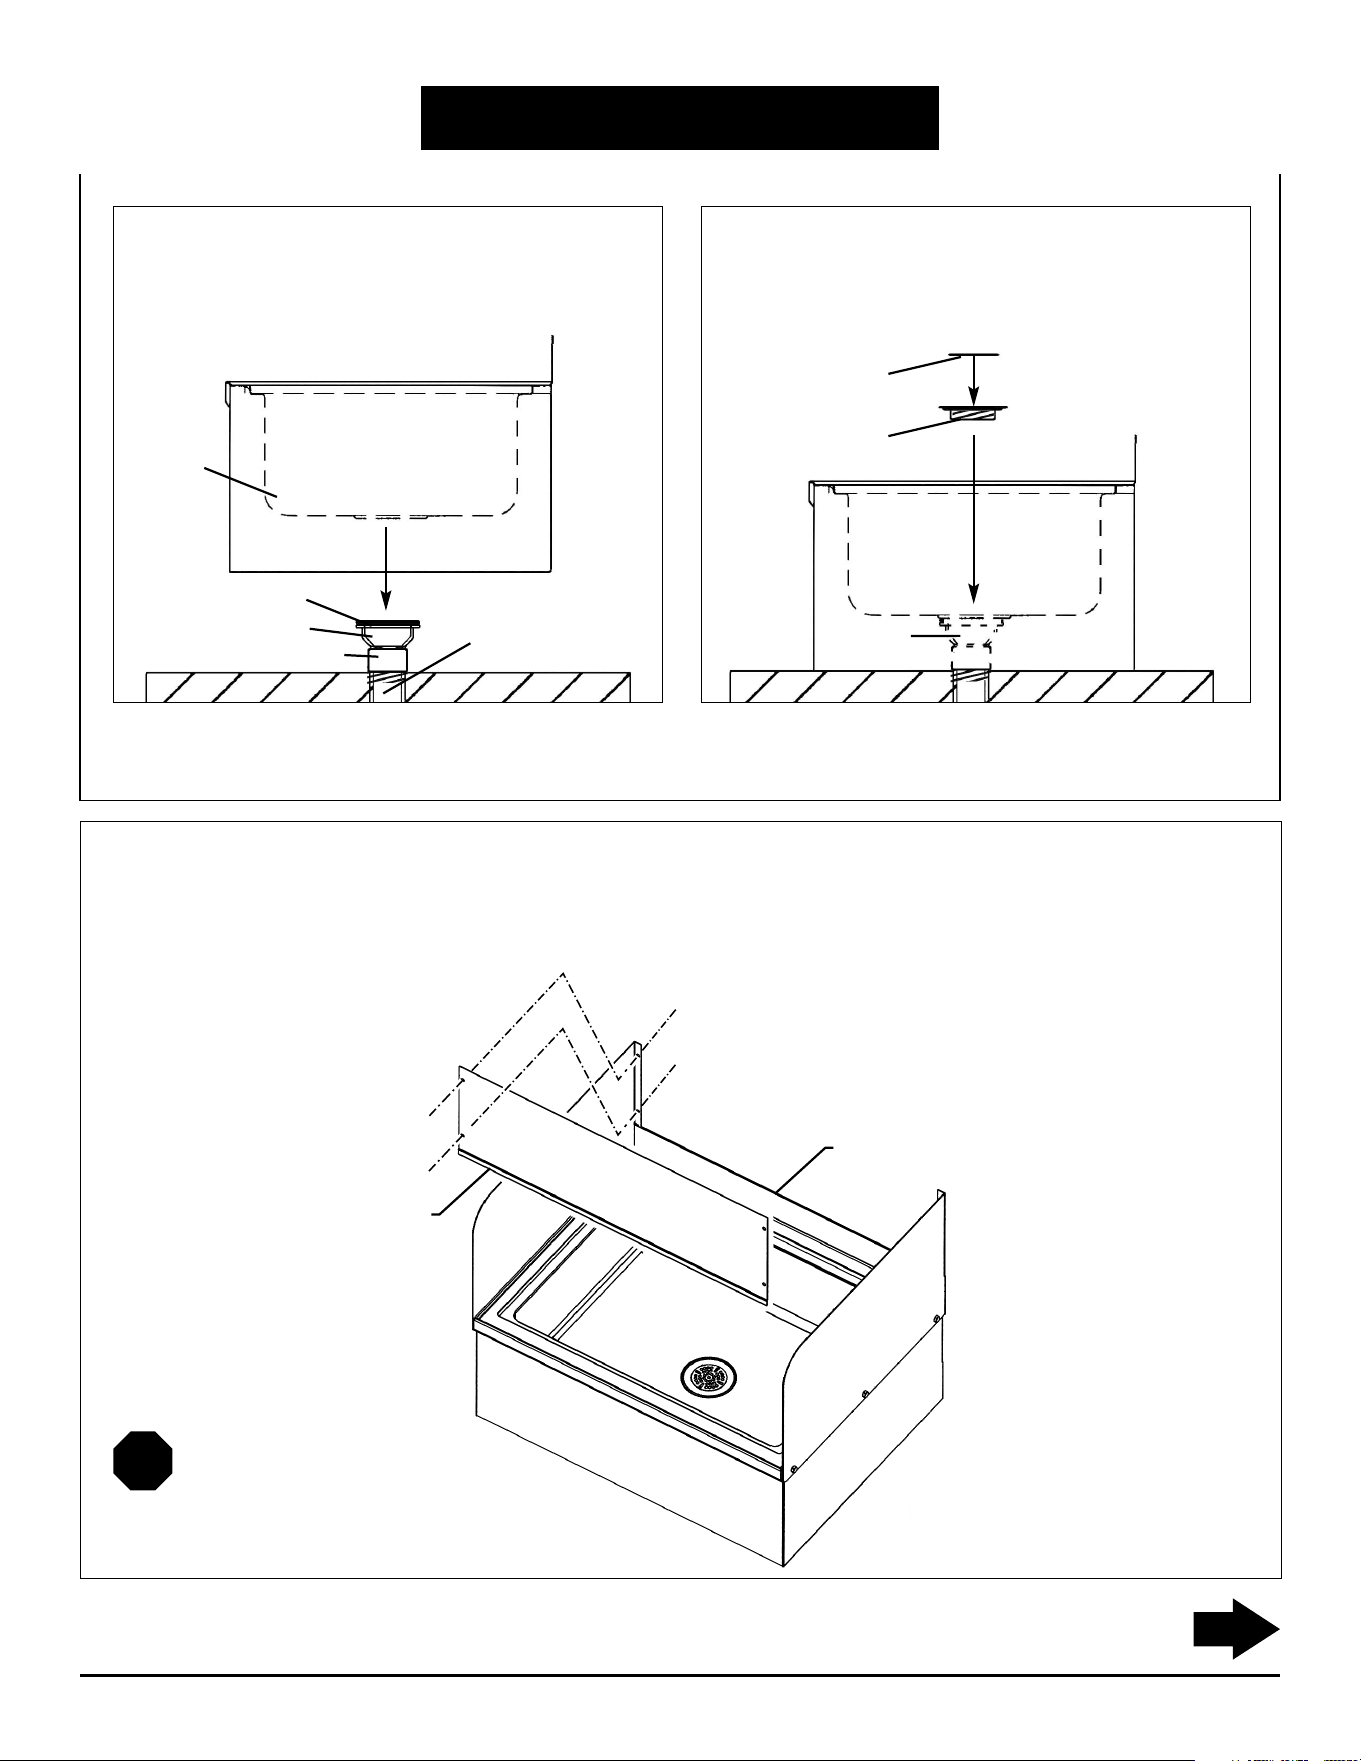
Step 2 - Affix mop sink to floor
Note: Pipe should be preinstalled into the floor.
2a - Screw coupling onto 2˝ threaded pipe.
Note: Coupling supplied by others.
coupling
2˝ threaded pipe
(floor-mounted)
2b - Attach drain bottom and gaskets.
• Screw drain bottom into coupling until top of drain is
approximately 3
3
⁄4˝ from the floor.
• Place and center gaskets onto drain bottom as shown.
coupling
(supplied by others)
rubber gasket
paper gasket
drain
bottom
2˝ threaded pipe
(floor-mounted)
1a - Align end splash to adjacent side of mop sink.
Align front, rear, and bottom edges of end splash to those of
mop sink edge.
end splash
end splash
bolt for mounting end splash
sink bowl inside
mop sink edge
mop sink edge
(FRONT VIEW)
1c - Attach end splash.
Note: Lock nuts go BEHIND the sink edge. To position
each lock nut, go through the bottom of the unit. Attach
splash to sink, using lock nuts and bolts included.
Seal all seams with RTV silicone caulking.
Repeat Step 1 to install remaining end splash, if applicable.
lock nut
3
To retrofit splashes onto pre-installed
mop sink, go to back page
INSTALLATION INSTRUCTIONS
Mop Sink
Step 2 (continued)
2c - Install sink.
• Place and center sink over top of drain.
• Apply caulk or plumber’s putty onto rim of hole inside sink
bowl.
coupling
drain bottom
2˝ threaded pipe
(floor-mounted)
offset along bottom
of rear splash
gasket
sink
2d - Attach drain top.
• Screw drain top into drain bottom.
• Wipe away excess caulk or plumber’s putty.
• Insert screen into drain top.
drain bottom
drain top
screen
(End)
Step 3 - Attach rear splash to mop sink and wall.
• Apply silicone to flange of end splash(es) and rear upturn of mop sink.
• Position rear splash so that offset along bottom of rear splash will overlap rear upturn of mop sink.
• Align holes of rear splash and end splash(es), and run hardware (not included) through splashes and into adjacent wall.
• Seal all seams with RTV silicone caulking.
If your sink did not come with Splash Kit, then installation is done.
If your sink came with Splash Kit, Step 1 and Step 2 should be completed by now. Proceed to Step 3 below.
Installation of Splash Kit is complete.
upturn of mop sink
Eagle Foodservice Equipment, Eagle MHC, and SpecFAB
®
are divisions of Eagle Group. ©2022 by the Eagle Group
• 100 Industrial Boulevard, Clayton, Delaware 19938-8903 U.S.A.
• Phone: 302/653-3000 • 800/441-8440 • Fax: 302/653-2065
• www.eaglegrp.com • www.eaglegrpnews.com • www.eaglemhc.com
(End)
To retrofit splashes onto pre-installed mop sink…
INSTALLATION INSTRUCTIONS
Mop Sink
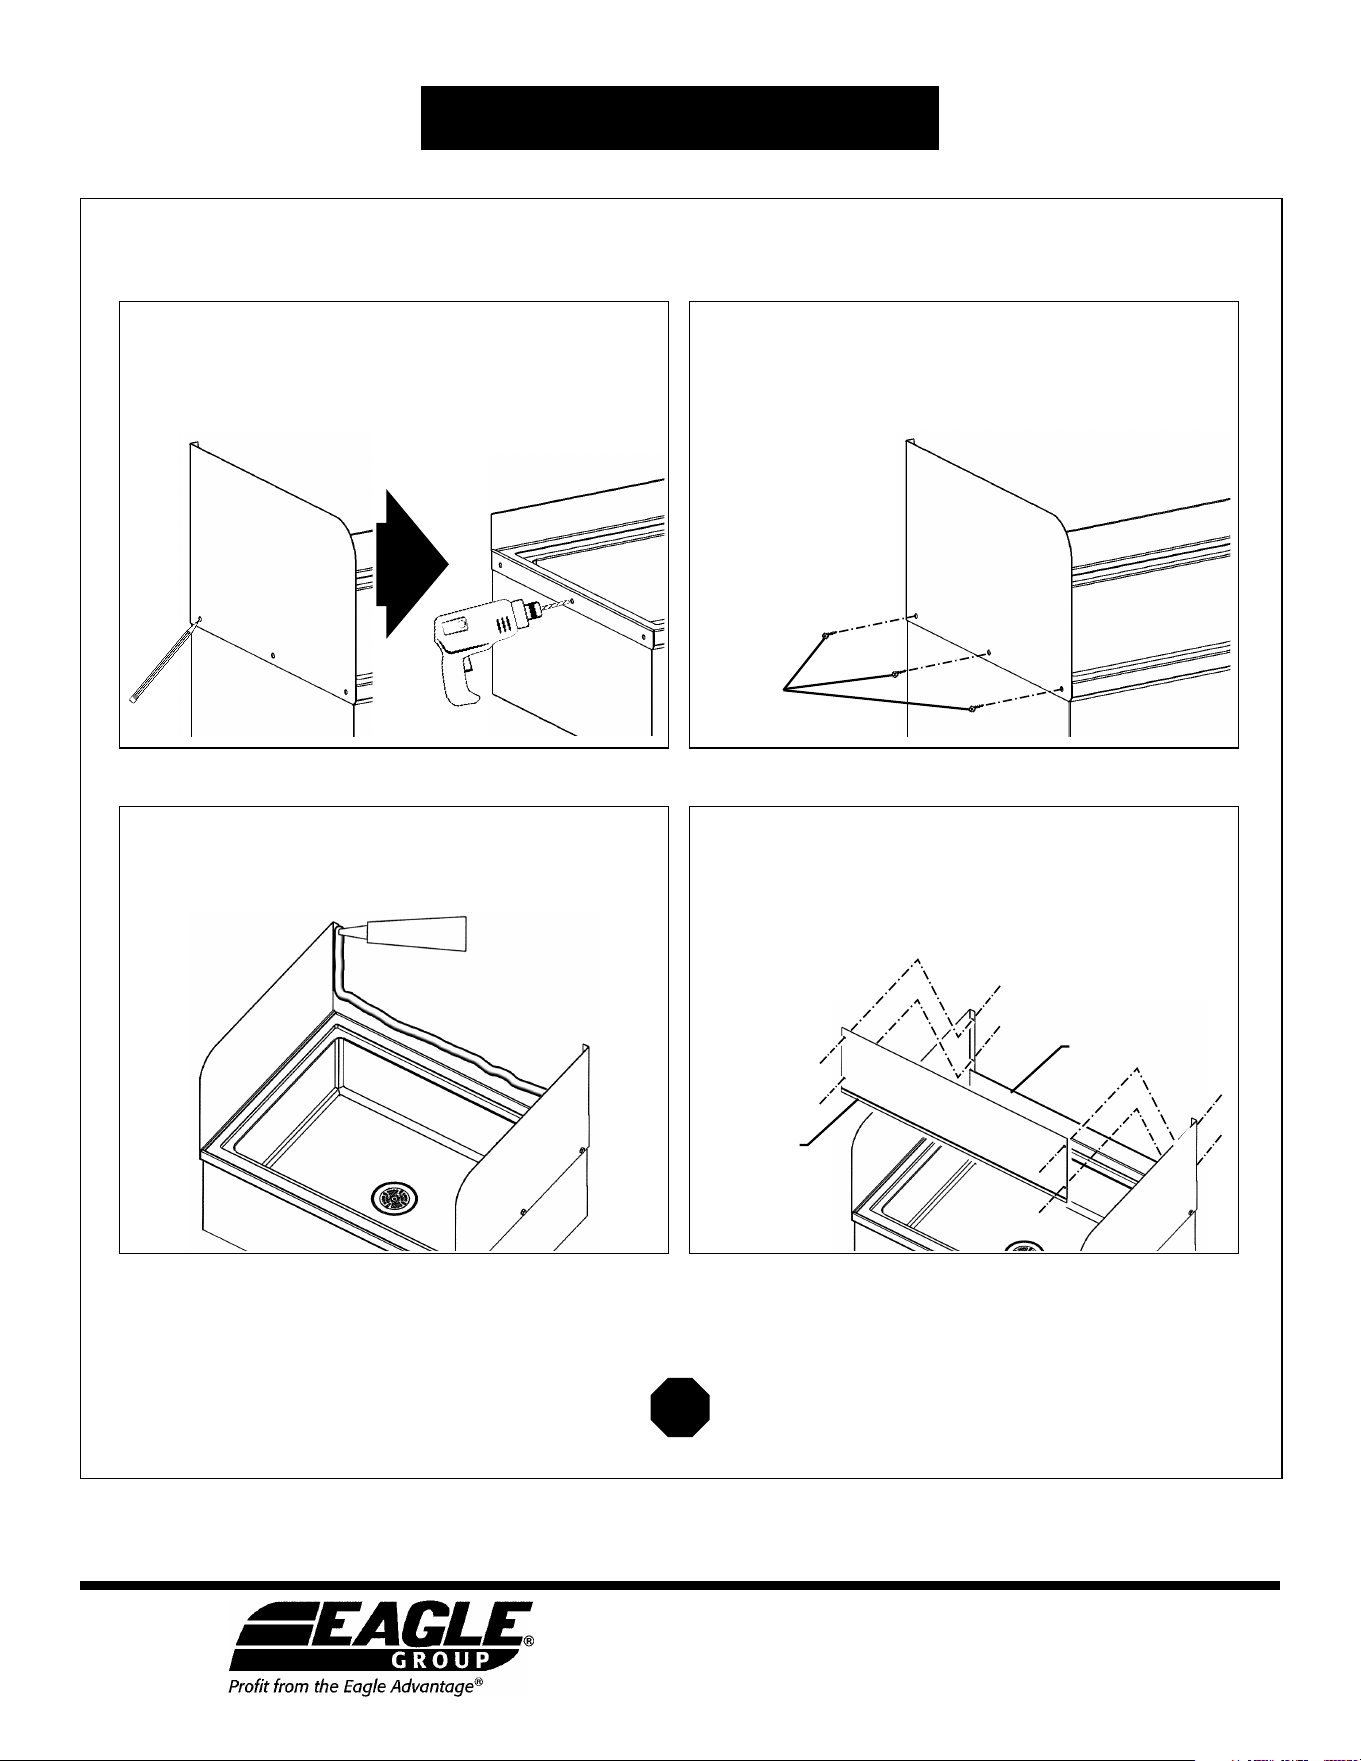
1 - Mark and drill holes.
Hold end splash in place, mark hole locations onto sink edge,
set aside end splash and drill holes using a #1 drill bit (0.228˝).
Repeat on other end splash, if applicable.
2 - Attach end splash(es).
Attach with 1/4˝-diameter stainless steel sheet metal screws
(not included). Repeat on other end splash, if applicable.
Note: NSF does not allow use of allen headed fasteners.
4 - Attach rear splash.
Position rear splash so that offset along bottom of rear splash
will overlap rear upturn of mop sink. Align holes of rear splash
and end splash(es), and run hardware (not included) through
splashes and into adjacent wall.
offset along
bottom of
rear splash
SILICONE
upturn of mop sink
3 - Apply silicone.
Apply silicone to flange of end splash(es) and rear upturn of
mop sink.
Installation of Splash Kit is complete.
Seal all seams with RTV silicone caulking.
sheet metal
screws (not
included)