
TRMNL X User Manual
E-Ink WiFi Smart Display
Newest information here:
https://help.trmnl.com/en/collections/7820478-general
Introduction
Thank you for choosing the TRMNL X E-Ink Smart Display. This next-
generation device introduces a refined interaction model using a
Touch Bar and a magnetic pogo-pin dock, while maintaining the low-
power, always-visible experience TRMNL is known for.
Package Contents
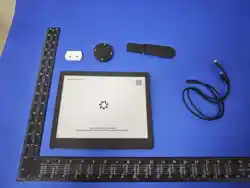
● 1 × E-Ink WiFi Display
● 1 × Dock (magnetic pogo-pin charging base with USB-C input)
● 1 × Kickstand
● 1 × USB Charging Cable
● 1 × User Manual
● 1 × Screwdriver
● 1 × Mounting Kit
● 1 × Microfiber Cleaning Cloth (optional)

Device Overview
Display
High-contrast E-Ink screen with improved clarity and refresh
behavior.
Touch Bar (Multi-Function Input)
Capacitive interface used for:
● Refreshing content
● Entering pairing/setup modes
● Confirming system actions
Dock (Charging System)
Magnetic pogo-pin dock:
● Snaps onto the back of the device
● Provides power via USB-C
● Allows easy attachment and removal
Battery
Rechargeable battery optimized for long-duration usage depending
on refresh settings.
WiFi Connectivity
Used for onboarding, syncing, and content updates.
Getting Started
Setting Up the Device (TRMNL X Flow)
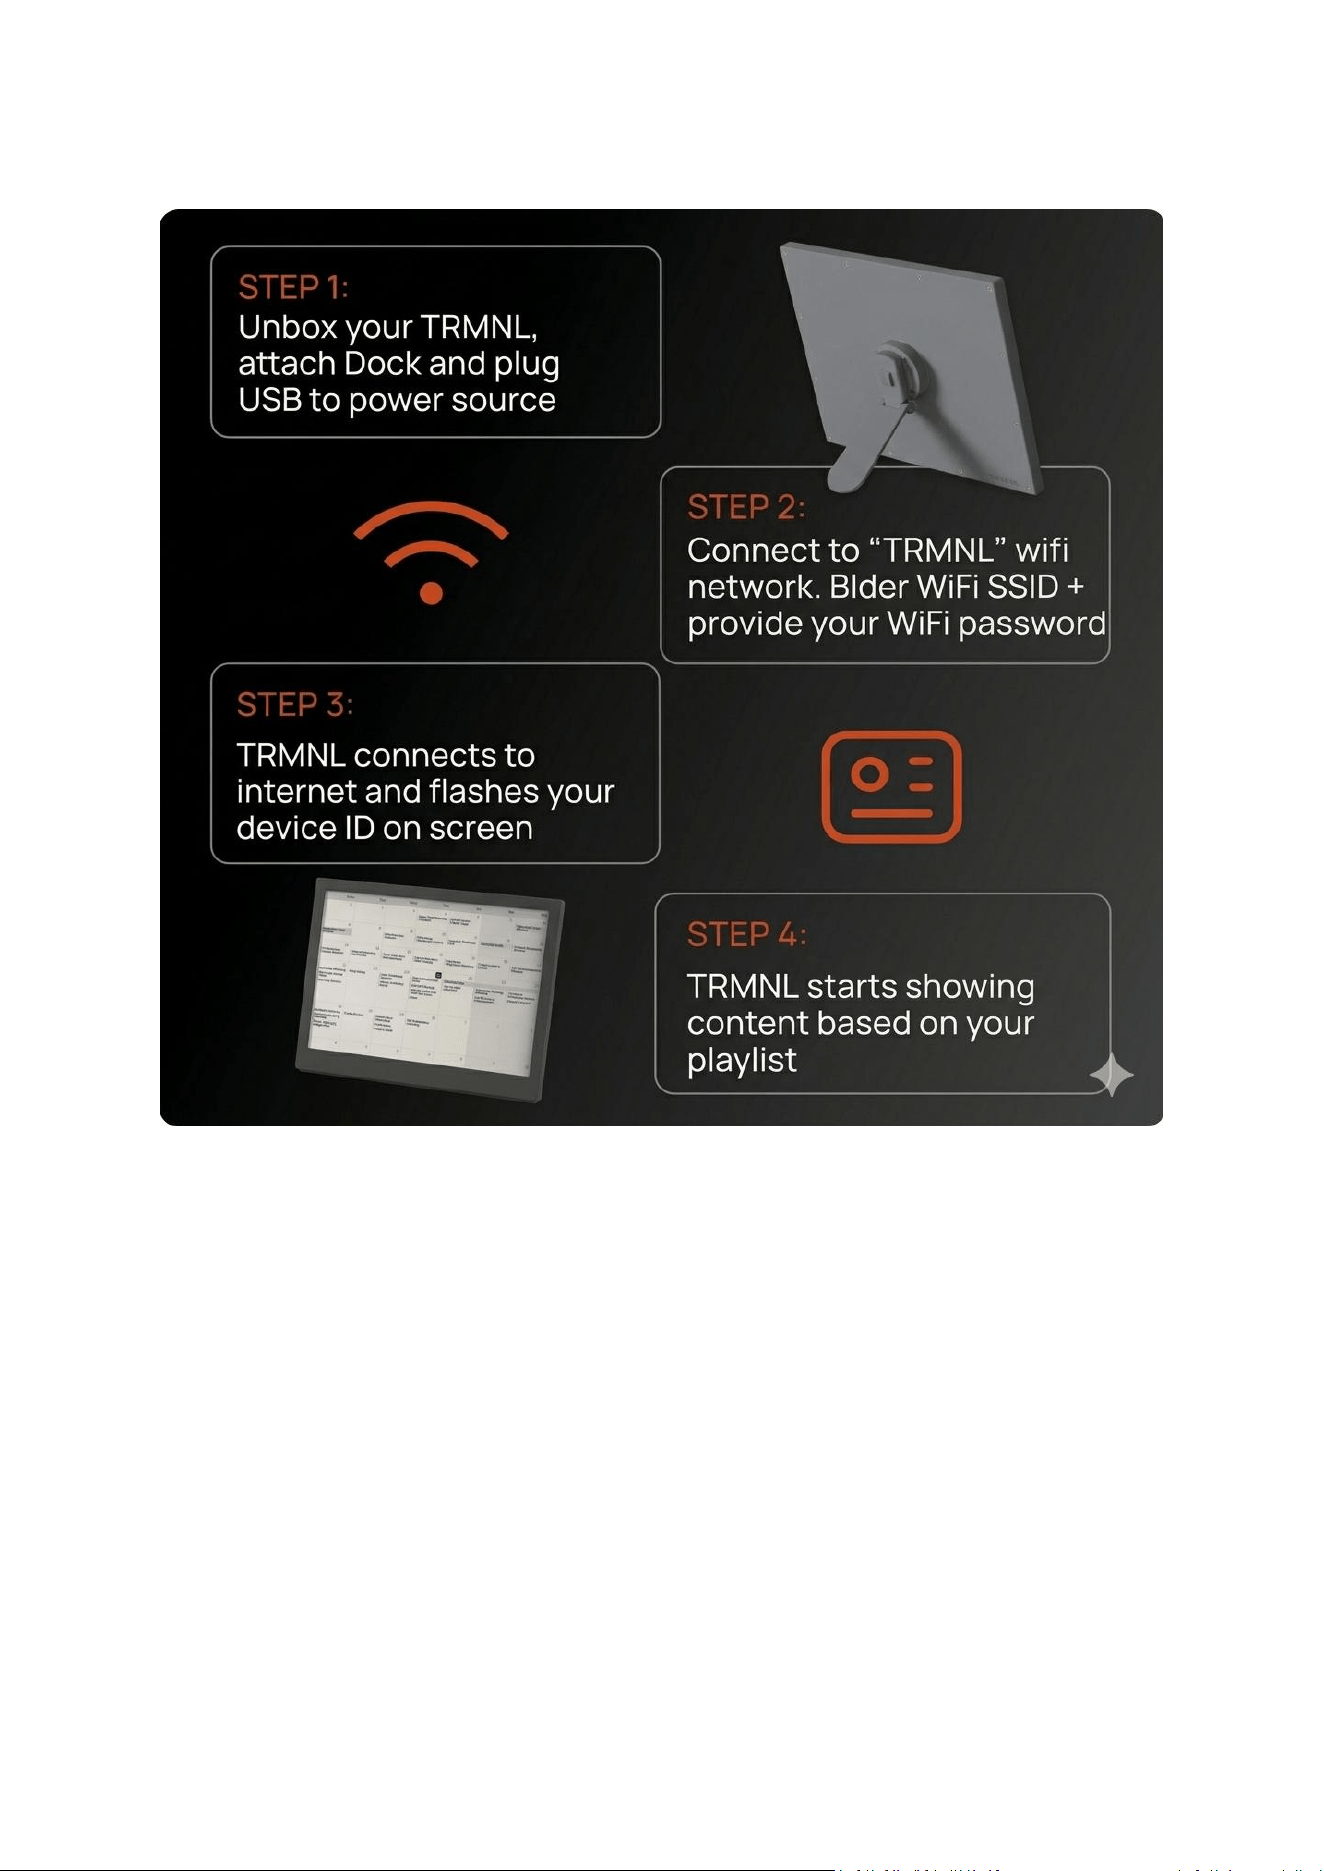
1. Attach and Power the Device
● Attach the magnetic dock to the back of the display
● Plug the USB-C cable into the dock and power source
● The device will boot automatically within a few seconds
If nothing happens:
● Rotate the dock slightly to ensure proper contact

● Confirm the power source is active
2. Connect to TRMNL Network
● On your phone or computer, open WiFi settings
● Connect to the network named “TRMNL”
3. Configure WiFi
● A configuration portal will appear automatically
● Select your WiFi network
● Enter password and tap Connect
● The device will reboot after saving credentials
4. Register Your Device
● After reboot, the screen will display a 6-digit Device ID
● Add this device in your TRMNL account
● If you don’t have an account, create one and enter the ID
5. Add Content (Plugins)
● Use the TRMNL web app to connect content sources
● The device will begin displaying content automatically
Operating the Device
Touch Bar Controls

Tap (center area recommended)
● Skip/refresh content
Content Management
All content is managed via the TRMNL web platform:
● Plugins (data sources)
● Refresh intervals
● Device settings
The device updates automatically based on configuration.
WiFi Pairing Mode
Entering WiFi Pairing Mode (TRMNL X)
1. Place fingers on both left and right sides of the Touch Bar
2. Hold until the screen flashes
3. Then:
○ Tap the middle to cancel
○ Hold the middle to confirm pairing mode
This mode allows you to:
● Change WiFi networks
● Reconfigure connectivity

Turning Off the Device
Power Off (TRMNL X Touch Bar Flow)
1. Press and hold both left and right sides of the Touch Bar
2. Release when the screen flashes
3. A confirmation screen appears
4. Hold the center of the Touch Bar to confirm shutdown
The device will then power down safely.
Battery Management
Charging
● Attach device to dock
● Ensure USB-C cable is connected to power
Monitoring
● Battery status available via TRMNL web interface
Optimization Tips
● Increase refresh interval
● Avoid excessive manual refresh
● Keep dock connected when possible

Maintenance
Cleaning
● Use the microfiber cloth
● Avoid liquids or abrasive materials
Firmware Updates
● Delivered automatically over WiFi
● No manual installation required
Troubleshooting
Device Not Powering On
● Check dock connection and alignment
● Verify USB-C power source
● Rotate dock slightly if needed
WiFi Setup Issues
● Ensure connection to “TRMNL” network
● Disable VPN during setup
● Use 2.4GHz WiFi networks when possible
Device Not Entering Pairing Mode
● Retry Touch Bar gesture (both sides → confirm center)
● Ensure device is powered and responsive

Display Not Updating
● Tap Touch Bar to refresh
● Verify WiFi connection
● Check plugin configuration
Reset Options
Soft Reset / Re-Pairing
● Enter WiFi pairing mode
● Use on-screen options to reset or reconfigure
Dock & Mounting Notes
● Dock must be used for charging
● Magnetic alignment ensures correct positioning
● Kickstand or mounting kit can be used for placement
● Ensure stable surface during use
Warranty and Support
TRMNL X includes a limited warranty.
For support:
● Visit the TRMNL Help Center
● Contact: support@usetrmnl.com

Key Differences from TRMNL OG
● Display with 4x higher resolution, 16-greyscale and quick,
partial refresh support
● No physical buttons → replaced by Touch Bar gestures
● Magnetic pogo-pin dock instead of direct cable charging
● 5GHz WiFi support
FCC caution statements
This device complies with part 15 of the FCC Rules. Operation is
subject to the following two conditions:
(1) This device may not cause harmful interference, and
(2) this device must accept any interference received, including
interference that may cause undesired operation.
Any Changes or modifications not expressly approved by the party
responsible for compliance could void the user's authority to operate
the equipment.
This device complies with FCC RF exposure limits for mobile
equipment. This equipment shall be installed and operated with a
minimum distance of 20 cm between the radiator and the human
body.

and, if not installed and used in accordance with the instructions,
may cause harmful interference to radio communications. However,
there is no guarantee that interference will not occur in a particular
installation. If this equipment does cause harmful interference to
radio or television reception, which can be determined by turning
the equipment off and on, the user is encouraged to try to correct
the interference by one or more of the following measures:
-Reorient or relocate the receiving antenna.
-Increase the separation between the equipment and receiver.
-Connect the equipment into an outlet on a circuit different from
that to which the receiver is connected.
-Consult the dealer or an experienced radio/TV technician for help.
Note: This equipment has been tested and found to comply with the
limits for a Class B digital device, pursuant to part 15 of the FCC
Rules. These limits are designed to provide reasonable protection
against harmful interference in a residential installation. This
equipment generates uses and can radiate radio frequency energy