Nest Power Connector
Installation Guide
Guide d’installation
2 3
ENGLIS H
Setup process
1. Install your Nest thermostat
2. Update your thermostat
3. Turn o the power at the circuit breaker
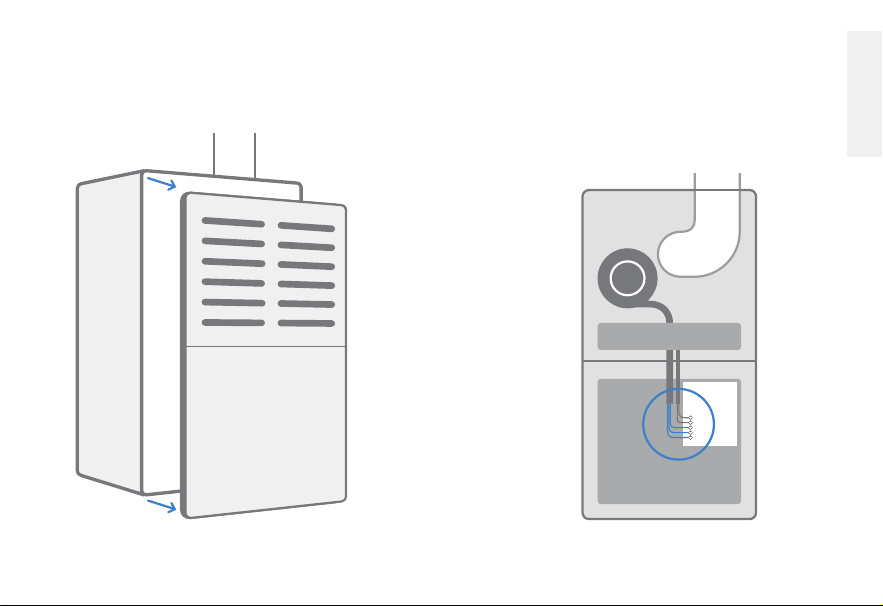
4. Open the HVAC equipment cover
5. Find the HVAC control board
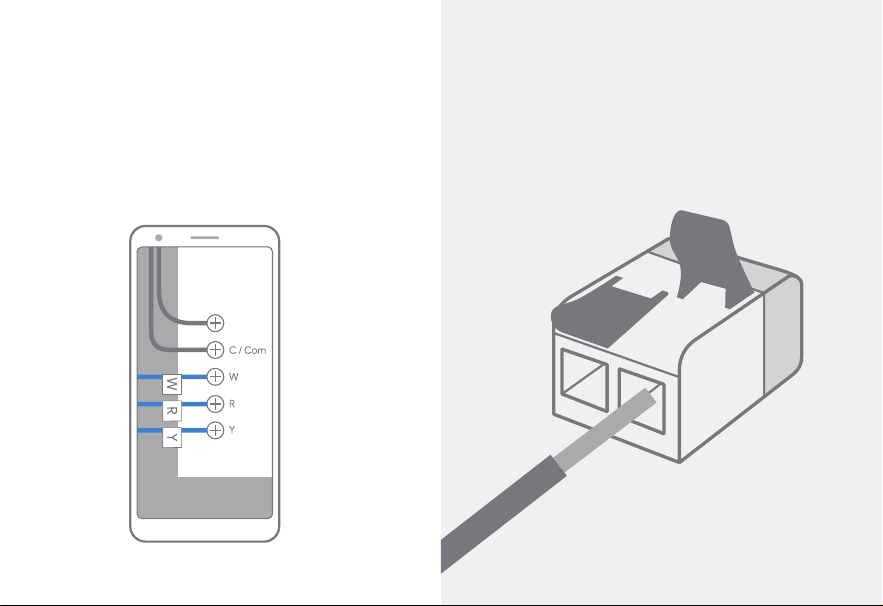
6. Label the thermostat wiring
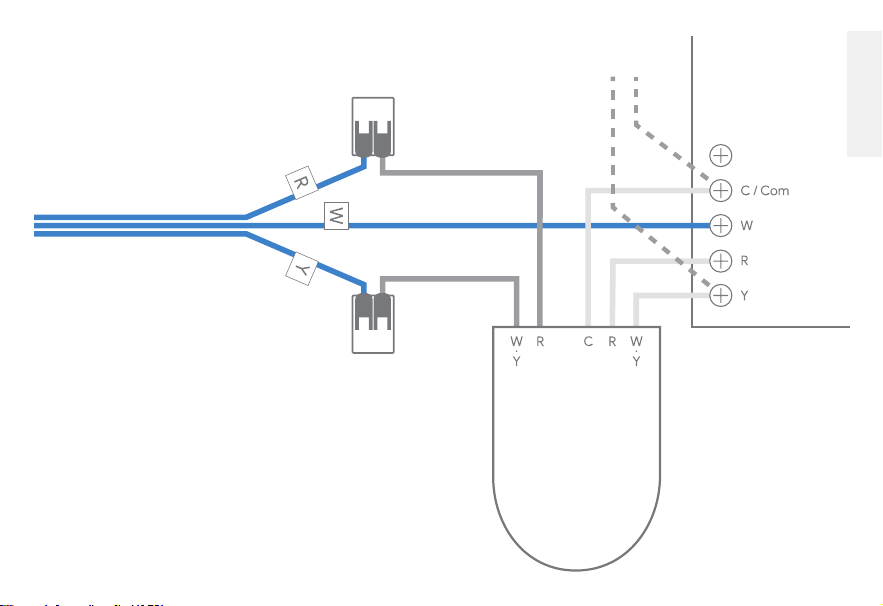
7. Install the power connector
a. Cooling and heating system
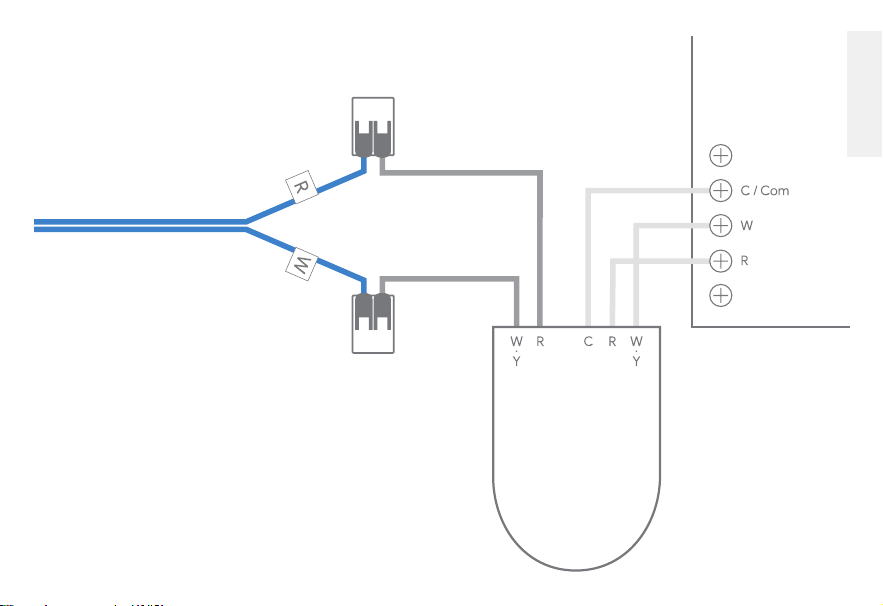
b. Heating-only system
c. Cooling-only system
d. No C-terminal
8. Close the HVAC cover and turn on the power
9. Conrm power connector installation
Compatibility
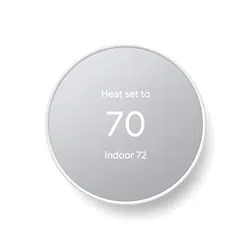
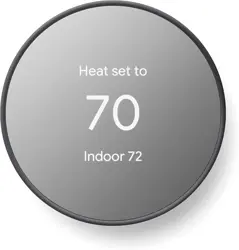
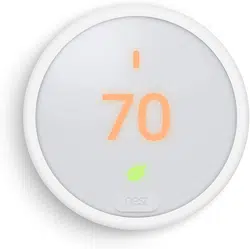
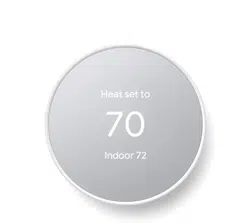
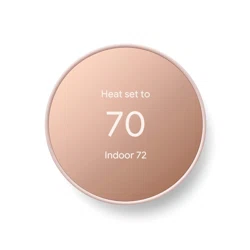
Nest Thermostat, Nest Thermostat E, Nest Learning
Thermostat 3rd gen. 24V VAC systems only.
Millivolt or high voltage systems are incompatible.
Basic safety
Read all installation instructions and the safety and
warranty guide before installation.
High voltages may be present! Be sure to turn
o the power at the breaker panel or unplug
your heater and/or air conditioning unit before
aempting installation or disconnecting
any wires.
Use caution when accessing your heater and/or
air conditioning unit. Call a pro if you are not
comfoable installing this product. Installation
will require access to wiring, and may require
the use of ladders or working in locations with
lile space. Use a helper if possible and avoid
installing the device when home alone.
Technical specications
Operating temperature: -22° to 140°F (-30° to 60°C)
Voltage rating: 20-30 VAC
Ingress protection: IP51
4 5
ENGLIS H
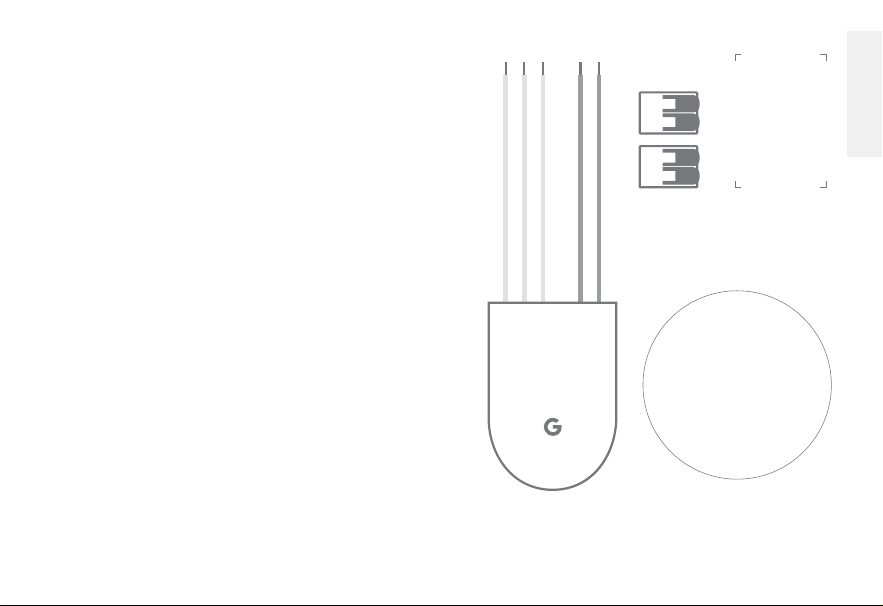
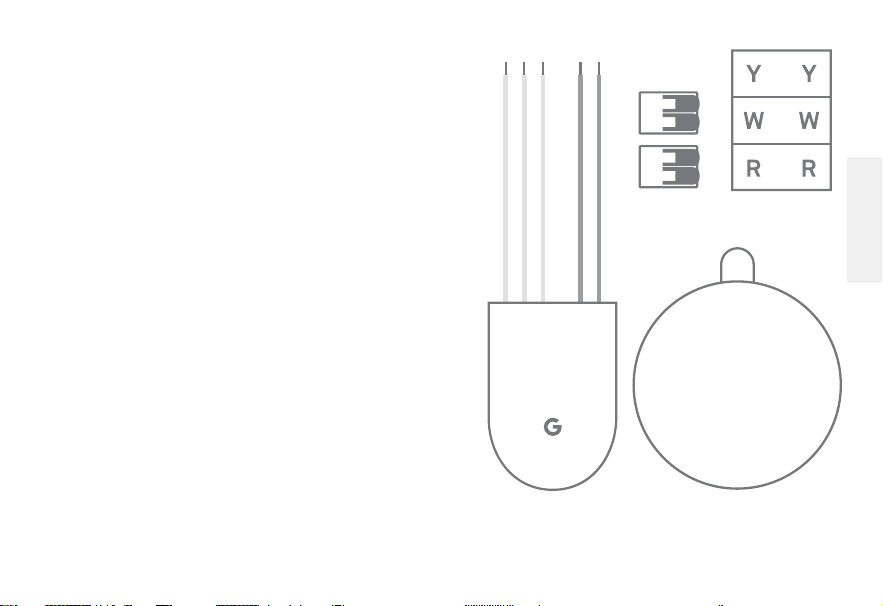
Wire labelsWire
connectors
What’s included
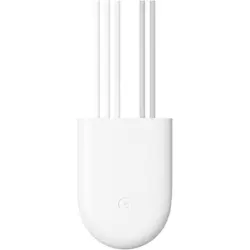
Nest Power
Connector
Sticky pad
Before you sta
Watch an install video at
g.co/nest/powerconnectorinstall
Professional installation
recommended
Connect with an independent installer who’s
trained to install Google Nest products
at g.co/nest/install
Get advanced instructions at
g.co/nest/powerconnectoradvanced
6 7
ENGLIS H
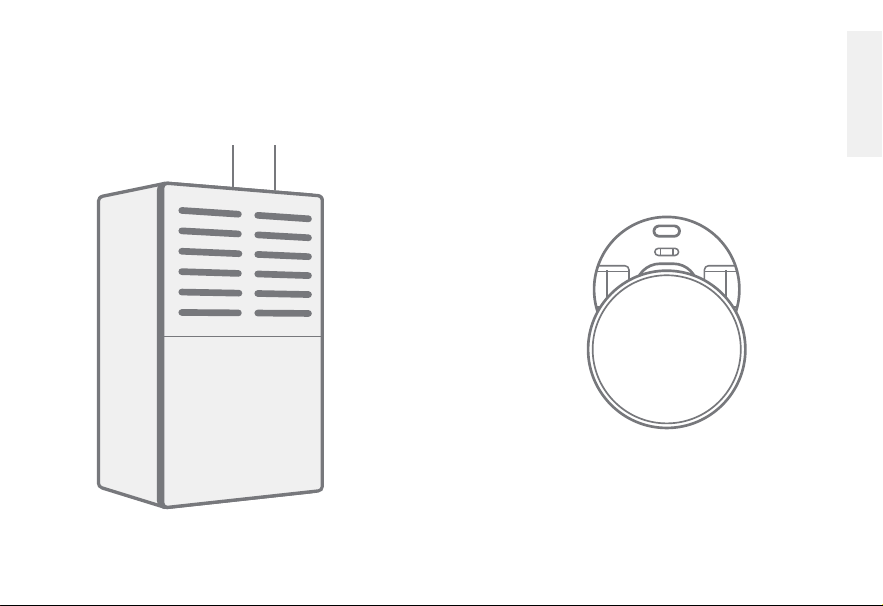
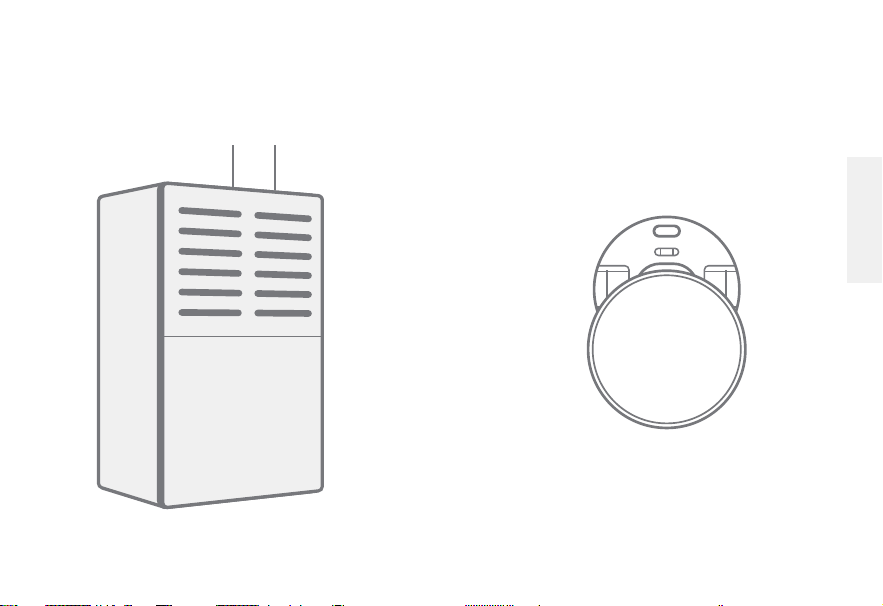
1. Install your Nest thermostat
Install your thermostat before the power connector
Install the power connector at your HVAC equipment,
not your thermostat. If you have multiple thermostats,
install at your zone controller.
*
*
Box where wires from multiple thermostats connect
8 9
ENGLIS H
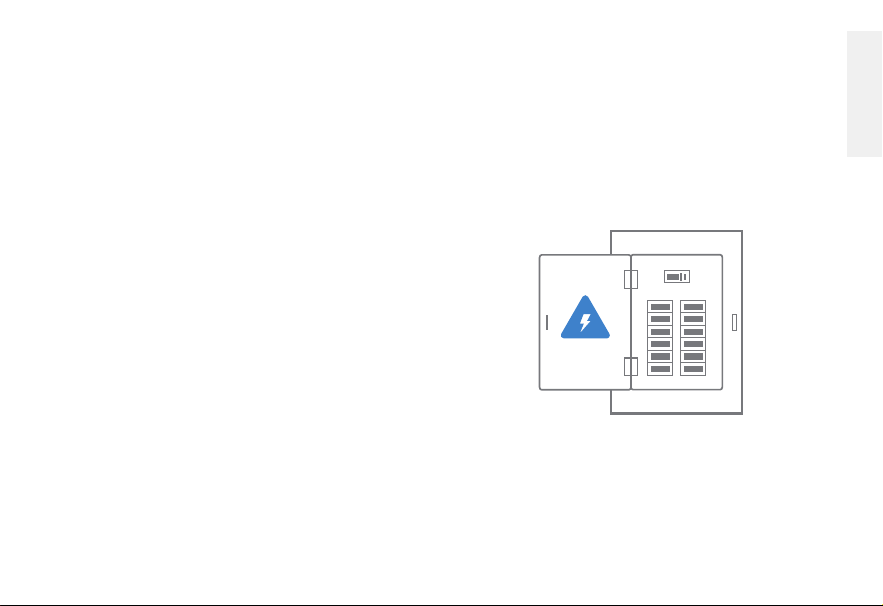
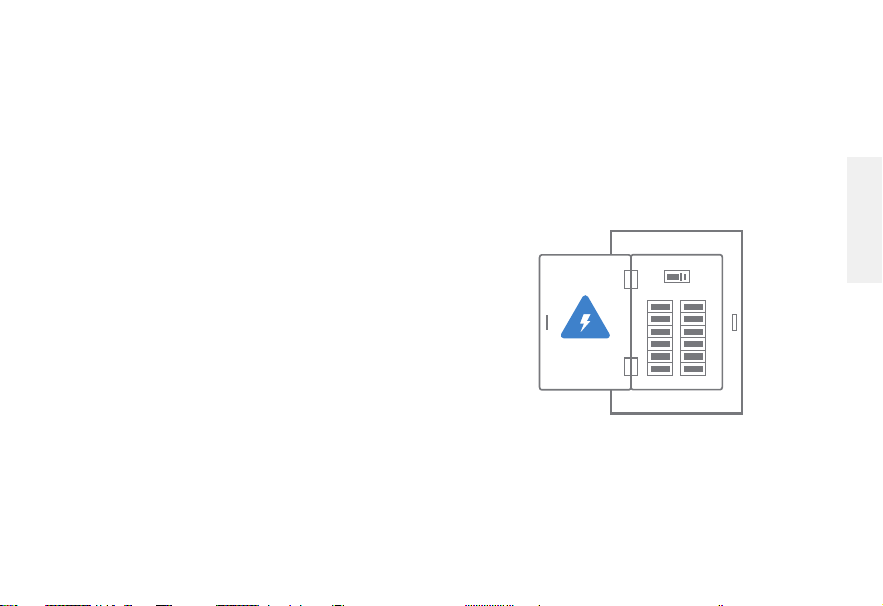
3. Turn o the power at the
circuit breaker
This protects you and your equipment
2. Update your thermostat
Nest Thermostat
Go to Seings > Version > Update and get
version 1.1 or later
Troubleshooting
• You may see a wiring error. This’ll go away
aer installing the power connector.
• Adjust your thermostat target temperature
so your system isn’t heating or cooling.
This can prevent some errors.
• Replace thermostat baeries if prompted
Nest Learning Thermostat 3rd gen and
Nest Thermostat E
No need to update
Find additional instructions at
g.co/nest/nestpowerconnectorupdate
To check which thermostat you have, visit
g.co/nest/whichthermostat
10 11
ENGLIS H
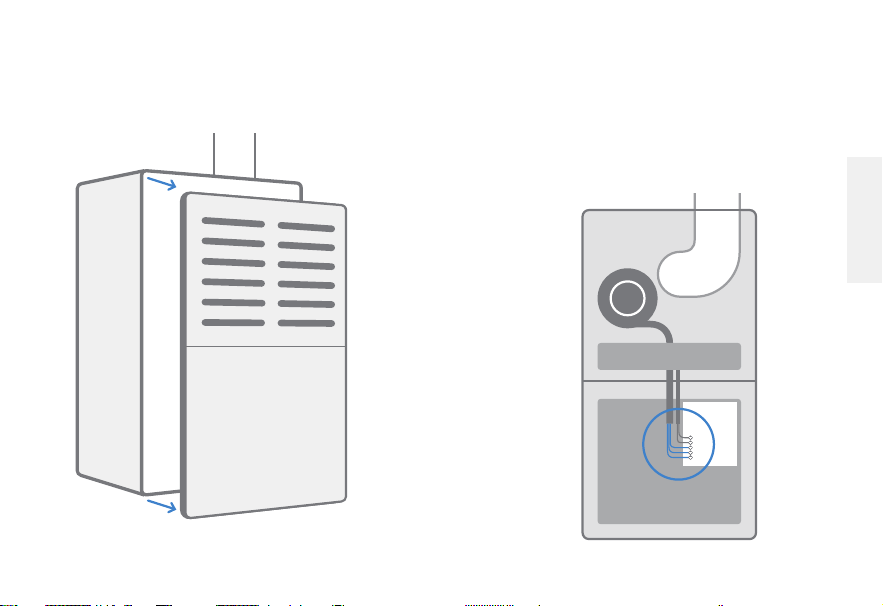
5. Find the HVAC control board
This is the main circuit board in your HVAC that
is wired to your thermostat. If you don’t have
a control board, nd the thermostat wires.
4. Open the HVAC equipment cover
12 13
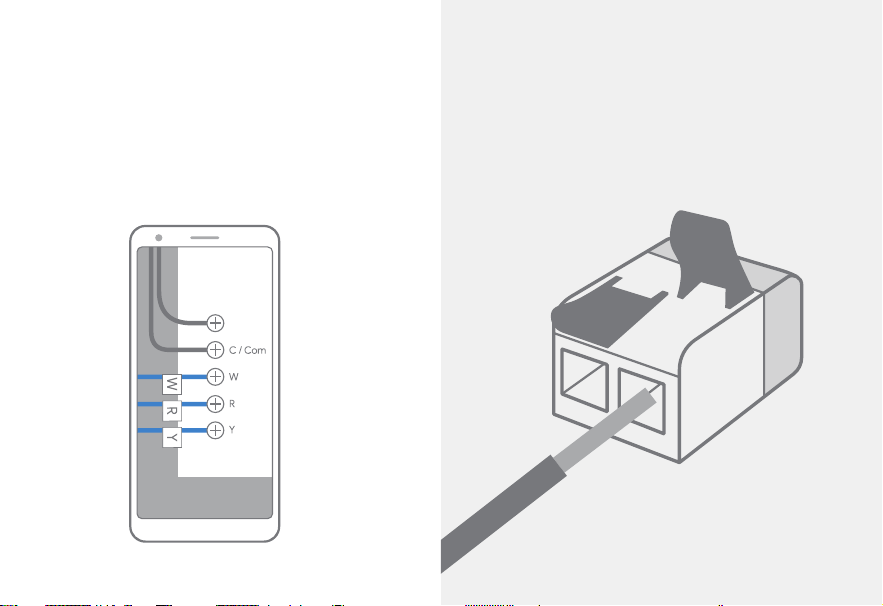
How to use wire connectors
1. Li the levers to 90 degrees. The levers are sti
2. Inse the wires and snap down the levers
3. Pull gently on the wires to check that
they’re secure
6. Label the thermostat wiring
Take a photo of the wiring. Your wiring may
look dierent.
If your HVAC terminals aren’t labeled, see advanced
instructions at g.co/nest/powerconnectoradvanced
Thermostat wires
Compressor
(AC) Unit Wires
14 15
ENGLIS H
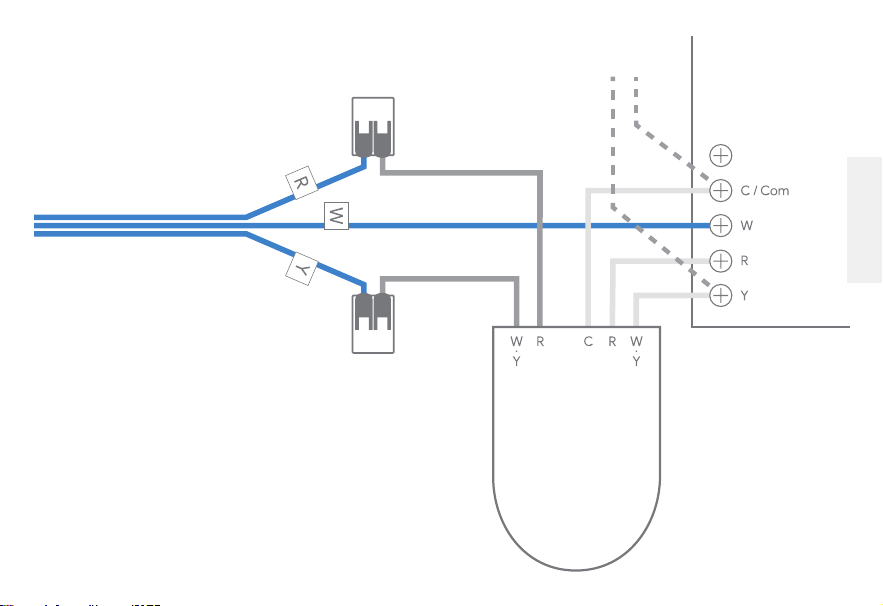
Your system may have extra wires,
like a G wire (to the thermostat)
and C and Y wires (to the compressor).
Keep them connected.
Properly terminate any loose wires
Optional: Use the sticky pad to aach
the power connector to the panel
7. Install the power connector
A. Cooling and heating system
Wire the power connector to Y
Thermostat wires
16 17
ENGLIS H
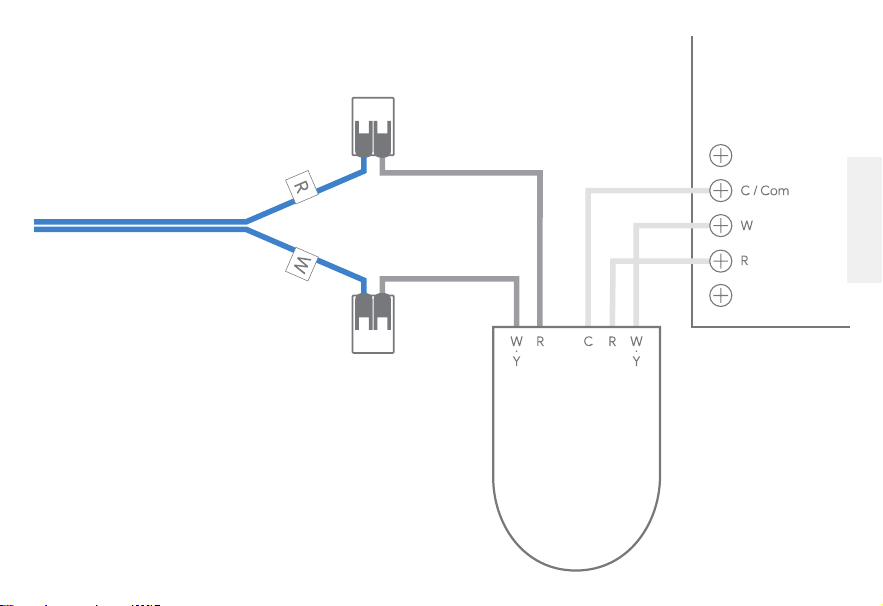
7. Install the power connector
B. Heating-only system
Your system may have extra wires,
like a G wire (to the thermostat).
Keep them connected.
Properly terminate any loose wires
Optional: Use the sticky pad to aach
the power connector to the panel
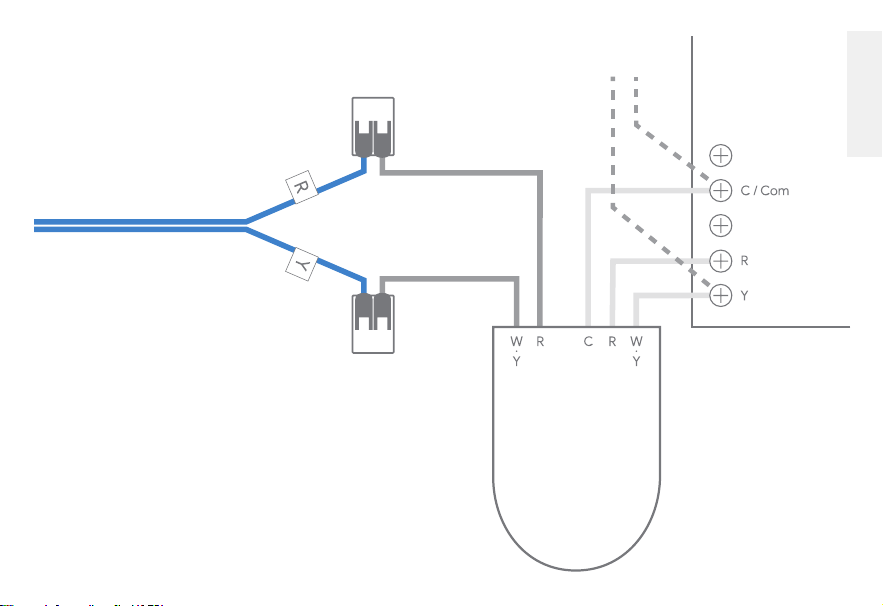
Thermostat wires
Compressor
(AC) Unit Wires
18 19
ENGLIS H
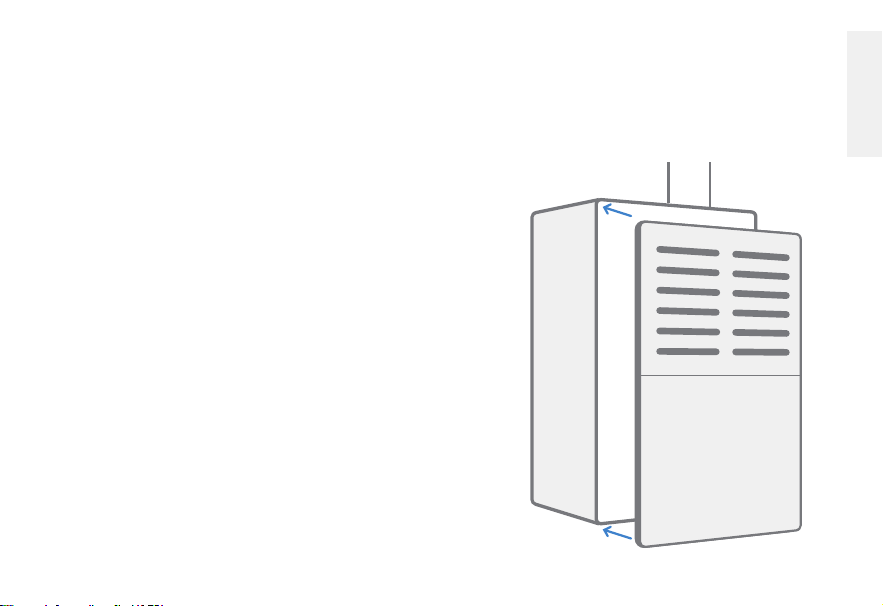
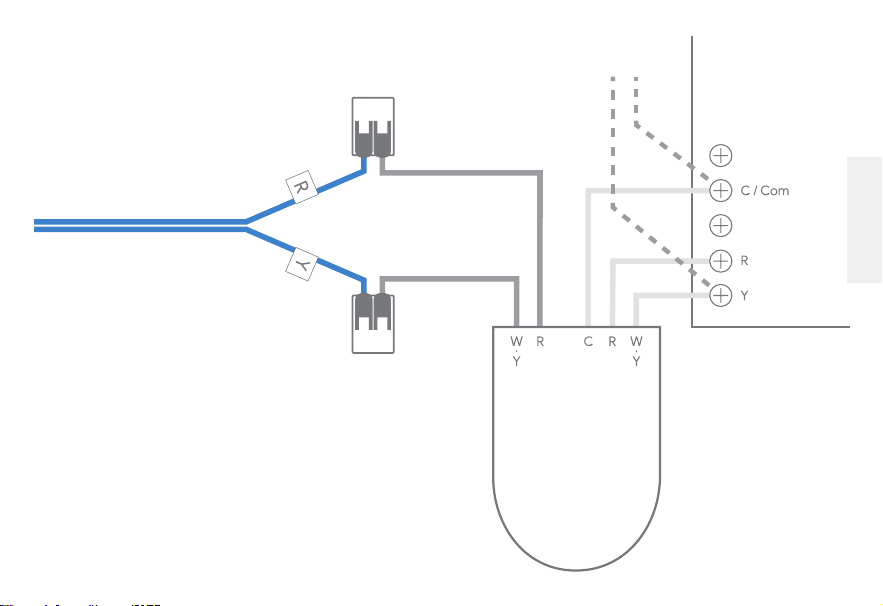
7. Install the power connector
C. Cooling-only system
Your system may have extra wires,
like a G wire (to the thermostat)
and C and Y wires (to the compressor).
Keep them connected.
Properly terminate any loose wires
Optional: Use the sticky pad to aach
the power connector to the panel
20 21
ENGLIS H
8. Close the HVAC cover and
turn on the power
To turn on your power and thermostat, the HVAC
cover must be closed. Your system may not
turn on with the cover open.
7. Install the power connector
D. No C-terminal
Professional installation recommended
Connect with an independent installer who’s trained
to install Google Nest products at g.co/nest/install
Find advanced instructions at
g.co/nest/powerconnectoradvanced
22 23
ENGLIS H
9. Conrm power connector
installation
For Nest Thermostat, go to Seings > Equipment
to check that your power connector is installed
For Nest Learning Thermostat 3rd gen and
Nest Thermostat E, there’s no need to check
For help, visit g.co/nest/checkpowerconnector
24 25
FRANÇAIS
Processus de conguration
1. Installer votre thermostat Nest
2. Mere à jour votre thermostat
3. Couper le courant au niveau du disjoncteur
4. Ouvrir le couvercle de l’appareil CVC
5. Localiser le tableau de commande du système CVC
6. Étiqueter le câblage du thermostat
7. Installer le connecteur d’alimentation
a. Système de climatisation et de chauage
b. Système de chauage uniquement
c. Système de climatisation uniquement
d. Aucune borneC
8. Fermer le couvercle du système CVC et allumer
le courant
9. Conrmer l’installation du connecteur
d’alimentation
Compatibilité
Nest Thermostat, Nest Thermostat E, Nest Learning
Thermostat de 3e génération. Systèmes CVC 24 V
uniquement. Les systèmes millivolts ou haute tension
ne sont pas compatibles.
Consignes élémentaires de sécurité
Avant l’installation, lisez intégralement les instructions
d’installation, ainsi que le guide relatif à la sécurité
et à la garantie.
Des tensions élevées peuvent être présentes!
Veillez à couper le courant au niveau du panneau
de disjoncteurs, ou à débrancher votre appareil
de chauage ou de climatisation avant de tenter
l’installation ou de débrancher des ls.
Faites preuve de prudence lorsque vous
accédez à votre appareil de chauage ou de
climatisation. Faites appel à un professionnel
si vous n’êtes pas à l’aise pour installer ce
produit. L’installation nécessitera l’accès au
câblage, et peut demander l’utilisation d’une
échelle ou un travail dans des endroits exigus.
Si possible, faites-vous aider et évitez d’installer
l’appareil lorsque vous êtes seul chez vous.
Caractéristiques techniques
Température de fonctionnement :
-30 °C à 60 °C (-22 °F à 140 °F)
Tension nominale : 20 VCA à 30 VCA
Indice de protection : IP51
27
FRANÇAIS
26
Nest Power
Connector
Étiquees
pour ls
Connecteurs
laires
Bloc adhésif
Dans la boîte
Consultez les instructions en anglais pour découvrir
les étiquees de ls et le bloc adhésif.
Avant de commencer
Regardez la vidéo d’installation à la page
g.co/nest/powerconnectorinstall
Une installation professionnelle
est recommandée
Contactez un installateur indépendant qui a reçu
la formation requise pour installer les produits
Google Nest à la page g.co/nest/install
Obtenez des instructions avancées à la page
g.co/nest/powerconnectoradvanced
28 29
FRANÇAIS
1. Installer votre thermostat Nest
Installez votre thermostat avant le connecteur
d’alimentation
Connectez le connecteur d’alimentation à votre
appareil CVC plutôt qu’à votre thermostat. Si vous
avez plusieurs thermostats, installez-le à votre
contrôleur de zone*.
*
Boîte dans laquelle les ls de plusieurs thermostats se connectent
30 31
FRANÇAIS
3. Couper le courant au niveau
du disjoncteur
Cela permet de vous protéger, ainsi que
votre appareil
2. Mere à jour votre thermostat
Nest Thermostat
Accédez à Réglages > Version > Mise à jour et
téléchargez la version 1.1 ou une version ultérieure
Dépannage
• Vous pourriez voir un message d’erreur de câblage.
Ce message disparaîtra après l’installation du
connecteur d’alimentation.
• Ajustez la température cible de votre thermostat
pour empêcher votre système de chauer ou
de climatiser votre domicile. Cela pourrait prévenir
ceaines erreurs.
• Remplacez les piles du thermostat si vous
y êtes invité.
Nest Learning Thermostat de 3e génération
et Nest Thermostat E
Aucune mise à jour requise
Vous trouverez des instructions supplémentaires
à la page g.co/nest/nestpowerconnectorupdate
Pour vérier quel thermostat vous avez, consultez
la page g.co/nest/whichthermostat
32 33
FRANÇAIS
5. Localiser le tableau de commande
du système CVC
Il s’agit de la cae de circuit principale de
votre système CVC, qui est raccordée à votre
thermostat. Si vous n’avez pas de tableau
de commande, localisez les ls du thermostat.
4. Ouvrir le couvercle de l’appareil CVC
34 35
Comment utiliser les
connecteurs laires
1. Soulevez les leviers à un angle de 90 degrés.
Les leviers sont rigides
2. Insérez les ls et abaissez les leviers
3. Tirez doucement sur les ls pour vous
assurer qu’ils sont bien en place
6. Étiqueter les ls du thermostat
Prenez une photo du câblage. Votre câblage
pourrait avoir l’air diérent.
Si vos bornes CVC ne sont pas étiquetées,
consultez les instructions avancées à la page
g.co/nest/powerconnectoradvanced
Fils du thermostat
Fils unitaires de
compresseur (CA)
36 37
FRANÇAIS
Votre système pourrait avoir d’autres ls,
comme un l G (connecté au thermostat),
et des ls C et Y (connectés au compresseur).
Gardez-les connecter.
Raccordez correctement tout l débranché
Facultatif: Utilisez le bloc adhésif pour xer
le connecteur d’alimentation au panneau
7. Installer le connecteur d’alimentation
A. Système de climatisation et de chauage
Connectez le connecteur
d’alimentation au l Y
Fils du thermostat
38 39
FRANÇAIS
7. Installer le connecteur d’alimentation
B. Système de chauage uniquement
Votre système pourrait avoir d’autres ls,
comme un l G (connecté au thermostat).
Gardez-les connecter.
Raccordez correctement tout l débranché
Facultatif: Utilisez le bloc adhésif pour xer
le connecteur d’alimentation au panneau
Fils du thermostat
Fils unitaires de
compresseur (CA)
40 41
FRANÇAIS
7. Installer le connecteur d’alimentation
C. Système de climatisation uniquement
Votre système pourrait avoir d’autres ls,
comme un l G (connecté au thermostat),
et des ls C et Y (connectés au compresseur).
Gardez-les connecter.
Raccordez correctement tout l débranché
Facultatif: Utilisez le bloc adhésif pour xer
le connecteur d’alimentation au panneau
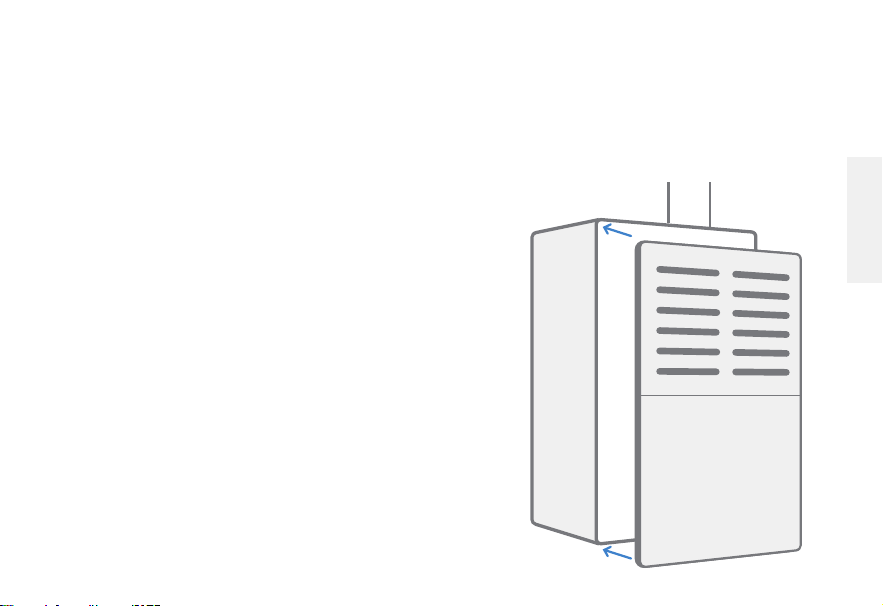
42 43
FRANÇAIS
8. Fermer le couvercle du système CVC
et allumer le courant
Pour pouvoir allumer le courant et le thermostat,
vous devez fermer le couvercle du système CVC.
Votre système pourrait ne pas s’activer si le couvercle
est ouve.
7. Installer le connecteur d’alimentation
D. Pas de borne C
Une installation professionnelle est recommandée
Contactez un installateur indépendant qui a reçu
la formation requise pour installer les produits
Google Nest à la page g.co/nest/install
Vous trouverez des instructions avancées à la page
g.co/nest/powerconnectoradvanced
44 45
FRANÇAIS
9. Conrmer l’installation du
connecteur d’alimentation
Pour le Nest Thermostat, accédez à Réglages >
Équipement pour vérier si votre connecteur
d’alimentation est installé
Pour le Nest Learning Thermostat de 3e génération
et le Nest Thermostat E, il n’y a rien à vérier
Pour obtenir de l’aide, consultez la page
g.co/nest/checkpowerconnector


We’re here to help
For online help and suppo,
visit g.co/nest/help
For help with accessibility,
visit g.co/disabilitysuppo
Nous sommes là
pour vous aider
Pour obtenir de l’assistance et de
l’aide en ligne, consultez la page
g.co/nest/help
Pour obtenir de l’aide concernant
l’accessibilité, consultez la page
g.co/disabilitysuppo
G953-01654- 01-C