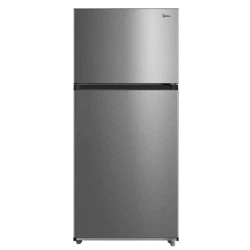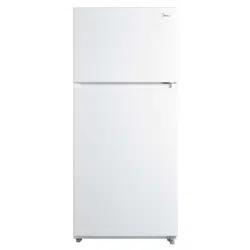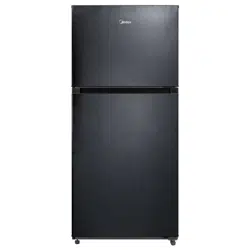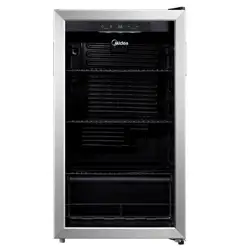
Beverage Cooler
ȆȆȋȊˏ
USER MANUAL
Warning notices: Before using this product, please read this manual carefully and keep it for future reference.
The design and specifications are subject to change without prior notice for product improvement.
Consult with your dealer or manufacturer for details.
The diagram above is just for reference. Please take the appearance of the actual product as the standard.

01
EN
THANK YOU LETTER
Thank you for choosing Midea! Before using your new Midea product, please read
this manual thoroughly to ensure that you know how to operate the features and
functions that your new appliance offers in a safe way.
CONTENTS
THANK YOU LETTER
----------------------------------------------------- 01
SPECIFICATIONS
---------------------------------------------------------- 02
PRODUCT OVERVIEW
--------------------------------------------------- 03
PRODUCT INSTALLATION
---------------------------------------------- 04
OPERATION INSTRUCTIONS
------------------------------------------- 07
CLEANING AND MAINTENANCE
-------------------------------------- 09
TROUBLESHOOTING
----------------------------------------------------- 10
02
EN
SPECIFICATIONS
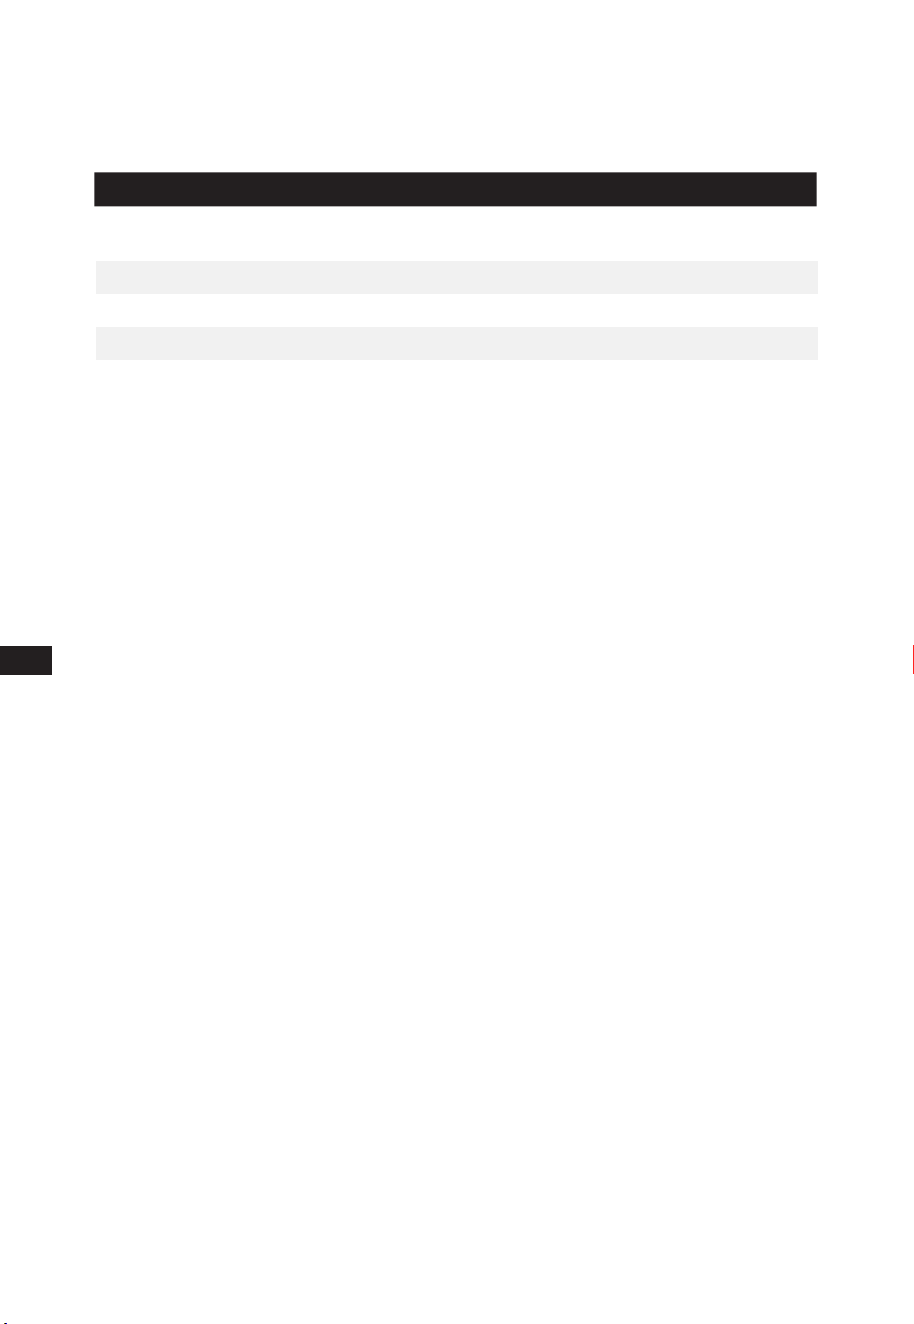
Product model
Total Storage Volume(L) 91L (3.2cu.ft.)
Rated Voltage/Frequency 115V~/60Hz
Rated Current 1A
Overall Dimension (H x W x D) 18.5x17.3x33.3 inches
03
EN
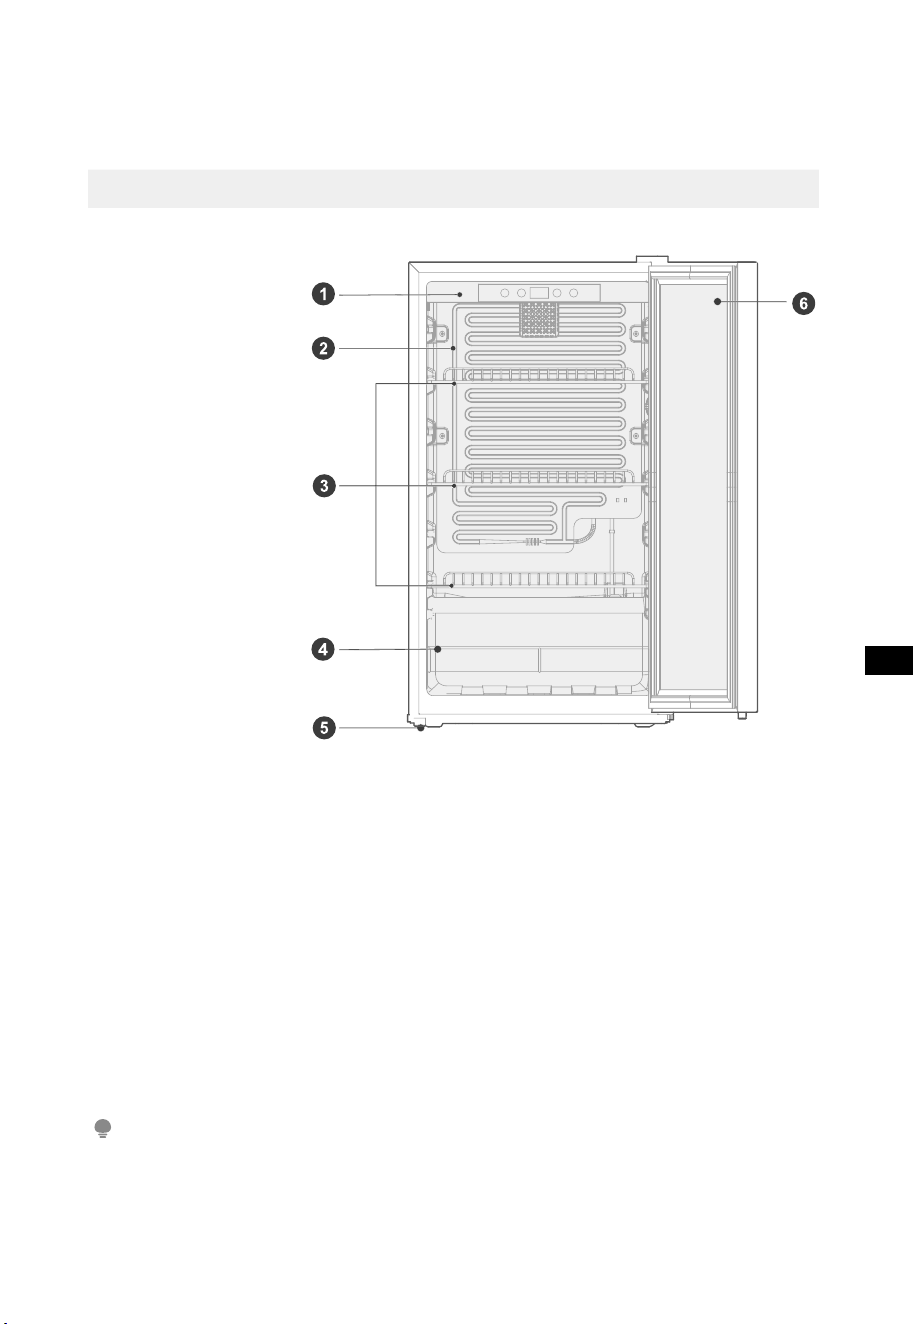
PRODUCT OVERVIEW
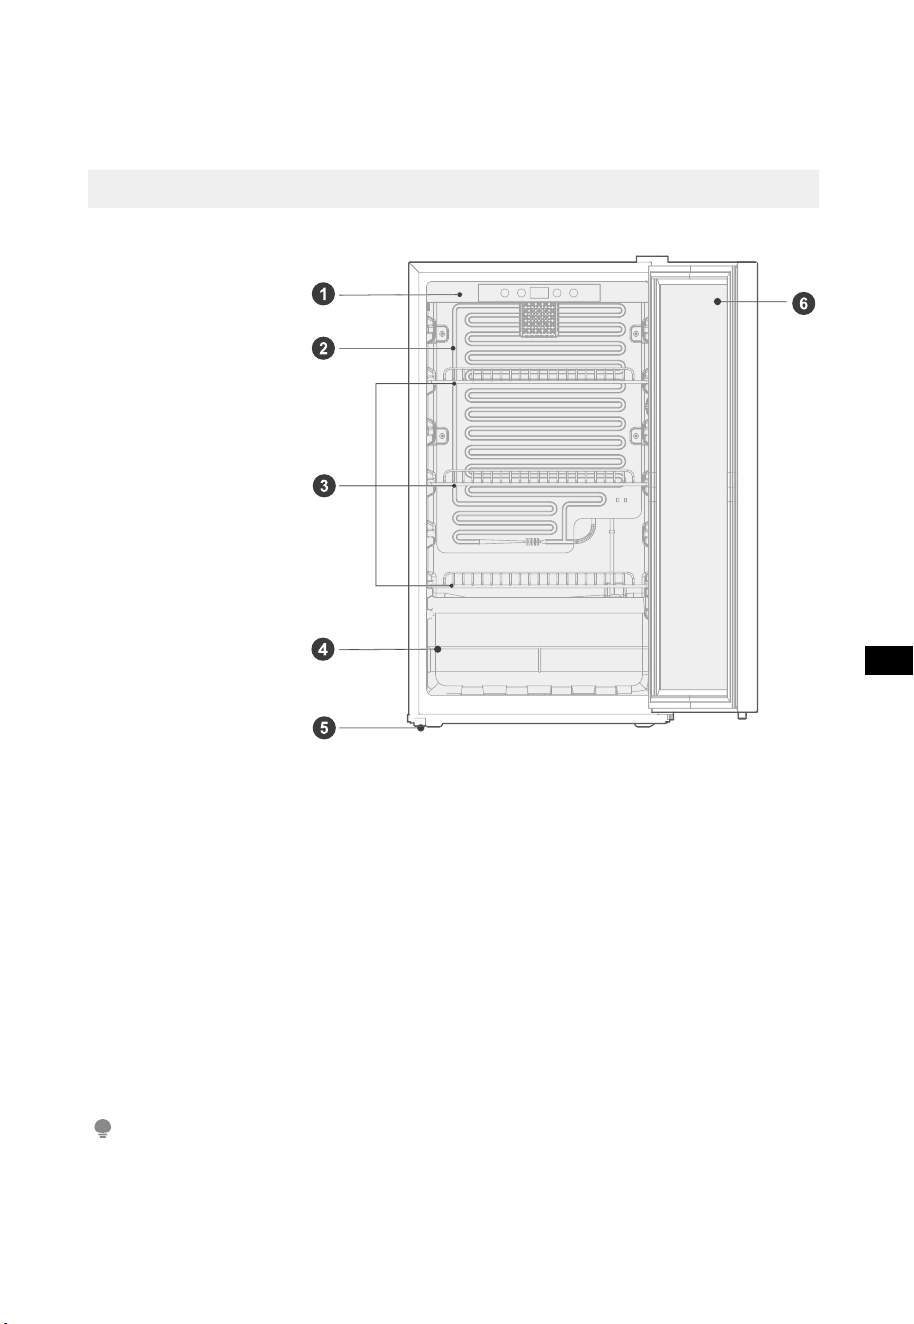
Names of components
1
Temperature control
4
Steel column strip
2
Refrigerator rollbond evaporator
5
Levelling foot
3
Shelf
6
Glass door
ATTENTION
7KHSLFWXUHDERYHLVRQO\IRUUHIHUHQFH7KHDFWXDOFRQ´JXUDWLRQZLOOGHSHQGRQWKHSK\VLFDO
product or statement by the distributor.
04
EN
PRODUCT INSTALLATION
Install Instruction
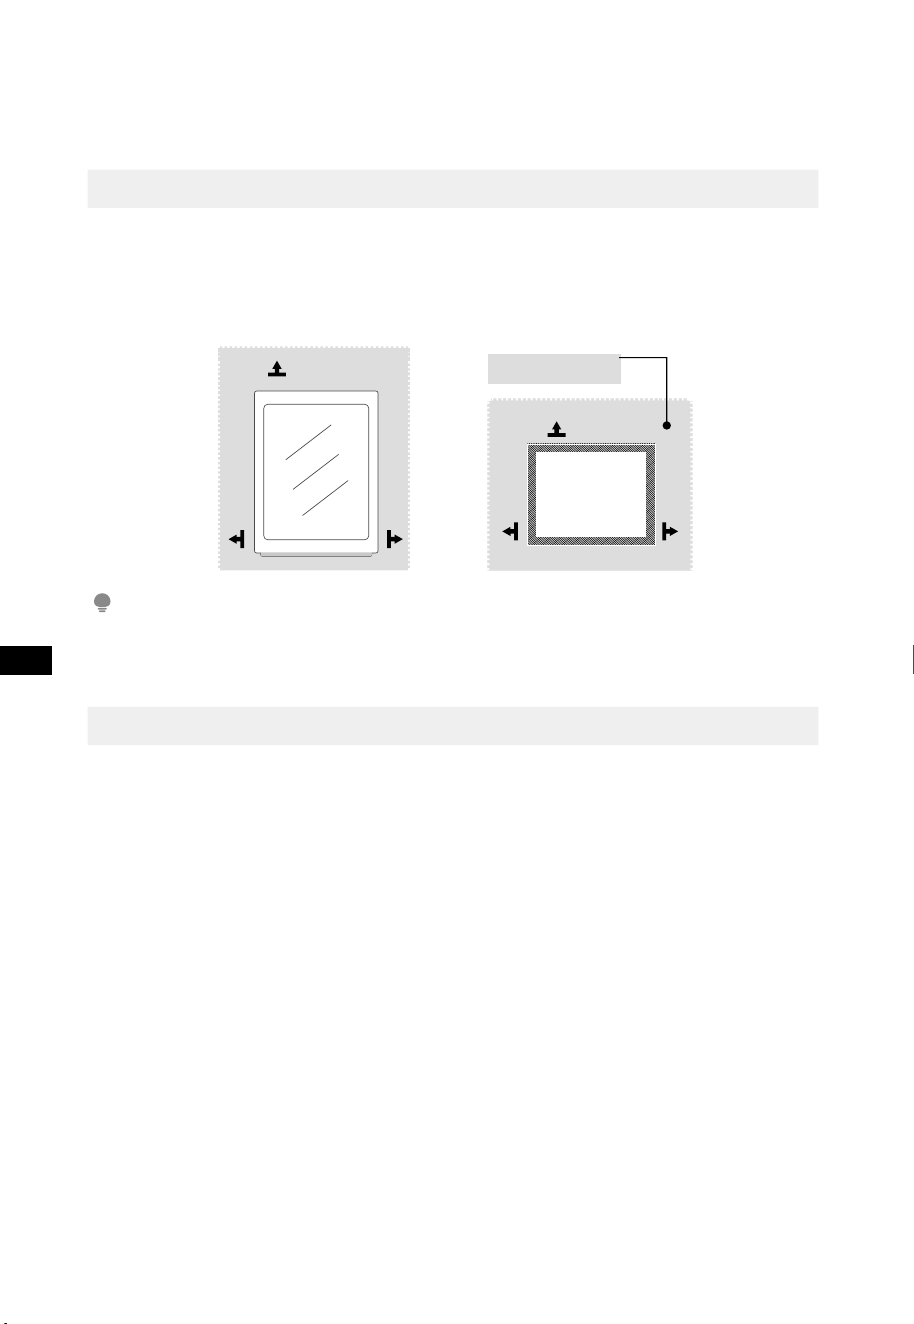
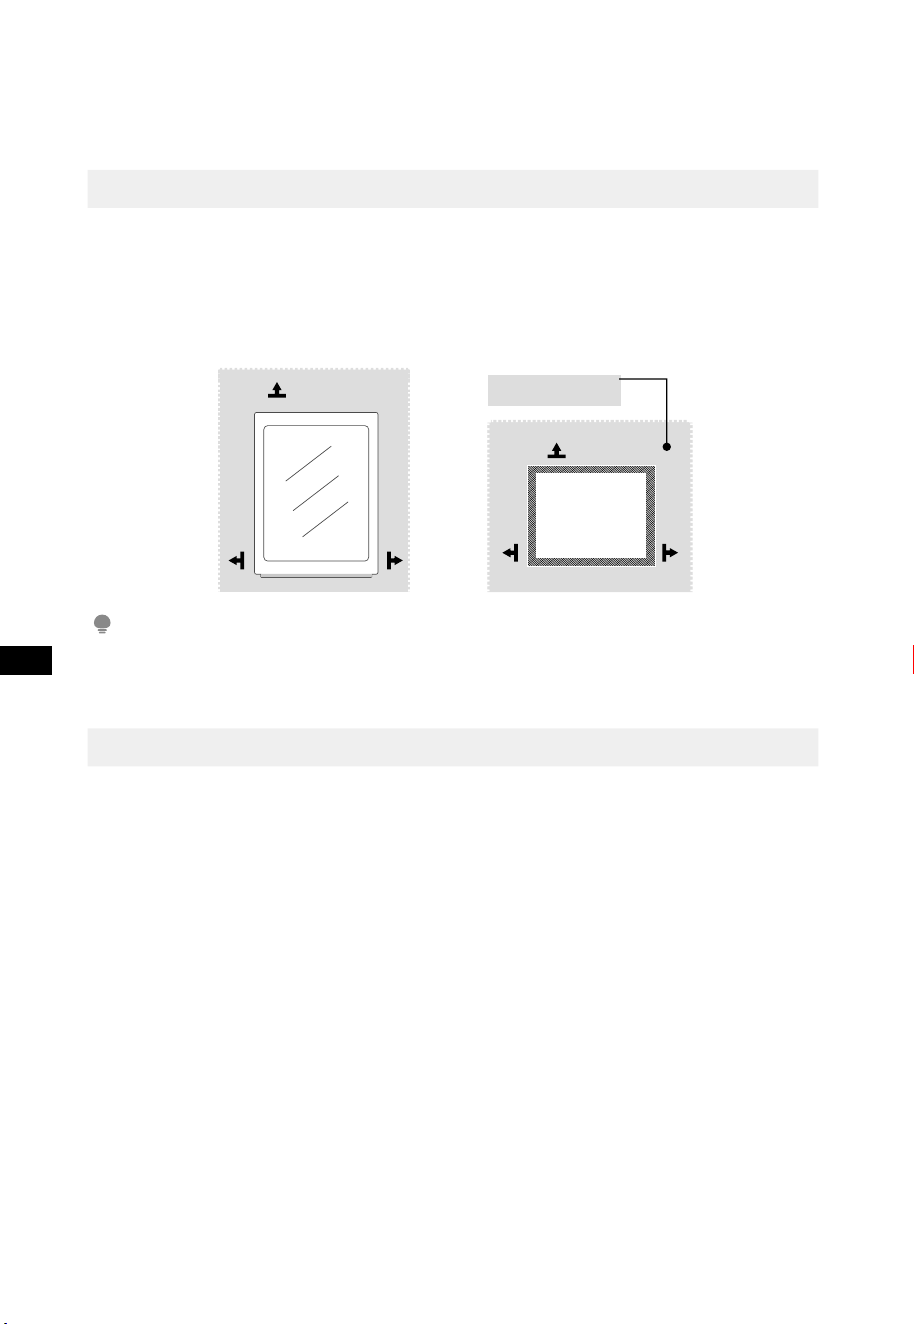
Dimensions and Clearances
• Too small of a distance from adjacent items may result in the degradation
of freezing capability and increased electricity costs. Allow over 100 mm of
clearance from each adjacent wall when installing the appliance.
>100mm
>100mm
>100mm
>100mm
>100mm
>100mm
Top View
Required space
for air circulation
ATTENTION
7KHSLFWXUHDERYHLVRQO\IRUUHIHUHQFH7KHDFWXDOFRQ´JXUDWLRQZLOOGHSHQGRQWKHSK\VLFDO
product or statement by the distributor.
Start to use
• After transportation, please let the cooler stay for more than 2 hours before
turning on the power, otherwise it will lead to a decrease in cooling capacity
or a damage to the cooler. The cooler shall stay for half an hour before
FRQQHFWLQJSRZHUZKHQLWLV´UVWO\VWDUWHG&OHDQXSWKHLQQHUFKDPEHUEHIRUH
SXWLQWRXVHIRU´UVWWLPH
• Please pull out plug in case of power failure or cleaning. Do not connect
WKHFRROHUWRSRZHUVXSSO\ZLWKLQ´YHPLQXWHVWRSUHYHQWGDPDJHVWRWKH
compressor due to successive starts.
• In the process of compressor work, water droplets or frost will be formed on
the back wall of the refrigerated compartment, which is a normal phenomenon.
$IWHUDSHULRGRIWLPHWKHIURVWZLOOPHOWLQWRZDWHUDQGµRZLQWRWKHZDWHU
tray to evaporate away.
• Do not connect cooler to electronic energy saving plug and converter that can
convert DC into AC (e.g.: solar energy system, ship grid).
05
EN
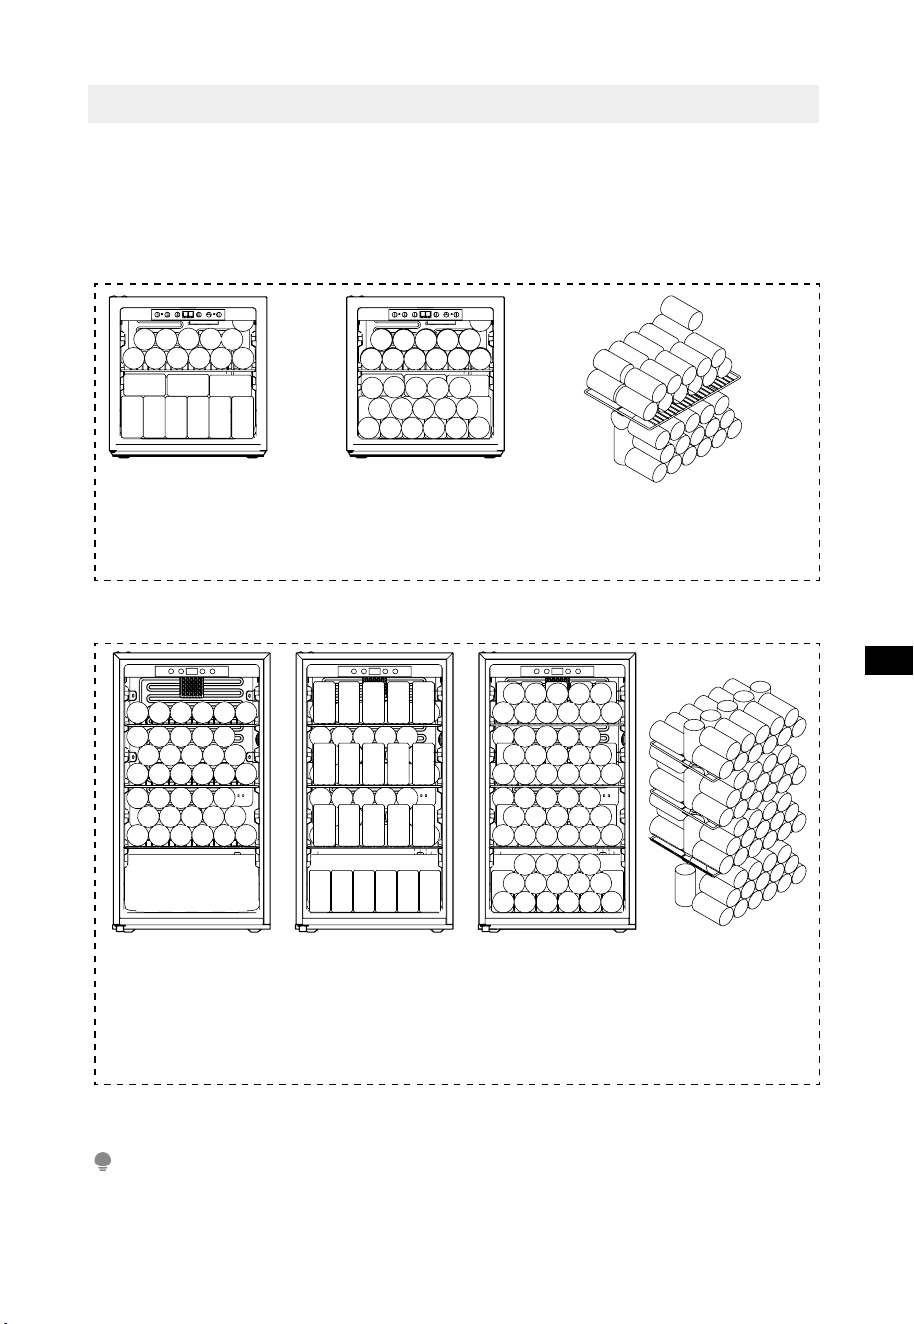
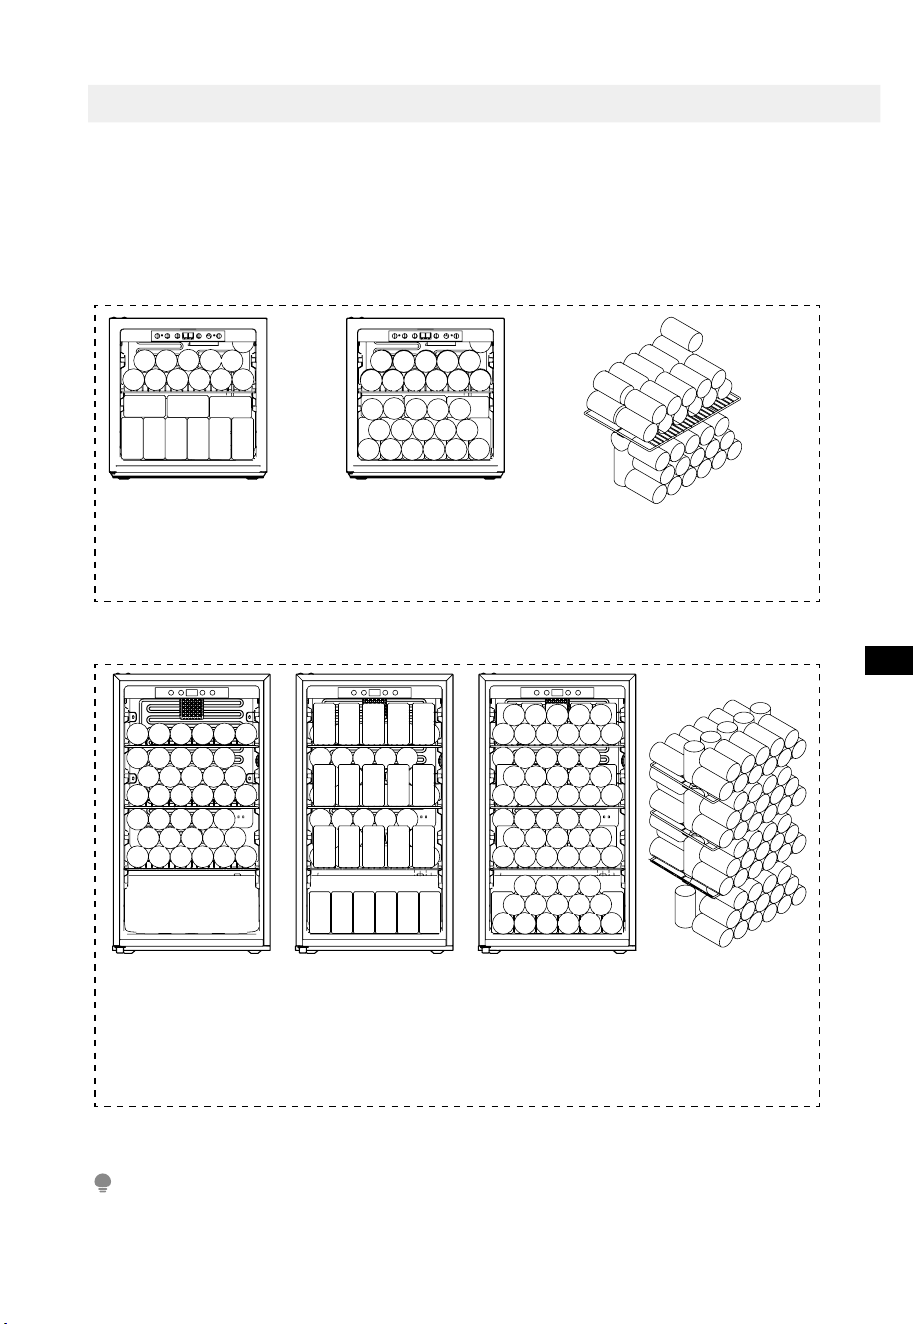
Recommended layout for beverage can in the cabinet
• Do not let the beverage can tough the back side of cooler in order to maintain
good air circulation in the cabinet.
• The capacity of beverage can storage is calculated based on the standard size
can 355ml(outline size
Ɍ
65mm*125mm,12oz) , oversized beverage can may
impact on the number of can storage in the cabinet.
Fig:1
Fig:2
ATTENTION
Due to different temperature zones generated due to air circulation in the beverage cooler,
the upper area’s temperature is higher than the low area.
Inner row
Top shelf-12 cans
Base-9 cans
Inner row
Top shelf-6 cans
Second shelf-16 cans
Third shelf-16 cans
Middle row
Top shelf-5 cans
Second shelf-5
cans Third shelf-5
cans Base-6 cans
Outer row
Top shelf-11 cans
Second shelf-15
cans Third shelf-15
cans Base-15 cans
Total beverage
can storage-115cans
Outer row
Top shelf-11 cans
Base-16 cans
Total beverage
can storage-48cans
06
EN
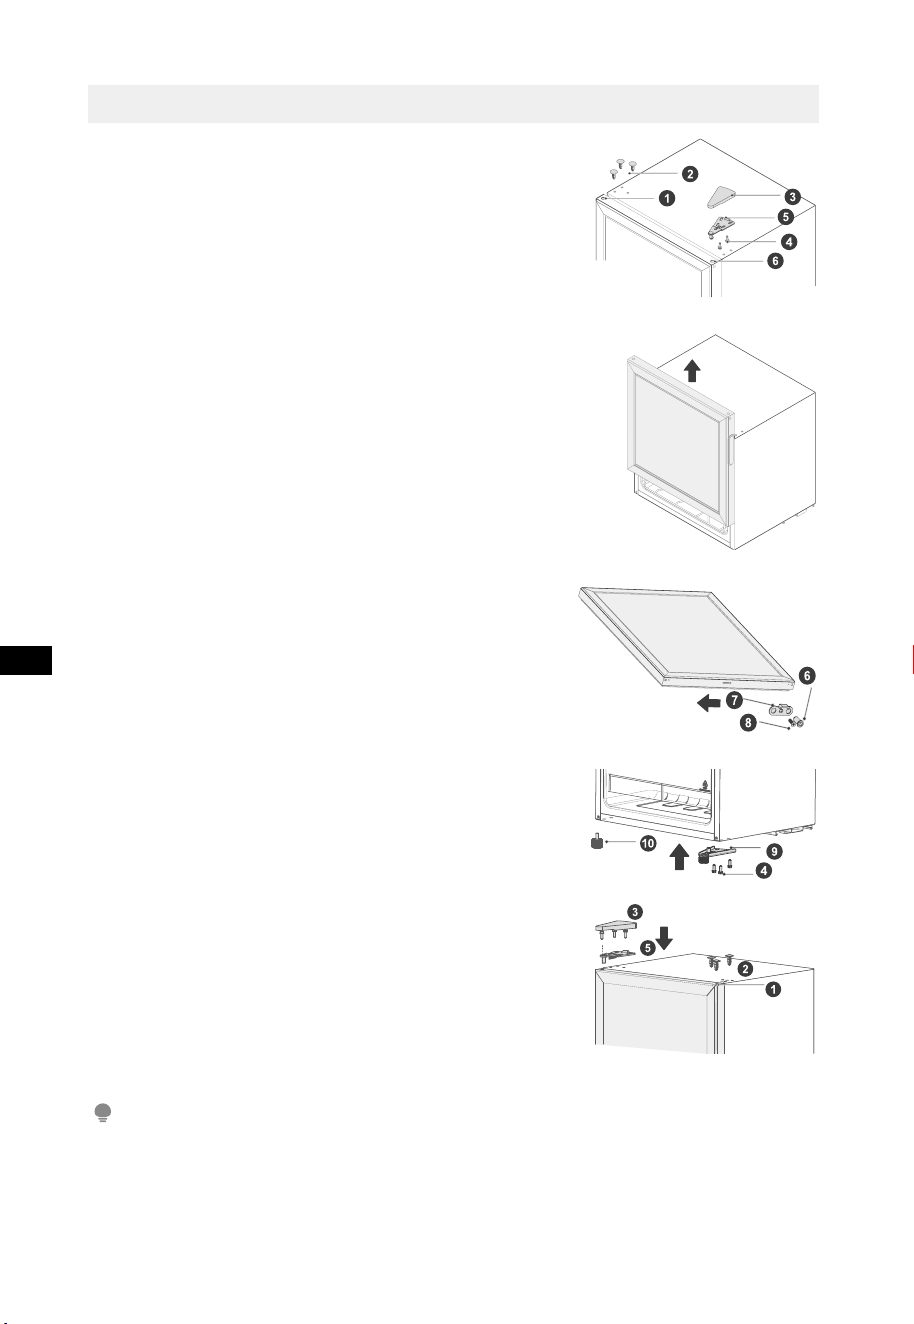
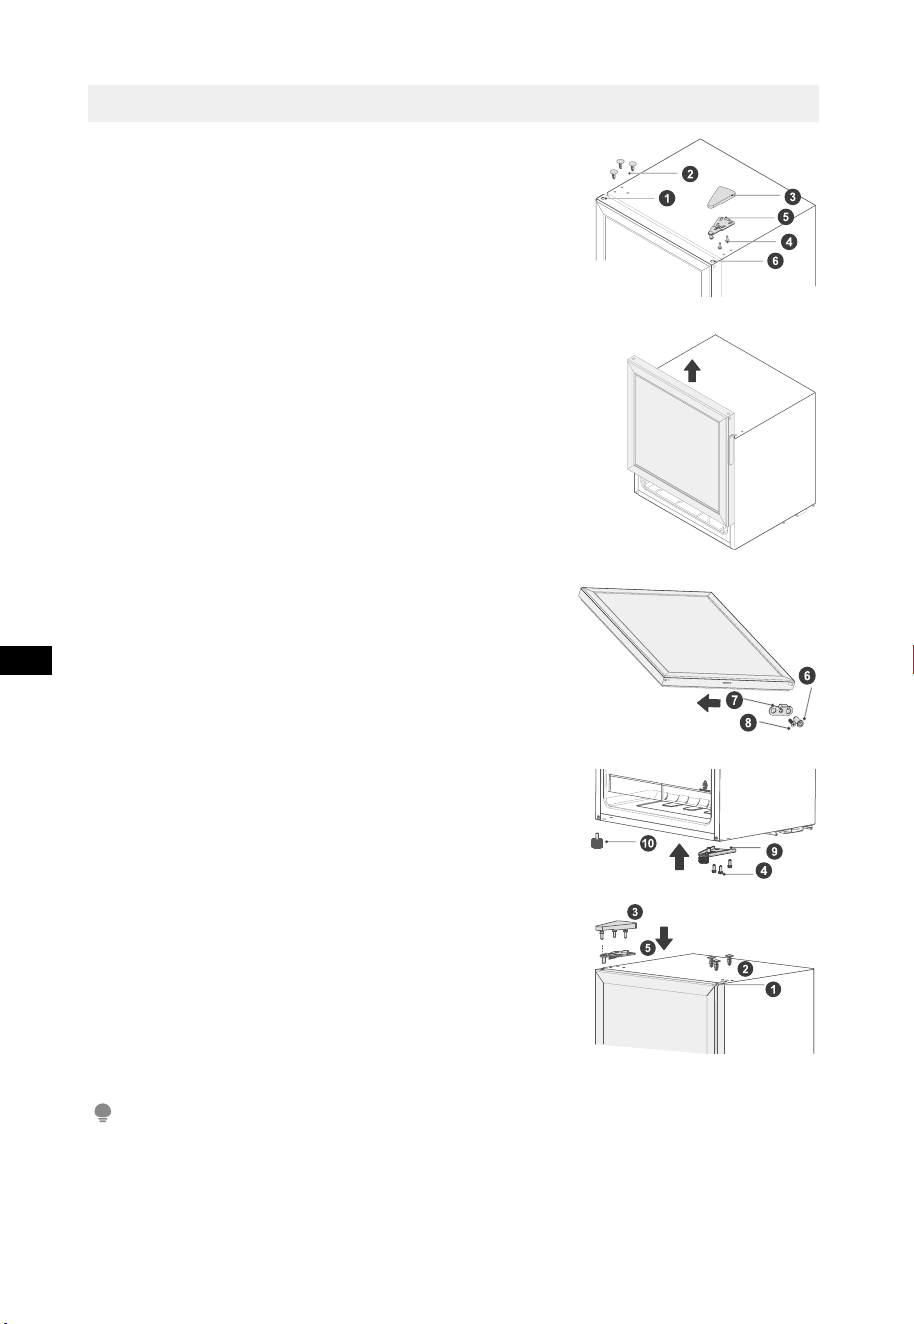
Reversing the door swing
1. Change the installation location of the upper hinge
(5) of the beverage cabinet, then the opening
direction of the door could be changed at will. Please
follow the following instructions for the change of
the opening direction of the beverage cabinet’s door
(for instance: from right-handed door to left-handed
door): close the glass door of the beverage cabinet,
use a blade to remove the rivet (2) carefully, loose
the mounting cover (3) of the door hinge and three
positioning bolts (4) and remove the upper hinge (5).
2. Open the door of the beverage cabinet and detach
the glass door of which with tremendous care.
3. Dismantle the door axle sleeve (6) at lower part of
the glass door, door stopper block screws (8)and
GRRUVWRSSHUDQG´[WKHPWROHIWVLGH
4. Dismantle the levelling foot (10), positioning bolts
(4) and lower hinge (9), then exchange the parts of
right and left sides and later use the reverse method
to install the levelling foot and positioning bolts.
5. Put the aforesaid glass door on the lower hinge,
LQVWDOOWKHGRRUD[OHVOHHYHEDFNDQG´[WKH
upper hinge (5). Align the door with the cabinet and
check the tightness of gasket, and then install all the
ornaments (1) (2).
ATTENTION
7KHSLFWXUHDERYHLVRQO\IRUUHIHUHQFH7KHDFWXDOFRQ´JXUDWLRQZLOOGHSHQGRQWKHSK\VLFDO
product or statement by the distributor.
07
EN
OPERATION INSTRUCTIONS
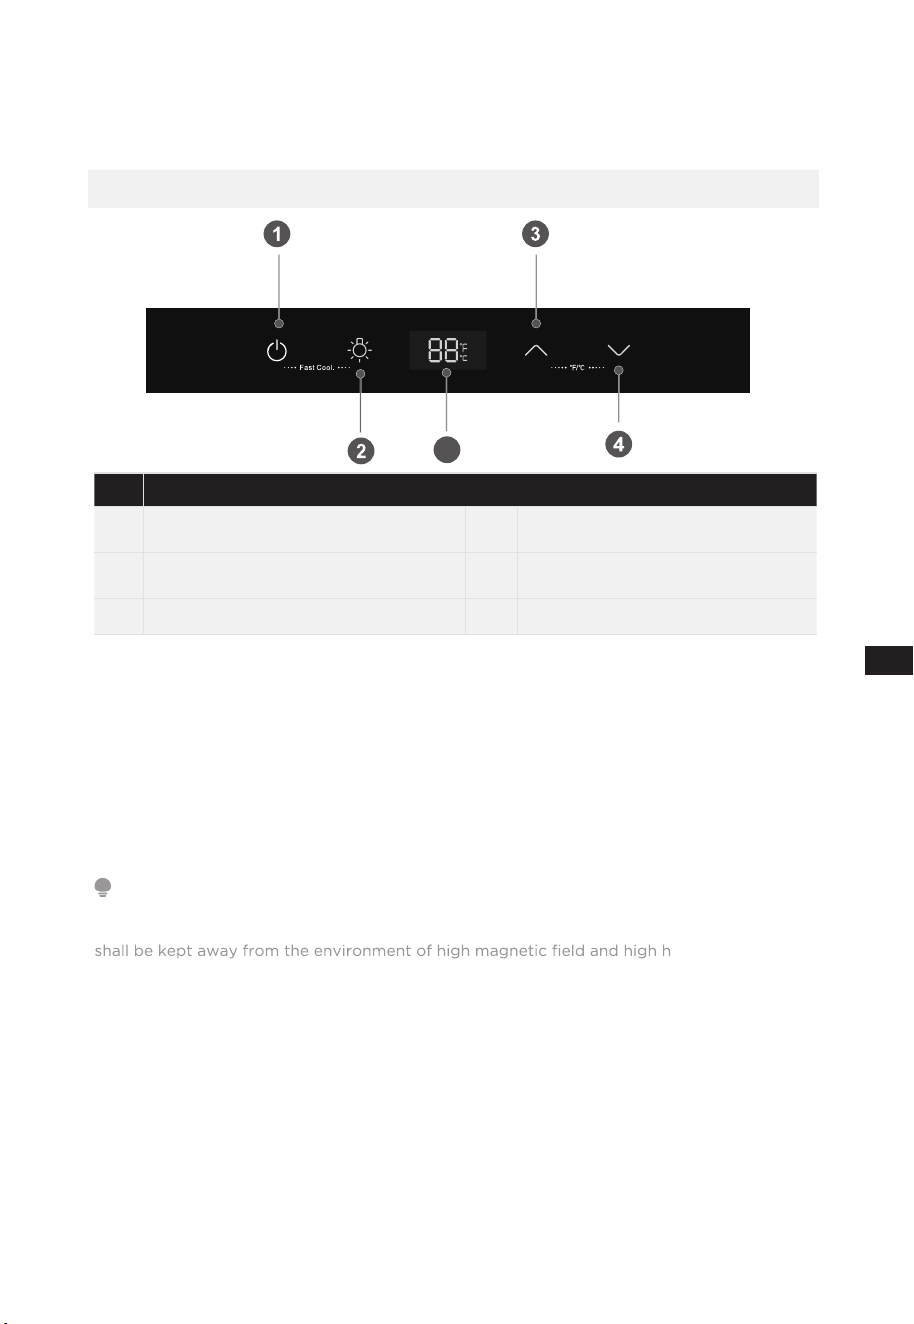
Control panel
Display
1
Standby button
4
Temperature-drop key
2
Lighting key
5
5
Display area
3
Temperature-rise key
* The actual control panel may differ from model to model.
Display Control
• when power-on the beverage cooler, the display screen will display in full last
for 3 seconds, and the start-up tone will ring, and then enter into the display of
normal operation;
• Normal operation display: In case of no failure, set temperature is displayed; In
case of failure, error code is displayed;
ATTENTION
This cooler adopts the touch control of the glass door. Touch slightly when pressing the keys.
It is to be avoided that the area of the display panel is scratched by the sharp things and it
umidity. Otherwise
the cooler is possible not to be set and operate normally.
Standby function
• In standby state,press the standby button until the buzzer rings, the beverage
cooler will exit standby state,and the display screen will display the set
temperature;
• If not in standby state, long press standby button for 3 seconds until the
buzzer rings, the beverage cooler will enter in standby state, the display screen
will turn off.
Except the lighting function, the following operations only be able to carried out under the
unlock state.
08
EN
Lighting mode
• Press the lighting key until the buzzer rings to turn on/off the internal lamp.
Super cool mode
Mode entry :
• Continuously press the standby button and the lighting mode button for 3
seconds to enter, the display area shows “FC” and the mode takes effect.
Mode exit :
• It lasts for 24 hours at most and will exit the mode automatically.
• Press the standby button and lighting mode button continuously for 3 seconds
again in this mode, or power off, also can exit the mode.
Switching of the Fahrenheit temperature and Cels
• Press the Temperature-rise key and the Temperature-drop key continuously
IRUVHFRQGVWR´QLVKWKHVZLWFKRIWKH&HOVLXVWHPSHUDWXUHDQG)DKUHQKHLW
temperature; the display area will show the setting Fahrenheit temperature or
Celsius temperature under the existing mode.
Temperature setting
• Press the “Temperature-rise key” , the temperature will increase 1
ദ
(or
ബ
).
After locking, the cooler will operate according to the setting value;
• Press the “Temperature-drop key” , the temperature will decrease 1
ദ
(or
ബ
).
After locking, the cooler will operate according to the setting value.
ATTENTION
Setting range of the Celsius temperature:1
ദ
~10
ദ
; setting range of the Fahrenheit
temperature: 34
ബ
~50
ബ
.
Memory function
• The cooler has the power off memory function. After the power is on again,
the cooler will work according to the setting before the power-off.
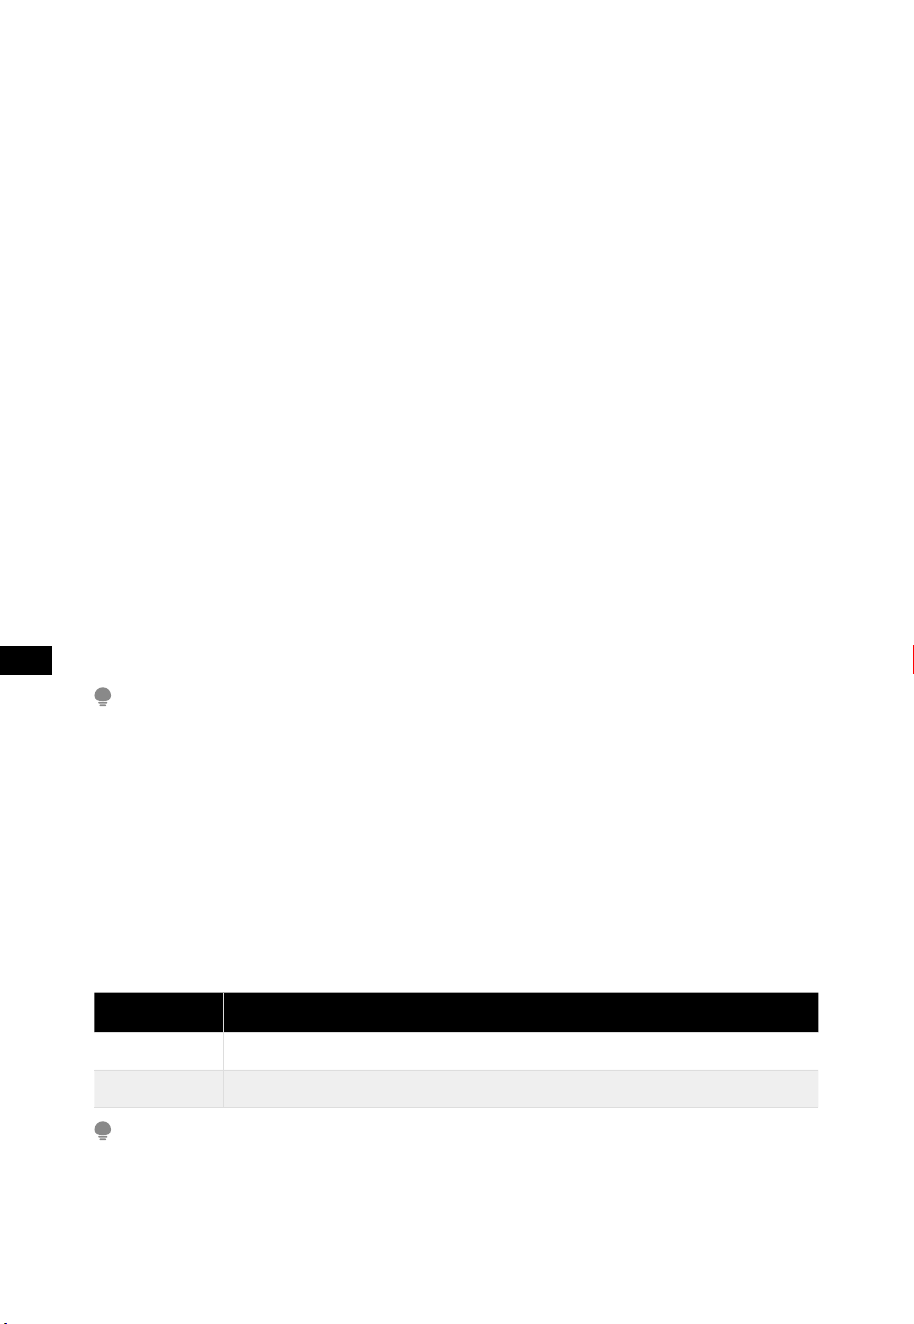
Error code
• If the failure happens, the display area will show corresponding error codes as
shown as below table, the user shall contact a specialist for maintenance, so as
to make sure the normal use of beverage cooler.
Fault Code Fault Description
E1 Temperature sensor fault
E6 Communication fault
ATTENTION
Storing too many cans or bottles in the cooler may cause the temperature in the cooler to
rise temporarily.

09
EN
CLEANING AND MAINTENANCE
Stop using the beverage cooler
If the beverage cooler left unused for a long time, please:
1. Unplug the beverage cooler;
2. Clean the beverage cooler;
3. Keep the beverage cooler door open.
Clean the beverage cooler
• Dusts behind the beverage cooler and on the ground shall be timely to improve the
cooling effect and energy saving.
• Check the door gasket regularly to make sure there are no debris.
• Clean the door gasket with a soft cloth dampened with soapy water cleaned or
diluted detergent.
• The interior of the beverage cooler should be cleaned regularly to avoid odor.
• Please turn off the power before cleaning interior, remove all foods, drinks ,shelves,
etc.
• Use a soft cloth or sponge to clean the inside of the beverage cooler, with two
tablespoons of baking soda and a quart of warm water. Then rinse with water and
wipe clean. After cleaning, open the door and let it dry naturally before turning on
the power.
• )RUDUHDVWKDWDUHGLI´FXOWWRFOHDQLQWKHEHYHUDJHFRROHUVXFKDVQDUURZ
sandwiches, gaps or corners), it is recommended to wipe them regularly with a soft
rag, soft brush, etc. and when necessary, combined with some auxiliary tools (such
as thin sticks) to ensure no contaminants or bacterials accumulation in these areas.
• Do not use soaps, detergents, spray cleaners, etc. to clean the inside of your
beverage cooler as these may create odors or contamination.
• Clean the shelves with a soft cloth dampened with soapy water or diluted detergent.
Then rinse with water and dry with a soft cloth or dry naturally.
• Wipe the outer surface of the beverage cooler with a soft cloth dampened with
soapy water, detergent, etc., and then wipe dry. Do not rub or scratch the surface of
the glass door to prevent the door from being broken or scratched.
• Do not use hard brushes, clean steel balls, wire brushes, abrasives(such as
toothpastes),organic solvents (such as alcohol, acetone, banana oil, etc.), boiling
water, acid or alkaline items, which may damage the beverage cooler surface and
interior. Boiling water and organic solvents such as benzene may deform or damage
plastic parts.
• Do not rinse directly with water or other liquids during cleaning to avoid short
circuits or affect electrical insulation after immersion.
10
EN
TROUBLESHOOTING
The following simple issues can be handled by the user. Please call the after-sale
service department if the issues are not solved.
Problem Possible reason
Not work
• Whether the cooler is plugged and connected to power
• Low voltage
• Failure power or tripping circuit.
Long-time operation
of the compressor
• It is normal that cooler operates for longer time in summer
when the ambient temperature is higher
• Do not put too much beverage s in the cooler at one time;
• Frequent opening of cooler door.
Light not work
• Whether the cooler is connected to power, whether the
indicator light is damaged.
Loud noises
• :KHWKHUWKHµRRULVµDWZKHWKHUWKHSODFHPHQWRIFRROHULV
stable;
• Whether the cooler accessories are properly placed.
Over heat on
sidewall
• The cooler enclosure may emit heat during running specially
in summer, this is caused by the radiation of the condenser,
and it is a normal phenomenon.
Surface
condensation
• Condensation: condensation phenomenon will be detected
on the exterior surface and door seals of the cooler when the
ambient humidity is high, this is a normal phenomenon, and
after wiping with towel, turns up the set temperature of the
appliance properly.
$LUµRZVRXQG
Buzz
Clatter
• Refrigerants circulating in the refrigerant lines will produce
eruption of sound and grunts which is normal does not affect
the cooling effect.
• Buzz will be generated by running compressor specially when
starting up or shutting down.
• The solenoid valve or electric switch valve will clatter which is
a normal phenomenon and does not affect the operation.
5HIURLGLVVHXUGH
ERLVVRQV
0$18(/'87,/,6$7,21
ȆȆȋȊˏ
Warning notices: Before using this product, please read this manual carefully and keep it for future reference.
The design and specifications are subject to change without prior notice for product improvement.
Consult with your dealer or manufacturer for details.
The diagram above is just for reference. Please take the appearance of the actual product as the standard.

01
FR
LETTRE DE REMERCIEMENT
Merci d’avoir choisi Midea ! Avant d’utiliser votre nouveau produit Midea, veuillez lire
DWWHQWLYHPHQWFHPDQXHODٴQGHYRXVDVVXUHUGHVDYRLUFRPPHQWXWLOLVHUOHVIRQFWLRQ-
QDOLW«VHWIRQFWLRQVTXHYRWUHQRXYHODSSDUHLORٳUHGHPDQLªUHV«FXULWDLUH
CONTENU
LETTRE DE REMERCIEMENT
------------------------------------------------------------- ࢿࣀ
SPÉCIFICATIONS -------------------------------------------------------------------- ࢿࣁ
PRÉSENTATION DU PRODUIT
----------------------------------------------------------- ࢿࣂ
INSTALLATION DU PRODUIT --------------------------------------------------- ࢿࣃ
INSTRUCTIONS D’UTILISATION ----------------------------------------------- ࢿࣆ
NETTOYAGE ET ENTRETIEN ----------------------------------------------------- ࢿࣈ
DÉPANNAGE -------------------------------------------------------------------------- ࣀࢿ
Volume total de stockage(L) 91L (3.2pieds cubes)
Tension/Fréquence nominale 115V~/60Hz
Courant nominal 1A
Dimension globale (H x W x D) 18.5x17.3x33.3 pouces
02
FR
SPÉCIFICATIONS
Modèle du produit
03
FR
APERÇU DU PRODUIT
Noms des composants
1
Contrôle de la température
4
Bande de colonne en acier
2
YDSRUDWHXUUROOERQGGXU«IULJ«UDWHXU
5
Pied de nivellement
3
WDJªUH
6
Porte en verre
ATTENTION
/ȅLPDJHFLGHVVXVHVWIRXUQLH¢WLWUHGHU«I«UHQFHXQLTXHPHQW/DFRQٴJXUDWLRQU«HOOHG«SHQGUDGX
SURGXLWSK\VLTXHRXGHODG«FODUDWLRQGXGLVWULEXWHXU
04
FR
INSTALLATION DU PRODUIT
Instructions d'installation
Dimensions et dégagements
• Une distance trop petite par rapport aux objets adjacents peut entraîner une
dégradation de la capacité de congélation et une augmentation des coûts
Gȅ«OHFWULFLW«/DLVVH]XQG«JDJHPHQWGHSOXVGHPPGHFKDTXHPXUDGMDFHQW
ORUVGHOȅLQVWDOODWLRQGHOȅDSSDUHLO
>100mm
>100mm
>100mm
>100mm
>100mm
>100mm
Top View
Required space
for air circulation
ATTENTION
/ȅLPDJHFLGHVVXVHVWIRXUQLH¢WLWUHGHU«I«UHQFHXQLTXHPHQW/DFRQٴJXUDWLRQU«HOOHG«SHQGUDGX
SURGXLWSK\VLTXHRXGHODG«FODUDWLRQGXGLVWULEXWHXU
Mise en service
• $SUªVOHWUDQVSRUWYHXLOOH]ODLVVHUOHUHIURLGLVVHXUUHSRVHUSHQGDQWSOXVGHKHXUHV
avant de le mettre sous tension, sinon cela entraînera une diminution de la capacité
GHUHIURLGLVVHPHQWRXXQGRPPDJHDXUHIURLGLVVHXU/HUHIURLGLVVHXUGRLWUHVWHU
XQHGHPLKHXUHDYDQWGHOHEUDQFKHUORUVGHVDSUHPLªUHPLVHHQPDUFKH1HWWR\H]
ODFKDPEUHLQW«ULHXUHDYDQWODSUHPLªUHXWLOLVDWLRQ
• 9HXLOOH]G«EUDQFKHUODSULVHHQFDVGHSDQQHGHFRXUDQWRXGHQHWWR\DJH1H
EUDQFKH]SDVOHUHIURLGLVVHXU¢OȅDOLPHQWDWLRQ«OHFWULTXHGDQVOHVFLQTPLQXWHV
TXLVXLYHQWSRXU«YLWHUGȅHQGRPPDJHUOHFRPSUHVVHXU¢FDXVHGHG«PDUUDJHV
VXFFHVVLIV
• 3HQGDQWOHIRQFWLRQQHPHQWGXFRPSUHVVHXUGHVJRXWWHOHWWHVGȅHDXRXGXJLYUHVH
IRUPHURQWVXUODSDURLDUULªUHGXFRPSDUWLPHQWU«IULJ«U«FHTXLHVWXQSK«QRPªQH
QRUPDO$SUªVXQFHUWDLQWHPSVOHJLYUHIRQGUDHQHDXHWVȅ«FRXOHUDGDQVOHEDF¢
HDXSRXUVȅ«YDSRUHU
• 1HFRQQHFWH]SDVOHUHIURLGLVVHXU¢XQHSULVH«OHFWURQLTXHGȅ«FRQRPLHGȅ«QHUJLHQL¢
XQFRQYHUWLVVHXUSRXYDQWWUDQVIRUPHUOHFRXUDQWFRQWLQXHQFRXUDQWDOWHUQDWLIH[
V\VWªPHGȅ«QHUJLHVRODLUHU«VHDXGHQDYLUH
05
FR
Disposition recommandée pour les canettes de boisson dans le cabinet
• 1HODLVVH]SDVOHVFDQHWWHVWRXFKHUODSDURLDUULªUHGXUHIURLGLVVHXUDٴQGHPDLQWHQLUXQH
ERQQHFLUFXODWLRQGȅDLUGDQVOHFDELQHW
• /DFDSDFLW«GHVWRFNDJHGHVFDQHWWHVGHERLVVRQHVWFDOFXO«HHQIRQFWLRQGHODWDLOOH
VWDQGDUGGHODFDQHWWHGHPOGLPHQVLRQVH[W«ULHXUHVŲPPPPR]XQH
FDQHWWHGHERLVVRQVXUGLPHQVLRQQ«HSHXWDٳHFWHUOHQRPEUHGHFDQHWWHVSRXYDQW¬WUH
VWRFN«HVGDQVOȅDUPRLUH
Fig:1
Fig:2
ATTENTION
(QUDLVRQGHVGLٳ«UHQWHV]RQHVGHWHPS«UDWXUHJ«Q«U«HVSDUODFLUFXODWLRQGHOȅDLUGDQVOHUHIURLGLVVHXUGHERLVVRQVOD
WHPS«UDWXUHGHOD]RQHVXS«ULHXUHHVWSOXV«OHY«HTXHFHOOHGHOD]RQHLQI«ULHXUH
Rangée intérieure
WDJªUHVXS«ULHXUHFDQHWWHV
Base - 9 canettes
Rangée intérieure
WDJªUHVXS«ULHXUH
FDQHWWHV'HX[LªPH«WDJªUH
FDQHWWHV7URLVLªPH«WDJªUH
FDQHWWHV
Rangée du milieu
WDJªUHVXS«ULHXUH
FDQHWWHV'HX[LªPH«WDJªUH
FDQHWWHV7URLVLªPH
«WDJªUHFDQHWWHV%DVH
FDQHWWHV
Rangée extérieure
WDJªUHVXS«ULHXUH
FDQHWWHV'HX[LªPH«WDJªUH
FDQHWWHV7URLVLªPH
«WDJªUHFDQHWWHV%DVH
FDQHWWHV
Boissons totales
VWRFNDJHGHFDQHWWHV
canettes
Rangée extérieure
WDJªUHVXS«ULHXUH
FDQHWWHV%DVHFDQHWWHV
Boissons totales
stockage de canettes - 48 canettes
06
FR
Inversion du sens d'ouverture de la porte
&KDQJH]OȅHPSODFHPHQWGȅLQVWDOODWLRQGHODFKDUQLªUH
VXS«ULHXUHGHOȅDUPRLUH¢ERLVVRQVSXLVODGLUHFWLRQ
GȅRXYHUWXUHGHODSRUWHSRXUUD¬WUHPRGLٴ«H¢YRORQW«
Veuillez suivre les instructions suivantes pour changer
OHVHQVGȅRXYHUWXUHGHODSRUWHGHOȅDUPRLUH¢ERLVVRQV
SDUH[HPSOHSDVVHUGȅXQHSRUWH¢GURLWH¢XQHSRUWH
¢JDXFKHIHUPH]ODSRUWHHQYHUUHGHOȅDUPRLUH¢
boissons, utilisez une lame pour retirer soigneusement
ODULYHWGHVVHUUH]OHFDFKHGHPRQWDJHGHOD
FKDUQLªUHGHODSRUWHDLQVLTXHOHVWURLVERXORQVGH
SRVLWLRQQHPHQWHWUHWLUH]ODFKDUQLªUHVXS«ULHXUH
2XYUH]ODSRUWHGHOȅDUPRLUH¢ERLVVRQVHWG«WDFKH]OD
SRUWHHQYHUUHDYHFXQHH[WU¬PHSU«FDXWLRQ
'«PRQWH]ODEDJXHGȅD[HGHSRUWHVLWX«HHQEDVGH
ODSRUWHHQYHUUHOHVYLVGXEORFGȅDUU¬WGHSRUWHHWOH
EXWRLUGHSRUWHSXLVٴ[H]OHVGXF¶W«JDXFKH
'«PRQWH]OHSLHGGHQLYHOOHPHQWOHVERXORQV
GHSRVLWLRQQHPHQWHWODFKDUQLªUHLQI«ULHXUH
«FKDQJH]HQVXLWHOHVSLªFHVGHVF¶W«VGURLWHWJDXFKH
puis réinstallez le pied de nivellement et les boulons de
SRVLWLRQQHPHQWHQVXLYDQWODP«WKRGHLQYHUVH
3RVH]ODSRUWHHQYHUUHVXVPHQWLRQQ«HVXUODFKDUQLªUH
LQI«ULHXUHUHPHWWH]HQSODFHODEDJXHGȅD[HGHSRUWH
HWٴ[H]ODFKDUQLªUHVXS«ULHXUH$OLJQH]ODSRUWHDYHF
OȅDUPRLUHHWY«ULٴH]Oȅ«WDQFK«LW«GXMRLQWSXLVLQVWDOOH]
WRXVOHVRUQHPHQWV
ATTENTION
/ȅLPDJHFLGHVVXVHVWIRXUQLH¢WLWUHGHU«I«UHQFHXQLTXHPHQW/DFRQٴJXUDWLRQU«HOOHG«SHQGUDGX
SURGXLWSK\VLTXHRXGHODG«FODUDWLRQGXGLVWULEXWHXU
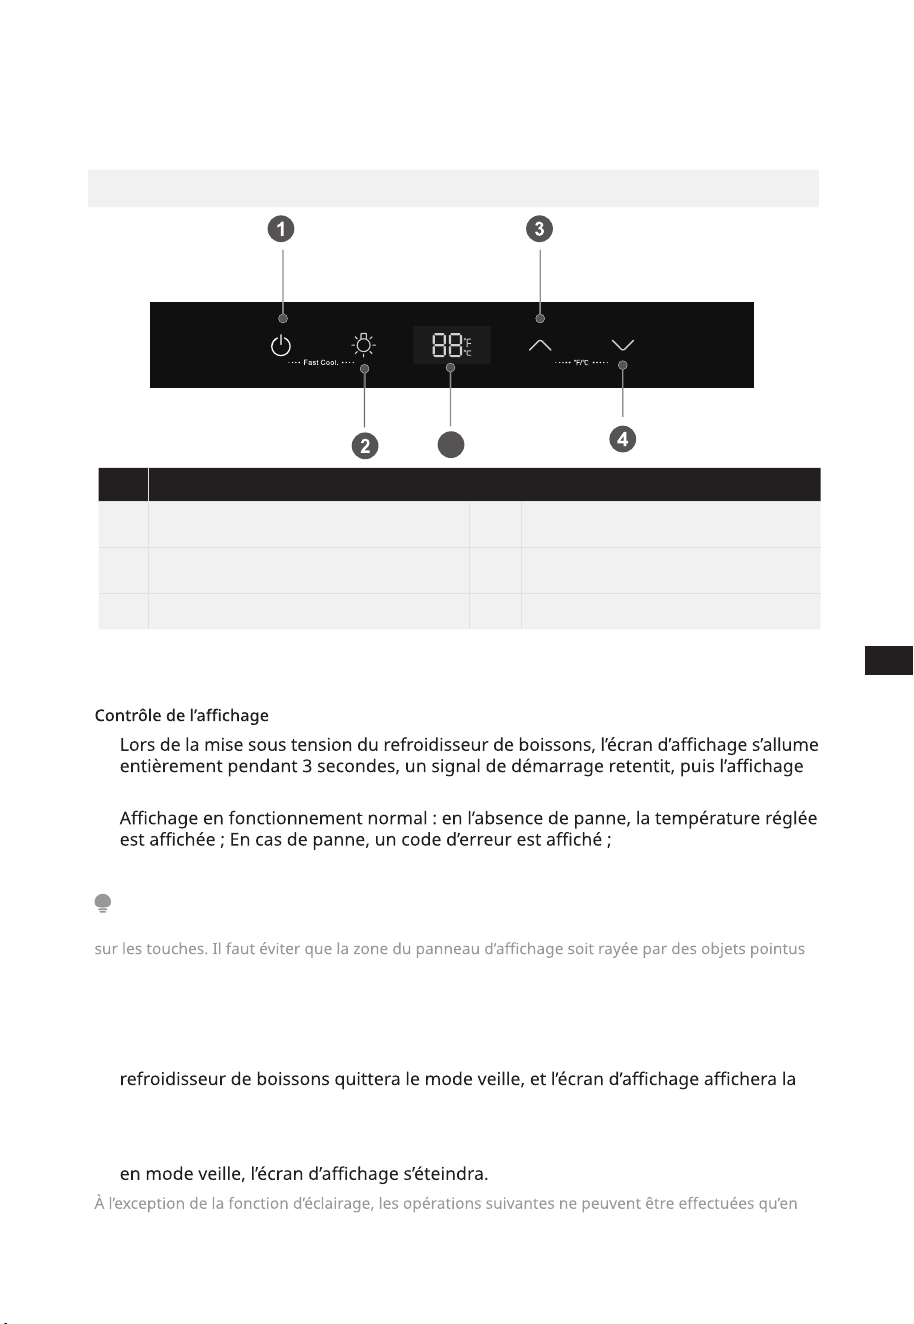
Affichage
1
Bouton de veille
4
Clé de chute de température
2
Clé d’éclairage
5
5
Zone d’affichage
3
Clé de hausse de température
07
FR
INSTRUCTIONS D'UTILISATION
Panneau de contrôle
* Le panneau de contrôle réel peut varier selon le modèle.
•
passe en mode fonctionnement normal ;
•
ATTENTION
Ce refroidisseur utilise le contrôle tactile de la porte en verre. Touchez légèrement lors de l’appui
et elle doit être tenue à l’écart d’un environnement à champ magnétique élevé et à forte humidité.
Sinon, il est possible que le refroidisseur ne puisse pas être réglé ni fonctionner normalement.
Fonction veille
• En mode veille, appuyez sur le bouton veille jusqu’à ce que le buzzer retentisse, le
température réglée ;
• Si vous n’êtes pas en mode veille, appuyez longuement sur le bouton veille pendant
3 secondes jusqu’à ce que le buzzer retentisse, le refroidisseur de boissons entrera
mode déverrouillé.
08
FR
0RGH«FODLUDJH
• $SSX\H]VXUODWRXFKH«FODLUDJHMXVTXȅ¢FHTXHOHEX]]HUUHWHQWLVVHSRXUDOOXPHU«WHLQGUHOD
lampe interne
Mode super refroidissement
(QWU«HHQPRGH
• Appuyez continuellement sur le bouton veille et le bouton mode éclairage pendant 3
VHFRQGHVSRXUHQWUHUOD]RQHGȅDٶFKDJHDٶFKHm)&}HWOHPRGHSUHQGHٳHW
6RUWLHGXPRGH
• ,OGXUHDXPD[LPXPKHXUHVHWTXLWWHUDDXWRPDWLTXHPHQWOHPRGH
• Appuyez de nouveau continuellement sur le bouton veille et le bouton mode éclairage
pendant 3 secondes dans ce mode, ou coupez l’alimentation, cela peut également sortir du
mode
&RPPXWDWLRQHQWUHODWHPS«UDWXUHHQ)DKUHQKHLWHWHQ&HOVLXV
• Appuyez simultanément sur la touche d’augmentation de la température et la touche de
diminution de la température pendant 3 secondes pour terminer la commutation entre la
WHPS«UDWXUHHQ&HOVLXVHWODWHPS«UDWXUHHQ)DKUHQKHLWOD]RQHGȅDٶFKDJHPRQWUHUDOD
WHPS«UDWXUHU«JO«HHQ)DKUHQKHLWRXHQ&HOVLXVVHORQOHPRGHH[LVWDQW
Réglage de la température
• $SSX\H]VXUODmWRXFKHGȅDXJPHQWDWLRQGHODWHPS«UDWXUH}ODWHPS«UDWXUHDXJPHQWHUD
GHবRXয$SUªVYHUURXLOODJHOHUHIURLGLVVHXUIRQFWLRQQHUDVHORQODYDOHXUU«JO«H
• $SSX\H]VXUODmWRXFKHGHGLPLQXWLRQGHODWHPS«UDWXUH}ODWHPS«UDWXUHGLPLQXHUDGH
বRXয$SUªVYHUURXLOODJHOHUHIURLGLVVHXUIRQFWLRQQHUDVHORQODYDOHXUU«JO«H
ATTENTION
3ODJHGHU«JODJHGHODWHPS«UDWXUHHQ&HOVLXVবaব3ODJHGHU«JODJHGHODWHPS«UDWXUHHQ
)DKUHQKHLWযaয
)RQFWLRQP«PRLUH
• /HUHIURLGLVVHXUGLVSRVHGȅXQHIRQFWLRQP«PRLUHHQFDVGHFRXSXUHGHFRXUDQW$SUªVOD
UHPLVHVRXVWHQVLRQOHUHIURLGLVVHXUIRQFWLRQQHUDVHORQOHU«JODJHDYDQWODFRXSXUHGH
FRXUDQW
Code d’erreur
• (QFDVGHSDQQHOD]RQHGȅDٶFKDJHPRQWUHUDOHVFRGHVGȅHUUHXUFRUUHVSRQGDQWVFRPPH
LQGLTX«GDQVOHWDEOHDXFLGHVVRXVOȅXWLOLVDWHXUGHYUDFRQWDFWHUXQVS«FLDOLVWHSRXUOD
PDLQWHQDQFHDٴQGȅDVVXUHUOȅXWLOLVDWLRQQRUPDOHGXUHIURLGLVVHXUGHERLVVRQV
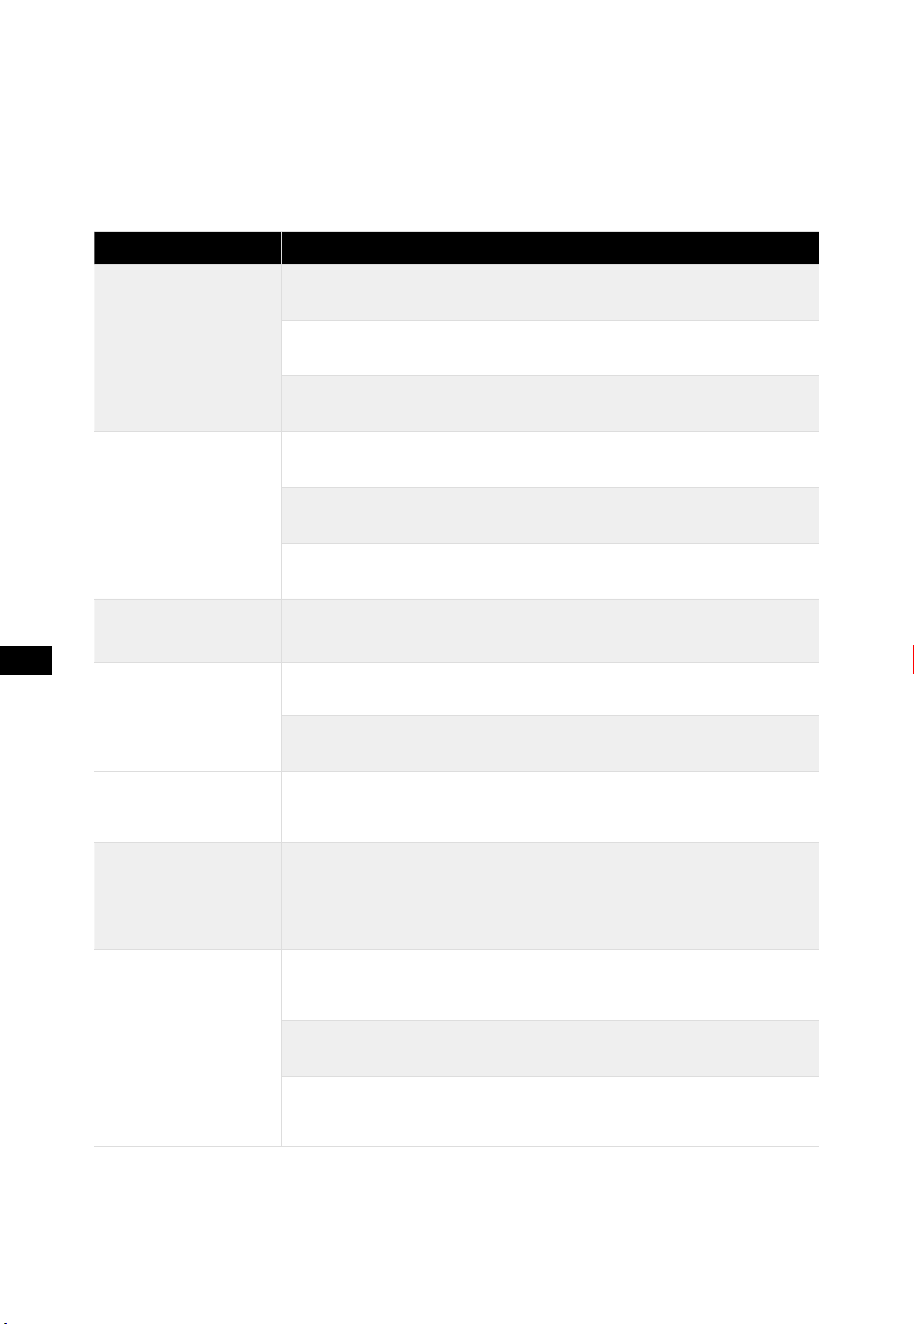
Code d'erreur
'HVFULSWLRQGHOHUUHXU
E1
'«IDXWGXFDSWHXUGHWHPS«UDWXUH
E6
'«IDXWGHFRPPXQLFDWLRQ
ATTENTION
6WRFNHUWURSGHFDQHWWHVRXGHERXWHLOOHVGDQVOHUHIURLGLVVHXUSHXWSURYRTXHUXQHDXJPHQWDWLRQWHPSRUDLUHGHOD
WHPS«UDWXUH¢OȅLQW«ULHXU

09
FR
NETTOYAGE ET ENTRETIEN
$UU¬WHUGXWLOLVHUOHUHIURLGLVVHXUGHERLVVRQV
6LOHUHIURLGLVVHXUGHERLVVRQVUHVWHLQXWLOLV«SHQGDQWXQHORQJXHS«ULRGHYHXLOOH]
'«EUDQFKHUOHUHIURLGLVVHXUGHERLVVRQV
1HWWR\HUOHUHIURLGLVVHXUGHERLVVRQV
/DLVVHUODSRUWHGXUHIURLGLVVHXUGHERLVVRQVRXYHUWH
1HWWR\HUOHUHIURLGLVVHXUGHERLVVRQV
• /DSRXVVLªUHGHUULªUHOHUHIURLGLVVHXUGHERLVVRQVHWVXUOHVROGRLW¬WUHHQOHY«HHQWHPSV
XWLOHSRXUDP«OLRUHUOȅHٳHWGHUHIURLGLVVHPHQWHW«FRQRPLVHUGHOȅ«QHUJLH
• 9«ULٴHUU«JXOLªUHPHQWOHMRLQWGHODSRUWHSRXUVȅDVVXUHUTXȅLOQȅ\DSDVGHG«EULV
• 1HWWR\HUOHMRLQWGHODSRUWHDYHFXQFKLٳRQGRX[KXPLGLٴ«DYHFGHOȅHDXVDYRQQHXVHRX
XQG«WHUJHQWGLOX«
• /ȅLQW«ULHXUGXUHIURLGLVVHXUGHERLVVRQVGRLW¬WUHQHWWR\«U«JXOLªUHPHQWSRXU«YLWHUOHV
RGHXUV
• Veuillez couper l’alimentation avant de nettoyer l’intérieur, retirer tous les aliments,
ERLVVRQV«WDJªUHVHWF
• 8WLOLVHUXQFKLٳRQGRX[RXXQH«SRQJHSRXUQHWWR\HUOȅLQW«ULHXUGXUHIURLGLVVHXUGH
ERLVVRQVDYHFGHX[FXLOOªUHV¢VRXSHGHELFDUERQDWHGHVRXGHHWXQOLWUHGȅHDXWLªGH3XLV
ULQFHU¢OȅHDXHWHVVX\HUSURSUHPHQW$SUªVOHQHWWR\DJHRXYULUODSRUWHHWODLVVHUV«FKHU
QDWXUHOOHPHQWDYDQWGHUHPHWWUHVRXVWHQVLRQ
• 3RXUOHV]RQHVGLٶFLOHV¢QHWWR\HUGDQVOHUHIURLGLVVHXUGHERLVVRQVFRPPHOHVHVSDFHV
«WURLWVOHVLQWHUVWLFHVRXOHVFRLQVLOHVWUHFRPPDQG«GHOHVHVVX\HUU«JXOLªUHPHQWDYHF
XQFKLٳRQGRX[XQHEURVVHGRXFHHWFHWVLQ«FHVVDLUHGȅXWLOLVHUGHVRXWLOVDX[LOLDLUHV
FRPPHGHVE¤WRQQHWVٴQVDٴQGHJDUDQWLUTXȅDXFXQFRQWDPLQDQWRXEDFW«ULHQH
VȅDFFXPXOHGDQVFHV]RQHV
• 1ȅXWLOLVH]SDVGHVDYRQVG«WHUJHQWVQHWWR\DQWVHQVSUD\HWFSRXUQHWWR\HUOȅLQW«ULHXU
GHYRWUHUHIURLGLVVHXUGHERLVVRQVFDUFHODSRXUUDLWSURYRTXHUGHVRGHXUVRXXQH
FRQWDPLQDWLRQ
• 1HWWR\H]OHV«WDJªUHVDYHFXQFKLٳRQGRX[KXPLGLٴ«GȅHDXVDYRQQHXVHRXGHG«WHUJHQW
GLOX«3XLVULQFH]¢OȅHDXHWV«FKH]DYHFXQFKLٳRQGRX[RXODLVVH]V«FKHUQDWXUHOOHPHQW
• (VVX\H]ODVXUIDFHH[W«ULHXUHGXUHIURLGLVVHXUGHERLVVRQVDYHFXQFKLٳRQGRX[KXPLGLٴ«
GȅHDXVDYRQQHXVHGHG«WHUJHQWHWFSXLVHVVX\H]¢VHF1HIURWWH]SDVHWQHUD\HUSDVOD
VXUIDFHGHODSRUWHHQYHUUHDٴQGȅ«YLWHUTXȅHOOHQHVHFDVVHRXQHVȅDE°PH
• 1ȅXWLOLVH]SDVGHEURVVHVGXUHVGHELOOHVGȅDFLHUSURSUHVGHEURVVHVP«WDOOLTXHVGȅDEUDVLIV
FRPPHOHVGHQWLIULFHVGHVROYDQWVRUJDQLTXHVFRPPHOȅDOFRROOȅDF«WRQHOȅKXLOHGH
EDQDQHHWFGȅHDXERXLOODQWHGȅREMHWVDFLGHVRXDOFDOLQVFDUFHODSRXUUDLWHQGRPPDJHU
ODVXUIDFHHWOȅLQW«ULHXUGXUHIURLGLVVHXUGHERLVVRQV/ȅHDXERXLOODQWHHWOHVVROYDQWV
RUJDQLTXHVWHOVTXHOHEHQ]ªQHSHXYHQWG«IRUPHURXHQGRPPDJHUOHVSLªFHVHQ
SODVWLTXH
• 1HSDVULQFHUGLUHFWHPHQW¢OȅHDXRXDYHFGȅDXWUHVOLTXLGHVORUVGXQHWWR\DJHDٴQGȅ«YLWHU
OHVFRXUWVFLUFXLWVRXGȅDٳHFWHUOȅLVRODWLRQ«OHFWULTXHDSUªVLPPHUVLRQ
10
FR
DÉPANNAGE
/HVSUREOªPHVVLPSOHVVXLYDQWVSHXYHQW¬WUHU«VROXVSDUOȅXWLOLVDWHXU9HXLOOH]DSSHOHU
OHVHUYLFHDSUªVYHQWHVLOHVSUREOªPHVQHVRQWSDVU«VROXV
Problème Cause possible
1HIRQFWLRQQHSDV
• /HUHIURLGLVVHXUHVWLOEUDQFK«HWFRQQHFW«¢OȅDOLPHQWDWLRQ«OHFWULTXH
• Tension basse
• 3DQQHGȅDOLPHQWDWLRQRXGLVMRQFWHXUG«FOHQFK«
Fonctionnement
prolongé du
compresseur
• ,OHVWQRUPDOTXHOHUHIURLGLVVHXUIRQFWLRQQHSOXVORQJWHPSVHQ
«W«ORUVTXHODWHPS«UDWXUHDPELDQWHHVWSOXV«OHY«H
• 1HSDVPHWWUHWURSGHERLVVRQVGDQVOHUHIURLGLVVHXUHQXQHVHXOHIRLV
• 2XYHUWXUHIU«TXHQWHGHODSRUWHGXUHIURLGLVVHXU
/XPLªUHQHIRQFWLRQQHSDV
• /HUHIURLGLVVHXUHVWLOFRQQHFW«¢OȅDOLPHQWDWLRQOȅLQGLFDWHXU
OXPLQHX[HVWLOHQGRPPDJ«
%UXLWVIRUWV
• /HVROHVWLOSODWOHUHIURLGLVVHXUHVWLOVWDEOH
• /HVDFFHVVRLUHVGXUHIURLGLVVHXUVRQWLOVFRUUHFWHPHQWSODF«V
6XUFKDXٳHVXUODSDURL
latérale
• /ȅHQFHLQWHGXUHIURLGLVVHXUSHXW«PHWWUHGHODFKDOHXUSHQGDQW
VRQIRQFWLRQQHPHQWVXUWRXWHQ«W«FHODHVWFDXV«SDUOH
UD\RQQHPHQWGXFRQGHQVHXUHWFȅHVWXQSK«QRPªQHQRUPDO
Condensation de
VXUIDFH
• &RQGHQVDWLRQXQSK«QRPªQHGHFRQGHQVDWLRQVHUDG«WHFW«
VXUODVXUIDFHH[W«ULHXUHHWOHVMRLQWVGHSRUWHGXUHIURLGLVVHXU
ORUVTXHOȅKXPLGLW«DPELDQWHHVW«OHY«HFȅHVWXQSK«QRPªQH
QRUPDOHWDSUªVDYRLUHVVX\«DYHFXQHVHUYLHWWHDXJPHQWH]
FRUUHFWHPHQWODWHPS«UDWXUHU«JO«HGHOȅDSSDUHLO
%UXLWGHٵX[GȅDLU
Bourdonnement
&ODTXHPHQWV
• /HVU«IULJ«UDQWVFLUFXODQWGDQVOHVFRQGXLWHVGHU«IULJ«UDWLRQ
SURGXLURQWGHVVRQVGȅ«UXSWLRQHWGHVJURJQHPHQWVFHTXLHVW
QRUPDOHWQȅDٳHFWHSDVOȅHٳHWGHUHIURLGLVVHPHQW
• Un bourdonnement sera généré par le compresseur en
IRQFWLRQQHPHQWVS«FLDOHPHQWDXG«PDUUDJHRX¢OȅDUU¬W
• /DYDOYHVRO«QR±GHRXODYDOYH«OHFWULTXH«PHWWUDGHV
FODTXHPHQWVFHTXLHVWXQSK«QRPªQHQRUPDOHWQȅDٳHFWHSDVOH
IRQFWLRQQHPHQW