NINJA FLEXFLAME
OUTDOOR COOKING SYSTEM
PG300 Series | Instruction booklet
IMPORTANT SAFETY INSTRUCTIONS
OUTDOOR HOUSEHOLD USE ONLY. READ ALL INSTRUCTIONS BEFORE USE
DANGER
If you smell gas: Shut o gas to the appliance and unplug cord from outlet. Extinguish any
open flame. Open lid. If odour continues, keep away from the appliance and immediately call
your gas supplier or your fire department.
WARNING
Do not store or use gasoline or other flammable liquids or vapours in the vicinity of this or
any other appliance. A liquid propane (LP) cylinder not connected for use shall not be stored
in the vicinity of this or any other appliance.
Failure to follow these instructions could result in electric shock, fire, or burn hazard, which
could cause property damage, personal injury, or death. When using electrical appliances,
basic safety precautions should always be followed, including the following:
Read and review instructions to understand operation and use of product.
Indicates the presence of a hazard that can cause personal injury, death, or substantial property damage if the warning included
with this symbol is ignored.
Avoid contact with hot surface. Always use hand protection to avoid burns.
Indicates risk of fire or electric shock, presence of live parts, dangerous voltage.
NOTE: The burners may have some visible discolouration. This is a result of our normal manufacturing
process. To ensure optimal performance, we test each individual grill before it gets to you.
32
ninjakitchen.co.uk
For outdoor use only. Not for commercial use.
Note to Consumer
Leave this Instruction Booklet in a convenient place for future reference.
Note to Installer
Leave this Instruction Booklet with the customer after delivery and/or installation.
Read this Instruction Booklet carefully.
Be sure your grill is properly assembled, installed according to the assembly instructions.
Keep any packaging materials far away from children—these are a potential source of danger (e.g., of suffocation). Remove any stickers
from the appliance.
The grill is intended only for outdoor cooking and should never be used as a heater or any other purpose.
Your grill will get extremely hot. Never lean over the cooking area while using your grill. DO NOT touch cooking surfaces, grill and pellet
box housing lid, or pellet box while the grill is in operation, or until the grill has cooled down after use. Use suitable heat-protection
gloves, covering hands and forearms.
DANGER: ELECTRICAL SHOCK AND FLAME FLARE-UP
To protect against electric shock, DO NOT immerse cord or
plugs in water or other liquid. DO NOT place a grill cover or
anything flammable on or in the storage area under the
grill while it is in use. Should a grease fire occur, turn o
burners and keep lid closed until fire is extinguished.
WARNING
• This is a liquid propane configured grill. DO NOT attempt to reconfigure for use with natural gas.
• Keep electrical power cord and fuel supply hose away from any heated surfaces and route the power cord in such a way that no one can trip over it.
• Connect ONLY to a grounded electrical socket or extension cord employing RCD protection. The cord should be arranged so that it will not drape over
the grill where it can be pulled on by children or tripped over unintentionally.
• DO NOT install and use portable or built-in outdoor cooking gas appliances in or on a recreational vehicle, portable trailer, boat or in any other moving
installation.
• Unplug from outlet when not in use and before cleaning.
• DO NOT operate any outdoor cooking gas appliance with a damaged cord or plug, or after the appliance malfunctions or has been damaged in any
manner.
• DO NOT let the extension cord hang over the edge of a table where it can be pulled on by children or tripped over unintentionally.
• DO NOT let appliance cord or extension cord touch hot surfaces.
• Use only extension cords with a three-prong grounded plug, rated for the power of the appliance, and approved for outdoor use with a W-A marking.
• DO NOT leave the grill unattended.
• Children must not be permitted to play with the appliance, nor be permitted to carry out any cleaning or maintenance work on the appliance.
• The appliance and its power cord must always be kept far away from children under 8.
• This appliance may be used by children (at least 8 years of age) and by persons with reduced physical, sensory, or mental capabilities, or lacking
experience and knowledge, provided they have been given supervision or instruction concerning the use of the appliance and fully understand all
dangers and safety precautions involved.
• DO NOT line the bottom of the grill housing with aluminum foil, sand or any substance that will restrict the flow of grease into the grease tray. Failure
to comply with these instructions could result in a fire or explosion which could cause serious bodily injury, death, or property damage.
THIS PRODUCT IS FOR PROPANE USE ONLY (NOT BUTANE).
IMPORTANT SAFETY INSTRUCTIONS
OUTDOOR HOUSEHOLD USE ONLY. READ ALL INSTRUCTIONS BEFORE USE
SAVE THESE INSTRUCTIONS
ninjakitchen.co.uk
BEFORE FIRST USE
CAUTION
• Use only the gas pressure regulator supplied with this appliance. This regulator is set for an outlet pressure of 11 in w.c. (37 mBar).
• Turn off LP supply at cylinder when appliance is not in use.
CAUTION
• Make sure that the supply voltage corresponds with the voltage marked on the rating label.
• The power cord should be regularly examined for any signs of damage. In the event of such damage being found, the appliance must no longer be
used.
• The minimum ambient operating temperature for safe use of the appliance shall be (9° C).
• DO NOT exceed a maximum load of 22 kg for the side tables.
• If you need to move the grill, unplug from extension cord, unlock wheels, move to new location, lock wheels.
• DO NOT use a power washer to clean.
• Check to ensure the burner tubes are assembled before using the gas grill. The location of the
burner tubes with respect to the orifice is vital for safe operation. If a burner tube does not fit over
the valve orifice, lighting the burner may cause explosion and/or fire.
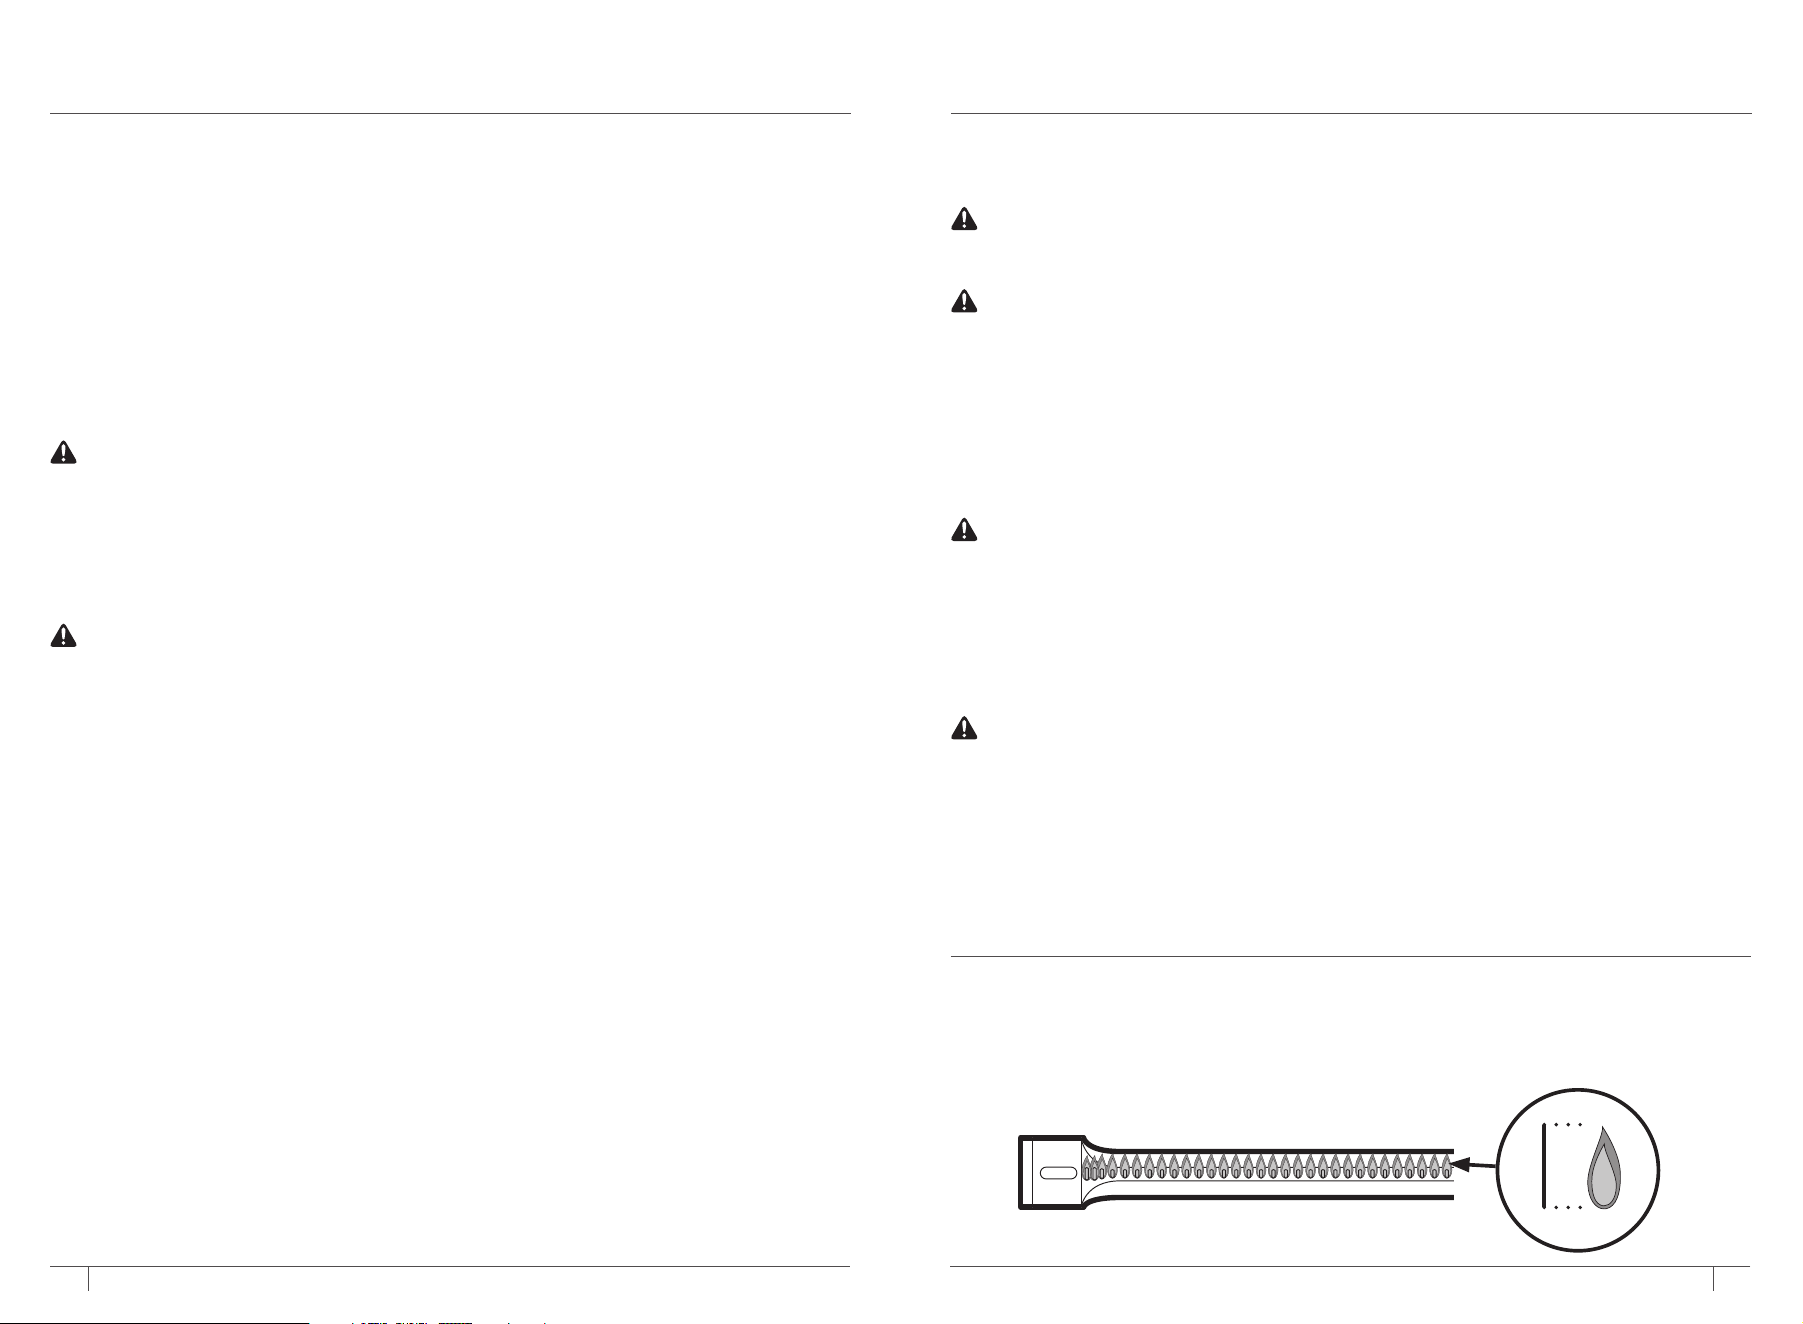
• After igniting, check the colour of the flames. They should be blue. (Slight yellow tipping is
normal for liquid propane gas.) The flames should be approximately 1" (2.5cm) high, but will be
slightly higher at the far left burner ports. If they ARE NOT, refer to the Cleaning section.
FLAME CHECK
INSECT AND SPIDER WEB SAFETY INSPECTION
CAUTION :
BEWARE OF FLASHBACK
• Spiders and small insects occasionally spin webs or make nests in the grill burner tubes during transit and warehousing. These webs can lead to
gas-flow obstruction that could result in a fire in and around burner tubes. This type of fire is known as flashback and can cause severe damage
to your grill and create an unsafe operating condition for the user.
• Although an obstructed burner tube is not the only cause of flashback, it is the most common cause and can lead to a fire beneath the grill.
• To reduce the chance of flashback, check and clean the burner/venturi tube for insects and insect nests. We recommend cleaning the burner
tubes at least once a month in late summer or early fall when spiders are most active. A clogged tube can lead to fire under the outdoor cooking
gas appliance. Also perform this cleaning procedure if your grill has not been used for an extended period.
• See how to clean the burner tubes and burners according to the cleaning instructions found in this owner's guide.
DANGER: FLAME AND FLARE-UP
• Close lid and keep closed.
• Turn dial to OFF.
• Unplug from outlet.
• Turn gas on tank to OFF.
2.5
CM
SAVE THESE INSTRUCTIONS
BEFORE YOUR FIRST COOK: RUN A BURN-OFF CYCLE
• Follow ignition instructions, set grill temperature to 315C and leave on for at least 20 minutes before cooking on your grill for the first time.
5
ninjakitchen.co.uk
4
ninjakitchen.co.uk
IMPORTANT: If the information above is not followed exactly, a fire causing serious injury or
death could occur.
1 To reduce the risk of fire, electrical shock, explosion, seriously bodily injury or death to persons,
or property damage when using the outdoor cooking gas appliance, follow basic precautions,
including the following:
2 The installation must conform with local codes or, in the absence of local codes, with either; ANSI
Z 223.1/NFPA S4 NATIONAL FUEL GAS CODE , CSA B149.1 Natural gas and propane installation
code or CSA B149.2 Propane storage and handling code
3 LP gas grill models are designed for use with a standard 13 kg. Liquid Propane Gas tank, not
included with grill. Never connect your gas grill to an LP gas tank that exceeds this capacity.
4 DO NOT use charcoal or lava rocks.
5 This outdoor cooking gas appliance must be electrically grounded to an earthed socket.
6 This outdoor cooking gas appliance shall be used only outdoors and shall not be used in a building,
garage, or any other enclosed area.
PLACEMENT & CLEARANCE
7 An appliance is considered to be outdoors if installed with shelter no more inclusive than with walls
on three sides, but with no overhead cover; all openings must be permanently open; sliding doors,
garage doors, windows, or screened openings are not considered as permanent openings.
8 The grill must be placed on a level and heat-resistant surface.
9 The outdoor cooking gas appliance shall not be located and used under overhead unprotected
combustible construction.
10 Keep a minimum of 1m clearance must be maintained between the front of the grill lid, sides,
and back of the grill and any combustible construction. A minimum clearance of 1m must also be
maintained below the cooking surface, and the grill shall not be used under overhead combustible
construction.
11 Open the cabinet door and inspect the gas cylinder supply hose before each use. If the hose shows
excessive abrasion or wear, or is cut, it MUST be replaced before using the outdoor cooking gas
appliance.
WARNING
This is a liquid propane configured grill. DO NOT attempt to reconfigure for use with natural gas.
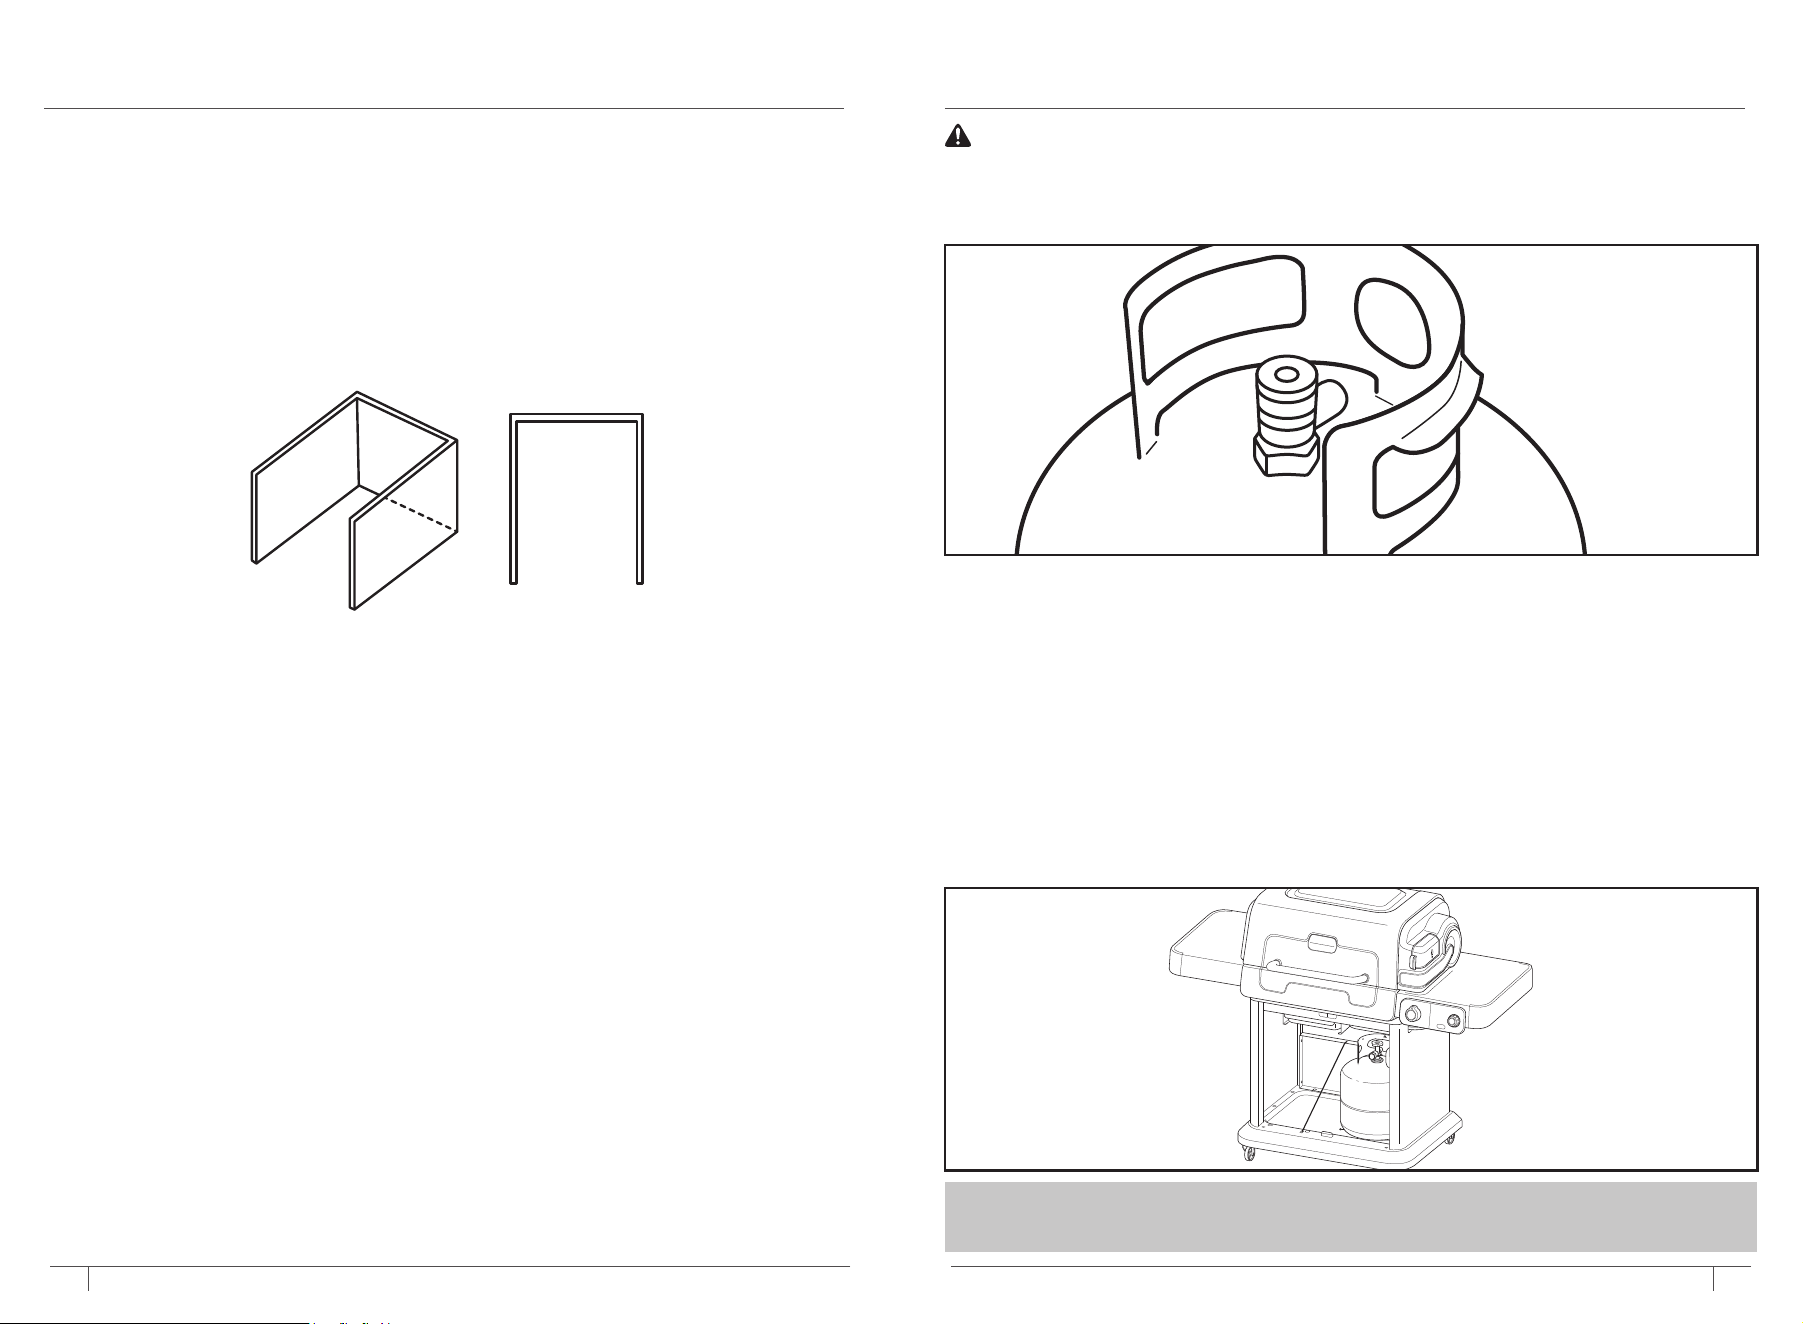
• The Patio Gas bottle (not included) shall be a standard 6kg or 13kg LP capacity no more than
320mm in diameter and 580mm high.
NEVER connect your grill to a tank that exceeds this capacity.
GAS BOTTLE REQUIREMENTS
DOT 4BA24
02 21
• Other tanks may be acceptable provided they are compatible with the grill retention means.
• The tank must include a collar to protect the tank valve.
• The tank must include a safety relieve device that has a direct connection with the vapor space
of the tank. This prevents the tank from being overfilled, which may cause malfunction of the LP
gas tank, regulator, and or grill.
ninjakitchen.co.uk
6
ninjakitchen.co.uk
7
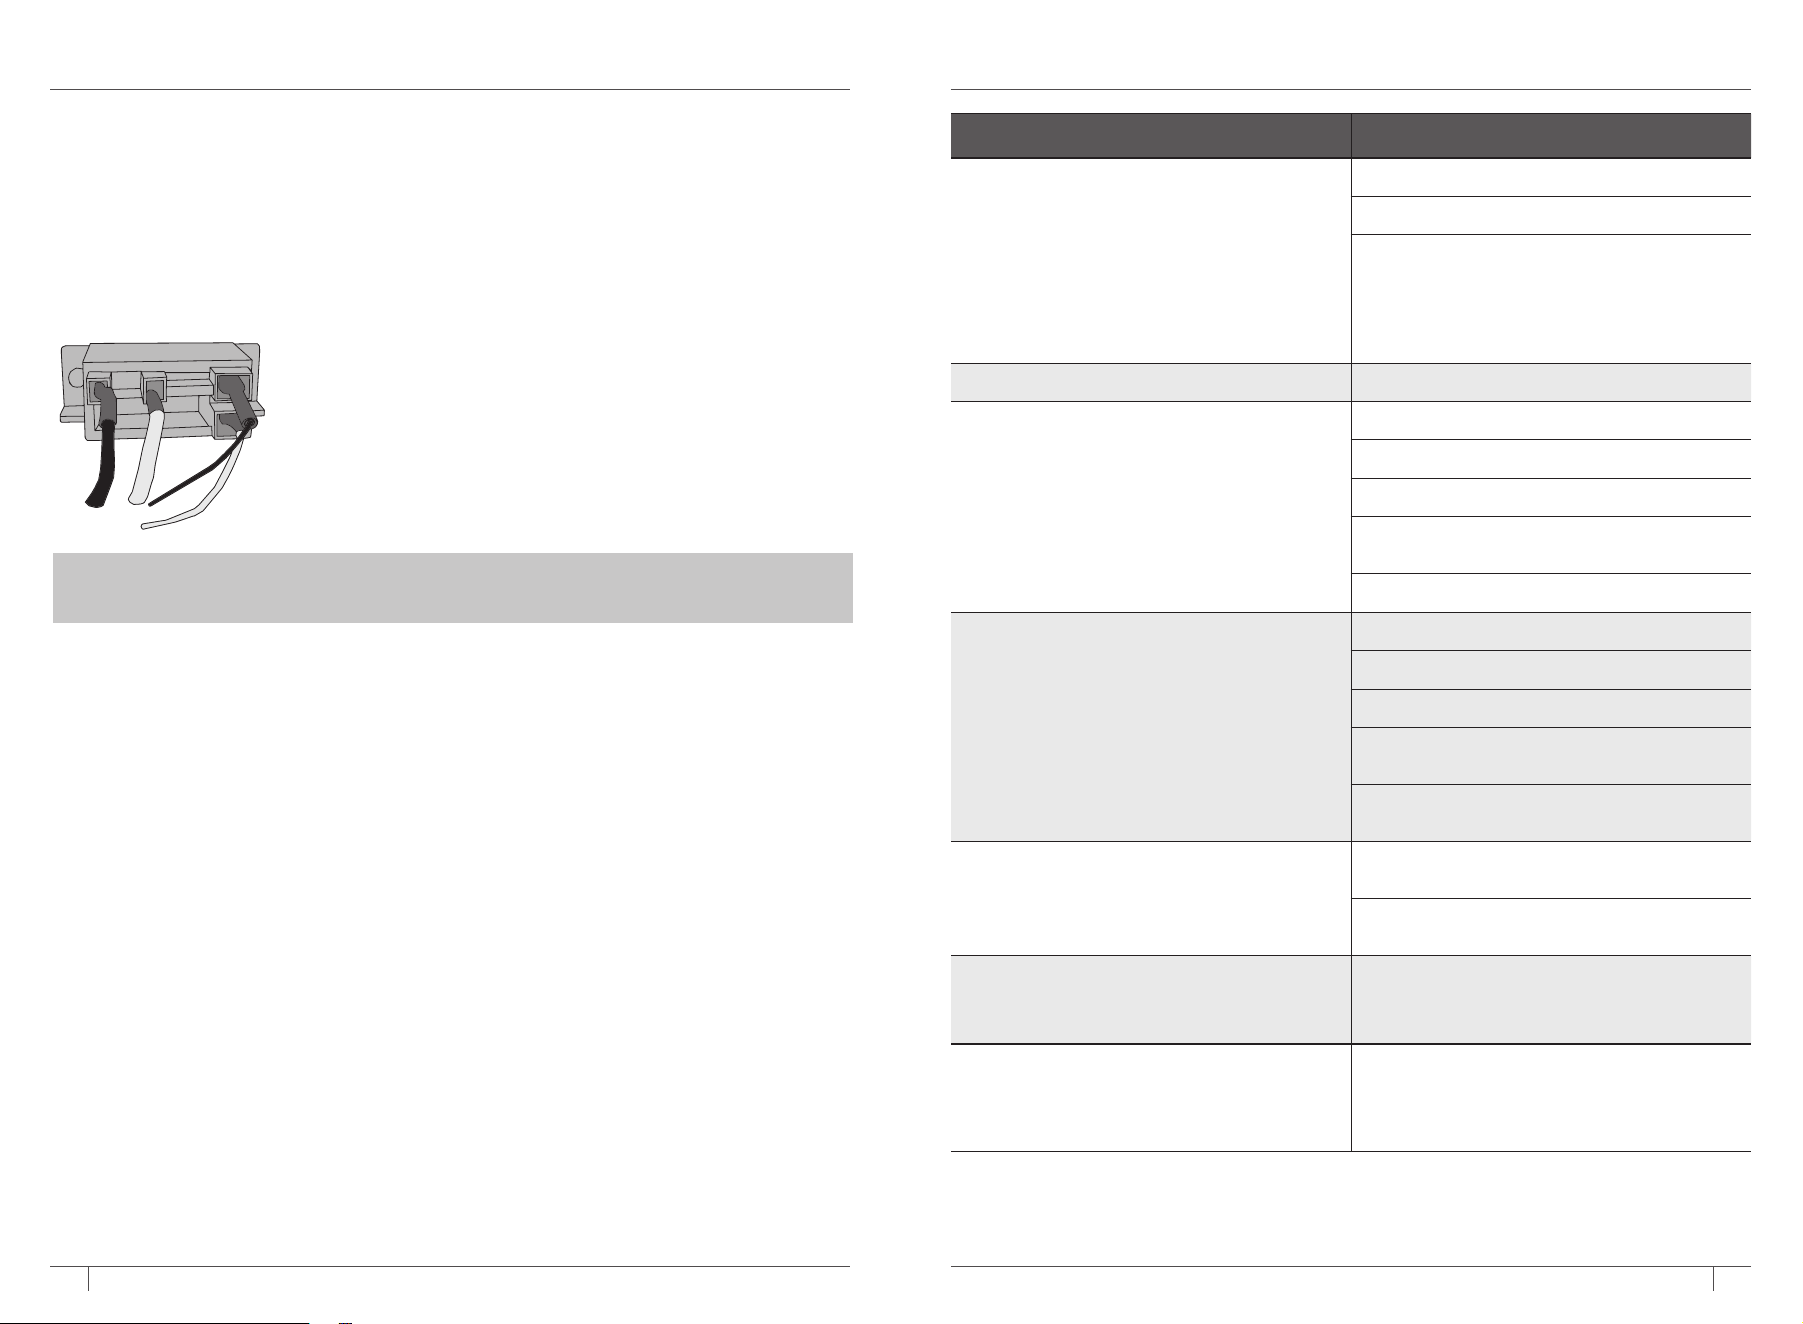
Regulator assembly information
1 The regulator and hose assembly supplied
with this grill must be used. This regulator
has a flow-limiting device built into the
grill that will restrict the flow of gas in the
event that a leak is detected.
2 Regulator is designed for vapour
withdrawal. Cylinder must be upright
when grill is in use.
3 Only a replacement regulator and
hose assembly specified by SharkNinja
Operating LLC must be used.
GAS BOTTLE PLACEMENT
1 Open cabinet doors.
2 Place the Patio Gas bottle into opening
slot area.
3 Fasten and secure the tank strap to ensure
the tank is held in place
4 Prior to connecting the regulator, inspect
tank valve for damage. Ensure the valve
is undamaged and free from any dirt or
foreign objects.
5 Inspect regulator valve, port, and assembly.
Look for any damage or debris. Remove as
necessary.
6 Inspect hose for damage.
ATTACHING LP GAS CYLINDER TANK AND REGULATOR GAS LEAK CHECK
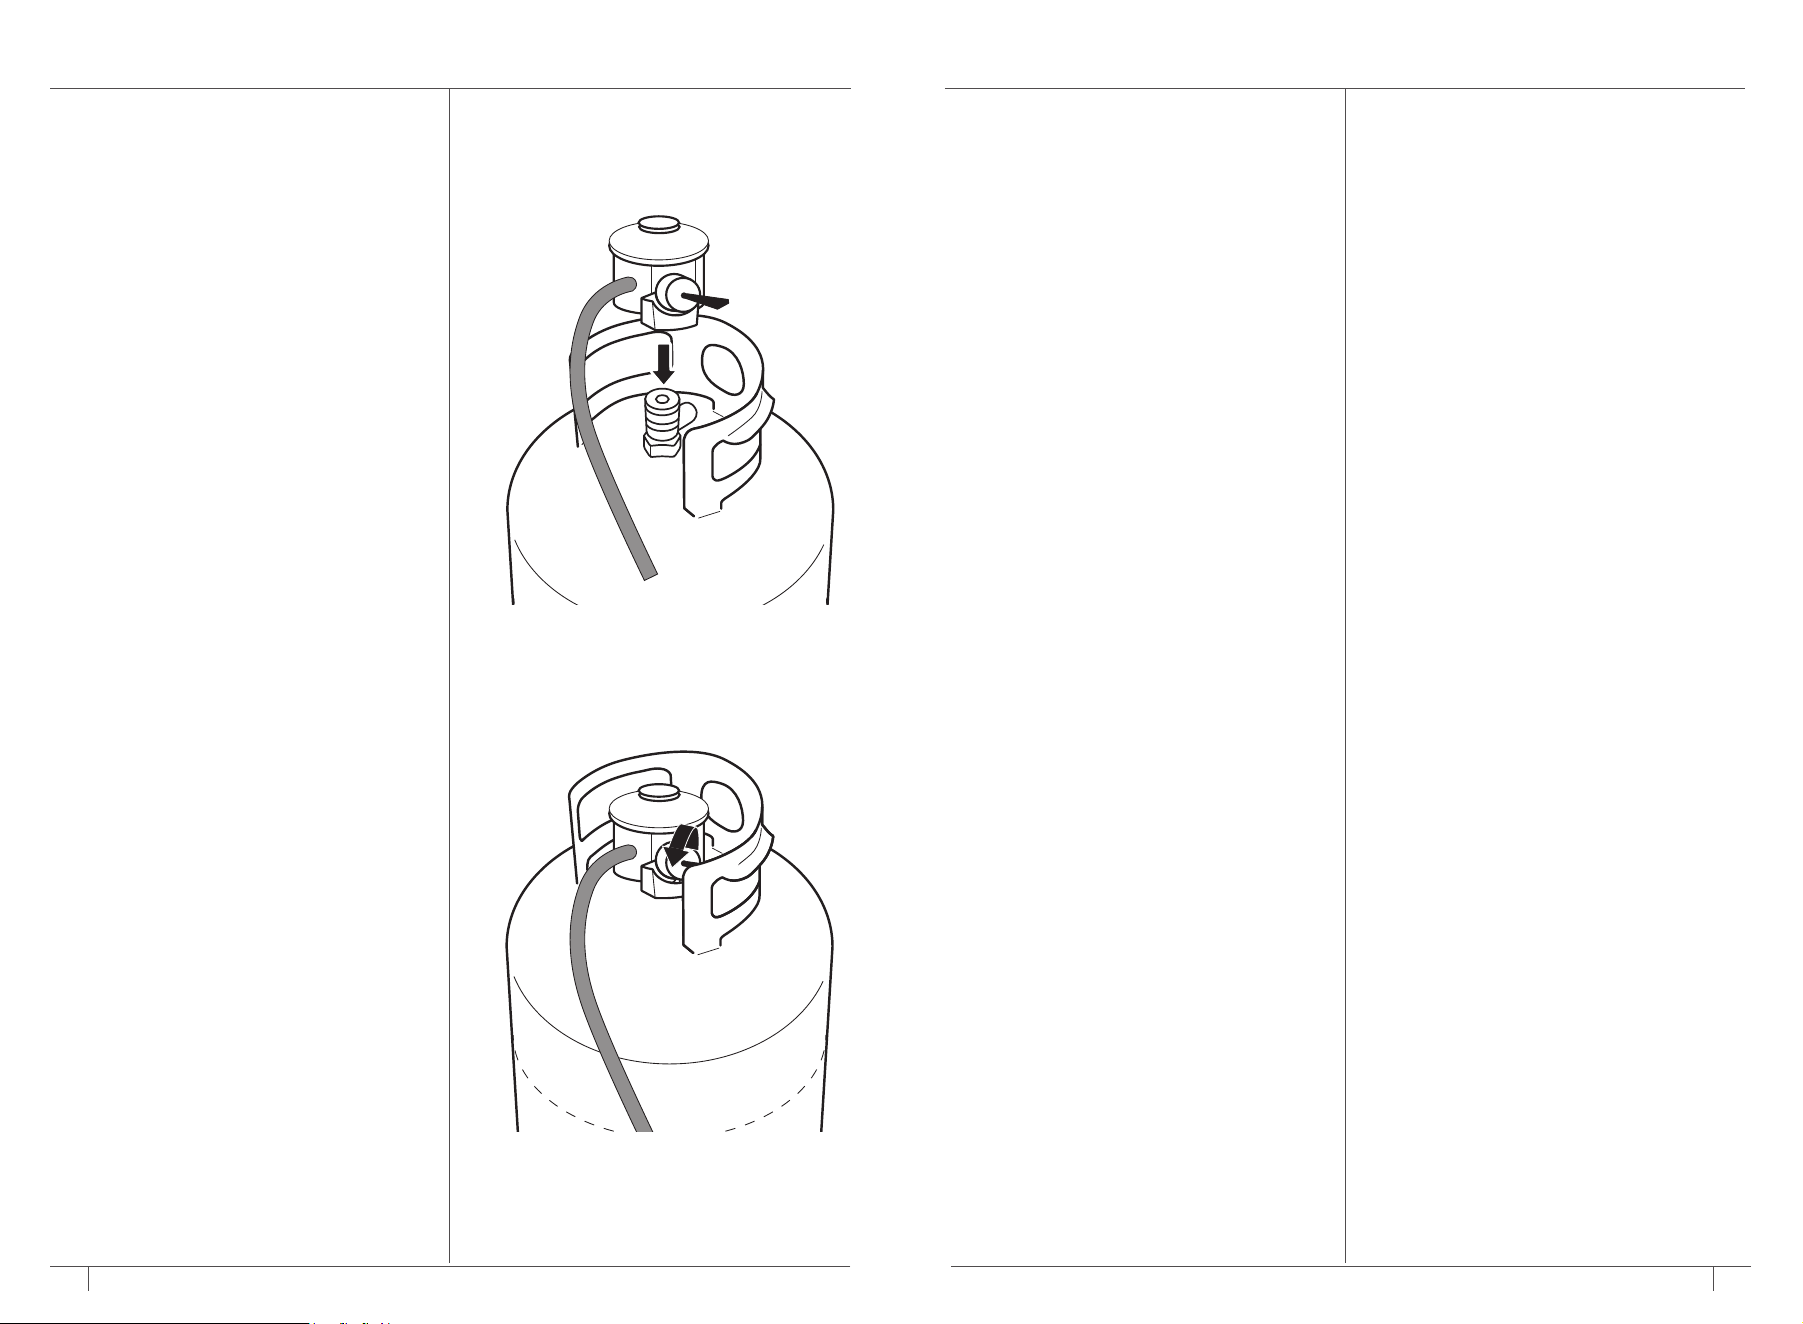
7 Make sure the regulator valve is open.
8 Place the regulator on the tank valve, apply
downward pressure. You will hear a clicking
noise which indicates the regulator is in
place.
9 Turn the valve lever. You may hear a hissing
sound; this is the gas being released into
the system.
Never perform leak check with an open flame.
Do not smoke while performing leak check.
1 Before lighting the grill, test all connections.
2 Apply an approved noncorrosive leak-
detection or soap solution* to all gas
connections.
3 If growing bubbles appear in the solution
applied, this indicates connection is not
secure or a leak exists.
4 Turn off tank valve.
5 Recheck connection or replace connection
unable to resecure on own.
6 Repeat gas leak check.
7 Additionally, perform leak check on cylinder
and seams. If any leaks appear, turn off tank
valve and contact gas supplier or local fire
department for assistance.
*Soap Solution: Fill spray bottle with one part
water and one part liquid detergent.
DISCONNECTING GAS BOTTLE AND
REGULATOR
1 Turn off burner valve.
2 Turn o tank valve counterclockwise fully to
a stop.
3 Detach regulator assembly from tank valve,
turning counterclockwise.
ADDITIONAL AND IMPORTANT INFORMATION
ABOUT LP GAS AND CONNECTIONS.
1 A dented or rusty gas bottle may be
hazardous and should be checked by your
liquid propane supplier.
2 DO NOT use a gas bottle with a damaged
valve.
3 Even if your gas bottle may appear to be
empty, gas may still be present, and the bottle
should be transported and stored accordingly.
4 The gas bottle must be installed, transported,
and stored in an upright, secure position.
gas bottles should not be dropped or
handled roughly.
5 NEVER store or transport the gas bottle
where temperatures can reach (51.7°C).
6 DO NOT store a spare gas bottle under or
near this appliance.
7 Place dust cap on cylinder valve outlet
whenever the cylinder is not in use. Only install
the type of dust cap on the cylinder valve
outlet that is provided with the cylinder valve.
Other types of caps or plugs may result in
leakage of propane.
8 Use only a reputable propane gas dealer to fill,
inspect, and requalify at each filling.
HANDLING AND STORAGE
1 When grill is not in use, turn off gas at the
regulator and disconnect the bottle.
2 Indoor storage is acceptable ONLY if the gas
bottle is disconnected and removed from the
grill.
3 Gas bottle shall be stored outdoors, out of the
reach of children, and shall not be stored in a
building, garage, or any other enclosed area.
4 DO NOT store or use petrol or other
flammable vapours and liquids in the vicinity
of this or any other appliance.
DOT 4BA24
02 21
DOT 4BA24
02 21
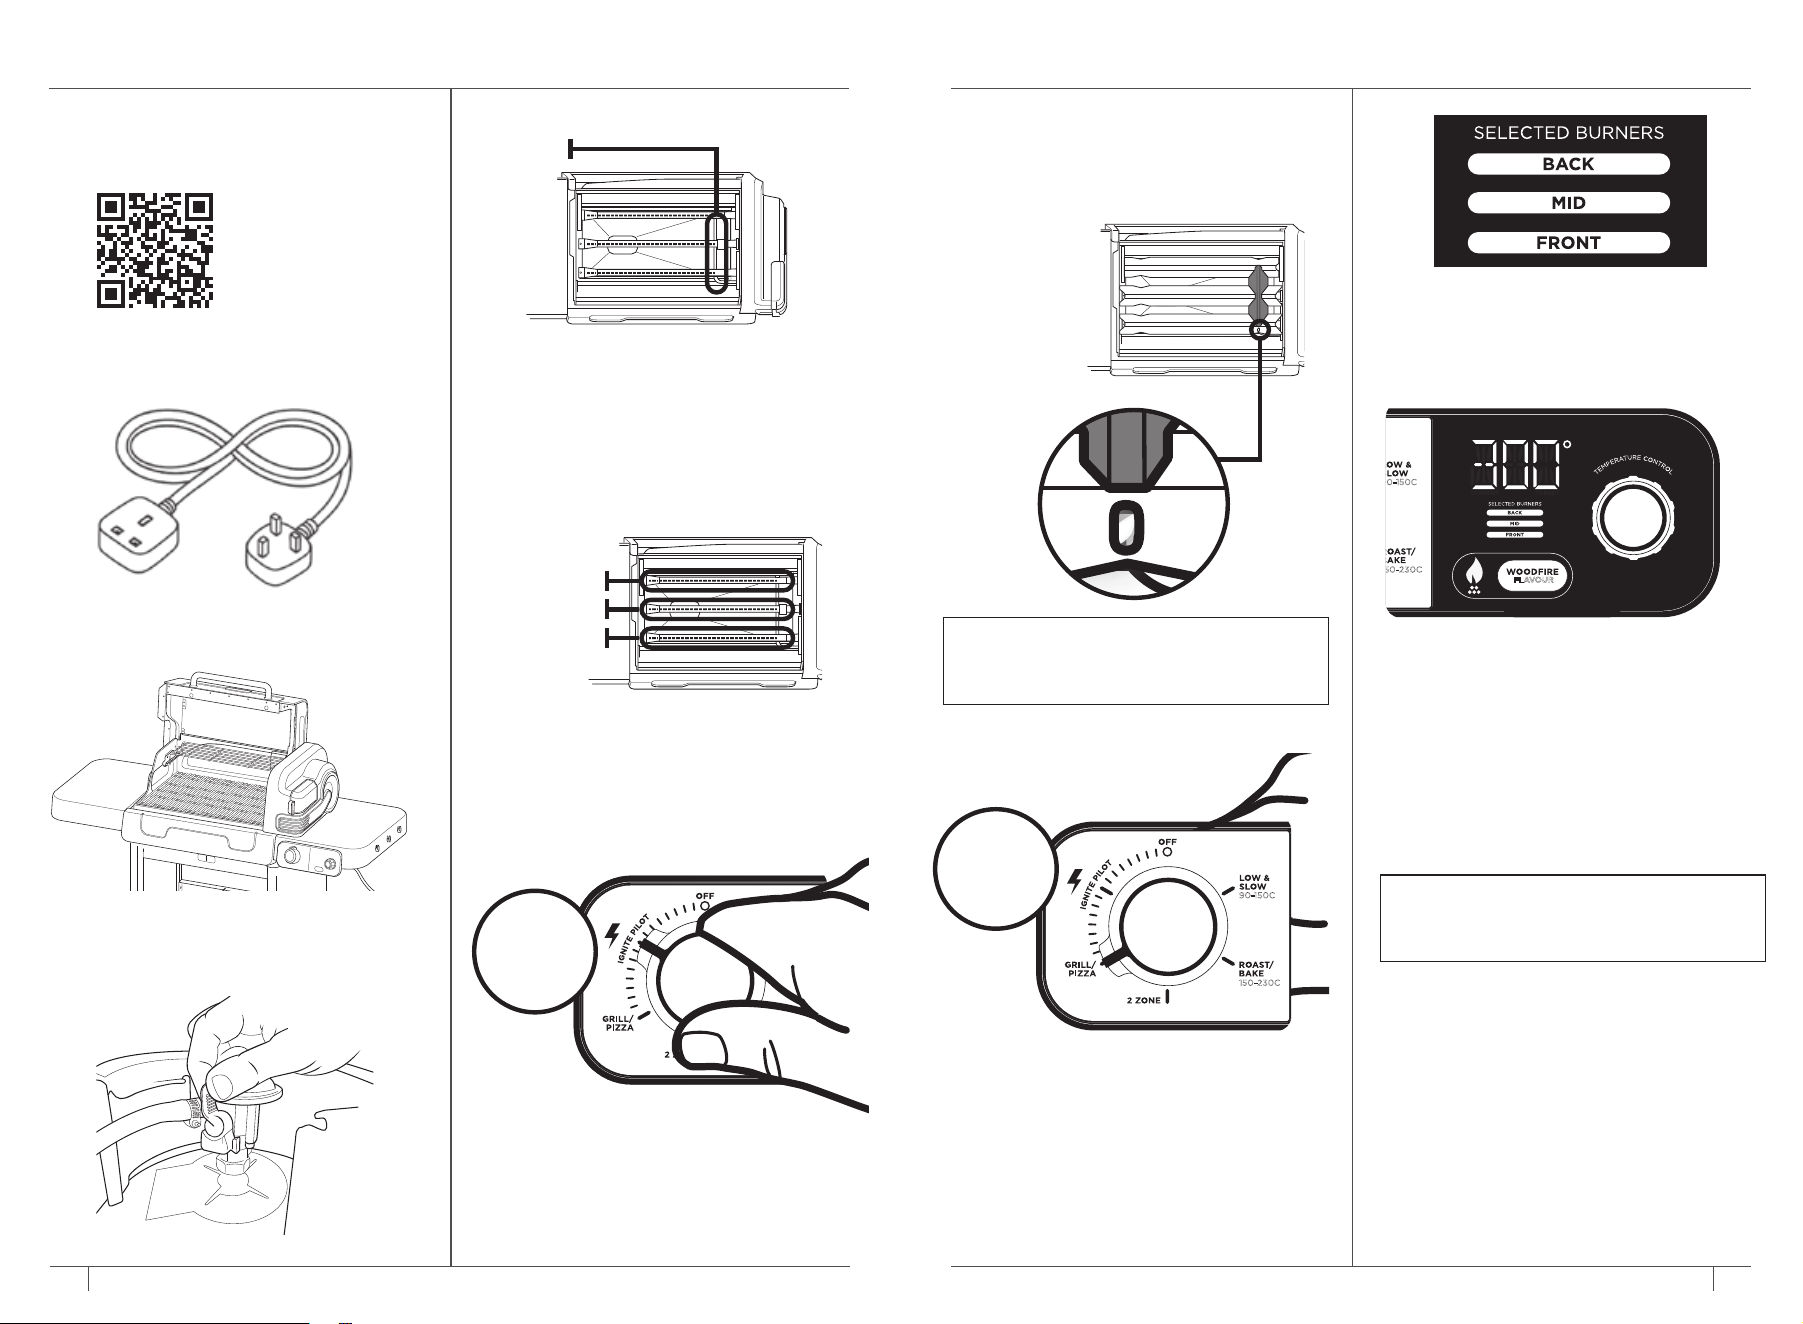
BACK BURNER
MID BURNER
FRONT BURNER
The pilot burner is the small vertical burner
located on the right-hand side of the grill. The
pilot burner needs to be lit for the main burners
to ignite.
During the ignition process, the pilot burner will
be the only burner that ignites before selecting
a function.
BE SURE TO FOLLOW THESE STEPS
BEFORE IGNITING BURNERS:
BEFORE YOUR FIRST COOK:
RUN A BURN-OFF CYCLE
GET TO KNOW YOUR BURNERS:
Pilot Burner
SCAN HERE
for step-
by-step
ignition
video
Plug In Grill: Plug in using a suitable extension
cord, rated for outdoor use.
Open Grill Lid before igniting.
Turn On Gas Supply by opening tank valve
completely.
After the pilot burner is lit, turn the dial to select
a function and ignite the main burners.
The 3 main horizontal burners automatically
adjust depending on your function and
temperature selection.
Main Burners
BACK BURNER
MID BURNER
FRONT BURNER
9
ninjakitchen.co.uk
8
ninjakitchen.co.uk
HOW TO IGNITE BURNERS AND SET TEMPERATURE
STEP 1: IGNITE PILOT BURNER
Push in Burner dial and turn to IGNITE PILOT.
Hold in for up to 10 seconds.
You will hear a ticking noise, indicating the pilot
burner is igniting.
230-315C
175-260C
150-230C
90-150C
NOTE: Pilot burner flames are small and may
be dicult to see in direct sunlight. Flames
will become more visible when the main
burners are lit.
STEP 2: TURN ON MAIN BURNERS
& SET TEMPERATURE
Follow ignition instructions, set grill temperature
to 315°C and leave on for at least 20 minutes
before cooking on your grill for the first time.
FLAVOUR
230-315C
175-260C
150-230C
90-150C
Set a Temperature:
Turn the TEMPERATURE CONTROL dial to set
a precise temperature within the temperature
range of your selected function.
Switch functions to access dierent
temperature ranges.
The display screen will flash between the set
temperature and current temperature during
preheat and will show the set temperature when
the grill is preheated.
TIP: Reference cooking charts in the charts
section for chef-recommended temperatures
and cook times for dierent food loads for
each cooking function.
Turn on the Main Burners:
Release dial and turn counterclockwise to select
a cooking function to turn on the main burners.
Main burners will automatically adjust based
on the function/temperature selected, and the
active burners will illuminate on the LED screen.
Look through the peep hole to see if the pilot
burner is ignited.
If ignition was unsuccessful, turn dial to OFF
and try again.
Ensure dial is set directly on a function and lined
up with its respective tick mark.
FLAVOUR
230-315C
175-260C
150-230C
90-150C
230-315C
175-260C
RELEASE
& TURN TO
FUNCTION
UP TO 10
SECONDS
11
ninjakitchen.co.uk
10
ninjakitchen.co.uk
CLEANING AND MAINTAINING YOUR NINJA FLEXFLAME
OUTDOOR COOKING SYSTEM
• ALWAYS ensure gas flow is OFF, Burner Dial is
in OFF position, and grill is unplugged before
cleaning or maintenance.
• ALWAYS allow grill, accessories, and pellet box
to cool before any cleaning or maintenance.
• We recommend you thoroughly clean the grill
regularly. Especially after every 20 hours of
cooking, 12 cooks, or completing a cook using
Low & Slow or Bake/Roast functions.
For regular maintenance, use a sponge with
liquid dish soap and water to clean any grease
and smoke residue. Ensure all parts are clean of
soap residue when done cleaning.
Pellet Box and Smoker Housing
Remove pellet box and safely discard all contents
after every use. It is not required to clean the
pellet box and smoke box housing after each
use—we recommend using a wire brush to
remove extra creosote after every 10 uses.
NOTE: Only use soap and water. DO NOT use
over the counter cleaning solutions on pellet box.
This may cause combustive or flare-up event.
NOTE: For best results, make sure to follow Low & Slow Tips in
the Quick Start Guide
NOTE: Your grill’s standard fan speed ensures optimal cooking
performance. For quieter operation, press and hold the Woodfire Button
for 5 seconds to activate a lower fan speed (not available while smoking).
Note: This mode may slow cooking and reduce browning and evenness.
Flame Tamers
The flame tamers catch any grease or other
dripping residue during grilling and protect
the burners to prevent clogging and flare-ups.
Remove the grill grates and set aside before
cleaning flame tamers.
Use a plastic scraper to clean any residue/
debris from the flame tamers. If necessary, a
stainless-steel grill brush may also be used.
Burners
Remove the grill grates and flame tamers before
cleaning burners. It is essential to keep both the
burner ports and mesh spider screens clean to
ensure safe operation.
Use a damp sponge to clean the top of the
burners and make sure they are fully air dried
before next use.
Mesh Spider Screens
Use a non-abrasive,
soft bristle brush to
clean the mesh spider
screens.
Inside of Firebox
Regularly check and clean the firebox to ensure
safe operation. Excessive grease accumulation
is a fire hazard. Use a plastic scraper to move
any debris buildup inside the firebox to the
opening that funnels down to the grease tray
and ensure grease tray is always emptied before
each use.
Firebox Lid
Use a stainless steel grill brush to scrape away
any colored flakes that resemble paint on
the inside of the lid. These flakes result from
carbonized grease and smoke and are harmless.
We recommend cleaning them as you notice
them to avoid them peeling o and falling into
food.
Grease Tray
Carefully remove cooled grease tray and safely
discard grease contents after each use. Hand-
wash grease tray in warm, soapy water. Grease
tray liners are available for purchase for easy,
hassle-free cleanup. Check grease tray and
dump any water or other contents after a rain or
snowstorm.
Grill Grates
We recommend cleaning the grates after every
few uses. Preheat the grill, use a stainless steel
grill brush to clean o any residue on the grates
from your previous cook, then oil the grates
before adding food.
GETTING TO KNOW THE NINJA FLEXFLAME
OUTDOOR COOKING SYSTEM
FUNCTION BUTTONS
GRILL (230°C - 315°C): High-heat searing and char-grilling for
steaks, burgers, and more. All 3 burners are on, use the precision
temperature dial to set an exact temperature between 230°C -
315°C.
2-ZONE GRILL (175°C - 260°C): Cook with direct heat on the
two front burners while using the back burner to indirectly
cook food using our convection technology. Use the precision
temperature dial to set an exact temperature between 175°C -
260°C.
ROAST/BAKE (150°C - 230°C): Even, surround browning
and crisping on large proteins and vegetables. The back and
front burners are on, combined with the fan, creates even heat
distribution for optimal surround colour. Use the precision
temperature dial to set an exact temperature between 150°C -
230°C.
LOW & SLOW (90°C - 150°C): High-heat searing and char-
grilling for steaks, burgers, and more. All 3 burners are on, use the
precision temperature dial to set an exact temperature between
90°C - 150°C.
WOODFIRE FLAVOUR: Add pellets and press after selecting
your cooking function to add authentic smoky flavours. When
pressed, flame icon will illuminate on the display screen.
TEMPERATURE CONTROL: Turn dial to set a precise grill
temperature within the range determined by your function
selection.
BACK
MID
FRONT
MID
FRONT
BACK
FRONT
MID
NOTE: When the grill is powered on, the display will be illuminated.
FLAVOUR
230-315C
175-260C
150-230C
90-150C
FLAVOUR
230-315C
175-260C
150-230C
90-150C
12
ninjakitchen.co.uk
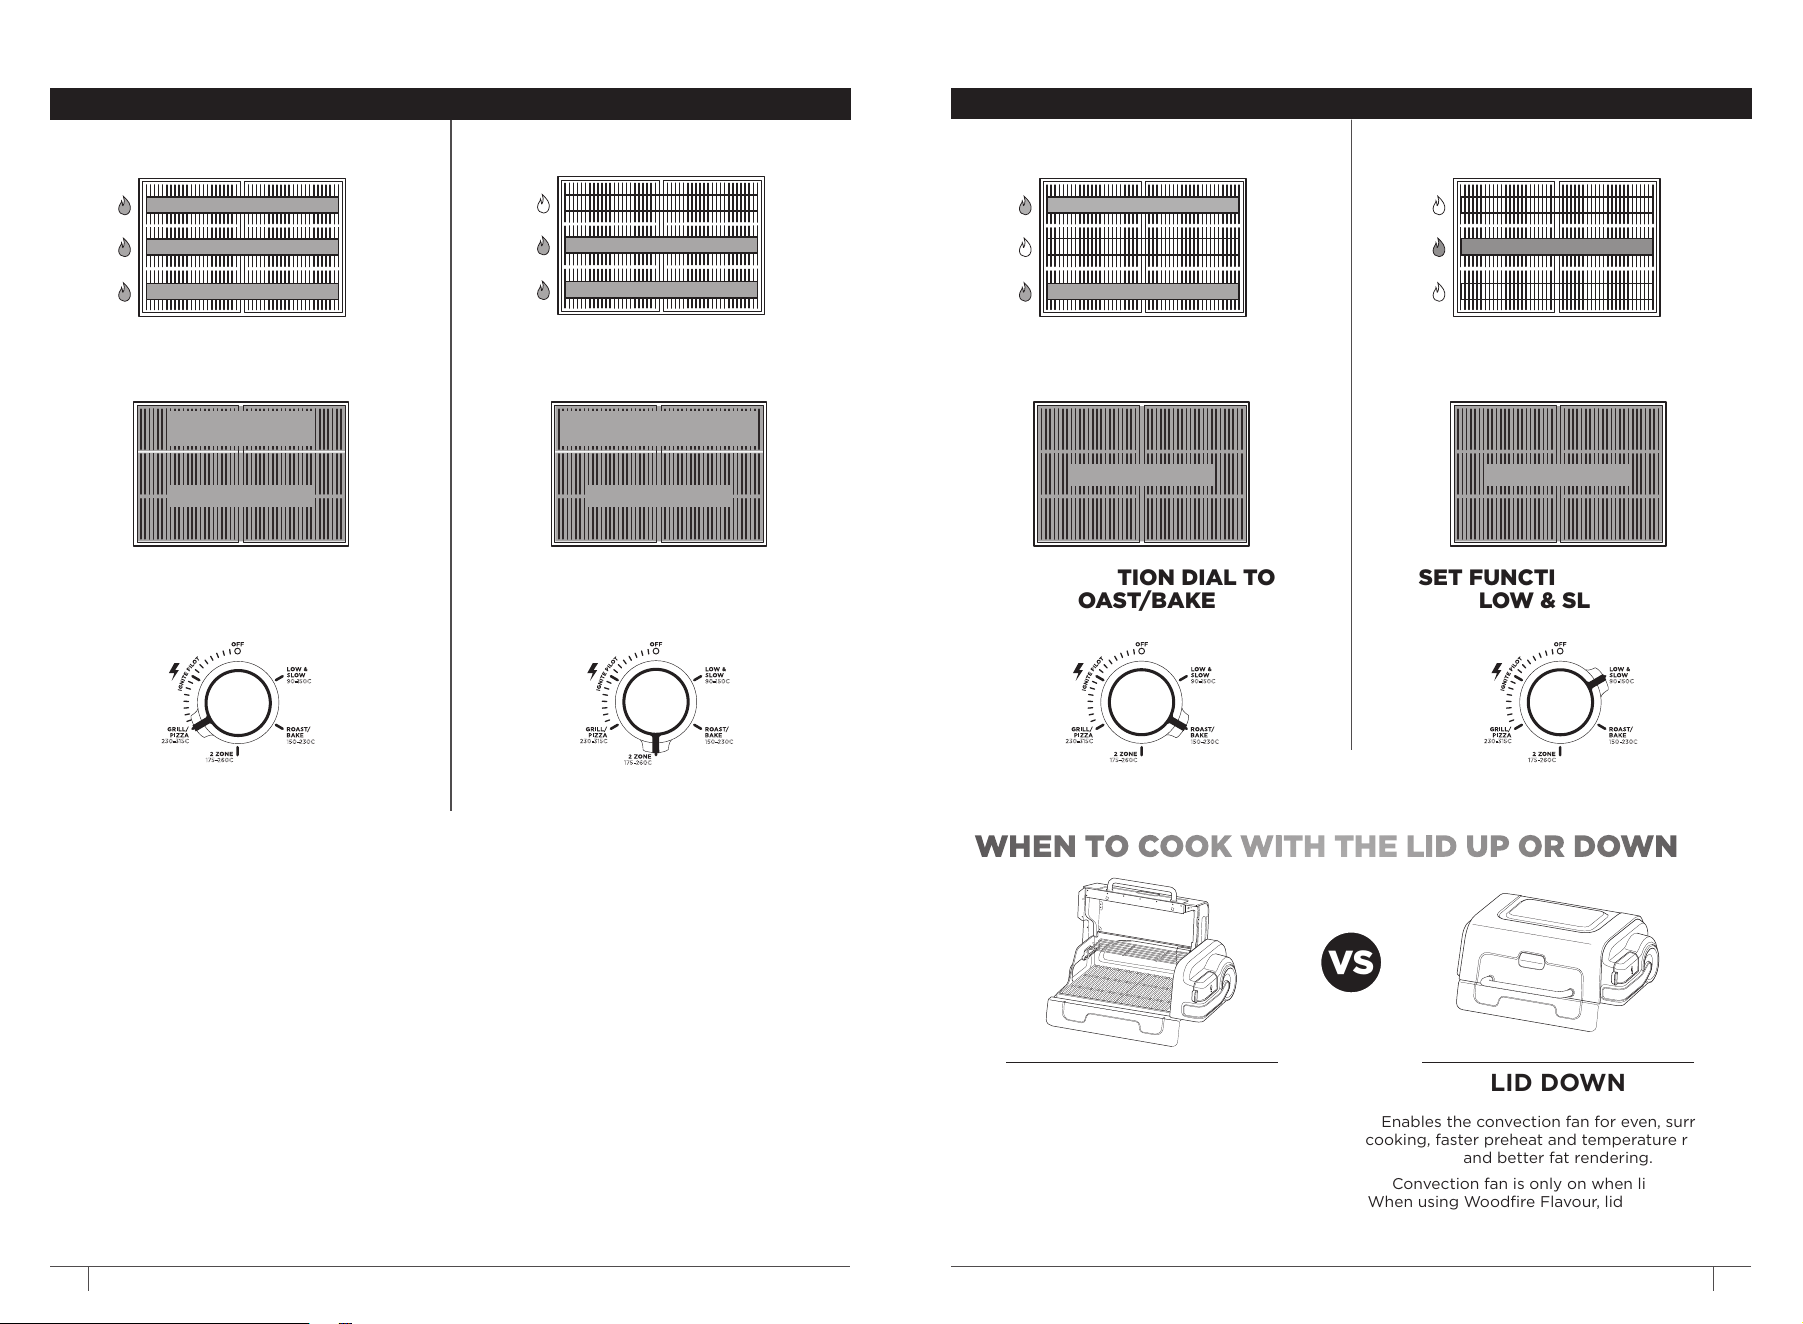
DIRECT AND INDIRECT COOKING: HOW TO SET UP
IMPORTANT: Review all warnings at the beginning of this Instruction Booklet before proceeding.
13
ninjakitchen.co.uk
IMPORTANT: Review all warnings at the beginning of this Instruction Booklet before proceeding.
GRILL/PIZZA
BACK
MID
FRONT
=
Indirect Zone
(top rack)
Direct Zone
SET FUNCTION DIAL TO
GRILL/PIZZA
DIRECT COOKING is when food is cooked
directly over the heat source. Best for quick
cooks and foods that need less than 20 minutes
of cooking. Consider this method for your every
day food items such as steak, burgers, chicken
breasts, and smaller vegetables. Direct cooking is
used to create direct charring and caramelization.
2-ZONE
MID
FRONT
=
Indirect Zone
(back burner & top rack)
Direct Zone
SET FUNCTION DIAL TO
2-ZONE
TWO-ZONE unlocks the ability to cook with both
direct heat and indirect heat. Cook with direct
heat using the two front burners to sear your
food over direct flame, for quick, hot contact. Use
the back burner and top rack as a place to move
your food so it’s not cooking over a direct flame,
or as a space to cook smaller, more delicate food
loads to avoid overcooking.
ROAST/BAKE
BACK
FRONT
=
Indirect Zone
SET FUNCTION DIAL TO
ROAST/BAKE
INDIRECT COOKING is when food is cooked
indirectly over the heat source. Best for longer
cooks and foods that need longer than 25
minutes of cooking. Consider this method
for your larger items such as roasts, dense
vegetables, whole chickens, etc., or for delicate
items that are too fragile for direct heat, such as
fish and small vegetables.
LOW & SLOW
MID
=
Indirect Zone
SET FUNCTION DIAL TO
LOW & SLOW
LID DOWN
Enables the convection fan for even, surround
cooking, faster preheat and temperature recovery,
and better fat rendering.
Convection fan is only on when lid is down.
When using Woodfire Flavour, lid MUST be down.
VS
WHEN TO COOK WITH THE LID UP OR DOWN
LID UP
Best for flat plate griddling and
shorter, more interactive cooks.
If grilling with lid up, you will not have the
benefits of the convection fan which may cause
cook times to vary.
FLAVOUR
230-315C
175-260C
150-230C
90-150C
FLAVOUR
230-315C
175-260C
150-230C
90-150C
FLAVOUR
230-315C
175-260C
150-230C
90-150C
FLAVOUR
230-315C
175-260C
150-230C
90-150C

Grill Cover
Helps protect your
grill from the elements
year-round.
Premium Full Flat Plate
Transform your grill into a
Flat Plate to unlock more
creations like pancakes,
hibachi-style fried rice,
and more.
Half Flat Plate
Transform half your grill
into a Flat Plate so you
can grill and Flat Plate at
the same time.
16" Pizza Stone
Create hand crafted
artisan-style pizzas to
feed a crowd.
Ninja Woodfire Pellets
Available in Robust and
All Purpose blend, both
flavour blends can be
used with anything you
make.
Grease Tray Liners
Make cleanup a breeze
with this 10-pack of liners.
Simply place in provided
grease tray and dispose
when full.
EXPLORE
NINJA FLEXFLAME
UPGRADES
SOLD SEPARATELY
Scan QR code to view
the full assortment.
WOODFIRE
™
PELLETS
ROBUST
BLEND
WOODFIRE
™
PELLETS
ALL-PURPOSE
BLEND
14
ninjakitchen.co.uk
15
ninjakitchen.co.uk
NINJA FLEXFLAME UPGRADES - SOLD SEPARATELY TROUBLESHOOTING GUIDE
GRILL WILL NOT IGNITE.
Before troubleshooting, reference how to ignite
burners and set temperature to ensure proper
ignition instructions were followed.
CHECK GAS FLOW:
Follow instructions to use a match to manually
light the burners:
1 Unplug the grill, open lid and ensure burner
dial is turned to OFF
.
BACK
MID
FRONT
PILOT
2 Turn on gas supply by following the
instructions designated by your propane
tank.
3 Place an unlit match in the provided
matchstick holder, then light match.
4 Position the lit match over the pilot burner
peep hole to light the pilot burner. Position
match towards the right to ensure match
flame is directly over pilot burner.
5 Push burner dial in and turn to IGNITE PILOT
,
remove matchstick once flame is visible,
continue to hold dial in for 5 seconds after
flame is lit.
NOTE: This will ignite only the burner all
the way to the right, the pilot burner. It’s
important to ensure the pilot burner is lit
before turning on the main burners. You
may check if the pilot burner is lit by looking
through the peep hole on the pilot burner
flame tamer. If ignition does not occur in
5 seconds, turn the burner dial to OFF, and
try again.
6 Release dial and turn counterclockwise to
select a cooking function and turn on the
main burners.
7 If all burners successfully ignite manually,
there may be an issue with your igniter or
ignition system. Refer to the next page for
further troubleshooting.
FLAVOUR
230-315C
175-260C
150-230C
90-150C
FLAVOUR
230-315C
175-260C
150-230C
90-150C
Expandable Roast &
Smoke Rack
Double your top-rack
cooking space. Swap out
the included top rack
for this folding rack for
increased capacity.
16" Pizza Peel
Easily add and remove
pizza from the pizza stone
for hassle-free pizza
making.
TROUBLESHOOTING GUIDE – CONT'D
16 17
ninjakitchen.co.uk
ninjakitchen.co.uk
CHECK IGNITION SYSTEM:
When you press and turn the BURNER DIAL, you should hear a “ticking” sound. If you do not hear the
ticking sound, follow the below steps.
CONFIRM YOUR GRILL IS PLUGGED IN:
The grill needs to be plugged in to ignite. After you have confirmed grill is plugged in, retry igniting.
If ignition is still unsuccessful, unplug the grill and proceed to check the wire connections.
CHECK WIRES:
Ensure grill is unplugged, gas is o, and Burner dial is in OFF position. Check ignition module wires
are properly connected and have no visible damage. These connectors should be damage free and
fully installed to ensure proper connectivity. If connectors are loose, fix connection and retry igniting.
IMPORTANT: If wires are damaged, call customer service 0800 862 0453.
GAS FLOW ISSUES
SYMPTOMS
• Uneven heating, or grill will not reach set
temperature.
• Pilot burner doesn’t ignite.
• Pilot burner is lit but main burners are not or
will not ignite.
• Flame height is low during preheat, or when
grill is set to 315°C and lid is open.
• Flames don’t spread fully across entire length
of burner.
• I mproper flame pattern across burners.
• Flame colour appears yellow and behaviour is
irregular.
SOAPY WATER TEST
• Combine 1 tsp. soap with 1 cup of water in a
spray bottle.
• Spray mixture on all of gas lines and
connection points.
• If you see expanding large bubbles, then you
have a gas leak.
• If you have a gas leak, shut o gas and call
customer service at 0800 862 0453.
PROBLEM RESOLUTION
Gas flow issue
Ensure gas flow is o.
Unscrew regulator hose.
Screw regulator hose back on, ensuring
connection is not cross-threaded. Propane
tanks often have a fail-safe mechanism to
restrict flow of gas in the case of abnormal flow.
This can happen if the regulator hose is not
screwed on properly.
Low or empty propane tank Refill or replace tank.
Bent or kinked regulator hose
Ensure gas flow is o.
Straighten bent or kinked regulator hose.
Perform a soapy water test.
If soapy water test passes, problem has been
resolved.
If soapy water test fails, replace regulator hose.
Bent or kinked corrugated gas line
Ensure gas flow is o.
Straighten bent or kinked regulator hose.
Perform a soapy water test.
If soapy water test passes, problem has been
resolved.
If soapy water test fails, call customer service
0800 862 0453 and do not use your grill.
Burner ports are dirty
Ensure gas flow is o, and burner dial is in
OFF position.
Clean burner ports
(Refer to Cleaning & Maintenance section.)
"TRN GAS OFF" error message appears
Grill is plugged in while ignition dial is not
in the O OFF position. Turn dial to O OFF
position.
Grill is running but temperature is not
responding to set point and is dropping
unexpectedly.
This could be caused by burner blowout or
low gas level. Turn ignition dial to O OFF,
then attempt to reignite flame. If reignition is
unsuccessful, check tank fuel level.
TROUBLESHOOTING GUIDE – CONT'D
18
ninjakitchen.co.uk
• There is an "E" error on my control panel.
If you see any "E" error on the control panel, call customer service 1-855-427-5125.
• Black specks are peeling from the inside of grill's lid.
These flakes result from carbonized grease and smoke and are harmless. We recommend cleaning
them as you notice them to avoid them peeling o and falling into food.
• Where can I store my grill?
The grill is weather-resistant and may be stored outdoors. We recommend keeping the grill covered
when not in use.
• How do I adjust which burners are on vs. o?
Use the Burner dial to adjust burners. Burner configuration varies based on what function/temperature
range is selected. Temperature range determines which burners are on/o. We’ve paired temperature
ranges with cooking functions to take the guesswork out of knowing what temperature to set for your
food.
• What temperature ranges correlate to high, medium, and low?
High: 315°C
Medium: 200°C
Low: 90°C–150°C
• My grill does not have power.
Make sure the grill is plugged in using a 3-prong grounded extension cord, rated for outdoor use.
• How do I shut the grill o?
Turn the Burner dial to the OFF position. Check to make sure the burners are all o. Shut o the gas
supply (follow all instructions on propane tank.) Unplug the power cord if desired.
• The grill is experiencing flare-ups.
The grill should be thoroughly cleaned after each use. See the Cleaning section.
• I am not seeing grill marks or charring on my food.
If you are not seeing grill marks or charring on your food, try adjusting the temperature in your
selected cooking function, or changing cooking functions to access a higher temperature range. The
grill grates are reversible. Keep the flat side of the grates facing up for better direct contact with food.
• How do I cook directly and indirectly?
Direct cooking: You can cook directly by using the Grill/Pizza or 2-Zone function. Indirect Cooking: You
can cook indirectly with any function by placing food on the top rack, using the back zone with the
2-Zone function, or using the Roast/Bake or Low & Slow function. See the Direct and Indirect Cooking
section for more information.
• Grill noises observed.
You may notice some noises coming from your grill. The following noises are normal and are part of
the standard grill operation: During burner ignition, you may hear a ticking (like igniting a gas stove), a
whoosh from the visible flames, minor rattling from the fan, or creaking due to material expansion from
weather.
• Why are my burners discoloured?
The burners may have some visible discolouration. This is a result of our normal manufacturing
process. To ensure optimal performance, we test each individual grill before it gets to you. weather.
• No Electrical Power When Plugged in?
Turn o the grill. Unplug the from the power source. Wait 5 minutes. Plug back into power source.
If the RCD continues to trip after resetting, it might indicate a problem with the grill itself and
professional assistance may be needed. Please call SN customer service.
NOTE: If troubleshooting is unsuccessful, call customer service 0800 862 0453
To order additional parts and accessories, visit ninjakitchen.co.uk or contact Customer Service at
0800 862 0453. We ask that you register your product online at registeryourninja.co.uk and have the
product on hand when you call, so we may better assist you.
REPLACEMENT PARTS
19
ninjakitchen.co.uk
The Ninja Guarantee
When a consumer buys a product in the UK, they
get the benefit of legal rights relating to the quality
of the product (your “legal rights”). You can
enforce your legal rights against your retailer,
including Ninja if you bought your Ninja kitchen
appliance from ninjakitchen.co.uk. However, at
Ninja we are so confident about the quality of our
products that we guarantee 10 years of use with
this product (upon registration), this includes free
parts and labour.
The guarantee it comes with is an important
consideration - and reflects how much confidence
the manufacturer has in its product and
manufacturing quality.
The manufacturer’s guarantee does not aect
your legal rights.
How long are new Ninja machines guaranteed
for?
Our manufacturer’s guarantee lasts for one year
from the date of purchase as standard, or for
10 years if you register your purchase with us
within 28 days.
How do I register my Ninja guarantee?
If you have purchased your Ninja kitchen appliance
directly from ninjakitchen.co.uk your guarantee is
registered automatically. If you bought it from
anywhere else in the UK, you can register your
guarantee online within 28 days of purchase.
• To register online, please visit www.ninjakitchen.
co.uk/register-guarantee or scan the QR code
in your instruction booklet.
• Keep a note of the date you purchased the
machine.
IMPORTANT:
• Keep your receipt if you bought your Ninja
kitchen appliance from anywhere except
ninjakitchen.co.uk. You will need it to claim under
your guarantee.
• The free Ninja guarantee only applies in the UK.
What are the benefits of registering my free
Ninja guarantee?
When you register your guarantee, you will get an
extra year of cover. We’ll also have your details to
hand if we ever need to get in touch. If you further
agree to receive communications from us, you can
also receive tips and advice on how to get the best
out of your Ninja kitchen appliance and hear the
latest news about new Ninja technology and
launches.
What is covered by the free Ninja guarantee?
Repair or replacement (at Ninja’s discretion) of
your Ninja machine, including all parts and labour.
What is not covered by the free Ninja guarantee?
• Normal wear and tear.
• Accidental damage or faults caused by negligent
use or care, misuse, neglect, careless operation
or handling of the Ninja kitchen appliance which
is not in accordance with the Ninja Operating
Manual supplied with your machine.
• Damage caused by use of the Ninja kitchen
appliance for anything other than normal
domestic household purposes.
• Damage caused by use of parts not assembled
or installed in accordance with the operating
instructions.
• Damage caused by use of parts and accessories
which are not Ninja Genuine Components
• Faulty installation (except where installed by
Ninja).
• Repairs or alterations carried out by parties other
than Ninja or its agents.
How can I claim under the free Ninja guarantee?
Contact our customer service helpline on 0800
862 0453. For service hours please visit our
website under ‘Contact Us’. It’s free to call, and
you’ll be put straight through to a Ninja
representative. You’ll also find online support at
https://support.ninjakitchen.co.uk/.
The Ninja representative will go through some
troubleshooting with you, and if we conclude that
the item has failed, we will send you a replacement
part or a returns label to send the defective item
back to us free of charge. When you have
delivered the defective product to us, we will send
you a replacement.
Please remember that the item will need to be
boxed when you return it to us. It can be any
suitable box, it does not have to be the original
packaging.
Where can I buy genuine Ninja spares and
accessories?
Ninja spares and accessories are developed by the
same engineers who developed your Ninja kitchen
appliance. You’ll find a full range of Ninja spares,
replacement parts and accessories for all Ninja
machines at www.ninjakitchen.co.uk. Please
remember that damage caused by the use of
non-Ninja spares may not be covered under your
guarantee.
MANUFACTURER’S GUARANTEE

TECHNICAL SPECIFICATIONS
ELECTRICAL RATING: 220–240 V~ 50–60 Hz 600W
CURRENT: 2.79–3.04A
GAS TYPE: Propane (G31)
OPERATING PRESSURE: 37 mbar
NOMINAL HEAT INPUT: 10.84 kW
APPLIANCE CATEGORY: I3P
IP RATING: IPX4
FACTORY: JM1
MADE IN CHINA
RECORD THIS INFORMATION
Model Number: ��������������������
Serial Number: ���������������������
Date of Purchase: �������������������
(Keep receipt)
Store of Purchase: ������������������
REGISTER YOUR PURCHASE
registeryourninja.co.uk
Scan QR code using mobile device
THANK YOU FOR PURCHASING THE FLEXFLAME
OUTDOOR COOKING SYSTEM
SharkNinja Europe Ltd, SharkNinja Germany GmbH,
1st/2nd Floor Building 3150, Rotfeder-Ring 9,
Thorpe Park, Century Way, 60327 Frankfurt am Main,
Leeds, England, LS15 8ZB Germany
+44 (0)800 862 0453
www.ninjakitchen.co.uk www.ninjakitchen.eu
Illustrations may dier from actual product. We are constantly striving to improve our products,
therefore the specifications contained herein are subject to change withoutnotice.
NINJA is a registered trademark in the United Kingdom of SharkNinja Operating LLC.
© 2025 SharkNinja Operating LLC
PG301UK�IB�MP�Mv6�251031
@ninjakitchenuk

