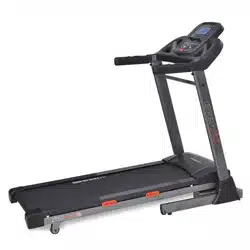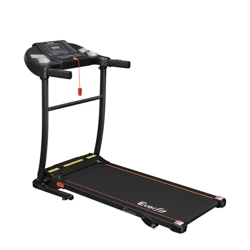

TREADMILL
MODEL: TMILL-TITAN40-W500-BK
Please read this user manual carefully before using the product. Please retain
this manual for future reference.
USER MANUAL

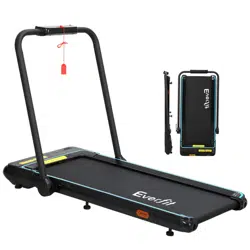
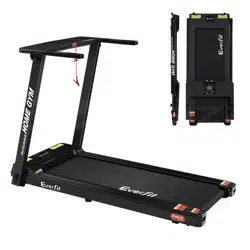
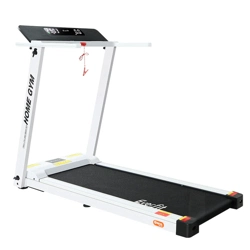
COMPONENTS
SPECIFICATONS AND PARTS LIST
Specifications may vary with continued enhancements of our products without prior notice.
Please refer to your product for actual specifications.
SECURITY PRECAUTIONS AND WARNINGS
∙ This treadmill is intended only for indoor use.
∙ Please wear appropriate clothing and footwear before any exercise. It is prohibited to exercise
barefoot on the treadmill.
∙ The power plug must be grounded and the treadmill must be plugged in into an exclusive mains
socket. Do not share the plug in with other electrical appliances.
∙ Keep children away from the treadmill to avoid accidents.
∙∙ Avoid use over long periods and do not overload the operation of the treadmill. This may damage
the motor and controller and deteriorate the working components such as the bearings, running
belt and running board. Maintain the treadmill on a regular basis.
∙ Keep the treadmill away from dust to avoid strong static.
∙ Please turn off the electrical power after use.
∙ Please maintain good ventilation when using the treadmill.
∙ Please clip the safety key to your clothing when using the treadmill to ensure that it will stop in the
event of an emergency.
∙ If you feel unwell when using this treadmill, stop using immediately and consult your doctor.
∙ Keep the silicon oil away from children at all times.
∙ If the power cord is damaged, it must be replaced by the manufacturer or qualified service
personnel. Do not attempt to use or repair the power cord.
· Do not bend or clamp the power cord or place heavy objects on it as it may cause electric shocks.
∙ It is prohibted to use the treadmill if the body shell is damaged or broken or internal components
are exposed or parts are in danger of breaking off. This is to prevent any accident or injury.
∙ Do not jump up and down on the treadmill while it is moving. This may cause a fall and injuries.
∙ Do not store the treadmill in or near damp areas such as a bathroom.
∙ Do not place the treadmill under direct sunlight or in high temperature environments such as near
a stove or heating appliance.
· Do not use the treadmill if you do not know how to operate the machine to avoid any injury.
· Do not eat or drink while using the treadmill as it may cause a hazard.
·· Do not use the treadmill after a meal as it may cause health problems,
· Do not do intensive exercises on the treadmill if you seldom exercise to avoid any health problems.
· This treadmill is only for domestic household use and not to be used in schools, gymnasiums and
other similar establishments.
· Do not have any hard objects or items in your pockets when using the treadmill.
· This treadmill is not intended for use by persons (including children) with reduced physical, sensory
or mental capabilities, or lack of experience and knowledge, unless they have been given
supervision or instructions concerning the use of the machine by a person responsible for their
safety.
· Children should be supervised to ensure they do not play with the machine.
· When the treadmill is not in use, unplug the power cord from the mains socket.
· Do not plug in the power cord with wet hands.
· This machine must be grounded. If the machine is dysfunctional, grounding will provide a good
channel for the electric current in order to reduce the risk of an electric shock. If you have doubts
about whether the machine is grounded correctly or not, consult an electrician for advice.
· Ensure that the power plug fits into the mains socket properly and tightly. Do not use any plug
adaptor.
BEFORE UNFOLDING THE TREADMILL, MAKE SURE THAT THE SURFACE IS LEVELLED.
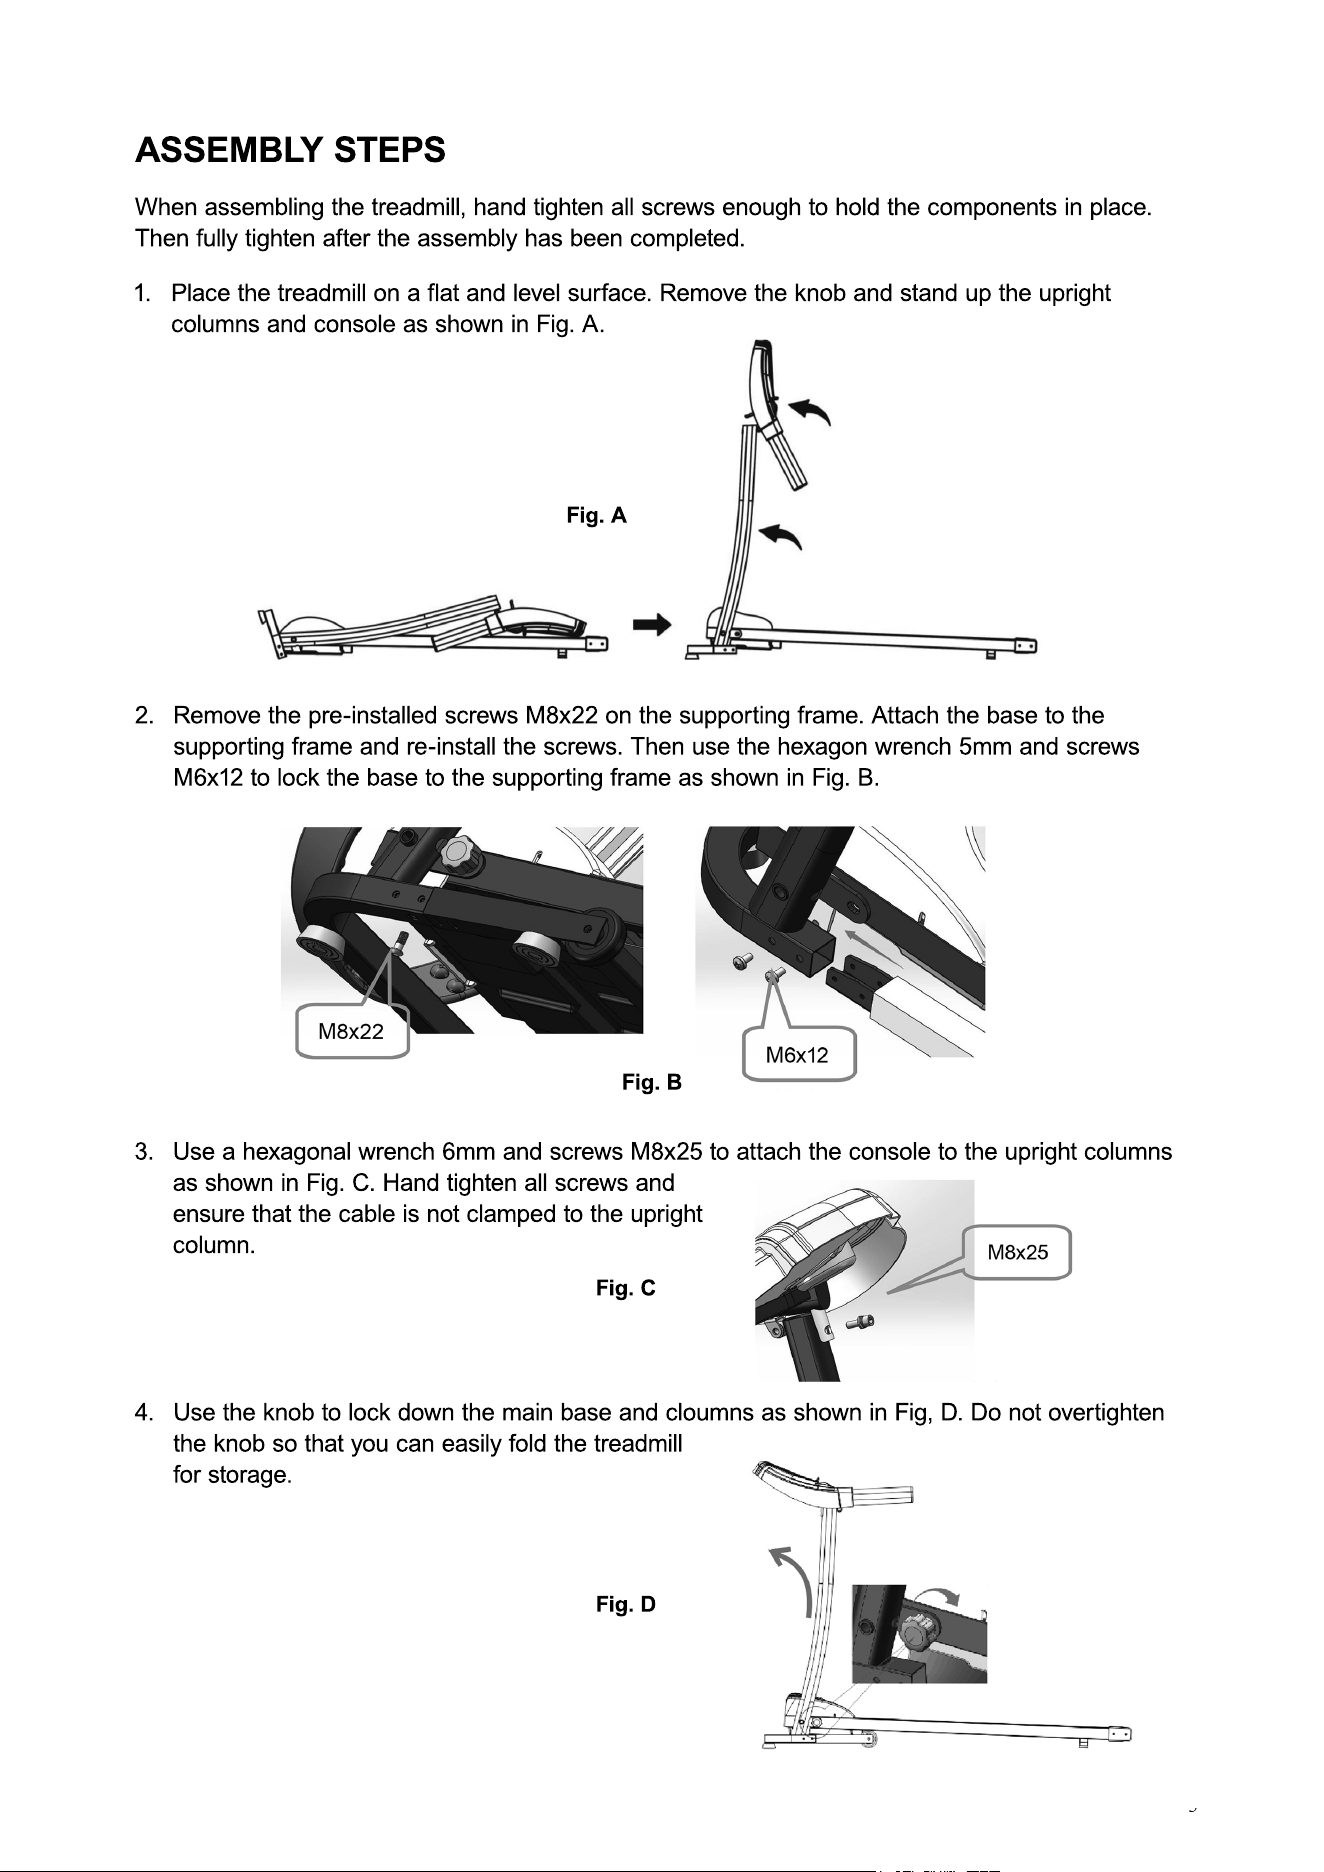
ASSEMBLY STEPS
When assembling the treadmill, hand tighten all screws enough to hold the components in place.
Then fully tighten after the assembly has been completed.
1. Place the treadmill on a flat and level surface. Remove the knob and stand up the upright
columns and console as shown in Fig. A.
2. Remove the pre-installed screws M8x22 on the supporting frame. Attach the base to the
supporting frame and re-install the screws. Then use the hexagon wrench 5mm and screws
M6x12 to lock the base to the supporting frame as shown in Fig. B.
3. Use a hexagonal wrench 6mm and screws M8x25 to attach the console to the upright columns
as shown in Fig. C. Hand tighten all screws and
ensure that the cable is not clamped to the upright
column.
4. Use the knob to lock down the main base and cloumns as shown in Fig, D. Do not overtighten
the knob so that you can easily fold the treadmill
for storage.
Fig. A
Fig. B
Fig. C
Fig. D
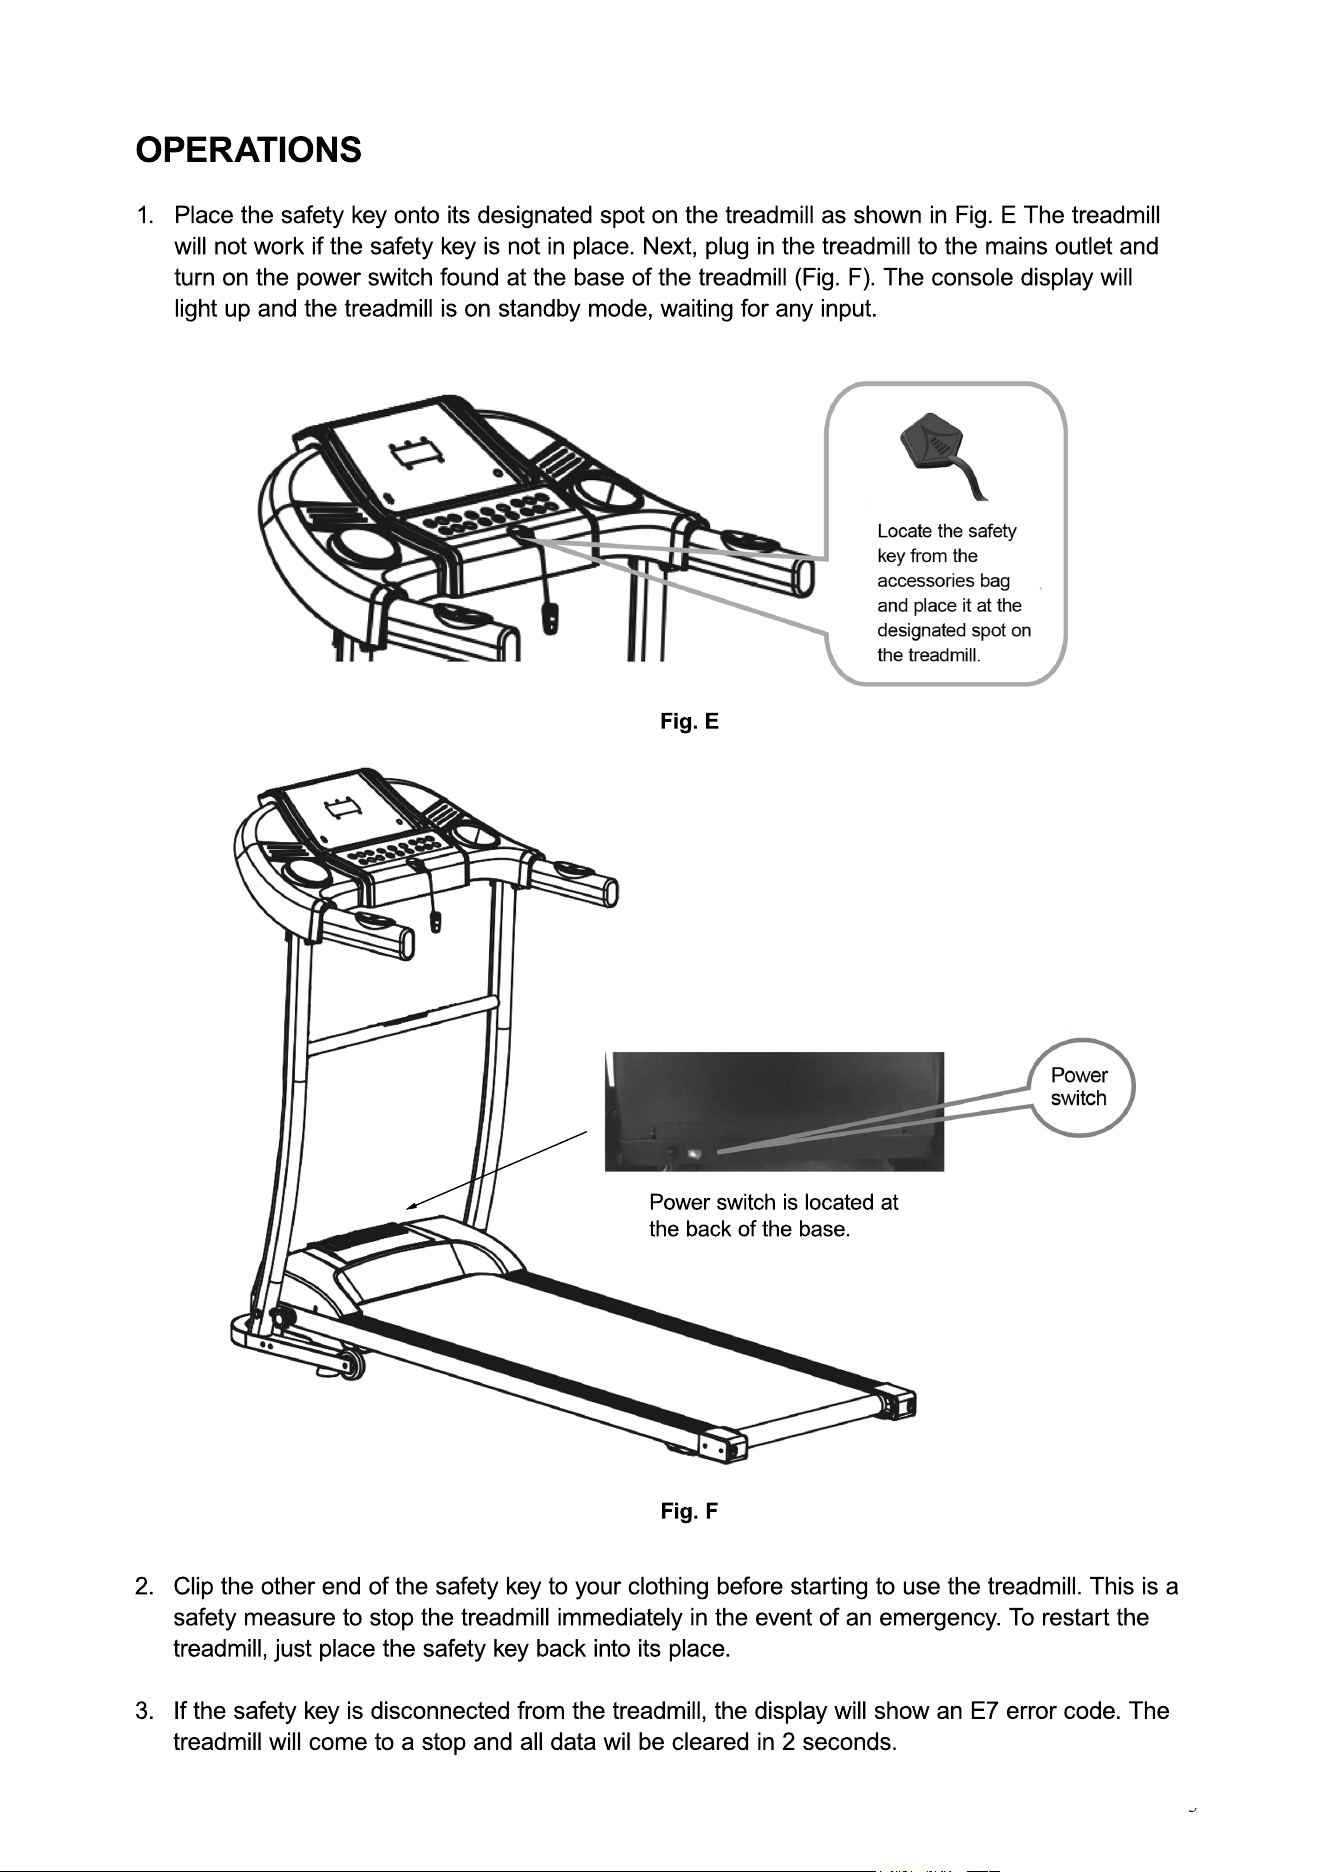
OPERATIONS
1. Place the safety key onto its designated spot on the treadmill as shown in Fig. E The treadmill
will not work if the safety key is not in place. Next, plug in the treadmill to the mains outlet and
turn on the power switch found at the base of the treadmill (Fig. F). The console display will
light up and the treadmill is on standby mode, waiting for any input.
2. Clip the other end of the safety key to your clothing before starting to use the treadmill. This is a
safety measure to stop the treadmill immediately in the event of an emergency. To restart the
treadmill, just place the safety key back into its place.
3. If the safety key is disconnected from the treadmill, the display will show an E7 error code. The
treadmill will come to a stop and all data wil be cleared in 2 seconds.
Fig. E
Fig. F
Power switch is located at
the back of the base.
OPERATIONS
CONSOLE BUTTONS FUNCTIONS
Start/Stop button
When the treadmill is on standby mode, press the Start button to start the treadmill. The screen will
display 1km/h. The treadmill will start functioning at its default settings. If other settings has been set
and the treadmill is running, pressing this button again will clear all data and the treadmill will come
to a stop.
PProgram button
While the treadmill is on standby mode, press this button to cycle through the program options from
manual mode to automatic mode (preset programs P1 to P12). The default mode is manual mode.
Mode button
While the treadmill is on standby mode, press this button to cycle through the various countdown
running modes: time countdown, distance countdown and calories countdown. In any mode, the
speed adjustment buttons can be used to set the value. Press start after setting the value to start
tthe treadmill.
Volume button
Use the button to adjust the music volume on your MP3 playback device.
Previous/Next button
Use the button to select the songs for playback on your MP3 playback device.
Speed button
When the treadmill is running, press this button to adjust the running speed.
QQuick Speed Select button
Use this button to select the pre-set speed of 3km/h, 6km/h or 9km/h.
DISPLAY FUNCTIONS
Speed display
Displays the current running speed value.
Time display
Displays the time in manual mode and the countdown time under automatic modes and programs.
DDistance display
Displays the cumulative distance in manual mode and programs. It also displays the distance
countdown in automatic modes and programs.
Calorie display
Displays the cumulative calories in manual mode and programs. It also displays the calories
count in automatic modes and programs.
Heart rate display
TThe heart rate (bpm) will be shown once the signal is detected. Please bear in mind the heart rate
value is only for reference and is not mean to be considered as accurate medical data.
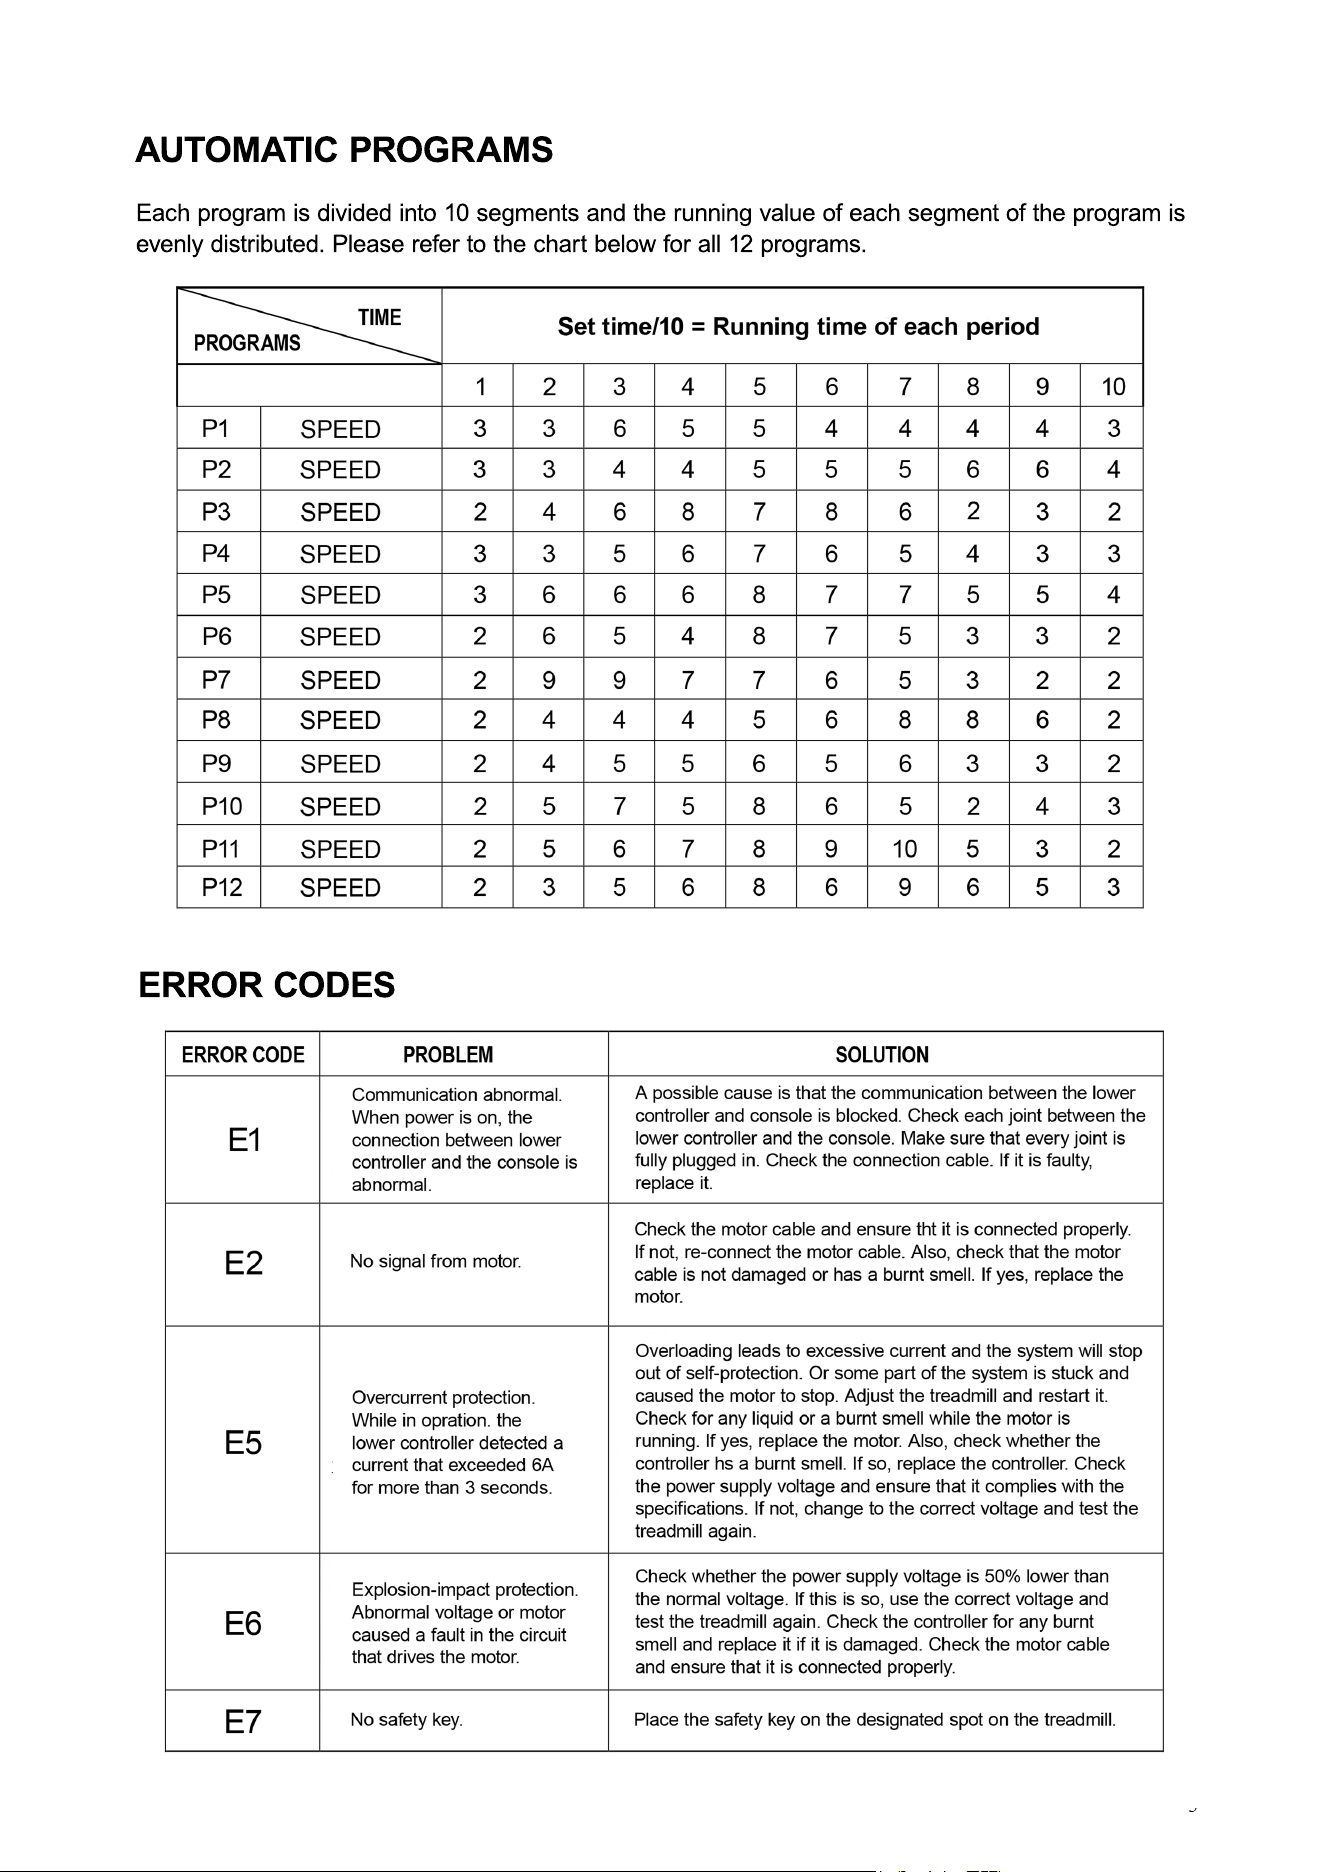
AUTOMATIC PROGRAMS
Each program is divided into 10 segments and the running value of each segment of the program is
evenly distributed. Please refer to the chart below for all 12 programs.
ERROR CODES
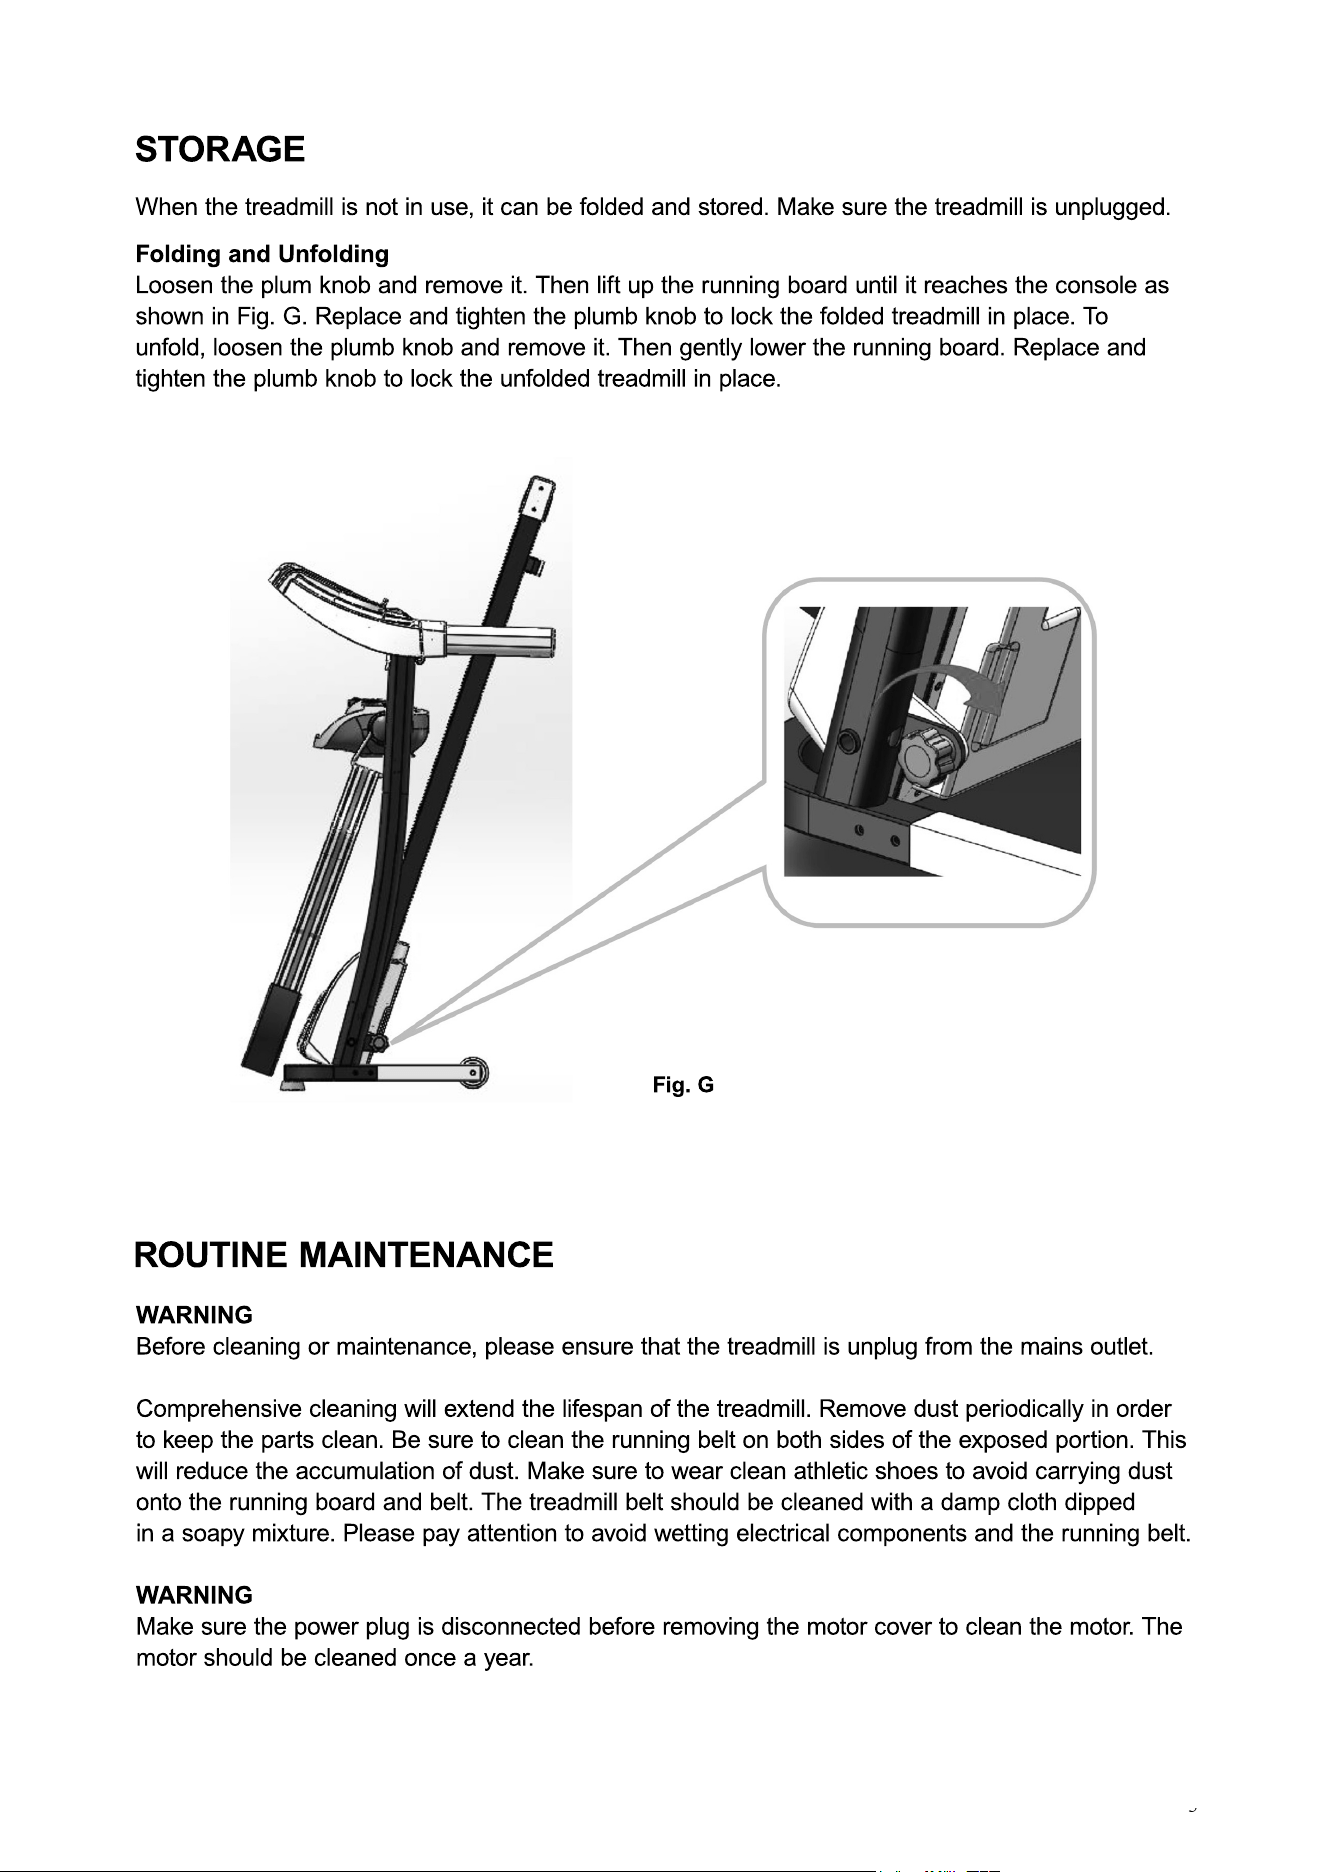
STORAGE
Folding and Unfolding
Loosen the plum knob and remove it. Then lift up the running board until it reaches the console as
shown in Fig. G. Replace and tighten the plumb knob to lock the folded treadmill in place. To
unfold, loosen the plumb knob and remove it. Then gently lower the running board. Replace and
tighten the plumb knob to lock the unfolded treadmill in place.
Fig. G
When the treadmill is not in use, it can be folded and stored. Make sure the treadmill is unplugged.
ROUTINE MAINTENANCE
WARNING
Before cleaning or maintenance, please ensure that the treadmill is unplug from the mains outlet.
Comprehensive cleaning will extend the lifespan of the treadmill. Remove dust periodically in order
to keep the parts clean. Be sure to clean the running belt on both sides of the exposed portion. This
will reduce the accumulation of dust. Make sure to wear clean athletic shoes to avoid carrying dust
onto the running board and belt. The treadmill belt should be cleaned with a damp cloth dipped
iin a soapy mixture. Please pay attention to avoid wetting electrical components and the running belt.
WARNING
Make sure the power plug is disconnected before removing the motor cover to clean the motor. The
motor should be cleaned once a year.
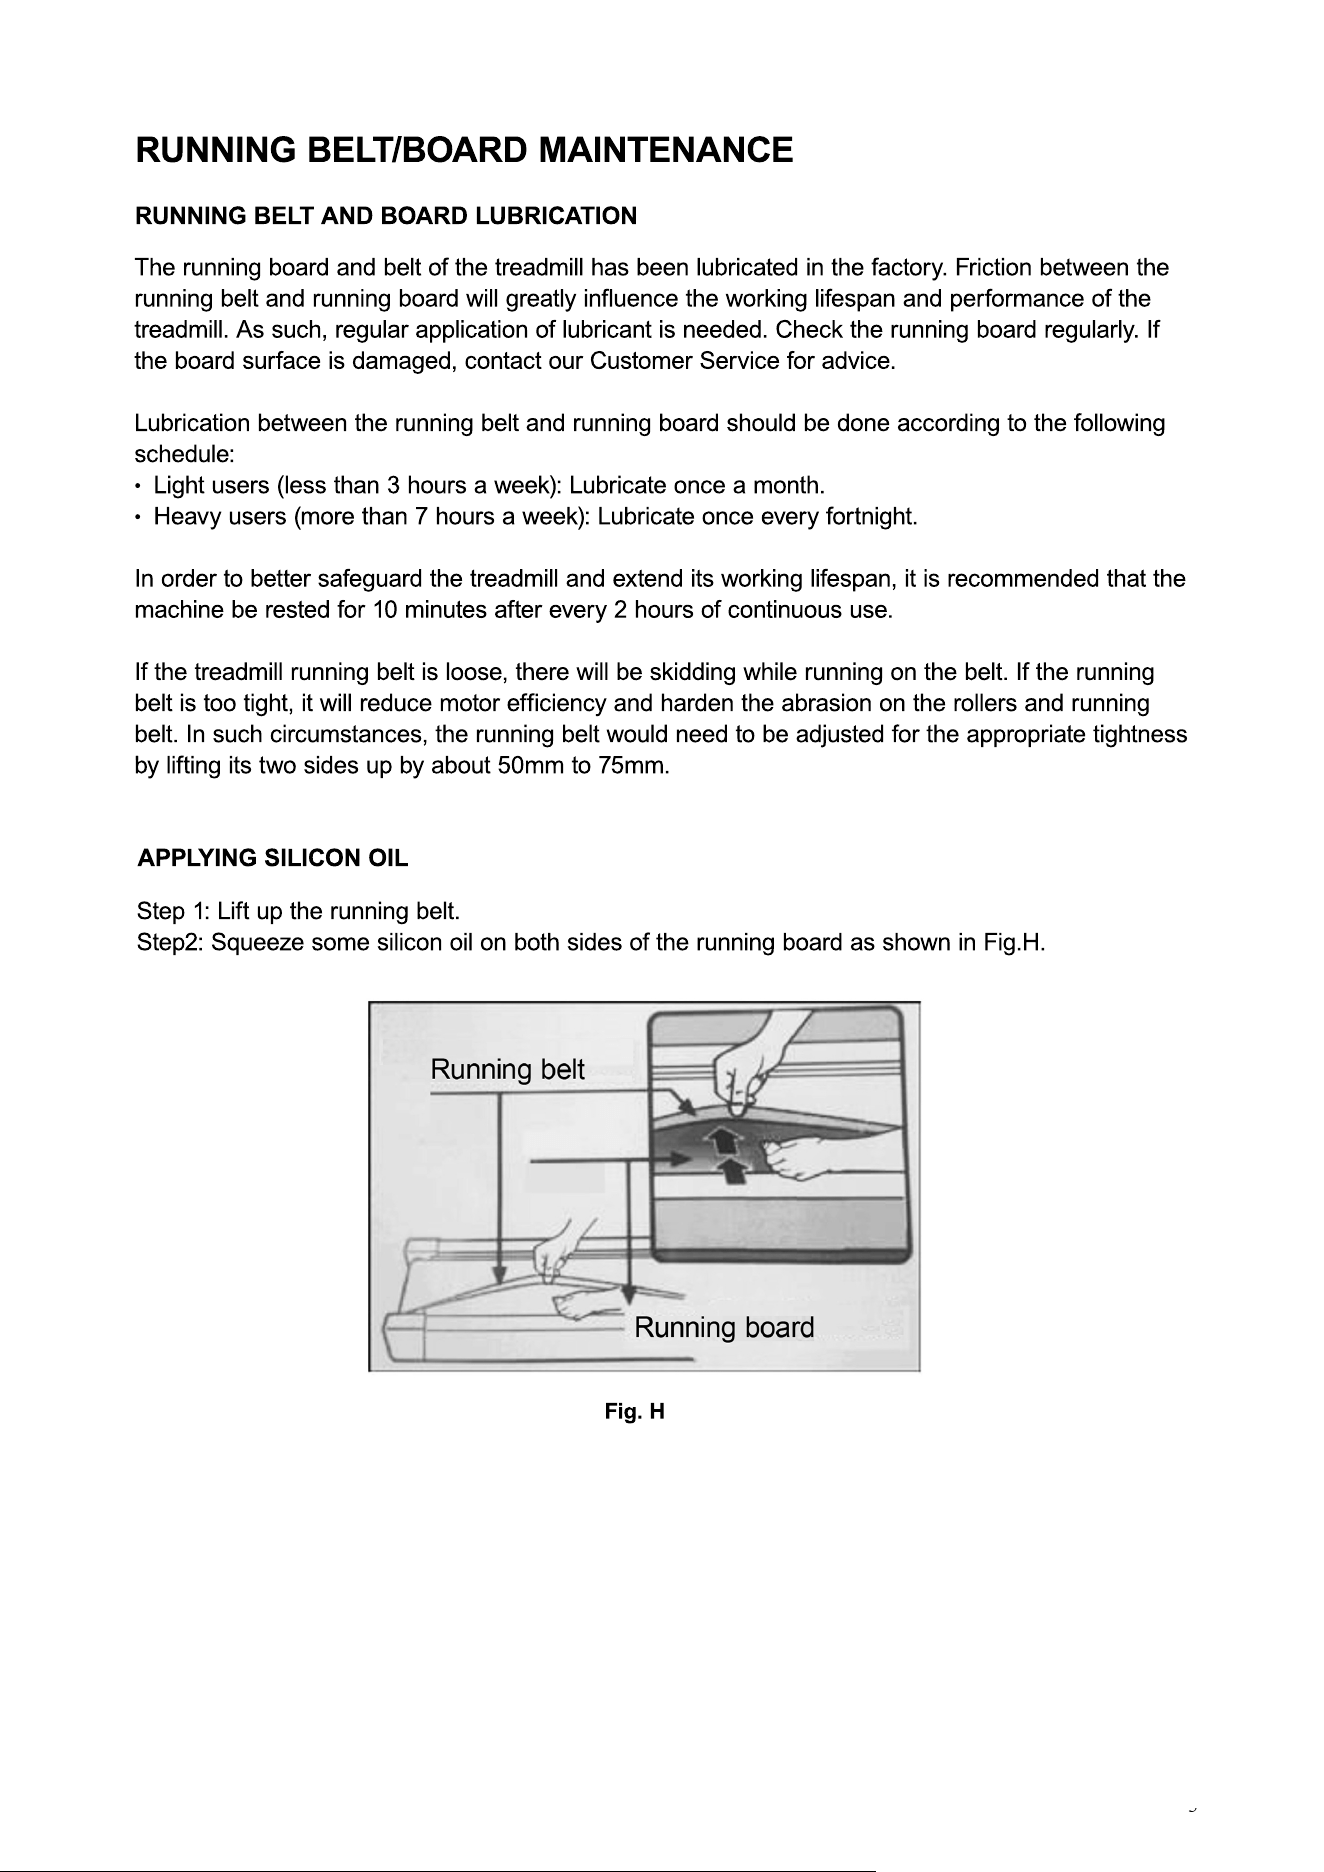
RUNNING BELT/BOARD MAINTENANCE
RUNNING BELT AND BOARD LUBRICATION
Step 1: Lift up the running belt.
Step2: Squeeze some silicon oil on both sides of the running board as shown in Fig.H.
APPLYING SILICON OIL
Fig. H
The running board and belt of the treadmill has been lubricated in the factory. Friction between the
running belt and running board will greatly influence the working lifespan and performance of the
treadmill. As such, regular application of lubricant is needed. Check the running board regularly. If
the board surface is damaged, contact our Customer Service for advice.
Lubrication between the running belt and running board should be done according to the following
schedule:
·· Light users (less than 3 hours a week): Lubricate once a month.
· Heavy users (more than 7 hours a week): Lubricate once every fortnight.
In order to better safeguard the treadmill and extend its working lifespan, it is recommended that the
machine be rested for 10 minutes after every 2 hours of continuous use.
If the treadmill running belt is loose, there will be skidding while running on the belt. If the running
belt is too tight, it will reduce motor efficiency and harden the abrasion on the rollers and running
belt. In such circumstances, the running belt would need to be adjusted for the appropriate tightness
bby lifting its two sides up by about 50mm to 75mm.
RUNNING BELT/BOARD MAINTENANCE
RUNNING BELT ALIGNMENT/TIGHTNESS ADJUSTMENT
Runnng belt alignment
· Place the treadmill flat on the ground.
· Let the treadmill run at a speed of between 6km/h and 8km/h.
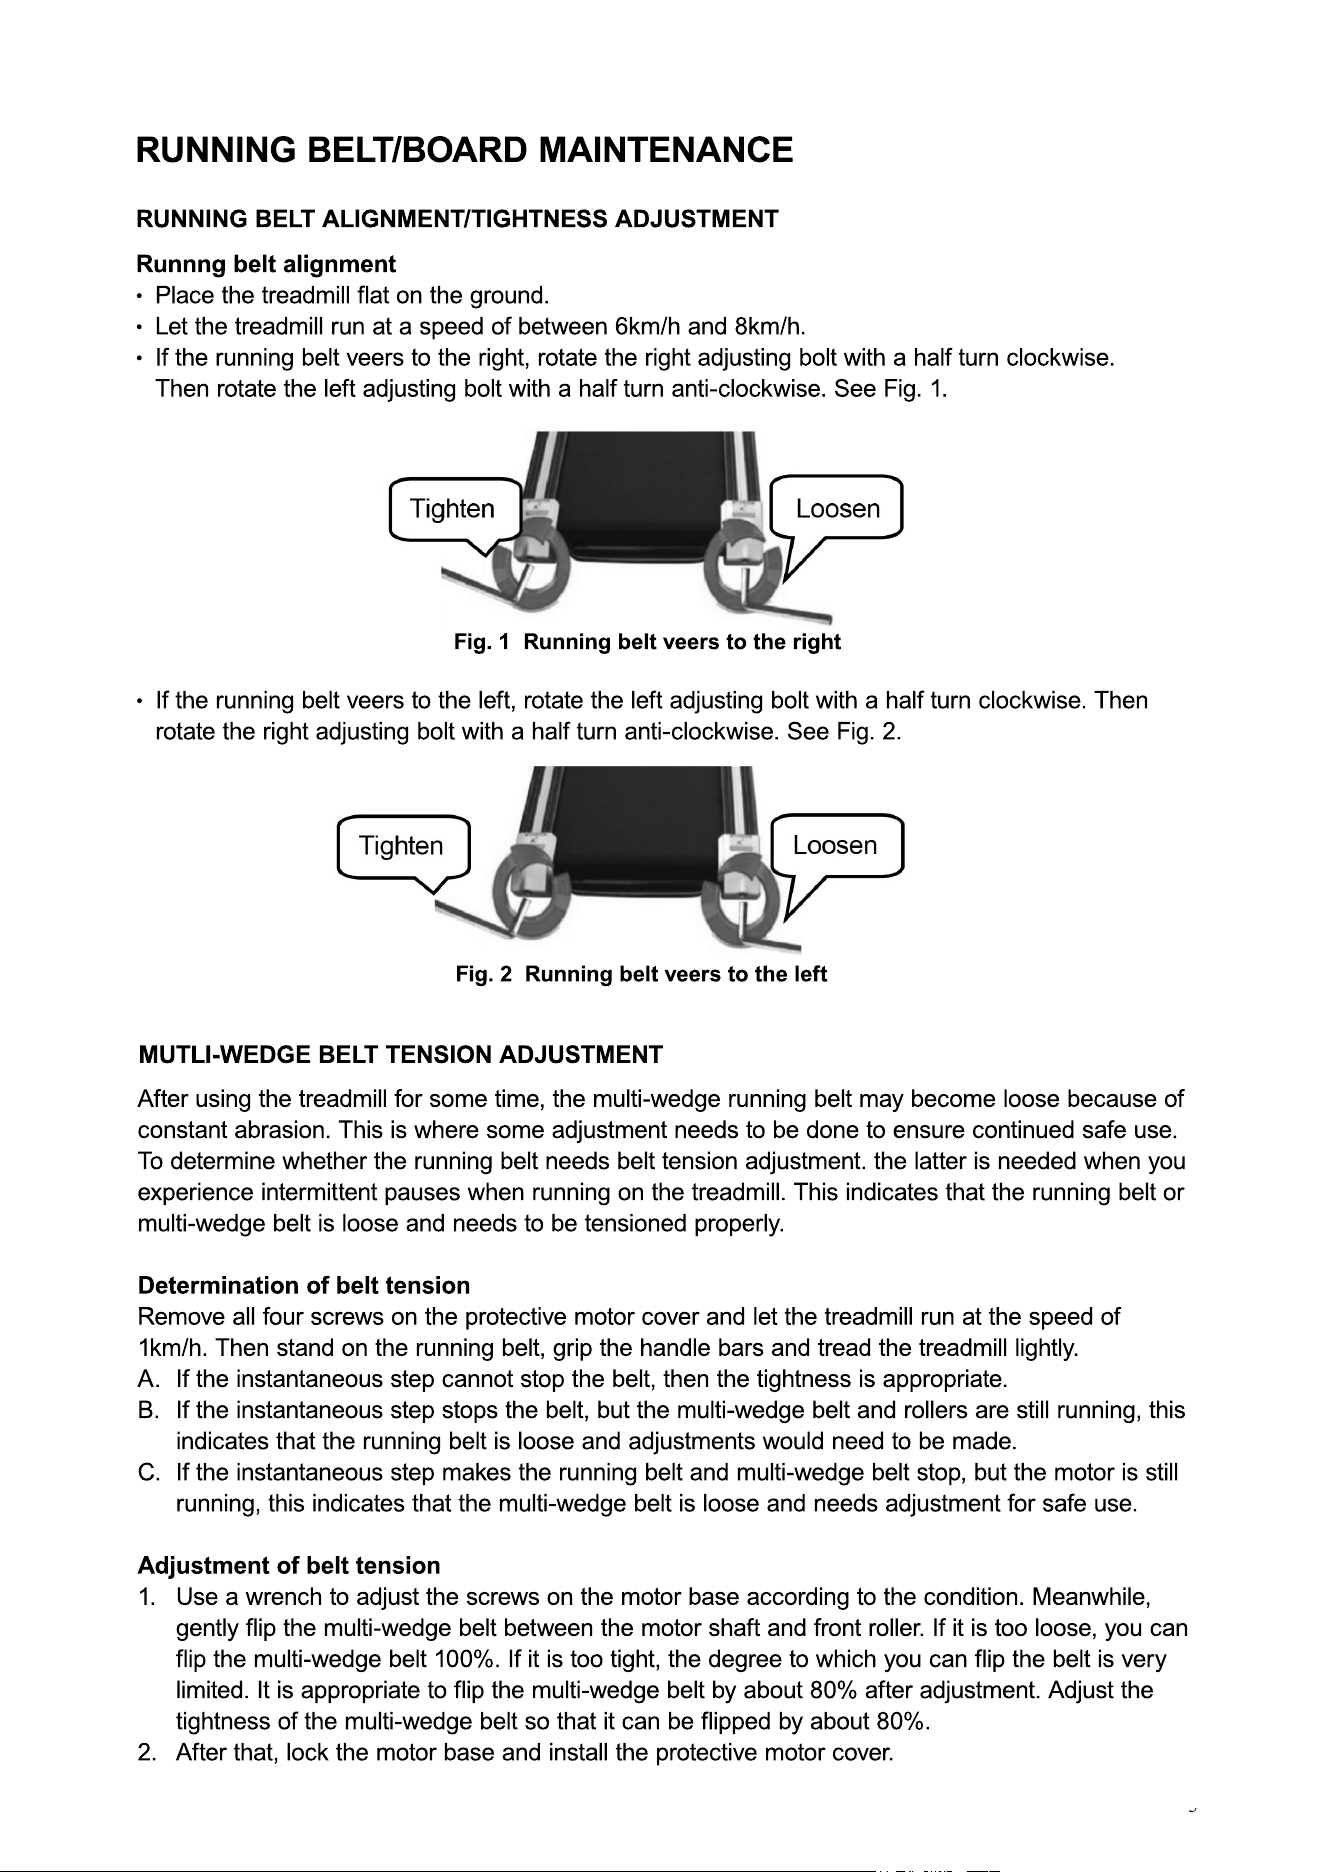
· If the running belt veers to the right, rotate the right adjusting bolt with a half turn clockwise.
Then rotate the left adjusting bolt with a half turn anti-clockwise. See Fig. 1.
After using the treadmill for some time, the multi-wedge running belt may become loose because of
constant abrasion. This is where some adjustment needs to be done to ensure continued safe use.
To determine whether the running belt needs belt tension adjustment. the latter is needed when you
experience intermittent pauses when running on the treadmill. This indicates that the running belt or
multi-wedge belt is loose and needs to be tensioned properly.
Determination of belt tension
RRemove all four screws on the protective motor cover and let the treadmill run at the speed of
1km/h. Then stand on the running belt, grip the handle bars and tread the treadmill lightly.
A. If the instantaneous step cannot stop the belt, then the tightness is appropriate.
B. If the instantaneous step stops the belt, but the multi-wedge belt and rollers are still running, this
indicates that the running belt is loose and adjustments would need to be made.
C. If the instantaneous step makes the running belt and multi-wedge belt stop, but the motor is still
running, this indicates that the multi-wedge belt is loose and needs adjustment for safe use.
AAdjustment of belt tension
1. Use a wrench to adjust the screws on the motor base according to the condition. Meanwhile,
gently flip the multi-wedge belt between the motor shaft and front roller. If it is too loose, you can
flip the multi-wedge belt 100%. If it is too tight, the degree to which you can flip the belt is very
limited. It is appropriate to flip the multi-wedge belt by about 80% after adjustment. Adjust the
tightness of the multi-wedge belt so that it can be flipped by about 80%.
2. After that, lock the motor base and install the protective motor cover.
· If the running belt veers to the left, rotate the left adjusting bolt with a half turn clockwise. Then
rotate the right adjusting bolt with a half turn anti-clockwise. See Fig. 2.
Fig. 1 Running belt veers to the right
Fig. 2 Running belt veers to the left
MUTLI-WEDGE BELT TENSION ADJUSTMENT