G
o
lfe
y
e
U
s
e
r
Ma
nu
a
l
万
彩
信
息
科
技
有
限
公
司
Wancai Information Technology Co., Ltd.
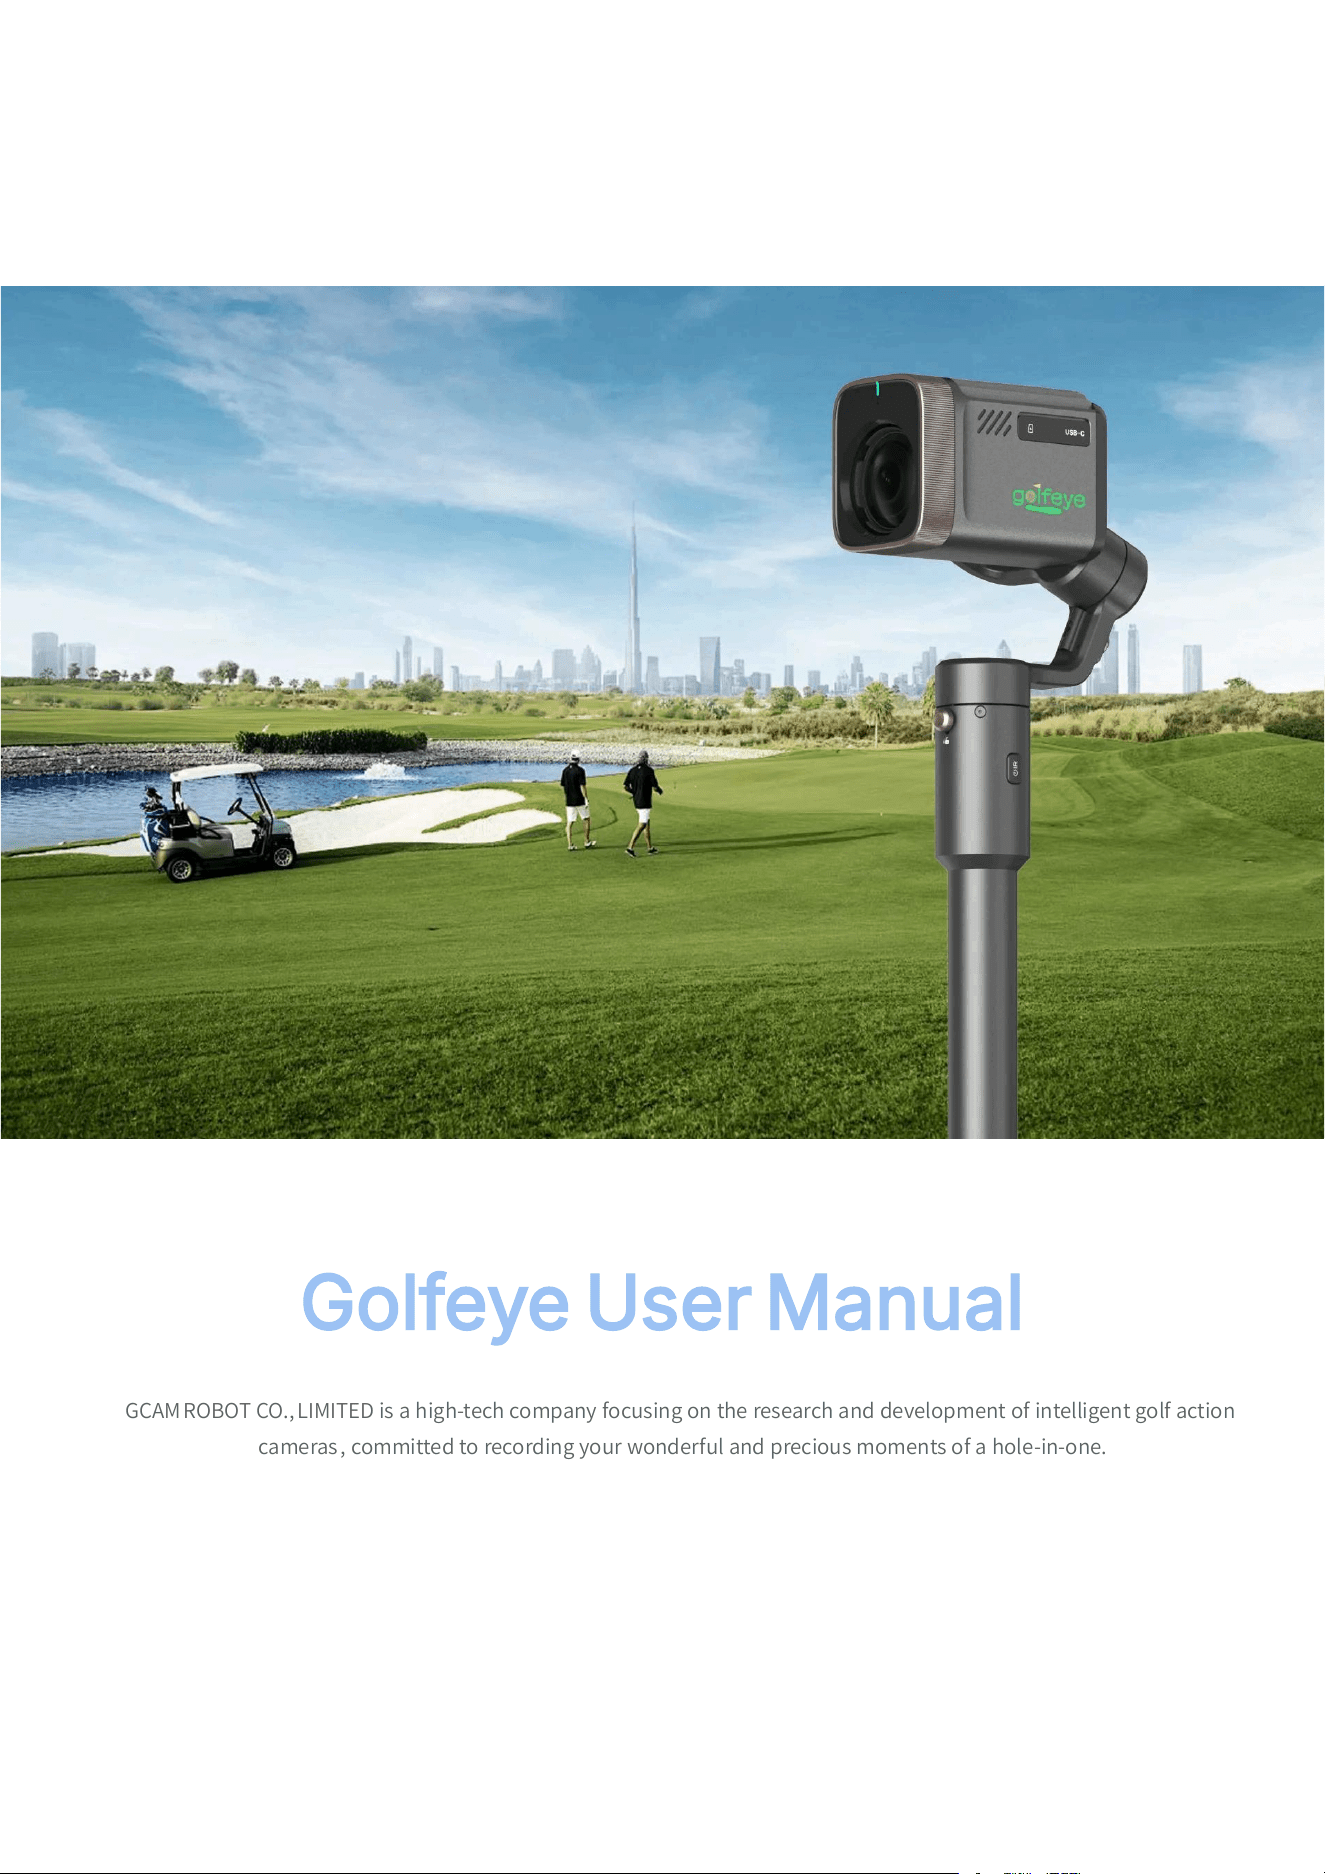
GCAMROBOT CO.,LIMITED is a high-tech company focusing on the research and development of intelligent golf action
cameras, committed to recording your wonderful and precious moments of a hole-in-one.
Contents
1. Package Contents 3
2. Equipment Assembly 4
3. Product Overview 5
4. Structure & Controls (Views & Keys) 6
5. Ports & Interfaces 7
6. Display & Recording Modes 8
7. Motor Locks — Unlock Before Use 9
8. On-Course Setup & Recording 10
9. AI Golfeye App & Wi-Fi 12
10. Customer Service & Support 13
1. Package Contents
Open the box and confirm all 8 items are present before use. If anything is missing, contact customer
service (page 13).
# Item Qty Notes
1 Intelligent Action Camera 1 Main device
2 Camera Protective Bag 1 Soft bag for storage
3 Extension Rod 1 Pole connecting camera to base
4 Ground Stake 1 For golf course turf
5 Ground Stake Protective Sleeve 1 Covers the stake
6 Tripod 1 For flat ground / driving range
7 Power Adapter 1 For charging
8 Data Cable 1 USB, for charging and data transfer
All 8 items shown in the package. The numbered callouts (
①
–
⑧
) correspond to the table above.
Before you start — quick checklist
1. Charge the
battery
Use the Power Adapter (item 7) and the Charge USB on the left side
2. Unlock all 3
motor locks
Push the 3 levers down (see page 9)
3. Mount the
camera
Attach the Extension Rod (item 3) to the camera body
Key features: 18× zoom lens · 3-axis gimbal stabilization · touchscreen control · AI Golfeye mobile app ·
voice activation.
— 3 —
2. Equipment Assembly
Follow these 5 steps to set up the camera on the course.
# Step Action Image Notes
1 Open & take out
Take the camera out of its protective bag.
Confirm all 8 items are present. Hold the
camera body firmly. The lens and 3-axis
gimbal are on top — keep them
protected from impact during handling.
8 items
check
Protect
lens +
gimbal
2 Screw tripod/spike
Screw the tripod or ground spike into the
hole at the bottom of the extension rod.
Pick one based on your course.
Course =
ground
spike
(stake into
grass)
Flat
ground =
tripod
(open
legs)
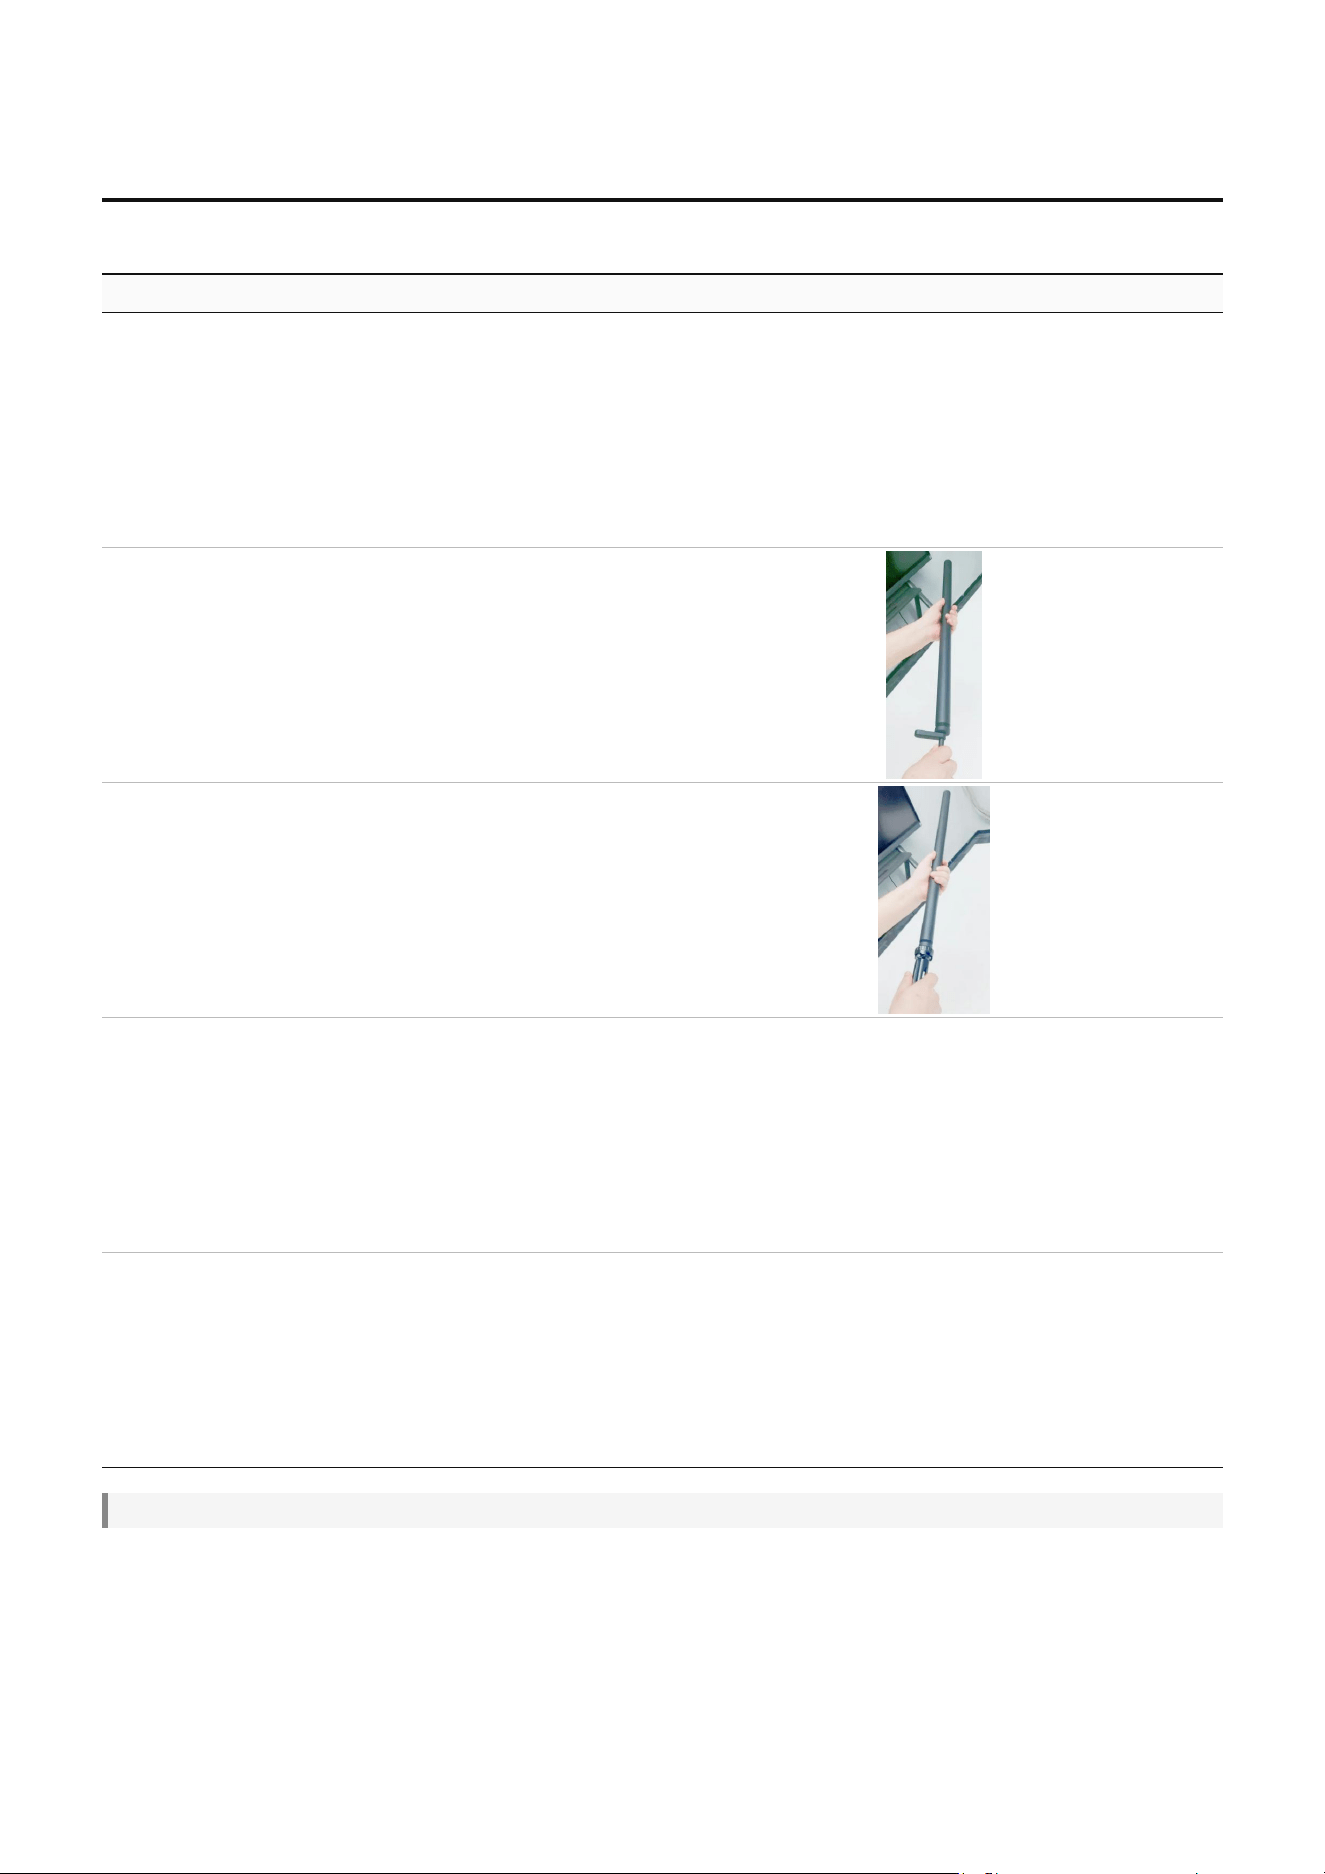
3 Screw extension rod
Screw the extension rod into the bottom
of the camera along the thread. Turn
clockwise until snug.
Hand-
tight only
— do not
use tools.
4 Screw rod to camera
Thread the extension rod (with
tripod/spike already attached) up into the
camera body's threaded base. Hand-
tighten only.
Camera
lens +
gimbal
face up
Match
thread
orientation
5 Place on course
Place the assembled device at the
chosen position. Insert 3–8 m from the
hitting point (4–5 m recommended).
(a) Course (b) Standard
Spike =
course
green,
tripod =
flat
ground
Note: The exact placement depends on the mode you choose — see §8 for real-course placement guidance.
— 4 —
3. Product Overview
Golfeye G20 is a portable AI Golf Camera built for real golf courses. It automatically captures your swing,
tracks the ball flight, and relives the landing moment, stabilizes the view with a 3-axis gimbal, and connects
to your phone for preview and sharing.
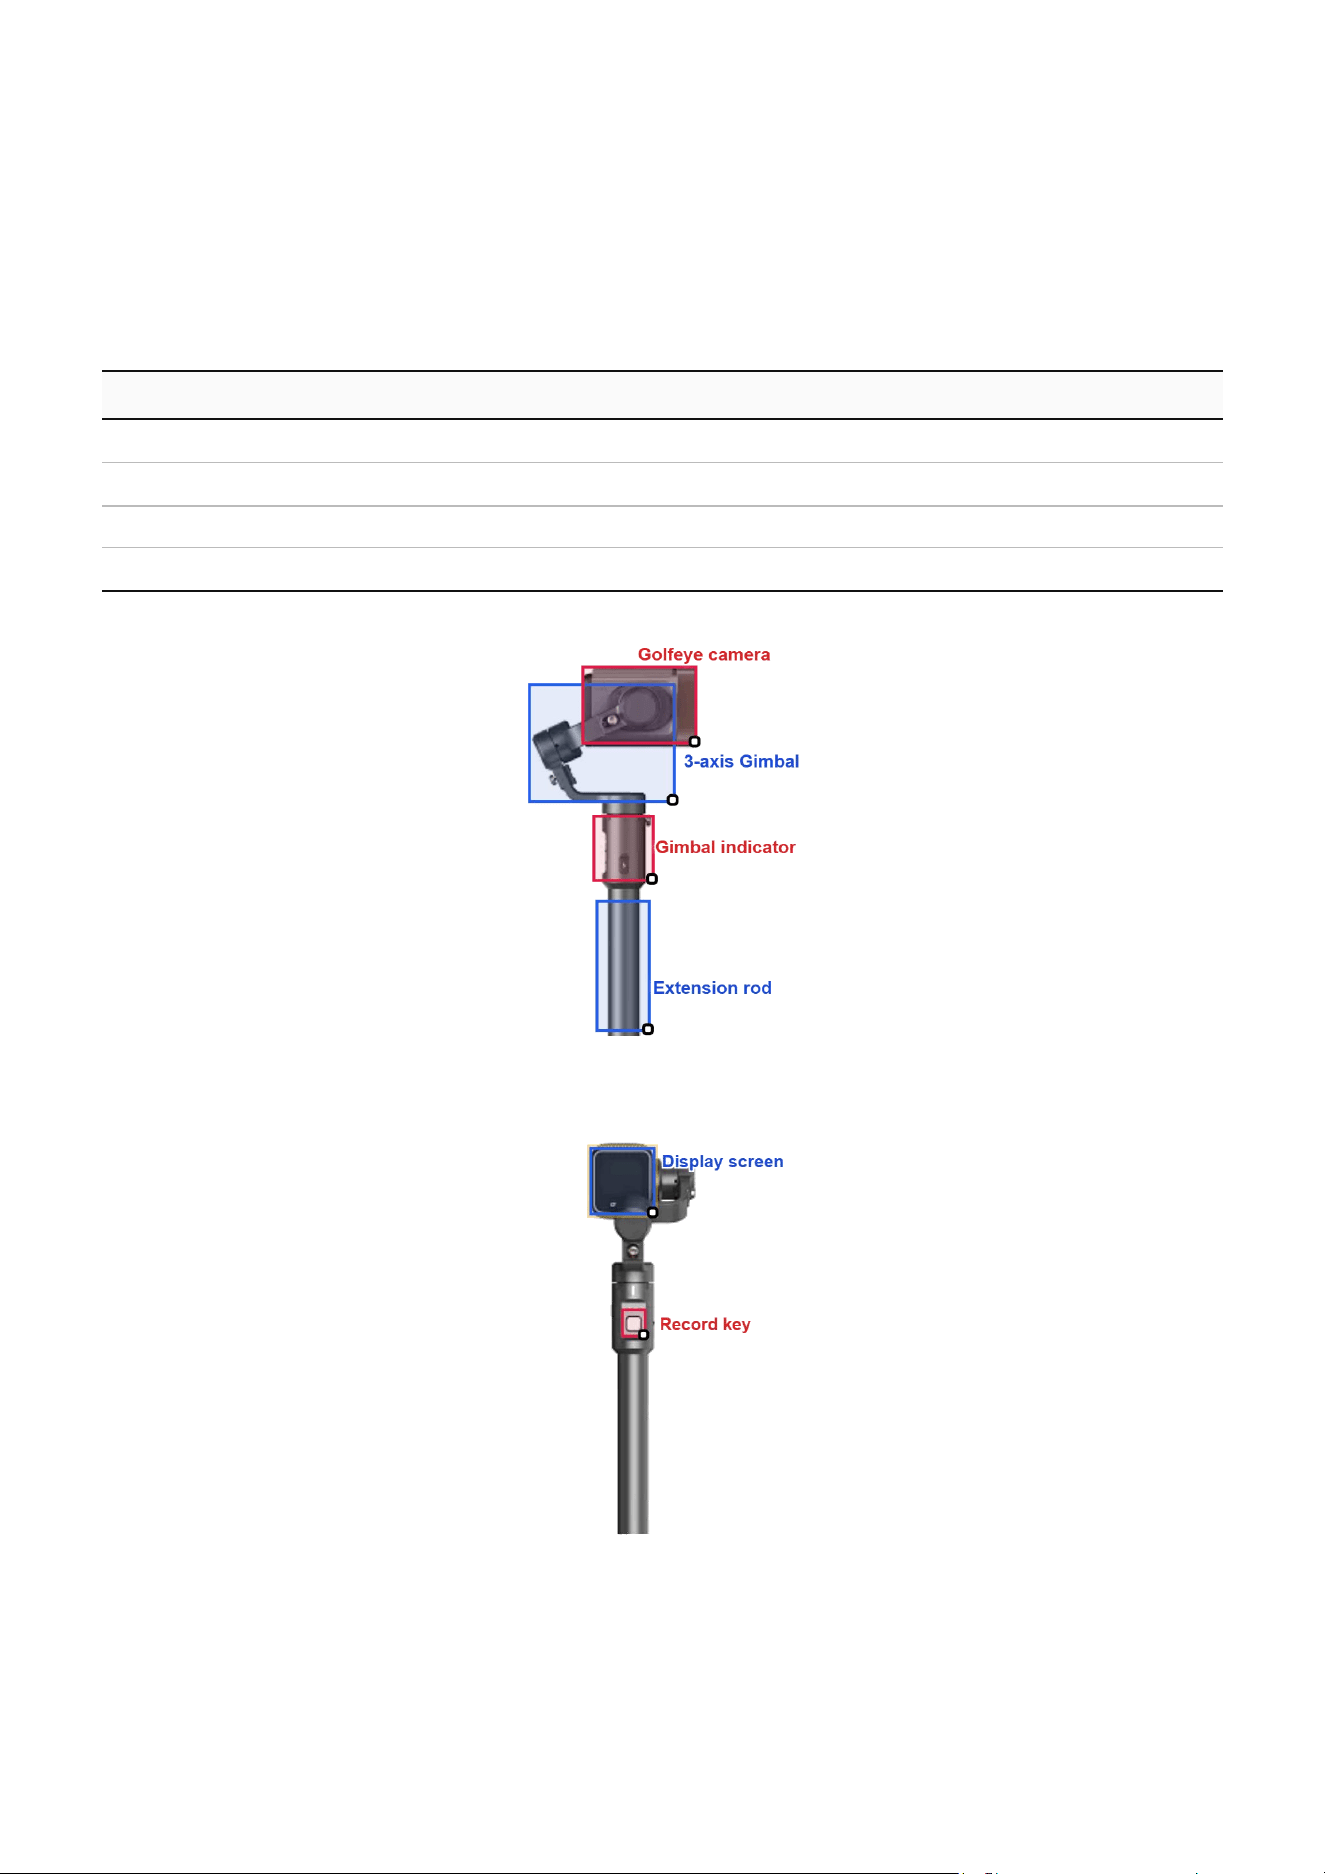
4 main parts (top to bottom)
# Part Function
1 Camera (body + 18× zoom lens) High-zoom video capture of your swing
2 3-axis Gimbal Mechanical stabilization; auto-follows the swing
3 Gimbal Indicator Status light on the gimbal
4 Extension Rod Pole with 1/4" screw thread at the bottom for tripod / stake
Main view of the camera. The 4 main parts are stacked top to bottom.
Back view: display screen, Record key, and the 3 motor locks (top to bottom on the left side).
— 5 —
4. Structure & Controls
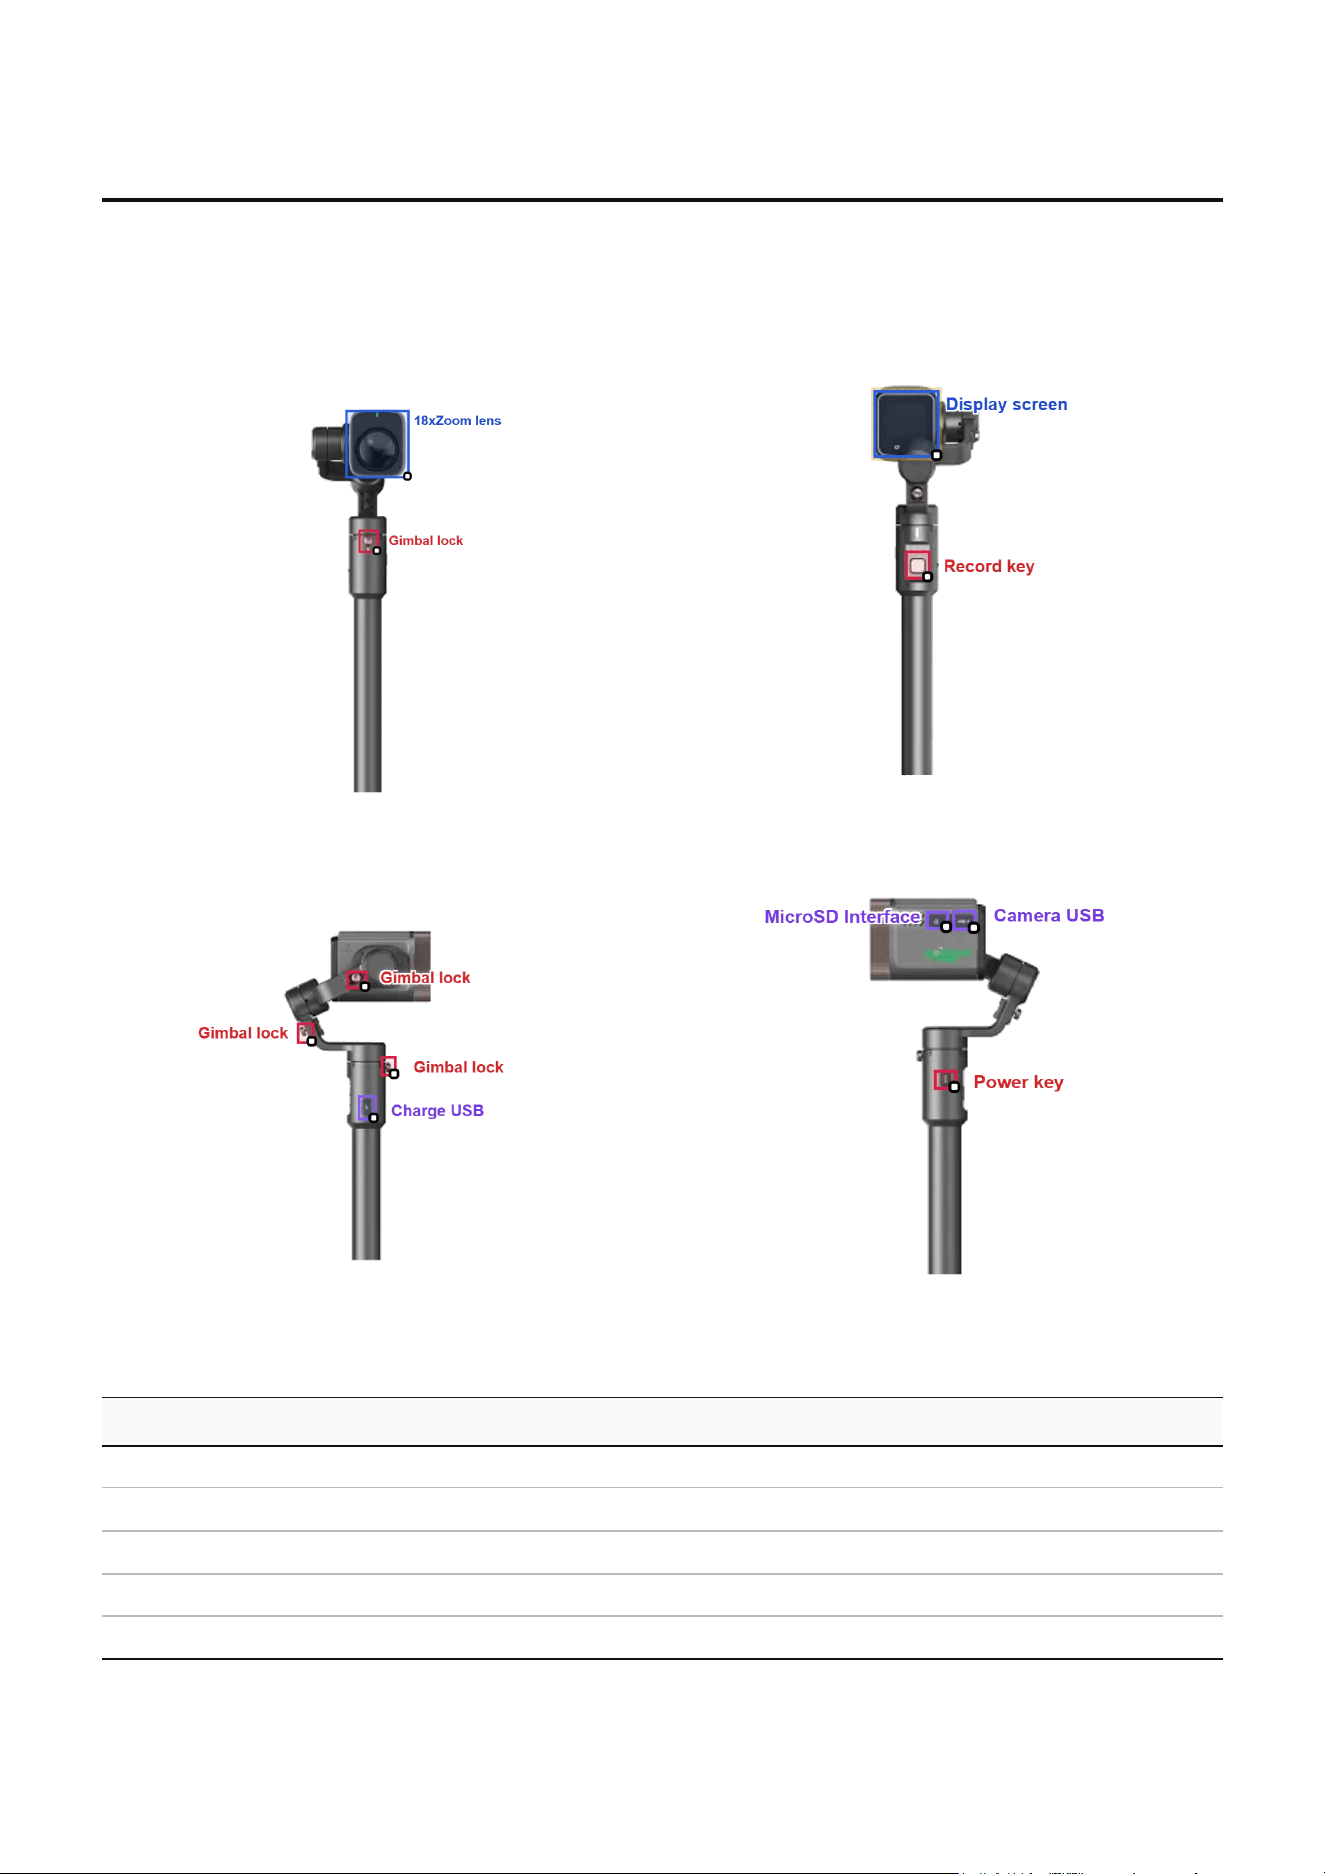
The camera has only 2 physical buttons (Record + Power) and 3 motor-lock levers. Most interaction
happens on the touchscreen (page 8) and the AI Golfeye app (page 12).
4.1 Four views of the camera
Front: 18× zoom lens + 1 motor lock Back: Display screen + Record key
Left: 3 motor locks + Charge USB Right: microSD + USB + Power key
4.2 Physical buttons & levers (5 items)
# Control Where What it does
1 Record key (red dot) Back of camera, center Short press = start / stop recording
2 Power key Right side, middle Long-press for 6–8 seconds = power on / off
3 Front Motor Lock Left side, top Switch down to unlock (see page 9)
4 Right Motor Lock Left side, middle-left Switch down to unlock
5 Rear Motor Lock Left side, middle-right Switch down to unlock
— 6 —
5. Ports & Interfaces
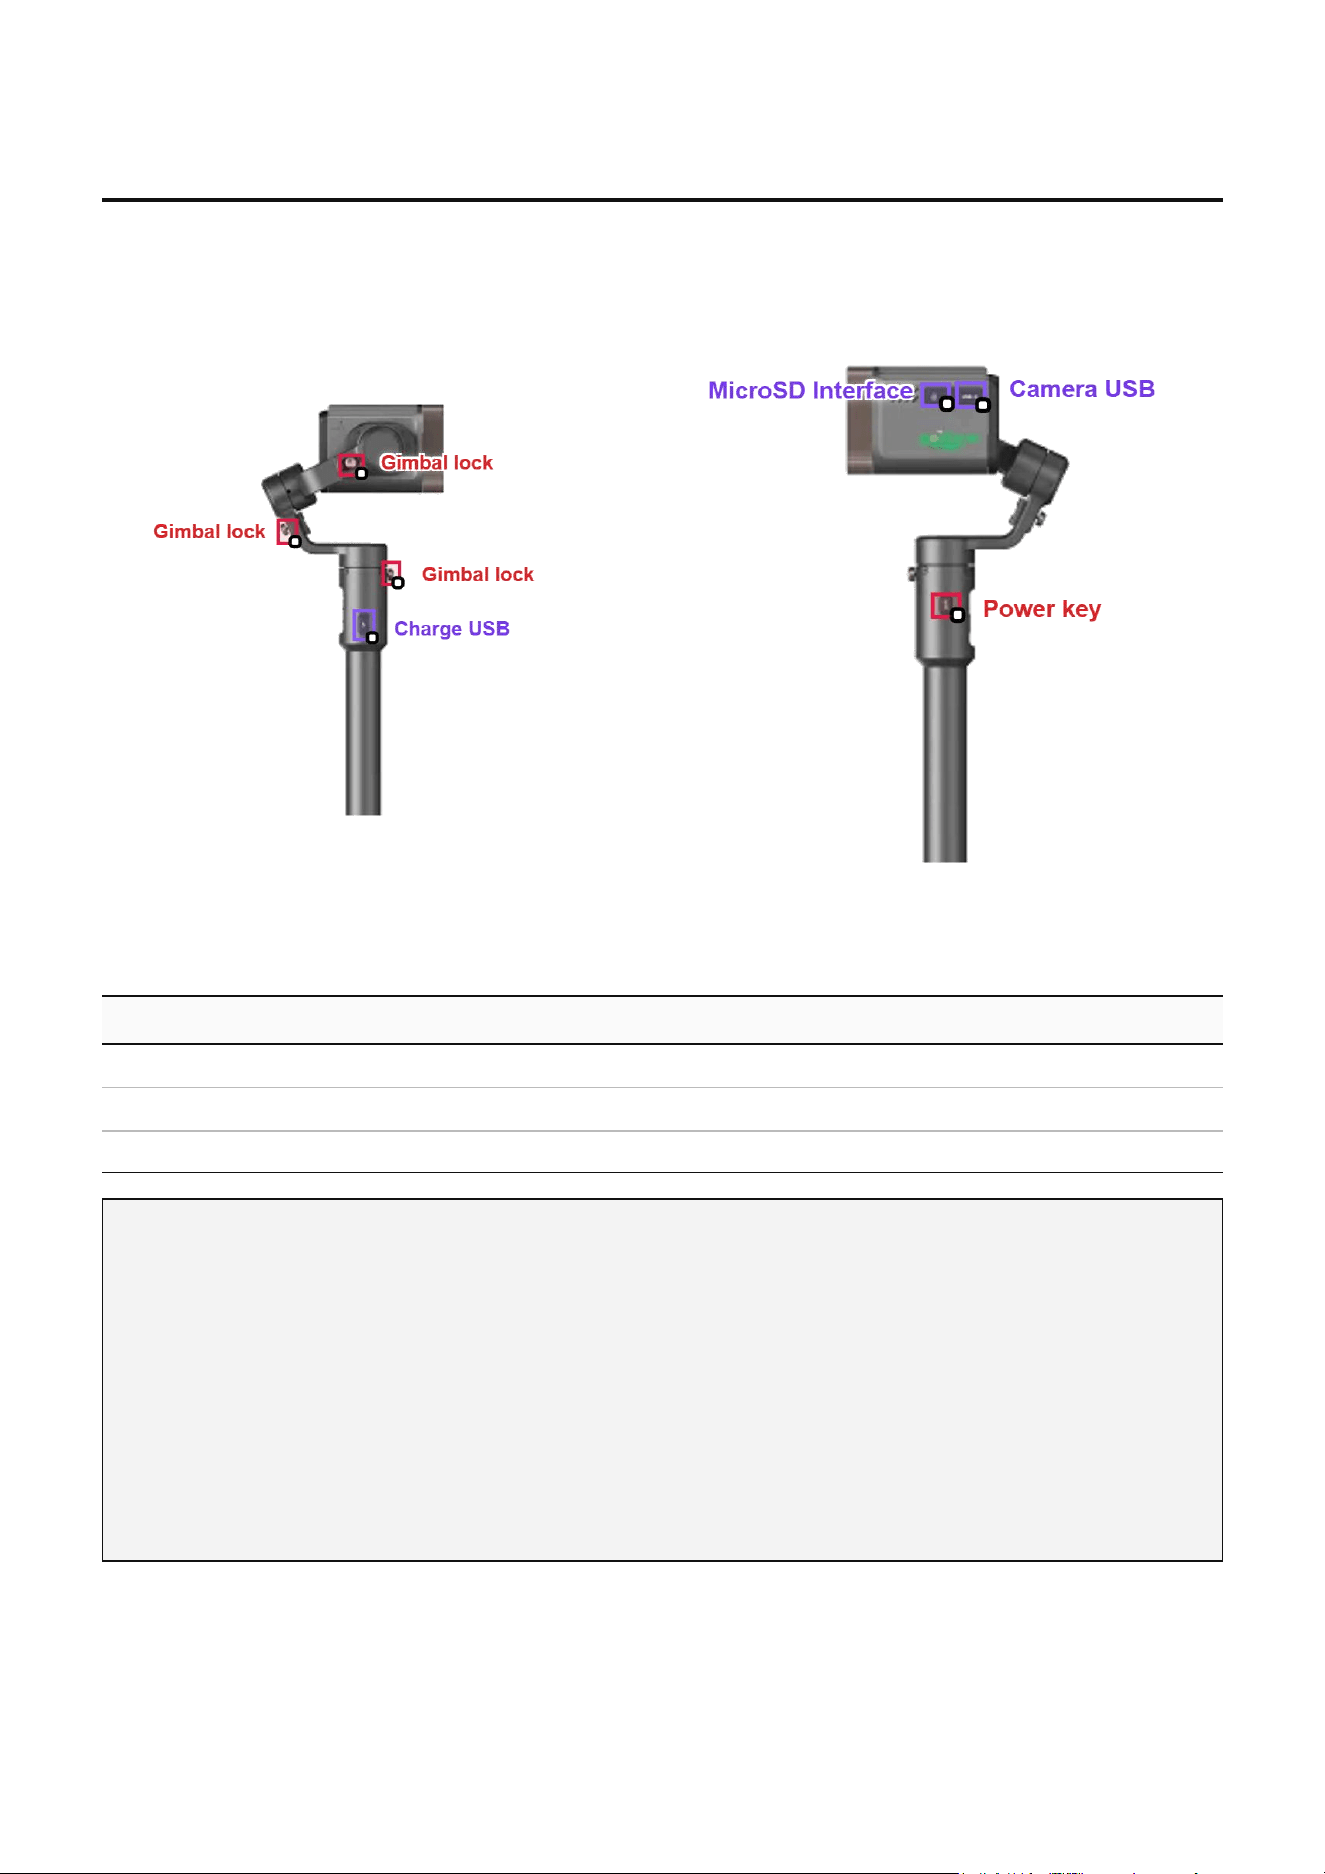
All ports are under rubber covers on the sides of the device. Lift the cover gently to access; press it back
when finished.
Left side: Charge USB (mid)
Right side: microSD + Camera USB (top)
Ports & indicators (3 items)
# Port / Indicator Where What it does
9 microSD Interface Right side, top (under cover) Card slot — Class 10 / U3, 64 GB+
10 Camera USB Right side, top (next to microSD) Data transfer to PC
11 Charge USB Left side, middle Charging only
Note: The Charge USB and Camera USB look the same but have different functions. Use the Charge USB
on the left for charging only; use the Camera USB on the right for data transfer.
microSD card: Class 10 / U3, 64 GB+ recommended (not included). The device has 64 GB internal storage
(≈36 GB available) for local recording.
Charging: full charge takes ≈2.5 hours. The LED next to the Charge USB turns red while charging and
green when complete.
Battery life: ≈6–7 hours on a full charge.
— 7 —
6. Display & Recording Modes
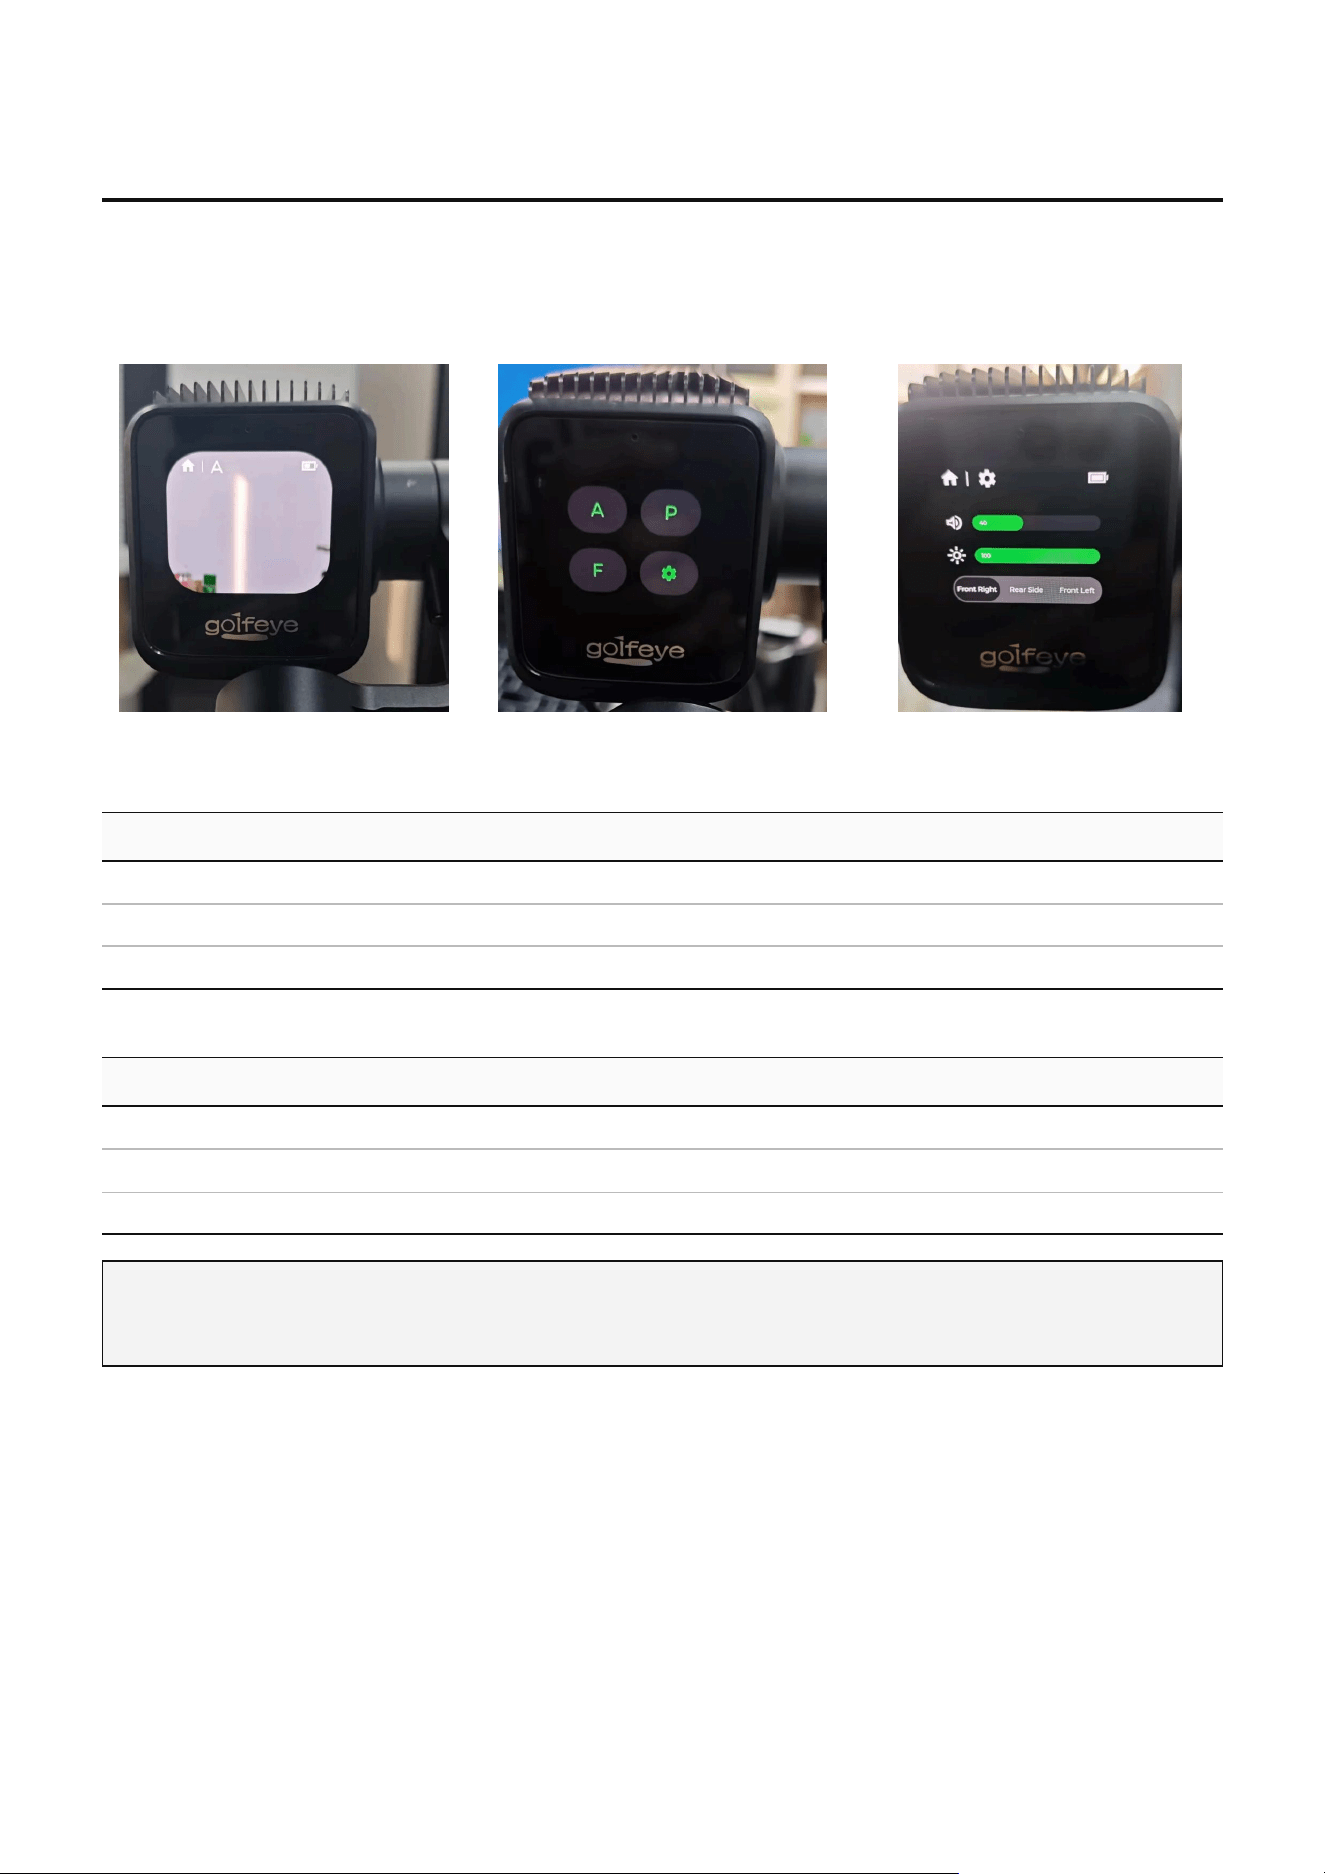
The camera's touchscreen (dark mode) is the main interface. The app (page 12) is only for live preview,
remote control, and downloading.
6.1 The device touchscreen
Mode A live preview Mode selector (A / P / F) Settings & Camera View
6.2 Three recording modes
# Mode Best for What it does Slope-adj.
A Auto Recording Driver, woods, irons, wedges Default — auto-detect & record ✓
P Putter Putting strokes Records putts for review ✓
F Freestyle Custom use Swipe to pan; adjust zoom ✓
6.3 Camera View options
# View Best for
1 Front-Right (default) Records forward-facing swing (right-handed)
2 Rear Side Records rear side swing
3 Front-Left Records forward-facing swing (left-handed)
How to switch modes: On the device touchscreen, tap the mode letter (A / P / F) at the top center. Use the
red-circle icon for pan / tilt, and the red-box icon for settings.
— 8 —
7. Motor Locks — Unlock Before Use
⚠
CRITICAL
Before powering on, you MUST unlock all 3 motor locks. If you skip this step,
the gimbal will not work.
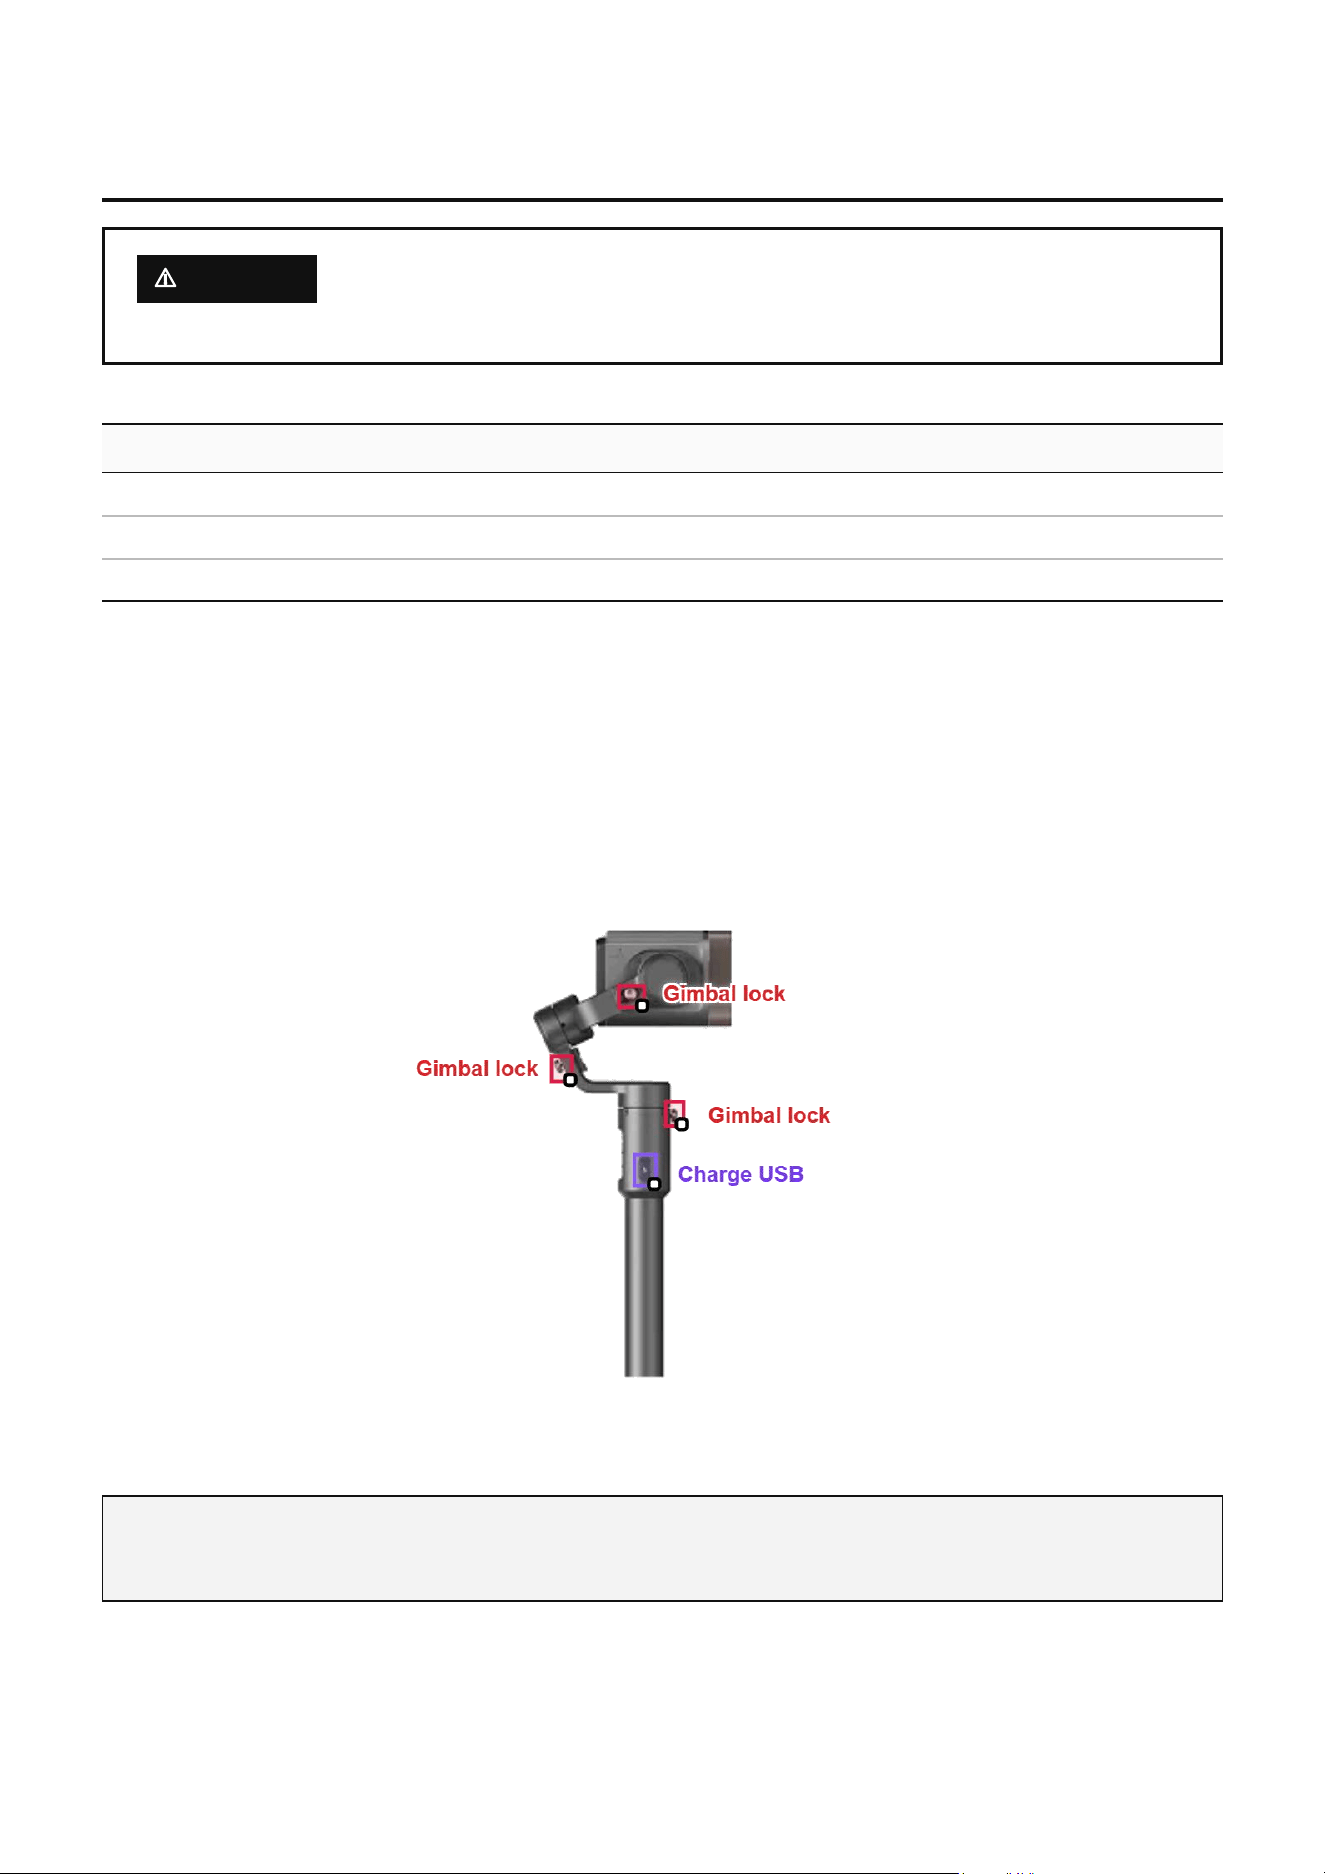
7.1 The 3 motor locks
# Lock Position on the device
1 Front Motor Lock Left side, top
2 Right Motor Lock Left side, middle-left
3 Rear Motor Lock Left side, middle-right
7.2 How to unlock
. Locate the 3 lock levers on the left side of the device.
2. Push all 3 levers down.
3. Confirm: no red mark visible on any lever = unlocked.
4. Now you may press the power key to turn on the device.
Left side of the device. The 3 motor locks are at the top and middle; the Charge USB is below them.
Re-lock before transport: Push the 3 levers back up before putting the camera in the bag, to protect the
gimbal from damage.
— 9 —
8. On-Course Setup & Recording
8.1 Placement parameters (per mode)
Each mode has its own recommended placement. Pick the mode that matches your shot, then set the
device up as follows.
General workflow for all 3 modes: Power on → mount the device (ground stake / tripod / handheld) → press Record (or say
“Golfeye Go”); the app can also start recording See the per-mode section below for placement specifics.
Parameter A — Auto Recording (fairway) P — Putter (green / short) F — Freestyle (custom)
Distance 3–8 m to hitting point
3-10 m to ball (stake outside
green)
—
Angle
85° ± 15° (device – flagstick/target
fairway – hitting point)
0–90° offset (lens facing putt
direction)
—
Direction
Camera’s white arrow aligned
with the flagstick (target fairway)
Lens pointed at the ball (not the
hole)
—
Default view Records forward-facing swing Straight-on (Front view) —
Tracking Swing / flight / landing Ball-rolling: start → putt → drops —
Body pos. Right-handed = Front-Right view
Device on green edge, beside ball
line
—
8.2 Three ways to start recording & voice prompts
Voice: say “Golfeye Go” to the camera.
Record key: press the red-dot button on the back of the camera.
App: open the AI Golfeye app on your phone → tap the Mode button (A / P / F) to start recording remotely — same prompts as
voice control below.
Prompt Meaning
“Start” Recording has started
“Ready” You may swing now
“No ball found” Ball not detected — check the tee / ball position
“Finish” Recording has ended
“Cancel” You pressed the Record key to stop mid-recording
Important: Between “Start” and “Ready”, don't walk between the ball and the Golfeye.
—10—
8.3 A Mode — auto-capture swing, ball flight and landing point
Setup: Place Golfeye between the hitting point and the flagstick/target fairway. Aim the white arrow at the flagstick or target fairway.
Body position — what gets recorded:
• Forward-facing swing (front-right & front-left views of the player)
• Rear-side swing (rear view of the player)
8.4 Image references
Flagstick & target area — visible on preview. Line overlay — draw a line flagstick → ball landing (in app).
8.5 P mode — putter auto-capture
Note: Recording must be stopped manually first, then switch to Mode A to continue recording.
0–90° offset (lens facing putt direction) — place the device on the green edge, lens pointed at the ball (not the hole). The exact angle
depends on the lie; the closer the ball, the smaller the offset.
8.6 F mode — freestyle capture
F mode is fully freestyle. You can move the device anywhere and shoot from any angle. The camera will
automatically start and stop recording based on your movement and scene changes.
—11—
9. AI Golfeye App & Wi-Fi
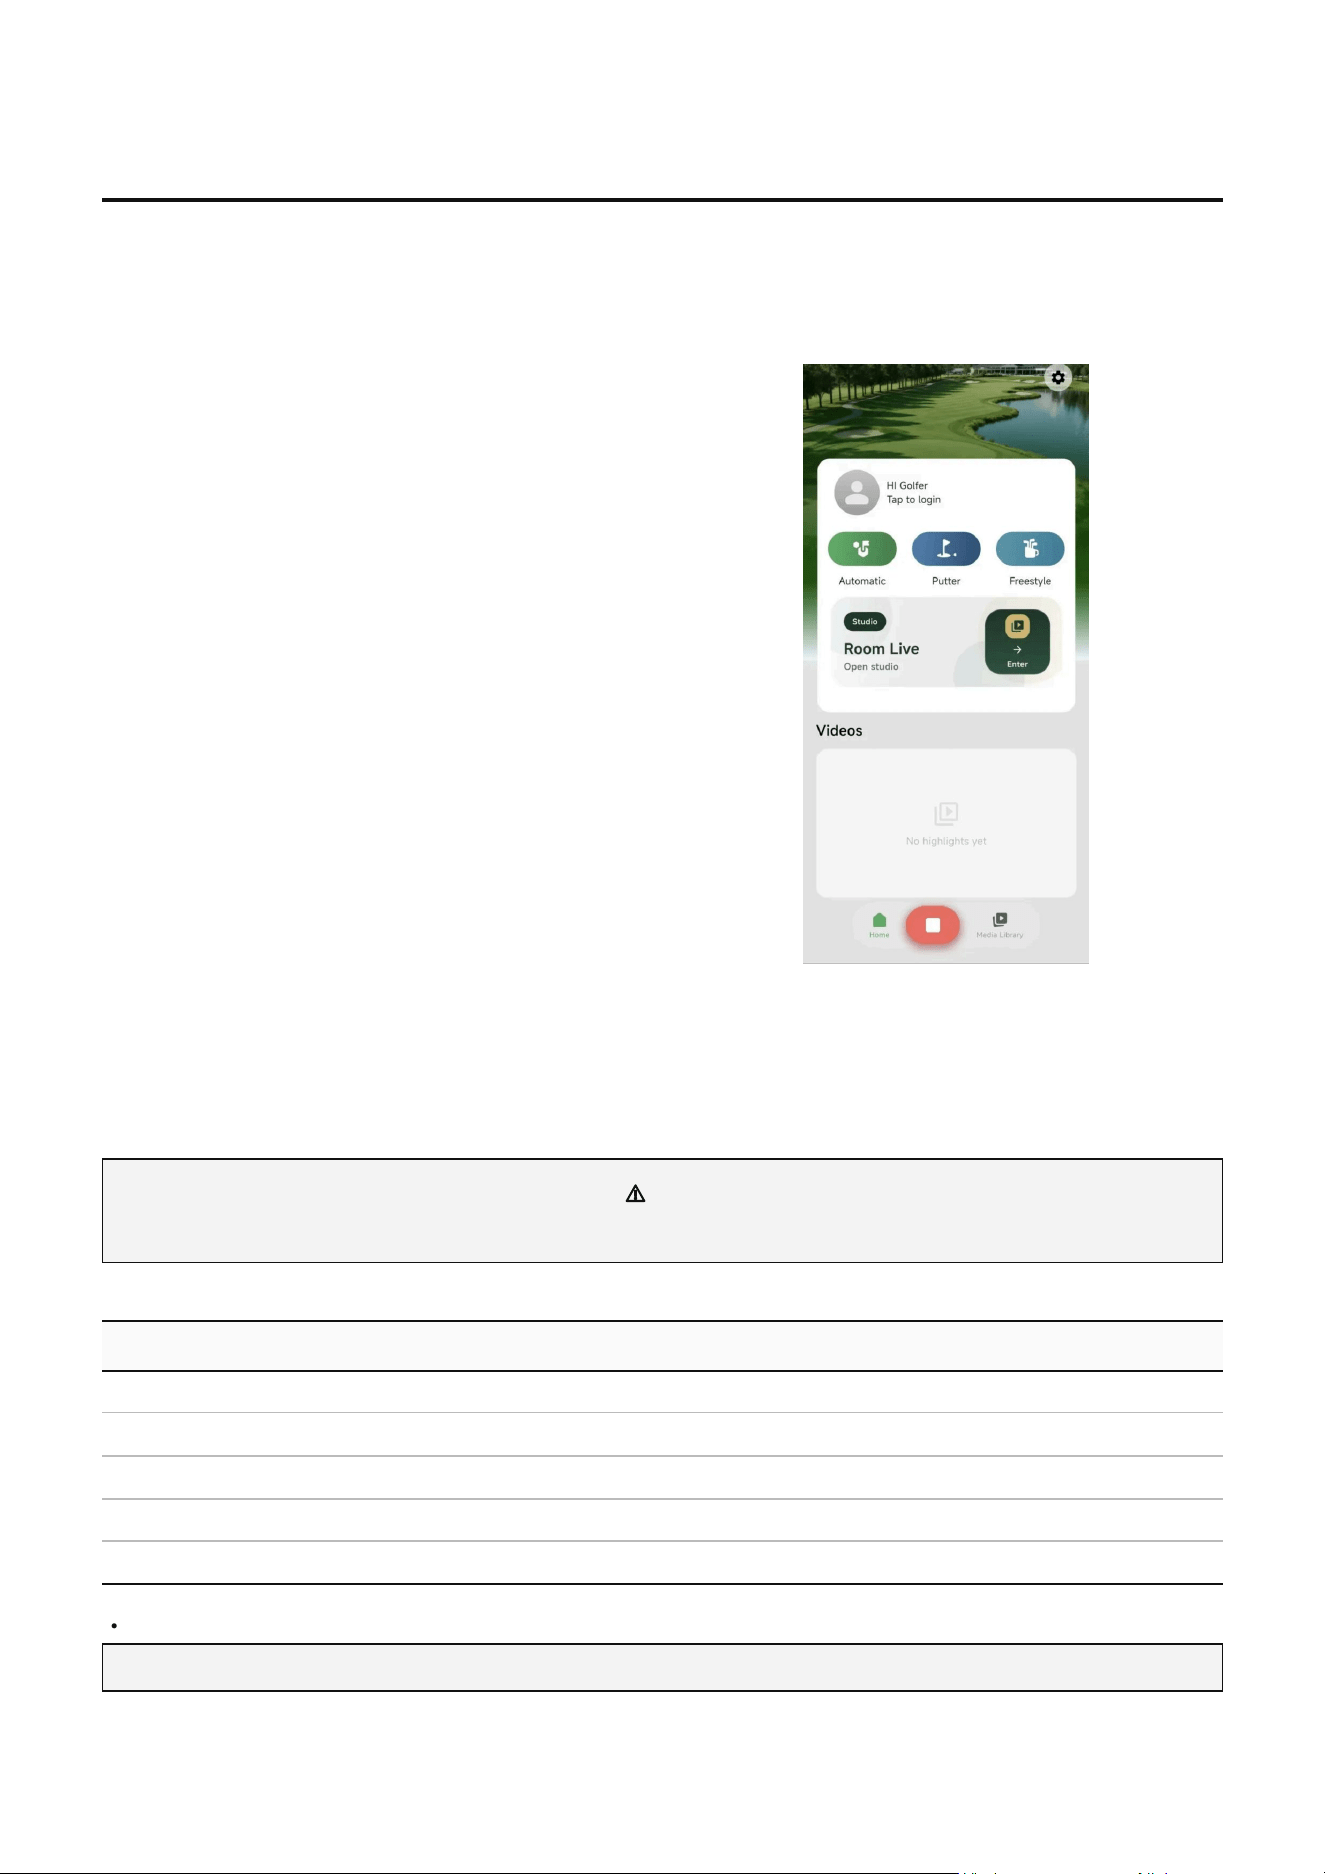
The app is for: live preview, remote control, downloading, and sharing. All primary controls remain on
the device touchscreen.
9.1 The AI Golfeye app
AI Golfeye App — Scan to download Golf Live — available on App Store / Google Play
9.2 Connect in 3 steps
1) Download AI Golfeye (App Store / Google Play). 2) Long-press Power 6–8s, wait for green LED. 3) In
app, gear icon → Wi-Fi Connection → pick Golfeye-XXXX → enter password.
Wi-Fi password: AIGolf54321 (case-sensitive).
⚠
Do NOT pair in system Wi-Fi — only through the
app.
9.3 What you can do in the app
# Action Where in the app
1 Live preview of the device screen Home → Mode A (or P / F)
2 Download a video to the phone Videos → More → tap the purple button
3 Delete a video from the device Videos → More → tap the red-dashed button
4 Auto-download new videos Settings → ON “Auto Download Video”
5 Auto-create highlight videos Settings → ON “Auto Create Highlight”
Start Live Stream — Home → Room Live.
Tip: For full backups, use the USB data cable.
— 12 —
10. Customer Service & Support
We are here to help. Reach out anytime for product questions, app support, warranty, or replacement parts.
10.1 Contact us
Phone (hotline) +86-18923898977
Website www.golfeye.com
Address Unit 1311, 13/F, Delta House, 3 On Yiu Street, Shatin, Hong Kong
Manufacturer Wancai Information Technology Co., Ltd.
10.2 What we can help with
Missing or damaged parts in the package (see page 3).
Wi-Fi connection or app setup questions.
Video download, sharing, and AI Golfeye account questions.
Warranty and replacement requests.
Firmware updates for the camera.
Before you call: Please have the camera powered on and your phone's Wi-Fi settings ready. This will help
us solve your problem faster.
10.3 Online resources
Video tutorials Scan the QR code on the back cover
User Manual (full)
Available at www.golfeye.com — 25 pages, detailed specifications and
parameters
Certifications FCC / CE / RoHS (see manufacturer documentation)
10.4 Quick troubleshooting
Problem Try this
Camera won't turn
on
Charge the battery · check that all 3 motor locks are unlocked · long-press Power for 8
seconds
Gimbal doesn't
move
All 3 motor locks must be in the down (unlocked) position before powering on
App can't find the
camera
Confirm the green LED is flashing · in the app, Settings → Wi-Fi Connection → pick
Golfeye-XXXX · default password AIGolf54321
— 13 —
FCC Warning Statement
FCC Warning statement: This device complies with part 15 of the FCC Rules. Operation is subject to
the following two conditions: (1) This device may not cause harmful interference, and (2) this device
must accept any interference received, including interference that may cause undesired operation.
Any changes or modifications not expressly approved by the party responsible for compliance could
void the user's authority to operate the equipment.
This equipment has been tested and found to comply with the limits for a Class B digital device,
pursuant to part 15 of the FCC Rules. These limits are designed to provide reasonable protection
against harmful interference in a residential installation. This equipment generates uses and can radiate
radio frequency energy and, if not installed and used in accordance with the instructions, may cause
harmful interference to radio communications. However, there is no guarantee that interference will not
occur in a particular installation. If this equipment does cause harmful interference to radio or television
reception, which can be determined by turning the equipment off and on, the user is encouraged to try
to correct the interference by one or more of the following measures:
Reorient or relocate the receiving antenna.
Increase the separation between the equipment and receiver.
Connect the equipment into an outlet on a circuit different from that to which the receiver is
connected.
Consult the dealer or an experienced radio/TV technician for help.
FCC RF exposure statement
The equipment complies with FCC radiation exposure limits set forth for an uncontrolled environment.
This equipment should be installed and operated with minimum distance between 20cm the radiator
your body.
Frequency stability: The frequency stability of this device is maintained within the band of operation
under all conditions of normal operation. The transmitter shall not be tuned or adjusted such that it
operates outside the authorized frequency band or bands of operation under any condition of normal
operation.