Thank you for your purchase!
Enjoy seamless Wi-Fi connectivity
throughout your home or office with your
new Extendtecc Pro/Speedwave Pro
AC1200 Wi-Fi Range Extender!
What’s in the box
● Wi-Fi Extender unit
● Factory Setup Guide
Get started in three easy steps
1. Plug in the device: Insert the Wi-Fi
booster into a power outlet halfway
between your router and where you
want a stronger signal.
It’s helpful to first plug it in close to
your router to set up and connect,
then you can move it anywhere that
needs a stronger signal.
2. Connect to the extender: Using
your computer, phone or tablet, open
your Internet/Wi-Fi settings and
connect to the new network name
(WiFi_XXXX).
The last 4 digits of your device MAC
address will display in the available
network list, such as “WiFi_XXX1”.
3. Follow setup instructions: Follow the in-app prompts to pair the extender with
your existing Wi-Fi network, then enjoy a stronger Wi-Fi signal throughout your
space.
Wi-Fi Extender Setup
1. Plug in the unit and wait for 30 seconds. It’s often helpful to plug
it in close to your router for set up, then you can move it to
wherever you want a signal boost. The green LAN, 2.4G, 5G,
and Extender lights will display. After about a minute, the 2.4G
light will turn green.
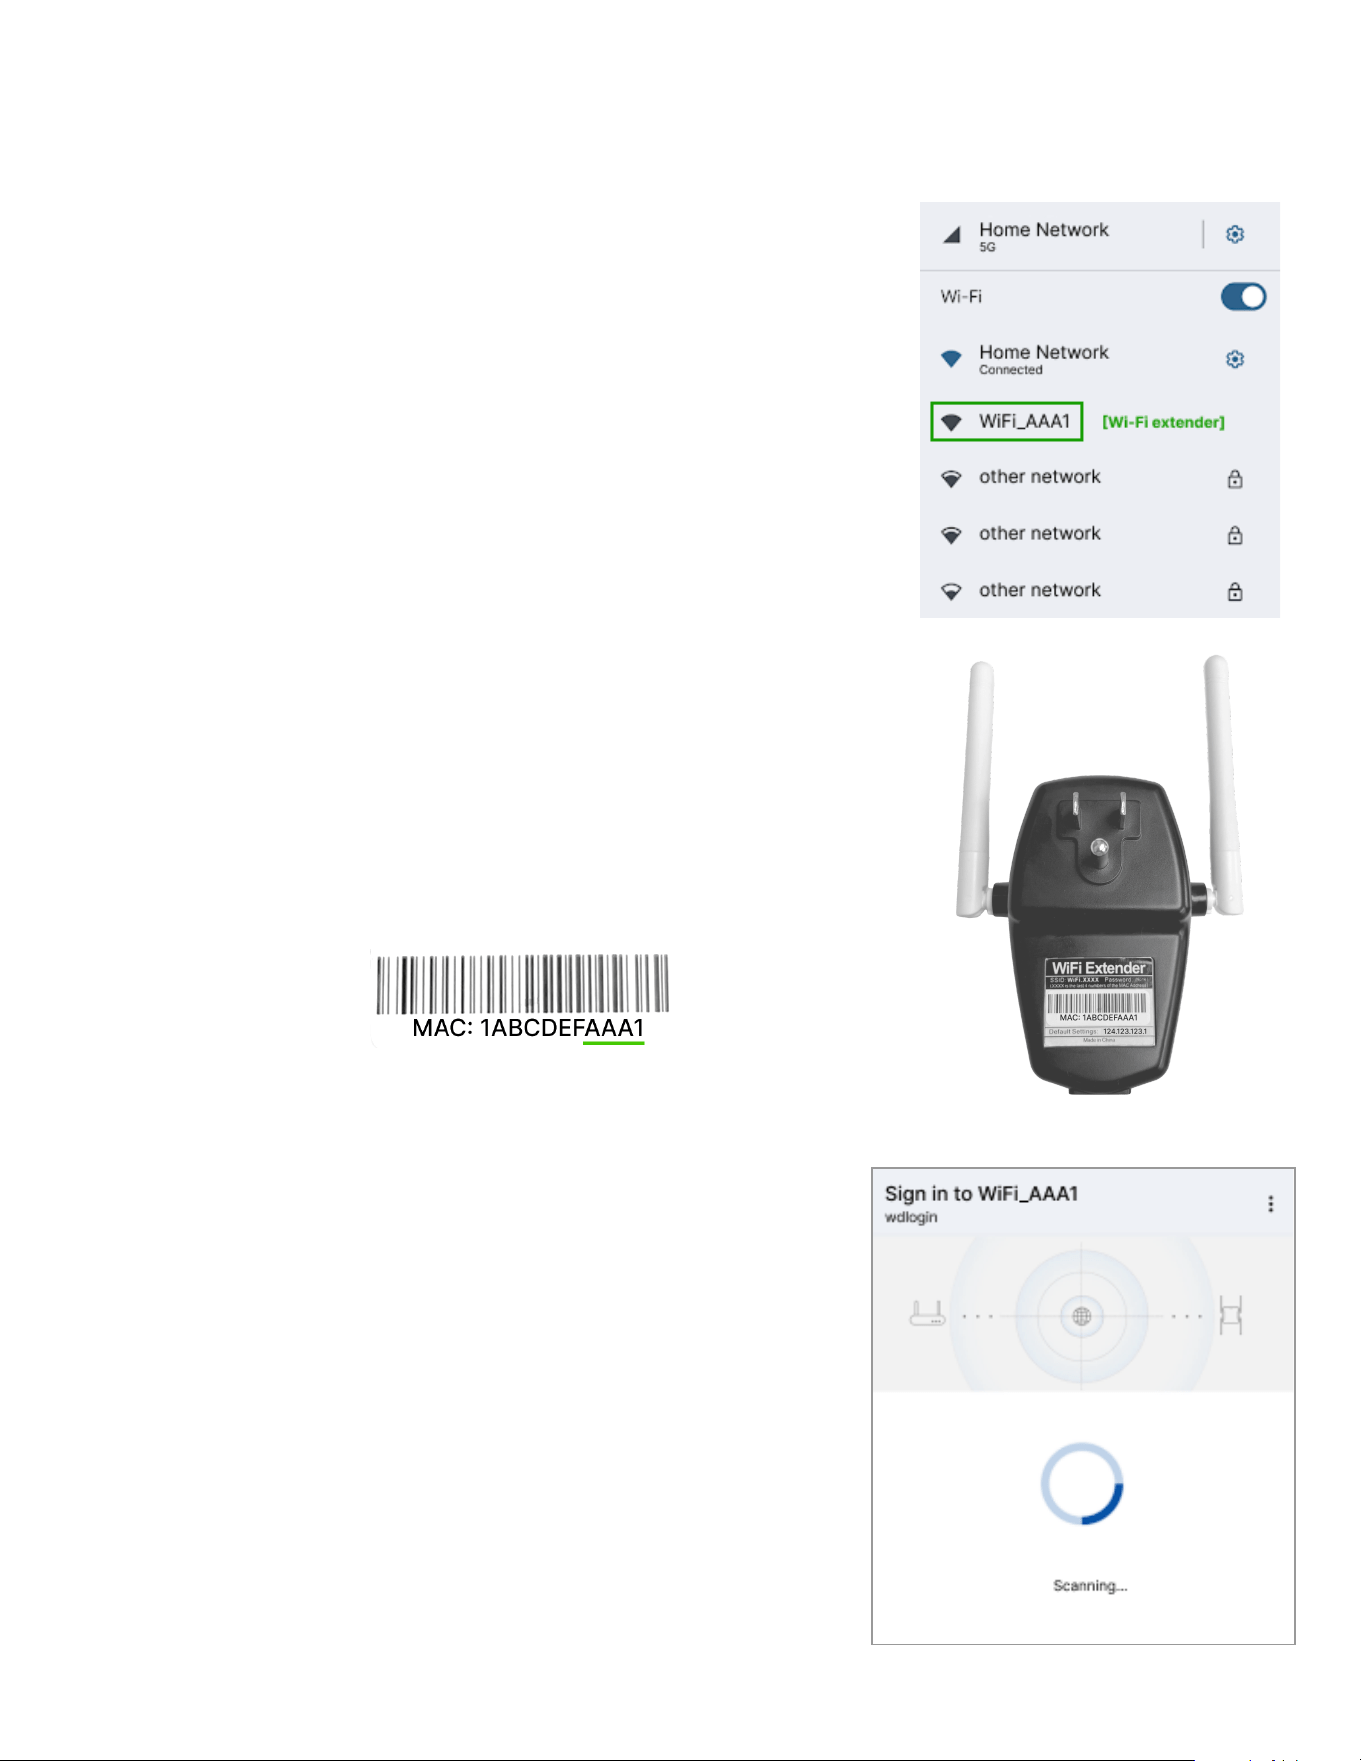
2. Using an Apple or Android phone or computer/laptop device,
select the Wi-Fi extender in the available Wi-Fi or network
options, which will display as “WiFi_XXXX”. The XXXX numbers
are the last four digits of the MAC address on the back of your
unit. See below for how to find the MAC address numbers.
a. On your Apple device, open your device Settings and select
Wi-Fi, then in Networks, select “WiFi_XXXX”.
b. On your Android device, open your device Settings and
select Network & Internet, then select Internet, and
“WiFi_XXXX”.
c. On your desktop or laptop computer, open the Wi-Fi or
Network settings and select “WiFi_XXXX” in the list of
available networks.
3. As shown, the MAC address is located on the back of your device
below the bar code. The last four letters or digits of the address
will display in the available network list, such as “WiFi_AAA1”.
4. After selecting the new Wi-Fi option in the list, the device will
scan for available Wi-Fi networks to connect to.
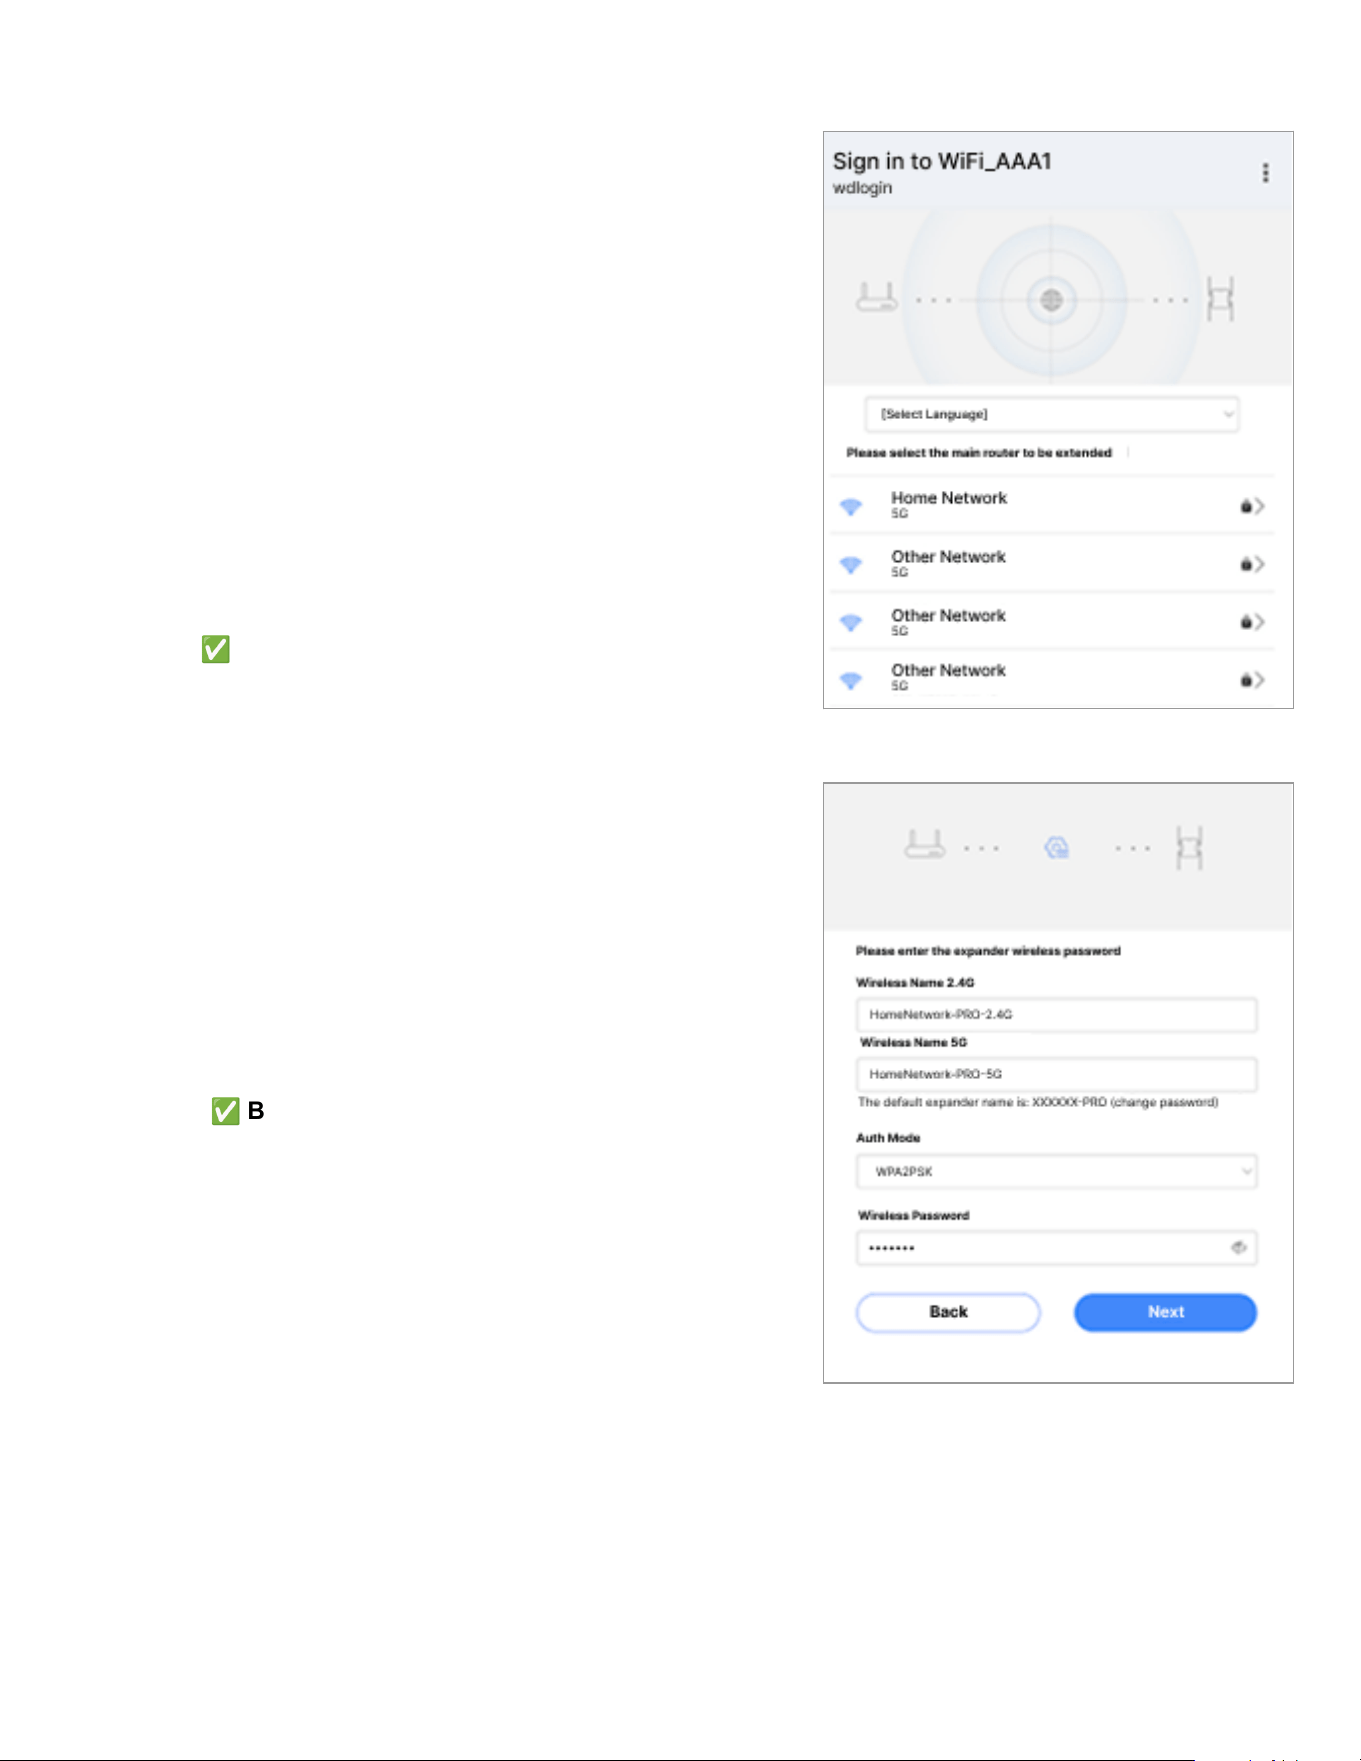
5. On the next screen, select your desired language and your
home or office network/router (SSID) in the list of available
networks. Enter your network password then click Next.
6. On the next screen, confirm the Wireless Name for 2.4G and
5G options (usually your existing Wi-Fi network name with
“-PRO-2.4G” and “-PRO-5G” after it). Select your Auth Mode
(WPA2PSK is recommended), then create a password for
the extender if you want to (optional and not required for set
up, but recommended for additional security).
7. Wait for the extender to connect to your router. Once
connected, the green 2.4G and 5G lights will display.
8. With the extender connected, you can continue using
your existing Wi-Fi network in Repeater Mode and enjoy
an enhanced signal, or in your device settings, connect
your phone, tablet, etc. directly to the extended “PRO”
network.
Your Original Wi-Fi Network (Repeater Mode)
● This is the same network name (SSID) you’ve
always used.
● Use this if you want to keep using your normal
Wi-Fi name and don’t want to manually switch
networks.
● With the extender working in the background, it
helps boost the signal across your home without
changing anything.
✅
Best for: Simple plug-and-play use, smart TVs,
computers, and devices that are already connected.
The “PRO” Extended Network (e.g., HomeWiFi_PRO)
● This is a new Wi-Fi network created by the
extender – your original network name with
“_PRO” added.
● Connect to this when you’re in a weak signal area
or farther from your router. The extender gives you
a stronger, cleaner connection.
● To connect directly to the new extender network,
you’ll need to enter the password you set during
setup.
✅
Best for: Phones, tablets, and laptops moving
between rooms or zones.
Product Features
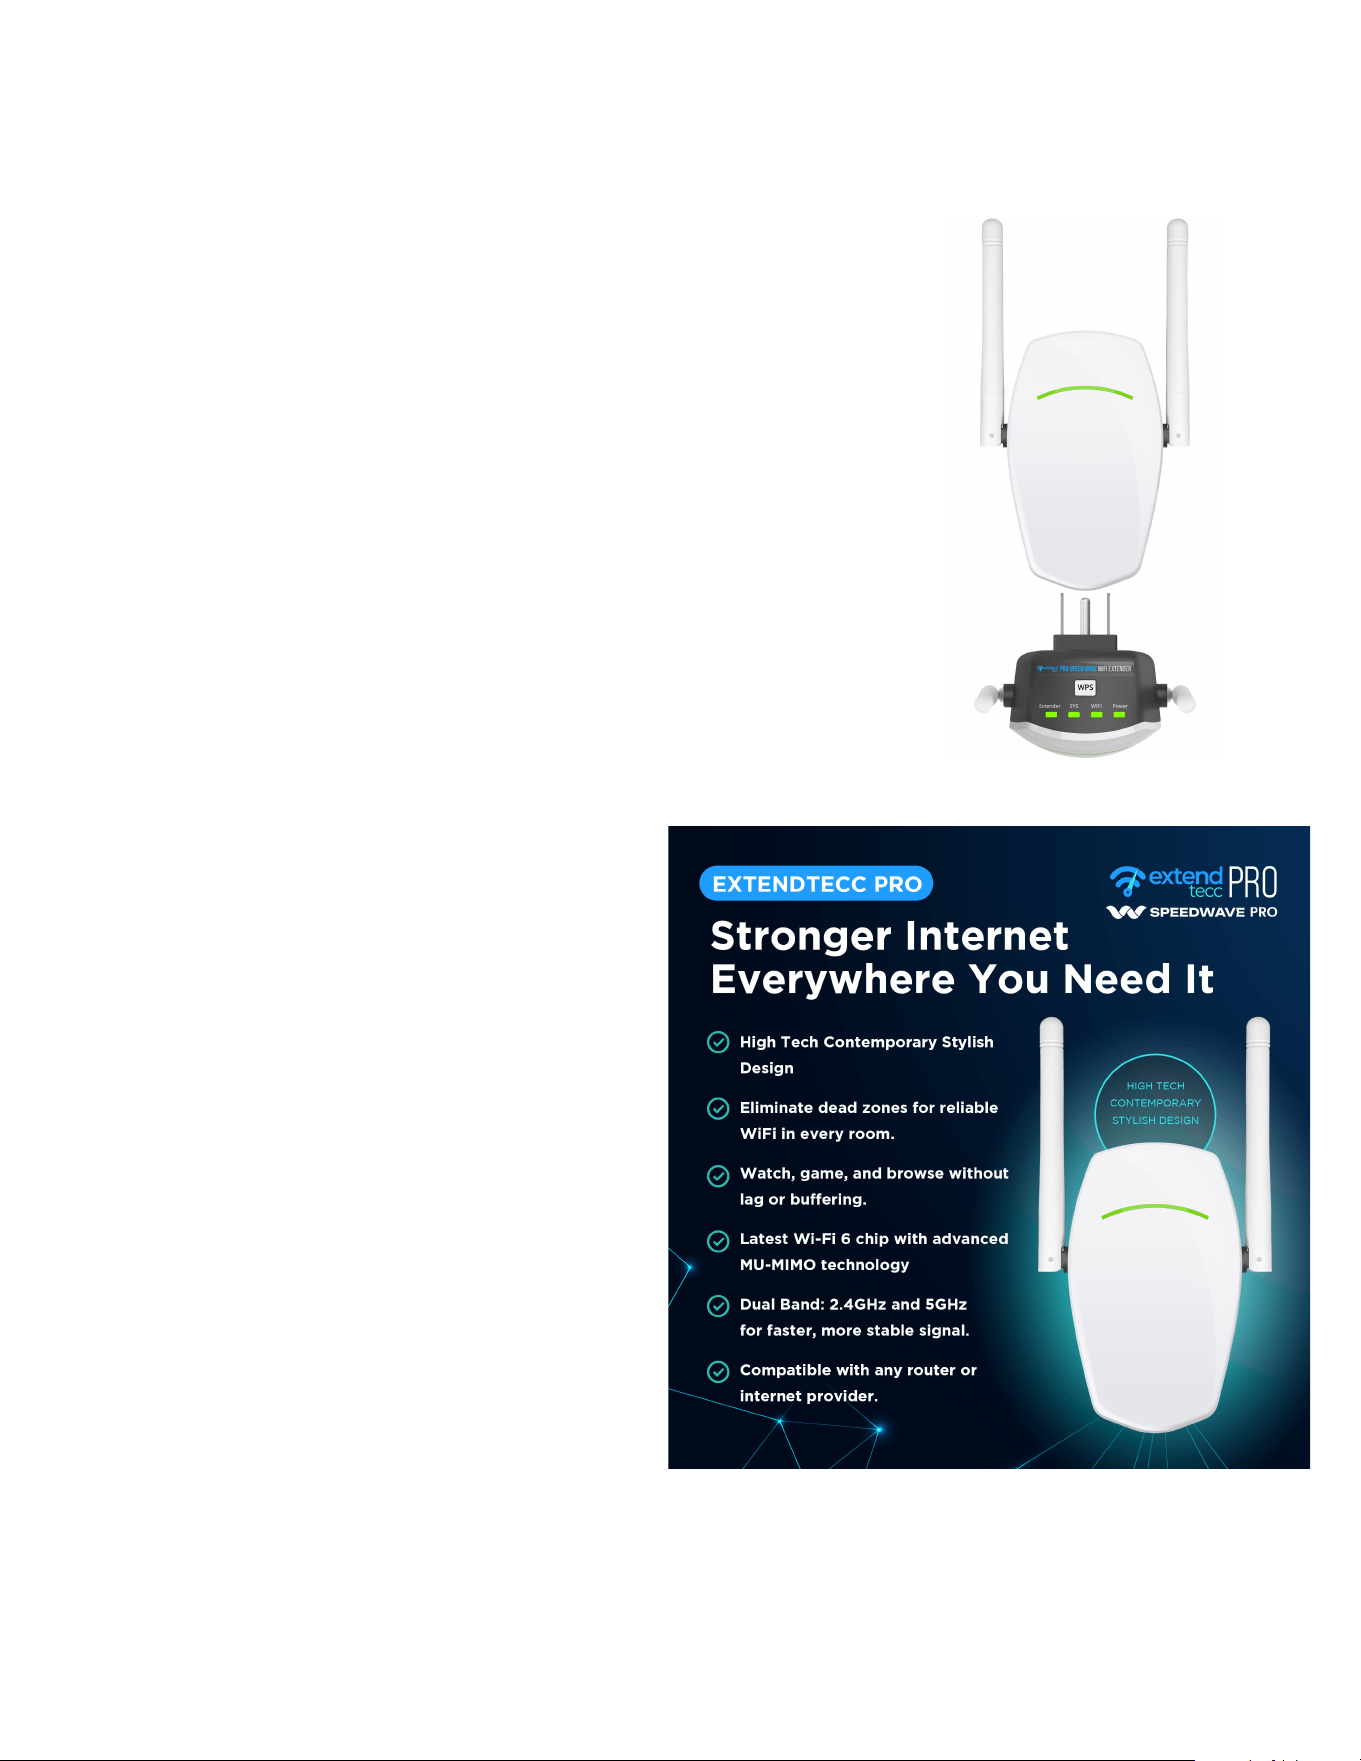
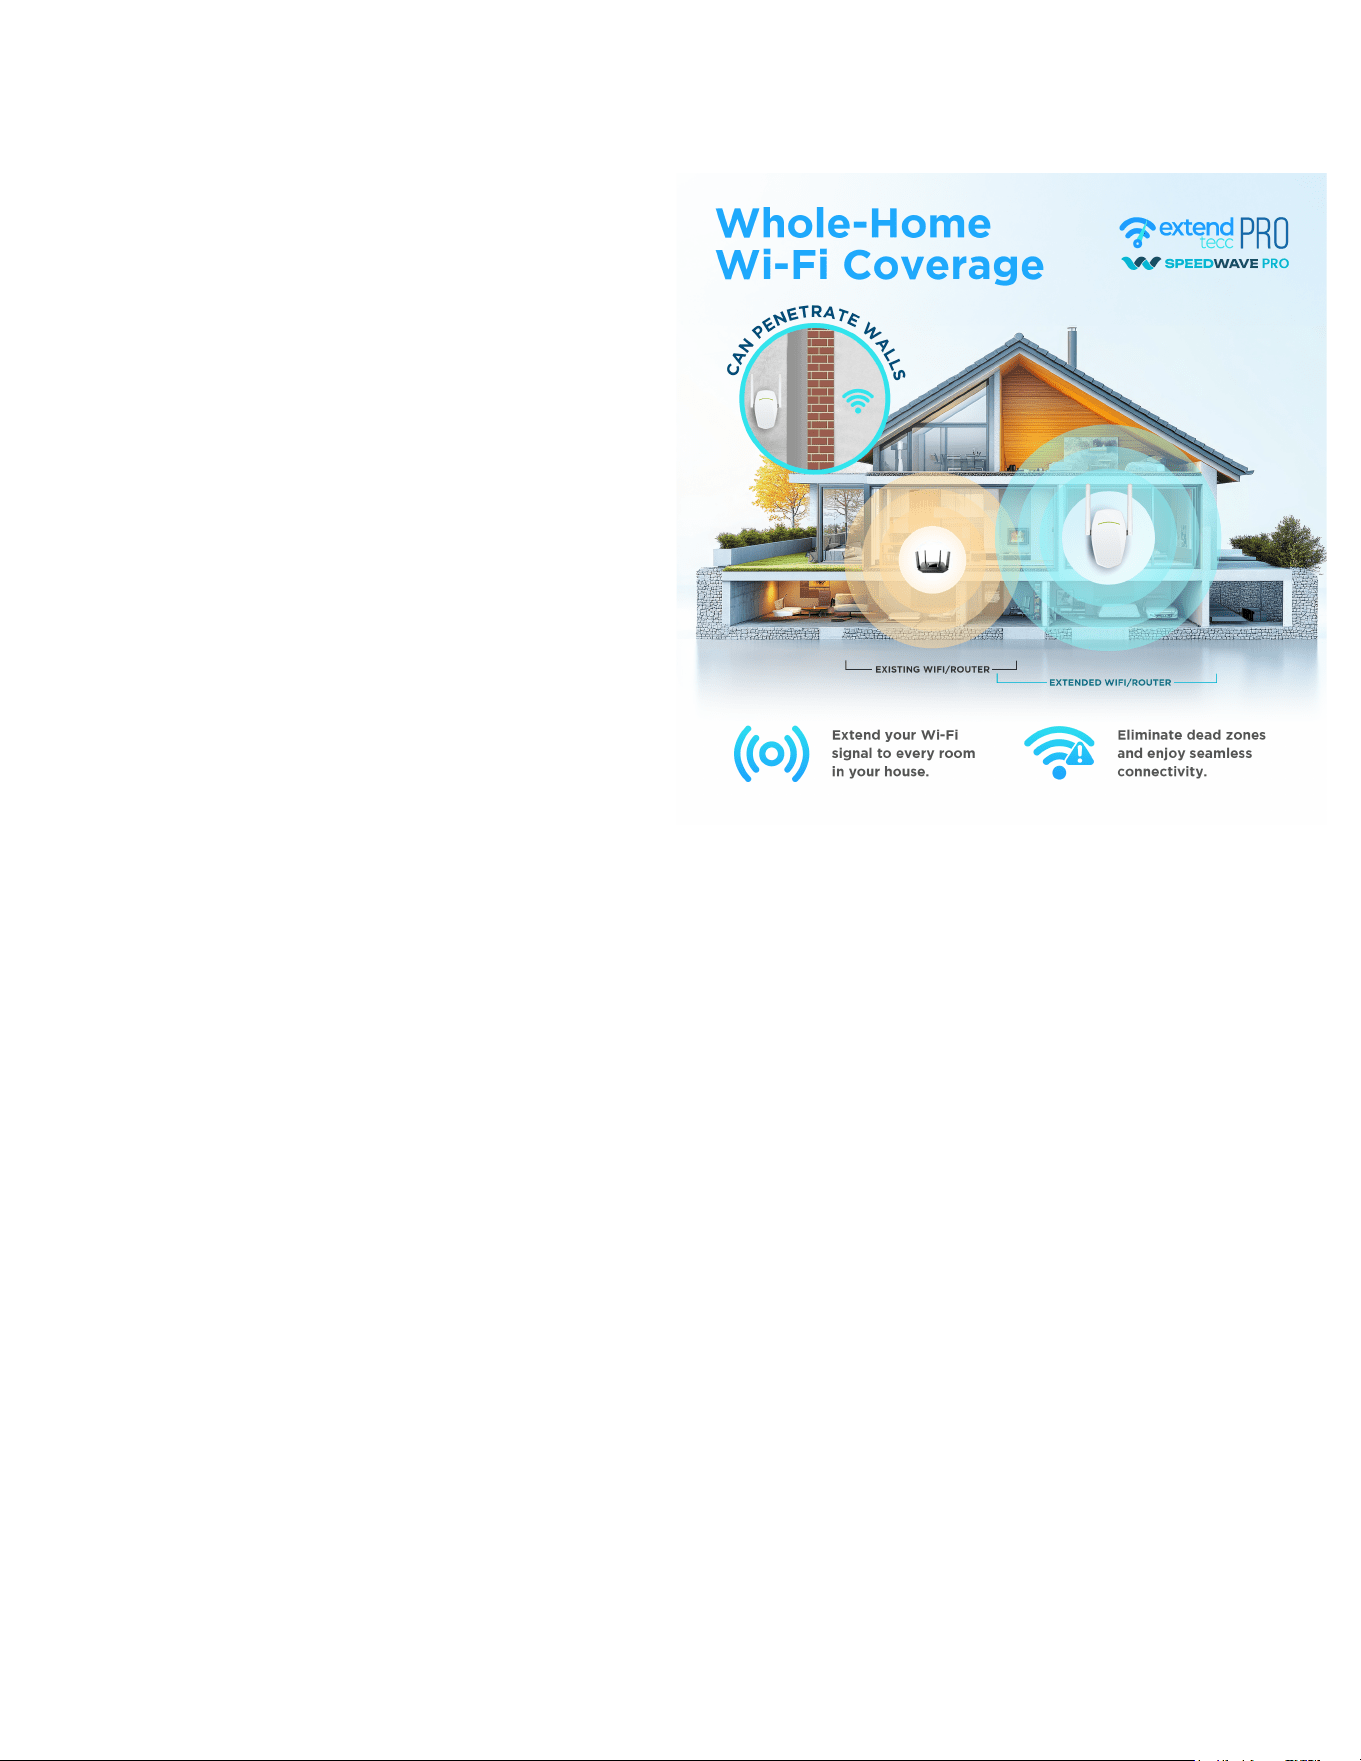
● Long Range Signal Boosting: Expands
Wi-Fi coverage across large homes,
garages, and outdoor spaces, up to 1700
square feet of coverage.
● Latest Wi-Fi 6 Chip with Advanced
MU-MIMO Technology: Gives you faster
speeds - up to 300Mbps on 2.4Ghz and
up to 867Mbps for 5 GHz - for wider
coverage and a more reliable connection
for smooth, lag-free Wi-Fi for multiple
devices in every corner of your home or
office.
● Automatic Speed Switching:
Automatically switches between 2.4GHz
and 5GHz for unlimited connections and
optimal performance
● Ethernet port: Connect directly to your
router or Wi-Fi satellite device for
additional signal strength.
● Universal Compatibility: Works with any
standard WiFi router.
● Indoor & Outdoor Use: Provides reliable coverage for your house, garage, office, or outdoor
patio.
● Secure Connection: Built-in encryption protocols protect your browsing and devices.
Care and Maintenance
● Keep the unit indoors or under cover if used outside. Avoid direct exposure to rain and
extreme heat or cold.
● Wipe with a dry cloth to clean. Do not use liquids or spray cleaners.
● Unplug during extended periods of non-use or electrical storms.
● Reboot the device occasionally to maintain peak performance.
● If the signal weakens, try moving the unit closer to the main router and repeating the
setup process.
AP Setup (Access Point)
Access Point mode is ideal for more technical users who want fast, reliable
Wi-Fi by connecting the extender directly to the router. This setup can be
more stable for devices such as laptops and work-from-home setups with
multiple devices requiring more bandwidth.
This mode is a bit more advanced than the typical extender setup, but
offers better performance if you’re comfortable with an Ethernet setup.
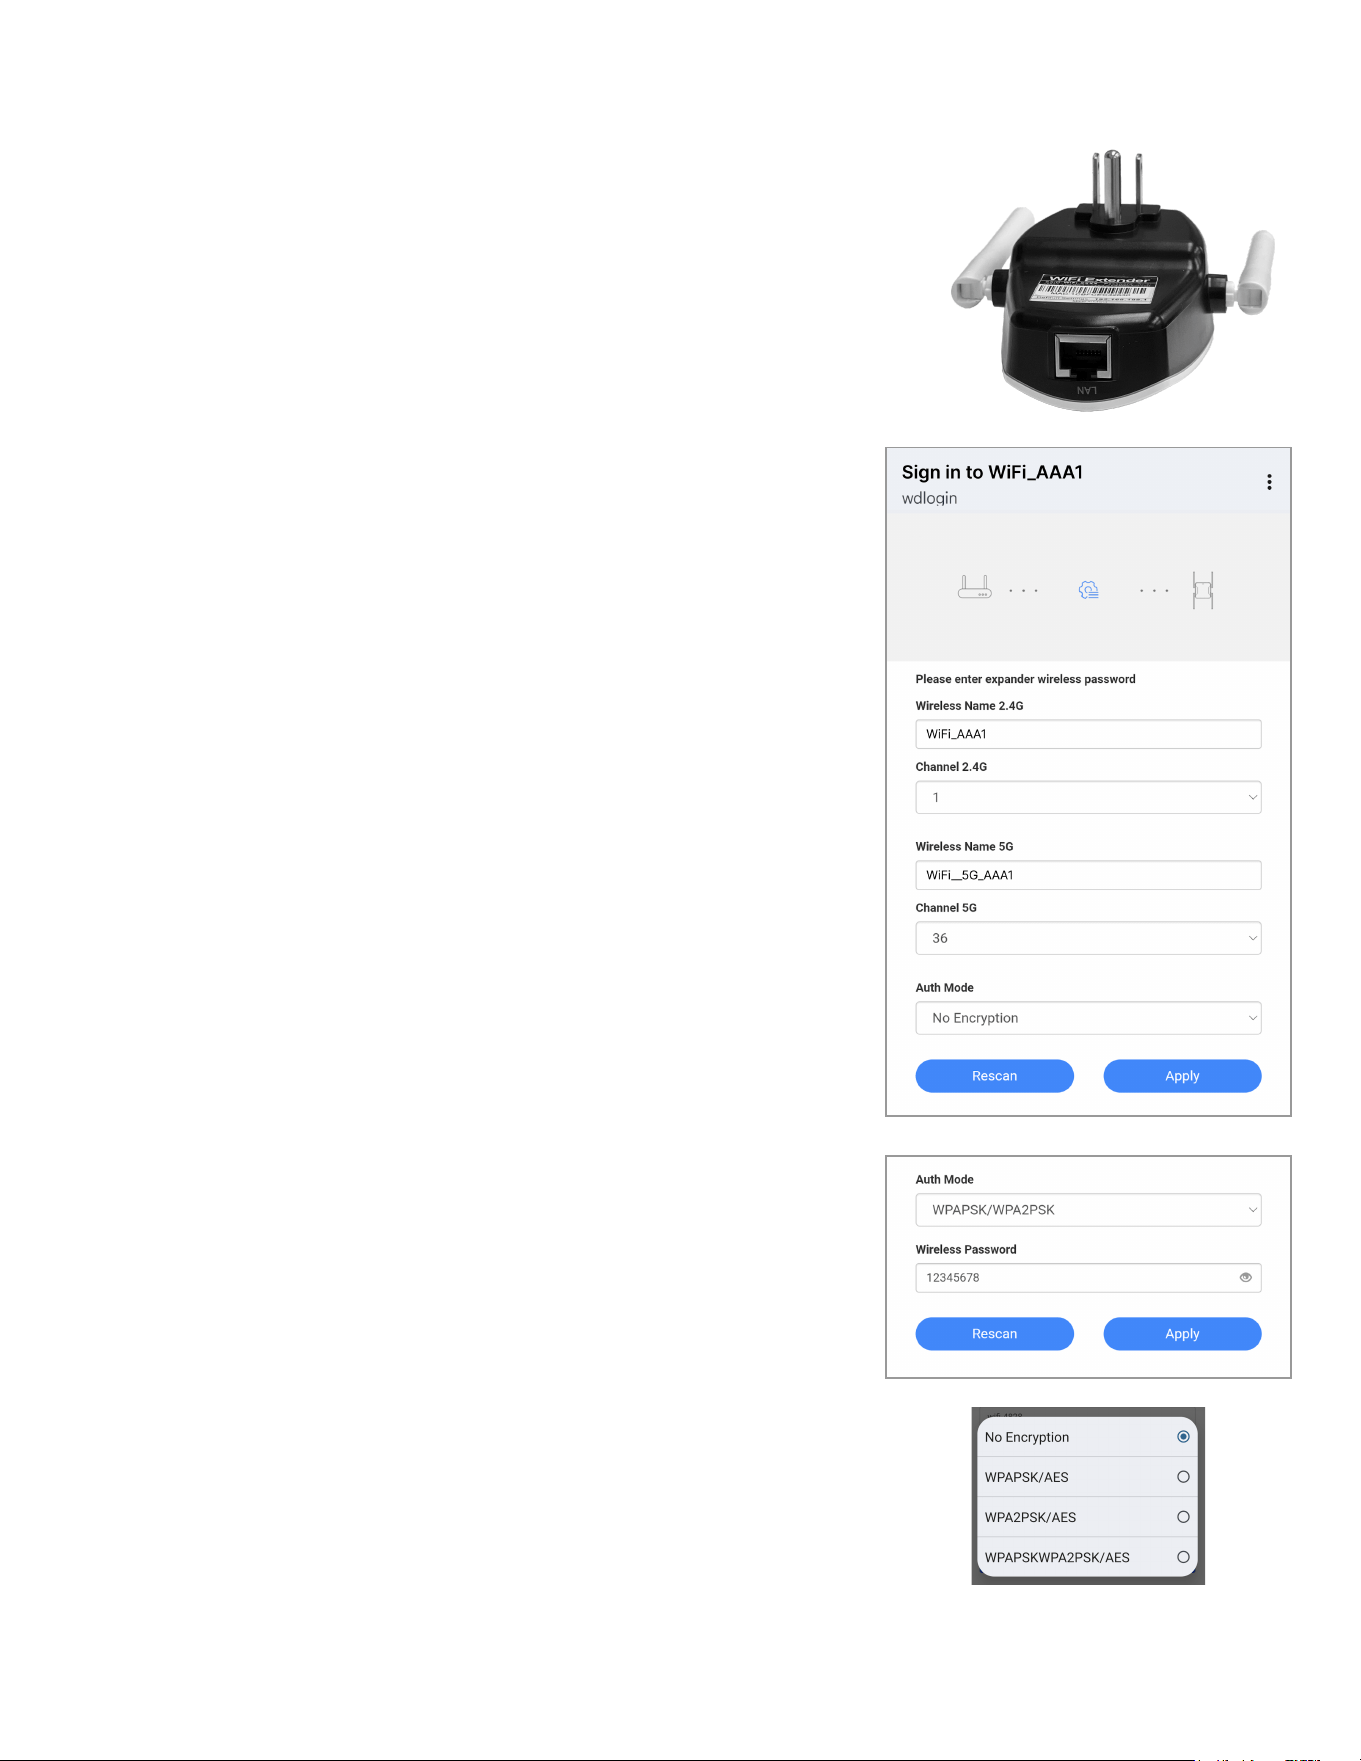
1. Plug in the unit and wait for 30 seconds.
2. Connect the extender to your router with an Ethernet cable.
The Ethernet input is on the bottom of the device.
3. In the setup screen, scroll all the way to the bottom of the
screen to select AP Settings to enter the AP details.
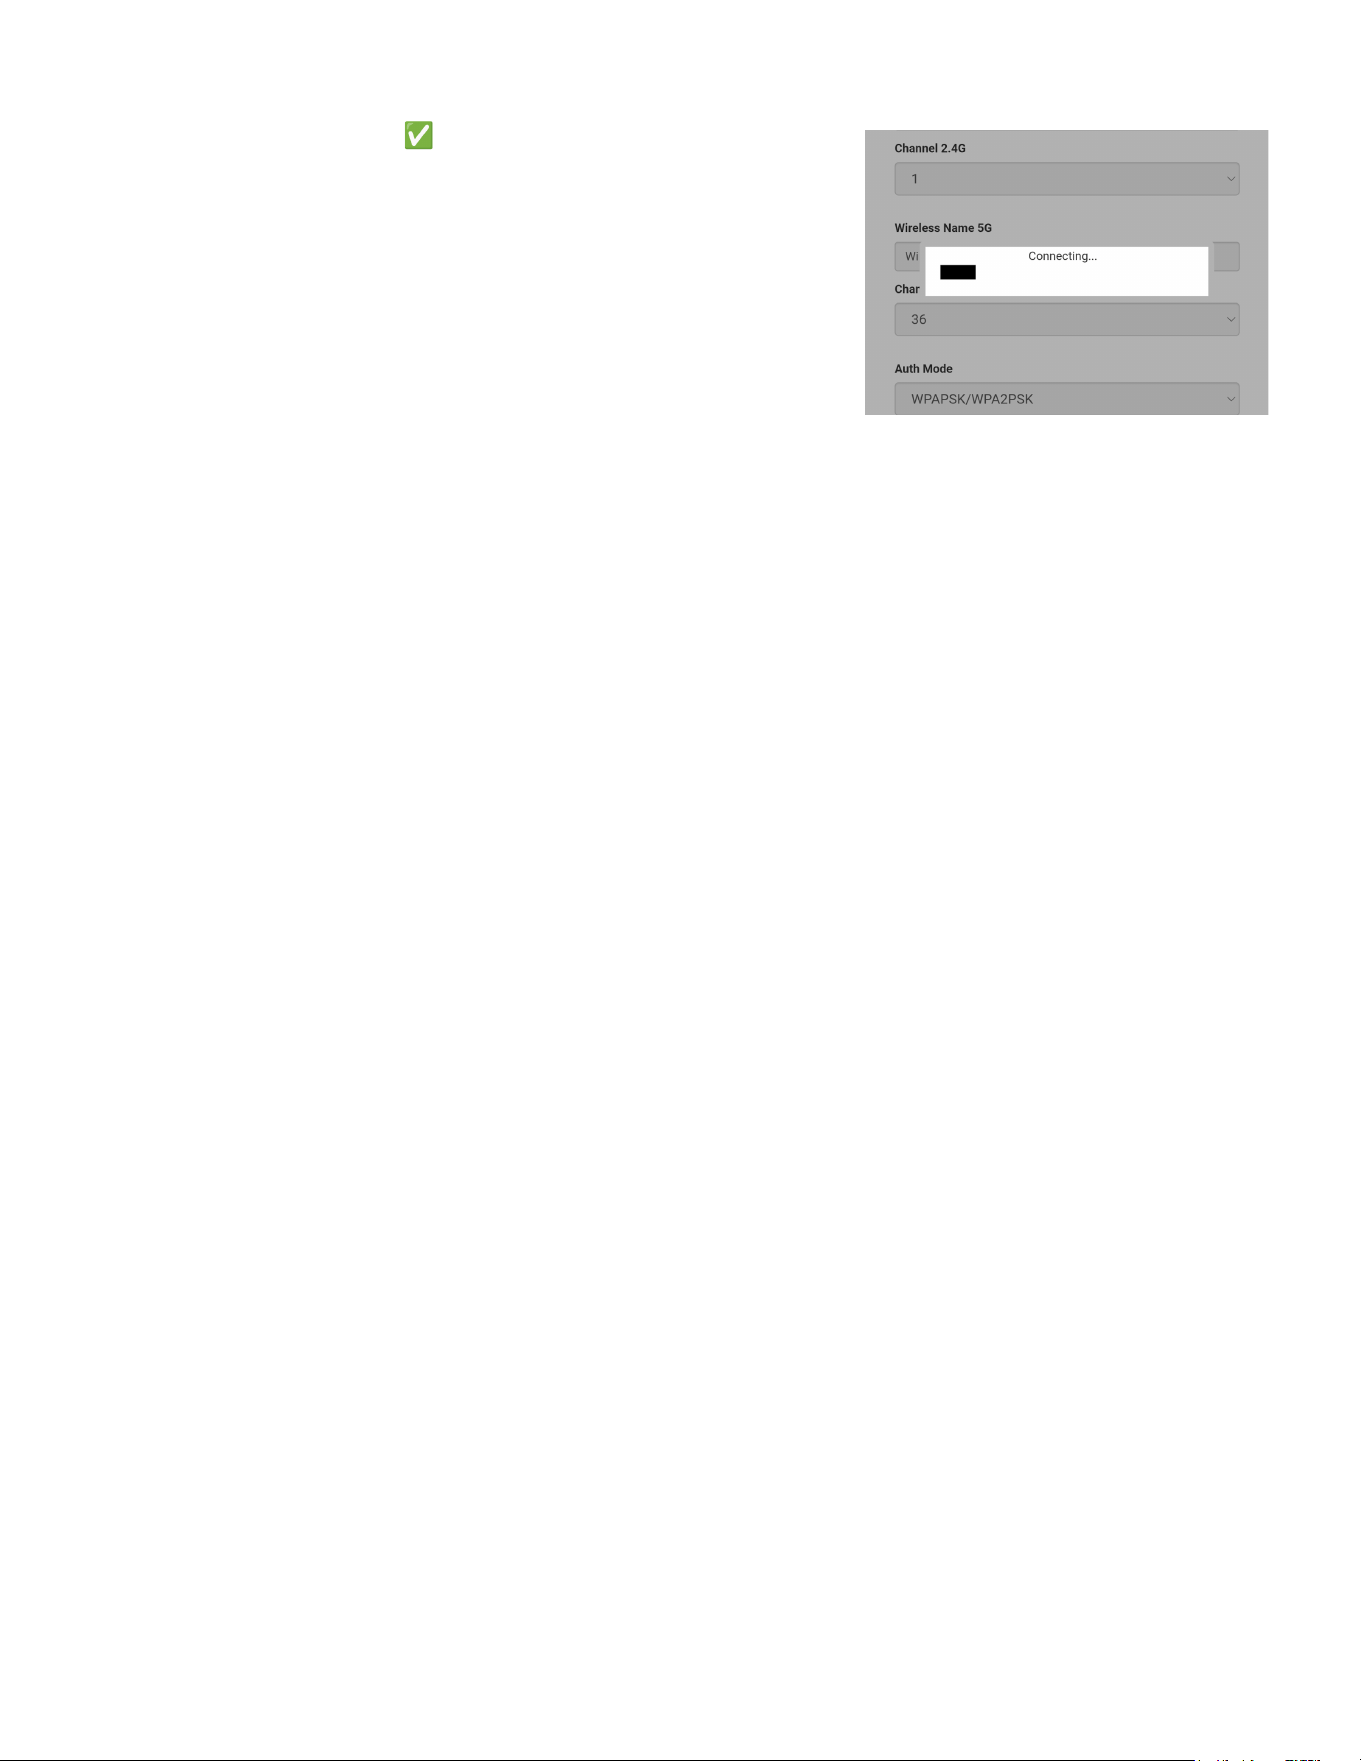
4. Update the 2.4G and 5G Wireless Names as you like, select
the Channel you want to use for this network, or leave it on
Auto so the extender can automatically choose the least
crowded channel.
The channel is the specific frequency range on which your
Wi-Fi signal transmits. On the 2.4GHz band, there are typically
11 channels (numbered 1-11). The 5Ghz band offers a wider
range of channels, often 20 or more, depending on your region
and router.
Each channel is like a lane on a highway – if too many
networks are using the same channel, the signal can become
slower or unstable due to competing networks and
interference. Leaving the setting on Auto will allow the extender
to find the least crowded channel for optimal performance.
You can always manually select a channel if you prefer to
designate a specific channel for the extender, or if you want to
troubleshoot a poor connection and want to experiment by
using different channels.
5. In Auth Mode, you can select the encryption method you want
to use. You can choose from:
a. No encryption – open network, not secure, anyone can
connect without a password. This isn’t recommended as it
leaves your network vulnerable to outside access.
b. WPAPSK/AES – Wi-Fi Protected Access, with AES encryption. This
is compatible with older devices but less secure than WPA2. Select
this option if you have very old devices that may not be able to
connect using WPA2.
c. WPA2PSK/AES –
✅
the recommended option. Wi-Fi
Protected Access 2, with AES encryption. This is the most
secure and modern option, best for most homes and
devices (phones, tablets, laptops, smart TVs, etc.
d. WPAPSKWPA2PSK/AES – This is a mixed mode that
supports both WPA and WPA2 and offers the broadest
compatibility if you’re not sure what your devices support.
It’s slightly less secure than WPA2-only, but a safe fallback.
6. After entering all your settings, click Apply to finish setup.
Resetting the Wi-Fi Extender
● If you need to reset the extender, press and hold the white WPS RST button for 5-10
seconds, then release and wait about 60 seconds for the device to fully reset.
● The extender will return to default factory settings and can be set up again as an extender or
AP connection.
● Reasons you may need to reset the device include:
○ You entered the wrong Wi-Fi password during setup and can’t connect.
○ You’re moving the extender to a new home or using it with a new network.
○ The device isn’t working properly or seems unresponsive.
○ You want to start over from scratch.
Troubleshooting
Here are some quick solutions to common issues with Wi-Fi extenders.
● If the device won’t connect or load the setup page:
○ Make sure the extender is plugged into a working power outlet.
○ Connect your phone or computer to the extender’s network (e.g., wifi-XXXX).
○ Open a browser and go to 192.168.0.1 or look for a pop-up window.
○ If nothing loads, try a different browser or device.
● If you can’t connect to Wi-Fi after setup:
○ Wrong Wi-Fi password entered during setup - try again with the correct password.
○ Too far from the main router - move the extender closer to your router.
○ Interference from walls or appliances - move the extender to a location with clearer
exposure to the router and avoid plugging it into outlets behind furniture or appliances.
● If the Wi-Fi signal is weak or unstable:
○ Try different placement – halfway between router and a dead zone is ideal.
○ Switch the Wi-Fi Channel from Auto to 1, 6, or 11 in advanced settings.
● If devices won’t connect to the new network:
○ Use WPA2PSK/AES for the best security and compatibility.
○ Try WPAPSKWPA2PSK/AES if you have older devices that can’t see the network.
● If AP mode isn’t working:
○ AP Mode requires an Ethernet cable connection from your router to the extender.
○ After plugging in, switch to AP Settings and follow the prompts.
○ Use a unique name and password for your new access point.