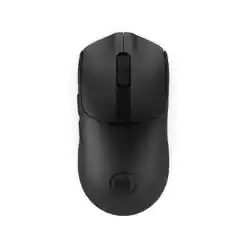

BEAST G

Scan me!
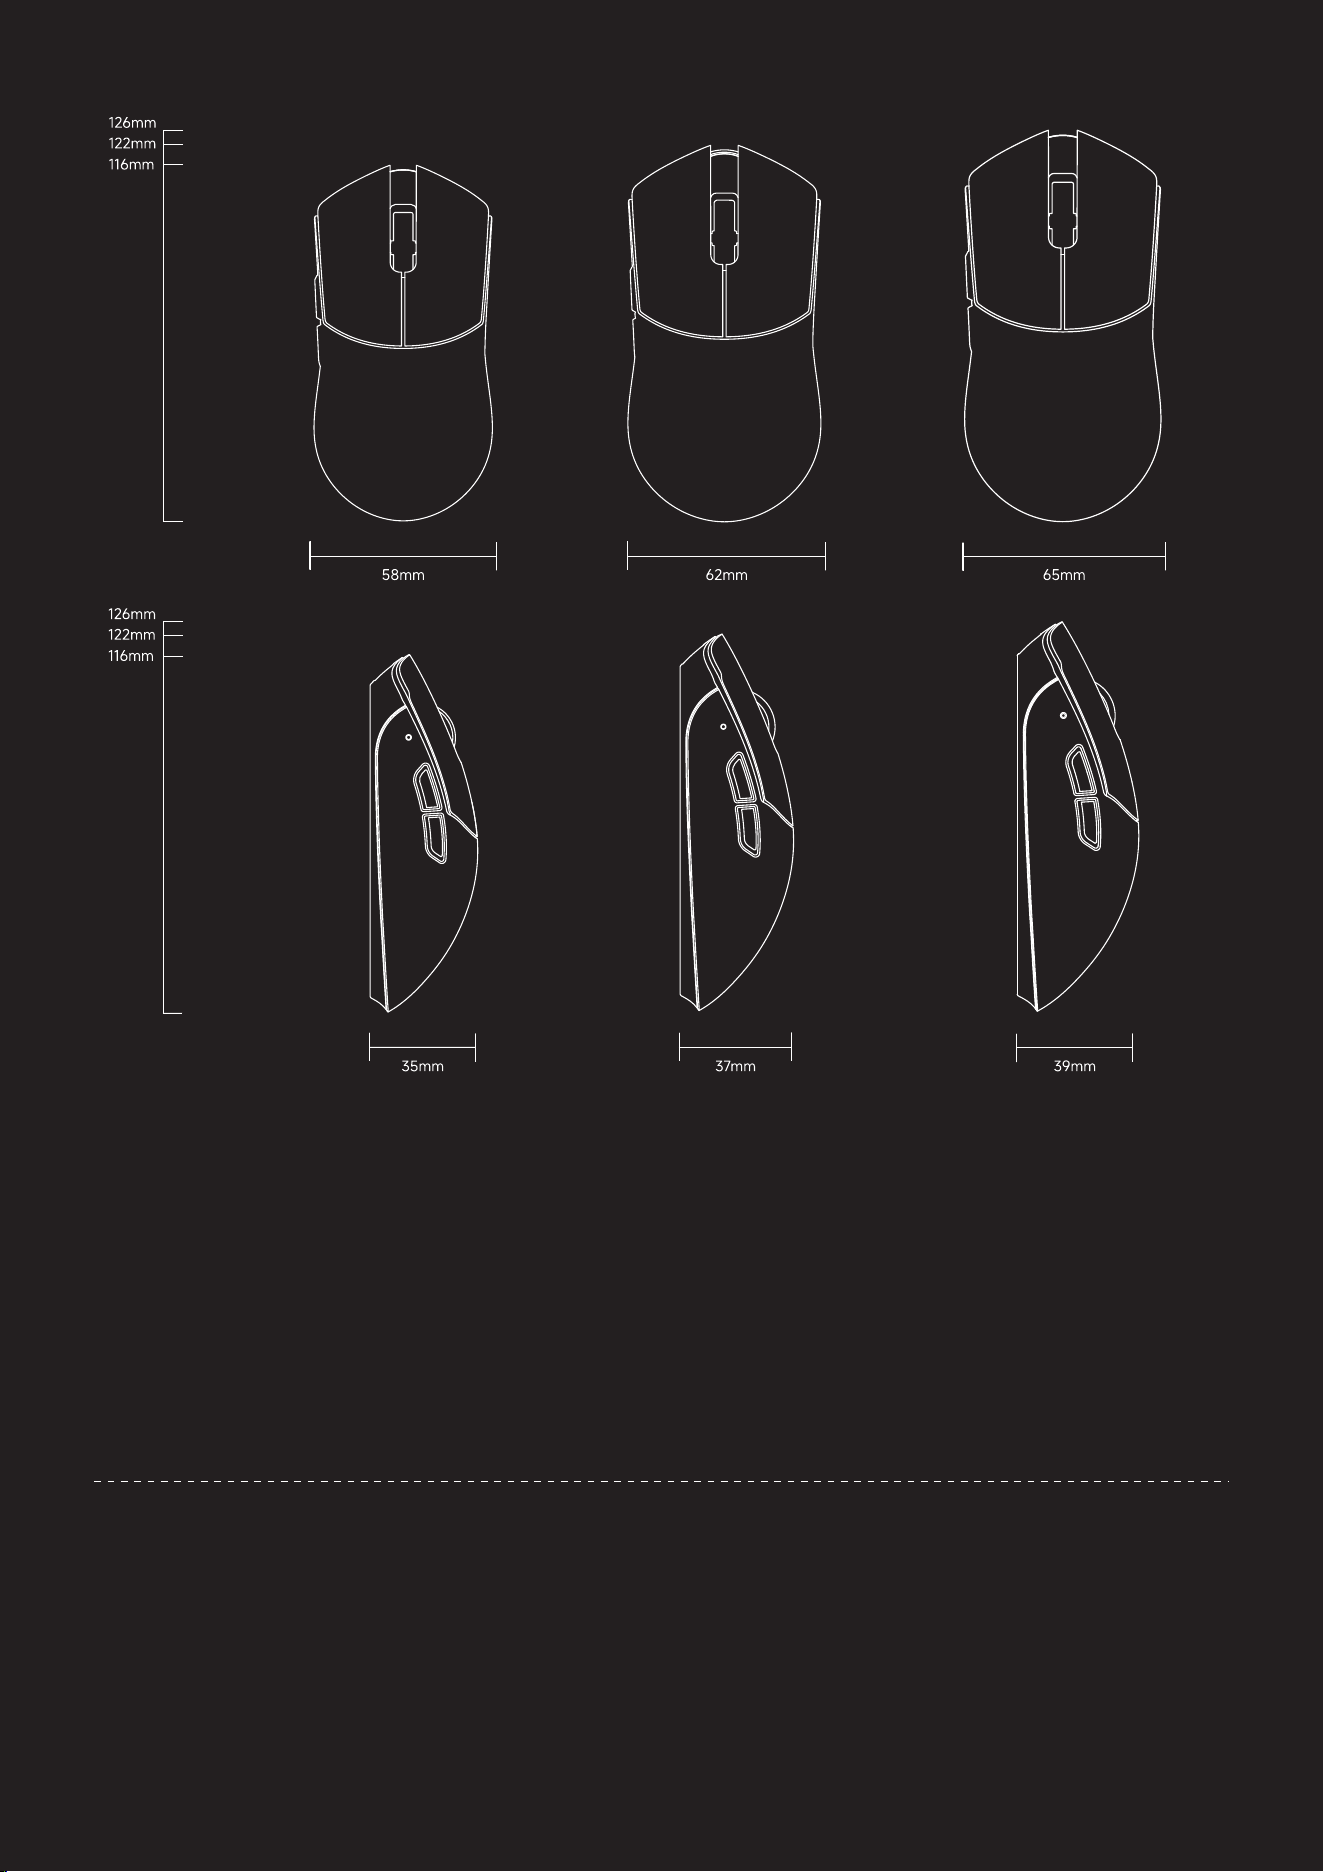
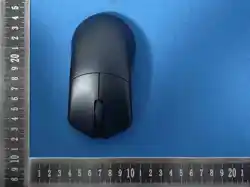
length: 4.57 in / 116mm
width: 2.28 in / 58mm
height: 1.38 in / 35mm
weight: 35±2g
·BEAST G MINI:
·MCU: Nordic 54L15
·Sensor: PAW3950HS
·Max Polling Rate: 8000 Hz / 8K (Wired & Wireless)
·Main Switches: Kailh Optical Switches
·Encoder: TTC Dust-Proof Silver Encoder
·Battery: 300 mAh
·Number of Buttons: 5
·Max Tracking Speed: 750 IPS
·Max DPI: 30,000
·Connector: USB Type-C
length: 4.8 in / 122mm
width: 2.44 in / 62mm
height: 1.46 in / 37mm
weight: 38±2g
·BEAST G M:
length: 4.96 in / 126mm
width: 2.56 in / 65mm
height: 1.54 in / 39mm
weight: 41±2g
·BEAST G MAX:
BEAST G M BEAST G MAXBEAST G MINI
or
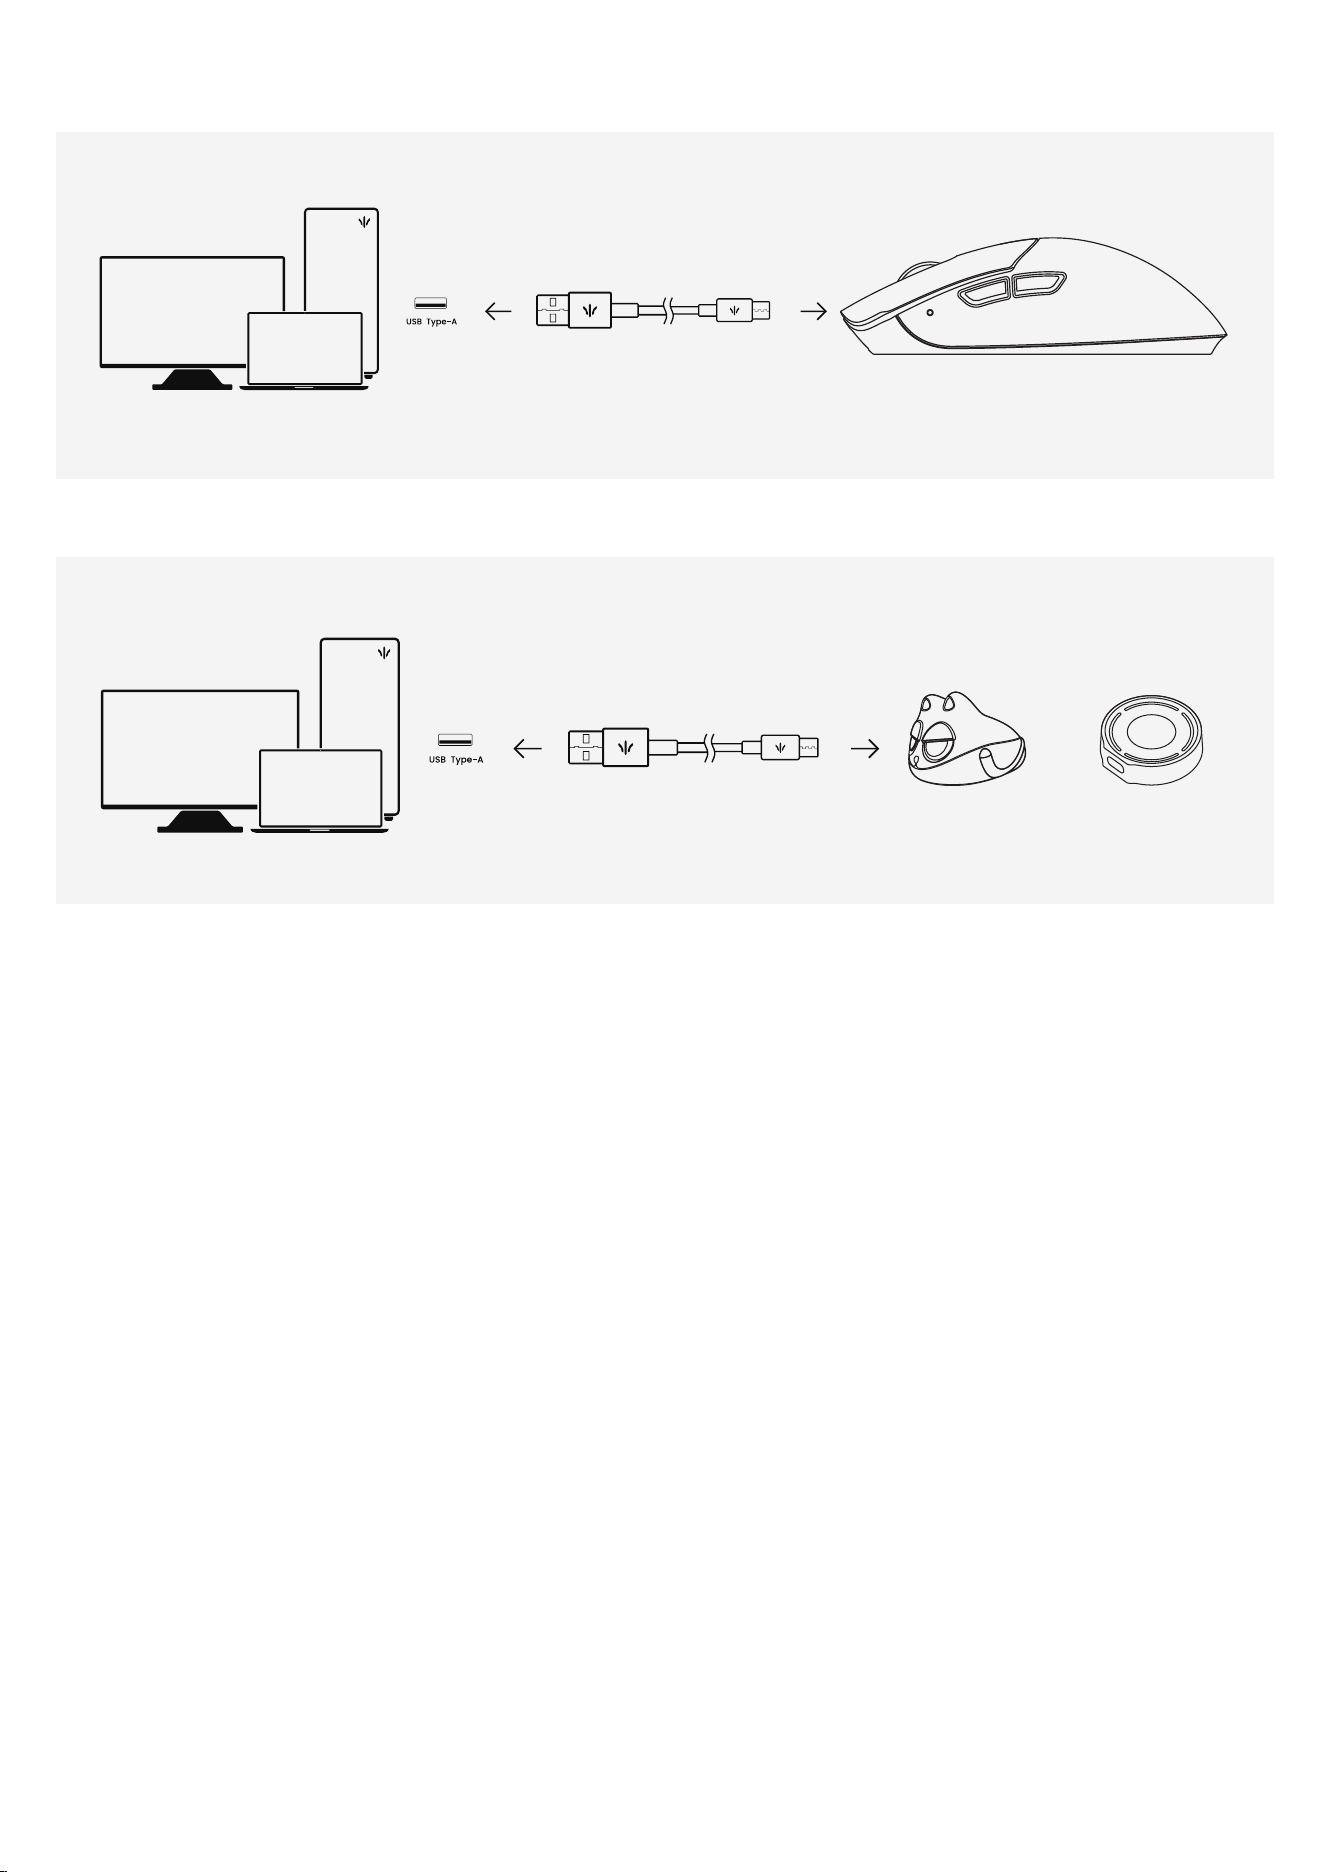
USB 3.0
USB 3.0
To achieve the best performance for the mouse, please ensure that the distance between the dongle and
the mouse does not exceed 50 cm, and that there are no wireless interference devices around the mouse.
Additionally, please connect to a USB 3.0 port or higher.
マウスの最適な使用状態を達成するために、レシーバーとマウスの間の距離が50cmを超えないようにし、マウス
の周囲に無線干渉装置がないようにしてください。さらに、USB 3.0ポートまたはそれ以上のバージョンのポート
に接続してください。
마우스의 최적 사용 상태를 달성하려면 리시버와 마우스 사이의 거리가 50cm를 초과하지 않도록 하고, 마우스
주변에 무선 간섭 장치가 없도록 하십시오. 또한, USB 3.0 포트 이상에 연결하십시오.
Pour atteindre les meilleures performances de la souris, assurez-vous que la distance entre le récepteur et
la souris ne dépasse pas 50 cm et qu'il n'y a pas d'appareils de brouillage sans fil autour de la souris. De
plus, veuillez connecter à un port USB 3.0 ou supérieur.
Um die beste Leistung der Maus zu erreichen, stellen Sie bitte sicher, dass der Abstand zwischen dem
Empfänger und der Maus 50 cm nicht überschreitet und dass sich keine drahtlosen Störgeräte in der Nähe
der Maus befinden. Bitte verbinden Sie außerdem die Maus mit einem USB 3.0-Port oder höher.
Farenin en iyi performansı göstermesi için, alıcı ile fare arasındaki mesafenin 50 cm'yi geçmediğinden ve fare
etrafında kablosuz parazit cihazların bulunmadığından emin olun. Ayrıca, USB 3.0 veya daha yüksek bir porta
bağlayın.
WIRELESS
WIRED
[EN]
[JP]
[KR]
[FR]
[DE]
[TR]
Standard
8K Dongle
Co-branded
8K Dongle
Dongle Pairing
If the mouse cannot be used in wireless mode, please
use the following method to pair the dongle.
1、Unplug the mouse from the computer. Switch the mouse back into wireless mode to start the
process of pairing.
2、Hold the left and right mouse buttons, along with the forward button for 3 seconds.
3、Once the green LED on the mouse starts flashing faster than normal, connect the 8K dongle to
the computer with the included cable.
4、When the LED on the mouse turns off, pairing has been completed.
マウスがワイヤレスモードで使用できない場合は、以下の
方法でレシーバーをペアリングしてください。
마우스를 무선 모드에서 사용할 수 없는 경우, 다음 방법을
사용하여 수신기를 페어링하십시오.
Si la souris ne peut pas être utilisée en mode sans fil,
veuillez utiliser la méthode suivante pour appairer le
récepteur.
Fare kablosuz modda kullanılamıyorsa, alıcıyı eşleştirmek
için aşağıdaki yöntemi kullanın.
Wenn die Maus im drahtlosen Modus nicht verwendet
werden kann, verwenden Sie bitte die folgende Meth-
ode, um den Empfänger zu koppeln.
[EN]
[EN]
[EN] [JP] [KR] [FR] [DE] [TR]
[JP]
[KR]
[FR]
4
1 2
4
1
2
Pairing Steps
1. マウスをコンピュータから取り外します。ペアリングプロセスを開始するために、マウスをワイヤレス
モードに切り替えます。
2. 左右のマウスボタンと前進ボタンを3秒間押し続けます。
3. マウスの緑色のLEDが通常よりも速く点滅し始めたら、付属のケーブルを使用して8Kドングルをコンピ
ュータに接続します。
4. マウスのLEDが消灯したら、ペアリングは完了です。
ペアリング手順
HOLD ON 3-4 Seconds
Left Button
Right Button
Forward Button
4
1
2
左ボタン
右ボタン
前進ボタン
4
1
2
Bouton gauche
Bouton droit
Bouton avant
4
1
2
Linke Taste
Rechte Taste
Vorwärtstaste
4
1
2
Sol Tuş
Sağ Tuş
İleri Tuşu
4
1
2
왼쪽 버튼
오른쪽 버튼
앞으로 가기 버튼
[JP]
[DE]
[TR]

1. Débranchez la souris de l'ordinateur. Remettez la souris en mode sans fil pour commencer le
processus de jumelage.
2. Maintenez les boutons gauche et droit de la souris, ainsi que le bouton avant, pendant 3 secondes.
3. Une fois que la LED verte de la souris commence à clignoter plus rapidement que d'habitude,
connectez le dongle 8K à l'ordinateur avec le câble inclus.
4. Lorsque la LED de la souris s'éteint, le jumelage est terminé.
Étapes de jumelage
1. Ziehen Sie die Maus vom Computer ab. Schalten Sie die Maus zurück in den drahtlosen Modus, um
den Kopplungsvorgang zu starten.
2. Halten Sie die linken und rechten Maustasten sowie die vordere Seitentaste 3 Sekunden lang
gedrückt.
3. Sobald die grüne LED an der Maus schneller als normal zu blinken beginnt, verbinden Sie den
8K-Dongle mit dem beiliegenden Kabel mit dem Computer.
4. Wenn die LED an der Maus erlischt, ist die Kopplung abgeschlossen.
Kopplungsschritte
1.Fareyi bilgisayardan çıkarın. Eşleştirme işlemine başlamak için fareyi tekrar kablosuz moda alın.
2.Sol ve sağ fare düğmelerini, ayrıca ön yan düğmeyi 3 saniye boyunca basılı tutun.
3.Fare üzerindeki yeşil LED normalden daha hızlı yanmaya başladığında, 8K dongle’ı kutu içindeki
kablo ile bilgisayara bağlayın.
4.Fare üzerindeki LED söndüğünde, eşleştirme tamamlanmıştır.
Eşleştirme Adımları
1. 마우스를 컴퓨터에서 분리하십시오. 페어링 과정을 시작하려면 마우스를 무선 모드로 전환하십시오.
2. 왼쪽 및 오른쪽 마우스 버튼과 앞으로 가기 버튼을 3초 동안 누르고 있습니다.
3. 마우스의 녹색 LED가 평소보다 빠르게 깜박이기 시작하면, 포함된 케이블을 사용하여 8K 동글을
컴퓨터에 연결하십시오.
4. 마우스의 LED가 꺼지면 페어링이 완료된 것입니다.
페어링 단계
[KR]
[FR]
[DE]
[TR]
The default DPI is set to 1600 DPI, and you can adjust the
DPI levels in the driver settings.
デフォルトのDPIは1600 DPIに設定されており、ドライバ設
定でDPIレベルを調整できます。
Le DPI par défaut est réglé à 1600 DPI, et vous pouvez
ajuster les niveaux de DPI dans les paramètres du pilote.
Die Standard-DPI ist auf 1600 DPI eingestellt und Sie
können die DPI-Stufen in den Treibereinstellungen anpassen.
Varsayılan DPI 1600 DPI olarak ayarlanmıştır ve sürücü
ayarlarından DPI seviyelerini ayarlayabilirsiniz.
기본 DPI는 1600 DPI로 설정되어 있으며, 드라이버 설정에서
DPI 레벨을 조정할 수 있습니다.
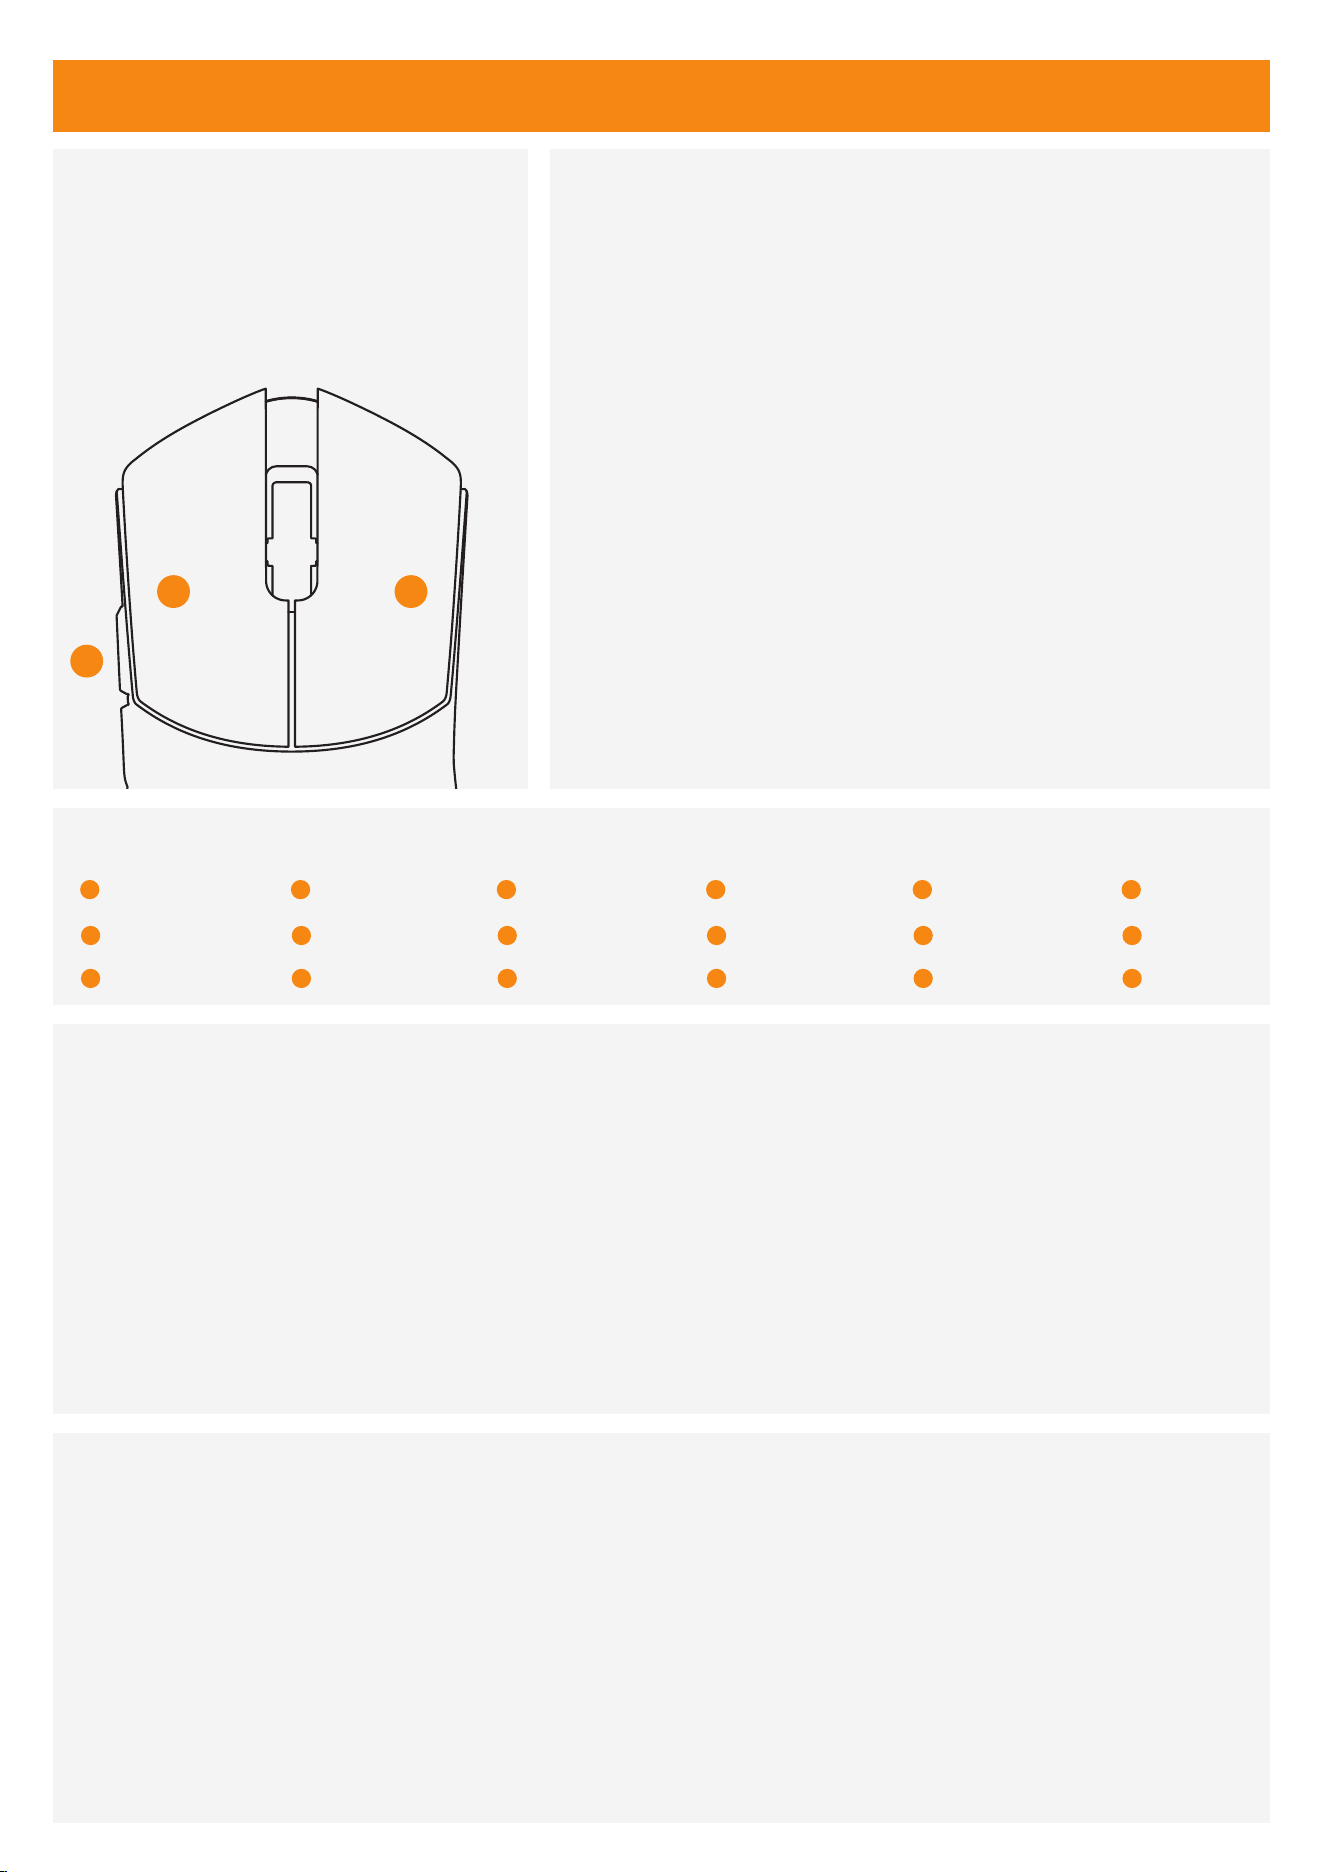
There are 6 DPI levels. To switch the DPI, press and hold the left mouse button, right mouse button, and
scroll wheel/middle mouse button simultaneously for 3 seconds.
DPIには6つのレベルがあります。DPIを切り替えるには、左ボタン、右ボタン、スクロールホイール/中央ボタン
を同時に3秒間押し続けてください。
DPI에는 6개의 단계가 있습니다. DPI를 전환하려면 왼쪽 버튼, 오른쪽 버튼 및 스크롤 휠/가운데 버튼을 동시에 3
초 동안 누르고 있으십시오.
Il y a 6 niveaux de DPI. Pour changer de DPI, maintenez simultanément enfoncés le bouton gauche, le
bouton droit et la molette/bouton du milieu pendant 3 secondes.
Es gibt 6 DPI-Stufen. Um die DPI zu wechseln, halten Sie gleichzeitig die linke Maustaste, die rechte
Maustaste und das Scrollrad/die mittlere Maustaste 3 Sekunden lang gedrückt.
DPI'nin 6 seviyesi vardır. DPI'yi değiştirmek için sol fare düğmesini, sağ fare düğmesini ve kaydırma teker-
leği/orta fare düğmesini aynı anda 3 saniye basılı tutun.
[EN]
[JP]
[KR]
[FR]
[DE]
[TR]
DPI Setting
[EN] [JP] [KR] [FR] [DE] [TR]
3
1 2
3
1
2
HOLD ON 3-4 Seconds
Left Button
Right Button
Scroll Wheel
4
1
2
左ボタン
右ボタン
スクロールホイール
4
1
2
Bouton gauche
Bouton droit
Molette
4
1
2
Linke Taste
Rechte Taste
Scrollrad
4
1
2
Sol Tuş
Sağ Tuş
orta düğme
4
1
2
왼쪽 버튼
오른쪽 버튼
스크롤 휠
400 DPI 800 DPI 1600 DPI 3200 DPI 6400 DPI 30000 DPI
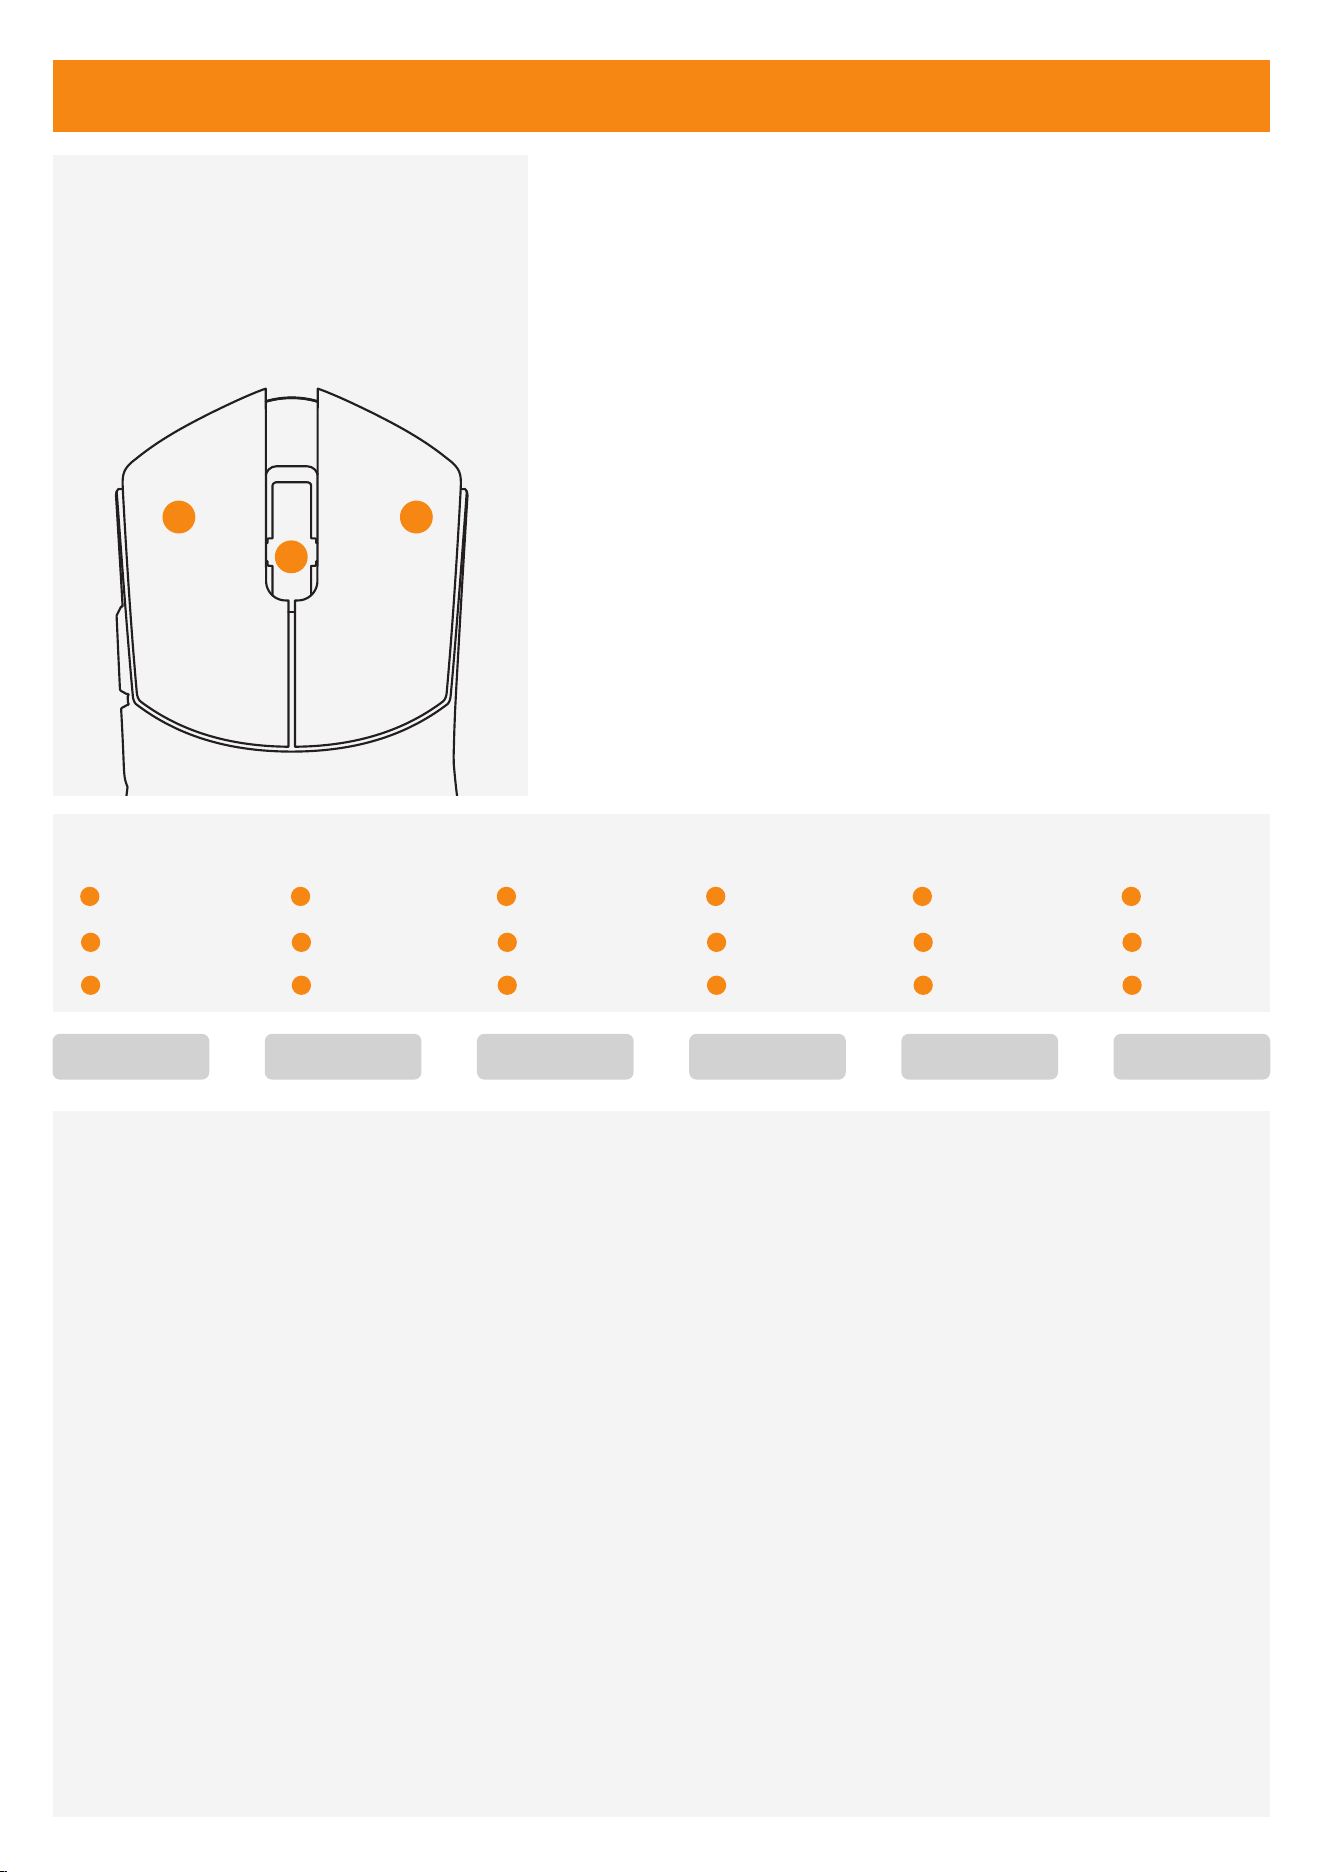
The mouse polling rate is default set to 1000Hz. To switch the polling rate, press and hold the mouse
backward button, scroll wheel/middle button, and right button simultaneously for 3 seconds.
マウスのポーリングレートはデフォルトで1000Hzに設定されています。ポーリングレートを切り替えるには、マ
ウスのサイドボタン、スクロールホイール/中ボタン、右ボタンを同時に3秒間押し続けてください。
마우스의 폴링 속도는 기본적으로 1000Hz로 설정되어 있습니다. 폴링 속도를 변경하려면 마우스 측면 버튼,
스크롤 휠/가운데 버튼, 오른쪽 버튼을 동시에 3초간 누르세요.
Le taux de rafraîchissement de la souris est par défaut réglé sur 1000Hz. Pour changer le taux de
rafraîchissement, appuyez et maintenez enfoncés simultanément le bouton latéral de la souris, la
molette/bouton central et le bouton droit pendant 3 secondes.
Die Maus-Pollingrate ist standardmäßig auf 1000Hz eingestellt. Um die Pollingrate zu ändern, halten Sie die
Maus-Seitentaste, das Scrollrad/Mittelklick und die rechte Taste gleichzeitig 3 Sekunden lang gedrückt.
Fare anket hızı varsayılan olarak 1000Hz olarak ayarlanmıştır. Anket hızını değiştirmek için fare yan düğmesi-
ni, kaydırma tekerleği/orta düğmeyi ve sağ düğmeyi aynı anda 3 saniye basılı tutun.
[EN]
[JP]
[KR]
[FR]
[DE]
[TR]
[EN] [JP] [KR] [FR] [DE] [TR]
5
2
3
Right Button
Scroll Wheel
Backward Button
5
2
3
右ボタン
スクロールホイール
戻るボタン
5
2
3
Bouton droit
Molette
Bouton arrière
5
2
3
Rechte Taste
Scrollrad
Rücktaste
5
2
3
Sağ Tuş
Kaydırma Tekerleği
Geri Tuşu
5
2
3
오른쪽 버튼
스크롤 휠
뒤로 버튼
Polling Rate Setting
Polling Rate Levels
3
5
2
HOLD ON 3-4 Seconds
125 Hz 250 Hz
2000 Hz 4000 Hz
500 Hz
8000 Hz
1000 Hz
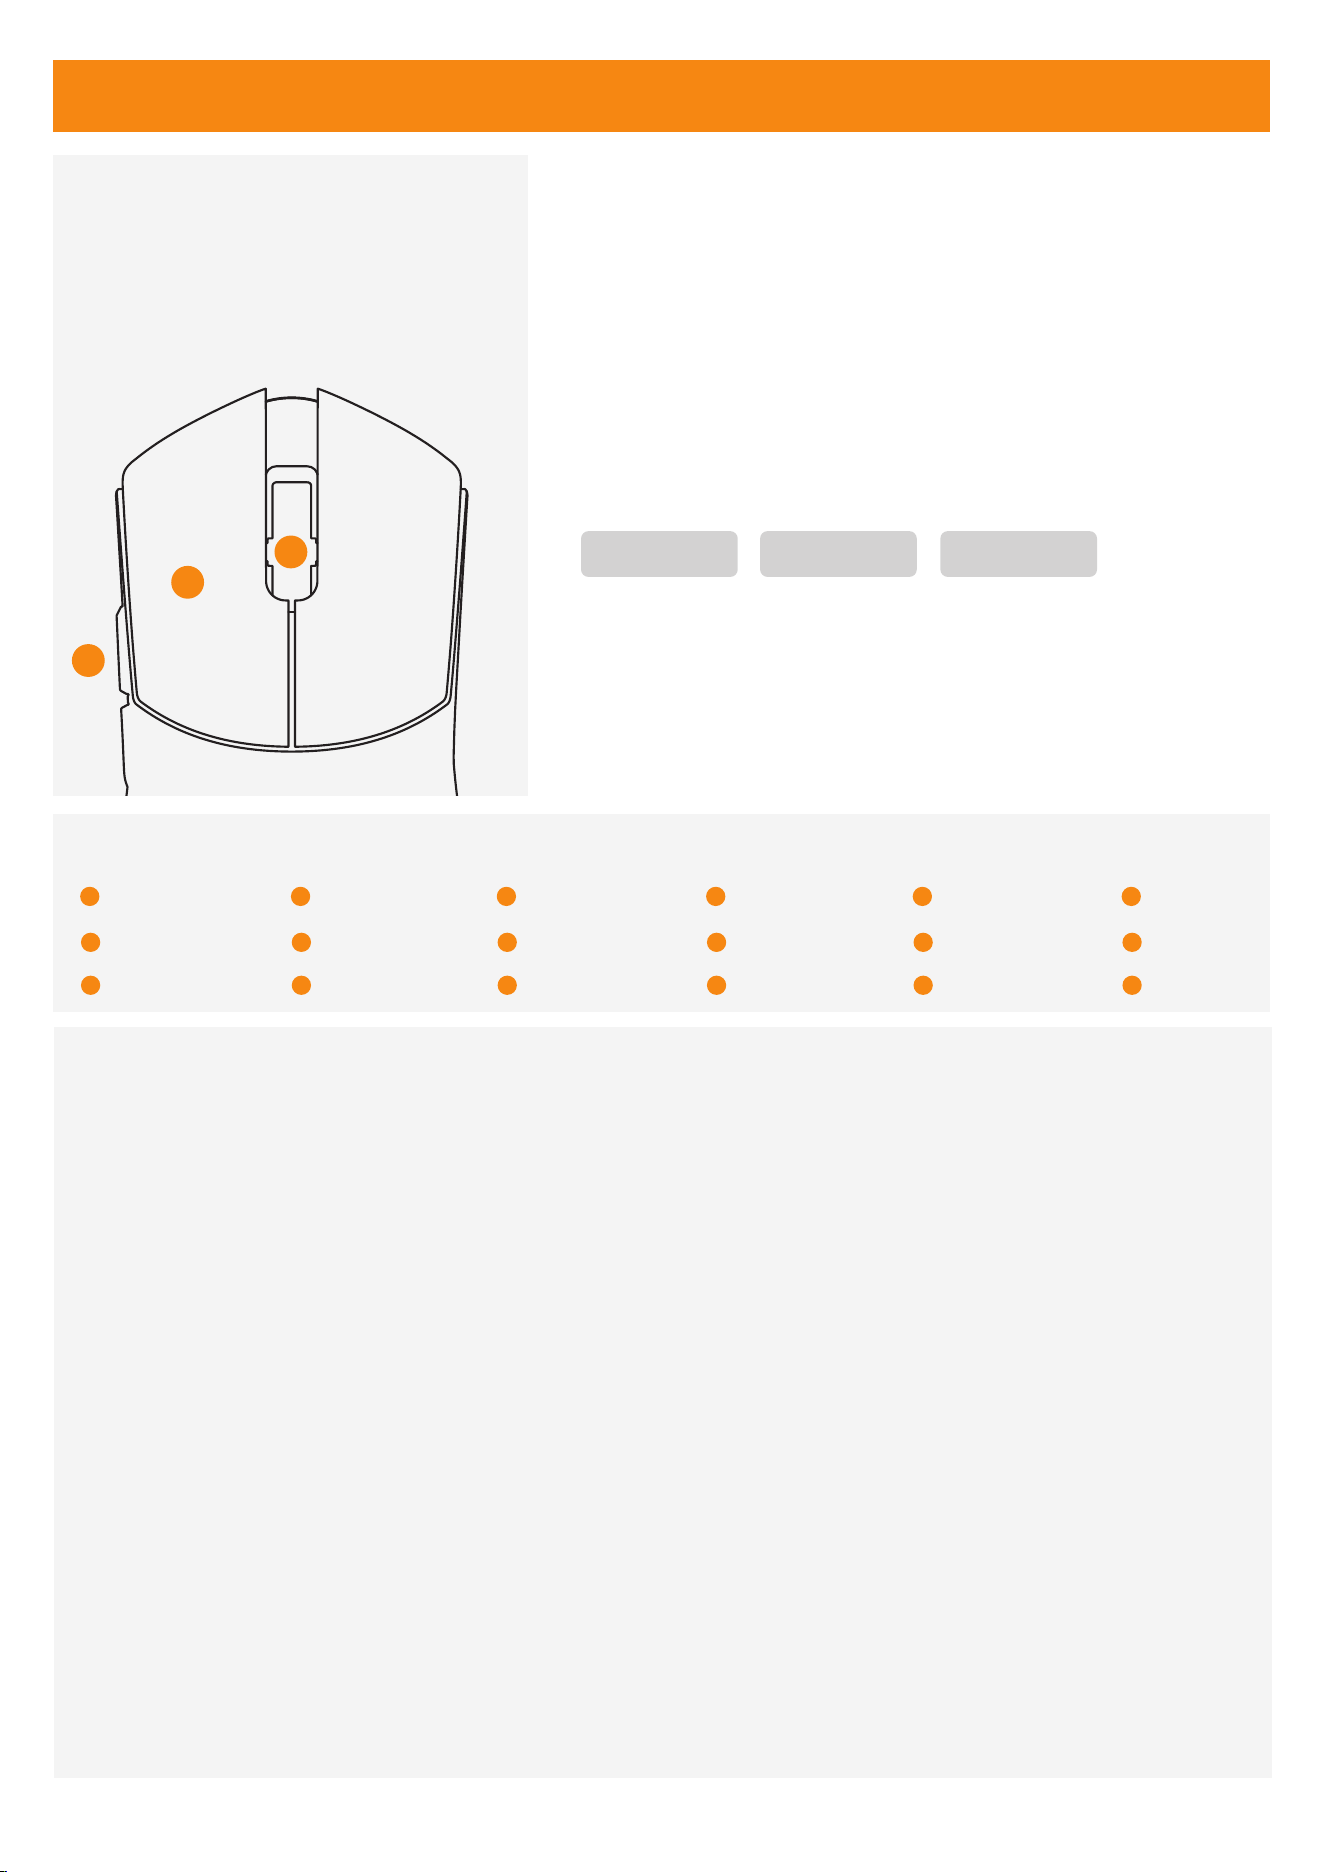
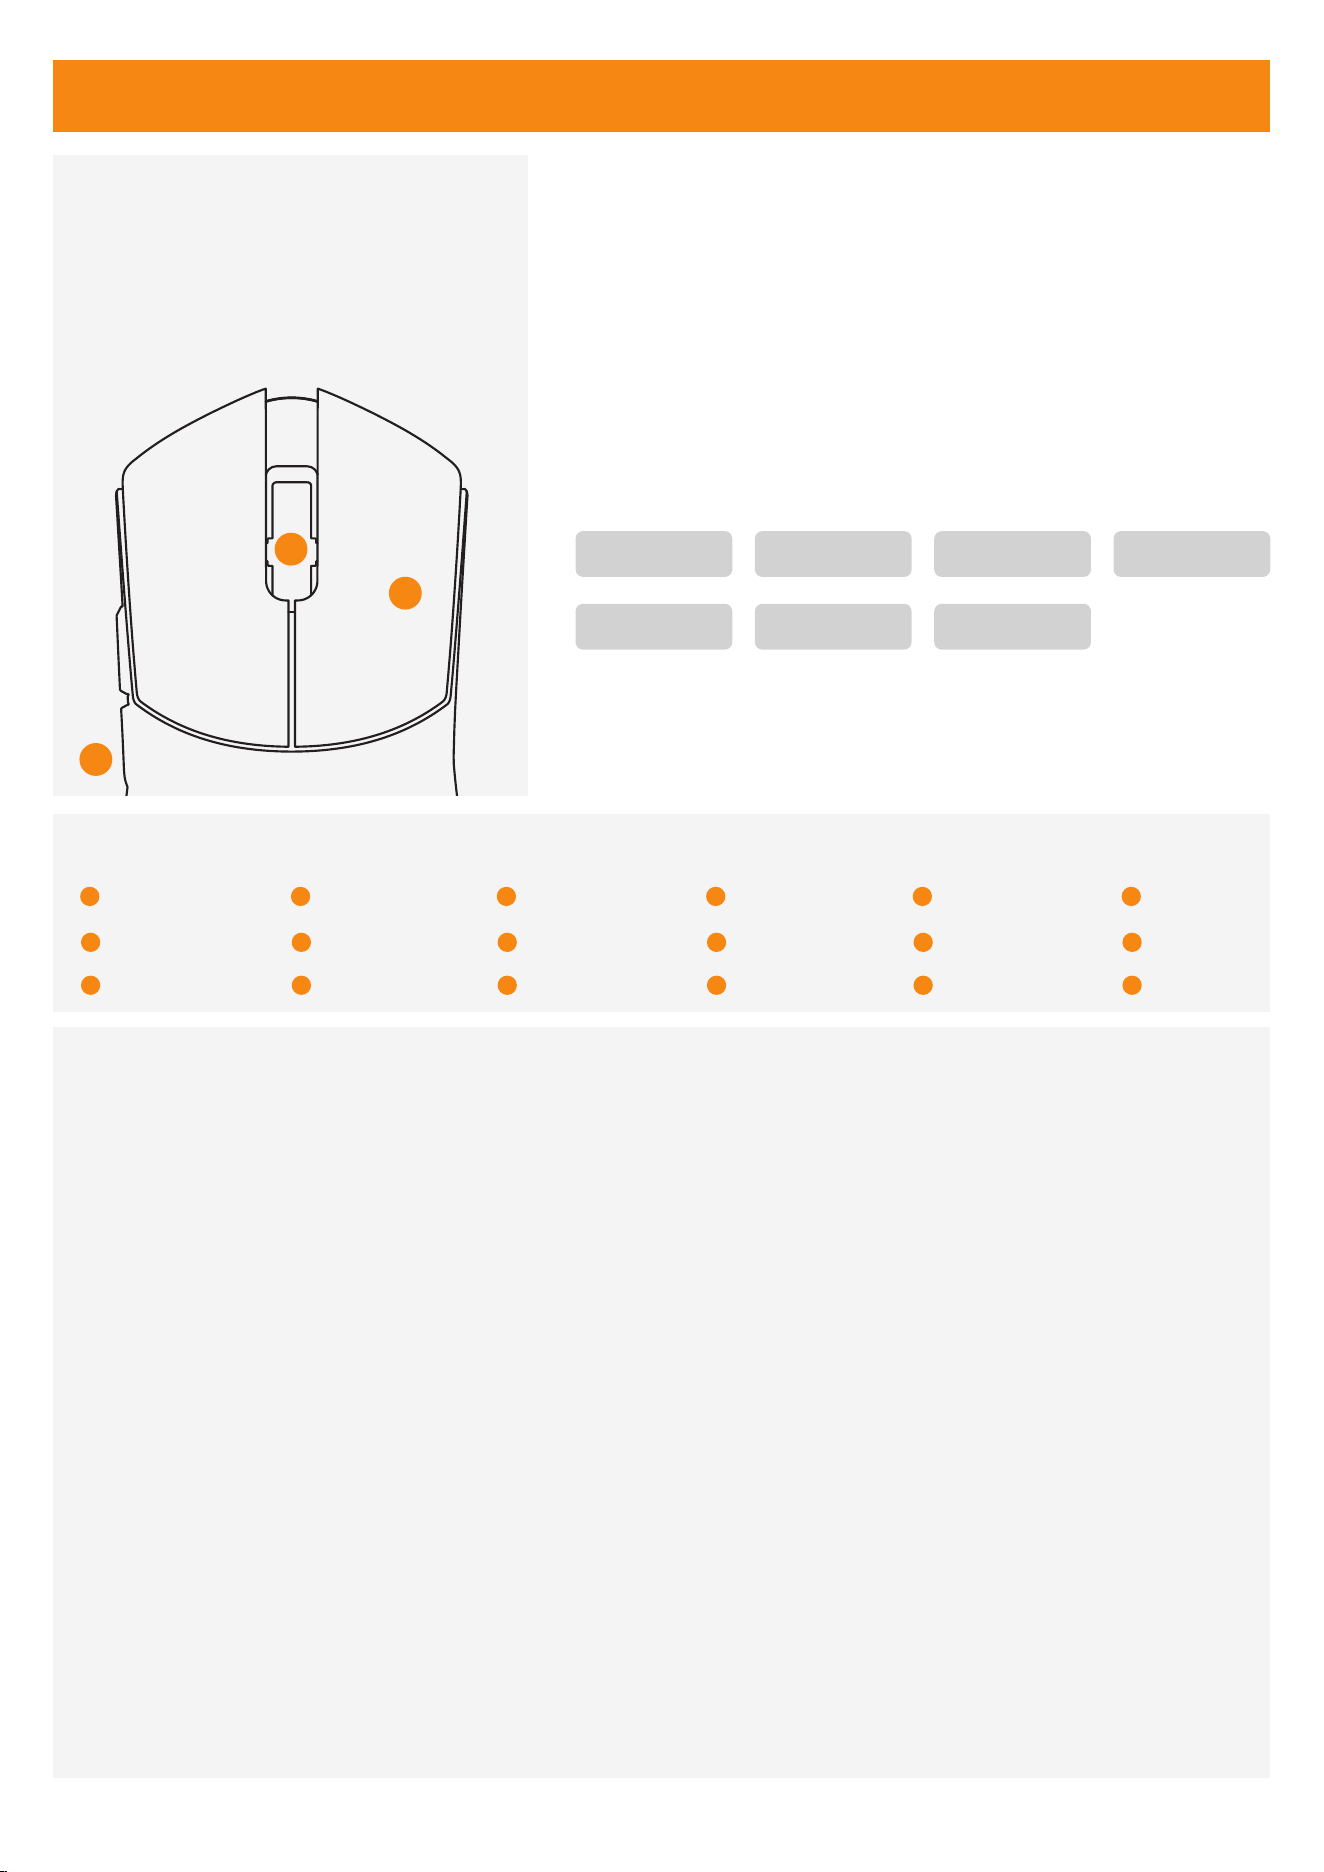
The default Lift-Off Distance (LOD) is 1mm. To switch it, press and hold the mouse forward button, left
button, and scroll wheel/middle button simultaneously for 3 seconds.
Lift-Off Distance (LOD) のデフォルトは1mmです。切り替える場合は、マウスの前側ボタン、左ボタン、スクロ
ールホイール/中ボタンを同時に3秒間押し続けてください。
리프트 오프 거리 (LOD)는 기본적으로 1mm입니다. 변경하려면 마우스 앞쪽 버튼, 왼쪽 버튼, 스크롤 휠/가운데
버튼을 동시에 3초간 누르세요.
La distance de décrochage (LOD) par défaut est de 1mm. Pour la changer, maintenez enfoncés simultané-
ment le bouton latéral avant de la souris, le bouton gauche et la molette/bouton central pendant 3
secondes.
Die Standard-Lift-Off-Distanz (LOD) beträgt 1mm. Um sie zu ändern, halten Sie die Maus-Seitentaste vorne,
die linke Taste und das Scrollrad/Mittelklick gleichzeitig 3 Sekunden lang gedrückt
Kalkma Mesafesi (LOD) varsayılan olarak 1mm olarak ayarlanmıştır. Değiştirmeniz gerekiyorsa, fare ön yan
düğmesini, sol düğmeyi ve kaydırma tekerleği/orta düğmeyi aynı anda 3 saniye basılı tutun.
[EN]
[JP]
[KR]
[FR]
[DE]
[TR]
LOD (Lift off Distance) Setting
3
1
4
HOLD ON 3-4 Seconds
[EN] [JP] [KR] [FR] [DE] [TR]
4
1
3
Left Button
Scroll Wheel
Forward Button
4
1
3
左ボタン
スクロールホイール
前進ボタン
4
1
3
Bouton gauche
Molette
Bouton avant
4
1
3
Linke Taste
Scrollrad
Vorwärtstaste
4
1
3
Sol Tuş
Kaydırma Tekerleği
İleri Tuşu
4
1
3
왼쪽 버튼
스크롤 휠
앞으로 가기 버튼
LOD Levels
0.7 mm 1 mm 2 mm
F
C
C
W
a
r
n
i
n
g
This device complies with Part 15 of the FCC Rules. Opera�on is subject to the following two condi�ons:
(1) This device may not cause harmful interference, and (2) this device must accept any interference received,
including interference that may cause undesired opera�on.
NOTE 1: This equipment has been tested and found to comply with the limits for a Class B digital device,
pursuant to part 15 of the FCC Rules. These limits are designed to provide reasonable protec�on against harmful
interference in a residen�al installa�on. This equipment generates, uses and can radiate radio frequency energy
and, if not installed and used in accordance with the instruc�ons, may cause harmful interference to radio
communica�ons. However, there is no guarantee that interference will not occur in a par�cular installa�on.
If this
equipment does cause harmful interference to radio or television recep�on, which can be determined by
turning
the equipment off and on, the user is encouraged to try to correct the interference by one or more of the
following
measures:
-Reorient or relocate the receiving antenna.
-Increase the separa�on between the equipment and receiver.
-Connect the equipment into an outlet on a circuit different from that to which the receiver is connected.
-Consult the dealer or an experienced radio/TV technician for help.
NOTE 2: Any changes or modifica�ons to this unit not expressly approved by the party responsible for
compliance could void the user's authority to operate the equipment.
The device has been evaluated to meet general RF exposure requirement. The device can be used in
portable exposure condi�on without restric�on.