
Important to know before detection leakage.
1. First, determine the pipeline location and direction.
2. Second, make sure there is no large and continuous environment noise around.
3. The drop leaking is not good detection or should keep the pipeline pressure 6Pa at
least.
4. Detection the exposed pipes and valve wells around.
5. The control handle switch on the cable, press down is turn on. Press again is
turn off. The detection should keep the handle switch ON
6. The detection Spectrum analysis/Filtering Analysis can’t save into instrument, you
can take the picture for saving. Only the Live recording of leaking sound can record to
repeat listening after measurement.
Assembly equipment
1. The headset connects to host machine. Turn on the button like“ ” of headset.
2. The sensor connects to the instrument, and cable connection to the host machine
too, if it is soft soil area, the connection of the three listening stick inserted into the
bottom of the sensor. Insert the listening stick to deep soft soil.
3. Use the belt when measurement, to avoid the damage and fall
1. Spectrum Analysis steps are as follows
(Spectrum Analysis is the rough test, After locking the small leakage area like 2 meter,
Use the Filtering Analysis to find the leakage point)
Open the power switch, double-click into the "Spectrum Analysis", the “volume”
adjusted to between 15-35, to hear the sound is appropriate; The “gain” adjusted to
between 10-15, or the sound will be distorted if raising.
Connecting the headset, turn on the headset power switch, turn on the noise control
button of the headset. Putting the sensor in the direction of the pipe or the valve in the
well, Press down the cable’s handle switch(which is a small button on the cable),
through the sound to determine the size of the vibration intensity, The pipe near the
water leakage point or the vibration of the valve well is large sound, with continuous
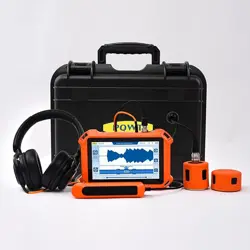
"ZI CI SI", Focus on the low-frequency spectrum of 3, 4, and 5 (from left to right) and
keep an eye for small areas of water leakage spectrum is raising. This area is
suspected leakage point of the spectrum is specially high/strong. After locking a small
area of the leakage area for filtering analysis.
Note: (We don’t need to operate the “Extend” setting in Spectrum Analysis interface.)
2. Filtering Analysis steps are as follows
(Through the “Location Mode” and “Long-Term Mode” to find the leakage)
A. Turn on the power switch, double-click into the "Filtering Analysis"; the “volume”
adjusted to between 15-35, to hear the sound is appropriate; The “gain” adjusted to
between 10-15, or the sound will be distorted if raising.
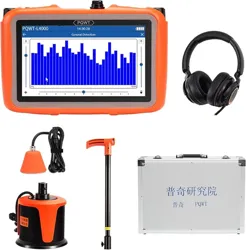
1. By selecting different frequencies to find leakage, click into the "24 Fix
Frequency" interface, select the frequency between 200HZ-500HZ, (Regular choose
the 200HZ to check the signal changes on the screen, If the signal is weak you can
choose 300HZ). Then click "Extend".
The first way: selecting"Location Mode". Please follow the direction of pipeline, long
press the cable handle switch in the measurement, A set of vertical line and thick line
appear on the screen,
With the change of the external noise has been ups and downs, The thick line
indicates the sound of water leak from the bottom. After the line is stable with
10seconds, click "Next" to lock the spectrum.
(Following the pipeline, each measurement moves 1-3 meter, Long down the cable
handle switch( On ) , until the signal column is stable, click "Next" again. On the
screen of thin and thick line will be fixed) Then repeat the above operation, and so on,
compared to the height of each measuring point thick line, the highest point of thick
line(Or the strong spectrum) is suspicious leakage point.
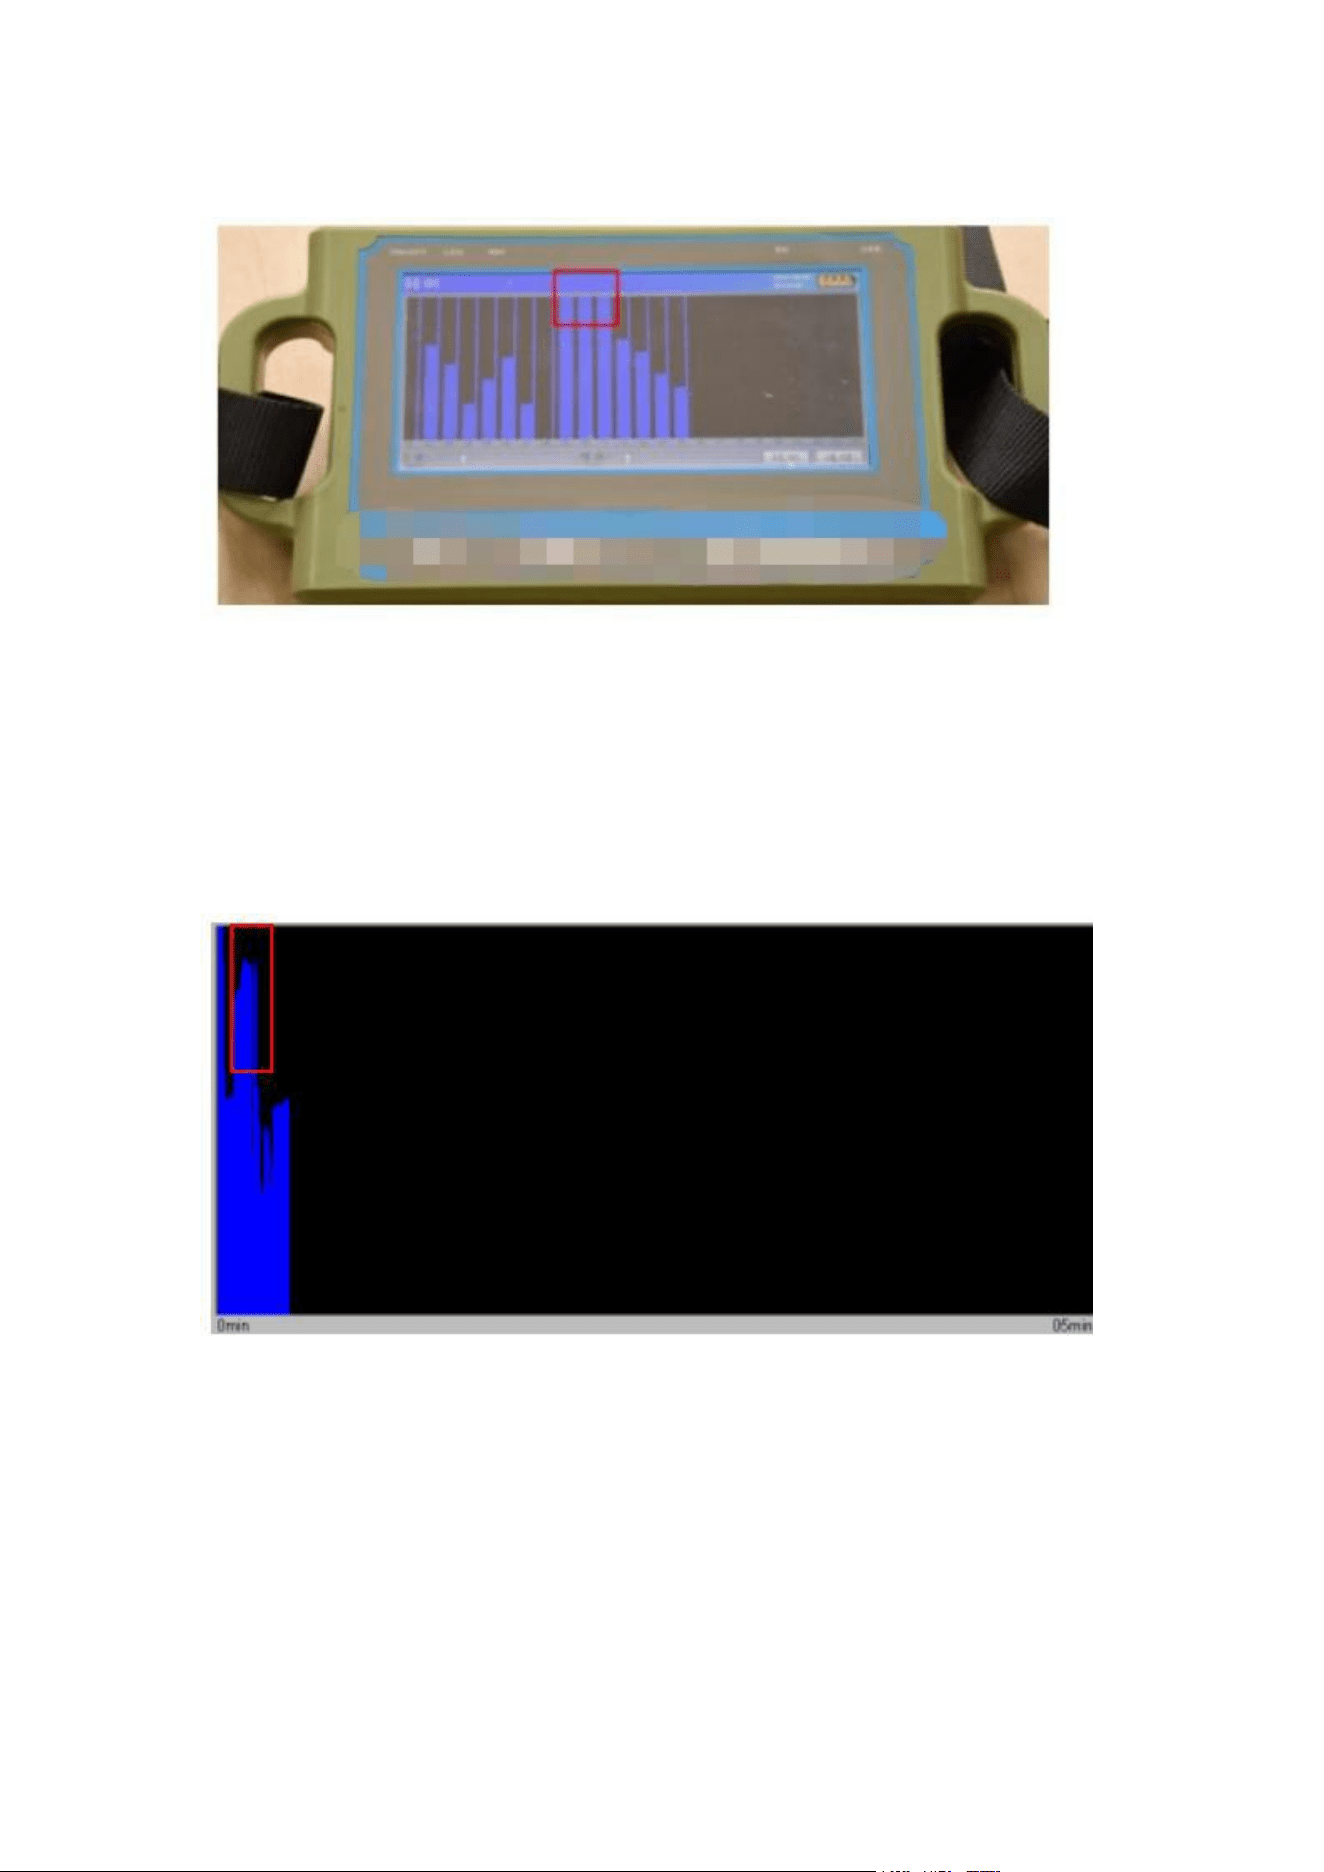
The second way: click "Long-Term Mode"
According to the length of the measuring pipe to determine the detection time, the
general choice 10Min, click "OK", Press down the cable handle switch during testing,
The instrument automatically records the column, Each point measuring is around 10-
20 seconds. After press the cable handle again to lose the switch, moving 1-3 meter
and press the handle again to measure. And so on, until the 10Min measurement
finished. The point with the highest column line is a suspicious leakage.
2. By selecting pipe material and soil texture to find the leakage.
(Soft soil available for listening stick into the soil)
For example: Click "Metal Pipe-Soft Soil", long press the cable handle switch,
The higher the Signal Level column is the high probability of water leakage.
Determine the high signal area, click "Extend", select "Location Mode" and "Long-
Term Mode" to test,
The measurement method can be based on the above operation mode.
Note: When the sensor is in the valve aperture, the spectrum will be higher.
3.Live Recording function
Live Recording function is real-time recording underground vocalization, can repeat
listen to the recordings to find suspected leakage.

Click to enter "Live Recording", click "REC", following the pipeline. The recording
can verbally record the measured position, click "MIC Off", speak out the exact
location, click "MIC Off" to continue the recording function.
After recording, click "Stop", click "Refresh" to save the recording. Click "Play" to
repeatedly detect suspected leaks.
The water leak detection is a system working, The CL is only one tool to track the
leakage, You need to hear them especially sound from the headset and observe the
spectrum changes on the screen( Regular to find the strong spectrum steady and
locked the suspicious leakage points. You can check whether it is a real water leakage
point before the excavation.