User Manual
Harry Potter Figural Mouse
Model# HPX009A
CONTROLS
SPECIFICATION
Material: ABS Plastic
Connection Distance:33 ft±6.6ft/10M±2M
Adjustable Resolution(DPI): 800-1200-1600
Button: 4 Function Buttons
Requires Two (2) 1.5 V AAA Alkaline Batteries (not included)
Minimum System Requirements:
Windows 11, 10, 8, 7
macOS 10 or higher
Package Contents:
* Harry Potter Figural Mouse
* 1 USB Dongle
* User Manual
How to Use
1. Insert Batteries
Open the battery cover on the bottom of the mouse and insert the
required batteries (usually AA or AAA), ensuring correct polarity.
2. Plug in the USB Dongle
Insert the USB Dongle into an available USB port on your computer.
3. Automatic Power On & Connection
The mouse will automatically power on and connect once the batteries
are installed and the USB receiver is plugged in.
4. Automatic Pairing
The mouse will pair with the USB receiver within a few seconds. No driver
installation is required.
5. Adjust DPI (If Applicable)
Press the DPI button to switch between dierent sensitivity levels for
better control.
6. Start Using
Once connected, the mouse is ready to use.
Notes
* If the mouse does not respond, try reinserting the USB Dongle or
replacing the batteries.
* Use the mouse within an eective range of up to 10 meters (32 feet).
* Avoid using the mouse on reective or glass surfaces for best
performance.
WARNING: TO AVOID BATTERY LEAKAGE
Requires 2 (Two) 1.5V AAA Batteries (Not included)
The batteries used with this product are small parts and should be kept
away from small children who still put things in their mouths. If they are
swallowed, promptly see a doctor and have the doctor phone American
Association of Poison Control Centers (1-800-222-1222).
Always purchase the correct size and grade of battery most suitable for
intended use.
Do not mix old and new batteries, alkaline, standard (Carbon-Zinc) or
rechargeable (Nickel-cadmium) batteries.
Clean the battery contacts and those of the device prior to battery
installation.
Ensure the batteries are installed correctly with the regard to polarity (+
and -)
Always remove batteries if depleted or if product is to be left unused for a
long time.
-If the battery compartment does not close securely, stop using the
product, remove the
batteries, and keep them away from children.
-Recycle or dispose of depleted batteries according to local regulations.
WARNINGS
• This is not a toy keep away from children under 6 years of age.
• Keep away from heat and open ames.
• Do not attempt to disassemble or reassemble this device.
• Please pay attention to the anode and the cathode of the battery install.
FCC STATEMENT
NOTE: This equipment has been tested and found to comply with the
limits for a Class B digital device, pursuant to part 15 of the FCC Rules.
These limits are designed to provide reasonable protection against
harmful interference in a residential installation. This equipment
generates, uses and can radiate radio frequency energy and, if not
installed and used in accordance with the instructions, may cause harmful
interference to radio communications. However, there is no guarantee
that interference will not occur in a particular installation. If this
equipment does cause harmful interference to radio or television
reception, which can be determined by turning the equipment o and
on, the user is encouraged to try to correct the interference by one or
more of the following measures:
-Reorient or relocate the receiving antenna.
-Increase the separation between the equipment and receiver.
-Connect the equipment into an outlet on a circuit dierent from that to
which the receiver is connected.
-Consult the dealer or an experienced radio/TV technician for help.
Changes or modications not expressly approved by the party
responsible for compliance could void the user's authority to operate the
equipment.
This device complies with Part 15 of the FCC Rules. Operation is subject to
the following two conditions:
(1)This device may not cause harmful interference, and (2) this device
must accept any interference received, including interference that may
cause undesired operation.
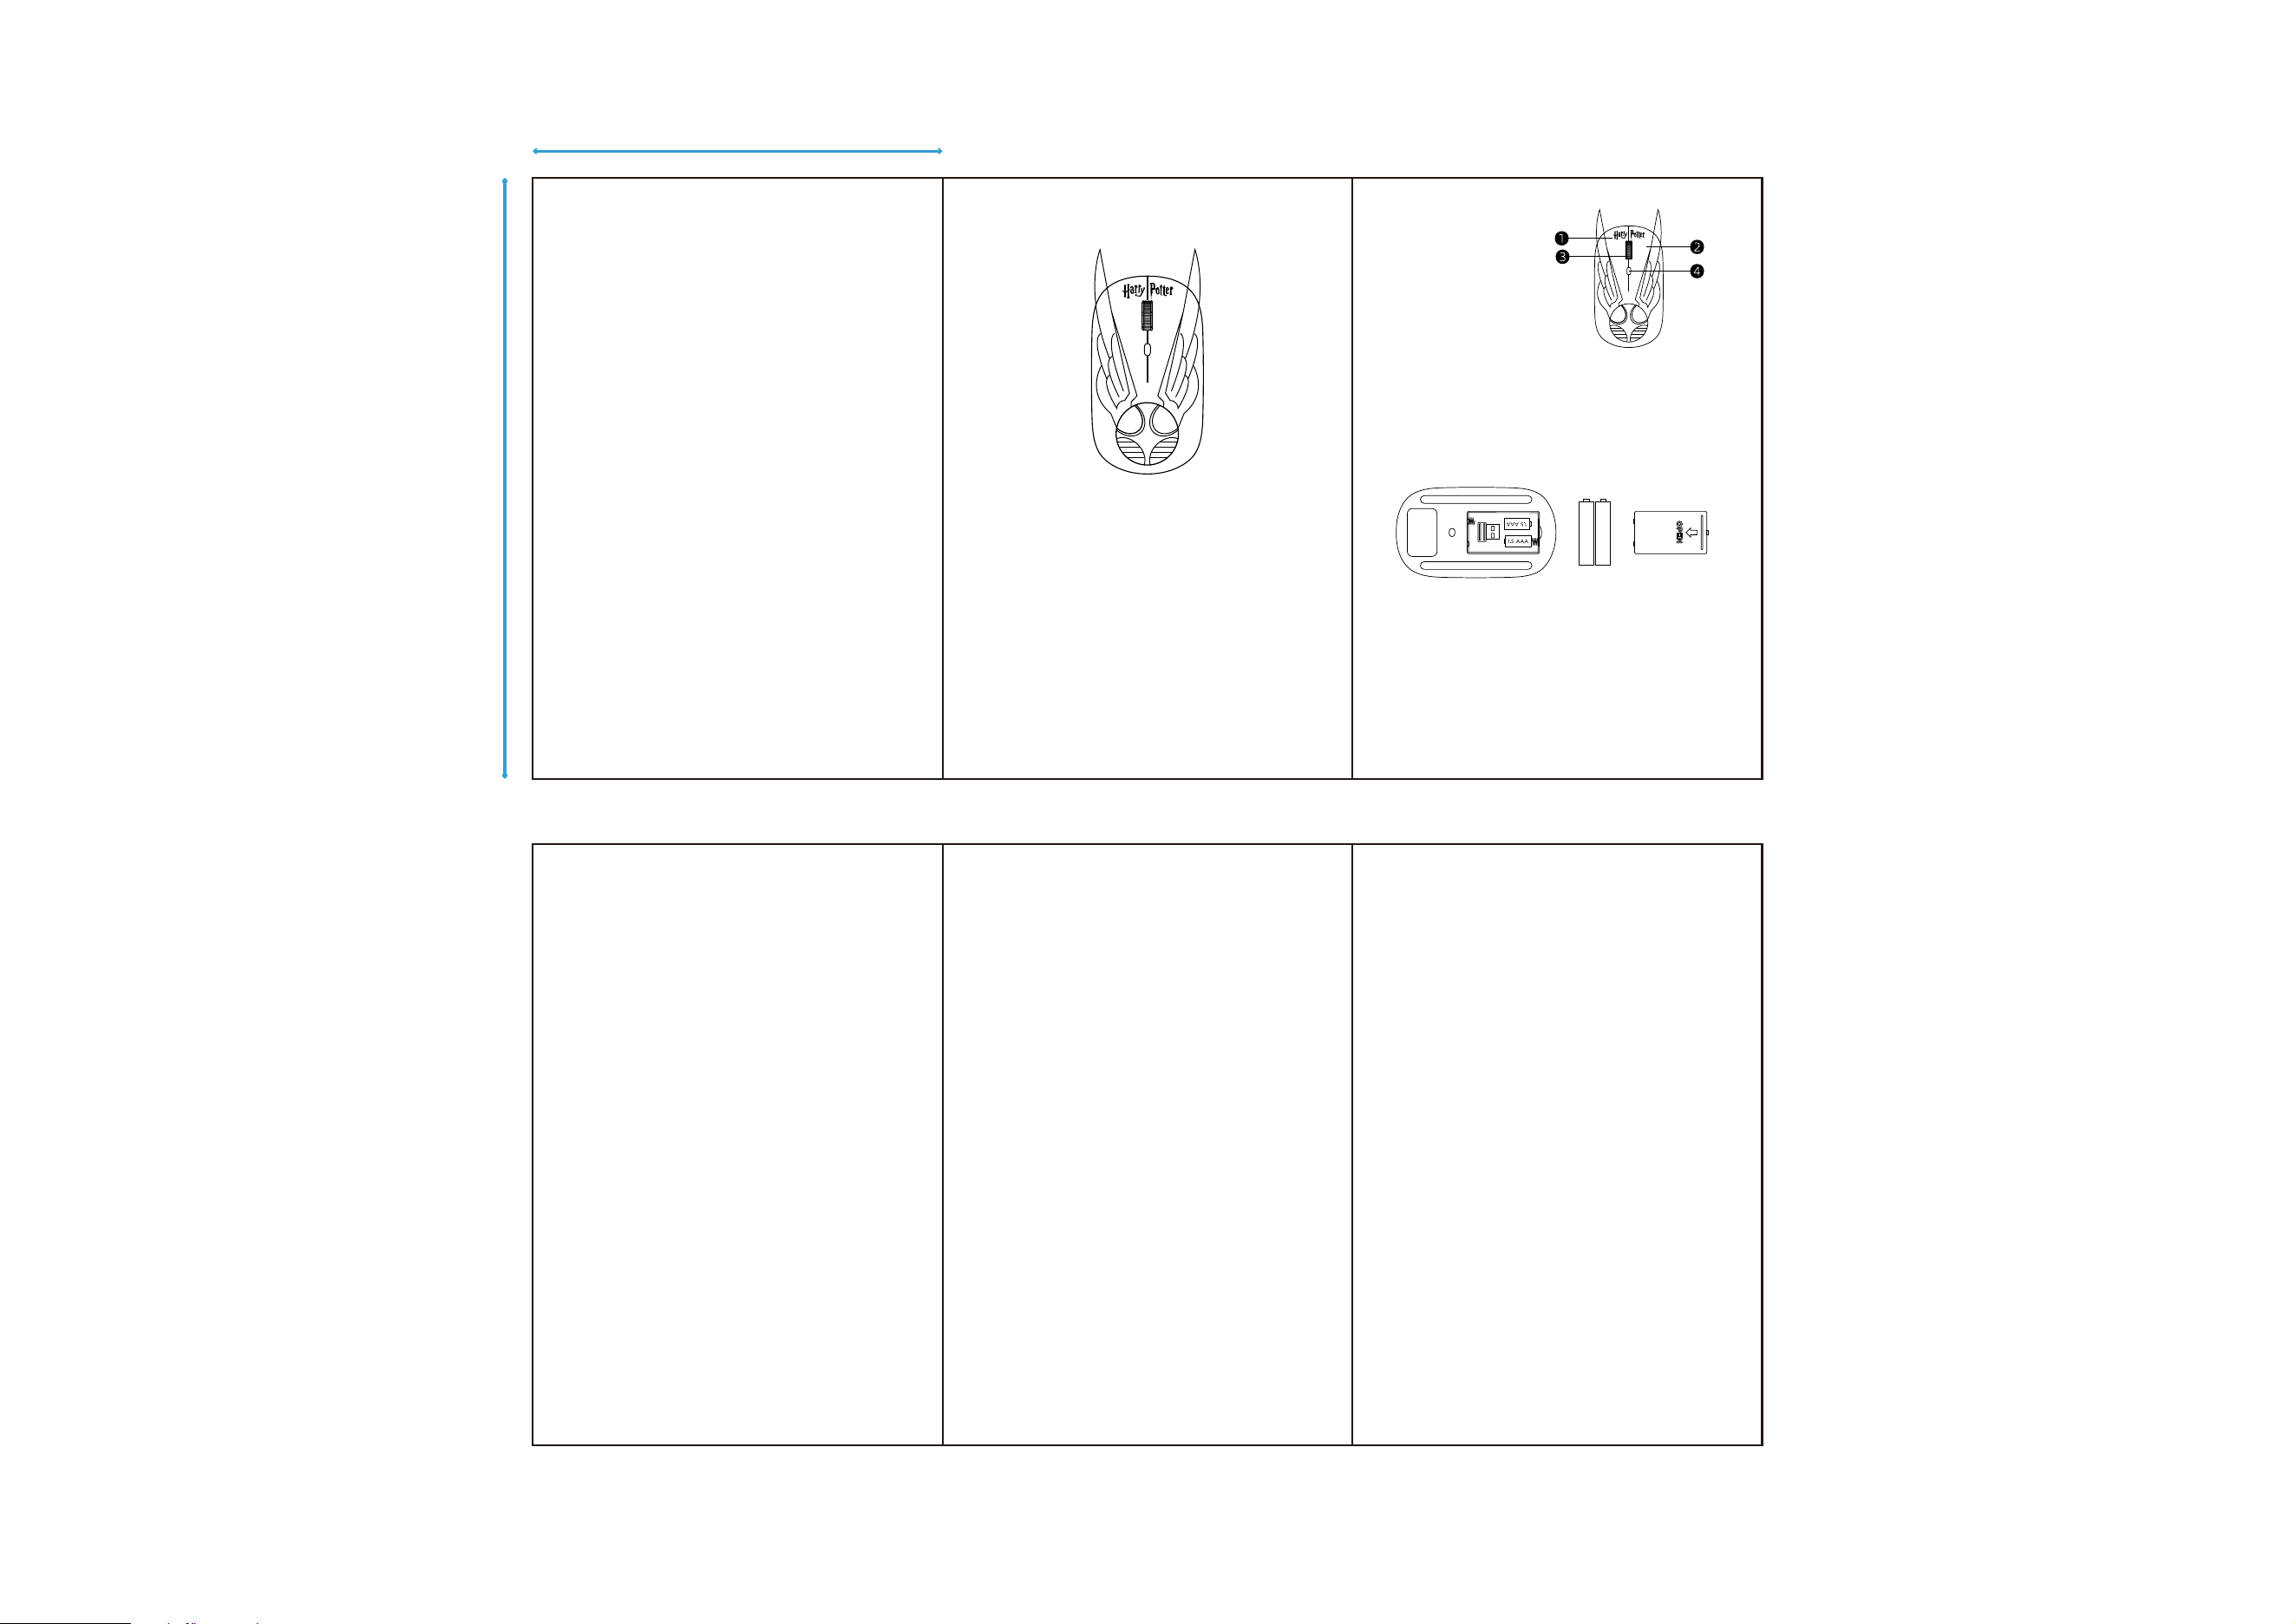
Battery Installation:
* This mouse requires two AAA batteries (not included).
* Locate the battery compartment on the bottom of the mouse.
* Remove the cover and Insert the batteries, ensuring correct polarity
(+/-).
* Replace the cover securely.
Mouse Diagram:
1. Left Button
2. Right Button
3. Scroll Wheel
4. DPI Switch Button
AAA x 2
Mouse FCC ID: 2A2WN-SCSB02
Dongle FCC lD: 2A2WN-SCJSQ01
FRN: 0031270333
Questions? Comments?
Contact: contact@culturey.com
FRONT
P1 P2 P3
P4 P5 P6
BACK
110 mm
75 mm