M P U L S E T E C H G U I D E
V E R S I O N 1 2 2 0 2 0 2 5
B L A U P U N K T
m Pulse
2
2
Welcome to your in-sauna entertainment!
In this guide, you will be walked through how to setup your sauna account and utilize your
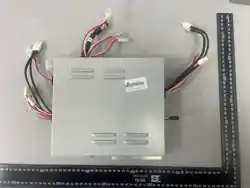
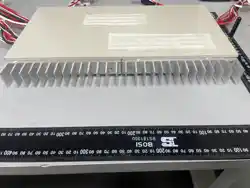
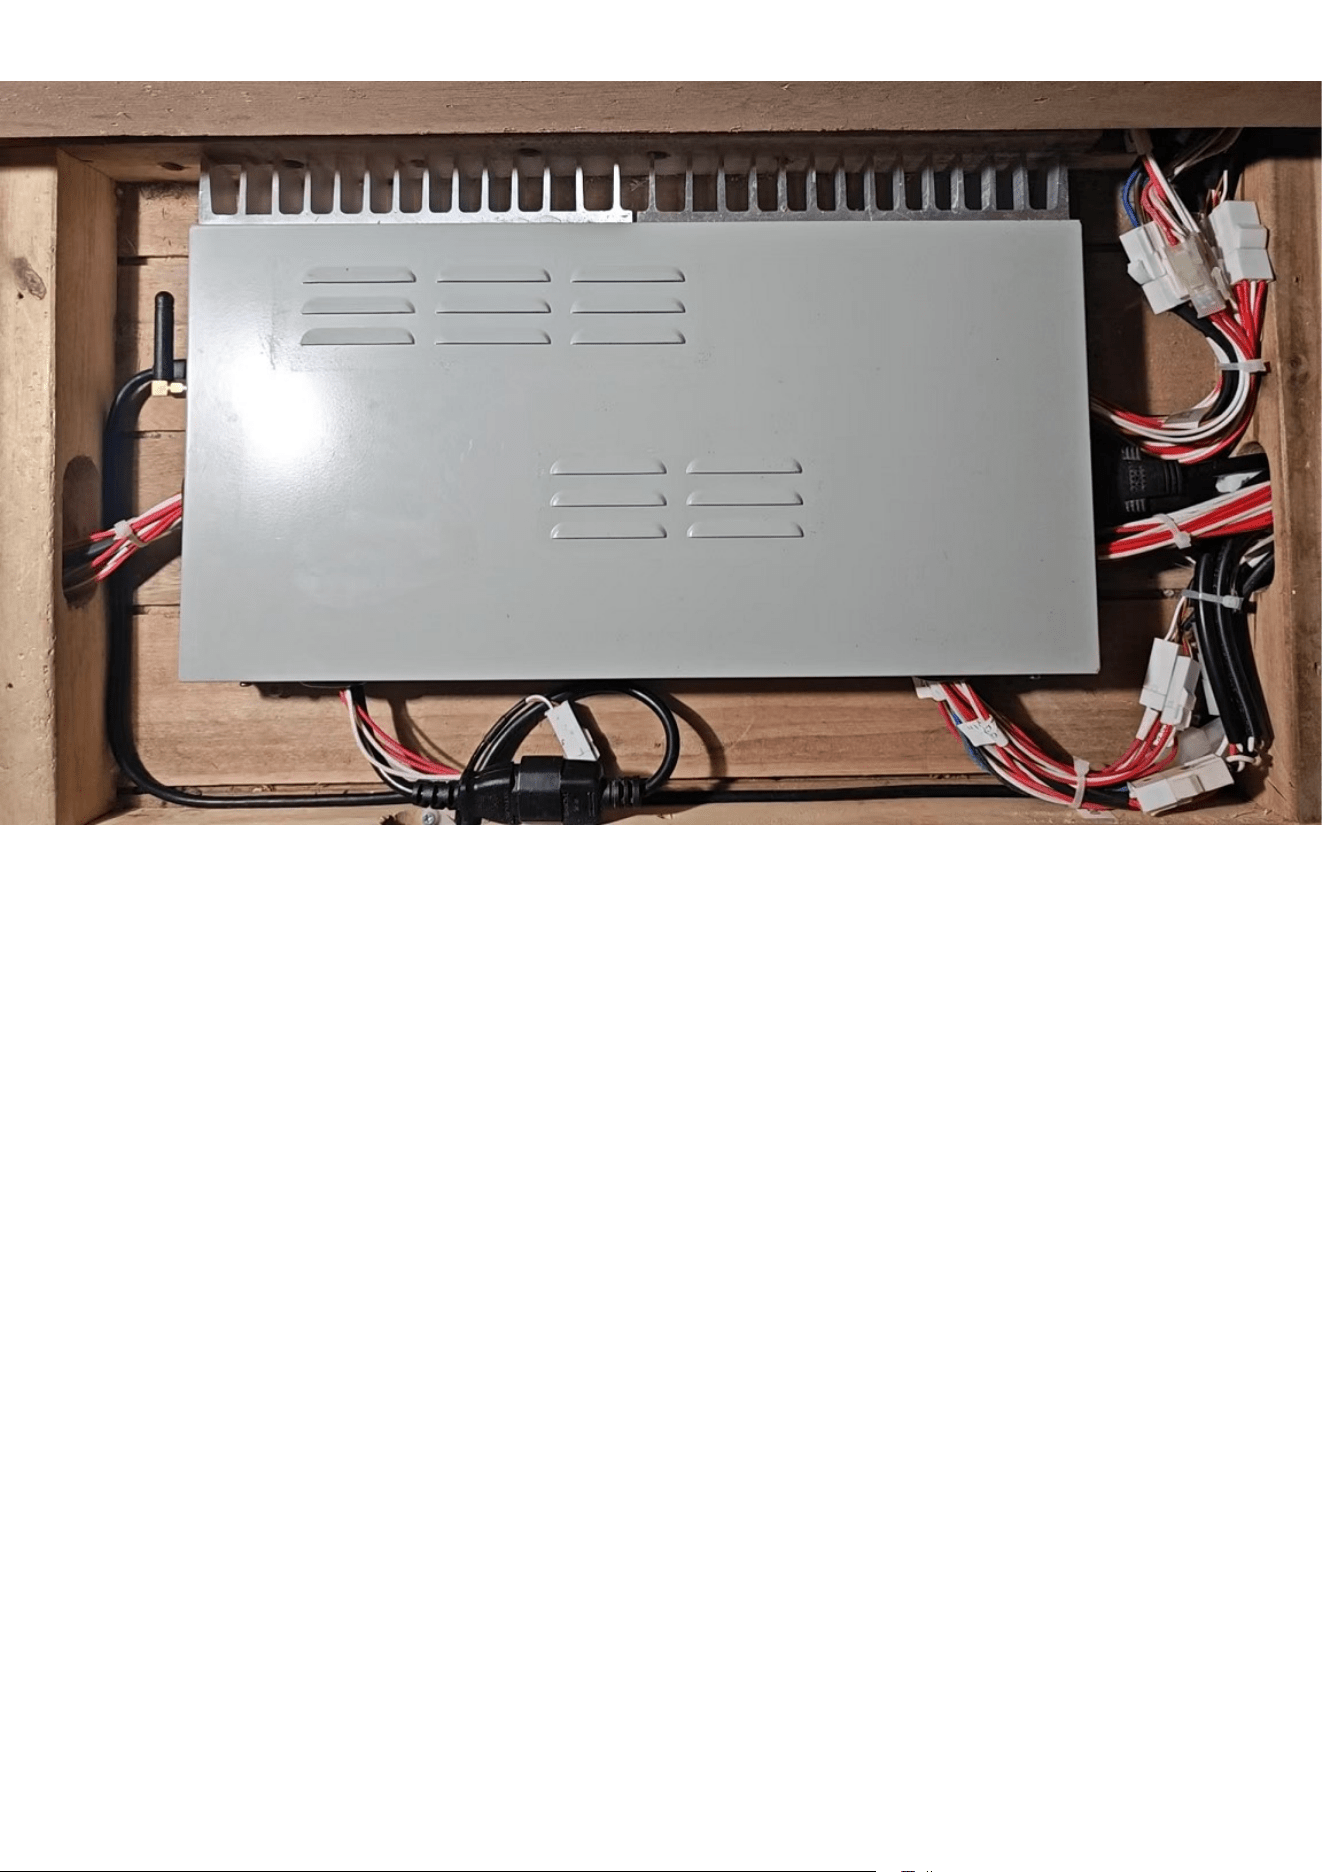
mobile app,Android Control Pad and mPulse Power box(PB). For optimal guidance,
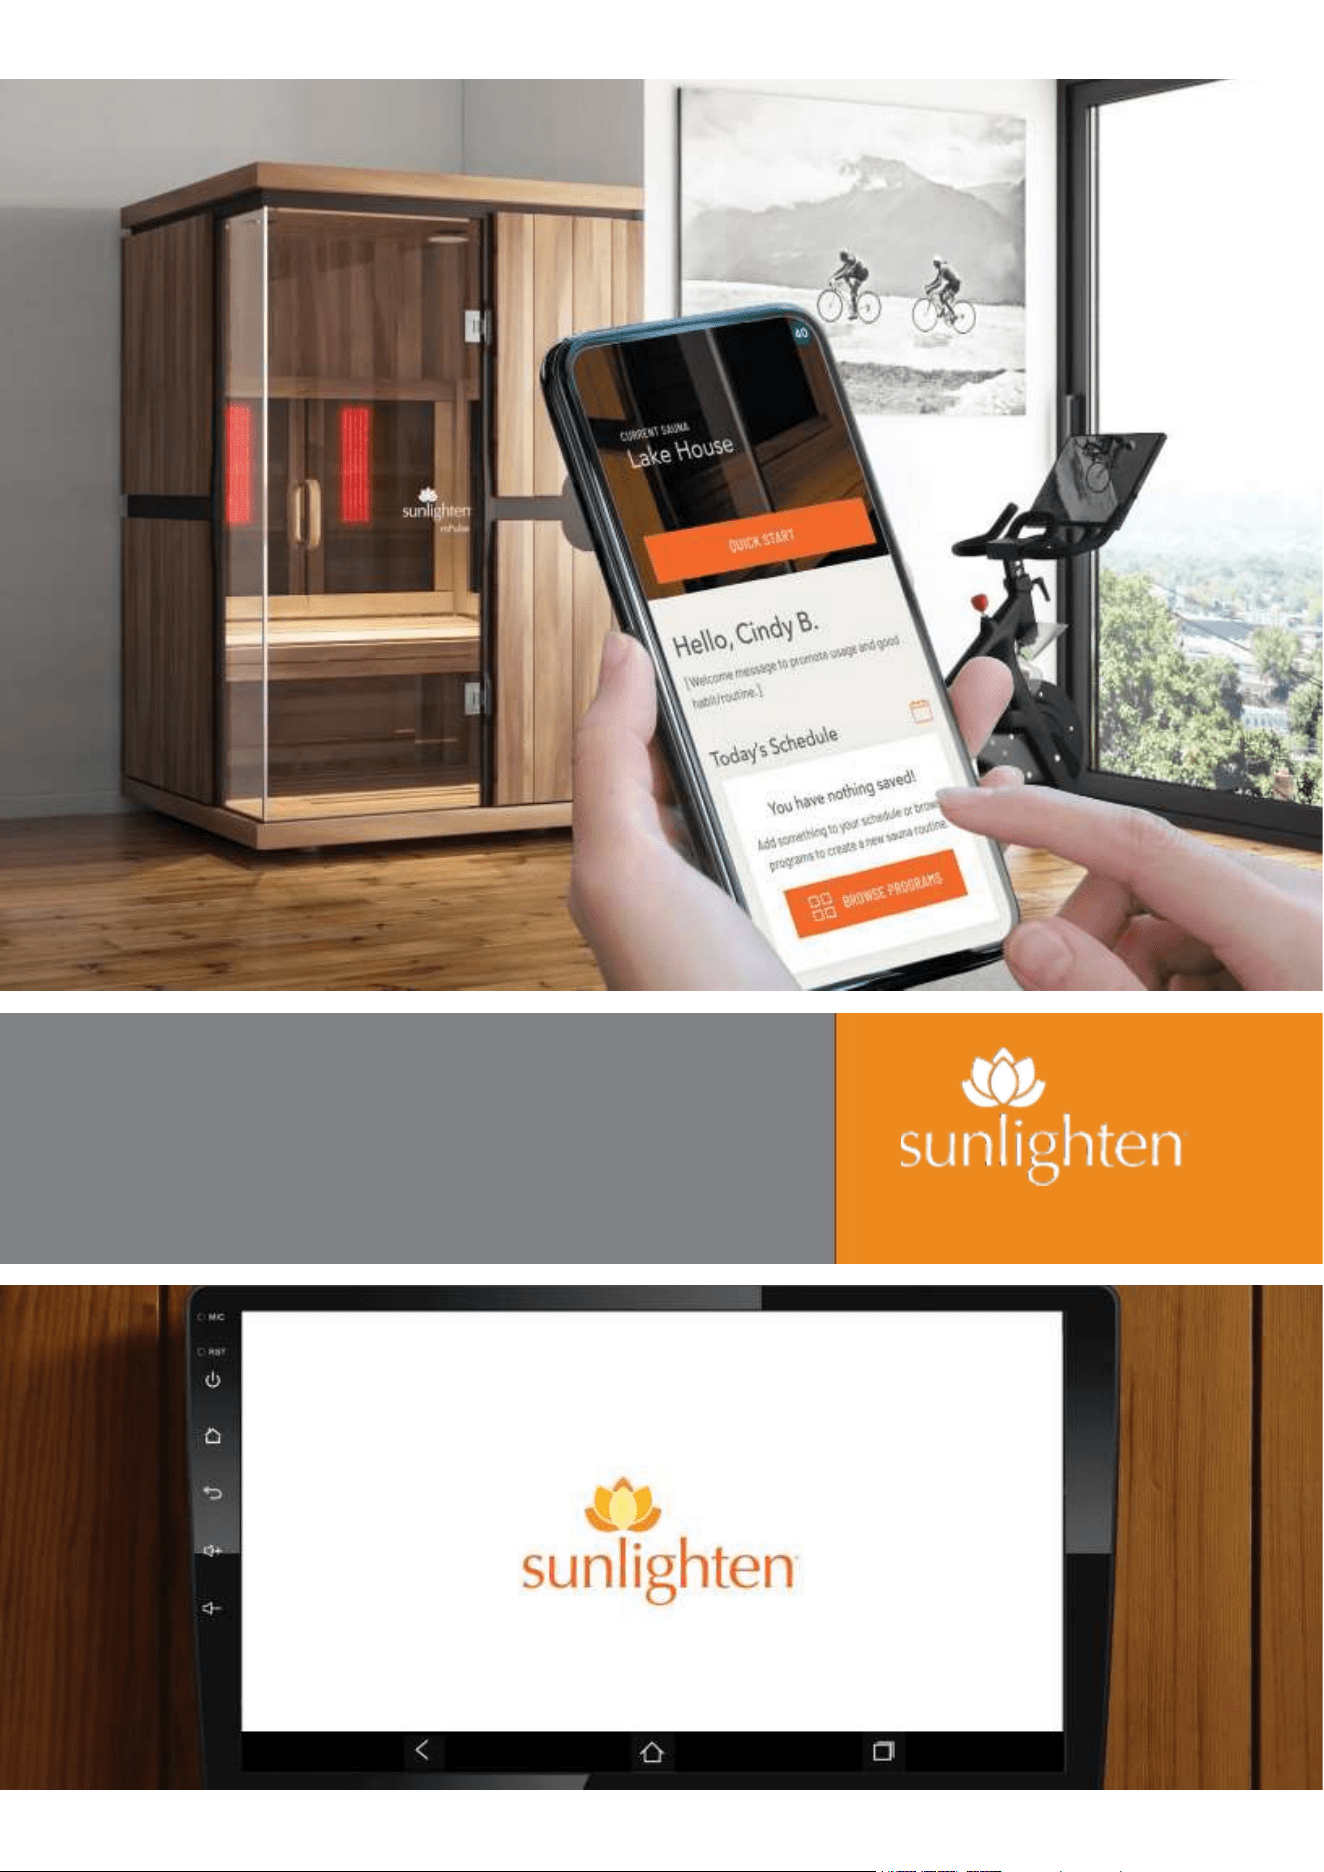
confirm that your Android Control Pad and mPulse Power box(PB) matche with the image
featured on the cover of this guide. To maximize the benefits of your sauna sessions and
customize the experience to suit your preferences,kindly follow these instructions.
The Sunlighten App
Welcome to the Sunlighten App! This guide will take you through the registration and setup
of your account and the most common and useful functions of your Android Control Pad in
operating your mPulse Smart Sauna.

m Pulse
M P U L S E T E C H G U I D E
V E R S I O N
1 2 2 0 2 0 2 5
TABLE OF CONTENTS
Sunlighten Mobile App
.....................................................................
4
Control Pad Screen/Initial Setup
..................................................
5
Account Registration
........................................................................
9
Profile Setup
.........................................................................................
10
Welcome Screen
.................................................................................
11
Wellness Programs
.............................................................................
12
Schedule
...............................................................................................
13
Custom Programs
..............................................................................
14
More
..........................................................................................................
15
Media & Applications
...........................................................................
16
FAQ
............................................................................................................
17
Troubleshooting
...................................................................................
18
Error Codes/Diagnostics
....................................................................
19
FCC
Warning
.............................................................................................
21
Warranty
...................................................................................................
22
Additional guides, including the mPulse owner’s manual, can be found at
sunlighten.com/customer-service/guides-and-specs.

4
USING THE SUNLIGHTEN MOBILE APP
Available on the App Store for iPhone 12 (or later) and Google Play store for Android 8
(or later) is the Sunlighten app. Currently, this is a foundational version.
• Schedule sessions with our upgraded scheduling tool
• View calendar of upcoming sessions to easily integrate into your routine
• Choose pre-set wellness programs that help you pursue your health goals
• Create custom programs for a personalized option
• Set specific health goals so you stay focused
• Access your sauna from 500 meters, or 1/3 of a mile
• View wavelength animation during selected programs to understand what
wavelengths are emitting to create specific health benefits
All these amazing features are just the beginning. Features around the corner include
notifications, exclusive sauna content, milestone tracking, gamification, and so much
more! Stay connected with us so you don’t miss an update. As the most advanced sauna
on the market, our vision for you to have access to your sauna from your phone is to make
it a more seamless and pleasurable part of your daily life. It easily supports your health
goals and wellness routine to feel better so you can do more and live your fullest life.
How to Get the Sunlighten Mobile App
Step 1. Make sure your in-sauna tablet has the latest version (3.2.1 or higher) In order
to use the mobile app, you’ll need to update your in-sauna tablet to 3.2.1 or higher. This
update is only available for Android 10 tablets. If you’re interested in upgrade options,
please contact our Customer Care team at (877) 292-0020 or Submit a Ticket here:
sunlighten.com/customer-service.
HOW: To make sure you have the latest version, click the “More” icon at the bottom of the
screen and look at the version number that is very small in the bottom center of the next
screen. If you did not get a pop-up message to update to the latest version, you will need
to manually update to the latest version from the Google Play store. You can access that
from the Google Play store icon on your tablet home screen.
Step 2. Download the Sunlighten mobile app to your phone.
5
ANDROID CONTROL PAD GUIDE
ANDROID CONTROL PAD
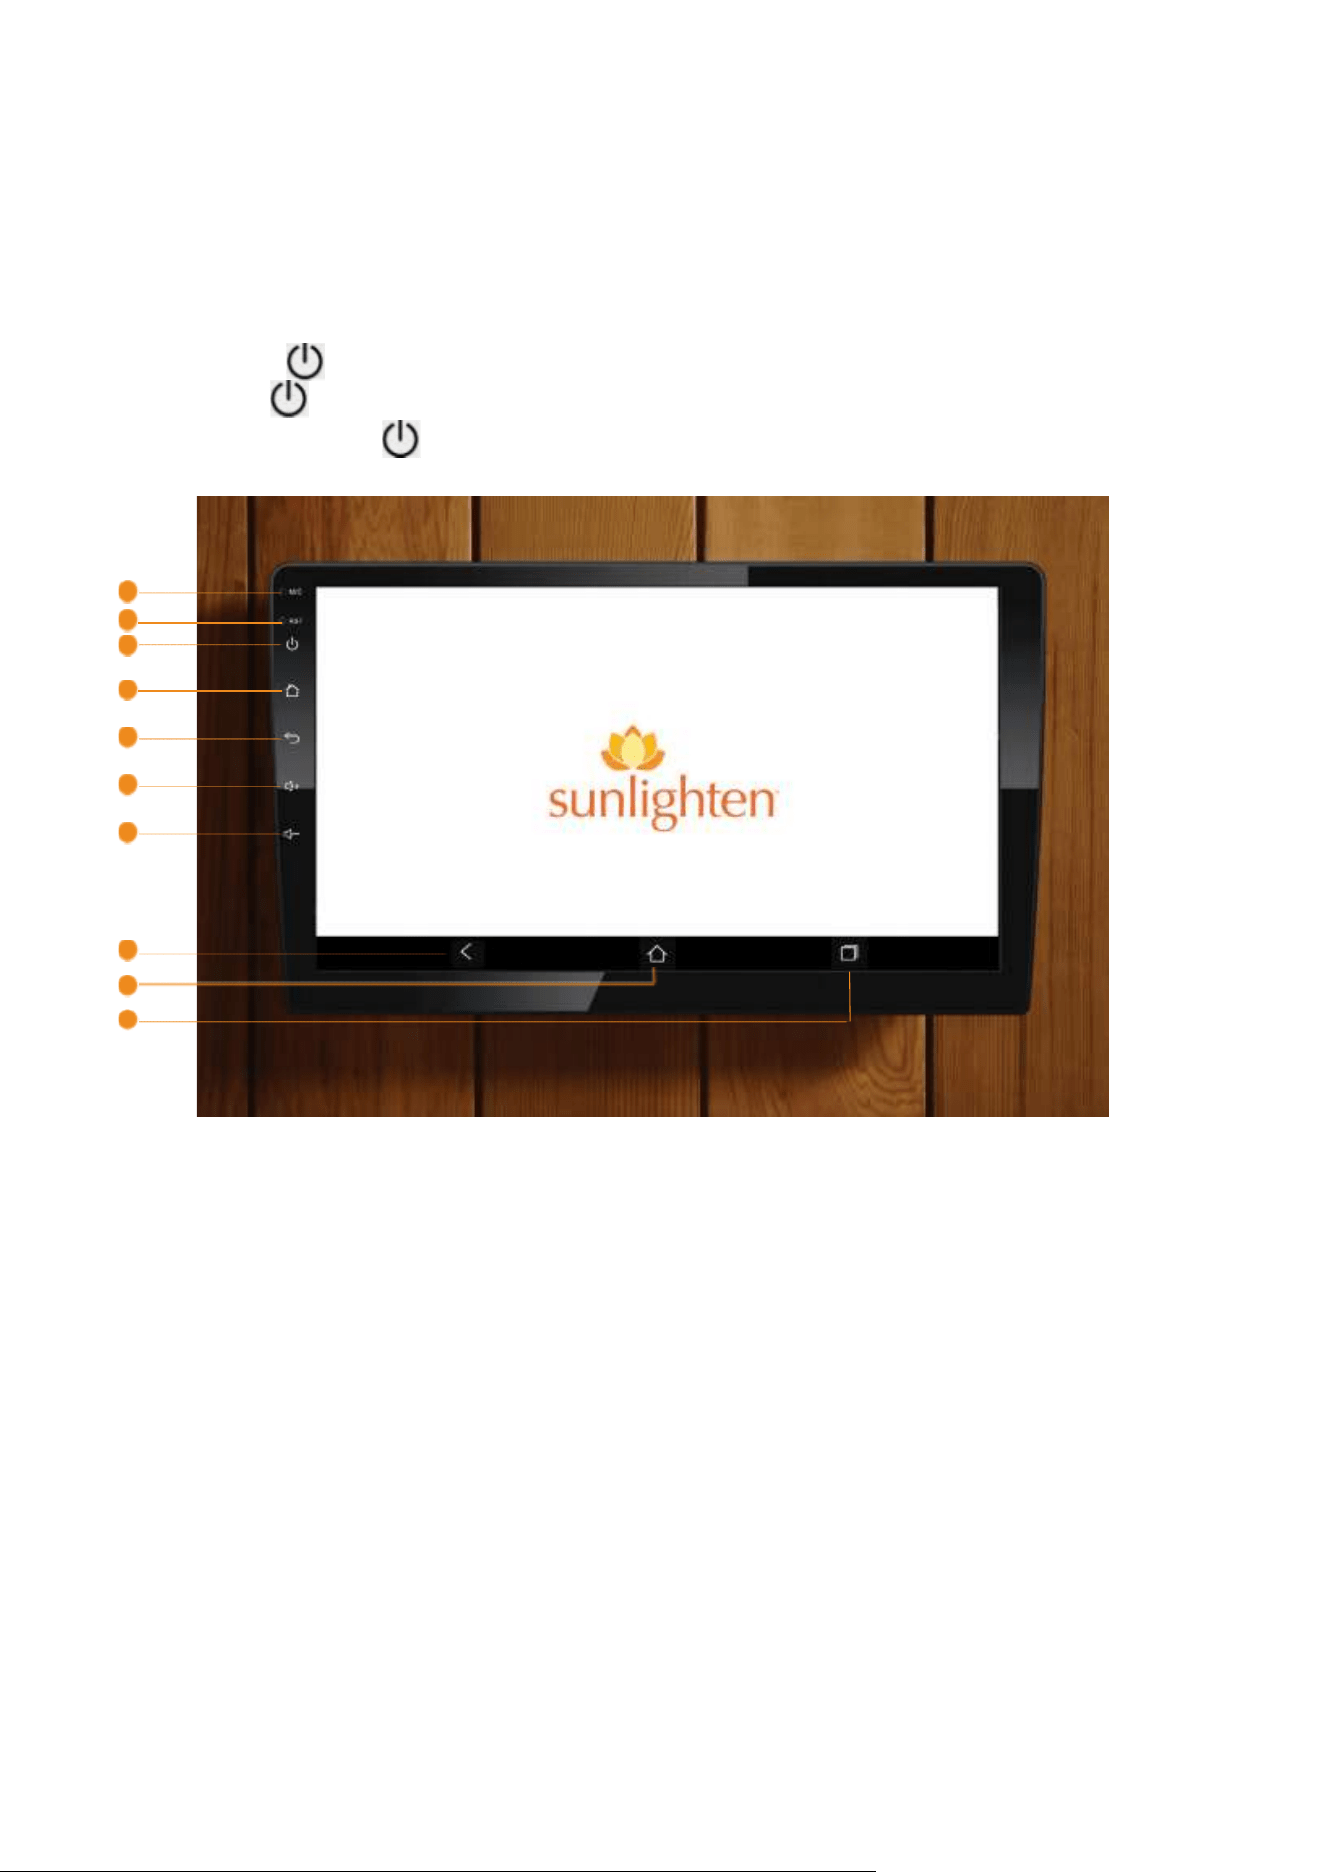
Power ON/OFF & Mute
To turn on: Press
To mute: Press while ACP is on
To turn off: Press and hold for 3 seconds
1
2
3
4
5
6
7
8
9
10
1 . MICR O P H O N E
2. RESET BU TT ON . REST ORE TO DE FA UL T FA CT ORY SETTING S OF T HE DEVICE .
CA UT ION: ALL PE R S O N A L SE T T I N G S WI LL BE LOST .
3 . PO W E R /M U T E B U T T O N . S H O R T PR ESS : TU R N O N DE V ICE; IN OP E R A T I O N : MU T E
A U D I O SO U R C E ; L O N G P R E S S : TU R N O F F D E V I C E
4. HOM E BUTT ON . SHOR T PRE SS: GO TO SO U RCE MENU
5. BACK BU TTO N . PRESS TO RE TU RN TO PREVIO US ME NU
6. PR ESS THI S BUTTON TO IN CR EAS E A UDIO VOL UME
7. PRESS TH IS BU TT ON TO DEC REASE A UDIO VOL U ME
8. BACK BU TTON . PRESS TO RE TURN TO PREVIOUS MENU
9. H OME BUT T O N . SHO R T PR E SS: GO TO SO U R CE ME NU LONG PR ESS : OPEN APPS
IN BACKGRO U N D
10 . OV E R LAI D SQUA RE S BU T T ON . PRESS TH IS BUT T O N TO BRIN G UP A SE L ECT ION
OF ALL APP S THA T AR E CU RREN TL Y OP E N
6
SETUP
SCREEN 1
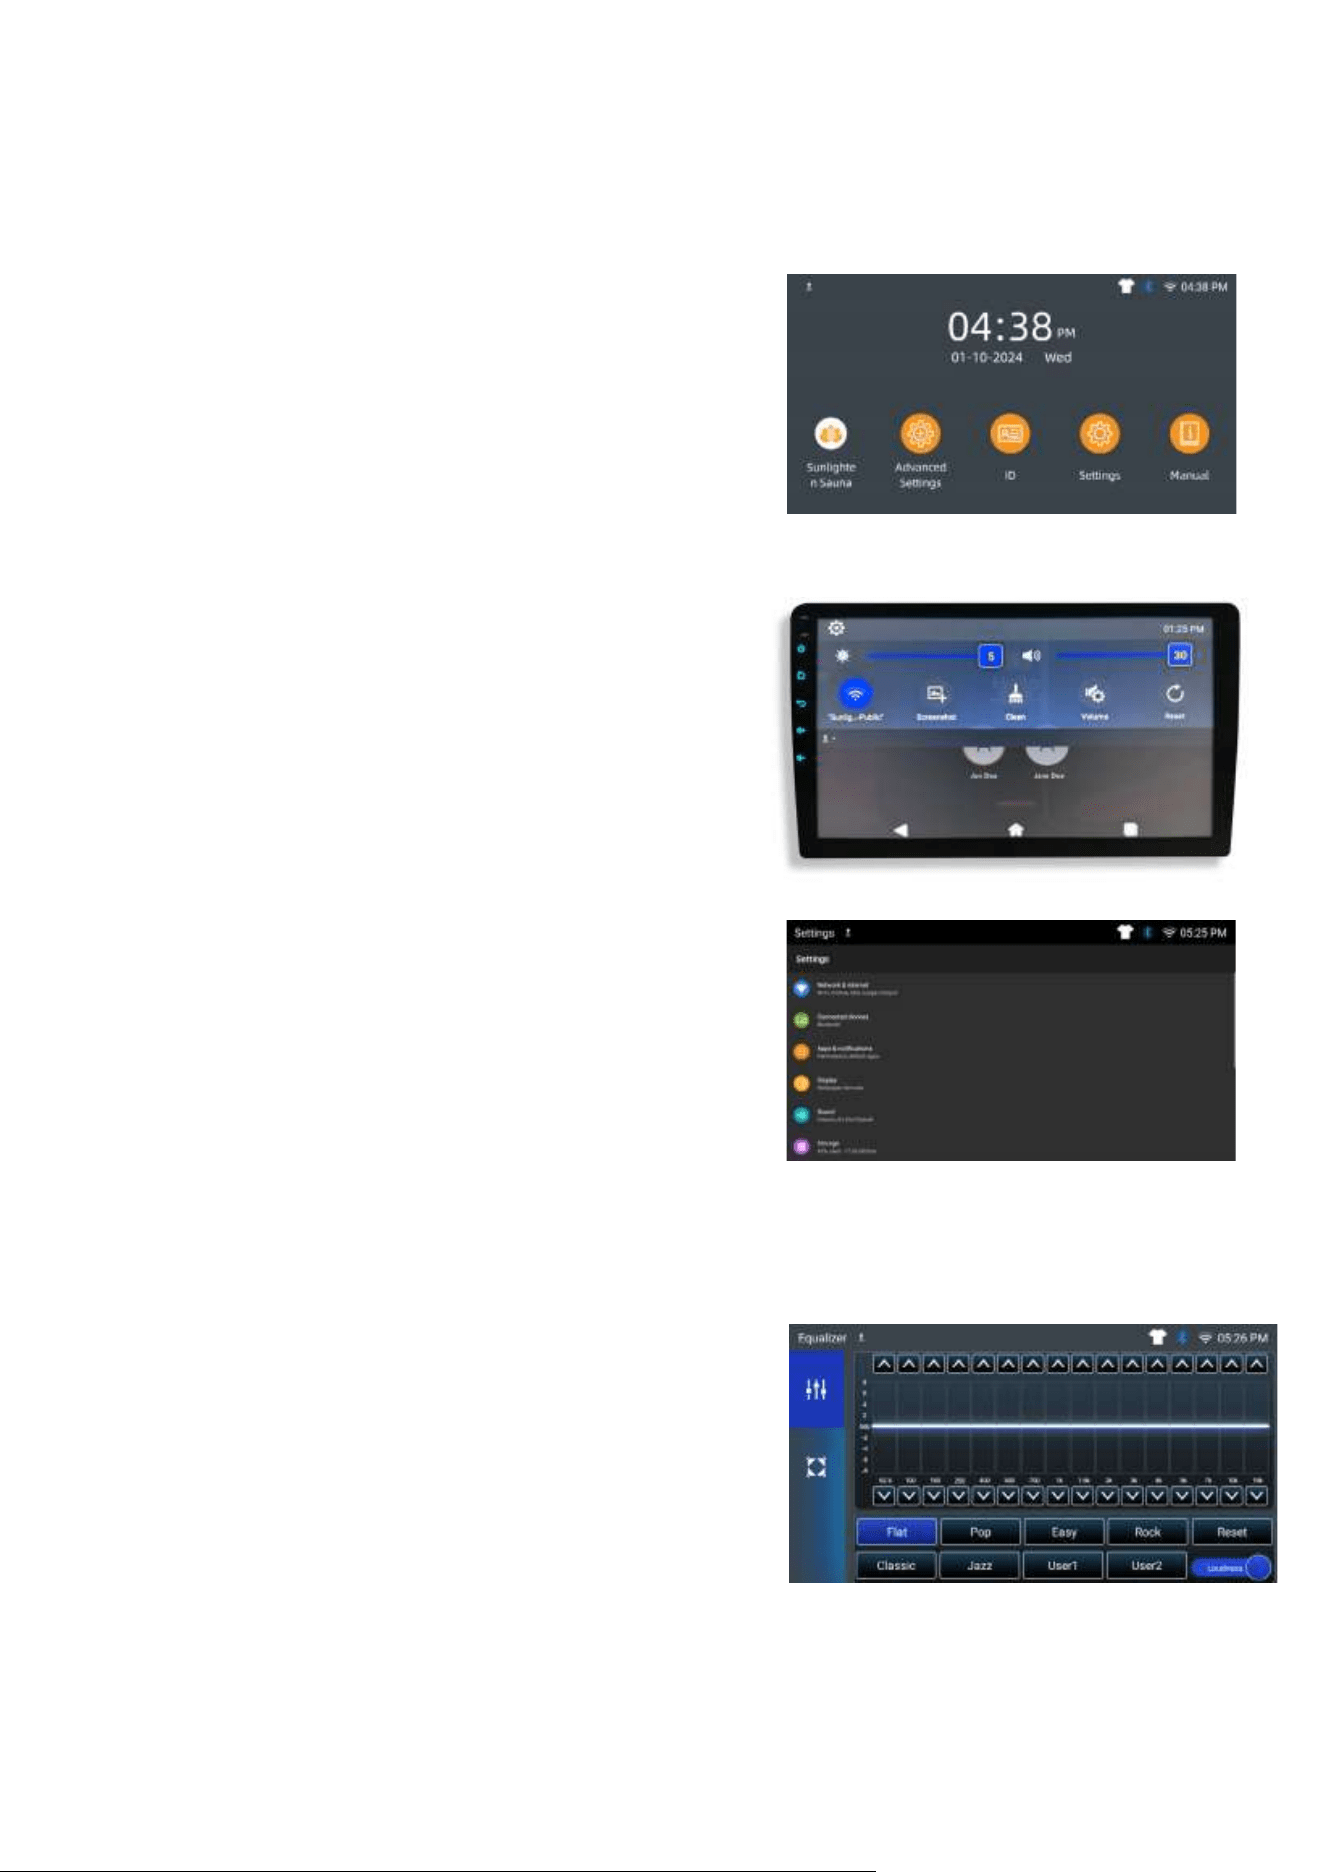
On activating your Control Pad, you’ll be greeted by a screen
with some starter Android app icons. To view additional
apps installed on the tablet, swipe left. You can tap the lotus
logo to return to the Sunlighten App at any time to see your
App Tray.
SCREEN 2
Swipe down from the top of the screen to:
• Adjust screen brightness and volume.
• Hold Wi-Fi button down to connect.
NOTE: the Sunlighten app requires a 2.4GHz
Wi-Fi line. 5GHz will also work with the tablet if you
are in range (about 20-30 ft from your router) .
• Screenshot will take a picture of your screen.
• “Clean” and “Reset” use are best advised by Customer
Care.
• Volume will allow you to control Media (apps) vs
Bluetooth Audio (secondary connected device) .
SCREEN 3
Click on
Settings
icon on home screen. Within Settings, you
can access Network & Internet, Bluetooth, Apps & Notifications,
Display, Sound, System (for time and date updates) and more.
Connecting to Wi-Fi
• Within Settings, select [Network & Internet].
• Long click on [Wi-Fi], if not already enabled, turn on the
Wi-Fi setting using the toggle.
• From the available list, select the desired Wi-Fi network.
• If required, enter the appropriate password.
SCREEN 4
The Equalizer controls the pitch and tone of the sound.
• Clicking the arrows up increases the sound frequency and
clicking the arrows down decreases the sound frequency.
This optimizes the sound for the type of music being
played.
• There are preset buttons that have the faders pre-adjusted
for specific genres of music. Select a preset equalizer button
or create your own custom setting using User1 or User2.
• Press “Flat” for a linear sound playback. Toggle on
“Loudness” to increase bass and treble at low volume.
• Note: “Reset” will reset the customized user settings.
1.
2.
3.
4.
SETUP
7
SCREEN 5
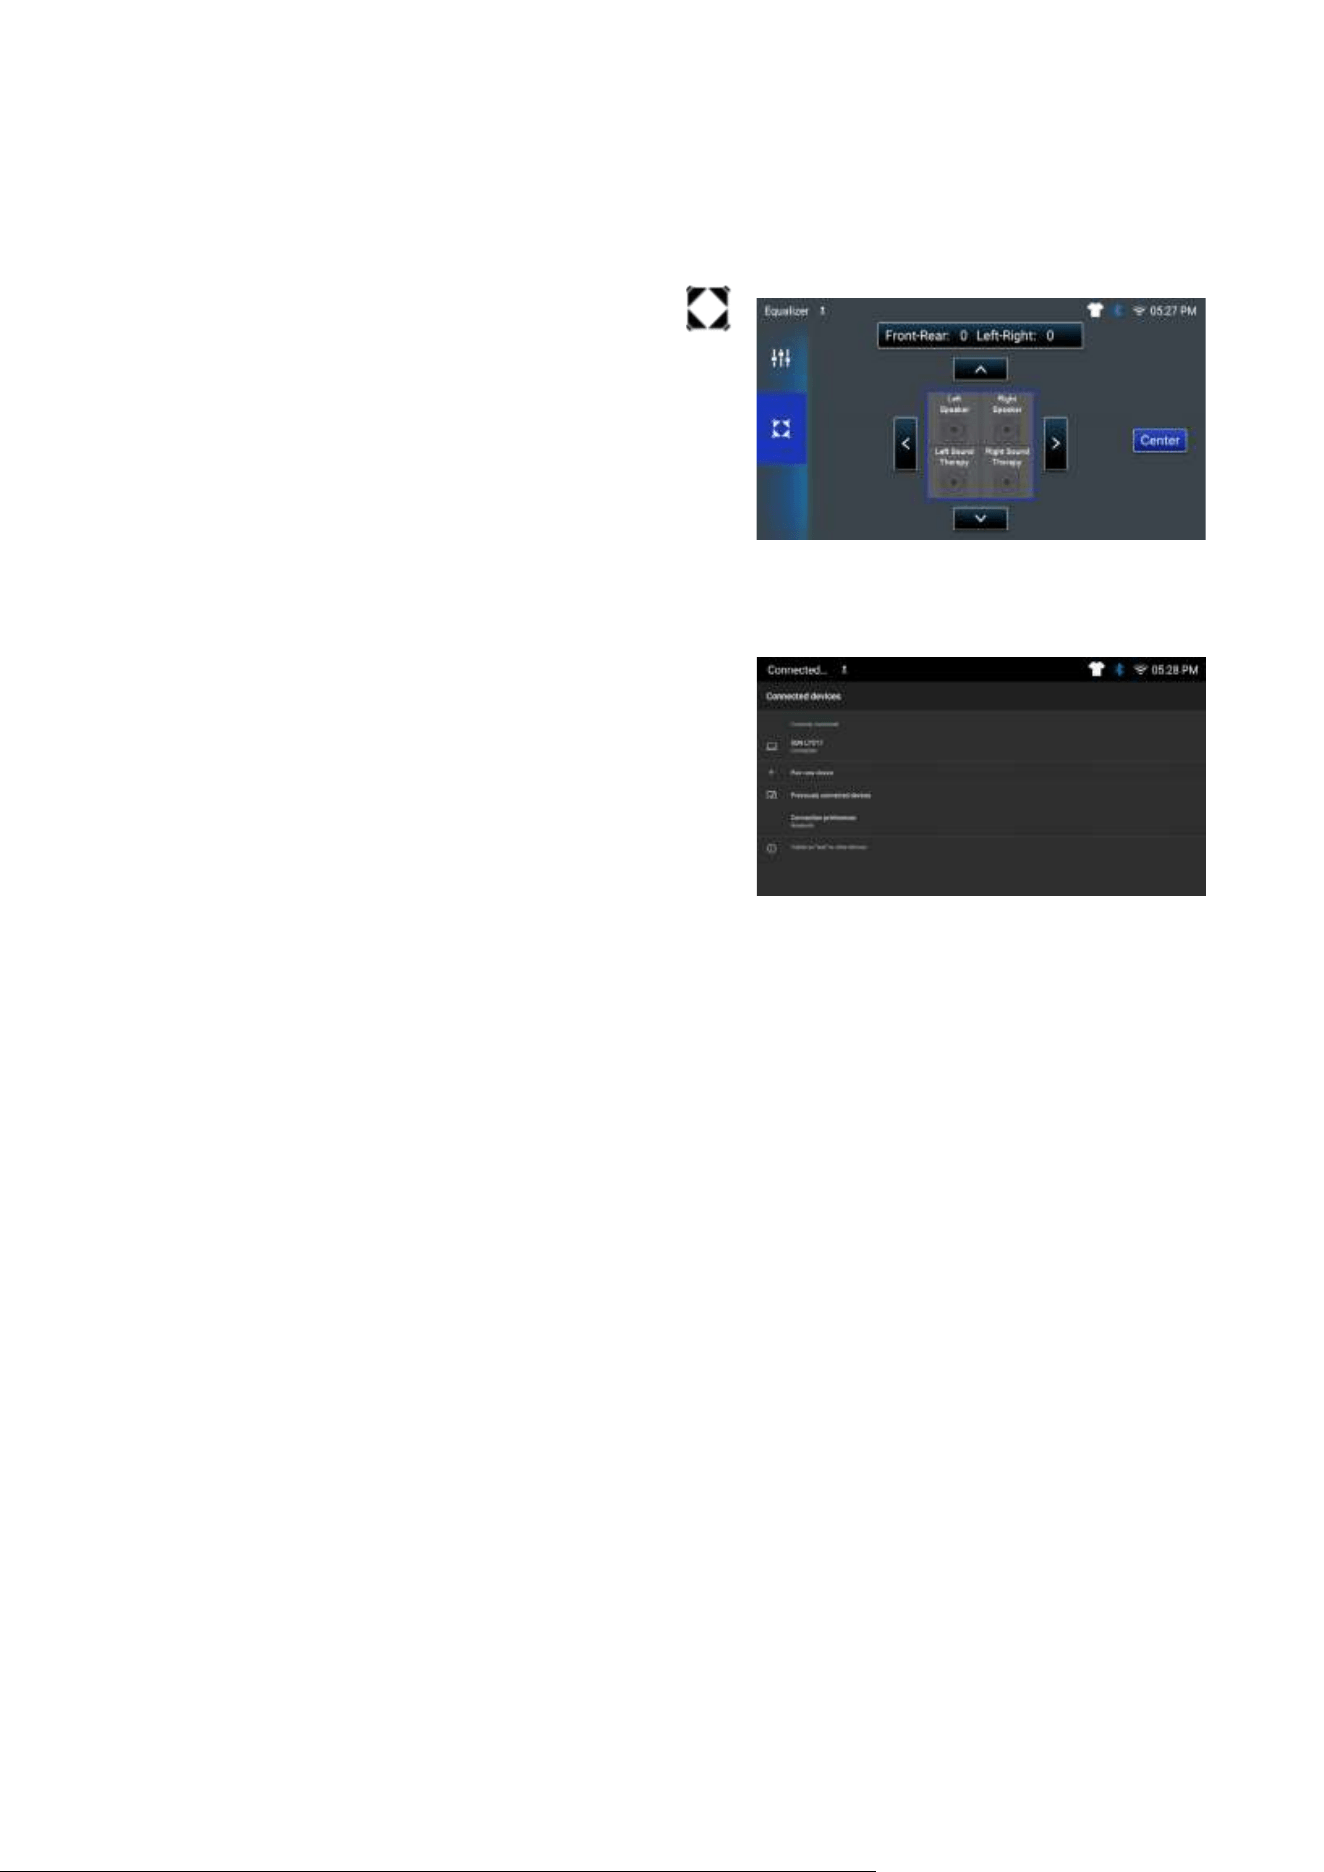
To adjust volume distribution (fader/balance), click on the
icon on the left side of the screen.
• This screen allows you to control which speaker(s) sound
will come out of. Touching the arrows will move the sound
more left/right or front/rear.
• NOTE: By default, the Left Sound Therapy and Right
Sound Therapy do not come with your sauna, this is an
upgrade choice.
SCREEN 6
The Bluetooth® function allows pairing cell phones and media
playback devices with the sauna sound system.
• Select Bluetooth on the home screen
• Touching the “Add Device” icon will allow you to connect a
new Bluetooth device. From the device you wish to connect
(such as your phone), turn on the Bluetooth setting. You
should then see something indicating “find new devices,”
then “pair” and select the SUNLIGHTEN device.
• Clicking the Gear icon will display the list of known
Bluetooth® devices. To rename a device, select the device
you wish to rename, and enter the new name.
• If you want to register a device with the sauna sound
system for the first time, proceed as follows:
• Ensure that Bluetooth® is activated on the control
panel and your device.
• Search for new devices/connections on your device.
• The control panel appears as “SUNLIGHTEN” in the
list of devices.
• By touching “Device name,” you can rename your
Bluetooth device if desired.
• Establish the connection; you may have to enter the
pairing code that was previously entered on the sauna
sound system.
• The connection is being established and the menu for
the registered device is displayed.
• Note: If a mobile phone is connected with the sauna
audio system, the Bluetooth® icon will change from
gray to blue at the top of the display.
5.
6.
SETUP
8
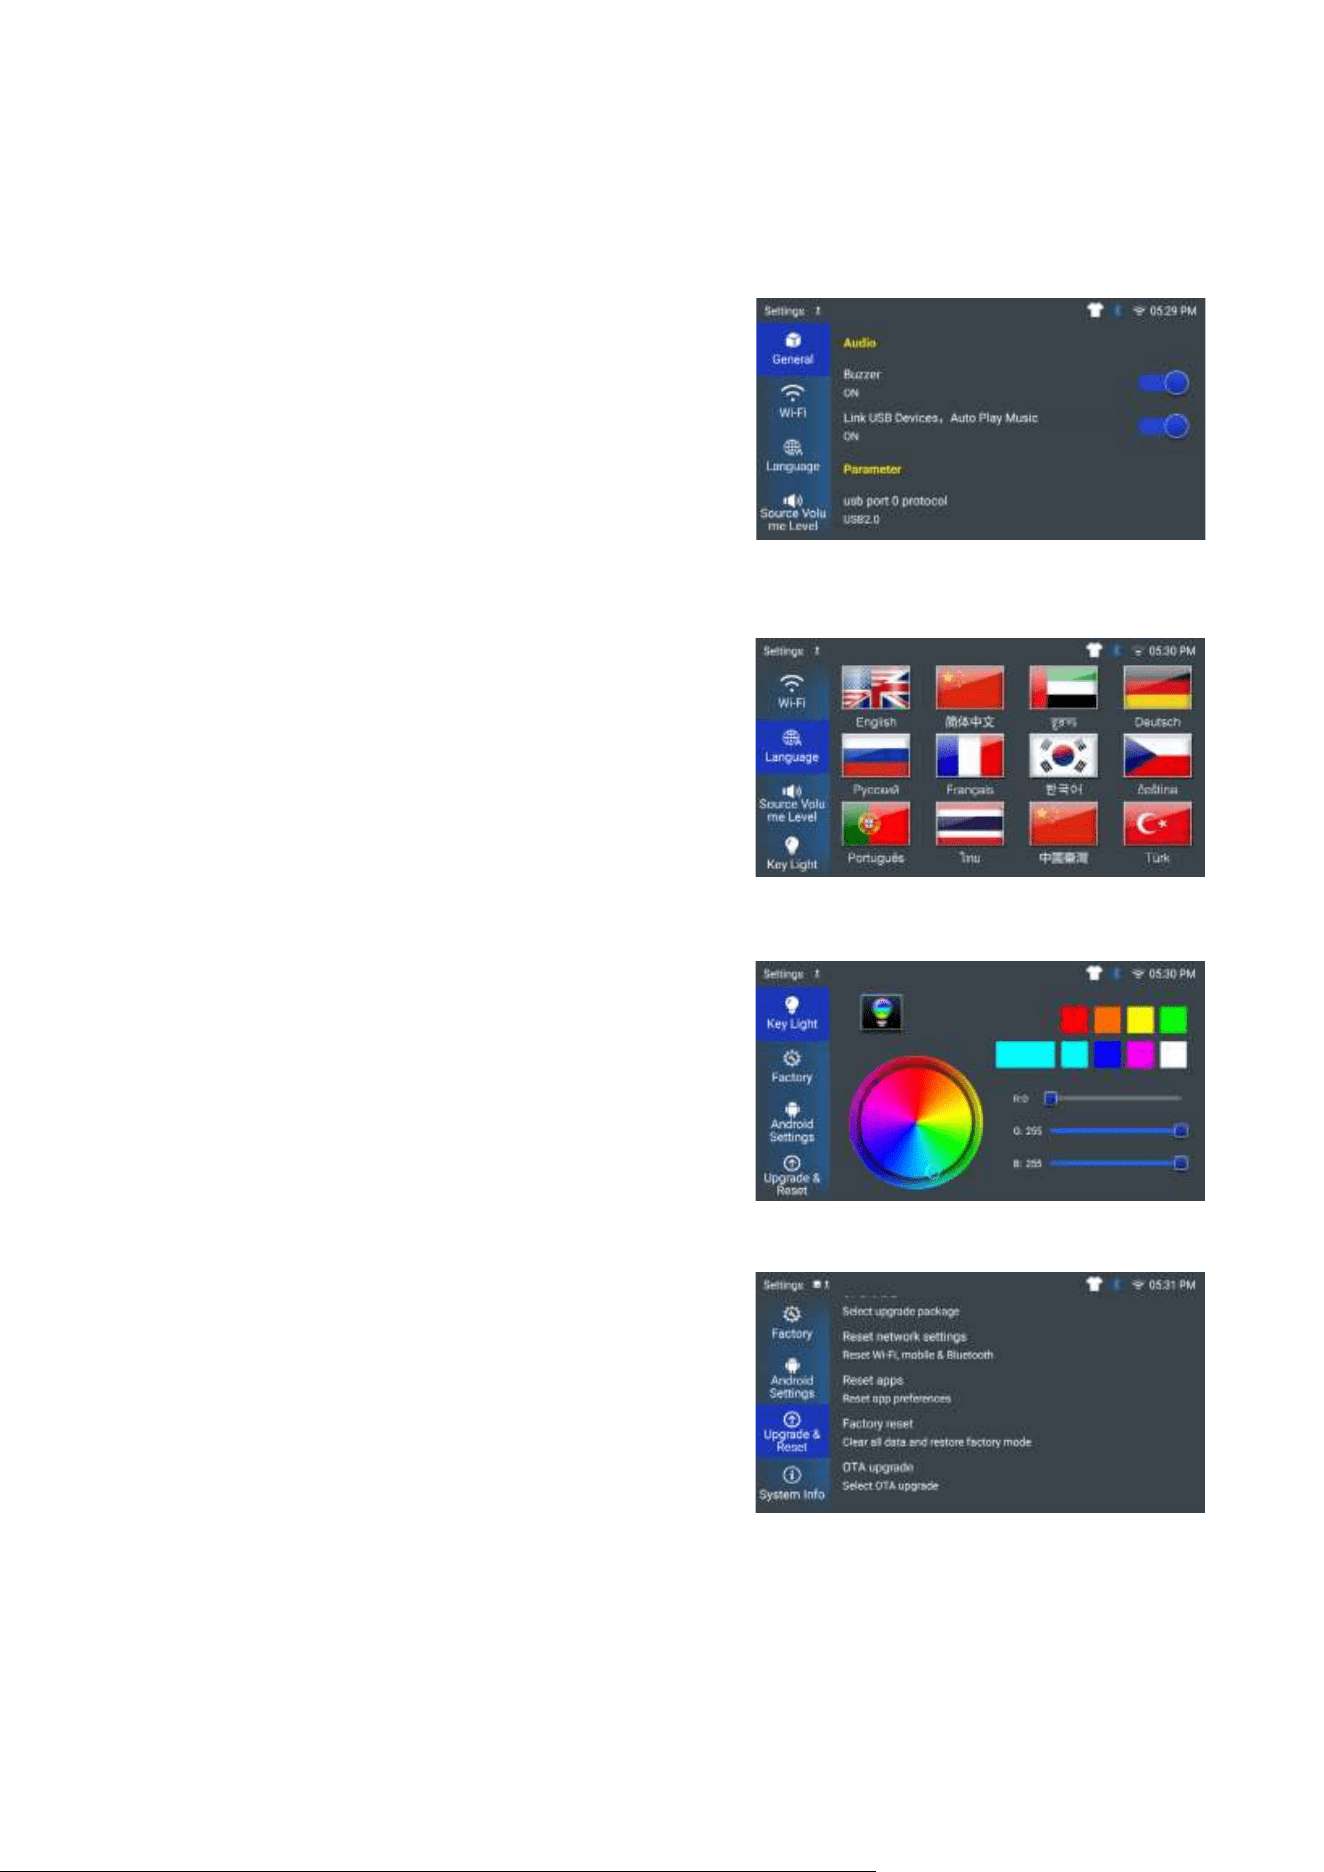
SCREEN 7
In Advanced Settings, you will have access to Wi-Fi, Language
and more. “Factory” and “Android Settings” use are best
advised by Customer Care.
SCREEN 8
Select Language to display the options available for the
device language. NOTE: Language selection is for the device
itself and may not apply to individual apps on the device.
SCREEN 9
Select Key Light to change the color of the icons on left of the
Android Control Pad.
SCREEN 10
Upgrade & Reset will allow you to upgrade the software
and reset the default settings. The OTA (over the air) option
should be used to check for any operating system updates.
Tap on “Check for update” and if a new update is available it
will show here. Select “upgrade” to download the most up-to-
date version of your device.
7.
8.
9.
10.
9
ACCOUNT REGISTRATION
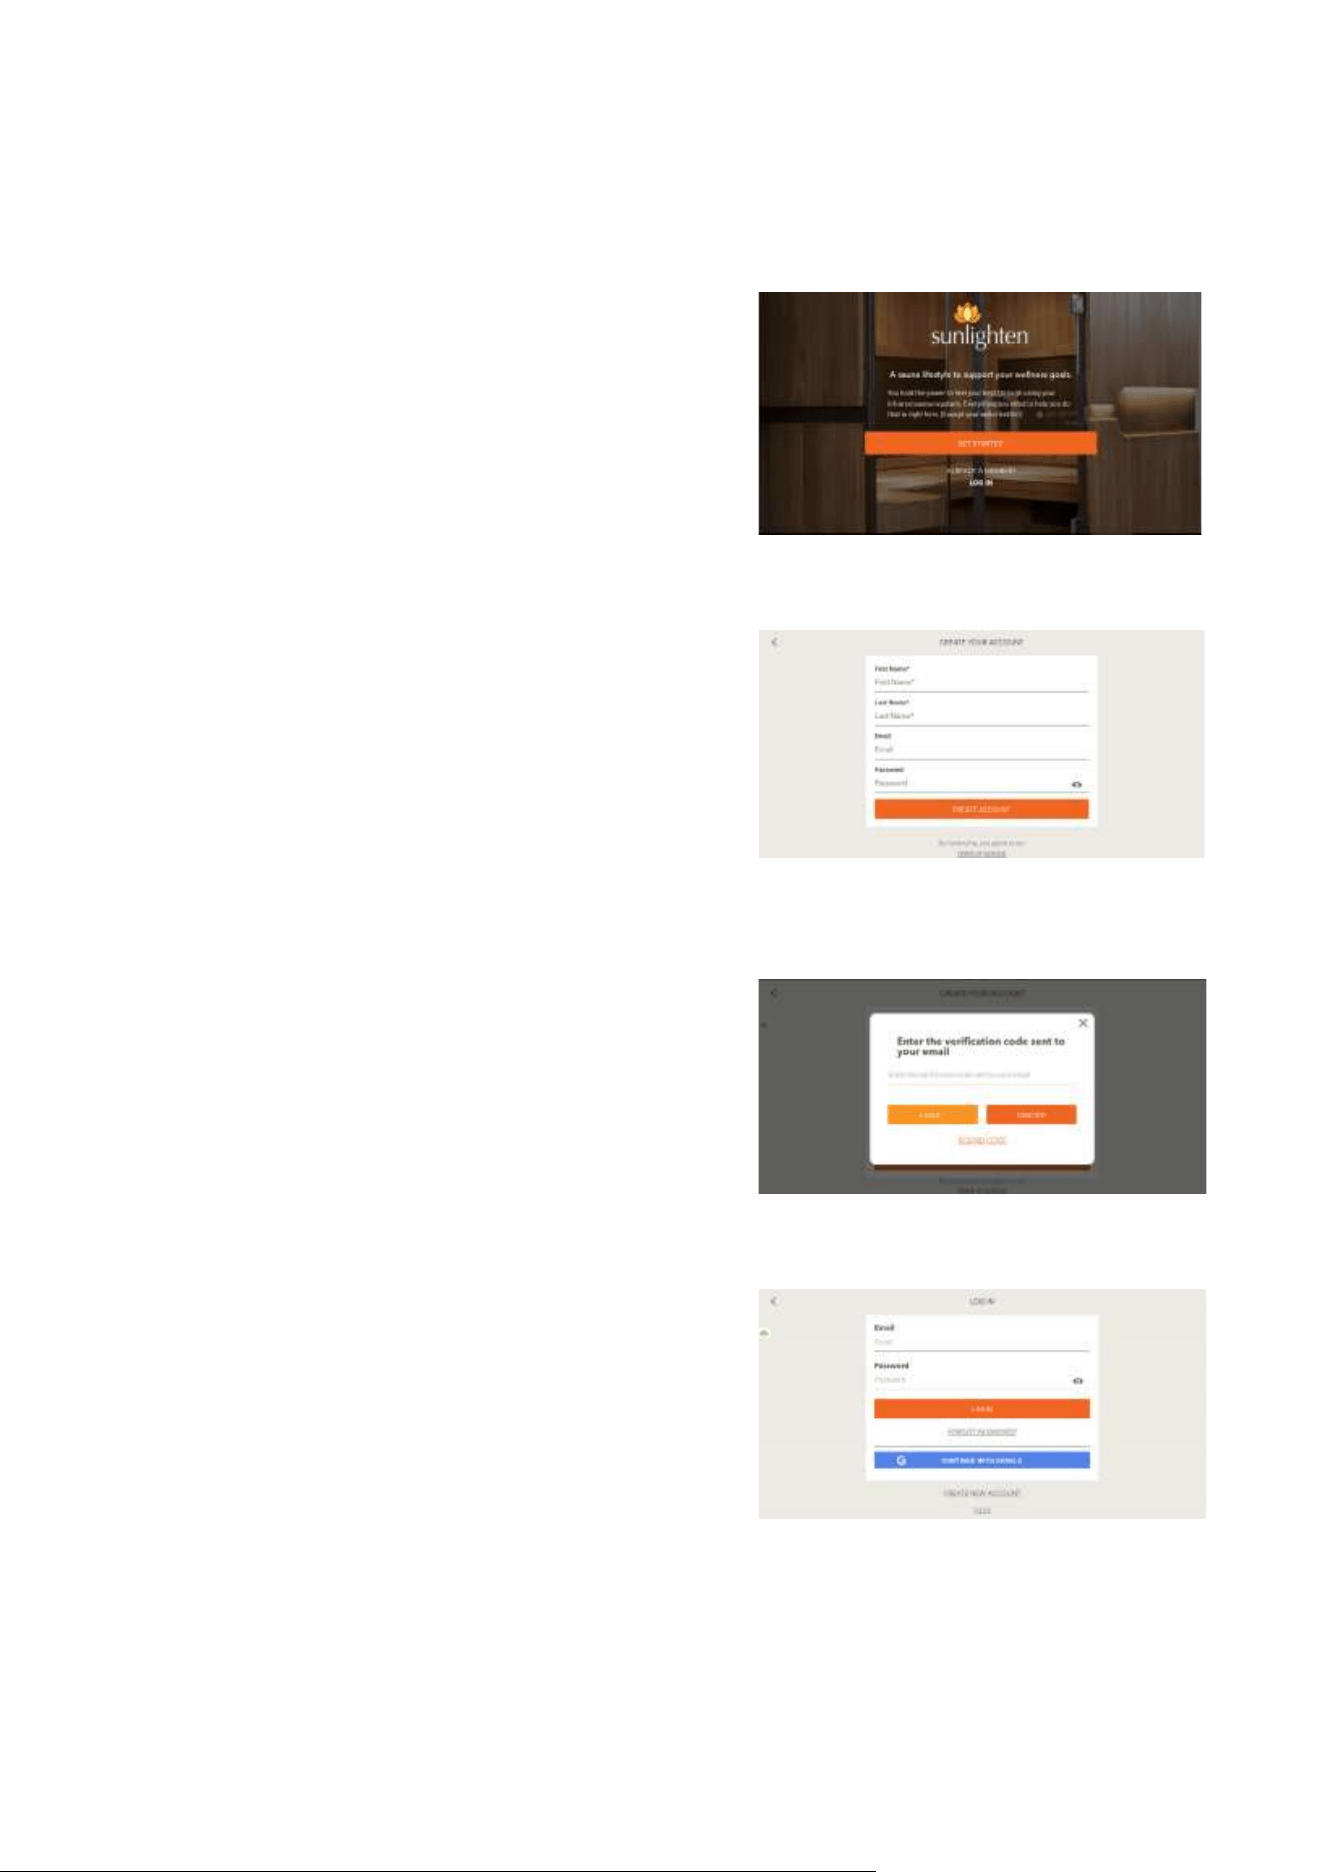
SCREEN 11
The app will start with an intro screen. If you select ‘Already
a Member? Log In,’ This will take you to a ‘Log In’ screen
where you can either log in or choose ‘Create Account’ at
the bottom of the screen (see screen 6). Or if you haven’t
created an account yet, tap the ‘Get Started’ button to create
a new account. You can create an account from any e-mail
address or you can continue as guest if no account has
been created.
SCREEN 12
To create a new account, you’ll be asked to enter your First
Name, Last Name, Email, and Password of your choice. Your
password must be at least 8 characters and is case sensitive.
SCREEN 13
A verification code will be sent to the e-mail address you used
for registration. Enter your code and click ‘Confirm.’
NOTE: Check your spam or junk folders if you do not see this
email.
SCREEN 14
You’ll be returned to the Log In screen where you’ll enter the
information you’ve just used for registration.
Once successfully logged in, you’ll need to setup Your Profile.
11.
12.
13.
14.
10
PROFIL E SETUP
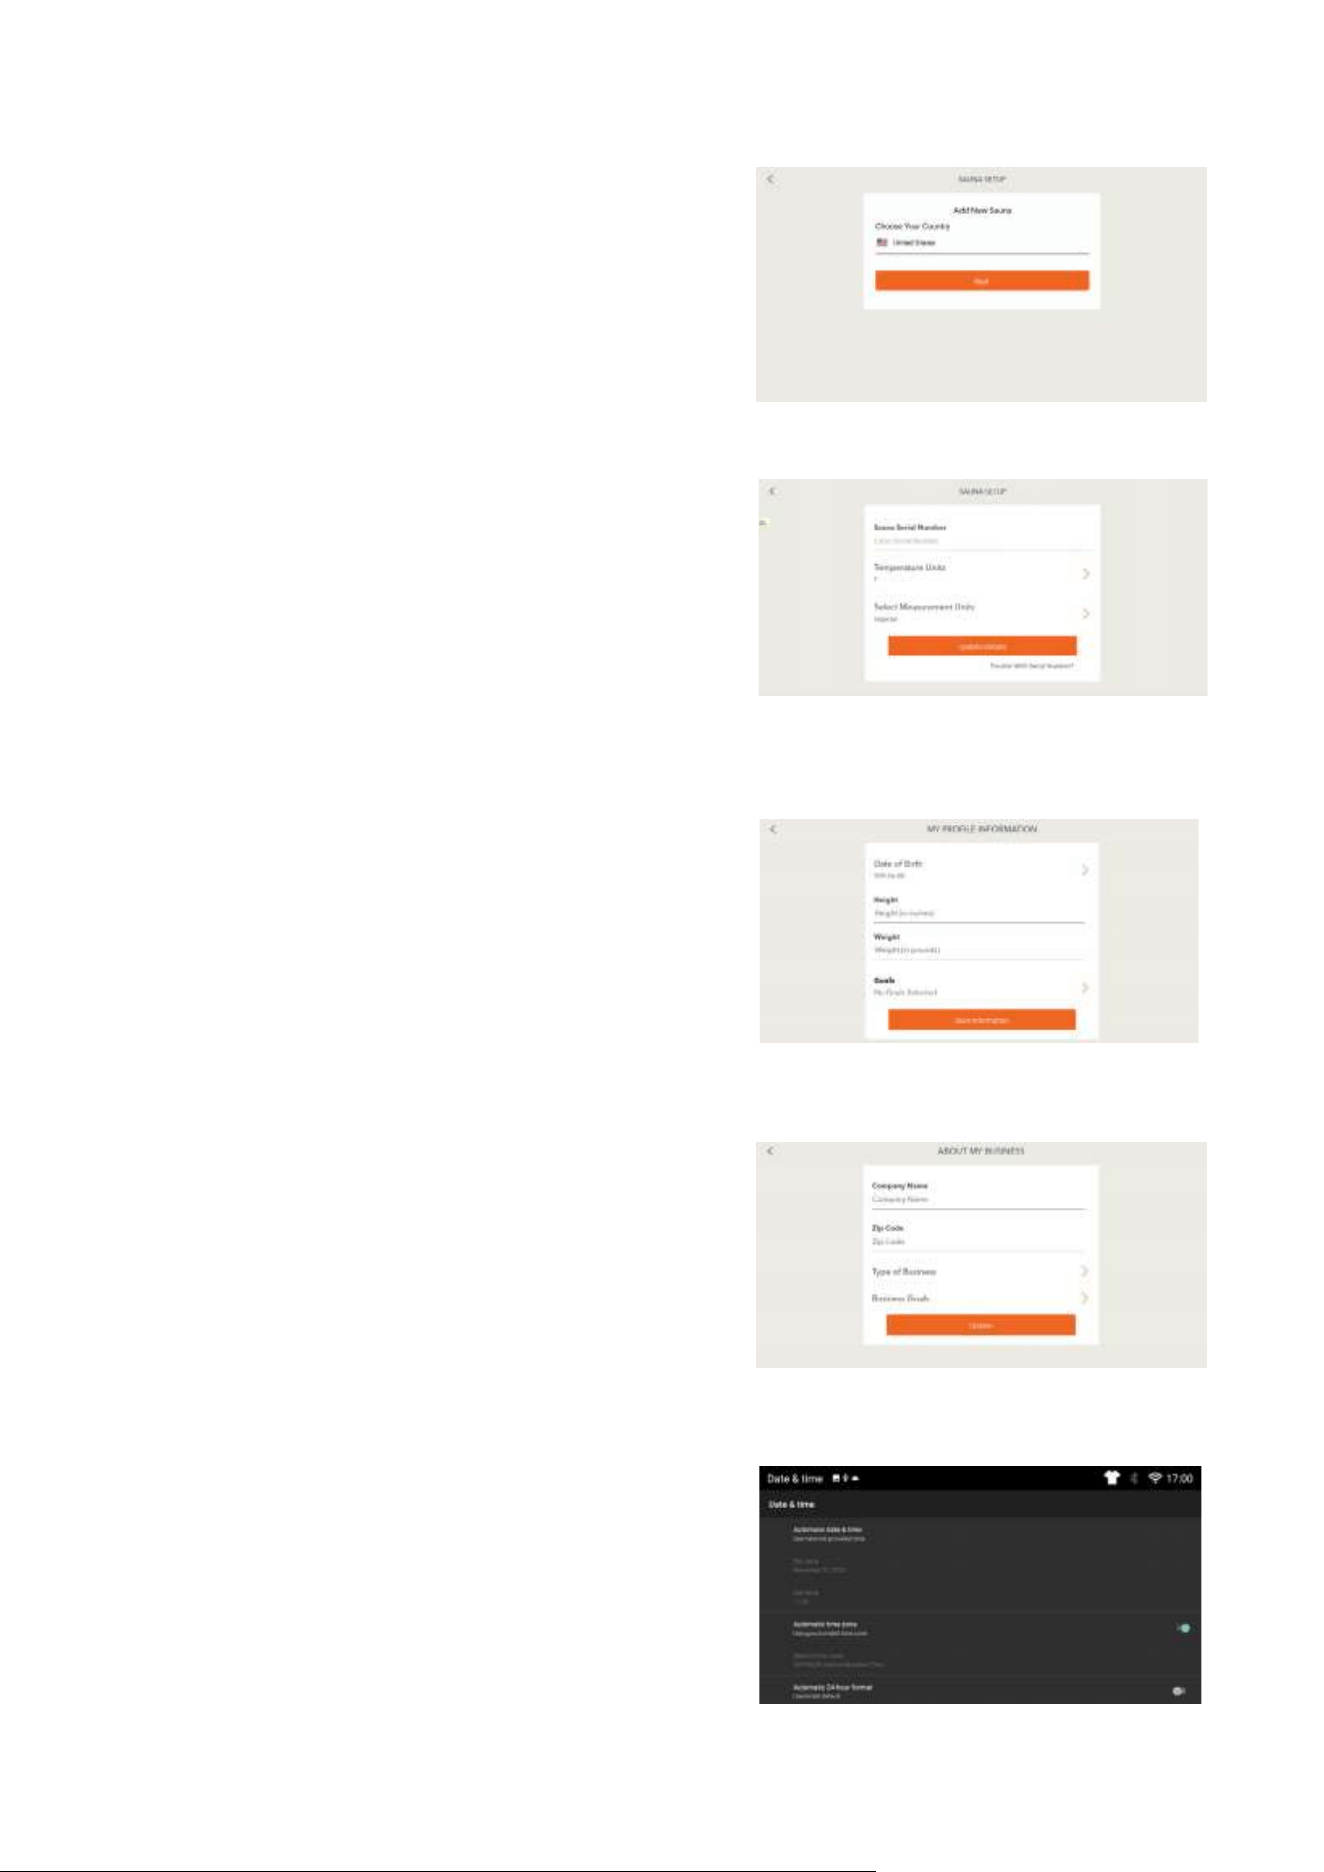
SCREEN 15
Choose your country.
SCREEN 16
In the Sauna Setup screen, enter your sauna serial number
(found on your quality control card that was hanging from
the hinges of your glass door or on the back of your unit by
the power cable). If you can’t find your serial number, select
Forgot Serial Number? You will then be asked a series of
questions.
Select your Temperature Units and Measurement Units.
After you update those details, you will be prompted to select
your intended use from the next screen; either Residential or
Commercial.
SCREENS 1 7 - 1 8
If you selected
Residential
, you ll be asked to provide
some personalizing profile information for future
customization use . If you selected Commercial, you ll be
taken to the About My Business screen where you are asked
a few questions.
Once you ve entered this information, you ll be asked if
you d like to update the time zone settings.
SCREEN 19
To update the date and time on your device, tap on the time
displayed on the home screen. This will bring up the Date &
time settings window. From here, use the toggle beside each
option to select your desired time settings:
• Automatic date & time will use the network-provided time.
• Automatic 24-hour format will use the local default.
Once done, you can click the Sunlighten lotus logo to get
back to the Sunlighten app home screen.
15.
16.
17.
18.
19.
11
WELCOME SCREEN
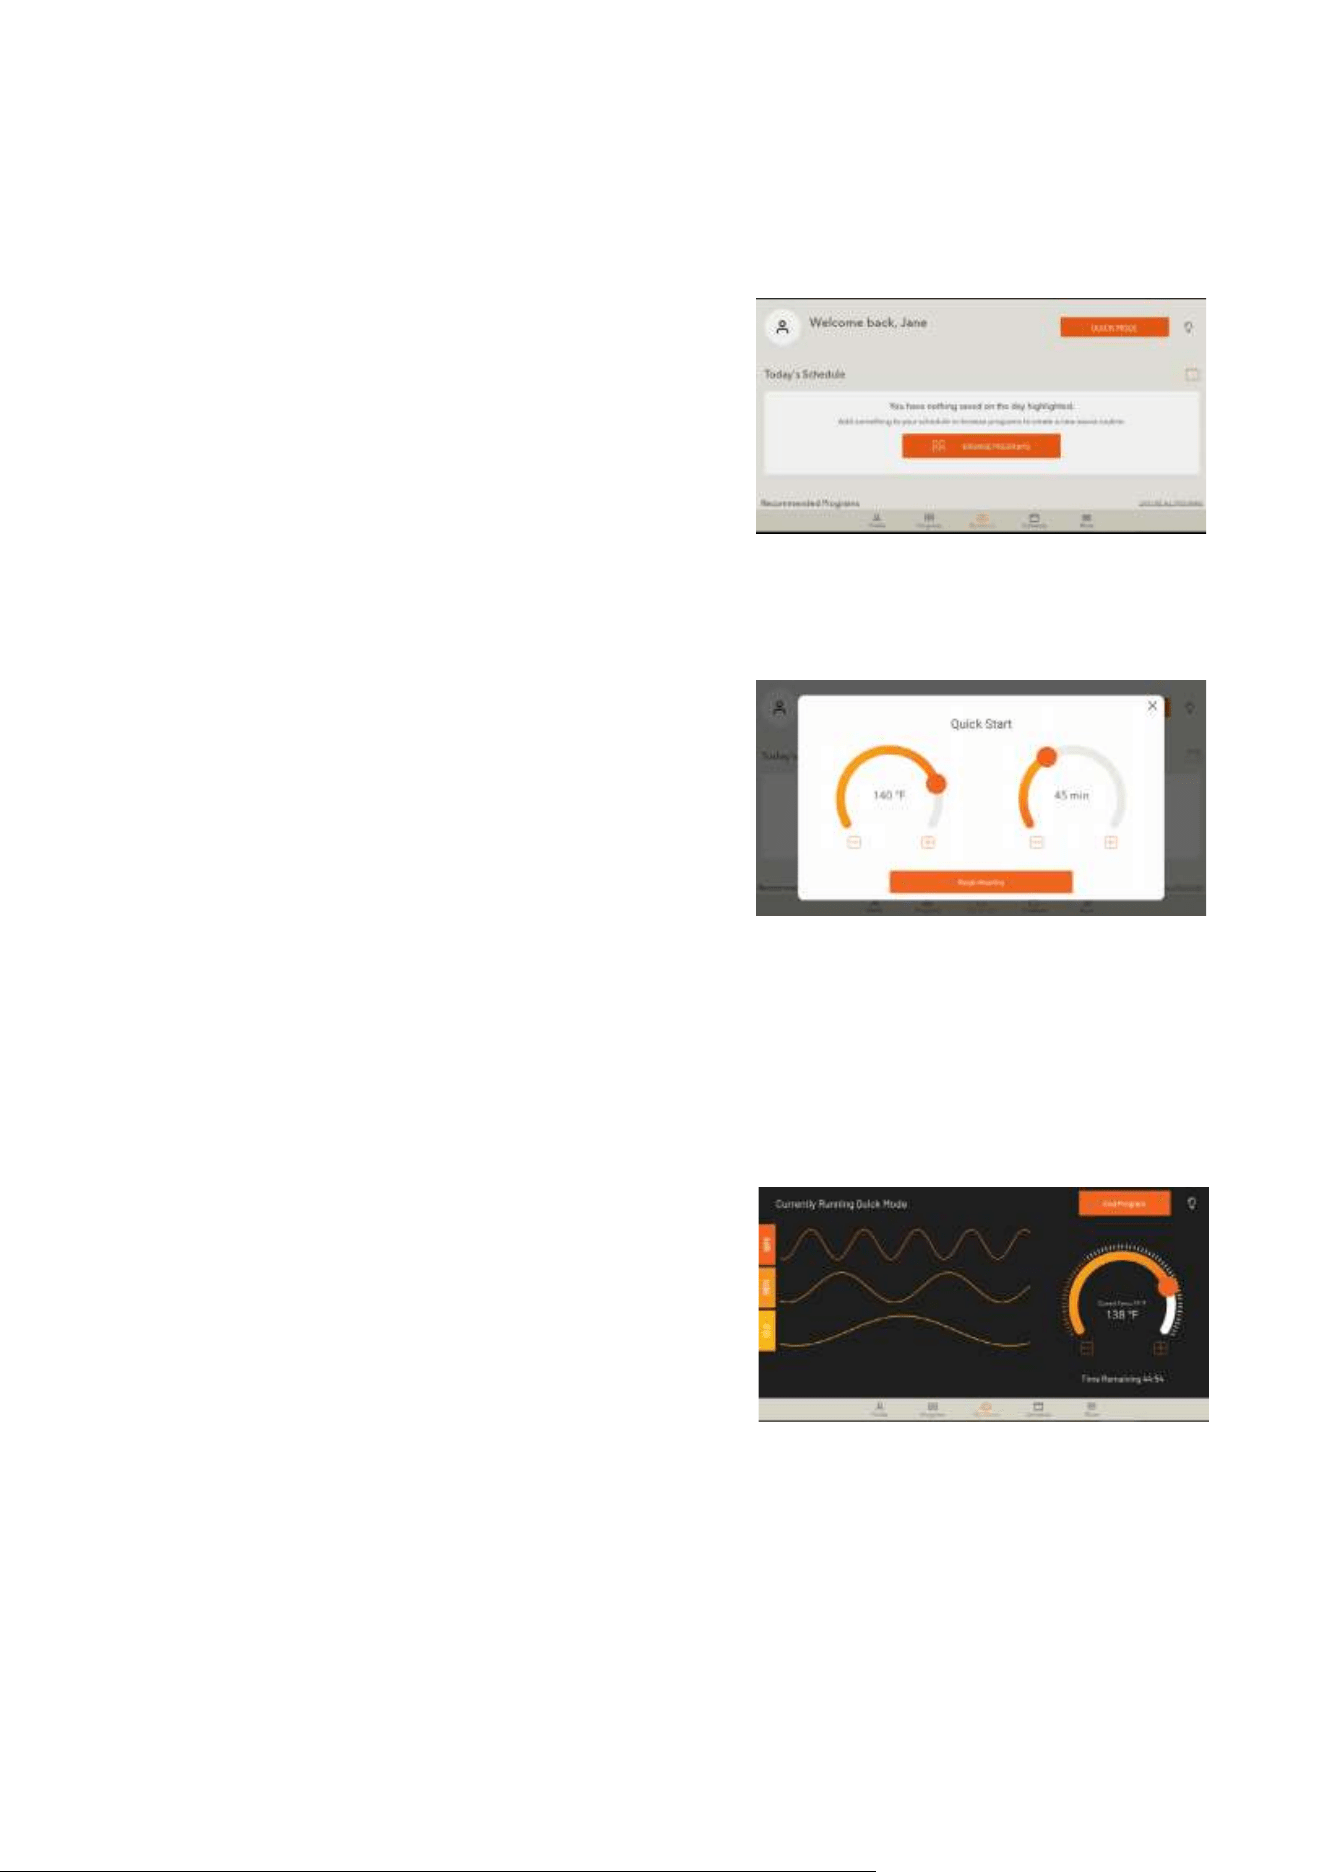
SCREEN 20
The
Welcome Screen
is where to begin using the Sunlighten
App. At the bottom of the screen is a row of primary
functions to which you can always return anywhere in the
app: Profile, Programs, My Sauna, Schedule and More.
If you want to change profiles, click on ‘More,’ then
‘Change Profile.’ To get back to the Welcome Screen, click
on ‘My Sauna.’ Tap the lightbulb icon to adjust the interior
and exterior lighting for your sauna and activate your
chromotherapy remote.
SCREEN 21
Quick Mode
The most commonly used, easily accessible, and quick
starting mode of operation, Quick Mode is ideal for
a basic high-temperature experience that utilizes the full
spectrum wavelengths at maximum intensity to increase
the temperature of the cabin. You can either touch and
drag the orange circle or the plus/minus buttons on the
temperature and timer dial to adjust. Once it’s where you
want it, click on ‘Begin Heating.’
The maximum duration for Quick Mode if you chose
/Residential’ as your intended use is one hour. If you chose
/Commercial’ as your intended use/ the maximum duration
will be eight hours.
SCREEN 22
Quick Mode Running
This screen will show you the wavelengths in use, current
temperature, and time remaining. You can end quick
mode by selecting the orange ‘End Program’ button on
the top right of your screen .
20.
21.
22.
12
WELLNESS PROGRAMS
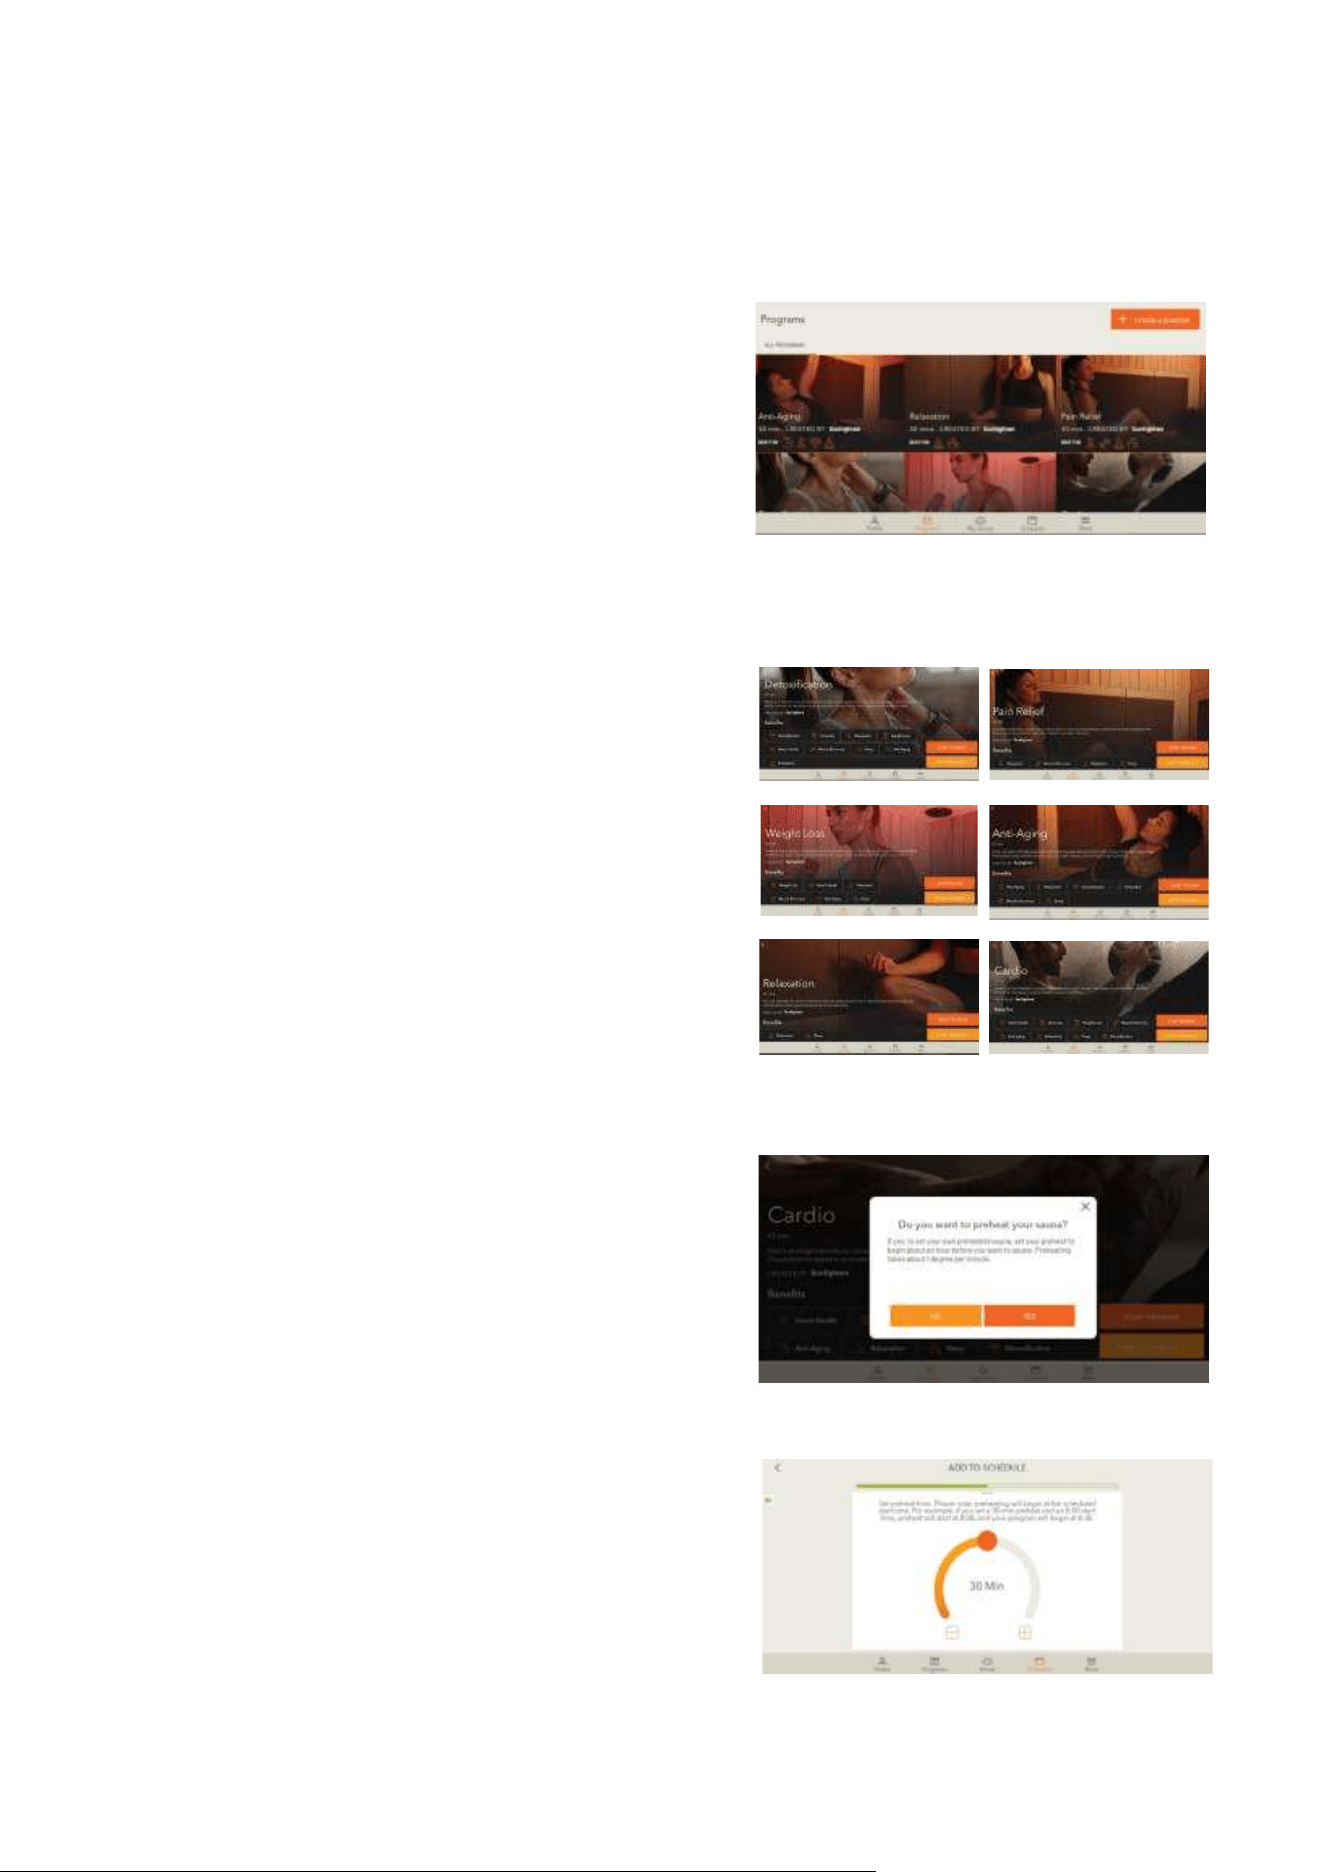
SCREEN 23
If you select ‘Browse Programs’ on the Welcome screen,
you can view a snapshot of all six pre-programmed
health benefit programs as well as the option to create
a program - the orange button on the top right of the
screen .
SCREEN 24
Your mPulse comes with
Wellness Programs
pre-programmed
in your Android Control Pad, each one focused on different
benefits of use in their configuration:
Detoxification - Starts at high intensity to increase the body’s
core temperature, then reduces to lower intensity. Mid and
far infrared combo improves vascular access flow to reach
toxicants at the cellular level.
Weight Loss
- Starts at high intensity to stimulate the
cardiovascular system, then reduces to medium level. As the
body works to cool itself, heart rate increases cardiac output
and metabolic rate, like aerobic exercise.
Relaxation
- Far, mid, and red/near infrared combination
induces deep relaxation as it relieves muscle tension at a low,
comfortable intensity, promoting overall stress reduction.
Pain Relief - A far and mid blend provides natural pain relief
by reducing inflammation and swelling. Red/near infrared
penetrates the tissue promoting cellular repair at a medium,
constant intensity.
Anti-Aging
- A low, constant intensity level penetrates the
body, and cells absorb the light energy to help skin health.
Red/near infrared improves overall skin tone, elasticity and
firmness, promoting anti-aging benefits.
Cardio - Starts at a high intensity to increase heart rate
and cardiac output, then lowers to sustain heart rate level.
Circulation increases to promote healthy blood pressure.
SCREEN 25
If you select ‘Start Program,’ you will be asked if you want
to preheat your sauna . If you select yes, it will ask you for
how long and then click ‘Begin.’ Remember, it takes about
a minute per degree to preheat. Or you can select ‘Save to
Schedule.’ See screen 29, below.
23.
24.
25.
25b.
13
SCHEDULE
NOTE: The tablet must be on and the Sunlighten
application must be active for scheduled sessions to run
properly.
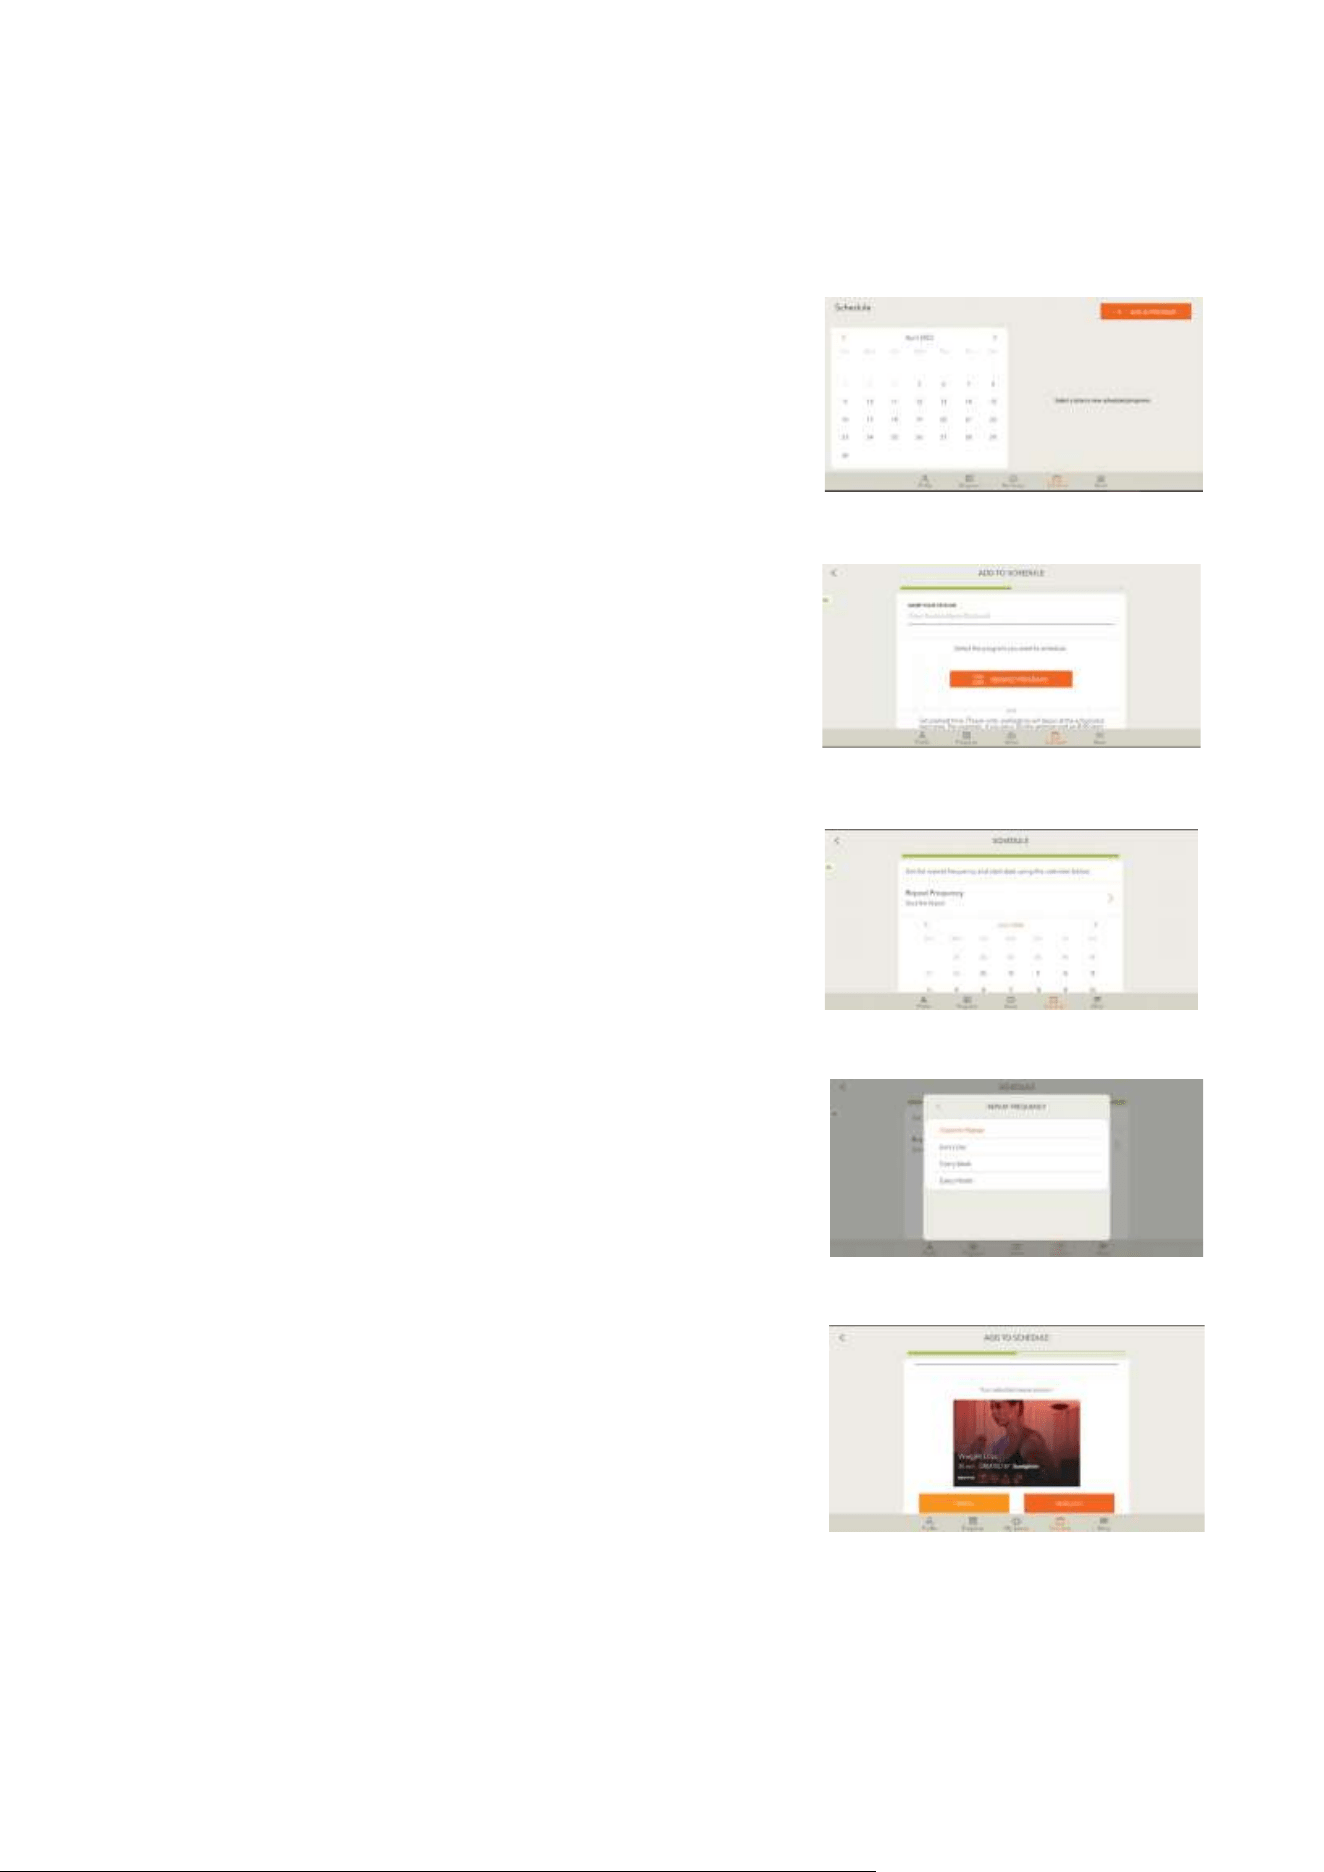
SCREEN 26
To schedule a sauna session in advance, click on ’Schedule’
in the primary functions row. Select a date or ’Add a
Program’ and you will be asked later the day(s) you would
like to schedule for.
SCREEN 27
First it will ask you to name your session. Then you will
’Browse Programs’ to select the Wellness Program you
would like to schedule. Once selected, you will be asked
to select your preheat time and then click ’Continue.’
Remember, it takes about a minute per degree to preheat.
SCREEN 28
Next, you will be asked what day(s) you would like to
run this program, the starting time and frequency. Once
scheduled, you will be taken back to the Schedule screen
and it will say, ’Successfully Created.’
SCREEN 29
Another way to schedule a program is by clicking on
’Programs’ in the row of primary functions at the bottom
of your screen (as mentioned in the previous page) . From
here, you can select ’Save to Schedule’ where you can
name your session and select your preheat time. Next, you
can cancel altogether, reselect a new program, or continue
scrolling down and select your preheat time. Once ready,
you can click ’Continue’ to add the session to your schedule.
will be asked same questions as in screen 28.
26.
27.
28.
28b.
29.
14
CUSTOM PROGRAMS
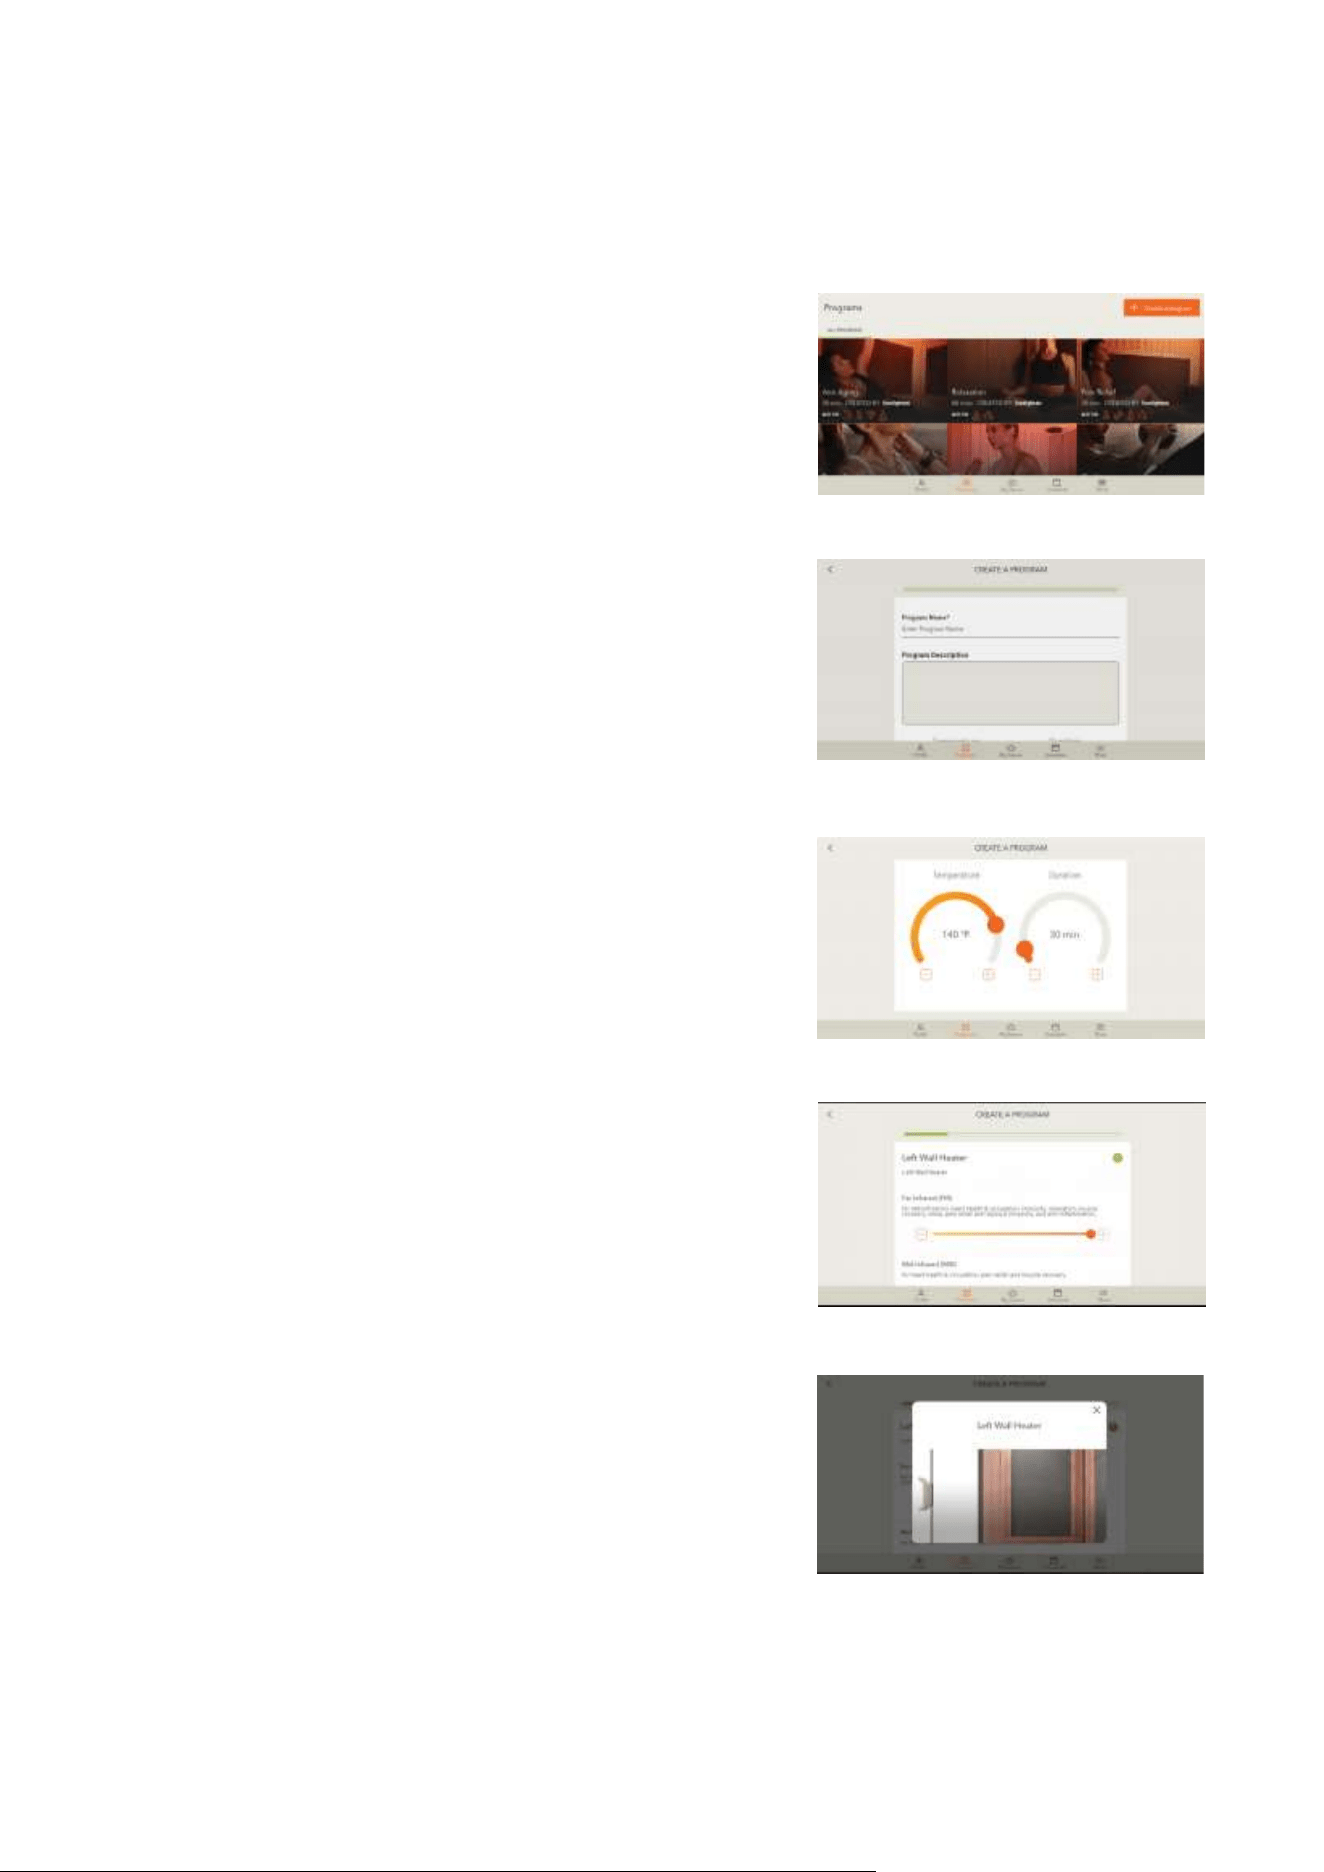
SCREEN 30
Creating a Custom Program
In addition to the pre-configured Wellness Programs already
in your Android Control Pad, you can also create your own
Programs. The ‘Create a program’ button will be at the top
right of the Programs screen. This mode enables you to craft
your own program by specifying wavelength intensity by
sauna wall.
SCREENS 3 1 - 3 2
You’ll be able to give your program a name and add a
description about your program. Next, you can either
touch the orange circle or the plus/minus buttons on the
temperature and duration dial to adjust. Once it’s where
you want it, click on ‘Continue.’
SCREEN 33 -34
The heater screens allow you to determine the intensity of
each infrared wavelength on individually selected wall during
the duration of a program segment; or you can select ‘Skip (Use
Default)’ to run all heaters at max heat. If you click on the green
question mark, you will see an image of where the heater is in
your sauna (screen 26).
Once you hit IContinue’ on the final heater screen (Floor
Heater), it will take you to the programs screen and a pop-up
will say, ‘Successfully Created.’ If you scroll past the Sunlighten
programs, you will now see your custom program(s) listed as
well.
30.
31.
32.
33.
34.
15
MORE
SCREEN 35
My Sunlighten Sauna
Takes you to the Sauna Setup screen where you can update
your sauna name.
Tablet Settings
Here you can clear app data, which will completely erase and
reset the Sunlighten app (including your sauna registration/
serial number); and to add a lock PIN. This is to lock out
anyone without the pin. If you choose to add a lock PIN, you
will be asked which settings you want locked after you choose
your 4-digit PIN. Once you complete these settings, you will
be asked for this 4-digit PIN when enabling features you
chose to lock. If you forget your PIN, please submit a support
ticket on sunlighten.com. After you choose to lock certain
features, when you go back to your ‘Tablet Settings,’ you will
now have an additional option to ‘Lock Tablet.’
Preferences
Here you can choose to allow (or not) push notifications and
update your measurement/temperature selection.
Diagnostic
You should go here to ‘Run Diagnostics’ if advised by
Sunlighten’s Customer Care team.
Change Profile and Logout
Change Profile will allow you to toggle between profiles
without logging in. If you choose to logout, you will have to
enter your email and password to log back in.
About My Business (Commercial Intended Use Only)
This will take you back to the ‘About My Business’ screen
where you can update your Company Name, Zip Code, Type
of Business, and Business Goals.
Manage Account Information
This will take you back to the ‘My Account’ screen where you
can update your First and Last Name, and Intended Use.
35.
36.
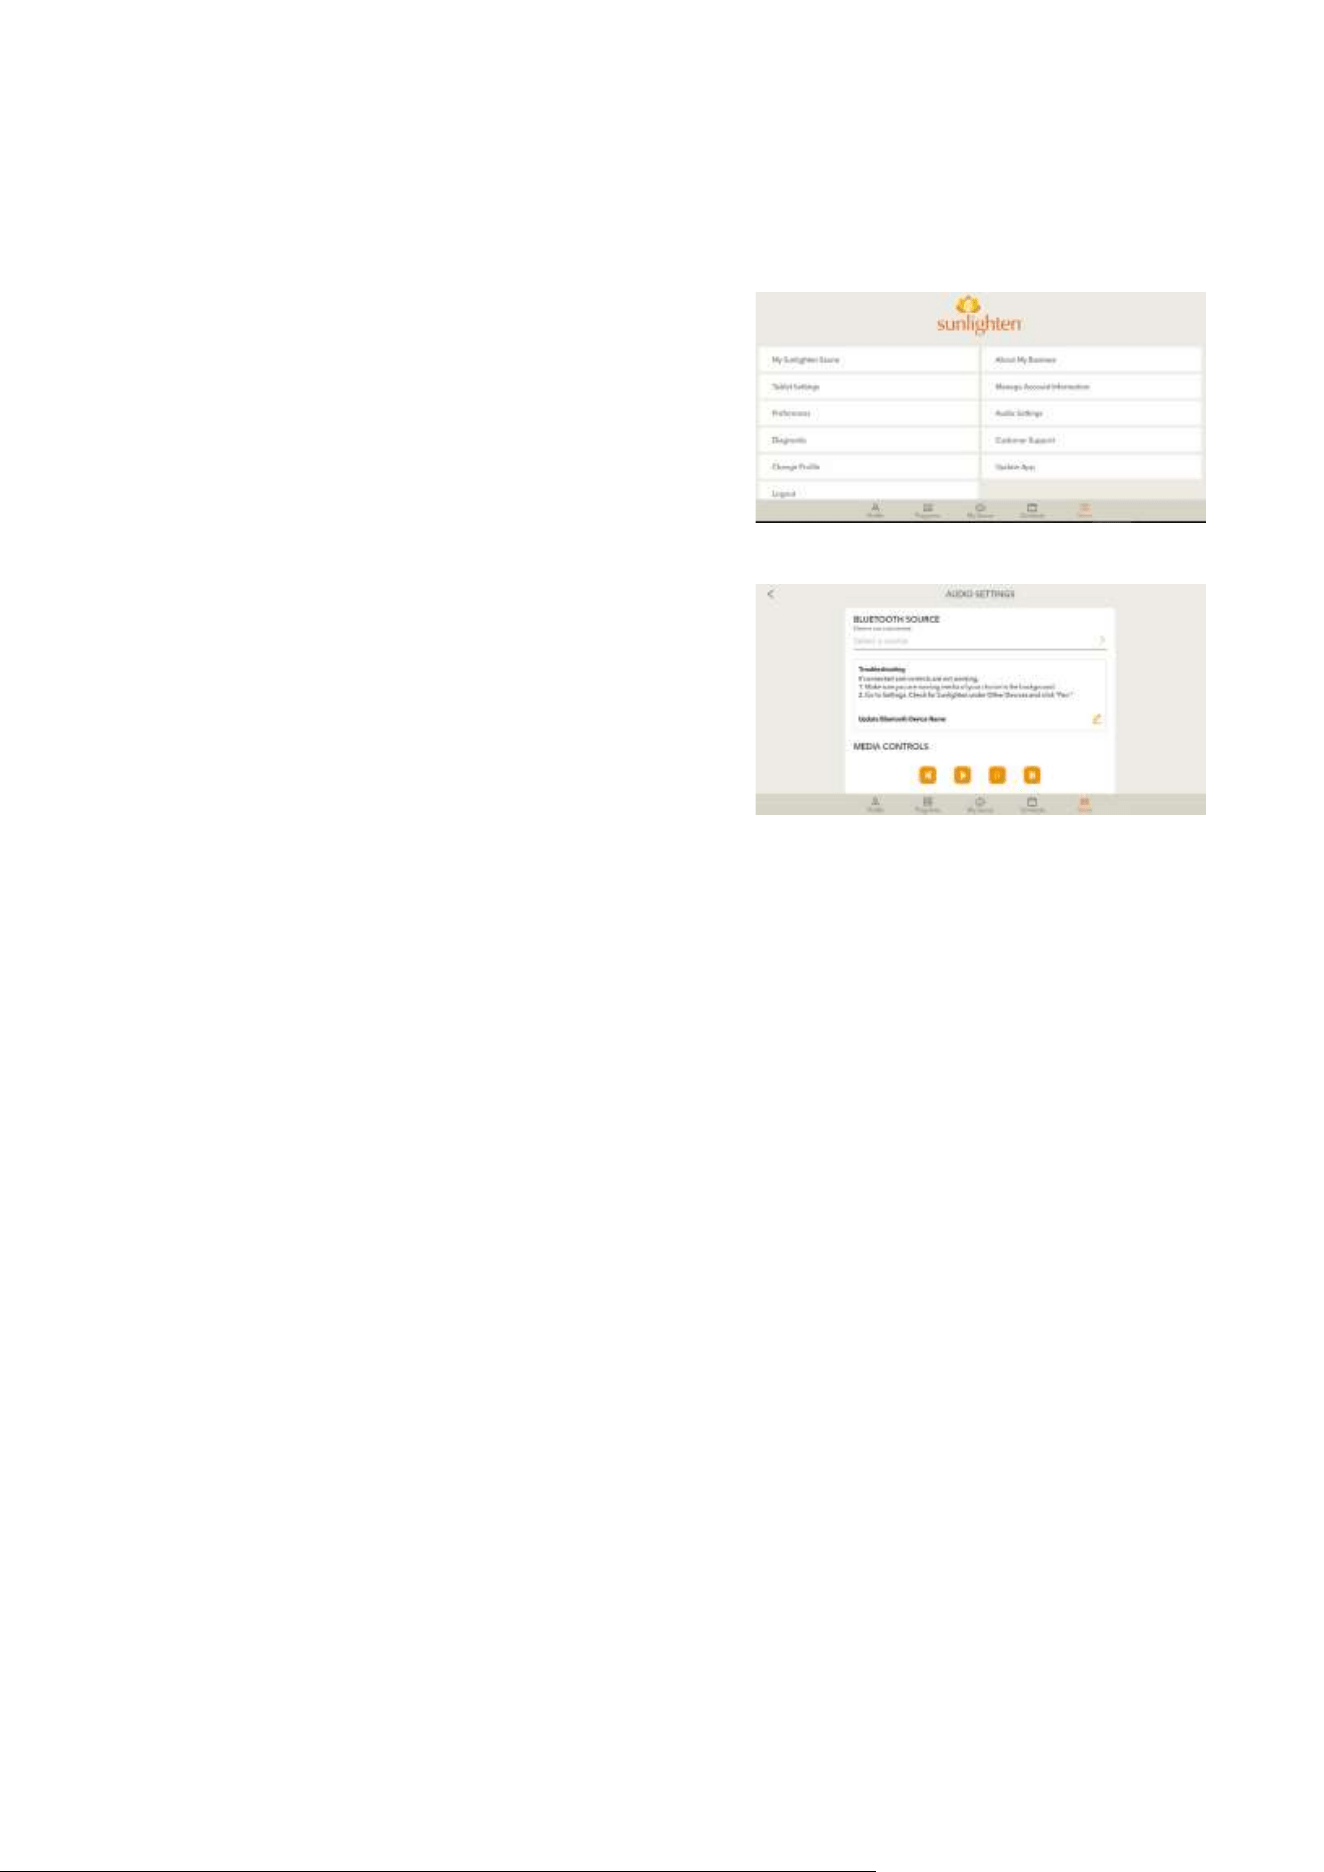
Audio Settings (Screen 36)
From here you can control audio from your
Android Control Pad by connecting it via
Bluetooth. If you purchased the sound
therapy accessory, this is where you go to
connect it via Bluetooth and control intensity.
Customer Support
Click here for FAQ’s.
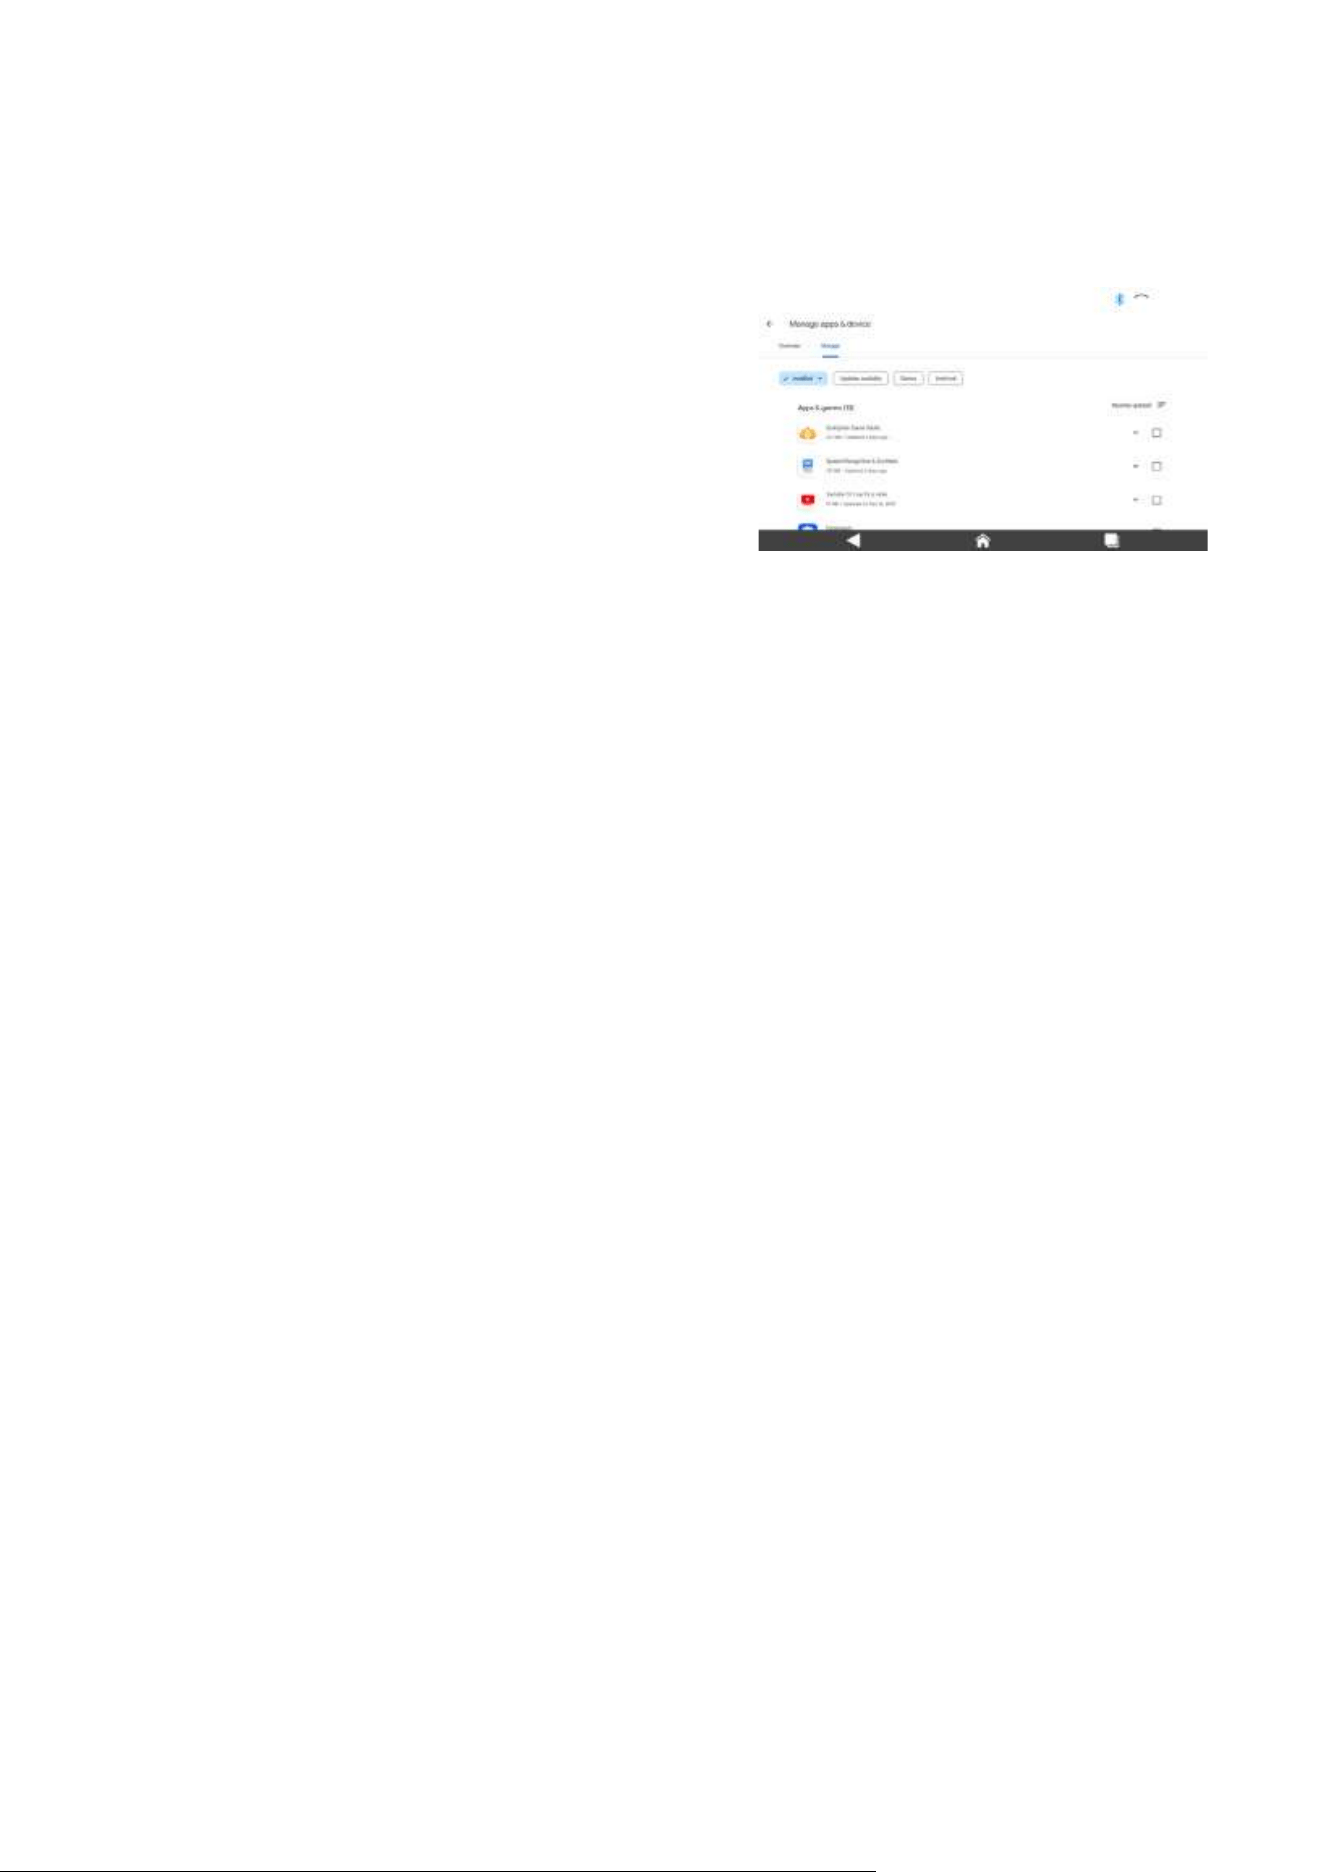
Update App
This will take you to the Google Play Store.
You will have to Log In via your Google
account. It will take you directly to the
Sunlighten app to update. Check this
periodically to check for updates.
If you have any additional questions or
concerns not addressed therein, please
submit a support ticket at
sunlighten.com/customer-service.
16
MEDIA AND APPLICATIONS
SCREEN 37
App Removal
To remove an application from your Android Control Pad, go
to the Google Play Store to uninstall. Click on the one you want
to remove and select ‘Uninstall.’ If that option isn’t visible, then
you can not remove the app.
App Addition
Adding new third party applications to the Android Control
Pad is done by accessing the Google Play Store, the Android
operating system’s app store. Access it by tapping the Play
Store icon in the App Tray. The Play Store will require you
to login using your Google account information. Sunlighten
is not responsible for third party Android app functionality.
Compatibility is not guaranteed with every application.
37.

17
FREQUENTLY ASKED QUESTIONS
USAGE
What do I do if it won’t let me set up my Sunlighten Account?
You will need your serial number. If you don’t remember your serial number, tap ‘Forgot Serial
Number’ and one will be generated for you. If you purchased your sauna outside the U.S., you can call
your local Sunlighten Customer Care.
Why is the Sunlighten app not communicating (or controlling) with my sauna?
To use the mobile app with your sauna, first ensure these items are set up before use:
• Ensure the sauna tablet’s date and time are correct for your location.
• Check that the Wi-Fi connection on the sauna tablet is securely setup. The tablet
does
need to be
on to communicate with the app.
• Verify the sauna tablet app is on version 3.2.1 or later to work with the app.
• The mobile app and tablet both need to be logged into the same user profile.
• Check that you have selected the sauna you’re trying to use.
Once the sauna tablet and mobile app are connected, you will see a green dot next to the sauna name.
This connection for both devices will need to stay within the range of 500 meters (about 1,640 ft) or on the
same Wi-Fi signal.
Where do I control the exterior lights from the mobile app?
From the mobile app, starting on the ‘My Sauna’ tab, scroll down to the bottom of the page and select
‘Lights’ to open the exterior lights toggle.
For more FAQ’s please visit
sunlighten.com/customer-service/frequently-asked-questions
.

18
TROUBLESHOOTING GUIDE
Here are some quick tips for troubleshooting your tablet. If you find that these suggestions do not address your
issue, please connect with our Customer Care team for further assistance by phone at 877-292-0020 or submit
a request on our website: https://www.sunlighten.com/customer-service.
ISSUE SOLUTION
Tablet cannot
power on
Try resetting the unit by sticking a pin in the RST hold in the upper left hand corner.
If this doesn’t fix the problem, contact Customer Care as the unit fuse may have
blown.
No/low audio
output
First, try increasing the volume level by swiping down from the top of the screen.
Next, try adjusting the channel balance to center by selecting equalizer on the
home screen and then selecting the fader/balance icon on the left of the screen.
If neither of those fix the issue, it may be an improper audio output connection
and you will need to contact Customer Care on how to check the wiring. For poor
sound quality or distortion, you will also need to check the wiring.
Flashing image or
interference
appears on screen
The video cable may be damaged and will need to contact Customer Care to
replace them. Another potential cause is improper video signal connections
and will need to call Customer Care to check the wiring.
Feedback from
speakers (high-
pitched buzz)
when using sound
from media apps
If a high-pitched interference is heard through the speakers, check for loose
connection of black rectangular plug on back of tablet. Check EQ widget to
confirm that sound is balanced using pre-set “flat” or “reset” setting.
Max volume is 0- 30
Sound Therapy
doesn’t work
The Fader setting (front/back balance) must be adjusted in the stereo. If you do
not have a stereo, check your audio settings on your Android Control Panel.

19
ERROR CODES & DIAGNOSTICS
DIAGNOSTIC RESULT CODES
Error No.
Cause/Solution
E1_01
This error popup appears when there has been an interruption in the information
traveling between your power box and the tablet. To reset, please turn off your
tablet, carefully unplug the sauna, wait 3-5 minutes, and then plug it back in and
turn on the tablet. If the error persists, please connect with our Customer Care
team for further troubleshooting.
E3
The sauna you purchased is designed to use 120 or 240 volts of electricity.
The voltage you have supplied is too low or too high. Double-check your
circuit to ensure that all parts installed are correct. This error encourages
optimal performance and protects the sauna from damage. You may also
consult the owner’s manual or contact customer service at 877.292.0020 for
further assistance.
E4
This error popup appears when the required amount of voltage provided is
high, which can damage the sauna . The sauna you purchased is designed to
use 120 volts of electricity. The voltage you have supplied is too high and may
damage the system. Please have your circuit checked. You may also consult
customer service at 877.292.0020 for more information.
E4_01
This error popup appears when FIR or MIR heating panel fails (H1 to H13
heater module) . The sensor on your heating panel is not detecting the
appropriate warm up of the heater over a set period of time. If your sauna is in
a cold environment, a false positive can show. Also, if you have voltage that is
slightly lower than normal, the power to each heater can be a little lower than
expected and can also cause a false positive. Please check the connections
of your heater wires at the bottom of each wall. If the issue persists, you may
consult customer service at 877.292.0020 for more information. You will still
be able to enjoy your sauna if this error appears .
E5
Each wall of your sauna houses temperature sensors that monitor and regulate heater power
to optimize your sauna session.The response time on your sensor is slower than expected. If
the issue persists, you may consult customer service at 877.292.0020 for more information.
This error will only close off avery small portion of one of your heaters.You will still be ableto
enjoy your sauna if this issue appears.
E6
This error popup appears when one of the heater control circuits does not respond.
Your sauna has a large number of heater control circuits. One of these circuits does
not appear to be responding as expected. Your sauna is still functional and you are
free to continue using it. If you would like assistance for a more permanent solution,
please call customer service at 877 .292.0020.

20
ERROR CODES & DIAGNOSTICS
DIAGNOSTIC
RESULT
CODES
Cause/Solution
This error popup appears when the lighting control board does not appear to
be responding. Please contact customer service at 877.292.0020 for additional
support.
A change in the air quality performance has been detected. Please contact
customer service at 877.292.0020.
This error popup appears when a heater is disabled due to high current
amperage. Some of the heaters in your sauna are disabled due to high
current values . Please contact customer service at 877.292.0020.
This error popup appears when the heater does not respond, and therefore is
not working. Please check the heater connections or contact customer service
at 877.2 92 .0020 for additional support.
This error popup appears when the temperature sensor is not working. Please
contact
customer
service
at
87 7.2 92 .0020
for
more
information
.
Error
No.
E7
E8
E9
Heater Error
Temp Error
This error popup appears when voltage mismatches occur. To prevent
damage to heaters, your tablet will shut down soon . Please have your circuit
checked as you are providing either too much or too little voltage to your
sauna . You may also consult the owner’s manual on the website for what
voltage you should be providing (either 120 or 240 volts) or contact customer
service at 877.292.0020 for more information.
Voltage
Error

21
FCC WARNING
This device complies with part 15 of the FCC Rules. Operation is subject to the following two conditions:
(1) This device may not cause harmful interference, and (2) this device must accept any interference
received, including interference that may cause undesired operation.
Caution: Changes or modifications to this unit not expressly approved by the party responsible for
compliance could void the user's authority to operate the equipment.
NOTE: This equipment has been tested and found to comply with the limits for a Class B digital device,
pursuant to part 15 of the FCC Rules. These limits are designed to provide reasonable protection against
harmful interference in a residential installation. This equipment generates, uses and can radiate radio
frequency energy and, if not installed and used in accordance with the instructions, may cause harmful
interference to radio communications. However, there is no guarantee that interference will not occur in a
particular installation. If this equipment does cause harmful interference to radio or television reception,
which can be determined by turning the equipment off and on, the user is encouraged to try to correct the
interference by one or more of the following measures:
—Reorient or relocate the receiving antenna.
—Increase the separation between the equipment and receiver.
—Connect the equipment into an outlet on a circuit different from that to which the receiver is connected.
—Consult the dealer or an experienced radio/TV technician for help.
To satisfy FCC RF exposure requirements, a separation distance of 20 cm or more should be maintained
between the antenna of this device and persons during device operation.
To ensure compliance, operations at closer than this distance is not recommended
Limited by local law regulations, version for North America does not have region selection option.

22
WARRANTY
Please refer to your country’s specific warranty information,
if outs ide the United Sta tes .
U.S. Residential:
Limited lifetime (7 years) on cabinetry and heaters; 3 years on controls; 1 year on stereo, Blaupunkt Sound
System, sound therapy and chromotherapy.*
U.S. Commercial:
5 years on cabinetry and heaters; 1 year on controls, bench, floor, backrest and stereo, Blaupunkt Sound
System, sound therapy and chromotherapy.*
U.S. Closeout and Floor Models:
5 years for heaters; 1 year on cabinetry and controls.
U.S. Water-Resistant Cover:
The limited warranty covers the fabric becoming unserviceable because of loss of color or strength from
normal usage and exposure conditions, including sunlight, mildew and atmospheric chemicals. Consumer is
responsible for normal care and cleaning of the fabric. This warranty covers fabric only, and is for (1) year.**
Requires use of .004mm plastic sheet (included with purchase) with tenting to create a slope for water run
off to prevent pooling.
Sunlighten warrants the sauna to be free of defects in material and workmanship.
This warranty extends only to the original retail or wholesale purchaser of the sauna and terminated upon
transfer of ownership. The sauna must be purchased and used within one year of the manufactured date.
Freight charges to and from the customer are the responsibility of the customer. This includes freight charges
for parts shipped to enable the services of the sauna.
This warranty is void if the sauna has been altered, misused, abused, or exposed to liquid. Such instances
shall include operation or maintenance of the sauna in deviation to the published instructions, including
operating on a non-dedicated circuit. The warranty extends only to the manufacturing defects and does not
cover the damages resulting from mishandling of the product by the owner.
Sunlighten Corp. shall not be liable for the loss of use of the sauna or other incidental or consequential
damages. Under no circumstances shall Sunlighten Corp. or any of its representatives be held liable for
injury to any persons or damages to any properties. Specifications are subject to change without notice.
This warranty is limited to customers in the United Kingdom and Ireland. Other International customers should
check with their local Sunlighten representative.

23
WARRANTY CONTINUED
*Limited Lifetime Warranty covers normal use for the lifetime of the product which is defined as 7 years.
Warranty is limited to replacement parts only and does not include costs for crating of glass door or freight for
parts shipped past 90 days from the date of receipt of goods. The cost of labor and/or service technicians is
not included.
**If sauna is placed outdoors, failure to utilize the .004mm plastic sheet supplied (with your sauna cover)
as additional water protection for your sauna will void your warranty. The fabric used for the roof of the
waterproof cover is resistant to water penetration; however it is sewn to the acrylic canvas sides. It is
required to place the included plastic sheet directly over the sauna roof prior to installing the cover and
tenting the plastic and canvas cover by placing an object on the sauna roof to give the fabric elevation for
water to run off and prevent water pooling, as further protection. The cover should remain on the sauna at
all times (including while on and in-use) to avoid water damage and void the warranty.
ATTENTION
Shipping damage must be notated on the Bill of Lading (BOL). Sunlighten must be notified
of any damage to your sauna within three (3) business days of signing the BOL. Failure to notify
Sunlighten within the established time frame will result in the owner taking full responsibility for cost of ALL
REPLACEMENT PARTS including shipping and handling fees.
24
ETL SAFETY CERTIFIED
The ETL Listed Mark is proof of product compliance (electrical,
gas and other safety standards) to North American safety
standards. Authorities Having Jurisdiction (AHJ’s) in 50 states
and Canada and retailers accept the ETL Listed Mark as proof
of product safety.
M P U L S E T E C H G U I D E
V E R S I O N 1 2 2 0 2 0 2 5
B L A U P U N K T
US / CAN 10975 El Monte St. | Leawood, KS 66211
913.754.0831 | sunlighten.com
Toll Free: 877.292.0020
International sunlighten.com
or contact your local Sunlighten representative