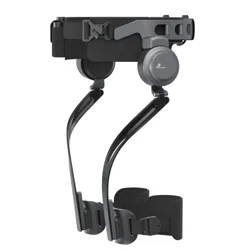
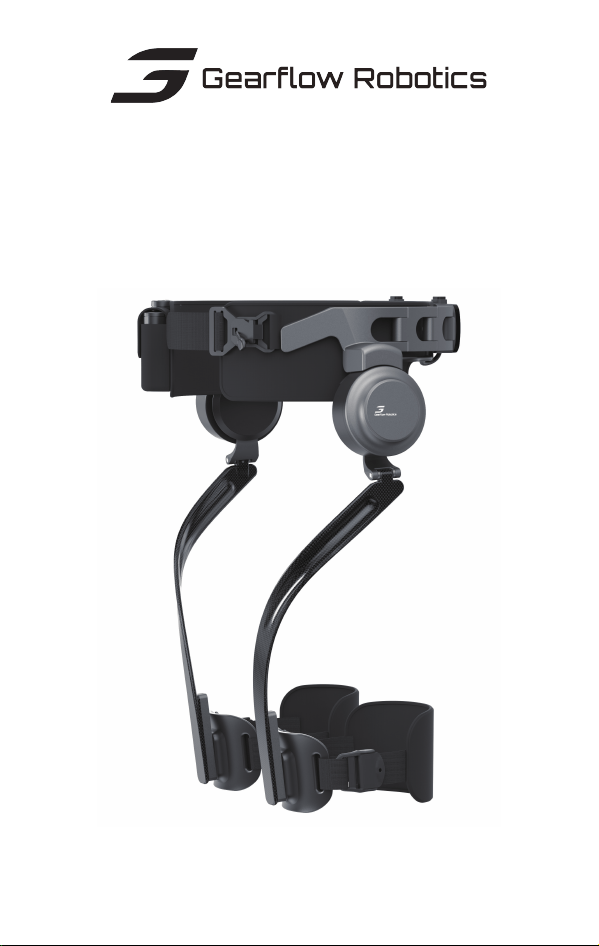
Exoskeleton User Manual
Applicable Models: Gearflow C2
Manufacturer: Gearflow Robotics Co., Ltd.

Table of contents
1.Product Illustration
2.Specifications
3
4
1
2
01 Product Overview
Preface
In the box
11
03 Maintenance
12
04 Troubleshooting
13
05 Warranty Service
1.APP Download
2.Device Donning & Doffing
3.Button Controls
4.Mode Reference
5.Device Status LED
6.Battery Management
5
6
7
8
9
10
02 User Guide
16
Contact Information
Preface
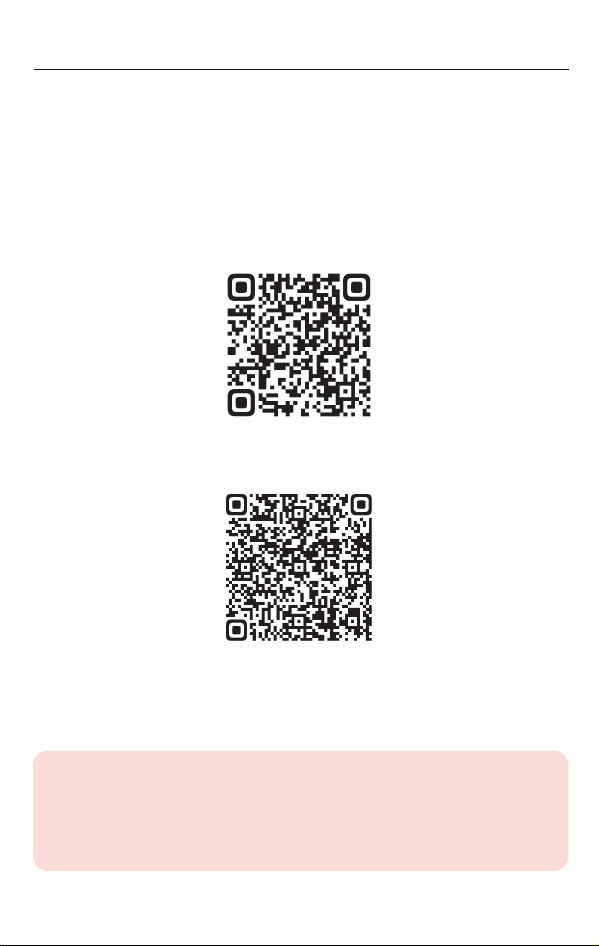
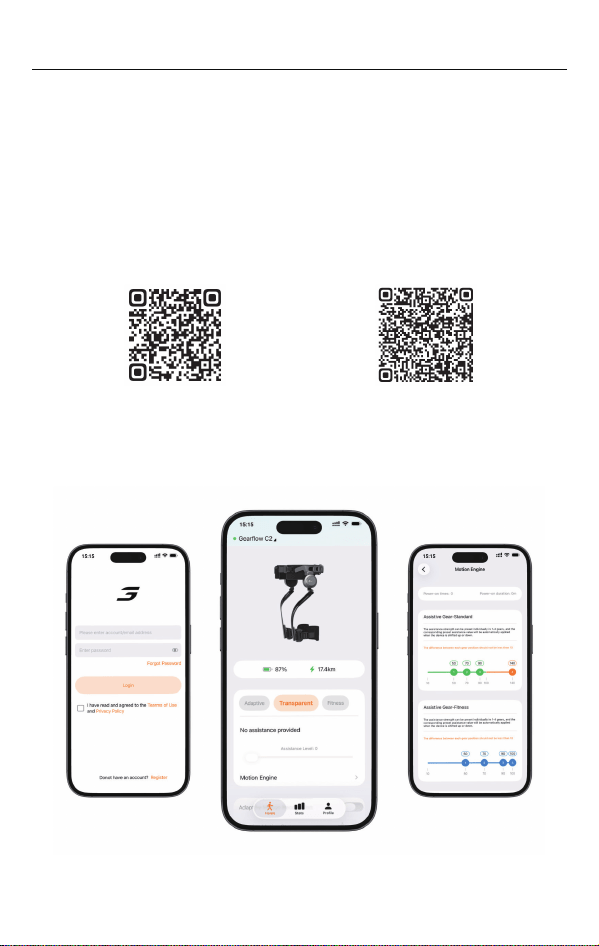
Scan the QR code below to get the APP
Android
iOS
1
Thank you for choosing the lower limb exoskeleton developed by
Gearflow Robotics Co., Ltd. This product is designed to assist
walking.
Caution
Please read this manual and the separate safety information
carefully before use. Improper use may cause personal injury
or equipment damage.
In the box
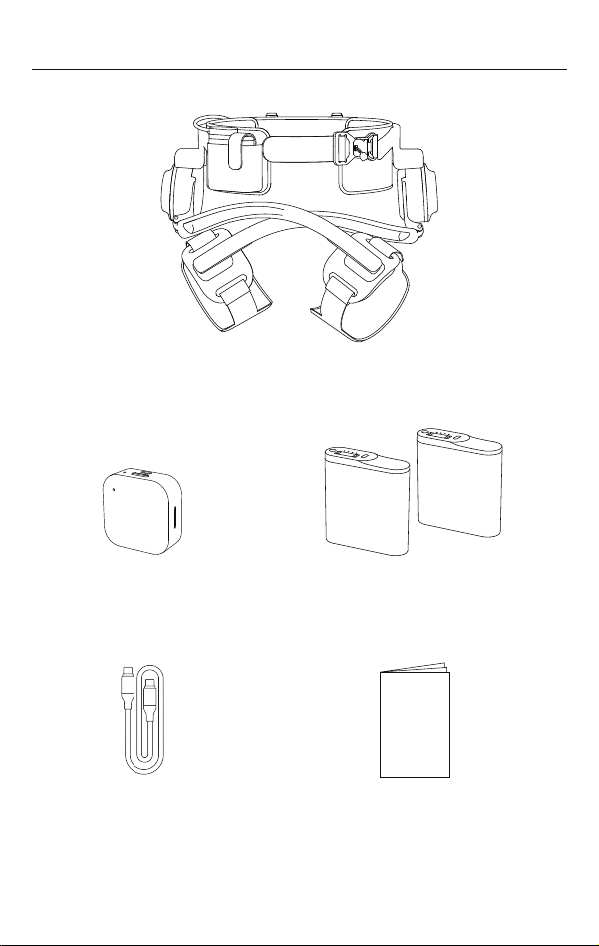
Exoskeleton x1
(Binding System x1)
Voice HMI Module x1
(optional)
USB-C Cable x1
Cold-resistant
High-endurance Battery x2
(the 2nd. one is optional)
Exoskeleton User Manual x1
(Includes Warranty Card)
Voice HMI Module User Manual x1
Safety Information x1
2
1.Product Illustration
01 Product Overview
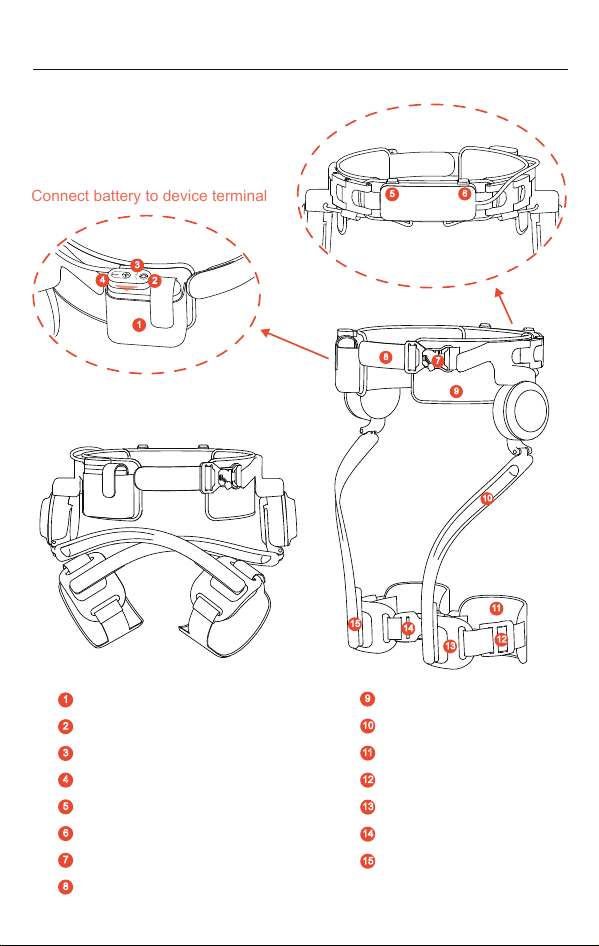
Battery
Power/Mode Button
Status LED Indicator
Power Adjustment Buttons
Left Waist Rod Adjustment Key
Right Waist Rod Adjustment Key
Magnetic Waist Buckle
Waist Adjustment
Waist Binding System
Leg Rod
Leg Binding System
Adjustable Leg Buckle
Front Leg Cover Plate
Plug-in Leg Buckle
Leg Rod Slider
9
1
2
3
4
5
6
7
8
10
11
12
13
14
15
1
2
3
4
5
6
7
8
9
10
11
14
13
15
12
3
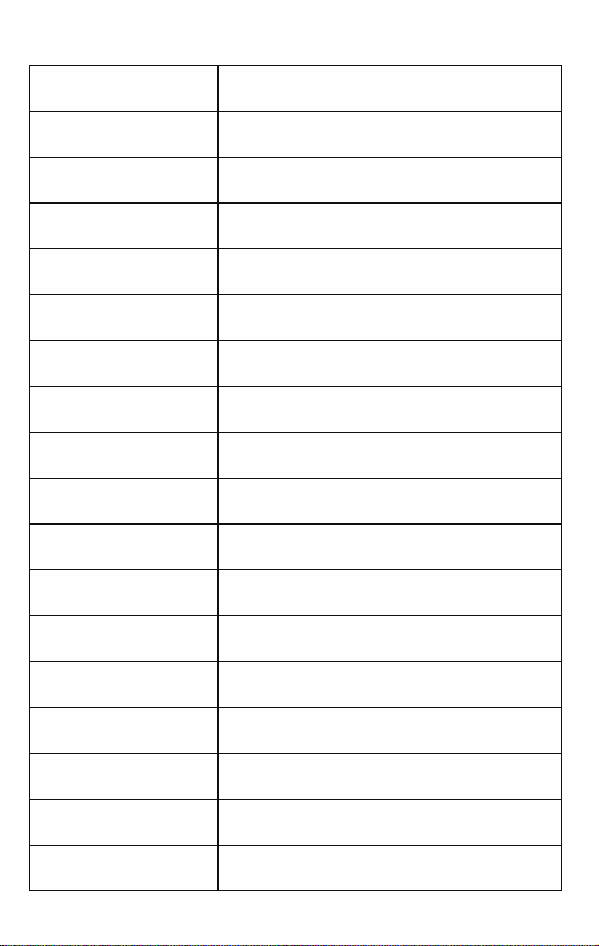
Connect battery to device terminal
2.Specifications
Product Model
Dimensions
415mm*206mm*116mm (Folded State)
430mm*300mm*510mm (Unfolded State)
Weight (Size: M)
≈2.0kg+0.36kg+0.38kg
(Device + Battery + Binding System)
Material Carbon Fiber / Magnesium Alloy / Aluminum Alloy
Waterproof IP54
14.8V
16.8V
Maximum Power Output Torque 21N·m x2
Mode
Transparency / Adaptive(Standard) / Ultra / Fitness
Motion Posture Recognition
Multimodal Sensor Fusion Recognition
AI Engine Gearflow Multimodal AI Engine 3.0
OTA Supported
Nominal Voltage
Maximum Charging Voltage
External Lithium-ion Battery PackPower Supply
4800mAhRated Battery Capacity
20km / 4h Endurance
(2nd level, 5 km/h, 3°–8°slope, 28℃, 175 cm, 75 kg user)
Battery Runtime
USB Type-C(Supports PD fast charging, max 65W)Charging Port
88 min. fully charged
-20℃ ~ 60℃
Charging
Operating Temperature
More functions to be launched subsequently,
OTA online upgrade
Gearflow C2
4
1.APP Download
02 User Guide
AndroidiOS
5
Thank you for choosing the lower limb exoskeleton developed by
Gearflow Robotics Co., Ltd. This product is designed to assist
walking.
(1) Download by scanning the QR code below or searching for
"Powermate+" on the App Store or Google Play.
(2) Please download the Powermate+ App, create an account,
and activate your exoskeleton device.
*Ensure Bluetooth is turned on when operating the device through the app.

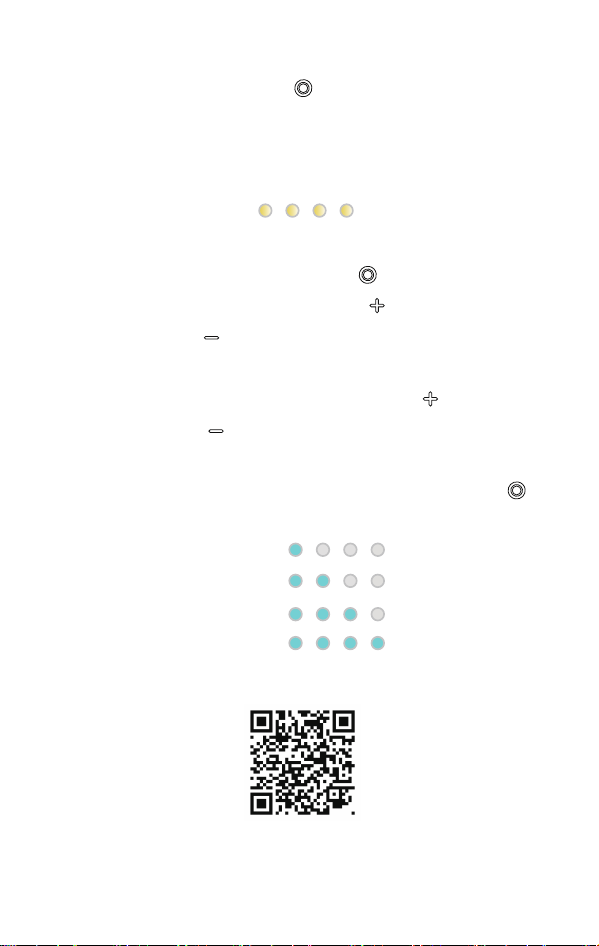
Scan to watch
donning & doffing videos
6
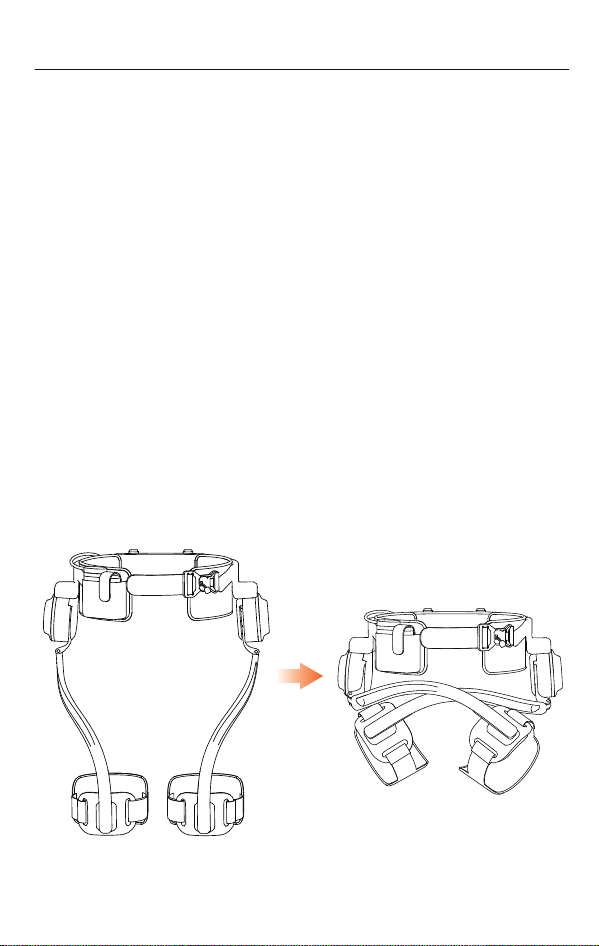
(1) Unfold the waist and leg binding systems.
(2) Adjust the rear waist rod to equal length on both sides; ensure
motors are parallel to the waist and the device fits snugly.
(3) Secure the waist binding system, fasten the magnetic buckle,
and adjust for a comfortable fit.
(4) Position leg plates above the knee, fasten leg buckles, and
adjust leg straps.
(5) Self-check: Perform squat and walking tests. Readjust if loose
or uncomfortable.
(6) Connect the battery to the device terminal.
2.Device Donning & Doffing
Donning Procedure
Doffing Procedure
CAUTION
• Power off before doffing.
• Hold the back frame to prevent dropping.
(1) Press the thigh release buckle to detach leg straps.
(2) Hold the left side with your left hand, pull the waist buckle
tab leftward with your right hand to release.
7
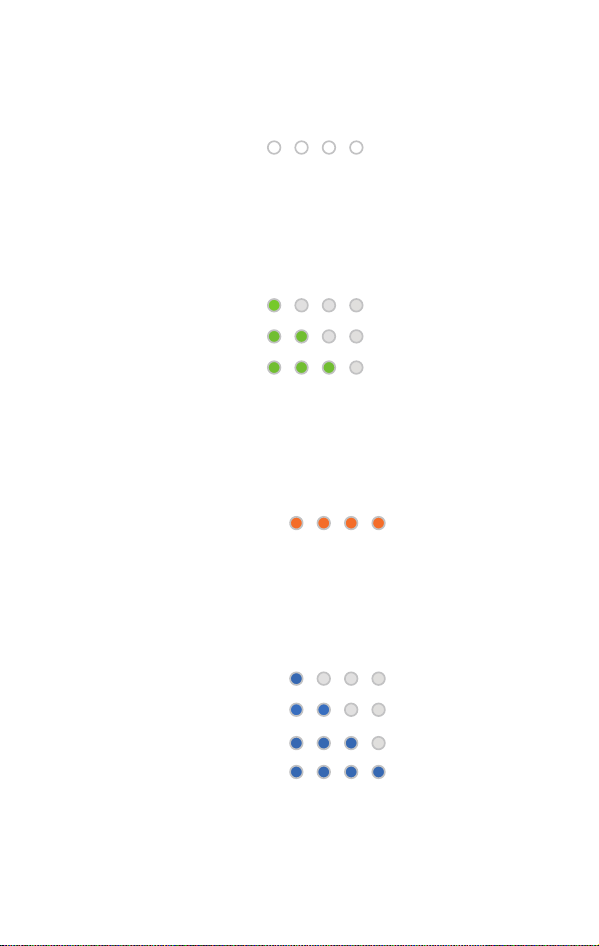
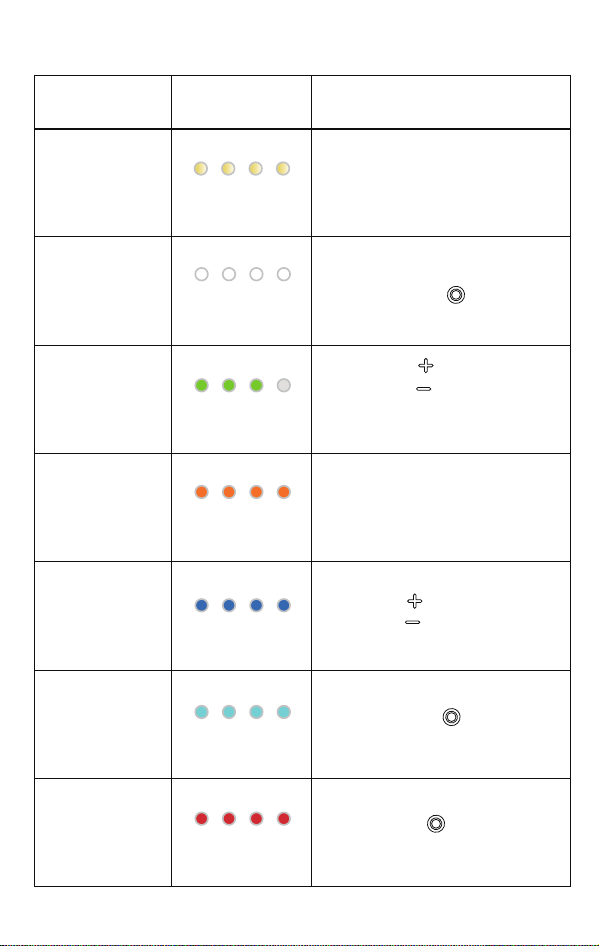
(1) Power On / Off:Hold the “ ” button on the front battery for
3 seconds. Wait for the white LED to fade in (on) or out (off).
(2) Device Activation:Activate via the Powermate+ App.
LED 1-4 Blinking Yellow:
(3) Mode Switching:Short press “ ” to cycle modes. In
Adaptive (Standard) mode, short press “ ” 3 times to enter Ultra
Mode; short press “ ” to return to Adaptive mode.
(4) Assist / Resistance Level:Short press “ ” Increase by 1
level;Short press “ ” Decrease by 1 level.
(5) Battery Check:When powered off, short press “ ” to
check battery level.
LED 1 Steady Light Blue:
LED 1-2 Steady Light Blue:
LED 1-3 Steady Light Blue:
LED 1-4 Steady Light Blue:
Battery 1%-25%
Battery 25%-50%
Battery 50%-75%
Battery 75%-100%
Pending activation
Scan for operation video
3.Button Controls
8
*Settings adjustable via Powermate+ App.
4.Mode Reference
(1) Transparency Mode
LED 1-4 Steady White:
Definition: Zero power output. Natural, unassisted feel.
Best for: Rest, posture adjustment, or free movement.
(2) Adaptive Mode (Standard Mode)
LED 1 Steady Green:
LED 1-2 Steady Green:
LED 1-3 Steady Green:
Definition: Sensor-driven, auto all-terrain assist.
Best for: Walking, jogging, stairs, cycling, hiking.
(3) Ultra Mode
LED 1-4 Steady Orange:
Definition: Full power output. Customizable via Powermate+.
Best for: High-intensity assistance needs.
(4) Fitness Mode
LED 1 Steady Dark Blue:
LED 1-2 Steady Dark Blue:
LED 1-3 Steady Dark Blue:
LED 1-4 Steady Dark Blue:
Definition: Algorithm-based adjustable resistance, simulating
gym equipment.
Best for: Leg strength training, resistance workouts.
Level 1 Assist
Level 2 Assist
Level 3 Assist
Level 1 Resistance
Level 2 Resistance
Level 3 Resistance
Level 4 Resistance
100%-140% Assist
9
Pending
Activation
Activate via Powermate+ App
Blinking Yellow
5.Device Status LED
Status
Transparency
Mode
Adaptive Mode
(Standard Mode)
Default mode after activation.
Short press “ ” to cycle
modes.
Short press “ ” to power off.
See P12 [04 Troubleshooting]
When powered off,
short press “ ” to check
(25%-50%-75%-100%)
Customized assist (100%–140%)
via Powermate+ App
Short press “ ” Increase assist
Short press “ ” Decrease assist
Adaptive Mode: Levels 1-3
Level 4 switches to Ultra Mode
Short press “ ” Increase resistance
Short press “ ” Decrease resistance
Levels 1–4
Ultra Mode
Fitness Mode
Battery Level
System Error
LED Indicator Action
Steady White
Steady Green
Steady Orange
Steady Dark Blue
Steady Light Blue
Steady Red
10
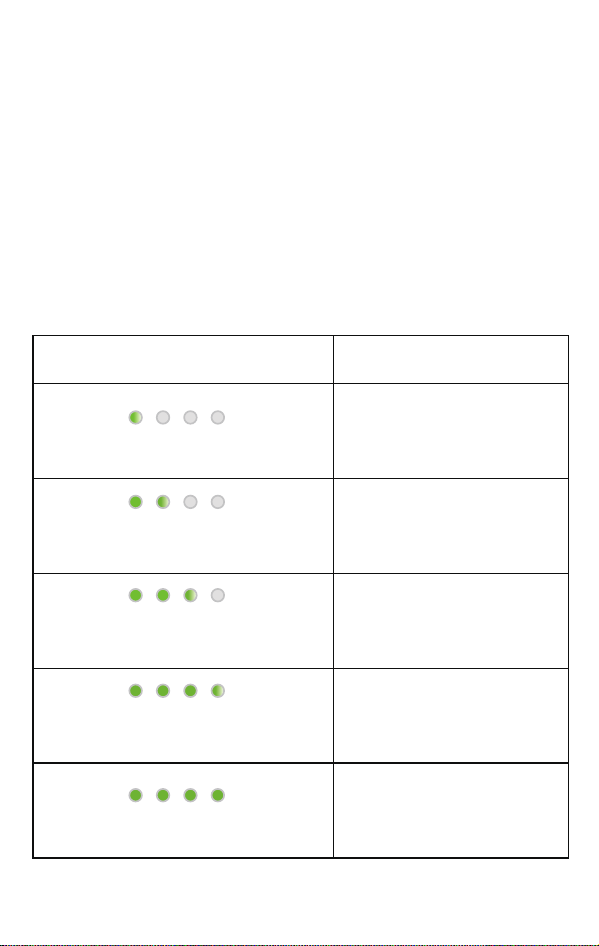
Charge LevelBattery LED Indicator
0%-25%
LED 1 :Blinking Green
25%-50%
50%-75%
75%-100%LED 1-3 :Steady Green
LED 4 :Blinking Green
LED 1-2 :Steady Green
LED 3 :Blinking Green
LED 1 :Steady Green
LED 2 :Blinking Green
100%
(Fully Charged)
LED1-4 :Steady Green
6.Battery Management
(1) Charging Time: 88 min. fully charged (65W)
(2) Battery Runtime: 20km/4h Endurance (2nd Level, 5 km/h,
3°–8° slope, 28°C, 175 cm, 75 kg user)
(3) Charging Steps: Power off device, remove control
module, connect charger to USB Type-C (PD fast charge
supported, max 65W)
(4) Battery Maintenance: If unused for extended periods,
charge every 3 months to maintain battery health.
11
1.Daily Cleaning: Wipe the device shell with a soft dry
cloth or a damp cloth dipped in neutral detergent. Do
not use corrosive solvents such as alcohol or gasoline.
2.Cleaning and Replacement of Binding System:
The waist and leg binding system is detachable. Hand
washing is recommended, followed by natural air
drying. The soft fabric binding system is a consumable
part and shall be replaced regularly.
3.Storage Requirements: Fold and store the device in
a dry and cool place, and avoid direct sunlight.
03 Maintenance
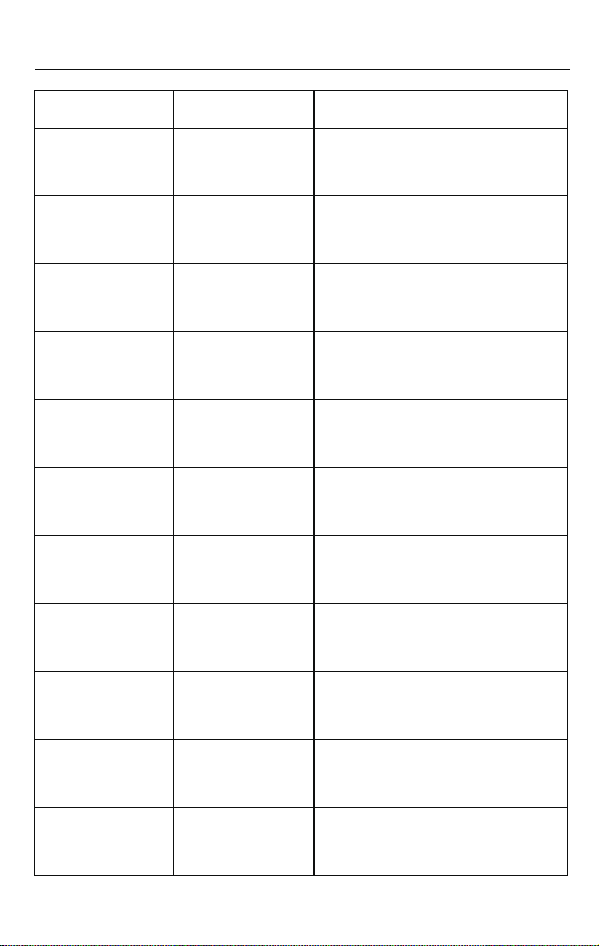
Symptom
Unable to
power on
Abnormal
motor noise
Possible Cause
Battery
depleted
Joint angle
obstructed or foreign
object jammed
Solution
Check if clothing is caught in leg
joints; restart device
Charge the device,
then try turning it on again.
Power off, re-wear the device
properly, then restart. Do not move
your body during startup
Power off and wait for motor to
cool down, then restart
Power off and restart; if alert
persists, contact support service
Power off and restart; if alert
persists, contact support service
Battery may not be inserted tightly;
reseat the battery. If alert persists,
contact support service
Power off and restart; if alert
persists, contact support service
Power off and restart; if alert
persists, contact support service
Register the device using the
mobile APP
Unsmooth
walking
Binding straps
too loose
Four red
LEDs flashing
Three red
LEDs flashing
Two red
LEDs flashing
One red
LED flashing
One white
LED flashing
Two white
LEDs flashing
Three white
LEDs flashing
Four red
LEDs solid
Wear anomaly
alert
High
temperature
alert
Right motor
anomaly
Left motor
anomaly
Battery read
error
Sensor read
error
Mainboard
fault alert
Device not
registered
Re-wear the device
12
04 Troubleshooting

13
05 Warranty Service
Warranty Terms & Conditions
1. Warranty Period: Commences on the date of physical delivery.
• EU, Switzerland, Norway, UK: 2 Years
• All Others: 1 Year
Extended to comply with mandatory local consumer legislation
where applicable.
2. Coverage: Defects in materials and workmanship under normal
and intended use. Excludes consumables (e.g., binding systems)
and normal wear & tear.
3. Eligibility: Valid only for original purchasers of authentic
Gearflow products purchased from the official website or
authorized distributors. Non-transferable. Valid proof of purchase
required.
4. Service: Gearflow will repair or replace defective components
at no additional charge during the warranty period.
Exclusions
Not Covered:
• Damage not caused by product design, engineering, or
manufacturing defects; inability to provide valid proof of
purchase; products beyond warranty period
• Misuse, abuse, improper storage, or unlawful use
• Unauthorized modifications, tampering, disassembly, or repair
• Damage from negligence, fire, liquid ingress, flooding, extreme
temperatures, or corrosion
• Use of non-Gearflow certified parts or accessories; battery
damage from insufficient maintenance (charge at least once
every 3 months during non-use)
• Lost, stolen, or misplaced products

14
Voiding Acts:
• Unauthorized modification to hardware, firmware, or
schematics
• Intentional alteration, defacement, or removal of serial
numbers, barcodes, or tracking tags
• Servicing by non-Gearflow or non-certified technicians
• Use of non-Gearflow certified accessories
Note: Accidental damage to warranty seals or serial numbers
during normal use does not invalidate warranty.
For full terms:
https://gearflow-robotics.com/warrantypolicy.html
Customer Support:
This warranty supplements your statutory rights under applicable
local consumer protection laws. In case of conflict, local law shall
prevail.
15
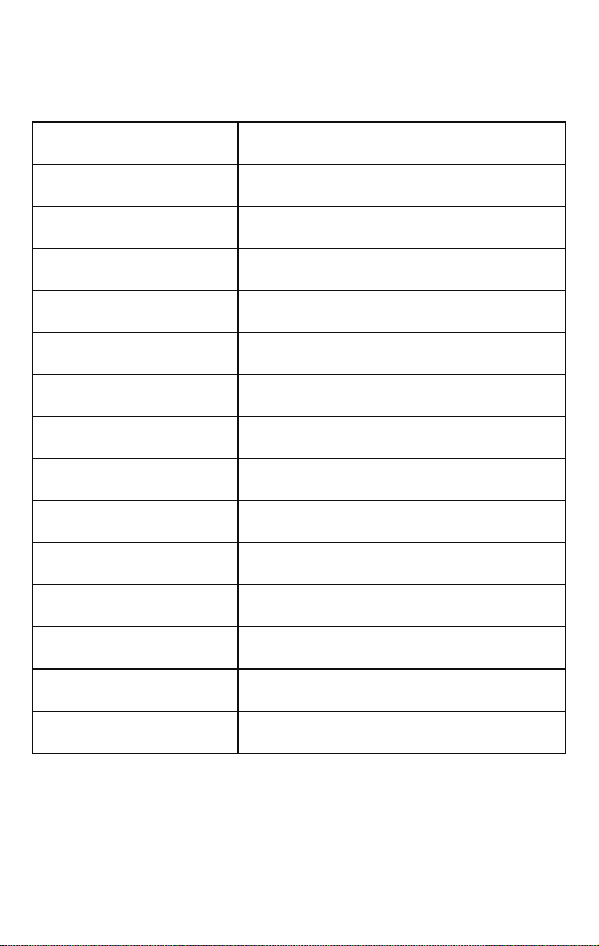
Field
Date of Purchase
(MM / DD / YYYY)
Place of Purchase
Order Number
Invoice Number
Contact Address
Email
Phone
Warranty Period
□ 1 Year / □ 2 Years / □ Other: _______
____ / ____ / ____
____ / ____ / ____
Defects in materials and
workmanship under normal use
Misuse, unauthorized repair, normal
wear and tear, non-manufacturing defects
Coverage
Exclusions
Customer Signature
Date (MM / DD / YYYY)
Product Model
Serial Number (S / N)
Information
Thank you for purchasing Gearflow products. Please complete
this card and retain your proof of purchase. This warranty is valid
only with a completed warranty card and original receipt.
For inquiries, please contact Customer Service:

16
FCC Caution.
This device complies with part 15 of the FCC Rules.
Operation is subject to the following two conditions: (1) This
device may not cause harmful interference, and (2) this
device must accept any interference received, including
interference that may cause undesired operation.
Any Changes or modifications not expressly approved by
the party responsible for compliance could void the user's
authority to operate the equipment.
Note: This equipment has been tested and found to comply
with the limits for a Class B digital device, pursuant to part
15 of the FCC Rules. These limits are designed to provide
reasonable protection against harmful interference in a
residential installation. This equipment generates uses and
can radiate radio frequency energy and, if not installed and
used in accordance with the instructions, may cause
harmful interference to radio communications. However,
there is no guarantee that interference will not occur in a
particular installation. If this equipment does cause harmful
interference to radio or television reception, which can be
determined by turning the equipment off and on, the user is
encouraged to try to correct the interference by one or more
of the following measures:
-Reorient or relocate the receiving antenna.
-Increase the separation between the equipment and
receiver.
-Connect the equipment into an outlet on a circuit different
from that to which the receiver is connected.
-Consult the dealer or an experienced radio/TV technician
for help.
RF warning for Portable device:
The device has been evaluated to meet general RF
exposure requirement. The device can be used in portable
exposure condition without restriction.

17
Scan QR code for website
Manufacturer: Gearflow Robotics Co., Ltd.
Address: Room 601, Building 7, No.178 Dingxing
Road, Tangjiawan Town, High-tech Zone, Zhuhai City,
Guangdong Province, China
Support Email: [email protected]
Official Website: https://gearflow-robotics.com
Contact Information
The actual product may vary slightly from the images shown in this user
manual. Product specifications and features are subject to change without
prior notice.