Heated Blanket
Remote Control
FCC ID:2BF7YJT-HTB002
FCC ID:2BF7YJT-HTC001
IC ID:33201-HTB002
IC ID:33201-HTC001
HVIN:JTHTB002
HVIN:JTHTC001
User Manual
Model: JT-HTB002
Heated Blanket
Cancer and Reproductive Harm
- www.P65Warnings.ca.gov.
www.jartoo.com
Email: [email protected]
Manufacturer Information:
Shenzhen Umbra Technology Co., Ltd.
Room 702, Building 11, Tianan Yungu Industrial Park,
Longgang District, Shenzhen, China
US Importer: Arknology LLC
Address: 30 DONOVAN IRVINE, CA, USA
UK Importer: CET PRODUCT SERVICE LTD. (For authorities only)
Address: Beacon House Stokenchurch Business Park, Ibstone Rd,
Stokenchurch High Wycombe HP14 3FE, UK
Email: [email protected]
EC Importer: CET PRODUCT SERVICE SP. Z O.O.(For authorities only)
Address: Ul. Dluga 33 102 Zgierz 95 100, Poland
Email: [email protected]
PRECAUTIONS FOR USE
PREFACE
· Inspect the power cord and adapter before use. If damaged, do not use and contact custome
support at [email protected].
· Use only the adapter provided with the heated blanket. Do not substitute with other adapters.
· Please cut off the power and unplug the adapter before washing.
· Keep the adapter away from water. Do not wash it.
· Ensure the blanket is completely dry before use for optimal performance.
· Do not use it together with other heating devices to avoid burns by overheating.
· Unplug when not in use to save energy.
· Machine washable, but do not dry cleaning.
· Replace the heated blanket every 5 to 6 years for best results.
Thank you for purchasing JARTOO products. For optimum experience, please read this manual
carefully before using.
01
01
01
02
02
03
03
03
04
05
06
06
07
07
07
08
09
09
09
10
11
CONTENTS
Package Contents
Jartoo Heated Blanket Diagram
Remote Control Diagram
Washing Instructions
Storage Instructions
PART 3 SPECIFICATIONS
PART 4 TROUBLESHOOTING
PART 5 WARRANTY & SERVICE
Part 6 FCC and IC Description
Remote Control Status Indications
Getting Started
Pairing the Remote Control with the Heated Blanket
Turn ON/OFF Indicator Light
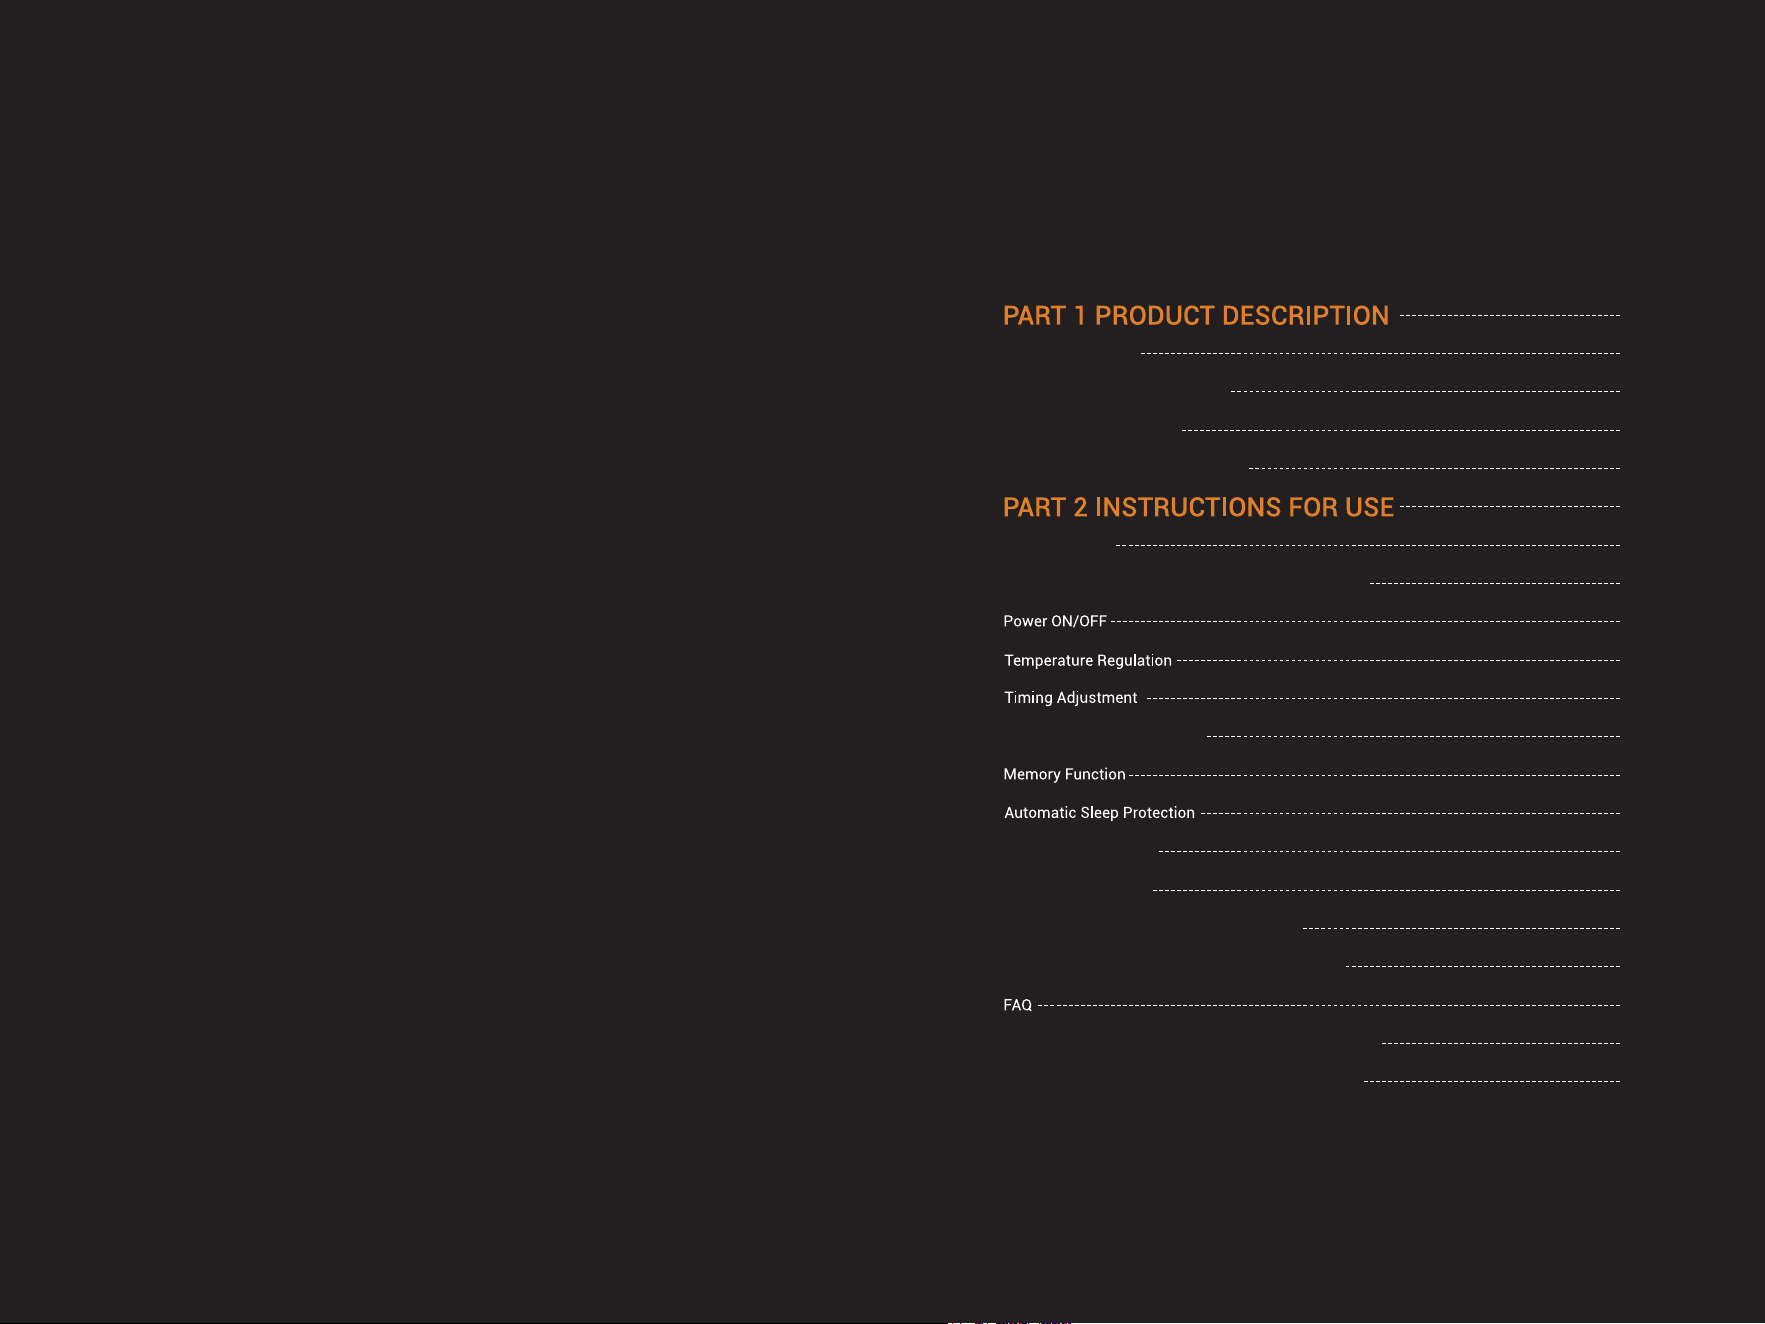
This product contains the following items:
Package Contents
Jartoo Heated Blanket Diagram
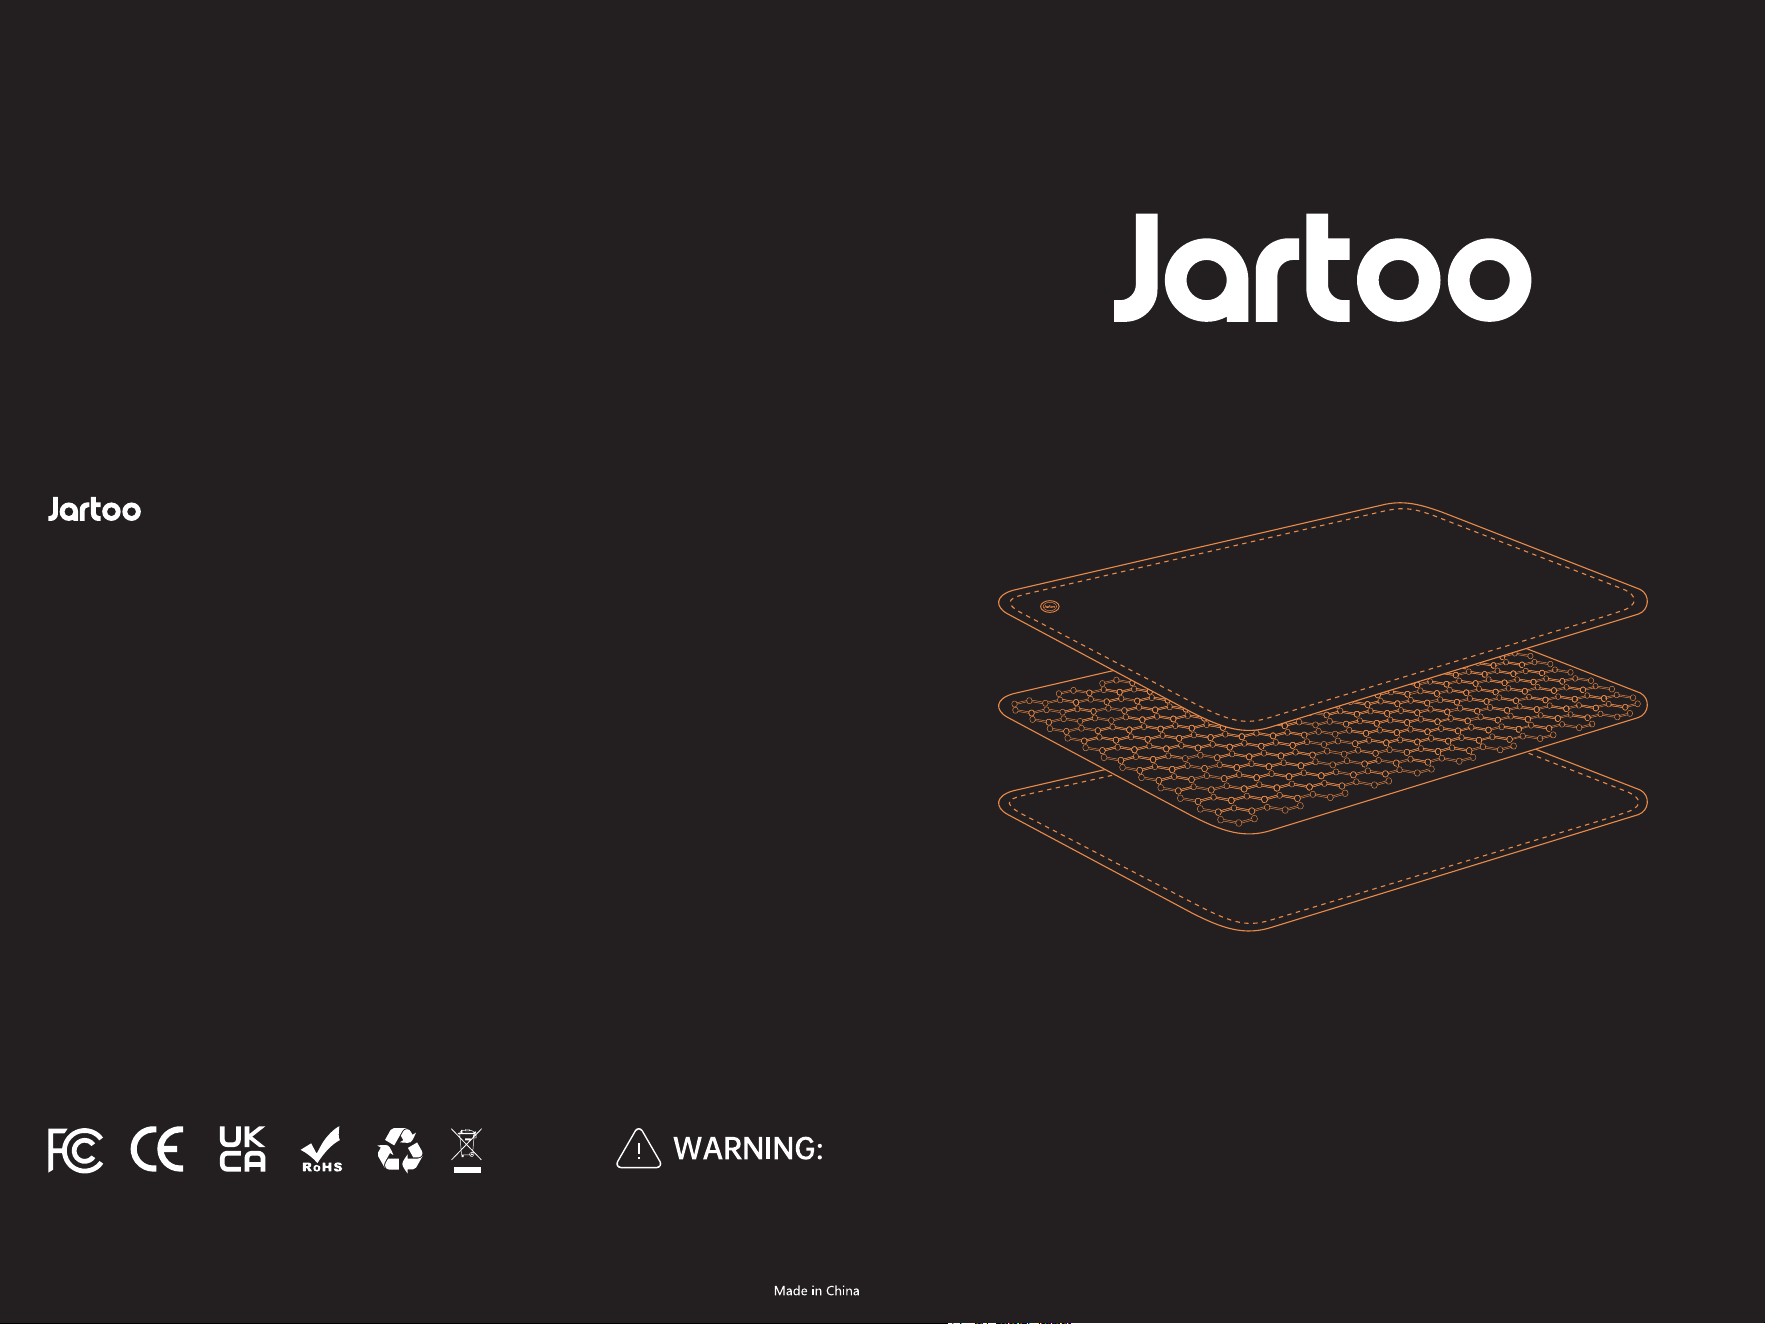
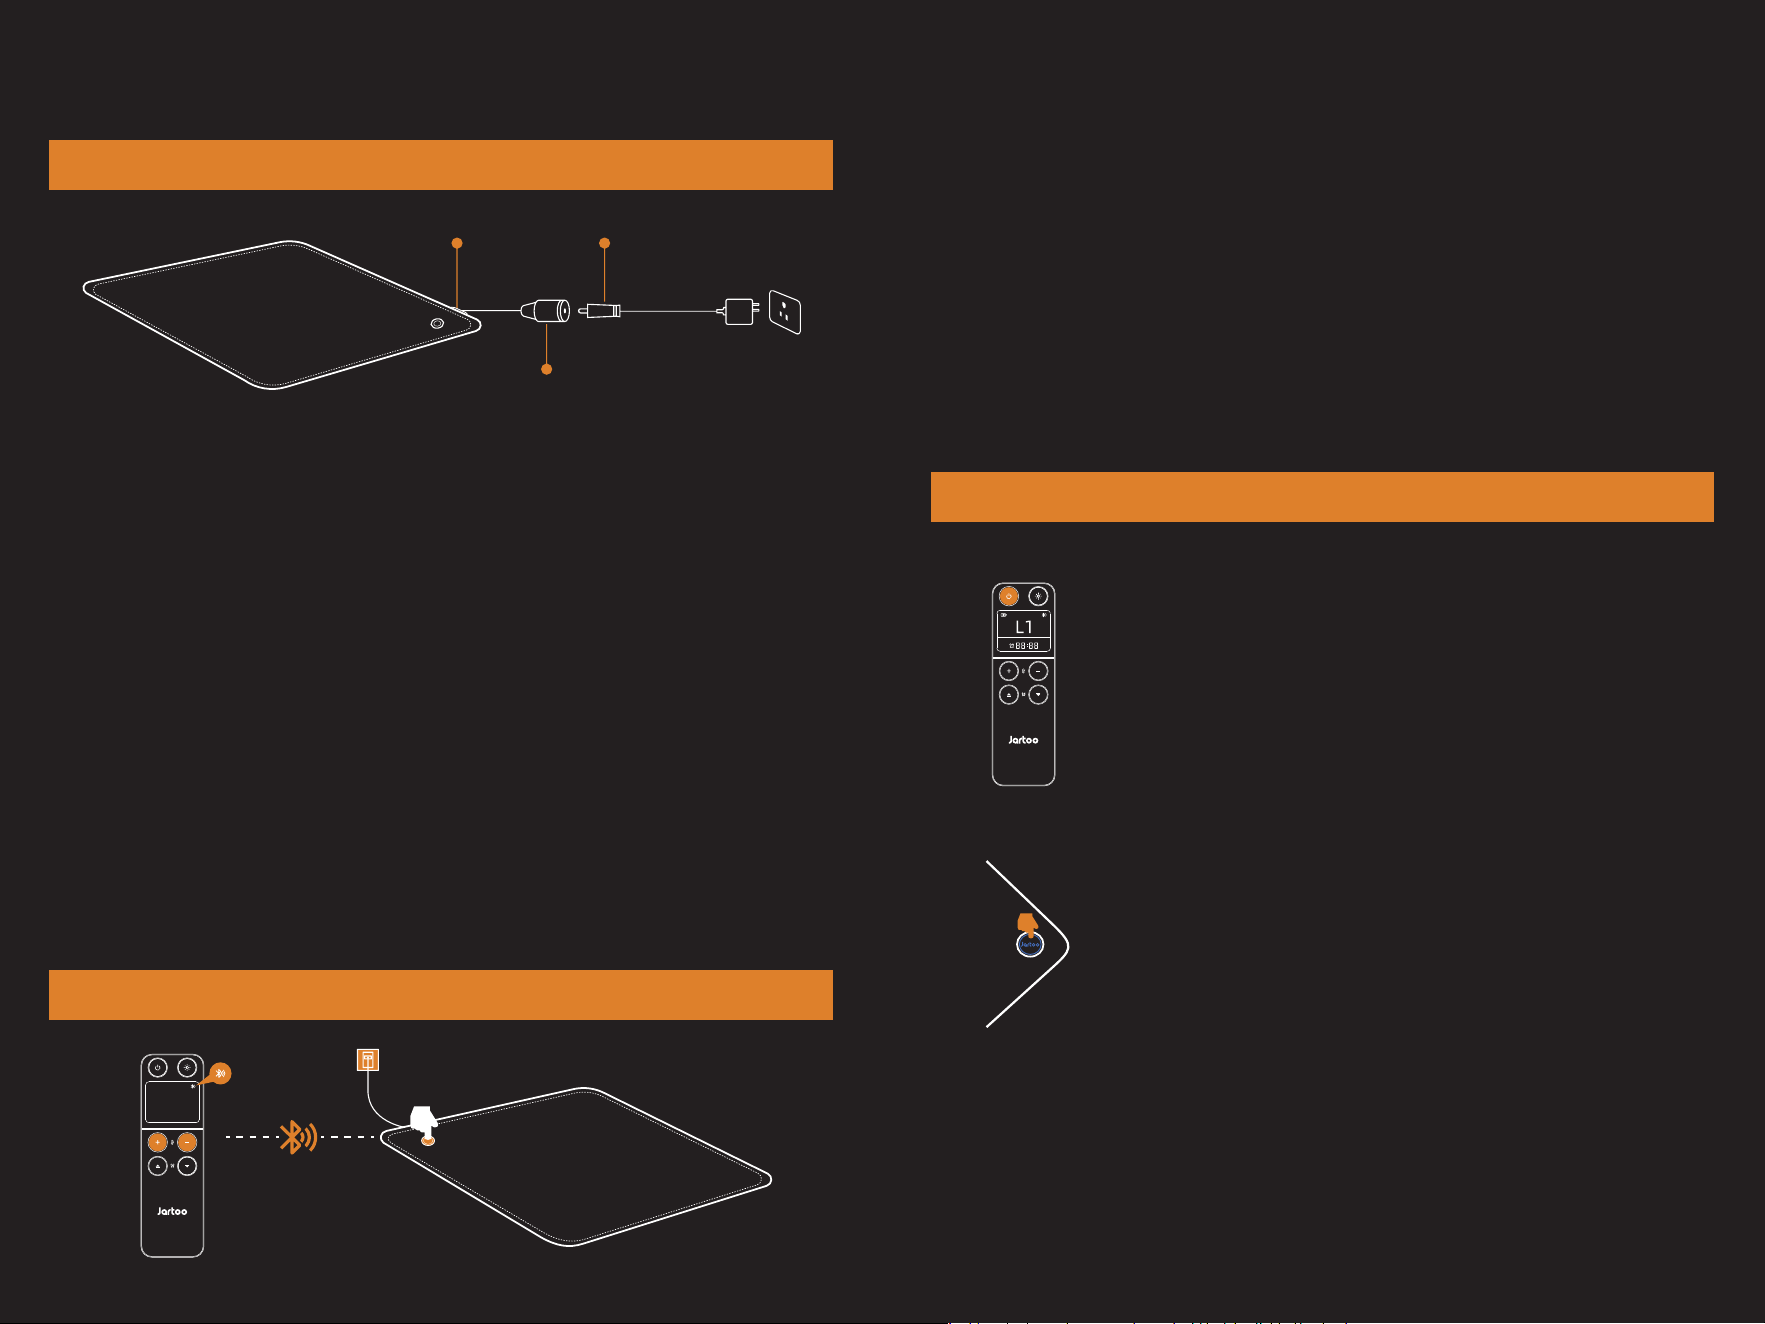
PART 1 PRODUCT DESCRIPTION
Adapter Connection Port
(hidden behind zipper)
Power Button
Side A: Velvet Fabric
Side B: Velvet Fabric
Apalos FlexHT Heating Element
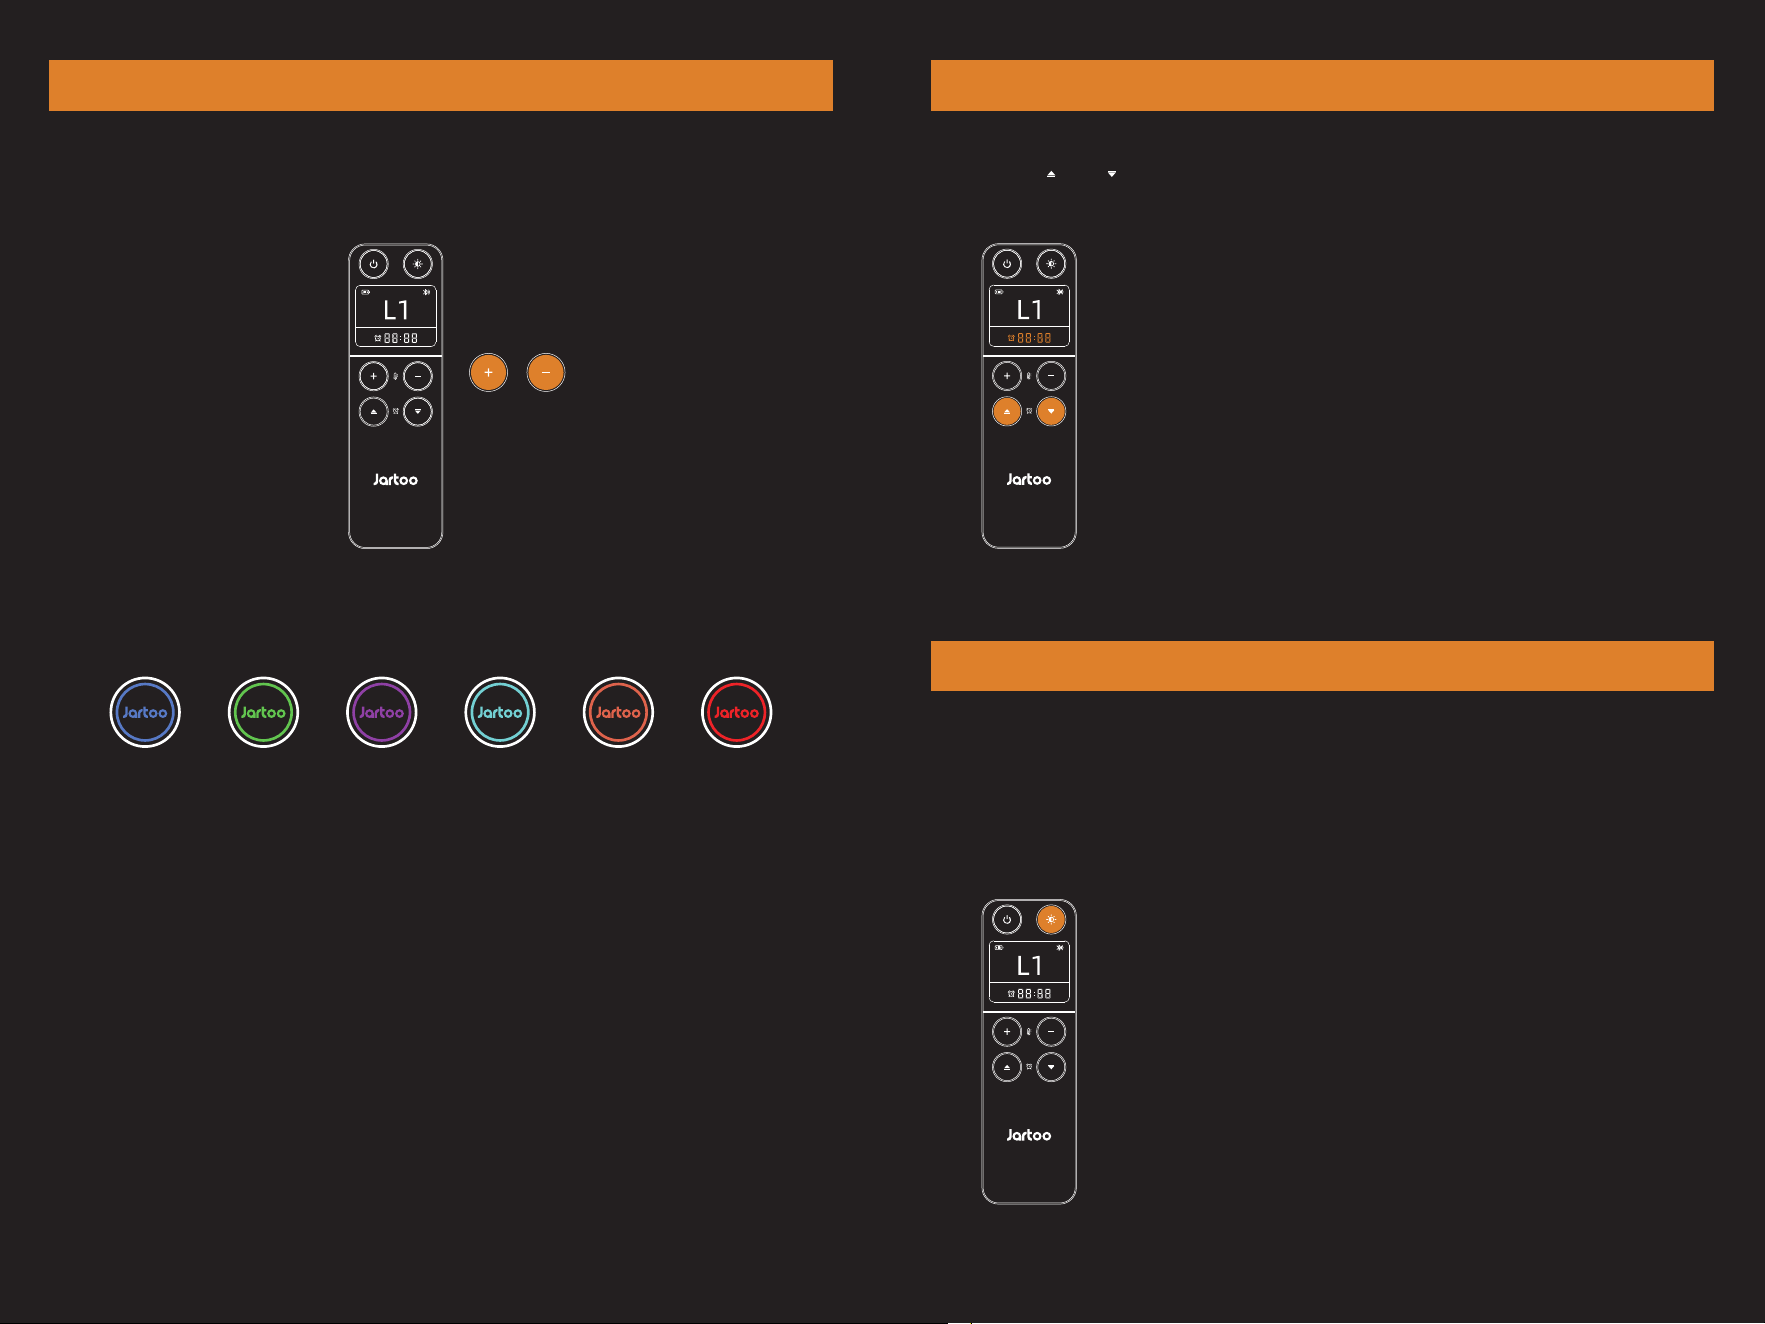
Remote Control Diagram
Power Switch
Indicator Light Switch
Temperature “+”
Temperature “-”
Timer “+”
Timer “-”
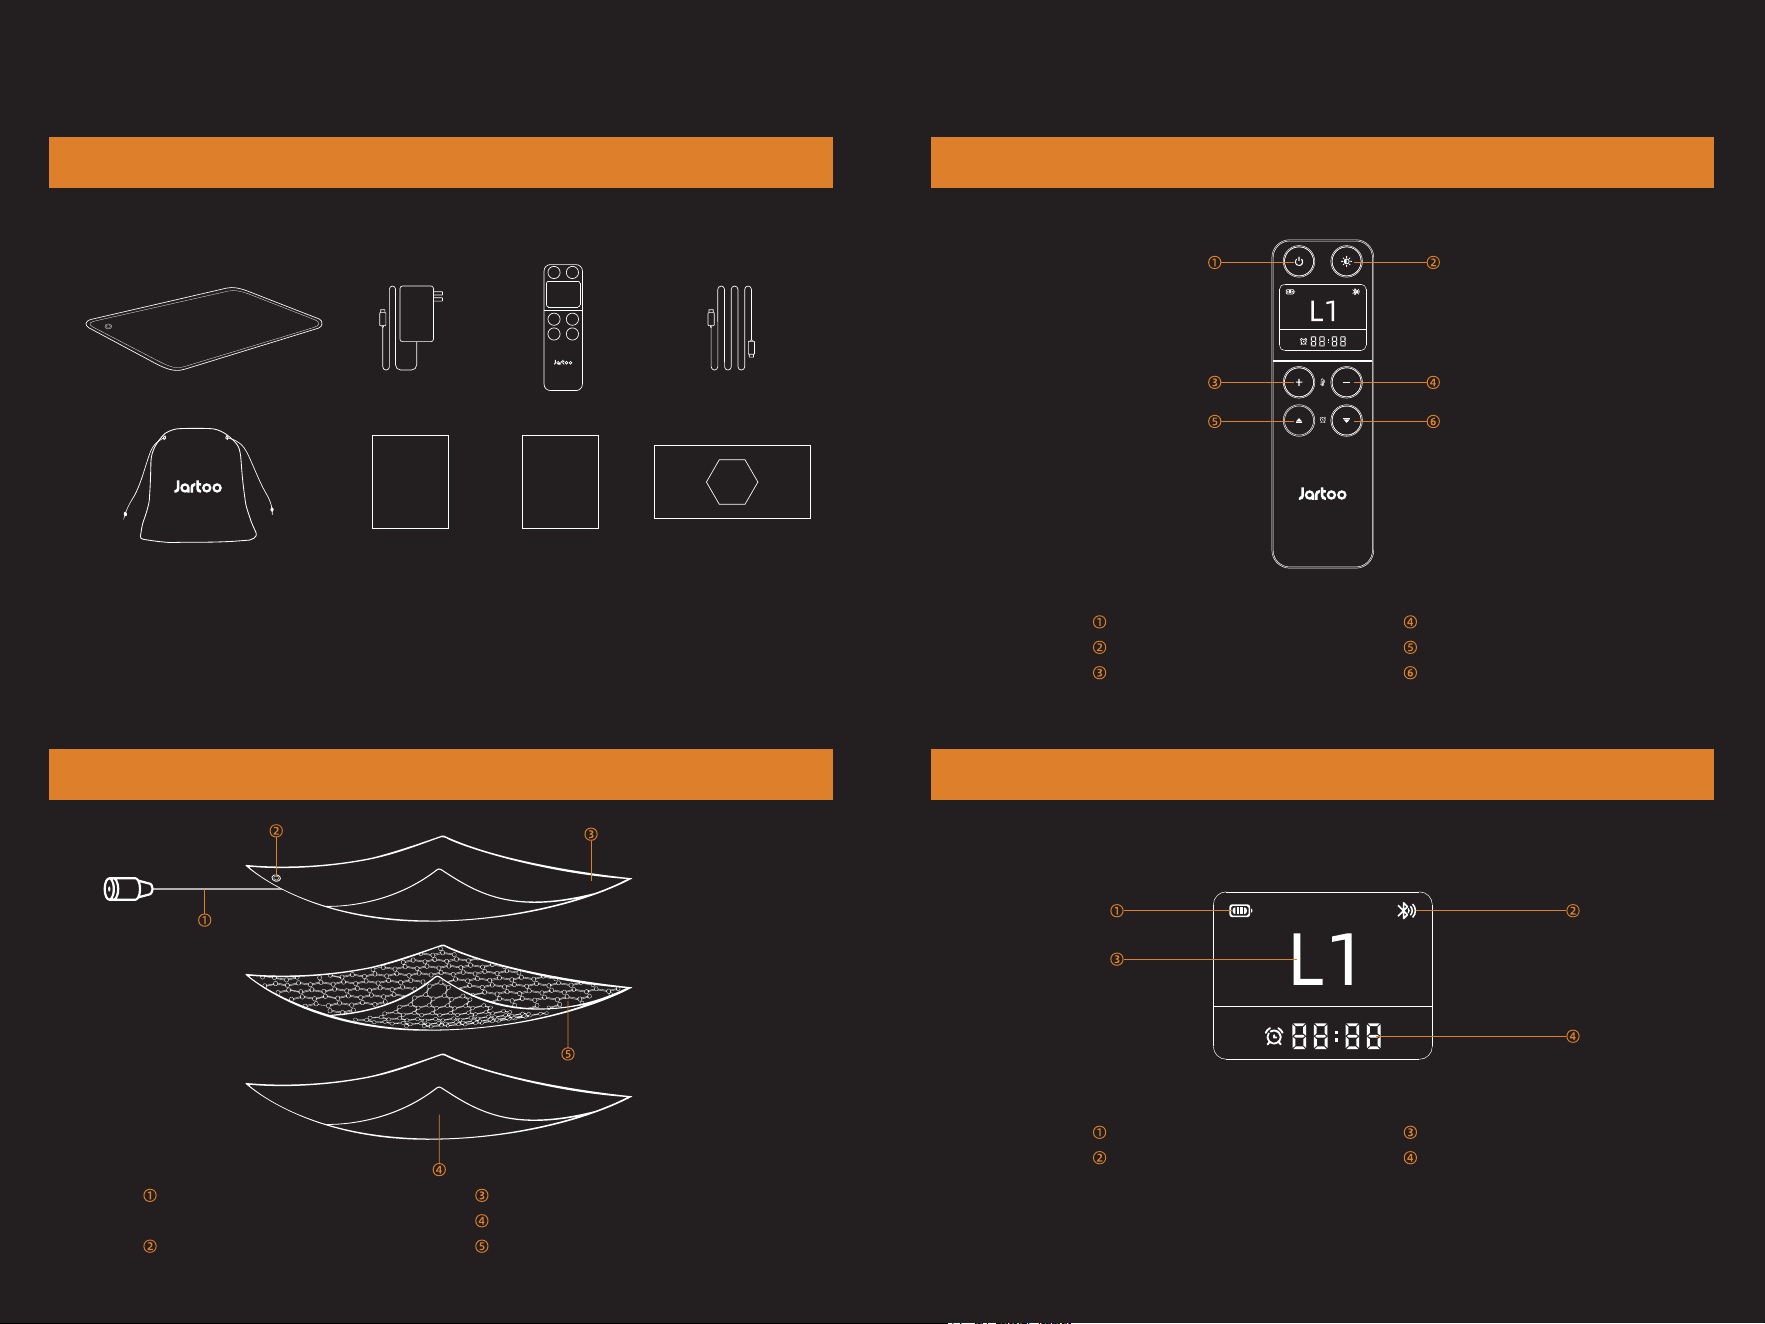
Remote Control Status Indications
Battery Indicator
Bluetooth Connection Icon
Temperature Level
Timer Countdown
01 02
· Heated Blanket ×1
· 100W GaN Adapter ×1
· Remote Control ×1
· Remote Control Charging Cable ×1
· Storage Bag ×1
· User Manual ×1
· Warranty Card ×1
· Apalos FlexHT Heating Technology
Introduction Card ×1
User Manual
Heated Blanket
100W
GaN
Warranty
Safety Precautions
1. If the indicator light flashes purple after powering on, disconnect the power
immediately due to a malfunction.
2. Keep the power cord away from children to prevent electric shock or injury.
3. Do not use damaged wires, which may cause overheating or fire.
4. Never try to plug in the product when it is damp or wet to avoid electrical short
circuits.
5. Ensure the power plug is fully inserted into the outlet to prevent electric shock,
short circuits, smoke, or fire.
6. If you notice any issues or malfunctions, stop using the product immediately and
unplug it.
7. Unplug the power cord when not in use to prevent potential hazards from circuit
aging, short circuits, or leakage in damp environments.
Note:
The remote control is in sleep mode by default. Press any button to wake it up
before operating.
1. Open the hidden zipper to locate the DC jack port of the heating blanket;
2. Plug the DC connector into the DC power jack;
3. Connect the adapter to a 100V to 240V AC power source.
PART 2 INSTRUCTION FOR USE
DC Power Jack
DC plugHidden Zipper
Getting Started
03 04
By default, the remote control has been paired with the heated blanket when manufactured.
To re-pair the remote control with the heated blanket, please follow these steps:
1. Connect the power supply and ensure the heated blanket is plugged in standby mode;
2. Press and hold the “+” and “-” temperature buttons on the remote control simultaneously
for 5 seconds;
3. Wait for the heated blanket’s indicator light to start flashing blue;
4. Press the button on the heated blanket;
5. The Bluetooth icon will appear on the remote control’s screen, indicating successful
pairing.
6. If the Bluetooth icon is not displayed, the pairing has failed. You can try pairing again or
contact customer support at [email protected].
Pairing the Remote Control with the Heated Blanket
Power ON/OFF
Method 1: Using the Remote Control
Power On: Press the power button on the remote control. The
remote will display "L1" and the indicator light on the heated blanket
will turn blue.
Power Off: Press the power button on the remote control again. The
indicator light will turn off.
Method 2: Using the Heated Blanket Button
Power On: Press the button on the heated blanket. The indicator
light will turn blue.
Power Off: Press and hold the button on the heated blanket for
3 seconds. The indicator light will turn off.
Turn Off: Press the button to turn off the indicator light on the blanket if it's on;
Turn On: Press the button to turn on the indicator light on the blanket if it's off.
This feature helps reduce the disturbance of lighting when you are resting.
Note:
1. The indicator light can only be turned on using the remote
control when it is off.
2. Pressing the button on the blanket will briefly turn the light
on during operation, but it will turn off again afterward.
3. Adjusting temperature or timer settings with the remote
will not turn on the indicator light if it is off.
Turn ON/OFF Indicator Light
Timing Adjustment
This function helps you automatically control the operating
time of the heated blanket. The blanket will automatically shut
off when the set time is reached. You can set the timer for 2, 4,
6, 8, or 10 hours.
0605
Level 1 is 95℉ (35℃), the remote control displays L1, and the indicator light is blue;
Level 2 is 102℉ (39℃), the remote control displays L2, and the indicator light is green;
Level 3 is 110℉ (43℃), the remote control displays L3, and the indicator light is purple;
Level 4 is 117℉ (47℃), the remote control displays L4, and the indicator light is cyan;
Level 5 is 124℉ (51℃), the remote control displays L5, and the indicator light is orange;
Level 6 is 131℉ (55℃), the remote control displays L6, and the indicator light is red.
Method 1: Adjust the temperature with the “+” and “-” buttons on the remote control;
Method 2: Adjust the temperature by pressing the button on the blanket.
The temperature settings cycle through from Level 1 to Level 6 and back to Level 1.
Temperature Regulation
Use the “ ” and “ ” buttons on the remote control to set the timer.
Memory Function
Level 3
Level 3
Turn Off Turned On
Our heated blanket retains your last set temperature level. Each time you turn it on
again, it will return to the last used setting.
Example: If the blanket was on Level 3 when you turned it off, it will start on Level 3
when you turn it back on.
Note: The memory function will be reset if the power is interrupted.
1.The heated blanket will enter sleep mode after two hours of inactivity.
2.If the blanket detects use while in sleep mode, it will immediately exit sleep mode and
resume normal operation.
Note:
This feature will not activate if a timer shutdown is set.
Automatic Sleep Protection
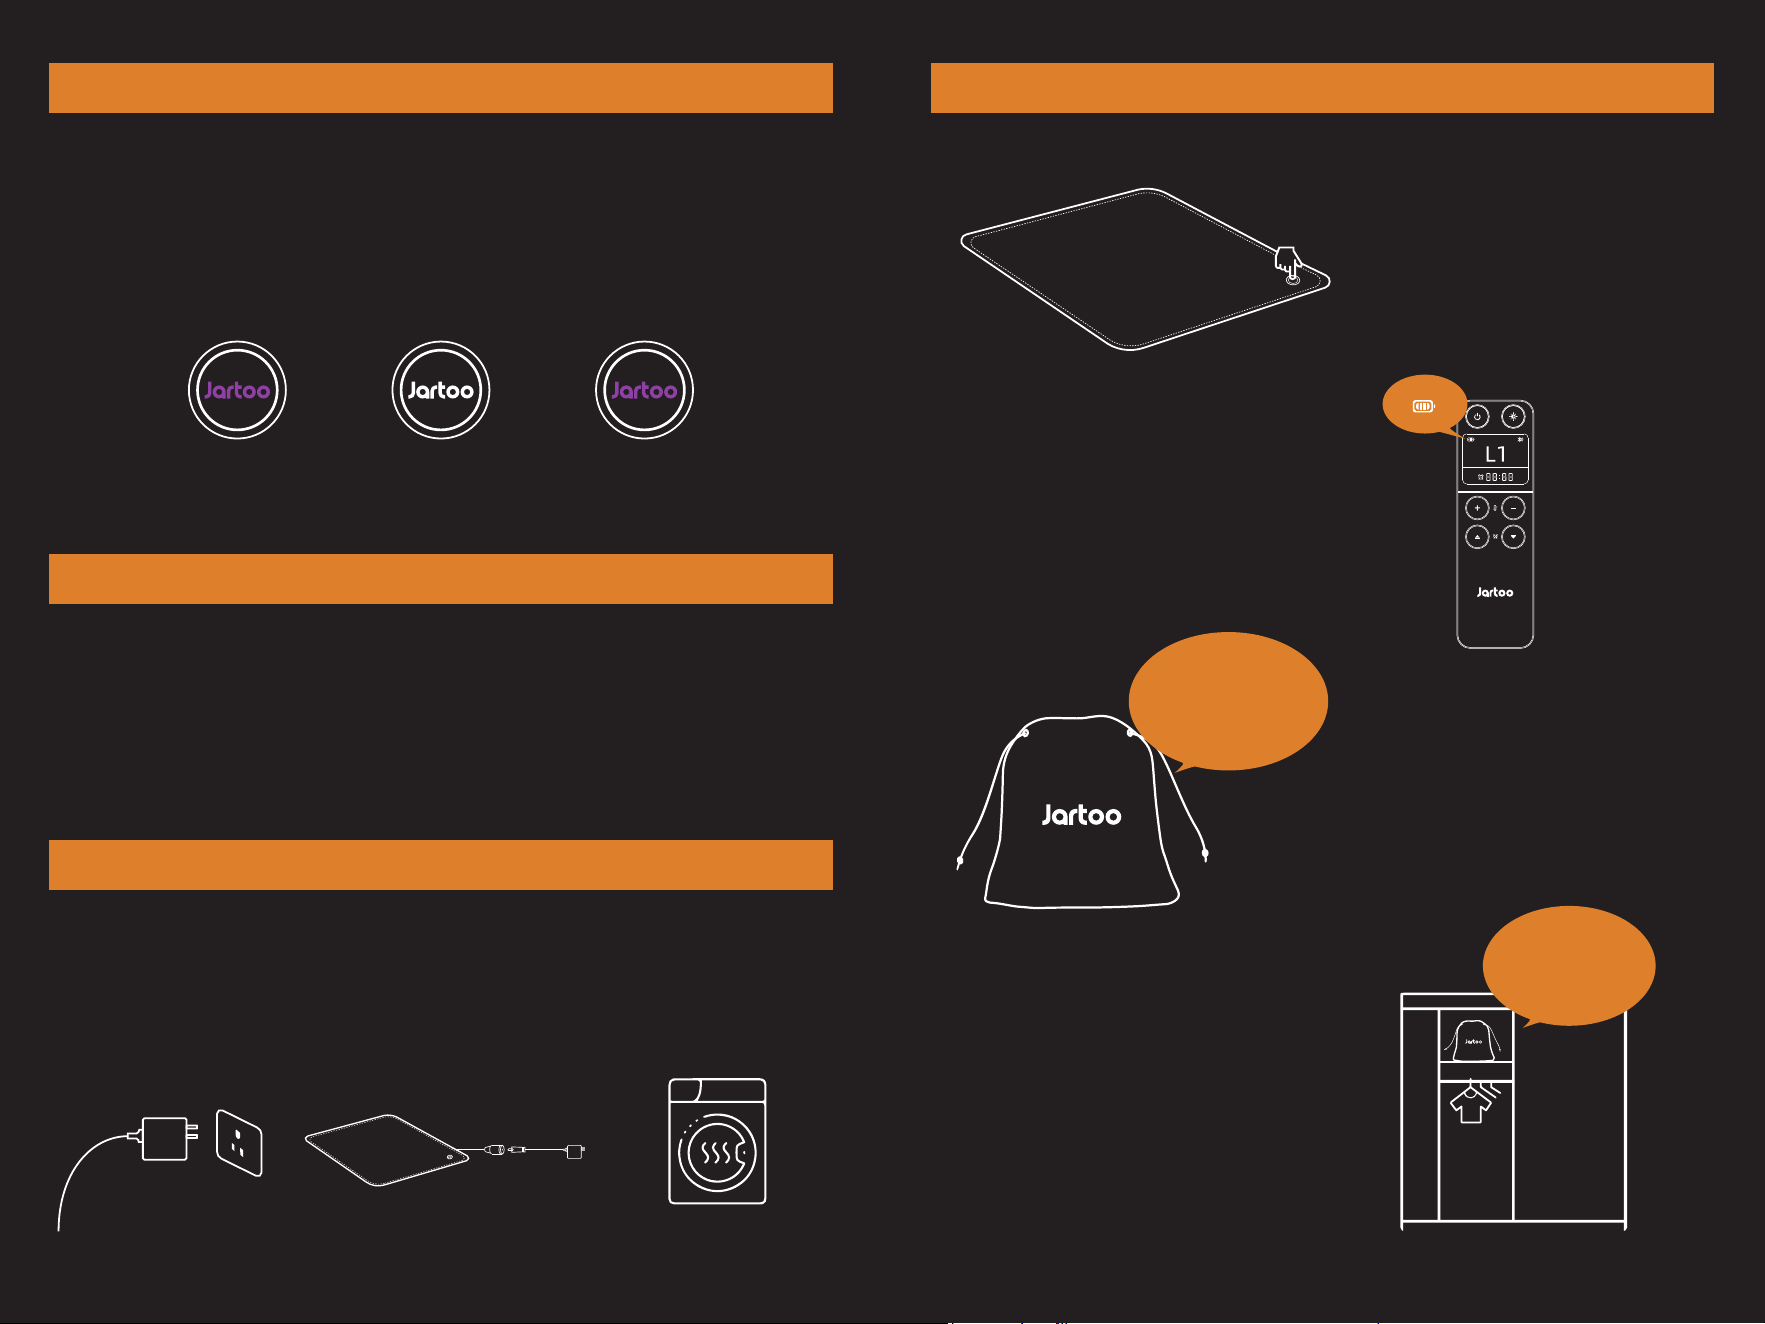
1. Disconnect power.
Unplug the adapter and place
the blanket power cable
into the storage bag and zip
it up.
Wash using a standard
machine wash, then hang
to dry or use a dryer.
Washing Instructions
07 08
3. Place the blanket and it’s
accessories in the provided
storage bag for safekeeping.
2. Fully charge the remote control to ensure
it's ready for future use.
4. Suggestion: Fold the heated blanket
and store it without placing heavy items on top.
1. Turn off the power and let the heated
blanket cool down before storing.
Turn off
Storage Instructions
1. Heated blanket ×1
2. Adapter ×1
3. Manual ×1
4. Remote control ×1
Place it on the top
shelf of
the storage cabinet
2. 3.
PART 4 TROUBLESHOOTING
A: Static electricity can build up in dry winter conditions. Using a fabric softener during
washing can help reduce static.
FAQ
Q: Static electricity can be felt during use?
A: The heated blanket has a power frequency of 50HZ. According to IEC62233 “House
hold appliances and similar apparatus. Measurement methods for electromagnetic
fields with regard to human exposure," it is safe when the radiation amount is lower
than 100 r.m.s; the value of the heated blanket measured by the authoritative
testing organization SGS is 1.09 r.m.s (including the self-contained radiation value
in the air), which is far lower than the safety limit.
Q: The heated blanket emit radiation?
Q: Can it be dried by a dryer?
A: Yes. However, to extend its lifespan, the drying temperature is recommended to be
lower than 149℉.
A: No. Using other heaters at the same time may cause overly high temperature and
pose a risk of overheating.
Q: Can the heated blanket be used with other heaters?
If the above solutions do not resolve the issue, please contact our customer service at
[email protected] for further assistance and solutions.
Product Name
Model Number
Remote Control Number
Size
Heating Technology
Rated Voltage
Rated Power
Temperature Levels
Temperature
Control Button Indicator Color
Heated blanket
JT-HTB002
JT-HTC001
60×50 inches
Apalos FlexHT
DC 24V
70W
Level 1
95℉
Blue
Level 2
102℉
Green
Level 3
110℉
Purple
Level 4
117℉
Cyan
Level 5
124℉
Orange
Level 6
131℉
Red
09 10
PART 5 WARRANTY & SERVICE
PART 3 SPECIFICATIONS

11
NOTE: This equipment has been tested and found to comply with the limits for a Class
B digital device, pursuant to part 15 of the FCC Rules. These limits are
designed to provide reasonable protection against harmful interference in a
residential installation. This equipment generates, uses and can radiate radio
frequency energy and, if not installed and used in accordance with the instructions,
may cause harmful interference to radio communications. However, there is no
guarantee that interference will not occur in a particular installation. If this equipment
does cause harmful interference to radio or television reception, which can be
determined by turning the equipment off and on, the user is encouraged to try to
correct the interference by one or more of the following measures:
- Reorient or relocate the receiving antenna.
- Increase the separation between the equipment and receiver.
-Connect the equipment into an outlet on a circuit different from that to which the
receiver is connected.
-Consult the dealer or an experienced radio/TV technician for help
Changes or modifications not expressly approved by the party responsible for
compliance could void the user's authority to operate the equipment.
This device complies with Part 15 of the FCC Rules. Operation is subject to the
following two conditions:
(1) this device may not cause harmful interference, and (2) this device must accept any
interference received, including interference that may cause undesired operation.
This device contains licence-exempt transmitter(s)/receiver(s) that comply with
Innovation, Science and Economic DevelopmentCanada’s licence-exempt RSS(s).
Operation is subject to the following two conditions:
(1) This device may not cause interference.
(2) This device must accept any interference, including interference that may cause
undesired operation of the device.
L’émetteur/récepteur exempt de licence contenu dans le présent appareil
est conforme aux CNR d’Innovation, Sciences et Développement
économique Canada applicables aux appareils radio exempts de licence.
L’exploitation est autorisée aux deux conditions suivantes :
PART 6 FCC AND IC DESCRIPTION
(1) L' appareil ne doit pas produire de brouillage;
(2) L' appareil doit accepter tout brouillage radioélectrique subi, même si le
brouillage est susceptible d' en compromettre le fonctionnement.