Adult assembly required.
Small parts may present choking hazard prior to assembly.
Enclosed please find simple step-by-step instructions to help you
quickly assemble your products. Before you begin we recommend
that you following the steps below:
1. Please read the instructions thoroughly.
2. Identify all parts and hardware.
3. You will need the following tools:
Philips head screw driver
Flat head screw driver
Hammer
Do Not Use Power Drills or Drivers
To protect your parts during assembly please place them on a soft
surface.
To clean surface use only water on a damp cloth. Do not use
window cleaners or cleaning abrasives as it will scratch the surface
and could damage the protective coating.
ITEM NO: 680
1
s
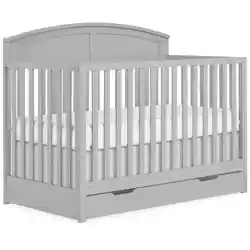
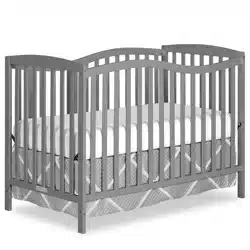
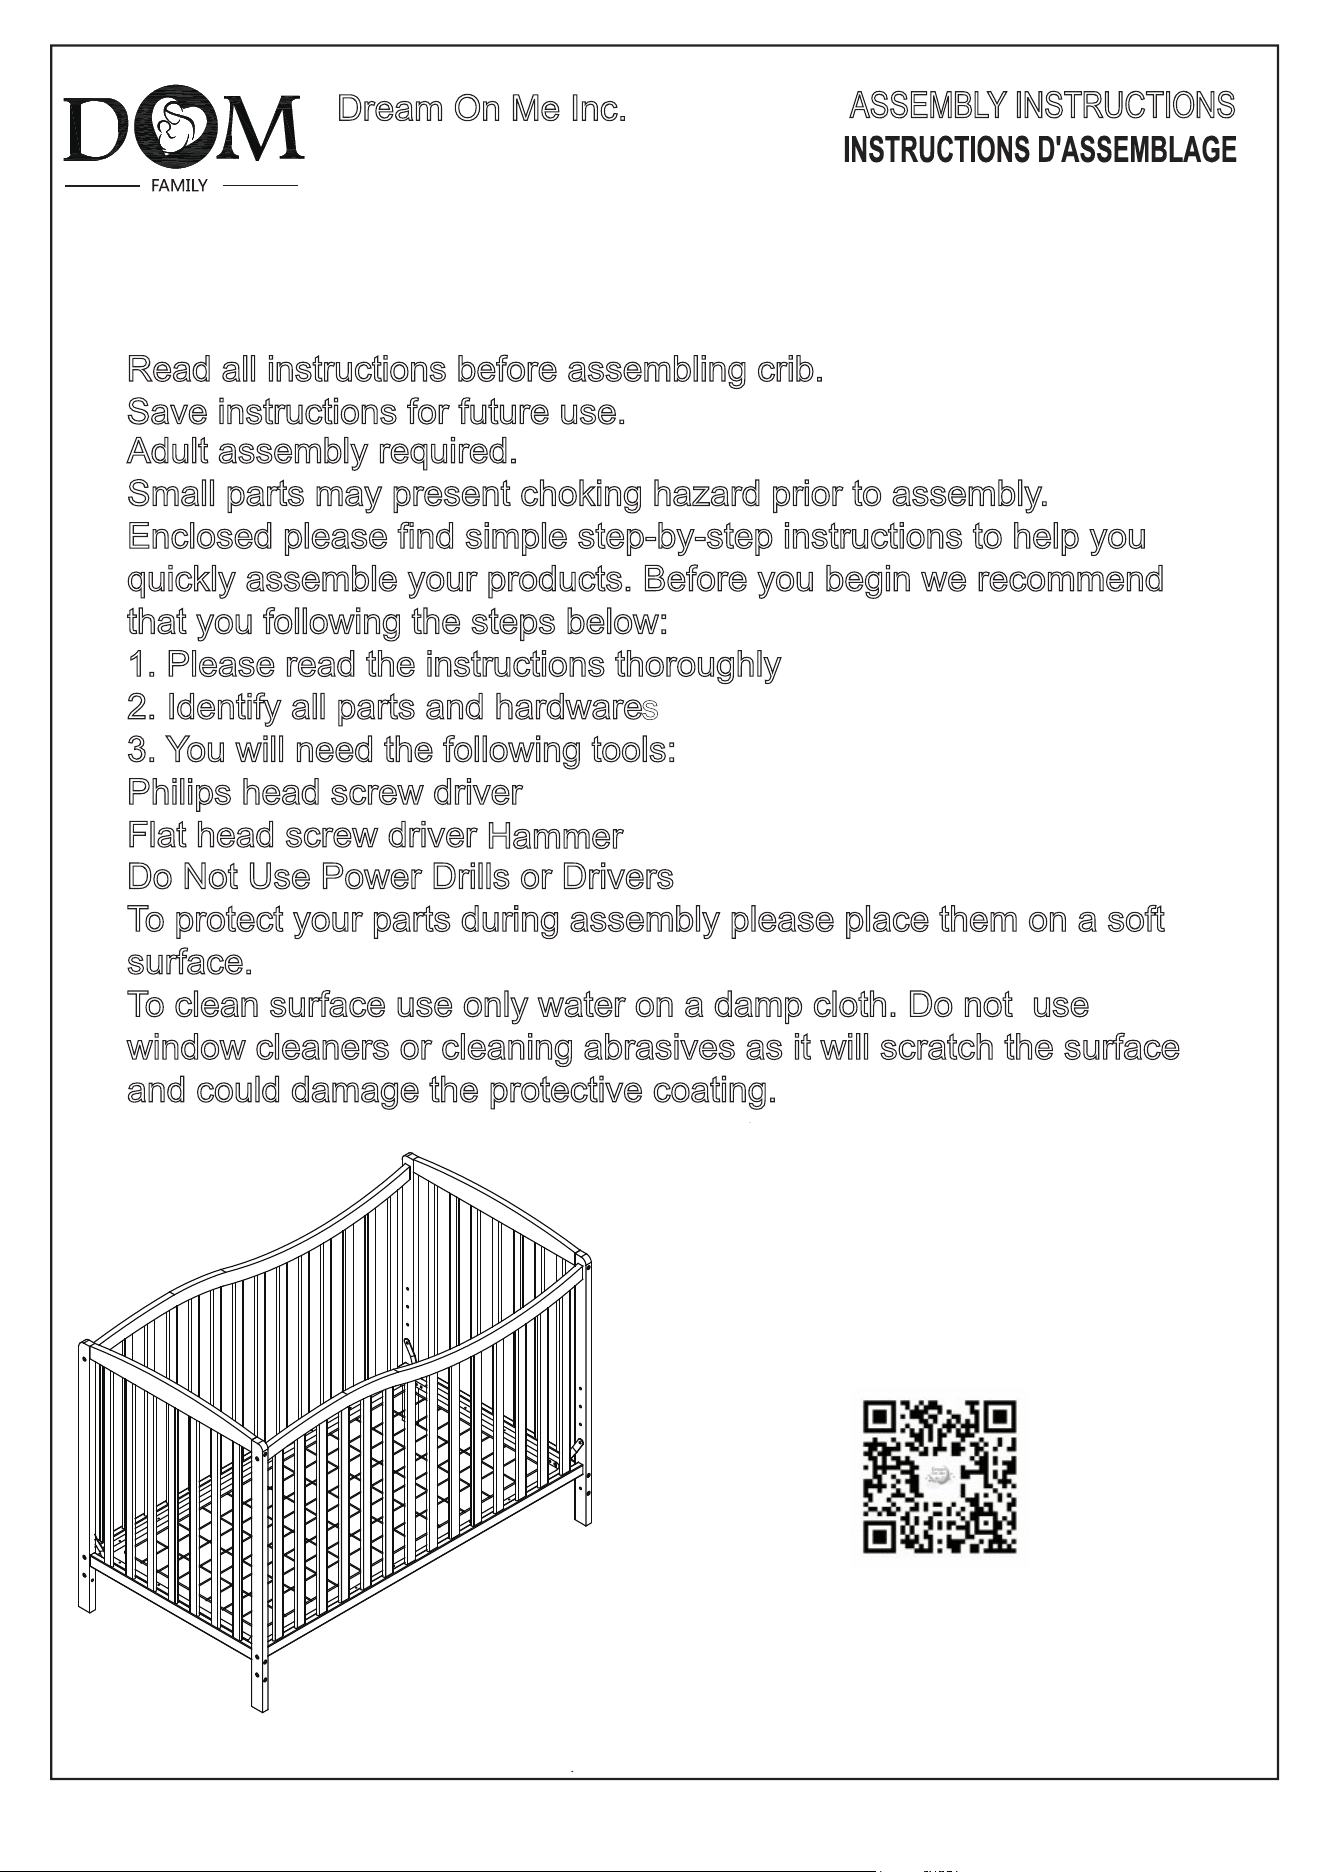
Read all instructions before assembling crib.
Save instructions for future use.
ASSEMBLY INSTRUCTIONS
NUMÉRO DE MODÈLE:680
Dream On Me Inc.
1532 S WASHINGTON AVE
PISCATAWAY TWP NJ 08854
Email: [email protected]
www.dreamonme.com
Scan the QR code to register your product
https://dreamonme.com/customercare/registration/

. Read all instructions before assembling crib, keep instructions for future use.
. Upon completion of assembly be sure all screws, bolts and fastening devices have been
securely tightened. A frequent check should be made.
. Infants can suffocate in gaps between a mattress too small or too thick and product sides,
on soft bedding never add a mattress, pillow,comforter or padding.
. CAUTION: Any mattress used in this crib must be at least 27-1/4inches(690mm) by 51-5/8
inches(1310mm),with a thickness not exceeding 6 inches(150mm), the dimensions of the
. Failure to follow these warnings and the in structions could result in serious injury or death.
.Never use plastic shipping bag or other plastic film as mattress covers not sold and
intended for that purpose, they can cause suffocation .
. Strings can cause strangulation! Never place items with a string around a child’s neck,
. Never use this product if there are any loose or missing fasteners, loose joints,broken
parts, or torn mesh/fabric. check before assembly and periodically during use.
Contact DREAM ON ME for replacement parts and instructional literature if needed.
. Never substitute parts, the product including side rails, must be fully erected prior to use.
.Discontinue use of the product when child is able to climb out or reaches the height of
.When child is able to pull to standing position,set mattress/base to lowest adjustment
positionand remove bumper pads, large toys ,and other objects that could serve as steps
for climbing out. A child can trap parts of the body or clothing on loose fasteners .
. Never use a water mattress with this product.
. If refinishing,use a non-toxic finish specified for children’s products.
.
To reduce the risk of SIDS, pediatricians recommend healthy infants be placed on their
back to sleep, unless otherwise advised by your physician.
WARNING !
.
Never place product near window where cords from blinds or drapes can strangle a child.
MADE IN CHINA
35in (890mm).
mattress shall be taken from seam to seam or edge to edge where appropriate.
such as hood strings or pacifier cords. Never suspend strings over product or attach
strings to toys.
. Infants can suffocate on soft bedding .
.Never add a pillow or comforter .
. Never place additional padding under an infant .
. To help prevent strangulation tighten all fasteners.
. A child can trap parts of the body or clothing on loose fasteners.
.
Follow warnings on all products in a crib .
See head panel & mattress support of the product for warnings.
Replace teething rail if damaged,cracked or loose.
2

3
Respecter les avertissements sur tous les produits du berceau.
L'assemblage par un adulte est nécessaire.
Les petites pièces peuvent présenter un danger d'étranglement avant l'assemblage.
Ci-joint s'il vous plaît trouver les instructions simples, étape par étape pour vous aider à
assembler rapidement vos produits. Avant de commencer, nous vous recommandons de
suivre les étapes ci-dessous:
1.Lire attentivement les instructions, s'il vous plaît.
2.Identifier toutes les pièces et le matériel.
3.Vous aurez besoin des outils suivants:
Tournevis tête phillips
Tournevis à tête plate
Marteau
Ne pas utiliser les perceuses ou pilotes
Pour protéger vos pièces lors de l'assemblage, placez-les sur une surface molle.
Pour nettoyer la surface, utiliser seulement l'eau et un chiffon humide.
Ne pas utiliser des nettoyants pour vitres ou des abrasifs de nettoyage car il va rayer la
surface et pourrait endommager le revêtement protecteur.
Le non-respect de ces avertissements et instructions peut entraîner des blessures graves
ou la mort.
Lisez toutes les instructions avant l'assembler du crèche, garder les instructions pour une
utilisation future.
À l'issue de l'assemblée, assurez-vous que toutes les vis, les boulons et les dispositifs de
fixation ont été bien serrés. Un contrôle fréquent doit être fait.
Ne jamais utiliser ce produit s'il y a des pièces desserrées ou manquantes, des joints lâches,
des pièces cassées ou maille/tissu déchiré. Vérifiez avant le montage et périodiquement
pendant l'utilisation. Contactez DREAM ON ME pour les pièces de rechange et des
instructions, si nécessaire. Ne jamais substituer les parties, y compris le produit des rails
latéraux, doivent être complètement érigé avant utilisation. Cesser d'utiliser le produit
lorsque l'enfant est capable de sortir ou atteint la hauteur de 35 pouces (890mm).
Ne placez jamais ce produit près de la fenêtre où les cordons de stores ou rideaux peuvent
étrangler un enfant.
Lorsque l'enfant est capable de tirer à la position debout, placez le matelas/base à la plus
basse position de réglage et enlever les bordures de protection, les gros jouets et d'autres
objets qui pourraient servir de marches pour grimper. Un enfant peut piéger les parties du
corps ou les vêtements sur des fixations desserrées. Ne jamais utiliser de sac en plastique
ATTENTION!

4
de transport ou tout autre film plastique pour recouvrir le matelas non vendu et conçus à
cette fin, ils peuvent provoquer la suffocation.
ATTENTION: Tout matelas utilisé dans ce lit doit être au moins 27-1/4 pouces (690mm) par
51-5/8 pouces (1310mm), avec une épaisseur n'excédant pas 6 pouces (150 mm), les
dimensions du matelas doivent être prises de la couture à la couture ou bord à bord dans le
cas échéant.
Ne jamais utiliser un matelas à eau avec ce produit.
Les cordes peuvent étrangler! Ne jamais placer des objets avec une chaîne autour du cou
de l'enfant, tels que les chaînes de capot ou de cordons de sucette. Ne jamais suspendre
de ficelles sur le produit ou attacher des ficelles aux jouets.
Les bébés peuvent être suffoqués dans les espaces entre un matelas trop petit ou trop
épais au côtés et des produits, ne jamais ajouter un matelas, un oreiller, une couette ou un
rembourrage sur un matelas mou.
Pour réduire le risque de SMSN, les pédiatres recommandent que les enfants en bonne
santé doivent être placés sur le dos pour dormir, sauf avis contraire de votre médecin.
Si la finition, utilisez un fini non toxique indiqué pour les produits pour enfants.
Les bébés peuvent suffoquer sur un matelas mou.
Ne jamais ajouter un coussin ou une couverture.
Ne placez jamais un rembourrage supplémentaire en vertu d'un nourrisson.
Pour aider à prévenir l'étranglement, serrer toutes les fixations. .
Un enfant peut piéger les parties du corps ou les vêtements sur des fixations desserrées.
Respecter les avertissements sur tous les produits du berceau.
Voir panneau tête et support du matelas du produit pour les avertissements.
Remplacer dentition ferroviaire si endommagé, fissuré ou lâche.
FABRIQUÉ EN CHINE
5
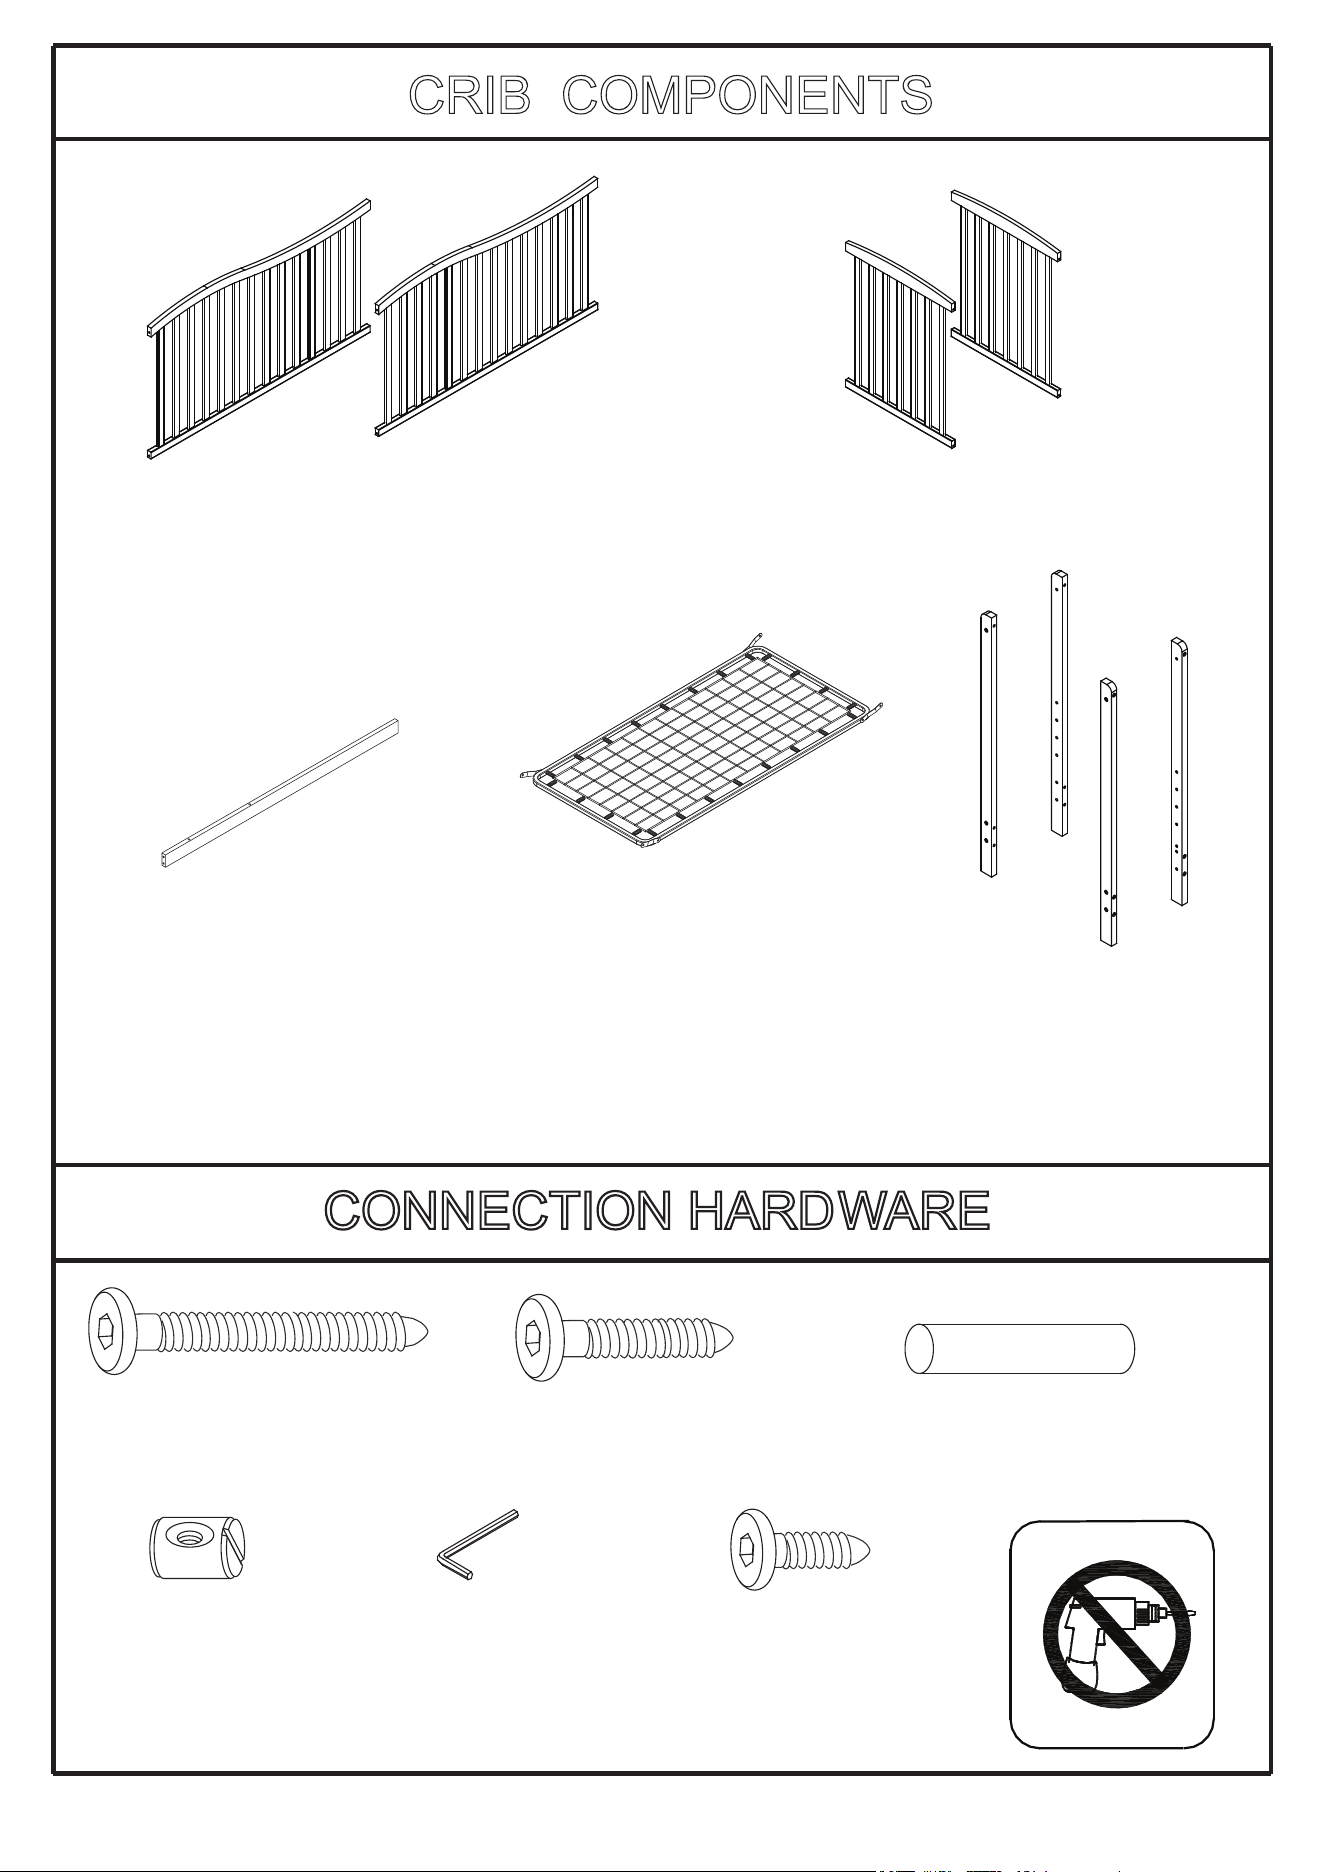
CONNECTION HARDWARE
CRIB COMPONENTS
A:Front/Back rail (2pcs)
B:Side rails (2pcs)
E:Left back leg (1pc)
F:Right back leg (1pc)
G:Left front leg (1pc)
H:Right front leg (1pc)
D:Mattress support (1pc)
B
E
F
G
H
D
b:2-1/8”Allen head bolts
(8pcs)
d:Barrel nuts (16pcs)
e:Allen wrench (1pc)
f:3/4”Allen head bolts
(4pcs)
C:The bottom bar (1pc)
c:1-1/2”Wood Dowel
(2pcs)
C
Do not use electric hand drill
a:3”Allen head bolts
(8pcs)
A
6
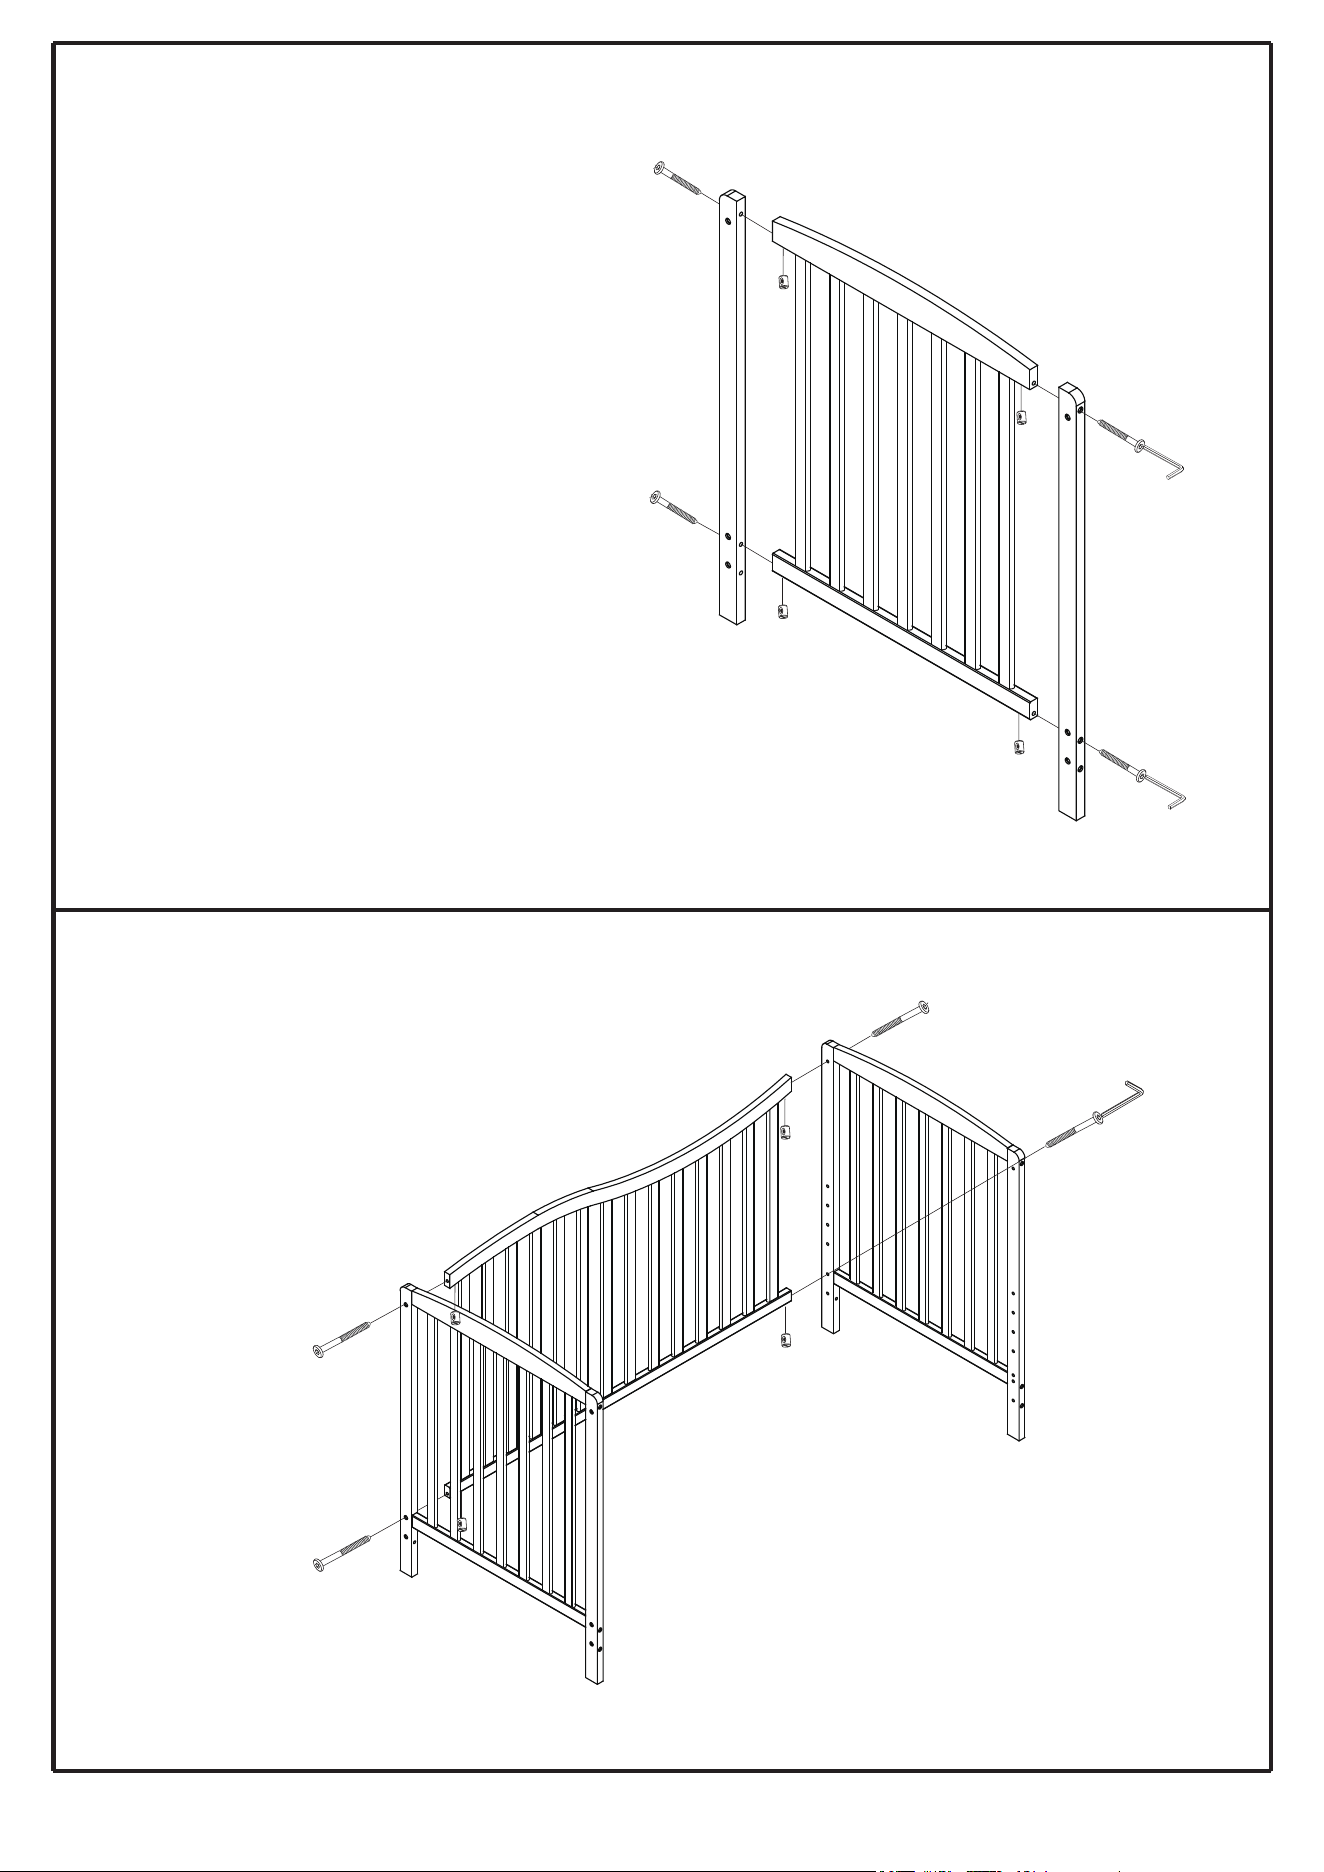
STEP1
STEP2
Connect Left&Right back leg (E&F) to
Rail (A) by Allen head bolts (b) ,
Barrel nuts (d) and Allen wrench (e) .
Connect Left front leg (G) &Left back
leg(E)to Side rail (B) by Allen head bolts (a) ,
Assemble Right front leg (H) &Right back leg(F)
to the
other side rail in the same way .
B
E
F
A
G
E
a
a
e
a
e
a
d
d
d
d
Barrel nuts (d) and Allen wrench (e) .
Assemble another rail(A) use
the same way .
b
b
e
b
b
d
d
d
d
7
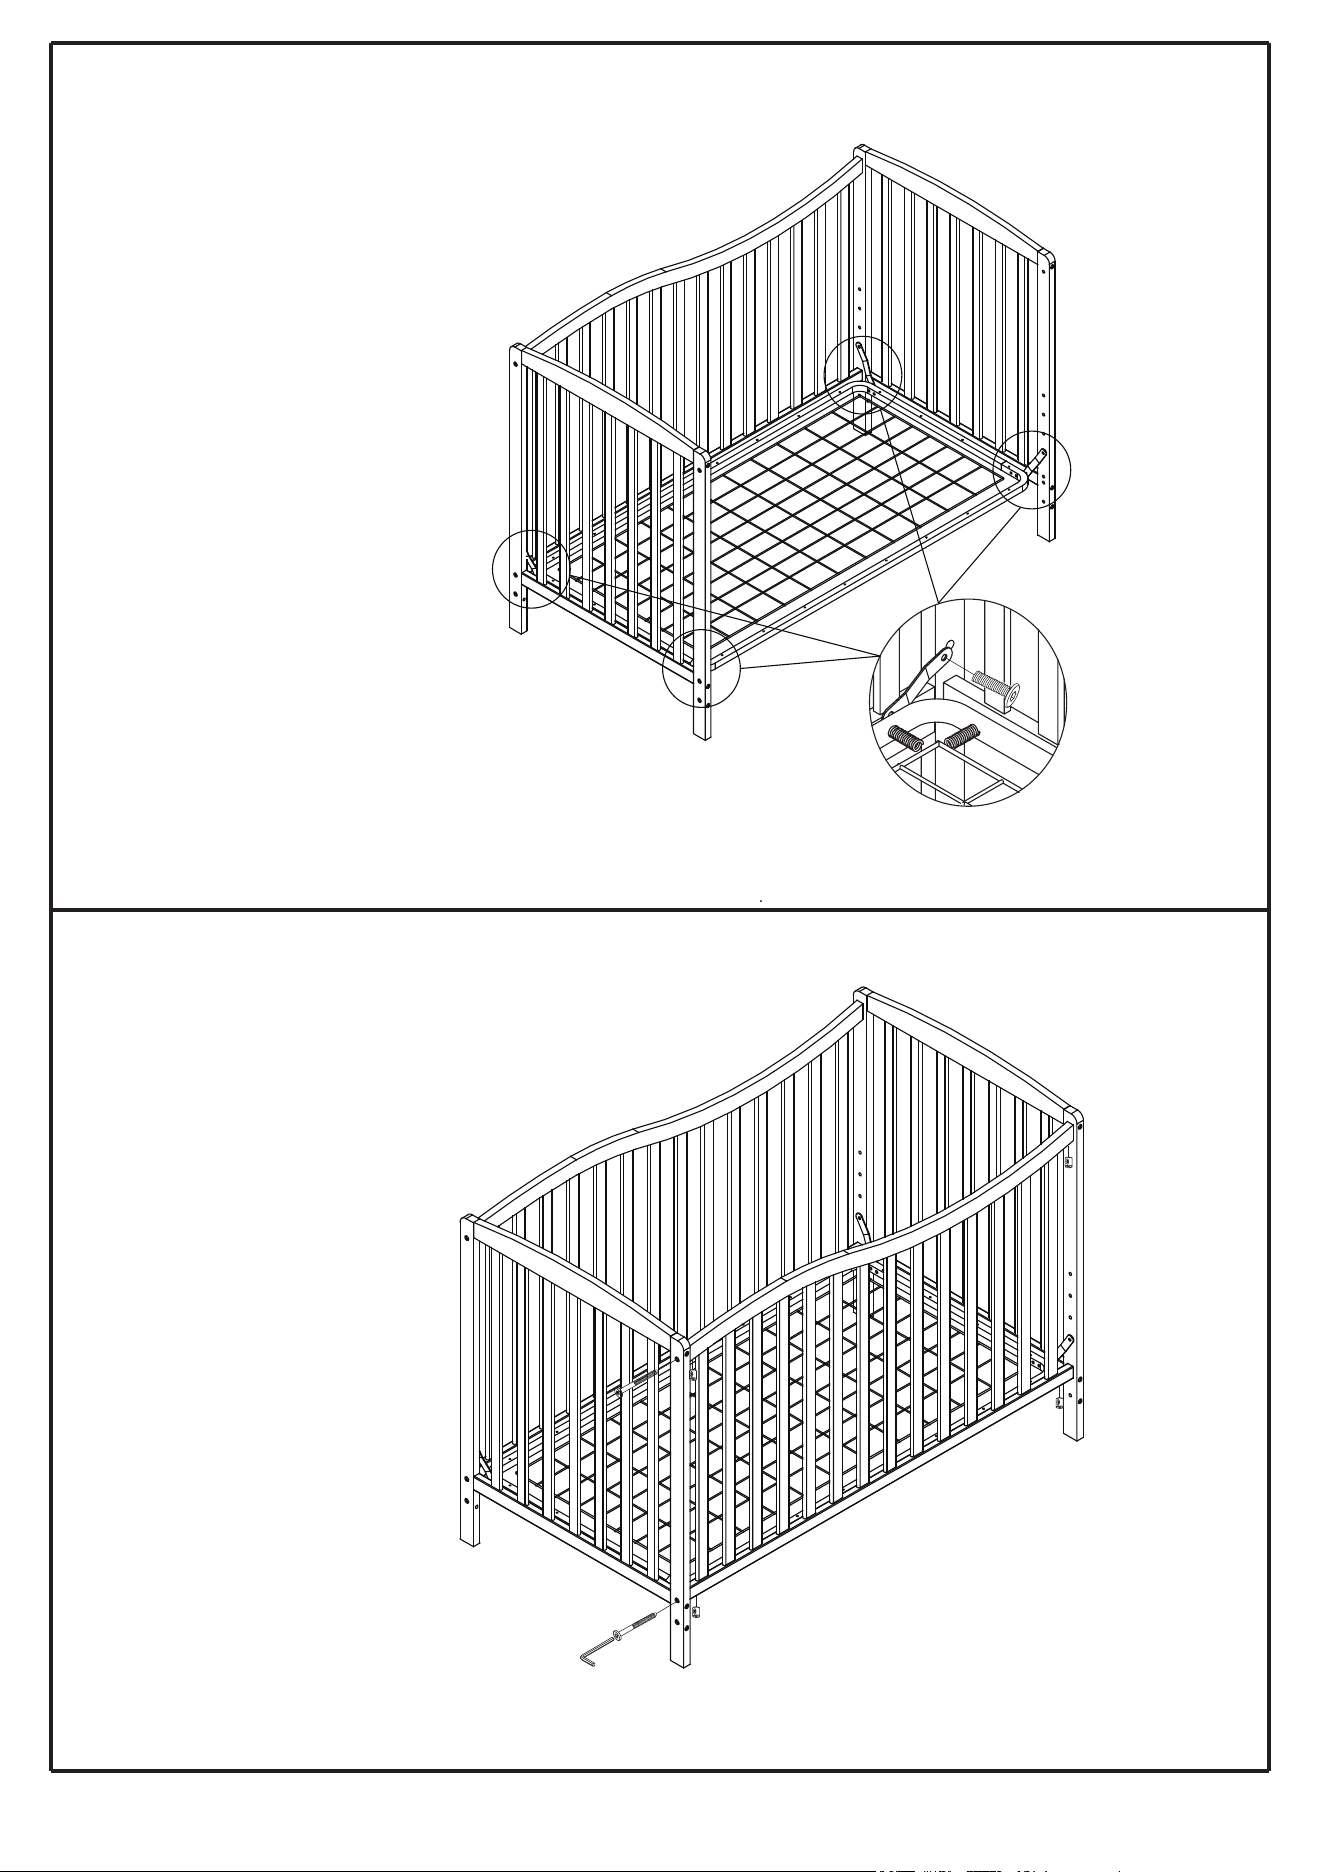
STEP4
Locate the Mattress support (D)
with tabs . Be sure the smooth
side of the Mattress support is
faced upwared .
Position the tabs of the Mattress
support (D) to mount to the
selected position onto the legs .
Insert the bolts (f) through the
tabs and into thread inserts .
Then tighten securely with Allen
wrench (e) .
STEP3
f
Connect another rail (A) to the
Left&Right front leg (G&H)
by Allen head board (b) ,
Barrel nuts (d) and Allen
wrench (e) .
TIGHTEN ALL THE BOLTS .
A
G
H
D
b
e
b
d
d
d
d

8
Please note that the warning sticker is placed on the cribs to keep parents and
caregivers informed it is a requirement by law under CPSC And ASTM.
We do apologize for any inconvenience this may cause you.
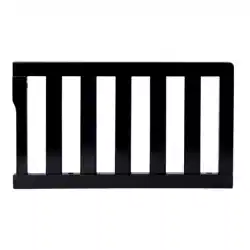
Converting crib to a toddler bed .
C
C
G
H
C
b
(toddler rail and converting bolts are sold separately)
e
b
d
d
b
9
Failure to follow these warning and the assembly instructions could result in serious injury or
death from entrapment or strangulation. DO NOT place bed near windows where cords
from blinds or drapes may strangle a child. DO NOT place items with a string,cord,or ribbon
around a child’s neck,such as a hood, strings or pacifier cords. DO NOT suspend strings
over a toddler bed for any reason.
WARNING FOR TODDLER BED USE
The mattress intended for use on the bed shall be a full-size crib mattress having the
dimensions of 51-5/8” (1310 mm) in length and 27-1/4”(690mm) in width and thickness of
4” (100mm) or a greater thickness as specified by the manufacture. The minimum age of the
intended user shall not be less than 15 months and the maximum weight shall not be greater
than 50lbs(22.7kgs).
AVERTISSEMENT POUR UTILISATION DE LIT POUR ENFANTS
Le non-respect de ces avertissements et instructions de montage peut provoquer des blessures
graves ou la mort de piégeage ou de strangulation.
N
E PAS placer le lit près d'une fenêtre où les cordons de stores ou rideaux, ça peuvent étrangler
l’enfant.
N
E PAS placer des objets avec une ficelle, corde, ruban ou autour du cou d'un enfant, comme un
capot, des chaînes ou cordes de sucette.
N
E PAS suspendre des chaînes sur un lit d'enfant pour une raison quelconque.
Le matelas destinés à être utilisés sur le lit doit être un matelas de lit avec de pleine grandeur ayant
les dimensions de 51-5/8" (1310 mm) de longueur et 27-1/4" (690mm) de largeur et épaisseur de 4"
(100 mm) ou une épaisseur plus grande que spécifié par le fabricant. L'âge minimum de l'utilisateu
r
visé ne doit pas être inférieur à 15 mois et le poids maximal ne doit pas être supérieur à 50
lbs(22.7kgs).
N
otez que l'autocollant d'avertissement est placé sur les berceaux pour tenir les parents et les
soignants informés que c'est une exigence de la loi en vertu de la CPSC et ASTM.
Nous faisons des excuses pour tout inconvénient que cela pourrait vous causer.
10
Converting crib to a day bed
You have the option to convert
crib to a day bed .
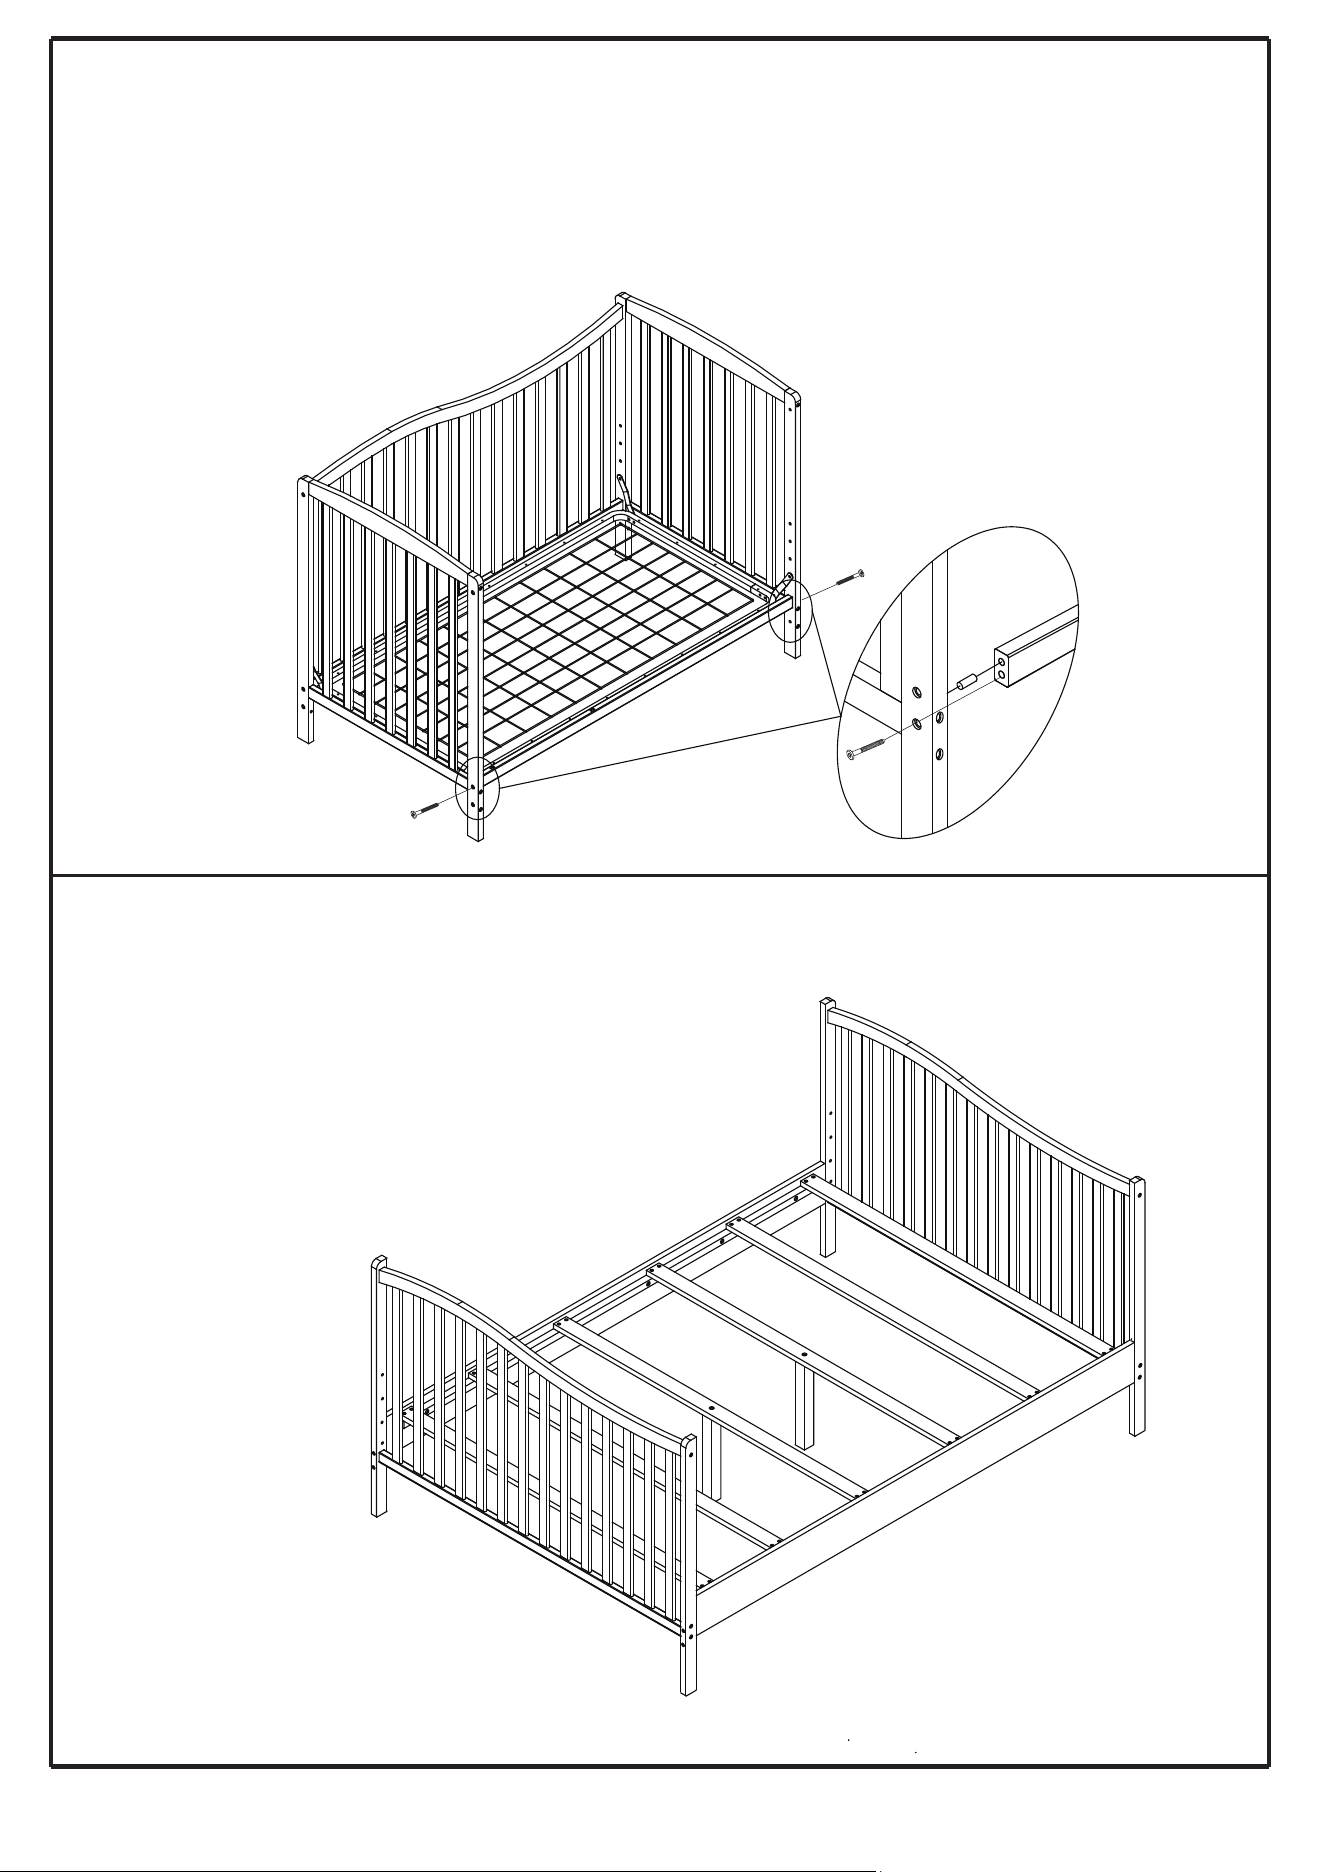
Converting crib to a full size bed I
Conversion kit is sold separately
You have the option to convert crib to a full size bed I
1:Remove the metal spring support platform (D),side rails(C).
2:Use the rail (A) & the left back leg (E) & the right back
leg (F) as the headboard of full size bed.
3:Use another rail (A) & the right front leg (G) & the right back
leg (H) as the footboard of full size bed.
4:Connect the footboard and headboard of adult bed to the
kits ( legs, long rails,and hardware ) which are not included
and sold separately.
1.Remove the Front rail (A) from the Left & Right front leg (G&H) as image shows,
keep the screws for use of next step.
2.Assemble the bottom bar (C) to the Left&Right front leg (G&H) by
Allen head bolts (b)
Barrel nuts (d),Wood Dowel(c) and Allen wrench (e).
3.Install the Mattress Support (D) in its lowest position .
C
b
C
H
G
D
A
A
E
F
G
H
b
b
(Hollywood bed frame sold separately)
11
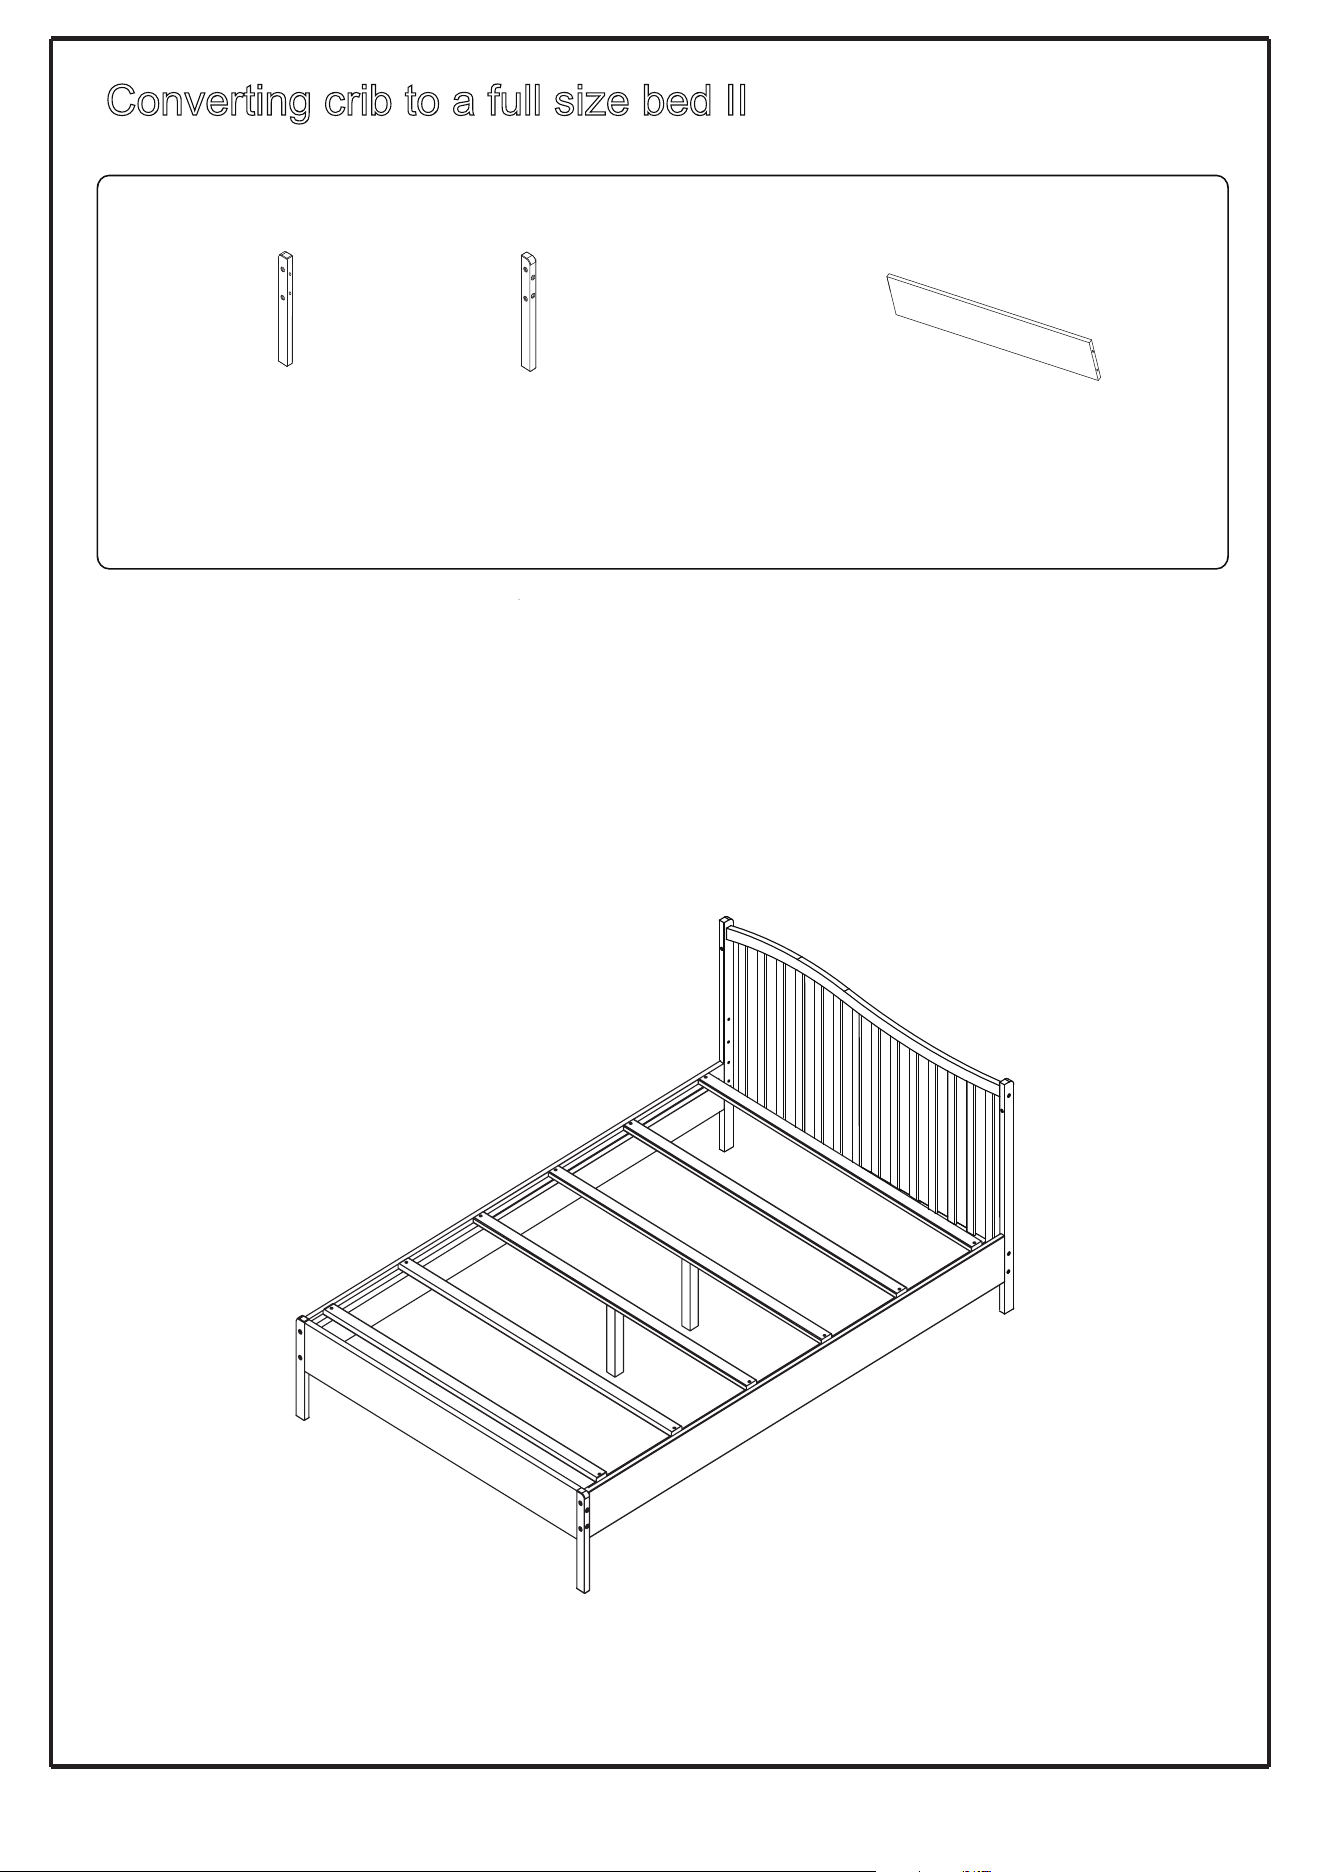
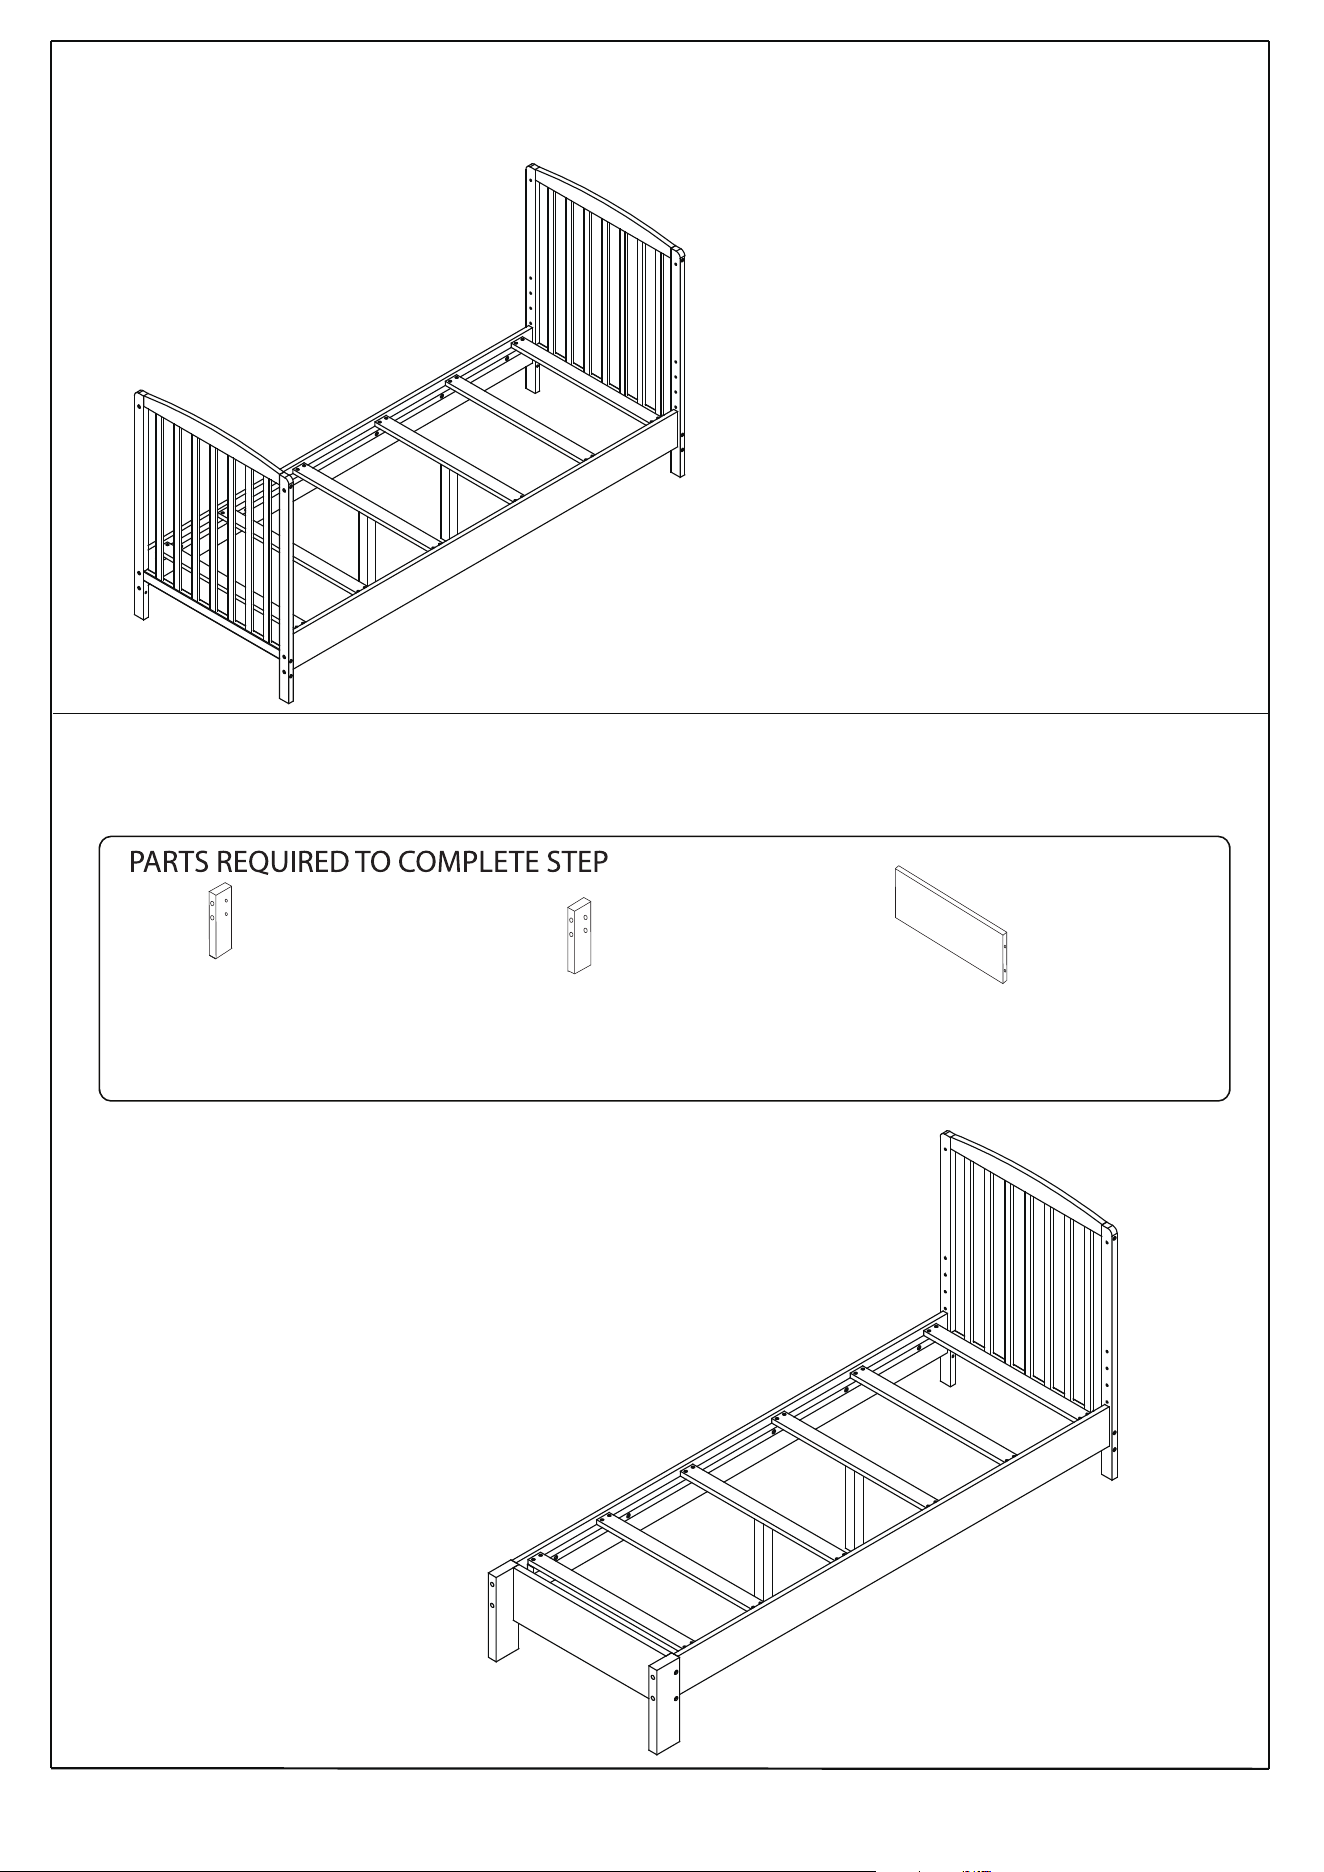
Converting crib to a full size bed II
Conversion kit is sold separately
You have the option to convert crib to a full size bed II
1:Remove the metal spring support platform (D),side rails(C).
2:Use the rail (A) & the left back leg (E) & the right back leg (F) as the headboard of full
size bed.
4:Connect the assembled parts and headboard of full size bed to the kits ( legs, long rails,and
hardware ) which are not included and sold separately.
3:Connect the left foot platform and the right foot platform to the rail which are not included and
sold separately.
LEFT FOOT PLATFORM
POST x 1
NOT INCLUDED
POST x 1
NOT INCLUDED
PARTS REQUIRED TO COMPLETE STEP
RIGHT FOOT PLATFORM
POST x 1
NOT INCLUDED
RAIL
A
(Hollywood bed frame sold separately)
12
Converting crib to a youth bed I
Conversion kit is sold separately
You have the option to convert
crib to a youth bed I
1:Use the right head board and left head
board as the headboard and footboard of
youth bed I;
2:Connect the right head board and the
left head board to the keyslot bedframe
which are not included and sold
separately.
Model shown is example only.
Styles may vary .
Converting crib to a youth bed II
You have the option to convert crib to a youth bed II.
1:Use the right head board as the headboard of youth bed II.
For youth bed,theyouth mattress 29/75’’ is sold separately.
2:Connect the right board to the keyslot bedframe
which are not included and
sold separately.
Converting kit is sold separately
LEFT FOOT PLATFORM
POST x 1
NOT INCLUDED
POST x 1
NOT INCLUDED
RIGHT FOOT PLATFORM
POST x 1
NOT INCLUDED
RAIL
(Hollywood bed frame sold separately)
(Hollywood bed frame sold separately)

Enter our monthly giveaway!
Simply scan the QRcode to register.
Chat with us!
For any questions or concerns or feedback.
1532, S. Washington Avenue
Piscataway, NJ 08854
E-mail: [email protected]
www.dreamonme.com
Follow us on
to get your nursery featured on our social media.
@dreamonmeinc
@dreamonmeinc