
Safety Warnings
Boombox
• Read all the instructions carefully before
using the unit and keep them for future
reference.
• Retain the manual. If you pass the unit
onto a third party make sure to include this
manual.
• Check that the voltage marked on the
rating label matches your mains voltage.
Damage
• Please inspect the unit for damage after
unpacking.
• Do not continue to operate the unit if you
are in any doubt about it working normally,
or if it is damaged in any way - switch o,
withdraw the mains plug and consult your
dealer.
Location of Unit
• The unit must be placed on a at stable
surface and should not be subjected to
vibrations.
• Do not place the unit on sloped or unstable
surfaces as the unit may fall o or tip over.
• The mains socket must be located near the
unit and should be easily accessible.
• This unit is designed for indoor, domestic
use only
Temperature
• Avoid extreme degrees of temperature,
either hot or cold. Place the unit well away
from heat sources such as radiators or gas/
electric res.
• Avoid exposure to direct sunlight and other
sources of heat.
• Attention should be drawn to the use of
apparatus in moderate climates.
Naked Flames
• Never place any type of candle or naked
ame on the top of or near the unit.
Moisture
• To reduce the risk of re, electric shock or
product damage, do not expose this unit
to rain, moisture, dripping or splashing. No
objects lled with liquids, such as vases,
should be placed on the unit. Do not
operate the unit with wet hands, near water
or other liquid.
• If you spill any liquid into the unit, it can
cause serious damage. Switch it o at the
mains immediately. Withdraw the mains
plug and consult your dealer.
Ventilation
• To prevent the risk of electric shock or
re hazard due to overheating, ensure
that curtains and other materials do not
obstruct the ventilation vents.
• Do not install or place this unit in a
bookcase, built-in cabinet or in another
conned space. Ensure the unit is well
ventilated.
Safety
• Always disconnect the unit from the mains
supply before connecting/ disconnecting
other devices or moving the unit.
• Unplug the unit from the mains socket
before a lightning storm.
Mains Adapter Cable
• Make sure the unit or unit stand is not
resting on top of the mains adapter cable,
as the weight of the unit may damage the
cable and create a safety hazard.
The mains plug is used as disconnect
device, the disconnect device shall
remain readily operable.
Mains Adapter
• The mains adapter will continue to draw
electricity from the mains supply when
plugged in the mains socket. In the
interests of safety and to avoid unnecessary
energy consumption, never leave the
adaptor plugged in the mains socket
while unattended for long periods of time.
Disconnect the adapter from the power
supply.
Use only power supplies listed in the
user instructions.
Interference
• Do not place the unit on or near appliances
which may cause electromagnetic
interference. If you do, it may adversely
aect the operating performance of the
unit, and cause a distorted picture or sound.
1
Safety_Boombox_Final201005V1.indd 1Safety_Boombox_Final201005V1.indd 1 06/10/2020 11:5506/10/2020 11:55
Batteries
• Please dispose of batteries correctly by
following the guidance in this manual.
• Do not expose the battery to direct sunlight
or sources of excessive heat.
• Attention should be drawn to the
environmental aspects of battery disposal.
Earphones
• Listening to loud sounds for
prolonged periods of time may
permanently damage your hearing.
• Before putting on earphones, turn
the volume down then put the earphones
on and slowly increase the volume until you
reach a comfortable listening level.
Supervision
• Children should be supervised to ensure
that they do not play with the unit.
• Never let anyone especially children push
anything into the holes, slots or any other
openings in the case - this could result in a
fatal electric shock.
Class 1 Laser Product
This unit utilises a laser. Use
of controls, adjustments or
performance of procedures
other than those specied
herein may result in hazardous radiation
exposure.
• Before moving the unit, ensure the disc tray
is empty.
• Always remove the disc when the unit is
not in use.
• Failure to do so will risk severely damaging
the disc and the unit.
• Do not stack devices, heat from other
devices may aect the performance of the
unit.
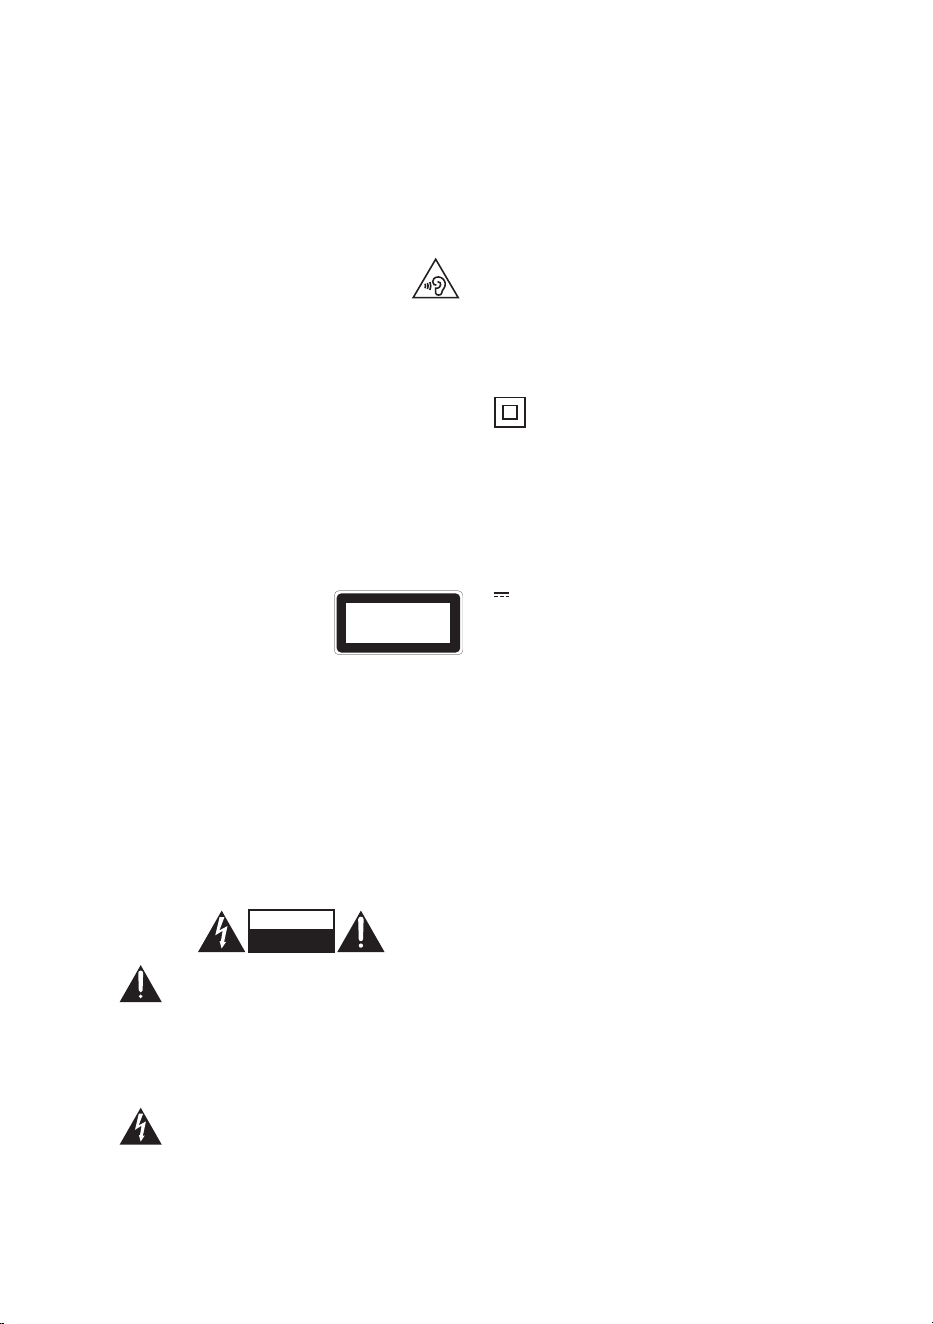
CAUTION
RISK OF ELECTRIC SHOCK
DO NOT OPEN
The lightning ash with arrowhead
symbol, within an equilateral triangle, is
intended to alert the user to the
presence of uninsulated “dangerous
voltage” within the unit’s enclosure that
may be of sucient magnitude to
constitute a risk of electric shock.
The exclamation point within an
equilateral triangle is intended to alert
the user to the presence of important
operating and maintenance (servicing)
instructions in the manual
accompanying the unit.
CLASS 1
LASER PRODUCT
This equipment is a Class II or double
insulated electrical appliance. It has been
designed in such a way that it does not
require a safety connection to electrical
earth.
~ AC voltage: This symbol indicates that the
rated voltage marked with the symbol is AC
voltage.
DC voltage: This symbol indicates that the
rated voltage marked with the symbol is DC
voltage.
Service
• To reduce the risk of electric shock, do not
remove screws. The unit does not contain
any user-serviceable parts. Please leave all
maintenance work to qualied personnel.
• Do not open any xed covers as this may
expose dangerous voltages.
Maintenance
• Ensure the unit is fully unplugged from the
power supply before cleaning.
• Do not use any type of abrasive pad or
abrasive cleaning solutions as these may
damage the unit’s surface.
• Do not use liquids to clean the unit.
2
Safety_Boombox_Final201005V1.indd 2Safety_Boombox_Final201005V1.indd 2 06/10/2020 11:5506/10/2020 11:55
Useful Information and Licences
Visit Partmaster.co.uk today for the easiest way to buy electrical spares and
accessories. With over 1 million spares and accessories available we can
deliver direct to your door the very next day. Visit www.partmaster.co.uk or
call 0344 800 3456 (UK customers only) Calls charged at National Rate.
In the unlikely event of a problem developing, please contact the store where you purchased your equipment.
We continually strive to improve our products; specications may change without prior notice.
For advice on where to purchase accessories, please contact the store where you purchased your equipment.
The Bluetooth® word mark and logos are registered trademarks owned by the Bluetooth SIG, Inc. and any use
of such marks by DSG Retail Limited is under license. Other trademarks and trade names are those of their
respective owners.
The symbol on the product or its packaging indicates that this product must not be disposed
of with your other household waste. Instead, it is your responsibility to dispose of your waste
equipment by handing it over to a designated collection point for the recycling of waste electrical
and electronic equipment. The separate collection and recycling of your waste equipment at the
time of disposal will help conserve natural resources and ensure that it is recycled in a manner
that protects human health and the environment.
For more information about where you can drop o your waste for recycling, please contact your
local authority, or where you purchased your product.
Notes for battery disposal
The batteries used with this product contain chemicals that are harmful to the environment. To preserve our
environment, dispose of used batteries according to your local laws or regulations. Do not dispose of batteries
with normal household waste.
For more information, please contact the local authority or your retailer where you purchased the product.
All trademarks are the property of their respective owners and all rights are acknowledged.
3
Safety_Boombox_Final201005V1.indd 3Safety_Boombox_Final201005V1.indd 3 06/10/2020 11:5506/10/2020 11:55

(Safety-JVC Boombox-200915V1)
DSG Retail Ltd. (co. no. 504877)
1 Portal Way, London, W3 6RS, UK
EU Representative
DSG Retail Ireland Ltd (259460)
3rd Floor Oce Suite
Omni Park SC, Santry, Dublin 9, Republic of Ireland
Safety_Boombox_Final201005V1.indd 4Safety_Boombox_Final201005V1.indd 4 06/10/2020 11:5506/10/2020 11:55
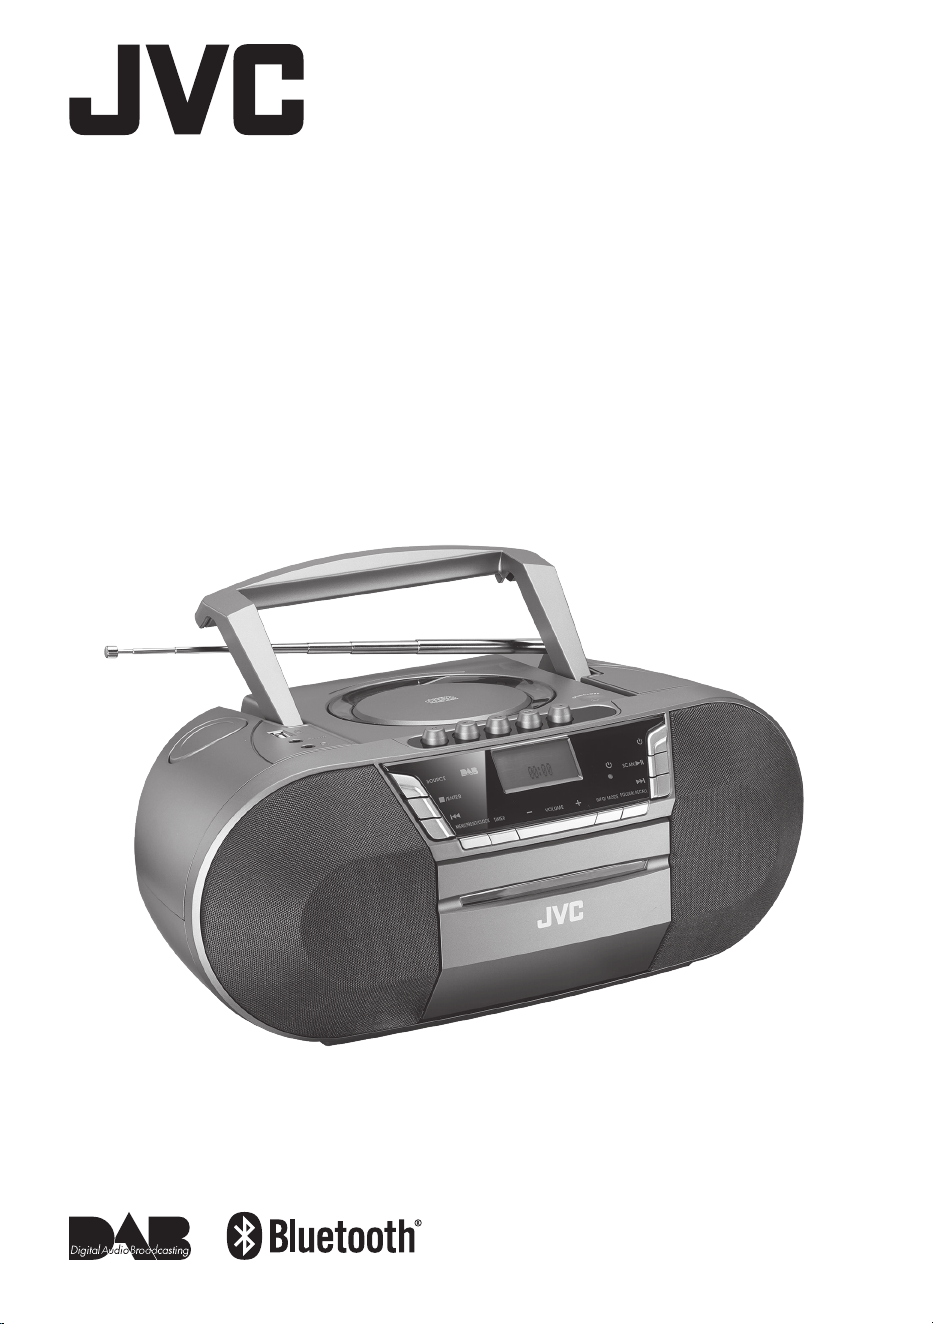
Instruction Manual
Boombox with DAB and
Cassette
RC-D327B
RC-D327B_IB_Final201006V5.indd 1RC-D327B_IB_Final201006V5.indd 1 06/10/2020 18:1306/10/2020 18:13

Contents
Unpacking ...................................................................................................................................... 4
Product Overview .......................................................................................................................... 5
Front View ..................................................................................................................................................................5
Rear View ................................................................................................................................................................... 5
Top View ..................................................................................................................................................................... 6
Power Source .................................................................................................................................7
Battery Power ...........................................................................................................................................................7
Mains Power ............................................................................................................................................................. 8
Connections ...................................................................................................................................9
Using the AUX Connection.................................................................................................................................. 9
Using Headphones ................................................................................................................................................. 9
Playing MP3s from a USB Device.....................................................................................................................10
General Operation .......................................................................................................................10
Powering ON/OFF ................................................................................................................................................. 10
Selecting Modes ....................................................................................................................................................10
Adjusting the Volume..........................................................................................................................................10
Auto Setting of the Clock ...................................................................................................................................10
Manual Setting of the Clock..............................................................................................................................11
Setting the Alarm Timer .....................................................................................................................................11
To Deactivate the Alarm Timer .........................................................................................................................11
DAB Operation .............................................................................................................................12
Full Scan ...................................................................................................................................................................12
Manual Scan ...........................................................................................................................................................12
Secondary Services ..............................................................................................................................................12
Presetting Stations ...............................................................................................................................................13
Recalling a Preset Station...................................................................................................................................13
DRC (Dynamic Range Compression) .............................................................................................................13
Prune .........................................................................................................................................................................13
DAB Display Modes ..............................................................................................................................................14
FM Operation ...............................................................................................................................15
Auto Scan .................................................................................................................................................................15
Manual Scan ...........................................................................................................................................................15
For Better Reception ............................................................................................................................................ 15
Presetting Stations ...............................................................................................................................................15
Recalling a Preset Station...................................................................................................................................15
FM Display Modes ................................................................................................................................................16
CD/MP3 Operation ......................................................................................................................17
Playback ...................................................................................................................................................................17
To Pause Playback ................................................................................................................................................. 17
To Stop Playback ...................................................................................................................................................17
Skipping to Another Track ................................................................................................................................. 17
Fast Forward and Fast Reverse .........................................................................................................................17
RC-D327B_IB_Final201006V5.indd 2RC-D327B_IB_Final201006V5.indd 2 06/10/2020 18:1306/10/2020 18:13

Selecting an Album (MP3) .................................................................................................................................17
Repeat Playback ....................................................................................................................................................18
Programme Setting .............................................................................................................................................. 18
Programme Cancel ...............................................................................................................................................18
Cassette Playback ........................................................................................................................19
Fast Forwarding/Rewinding..............................................................................................................................19
Bluetooth® Operation .................................................................................................................20
AUX Operation .............................................................................................................................20
Maintenance ................................................................................................................................21
Cleaning the Unit / Cassette Compartment ................................................................................................ 21
Handling Discs .......................................................................................................................................................21
Cleaning Discs ........................................................................................................................................................ 21
Storing Discs ...........................................................................................................................................................21
Hints and Tips ..............................................................................................................................22
Product Fiche and Specications ...............................................................................................23
RC-D327B_IB_Final201006V5.indd 3RC-D327B_IB_Final201006V5.indd 3 06/10/2020 18:1306/10/2020 18:13
Unpacking
Remove all items from the packaging. Retain the packaging. If you dispose of it please do so
according to local regulations.
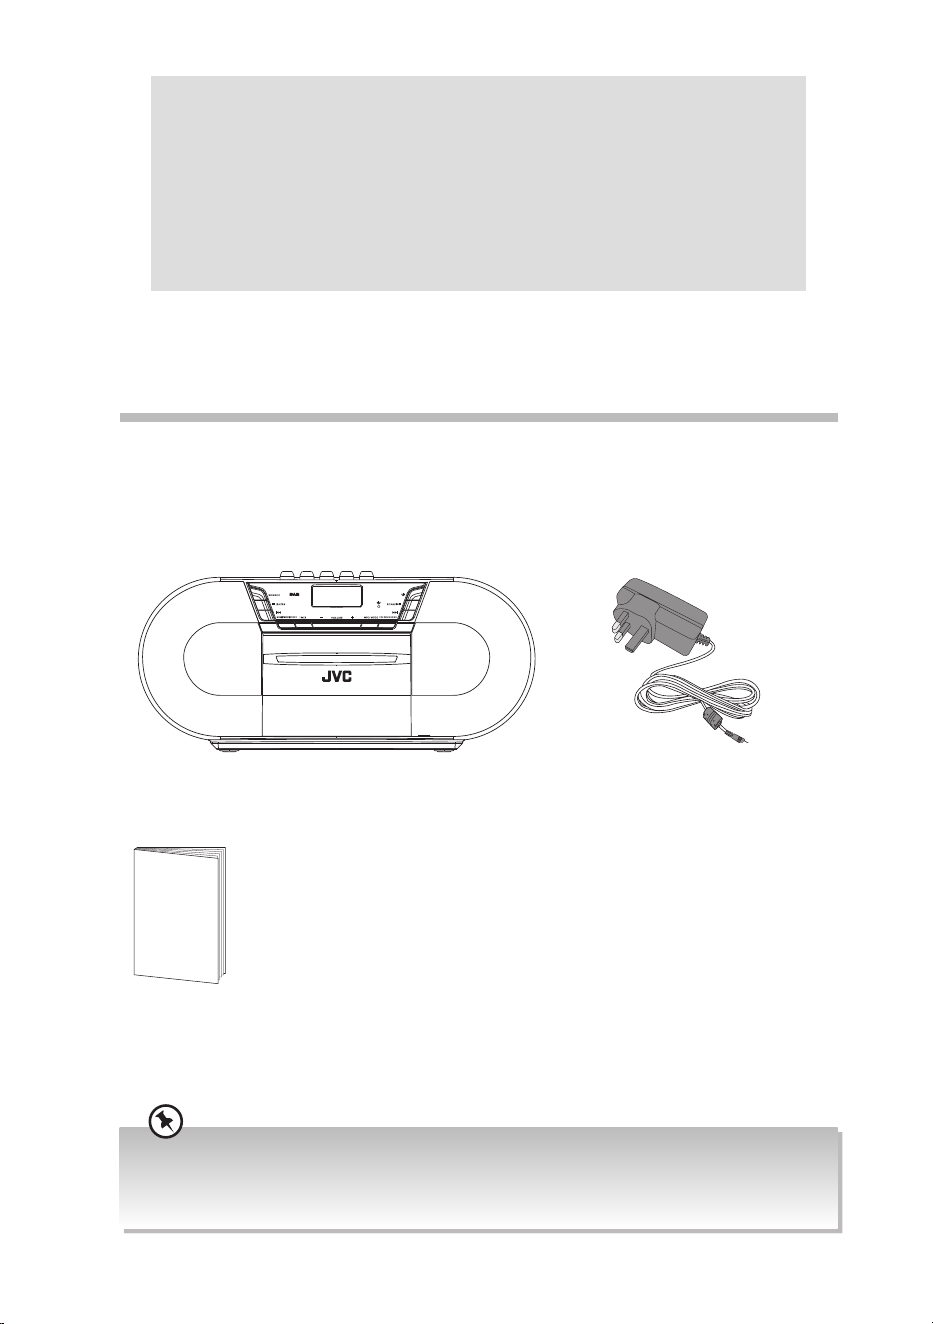
The following items are included:
Main Unit
Mains Adapter
Instruction Manual
Instruction
Manual
Thank you for purchasing your new product.
We recommend that you spend some time reading this instruction manual
in order that you fully understand all the operational features it oers. You
will also nd some hints and tips to help you resolve any issues.
Read all the safety instructions carefully before use and keep this
instruction manual for future reference.
• If items are missing, or damaged please contact Partmaster (UK only). Tel: 0344 800 3456 for assistance.
• If you require additional assistance:
For UK, please call our UK Call Centre on 0344 561 1234.
For Ireland, please call our Ireland Call Center on 1 890 818 575.
4
RC-D327B_IB_Final201006V5.indd 4RC-D327B_IB_Final201006V5.indd 4 06/10/2020 18:1306/10/2020 18:13
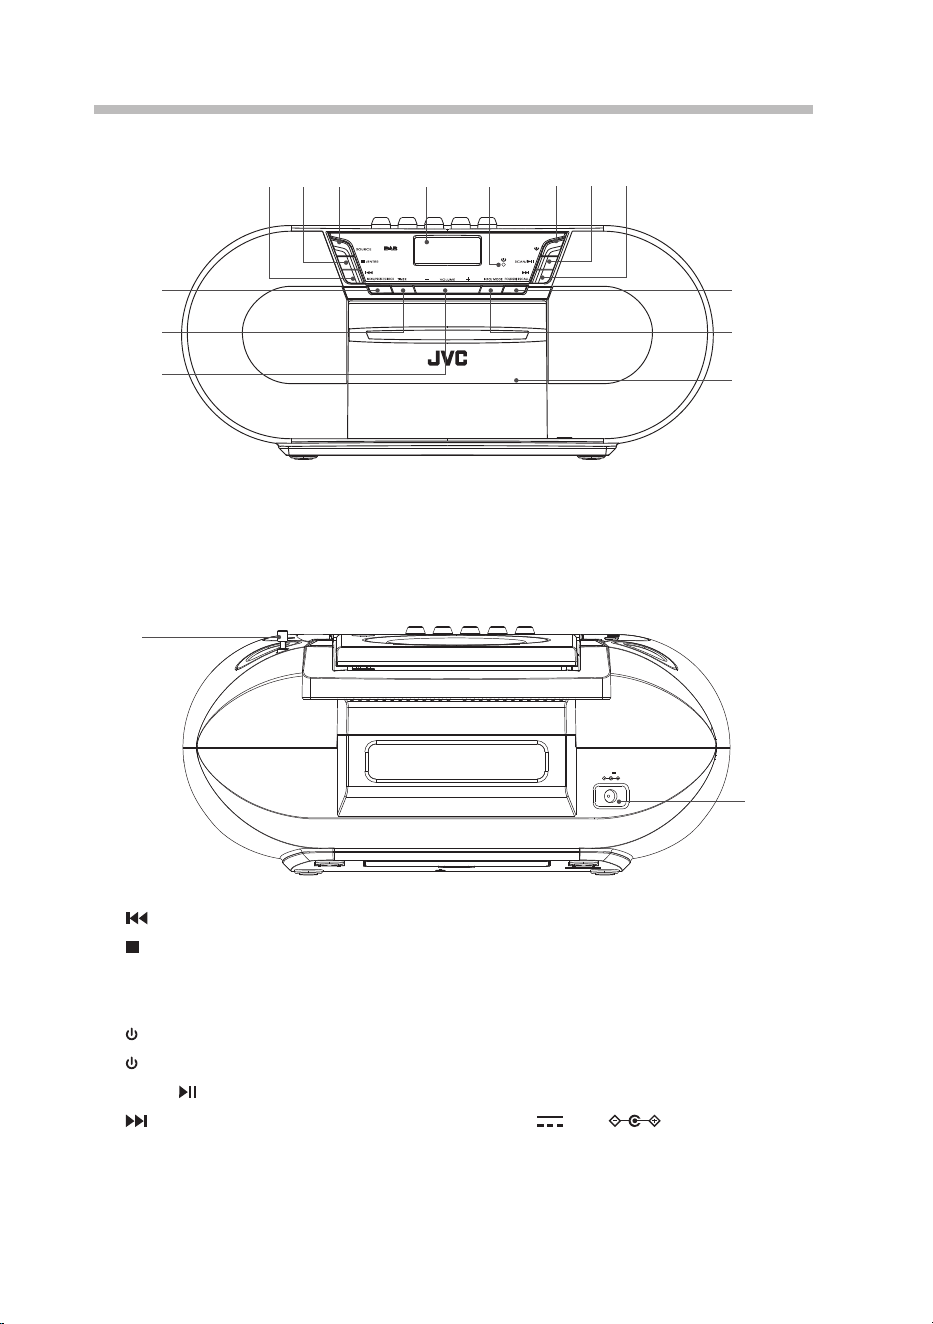
Product Overview
Front View
Rear View
1. Button
2.
/ENTER Button
3. SOURCE Button
4. Display
5.
Indicator
6.
Button
7. SCAN/
Button
8.
Button
DC 12V 1.5A
16
15
11
2 3 4 5 6 7 8
9 12
10 13
11 14
9. MENU/PRESET/CLOCK Button
10. TIMER Button
11. Volume +/– Button
12. FOLDER/RECALL Button
13. INFO/MODE Button
14. Cassette Door
15. Aerial
16. DC 12V
1.5A Socket
5
RC-D327B_IB_Final201006V5.indd 5RC-D327B_IB_Final201006V5.indd 5 06/10/2020 18:1306/10/2020 18:13
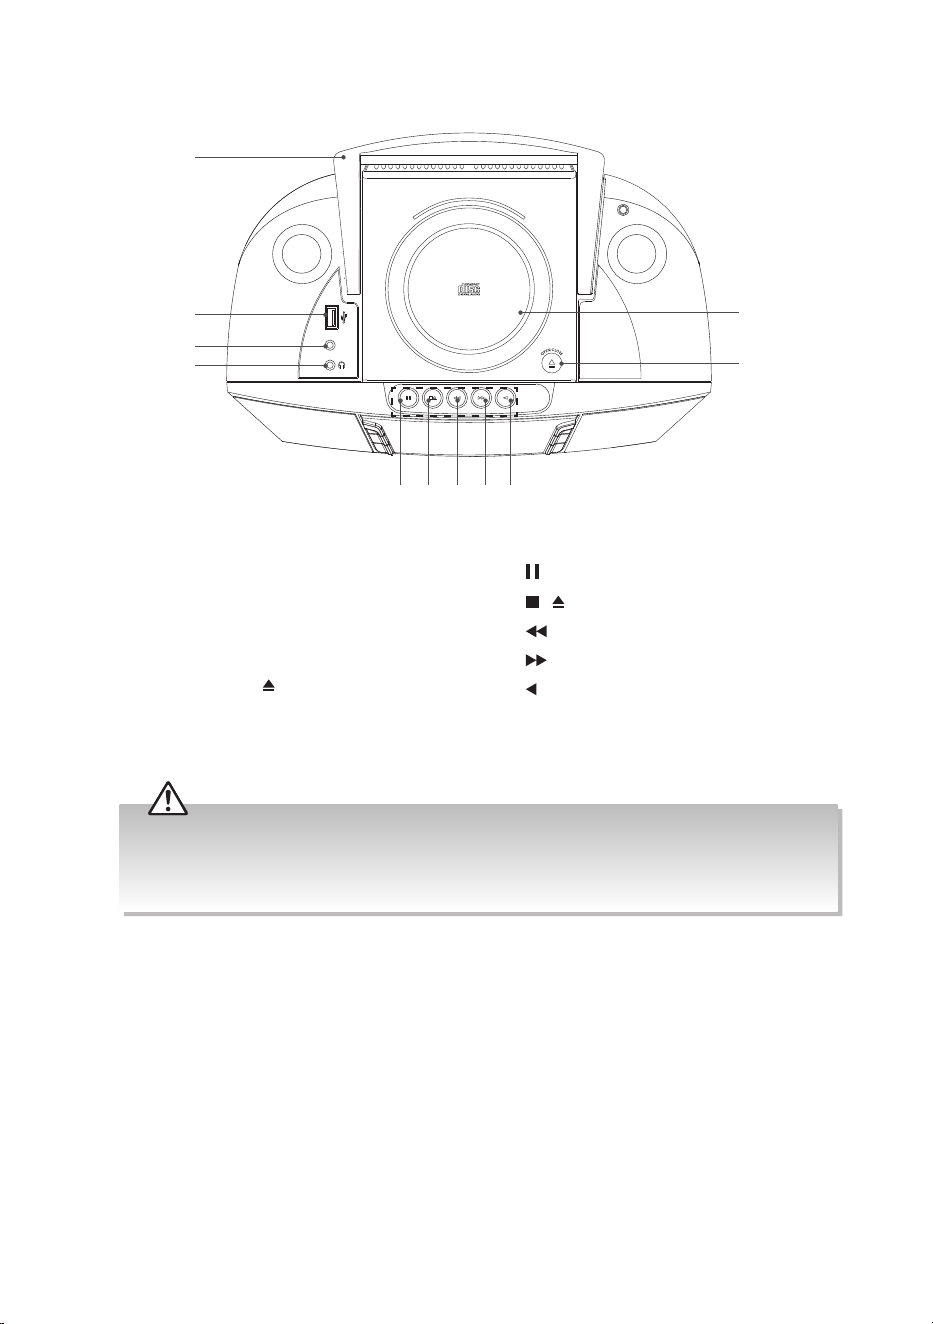
1. Handle
2. USB Socket
3. AUX IN Jack
4. HEADPHONES Jack
5. CD Tray
6. OPEN/CLOSE
Button
Cassette Buttons
7.
Button
8.
/
Button
9.
Button
10.
Button
11.
Button
AUX-IN
2
3
4
5
6
7 8 9 10 11
1
Top View
• Visible and invisible laser radiation. If the cover is open, do not look at the beam.
• High voltage! Do not open. You run the risk of getting an electric shock.
• The machine does not contain any user-serviceable parts.
• Modication of the product could result in hazardous radiation of EMC or other unsafe operation.
6
RC-D327B_IB_Final201006V5.indd 6RC-D327B_IB_Final201006V5.indd 6 06/10/2020 18:1306/10/2020 18:13
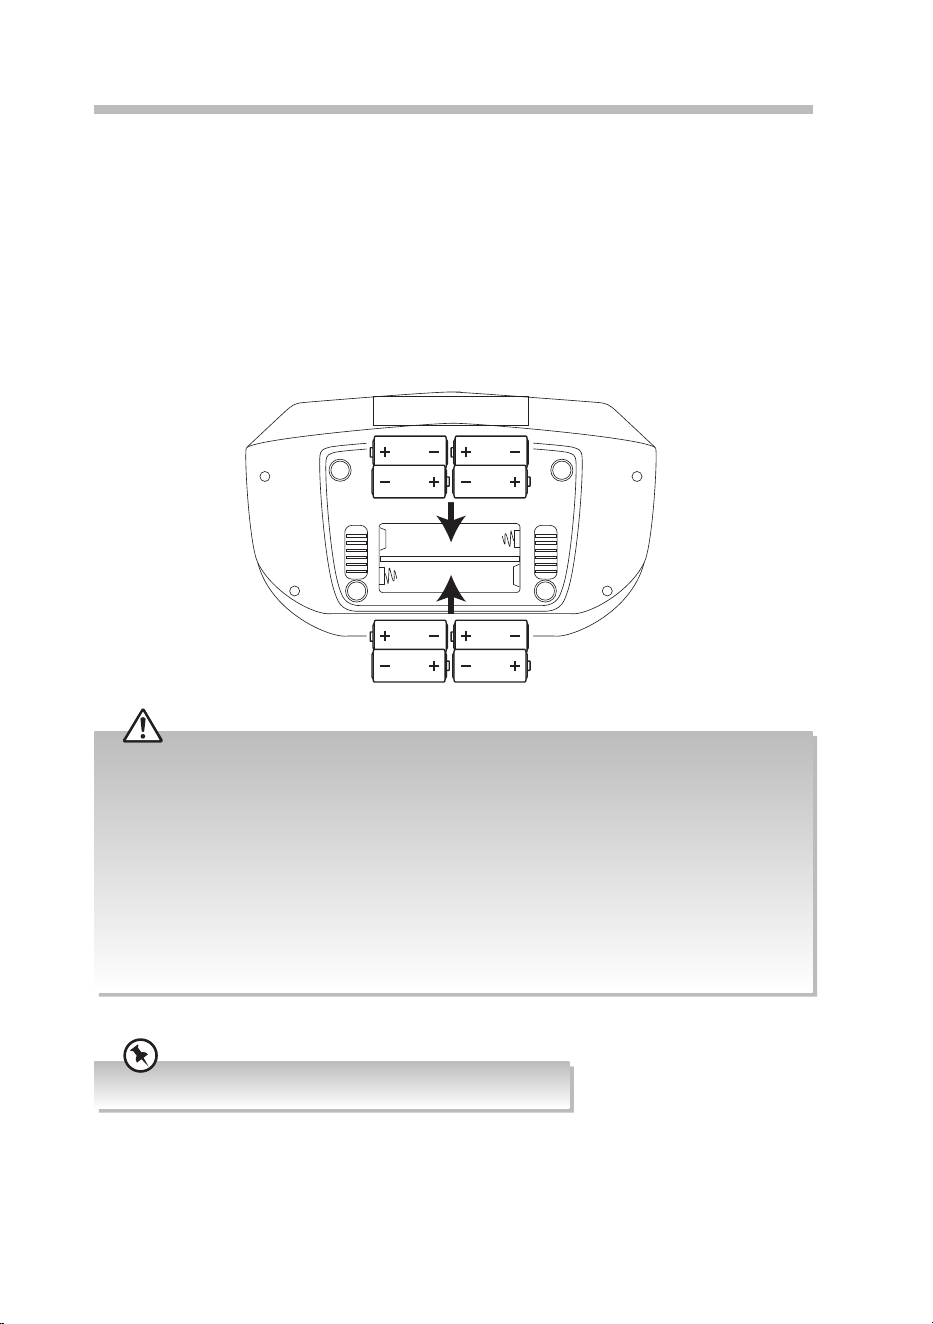
Power Source
Whenever convenient, use the mains adapter if you want to conserve battery life. Make sure
you remove the plug from the unit and mains socket before inserting batteries.
Battery Power
1. Open the battery door and insert 8 batteries, type UM-2 or C-cells (not included) with
the correct polarity as indicated by the “+” and “–” symbols inside the compartment.
2. Replace the battery door making sure the batteries are rmly and correctly in place. The
unit is now ready to operate.
Handling the Batteries
• Improper or incorrect use of batteries may cause corrosion or battery leakage, which could cause
personal injury or damage to property.
• Install the batteries correctly by following the polarity (+ and –) indications in the battery
compartment.
• Use only the types of the batteries which are indicated in this manual.
• Do not install new batteries with used ones and do not mix dierent types of batteries.
• Do not dispose of the used batteries as domestic waste. Dispose of them in accordance with local
regulations.
• If you are not going to use the unit for a long time, remove the batteries to avoid damage from battery
leakage and corrosion.
Underside of unit
Always switch the unit o after use to conserve the battery life.
7
RC-D327B_IB_Final201006V5.indd 7RC-D327B_IB_Final201006V5.indd 7 06/10/2020 18:1306/10/2020 18:13
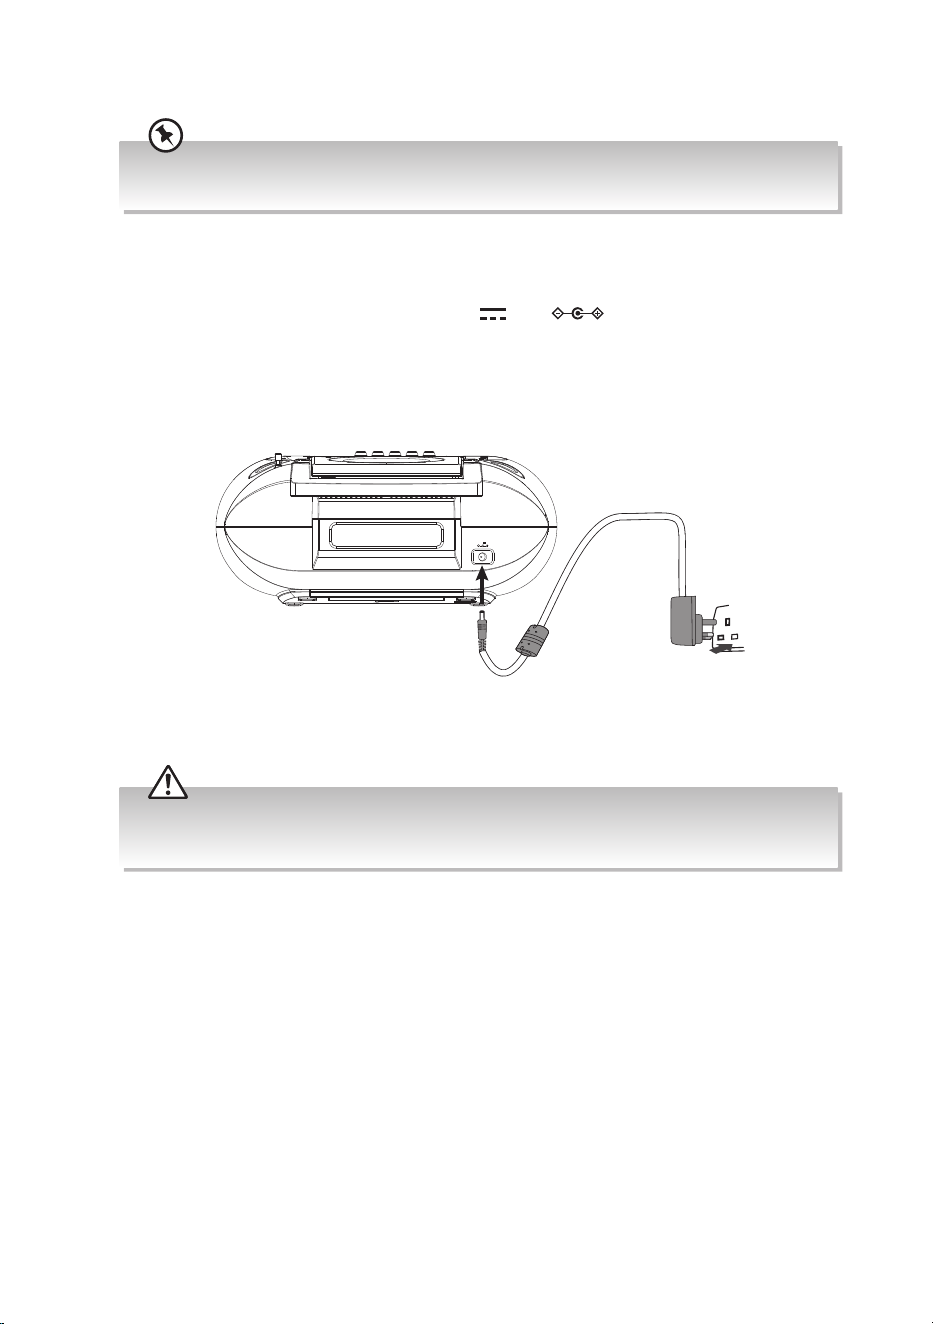
Mains Power
Always check you have completely switched o the unit, before you change or disconnect the power
supply.
1. Check that the power voltage shown on the rating label located on the bottom of
the unit, corresponds to your local power supply. If it does not, consult your dealer or
service centre.
2. Connect the mains adapter to the DC12V
1.5A socket and the mains socket.
The unit is now connected and ready for use.
3. To switch the unit o completely, withdraw the mains adapter from the mains socket.
4. Install the unit near a mains socket where the mains plug can be easily reached.
DC 12V 1.5A
Disconnect the mains adapter from the mains socket to protect your unit during heavy thunderstorms.
Children could seriously injure themselves as the free end of the adapter may still be live if only the
connector is removed from the mains socket at the back of the unit.
8
RC-D327B_IB_Final201006V5.indd 8RC-D327B_IB_Final201006V5.indd 8 06/10/2020 18:1306/10/2020 18:13
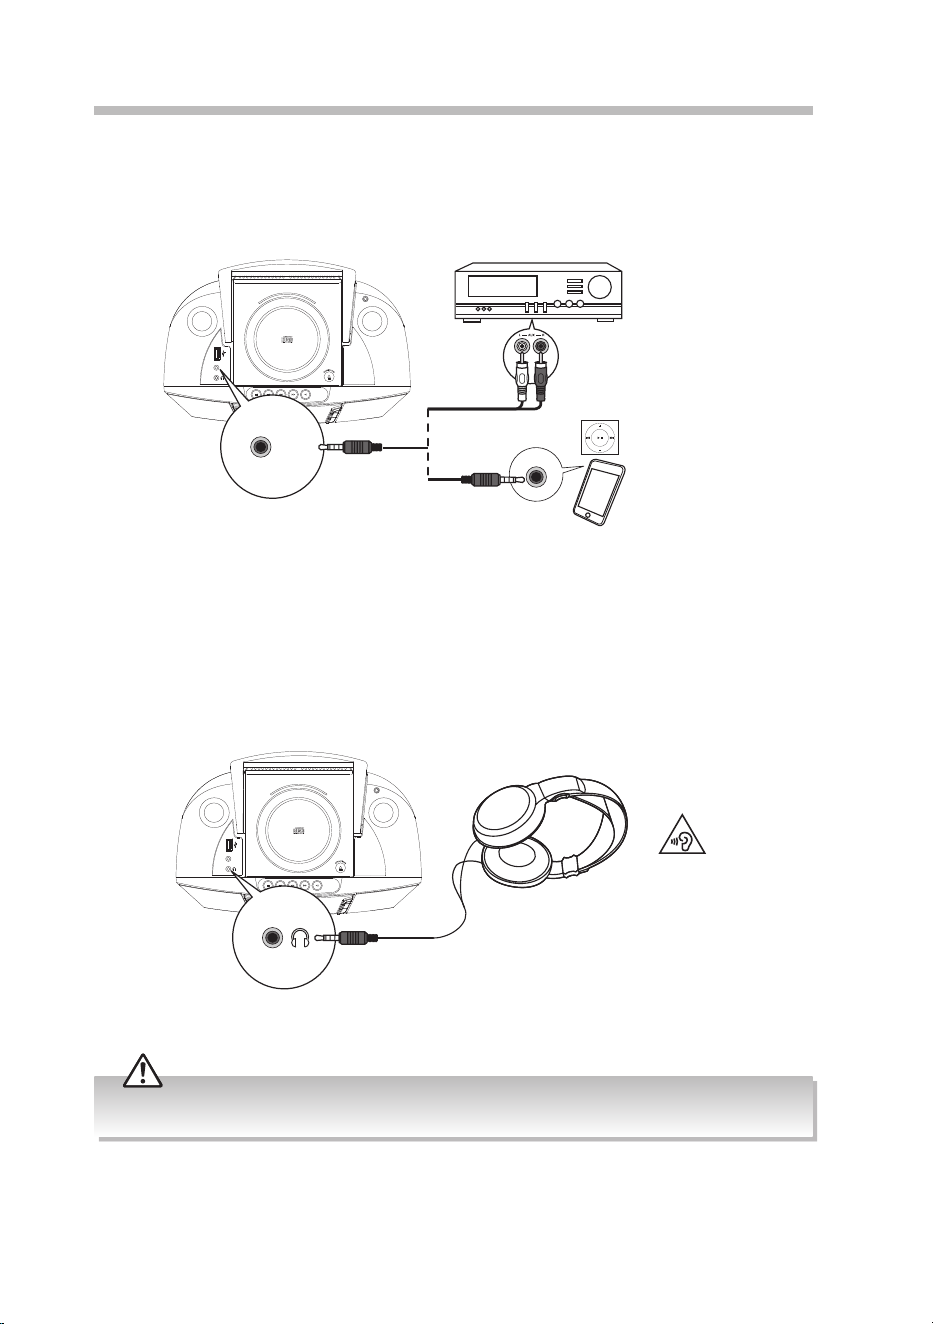
Connections
Using the AUX Connection
Use a 3.5mm to RCA stereo audio cable to connect the audio device’s audio output sockets
to the unit’s AUX IN socket.
Using Headphones
Turn down the volume before connecting the headphones. Slowly raise the volume with
the headphones on until you reach your desired volume. When headphones are connected,
the speakers automatically mute.
Long-term exposure to loud music may cause hearing damage. It is best to avoid extreme volume when
using headphones, especially for extended periods.
Top View of Unit Auxiliary device
Audio devices
3.5mm to RCA stereo audio cable
(not included)
3.5mm to 3.5mm
stereo audio cable
(not included)
AUX-IN
AUX IN
Top View of Unit
AUX-IN
9
RC-D327B_IB_Final201006V5.indd 9RC-D327B_IB_Final201006V5.indd 9 06/10/2020 18:1306/10/2020 18:13
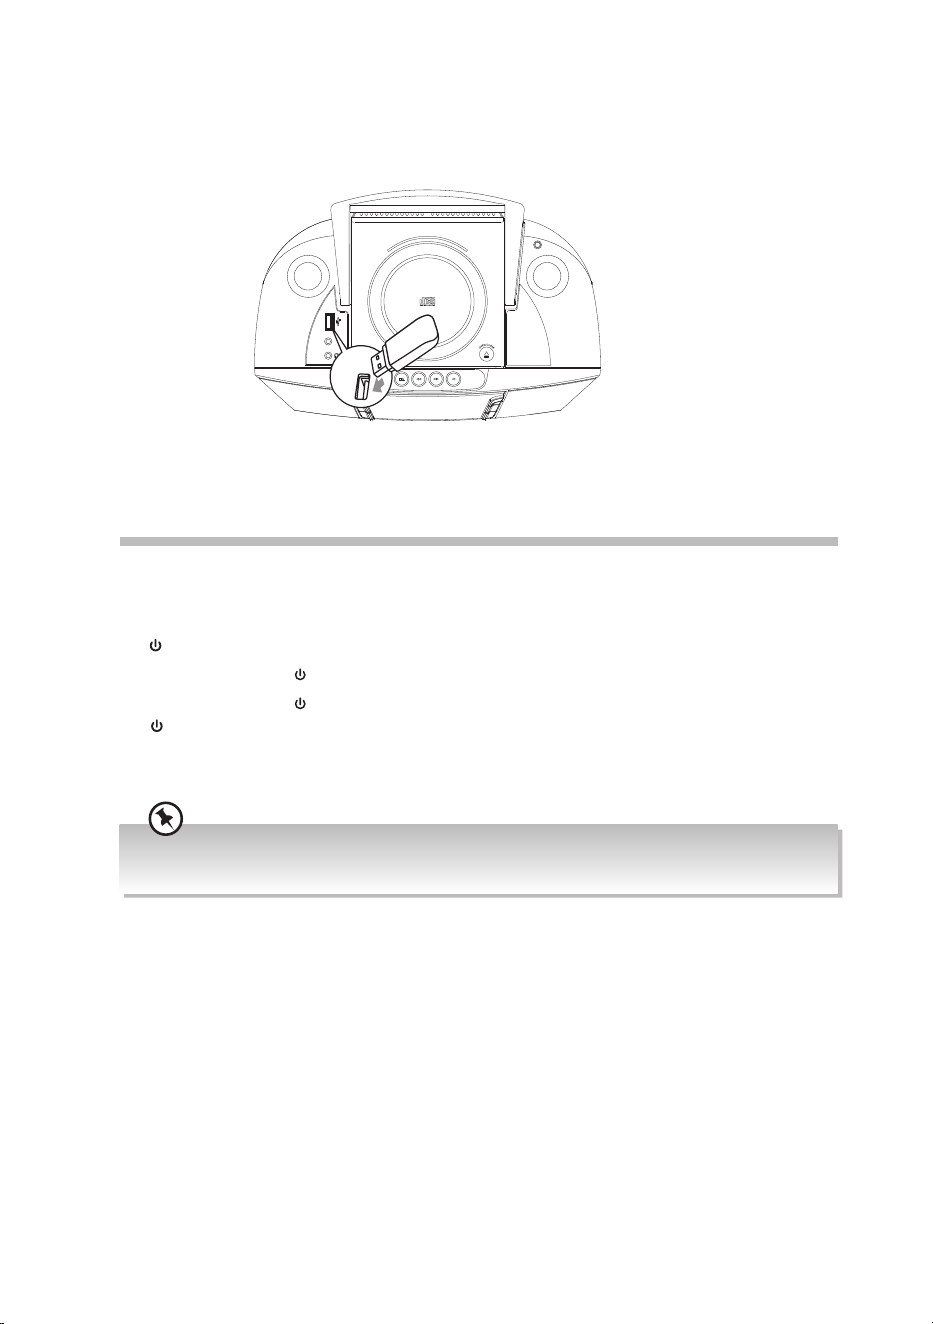
Playing MP3s from a USB Device
When a USB device is connected to the unit, press SOURCE button repeatedly on the unit
to select USB mode.
General Operation
Powering ON/OFF
When you rst connect the unit to the mains socket, the unit will be in STANDBY mode and
the
indicator will light up red.
• Press the Standby
button on the unit to switch the unit on.
• Press the Standby
button on the unit to switch the unit back to STANDBY mode. The
indicator will light up red.
• Disconnect the mains plug from the mains socket if you want to switch the unit o
completely.
Selecting Modes
Press the SOURCE button repeatedly on the unit to switch between DAB, FM,
BLUETOOTH/AUX, TAPE, CD and USB mode. The selected mode will show on the display.
Adjusting the Volume
• Press the VOLUME +/– button on the unit.
Auto Setting of the Clock
The clock can be updated automatically if you can receive a DAB signal in your location.
In order to synchronise to the current local time you must leave it on the DAB station for a
short period of time.
AUX-IN
Top View of Unit
To safely remove the USB switch to another mode or turn o the power, then remove the
USB.
When the unit volume is close to mute or is idle for approximately 15 minutes, it will automatically switch
to Standby.
10
RC-D327B_IB_Final201006V5.indd 10RC-D327B_IB_Final201006V5.indd 10 06/10/2020 18:1306/10/2020 18:13
Manual Setting of the Clock
1. During Standby mode, press and hold MENU/PRESET/CLOCK button on the unit.
‘24HR’ will ash on the display.
2. Press
to select ‘24Hour’ or ‘12Hour’, then press MENU/PRESET/CLOCK button.
3. Press
to set the hours, then press MENU/PRESET/CLOCK button.
4. Press
to set the minutes, then press MENU/PRESET/CLOCK button.
5. The time is now set.
Setting the Alarm Timer
1. Make sure that the unit is in STANDBY mode.
1. Press and hold TIMER until the display shows ‘Timer On’, and the hour digits ash.
2. Press
to set the hours, then press TIMER.
3. Press
to set the minutes, then press TIMER.
4. When On Timer Clock is set, the display will show ‘Timer O’ and the hour digits will
ash.
5. Press
to set the hours, then press TIMER.
6. Press
to set the minutes, then press TIMER.
7. Finally press
to select DAB, FM, TAPE, CD or USB mode, then press TIMER.
8. Press
to adjust the Timer volume, and then press TIMER to conrm.
9. “
” icon will show on the display to indicator the timer is on.
10. The Timer setting is now complete.
• If you select FM/DAB mode make sure you have selected the radio station you want to be woken up
to rst.
• If you have selected TAPE mode, make sure that you have a cassette tape in the unit.
• If you have selected CD mode make sure you have a CD inserted into the CD tray, if you forget to insert
a CD, the radio will switch on instead.
• If you have selected USB mode, make sure that you have connected your USB device with the unit.
To Deactivate the Alarm Timer
Press TIMER on the unit repeatedly to select Timer O mode. The “ ” indicator will
disappear from the display.
• If no buttons are pressed for 5 seconds the unit will exit clock setting mode.
• If your unit is disconnected from the mains supply the clock setting will be lost.
If you cannot receive any DAB signal, you can manually set the time. Once DAB signal is received, the time
will be automatically updated.
11
RC-D327B_IB_Final201006V5.indd 11RC-D327B_IB_Final201006V5.indd 11 06/10/2020 18:1306/10/2020 18:13
DAB Operation
Press
SOURCE
repeatedly to select DAB mode.
If the unit is connected to the mains power and then switched on to
DAB
mode for the rst
time, the unit will automatically start scanning. The display will show ‘
Scanning…
’.
All the stations that have been found will be stored automatically. To explore the found
stations, press the
buttons and then press the /
ENTER
button to conrm.
Full Scan
Press and hold the
SCAN
/ button, the unit will start a full scan to search all available Band
III channels. Or, press
MENU/PRESET/CLOCK
button, and then press to select <Full
scan>, and then press /
ENTER
to conrm.
Manual Scan
As well as the auto tune function, you can manually tune the receiver. This can help you
when aligning your aerial or when adding stations that were missed while auto tuning.
1. Press
MENU/PRESET/CLOCK
to display the menu.
2. Press
to select <Manual tune>, and then press /
ENTER
to select.
3. Press
to cycle through the DAB channels, which are numbered from 5A to 13F.
4. After your desired channel number is selected, press
/
ENTER
to conrm. The display
will show the multiplex.
5. The unit will start to scan.
Secondary Services
You may see a “>” symbol after the name of the station, this indicates that there are
secondary services available to that station. These secondary services contain extra
services that are related to the primary station. e.g. a sports station may want to add extra
commentaries. The secondary services are inserted directly after the primary station in the
station list.
To select the secondary station, press
/
ENTER
when the “>” appears in the display before
the station name. When the secondary service ends, the unit will automatically switch back
to the primary station.
Full auto scan will not replace the DAB stations in the memory. If you want to remove all the previously
scanned stations, a system reset is required.
12
RC-D327B_IB_Final201006V5.indd 12RC-D327B_IB_Final201006V5.indd 12 06/10/2020 18:1306/10/2020 18:13
Presetting Stations
You can store up to 10 of your favourite DAB stations to the memory. This will enable you to
access your favourite stations quickly and easily.
1. To store a preset, you must rst be listening to the station that you would like to
save, press and hold
MENU/PRESET/CLOCK
. The display will show ‘
Preset Store <1:
Empty>
’.
2. Press
to select your desired preset station number and then press /
ENTER
to
conrm.
3. The station will be stored and the screen will then show ‘
Preset # Stored
’.
Recalling a Preset Station
1. Once you have saved a station to one of the preset buttons, you can recall it by pressing
FOLDER/RECALL
.
2. Press
to select your desired preset station number.
3. Press
/
ENTER
to conrm the selection.
The stored stations will be saved into the memory and power o will not erase it. Storing a new station in
a preset location will erase the previously stored station in that location.
DRC (Dynamic Range Compression)
If you are listening to music with high dynamic range in a noisy environment, you may wish
to compress the audio dynamic range.
1. During DAB mode, press
MENU/PRESET/CLOCK
, and then press
to select
<
DRC
>. Press /
ENTER
to conrm.
2. Press
to select
DRC high/low/o
. Press /
ENTER
to conrm the setting.
Prune
You may remove all unavailable stations from the list.
1. During
DAB
mode, press
MENU/PRESET/CLOCK
, and then press
to select
<
Prune
>. Press
/
ENTER
to conrm.
2. Press
to select <
YES
> to conrm delete. Or select <
NO
> to cancel.
13
RC-D327B_IB_Final201006V5.indd 13RC-D327B_IB_Final201006V5.indd 13 06/10/2020 18:1306/10/2020 18:13
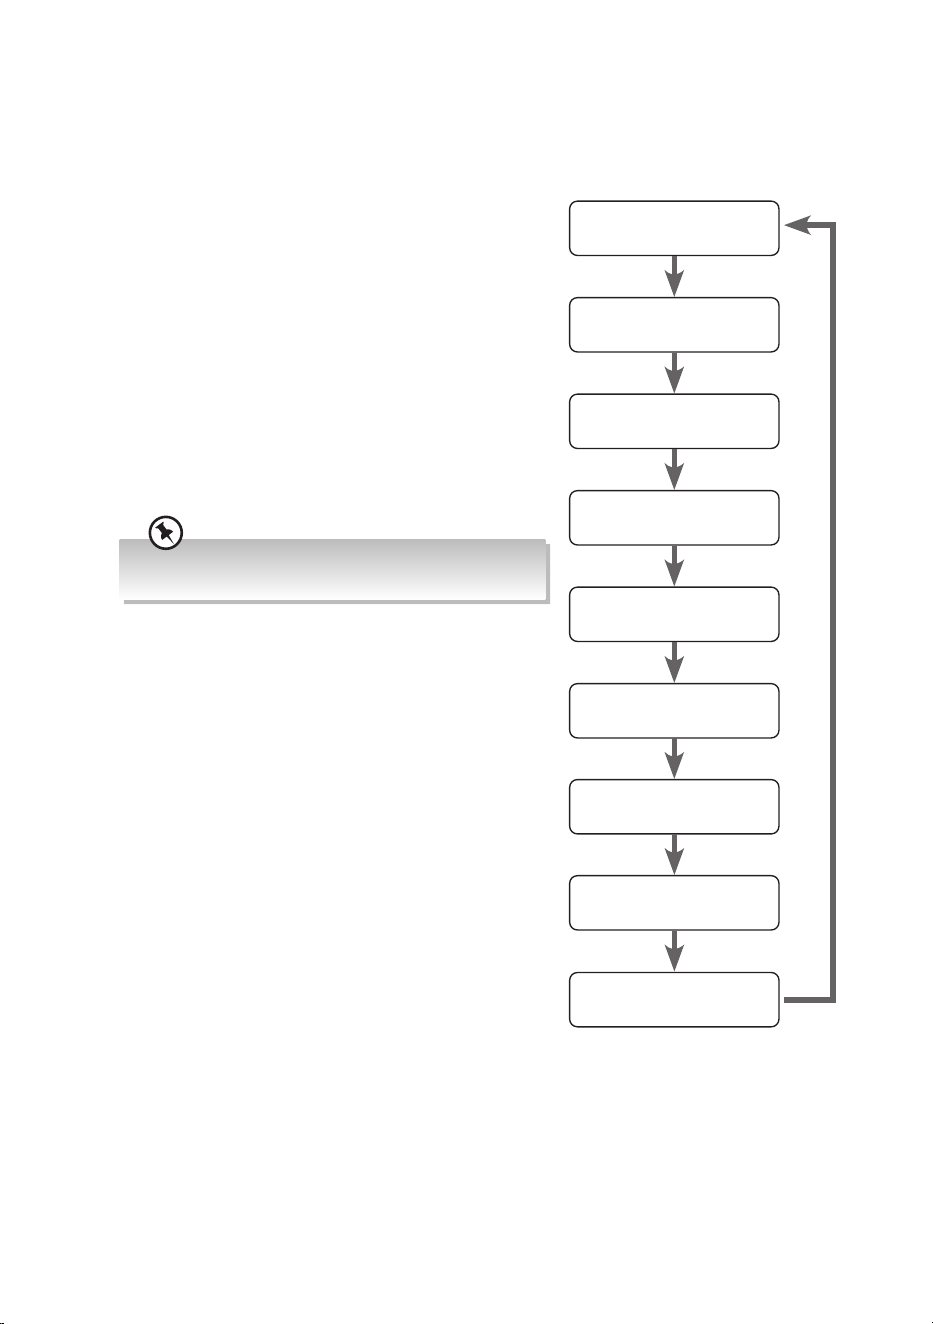
DAB Display Modes
Press INFO/MODE to switch through the following display modes.
The information of each display mode is displayed on the lower segment of the display.
Signal Strength
Programme Type
Ensemble Name
Frequency
Signal Error
Audio Bit Rate
Time
Date
DLS
Signal Strength
This shows a slide bar to indicate the signal strength, the
stronger the signal, the longer the bar will be from left to
right.
Programme Type
This describes the “style” or “genre” of the programme that
is being broadcast.
Ensemble Name
This displays the name of the multiplex that contains the
station you are listening to. A multiplex is a collection of
radio stations that are bundled and transmitted on one
frequency. There are national and local multiplexes. Local
ones contain stations that are specic to that area.
DAB – unlike normal radio, groups together several radio
stations and transmits them on one frequency.
Frequency
This shows the frequency of the current station.
Signal Error
This displays a number showing the error rate. If the
number is 0, it means the signal received is error free and
the signal strength is strong. If the error rate is high, it is
recommended to re-orient the aerial or re-position the
unit.
Audio Bit Rate
The display will show the digital audio bit rate being
received.
Time
This displays the current time provided automatically by
the broadcaster.
Date
This displays the date provided automatically by the
broadcaster.
DLS (Dynamic Label Segment)
Dynamic label segment is a scrolling message that the
broadcaster may include with their transmissions. The
message usually includes information, such as programme
details etc.
14
RC-D327B_IB_Final201006V5.indd 14RC-D327B_IB_Final201006V5.indd 14 06/10/2020 18:1306/10/2020 18:13
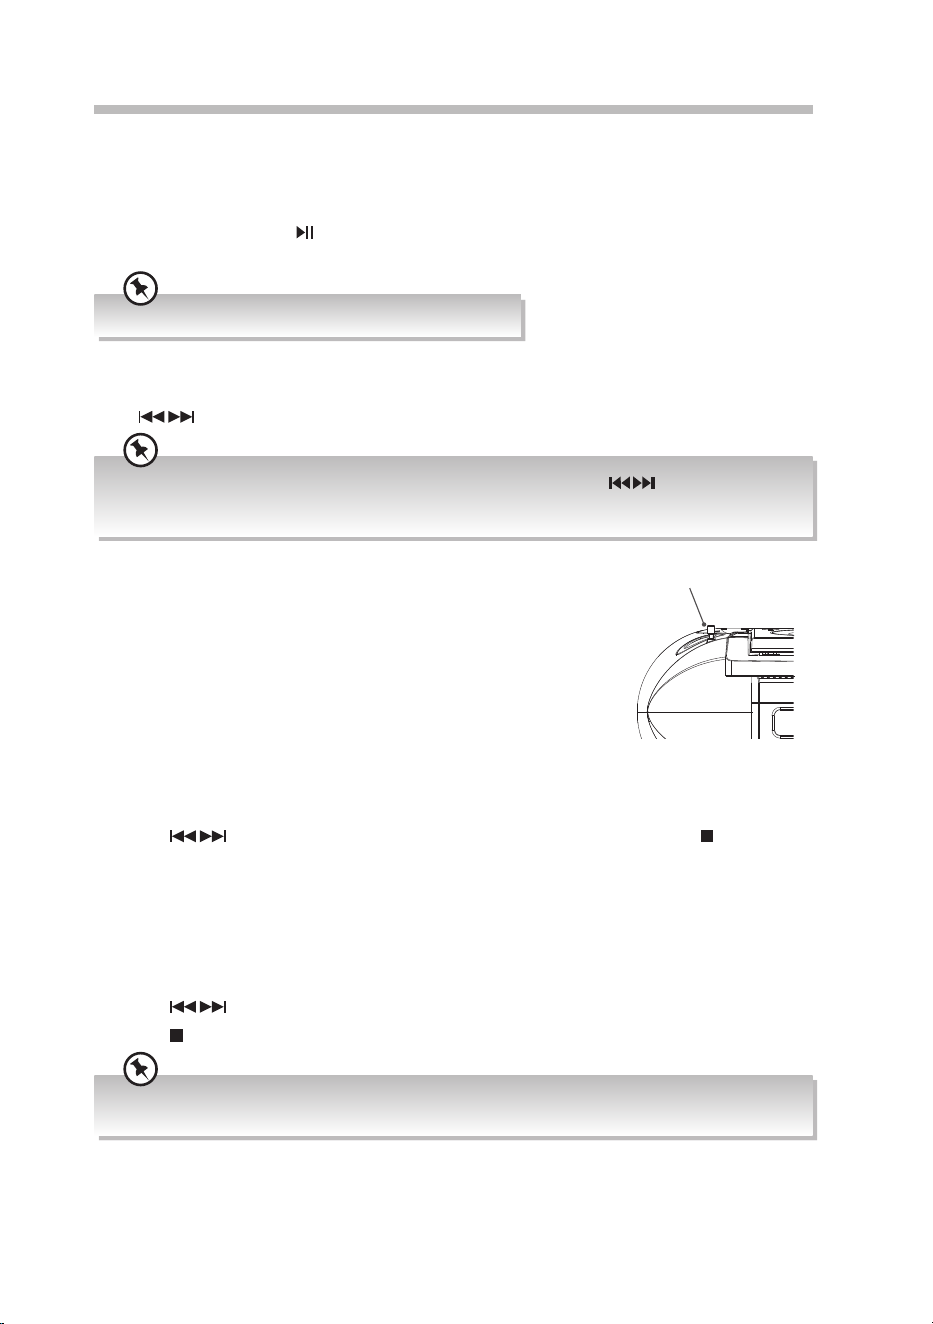
FM Operation
Press SOURCE repeatedly to select FM mode.
Auto Scan
Press and hold the SCAN/ button until the tuner starts searching for a station. Once a
station has been found, the scanning will stop automatically.
The search may not stop at a station with a very weak signal.
Manual Scan
Press repeatedly until your desired frequency is reached.
With FM radio it may be necessary to ne tune each station by pressing the buttons repeatedly.
Each press will adjust the frequency by 0.05MHz. If reception is still poor adjust the position of the aerial
or try moving the radio to another location.
For Better Reception
Fully unwind the aerial. Extend the aerial and place it in the position
that oers the best sound reception.
Presetting Stations
You can store up to 10 of your favourite FM stations to the memory.
This will enable you to access your favourite stations quickly and
easily.
1. To store a preset, you must rst be listening to the station that
you would like to save, press and hold MENU/PRESET/CLOCK.
The display will show ‘Preset Store <1: Empty>’.
2. Press
to select your desired preset station number and then press /ENTER to
conrm.
3. The station will be stored and the screen will then show ‘Preset # Stored’.
Recalling a Preset Station
1. Once you have saved a station to one of the preset buttons, you can recall it by pressing
FOLDER/RECALL.
2. Press
to select your desired preset station number.
3. Press
/ENTER to conrm the selection.
The stored stations will be saved into the memory and power o will not erase it. Storing a new station
into a preset location will erase the previously stored station in that location.
DC 12V 1.5A
Aerial
Rear View of Unit
15
RC-D327B_IB_Final201006V5.indd 15RC-D327B_IB_Final201006V5.indd 15 06/10/2020 18:1306/10/2020 18:13
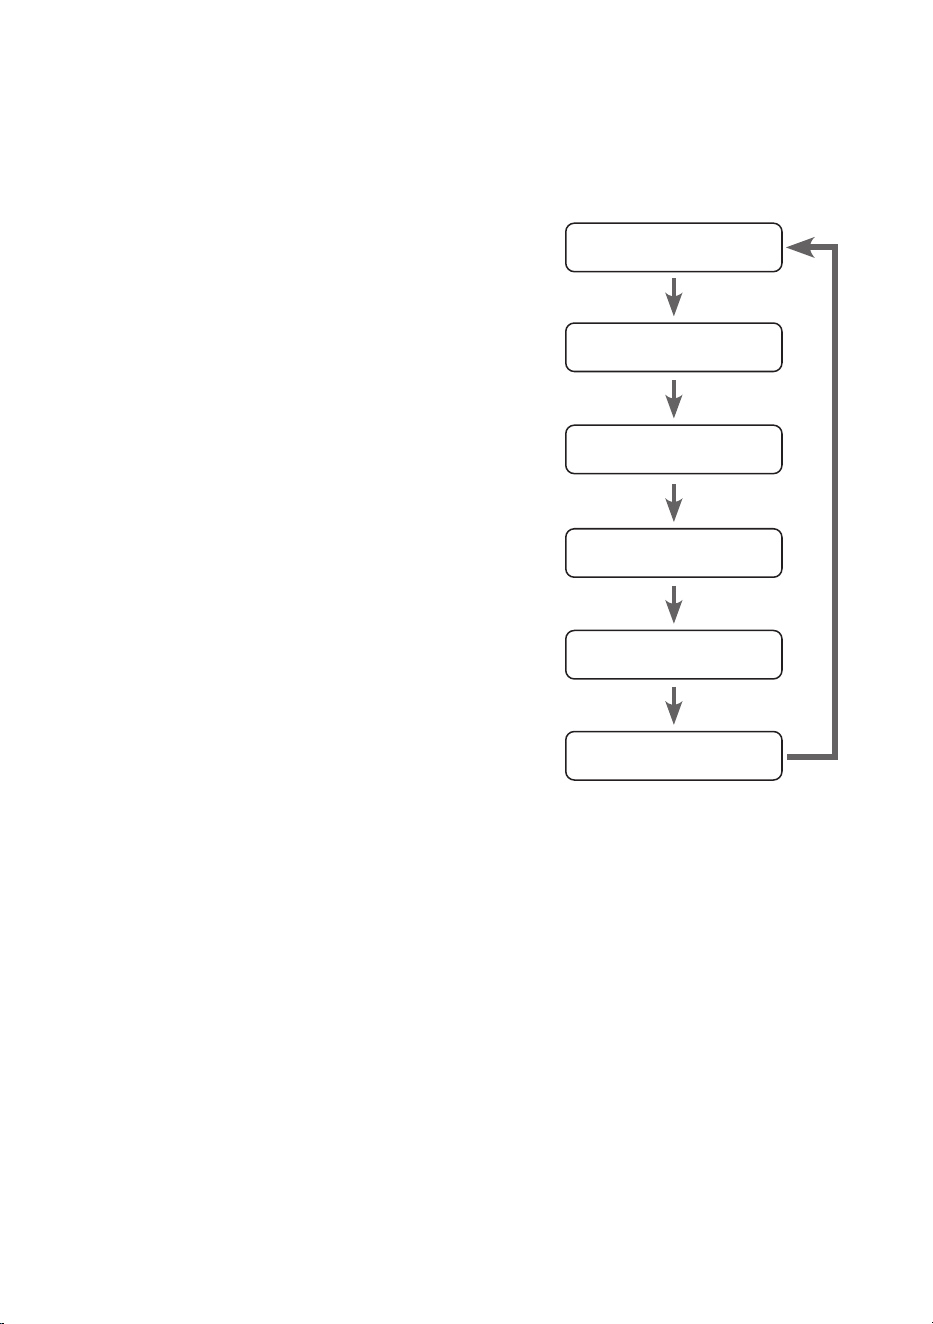
FM Display Modes
Press INFO/MODE to switch through the following display modes.
The information of each display mode is displayed on the lower segment of the display.
Radio Text
This displays a station description.
Programme Type
This describes the “style” or “genre” of the programme
that is being broadcast.
Station Name
When an RDS station is received, the name of that
station will be displayed.
Audio Type
This displays if the station being received is in mono or
stereo.
Time
This displays the current time provided automatically
by the broadcaster.
Time / Date
This displays the date provided automatically by the
broadcaster.
Radio Text
Programme Type
Date
Station Name
Audio Type
Time
16
RC-D327B_IB_Final201006V5.indd 16RC-D327B_IB_Final201006V5.indd 16 06/10/2020 18:1306/10/2020 18:13
CD/MP3 Operation
Press the SOURCE button repeatedly to select CD mode.
Playback
1. Press the OPEN/CLOSE button at the top of the unit and the disc tray will open
automatically.
2. Place the CD/MP3 disc with the label side up into the CD compartment, and then press
OPEN/CLOSE
to close the door.
3. If there is no disc or the disc can’t be read, ‘No Disc’ will show on the display.
4. The total number of tracks will display on the display, then press SCAN/
to play the
rst track of the CD/MP3 disc automatically.
To Pause Playback
1. Press SCAN/ to pause the playback. ‘PAUSE’ will show on the display.
2. To resume playback, press
again.
To Stop Playback
Press /ENTER to stop playback.
Skipping to Another Track
• Press to skip to beginning of the current track or the previous track.
• Press
to skip forward to the next track.
Fast Forward and Fast Reverse
• Press the buttons to fast backward or forward on the current track.
• To resume playback, release the
buttons.
Selecting an Album (MP3)
Press FOLDER/RECALL to select an album when playing an MP3 CD.
• CD-ROM, CD-I, CDV, VCD, DVD or computer CDs are not possible for playback.
• CDs encoded with copyright protection technologies by some record companies may be unplayable
by this unit.
17
RC-D327B_IB_Final201006V5.indd 17RC-D327B_IB_Final201006V5.indd 17 06/10/2020 18:1306/10/2020 18:13

Repeat Playback
For CD Mode
1. Press INFO/MODE once, ‘Rep1’ will show on the display. The CD will play the current
track repeatedly.
2. Press INFO/MODE twice, ‘RepA’ will show on the display. The CD will play all tracks
repeatedly.
3. Press INFO/MODE three times, ‘Rand’ will show in the display. The CD will play all tracks
randomly.
4. Press INFO/MODE once more and the repeat function will turn o.
For MP3 Mode
1. Press INFO/MODE once, ‘Rep1’ will show on the display. It will play the current le
repeatedly.
2. Press INFO/MODE twice, ‘RepF’ will show on the display. It will play all les in the
current folder repeatedly.
3. Press INFO/MODE three times, ‘RepA’ will show on the display. It will play all les
repeatedly.
4. Press INFO/MODE four times, ‘Rand’ will show in the display. It will play all les
randomly.
5. Press INFO/MODE once more and the repeat function will turn o.
Programme Setting
The user can program up to 20 tracks in CD mode or in MP3 mode in any desired order.
1. Make sure the disc is not playing.
2. Press MENU/PRESET/CLOCK to enter programme mode.
3. Press the
buttons to select the track that you want to preset.
4. Press MENU/PRESET/CLOCK to conrm the track.
5. Repeat steps 2-4 to program more tracks. Once it is completed, press the SCAN/
button to start playback of the programmed tracks.
Programme Cancel
Press /ENTER twice, or open the CD tray door and close it again to erase the memory.
18
RC-D327B_IB_Final201006V5.indd 18RC-D327B_IB_Final201006V5.indd 18 06/10/2020 18:1306/10/2020 18:13
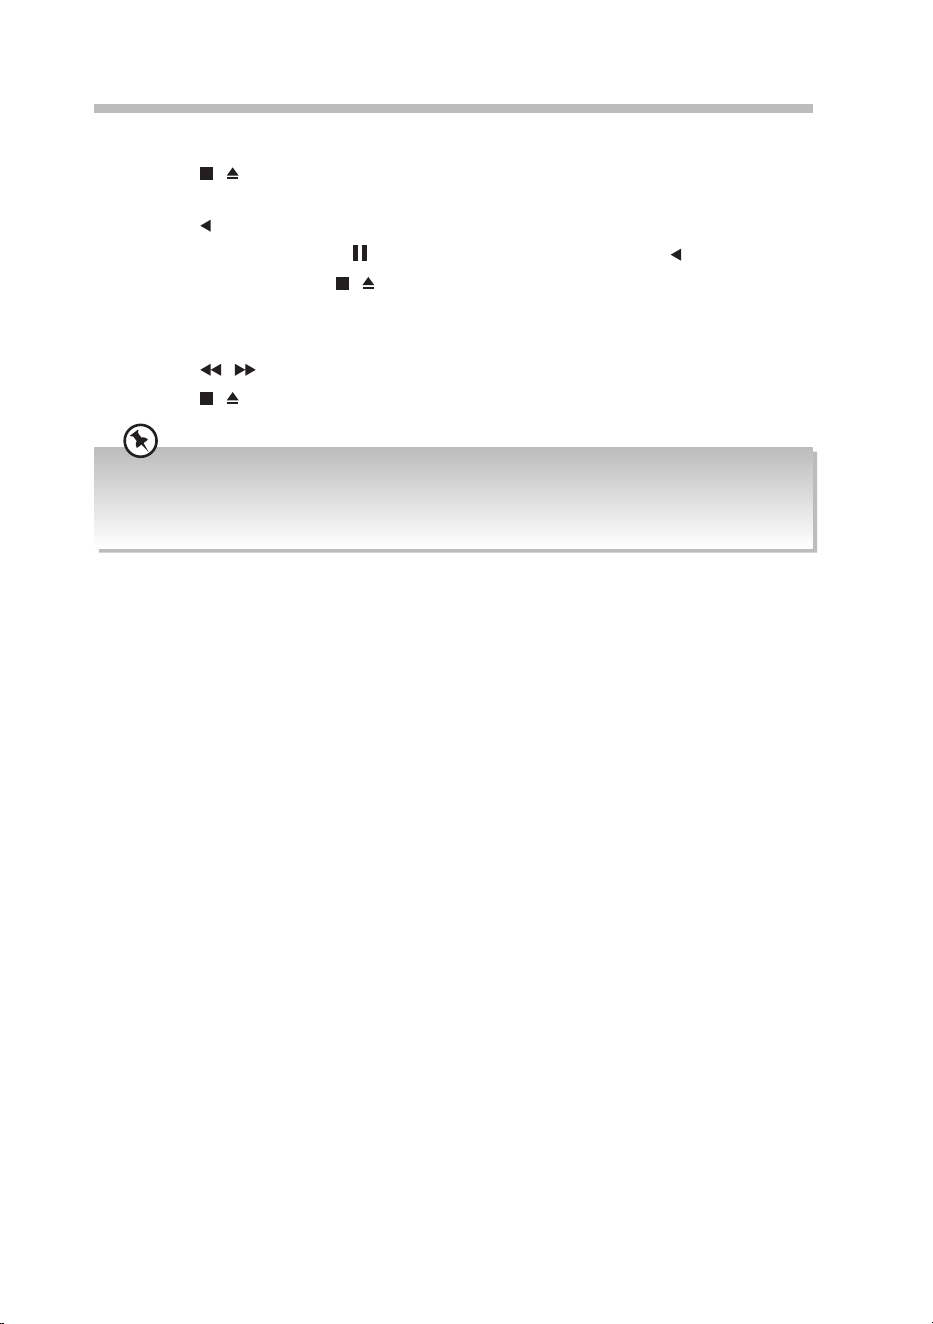
Cassette Playback
1. Press SOURCE button repeatedly to select TAPE mode.
2. Press the
/
button to open the cassette door. Insert a cassette and close the cassette
door.
3. Press the
button to start playback.
4. To pause playback, press the
button. To resume playback, press the button again.
5. To stop the tape, press the
/
button.
Fast Forwarding/Rewinding
1. Press the / buttons until you reach your desired passage.
2. Press the
/ button to stop fast forwarding/rewinding.
• The keys are automatically released at the end of a tape and the unit is switched o (unless the PAUSE
mode has been activated).
• During fast forwarding/rewinding, the key will not be released at the end of a tape. To switch o the
set, make sure the cassette keys are also released.
19
RC-D327B_IB_Final201006V5.indd 19RC-D327B_IB_Final201006V5.indd 19 06/10/2020 18:1306/10/2020 18:13
AUX Operation
There is AUX IN socket located at the top of the unit. Analogue audio sound signals from
other sources can be connected to the unit through the socket.
1. Connect to another audio device using the AUX IN socket via a 3.5 mm stereo audio
cable.
2. While in the ON mode, press the SOURCE button repeatedly to select AUX mode.
3. Press Volume +/– button to adjust the volume to your desired level.
4. In AUX mode, operate your audio device directly for playback features.
Bluetooth® Operation
Pairing the unit with a Bluetooth® device to listen to music:
1. Press the SOURCE button repeatedly to select Bluetooth mode. “BLUETOOTH” will
show on display.
2. The unit will enter pairing mode, and then “Pairing” will ashing on the display. After
hearing a beep tone, you may start pairing.
3. Activate your Bluetooth® device and select the search mode.
4. Select RC-D327B” and enter “0000” for the password if necessary. “Connected” will
show on display.
5. To disconnect the Bluetooth® function,
• Switch to another function on the unit or disable the function from your Bluetooth®
device. The unit will make a beep sound.
• Press and hold SCAN/
button.
If your Bluetooth® device supports A2DP, play music via your device.
• To pause/resume playback, press SCAN/
.
• To skip to a track, press
.
• Press Volume +/– button to increase or decrease the volume.
• The operational range between the unit and the device is approximately 8 metres.
• If the signal strength is weak, your Bluetooth® receiver may disconnect, but it will re-enter pairing
mode automatically.
• Compatibility with all Bluetooth® devices is not guaranteed.
• Make sure no cable is inserted in the AUX IN socket before or when using the BLUETOOTH mode.
• If a cable is inserted in the AUX IN socket, you cannot select BLUETOOTH mode.
• If a cable is inserted in the AUX IN socket while using the BLUETOOTH mode, the BLUETOOTH
mode will be disconnected and changed to AUX mode.
20
RC-D327B_IB_Final201006V5.indd 20RC-D327B_IB_Final201006V5.indd 20 06/10/2020 18:1306/10/2020 18:13
Maintenance
Cleaning the Unit / Cassette Compartment
Ensure the unit is fully unplugged from the mains socket before cleaning.
• To clean the unit, wipe the case with a slightly moist, lint-free cloth.
• Do not use any cleaning uids containing alcohol, ammonia or abrasives.
• Do not spray an aerosol at or near the unit.
• Use a soft brush to brush o any dust or dirt from the cassette compartment heads.
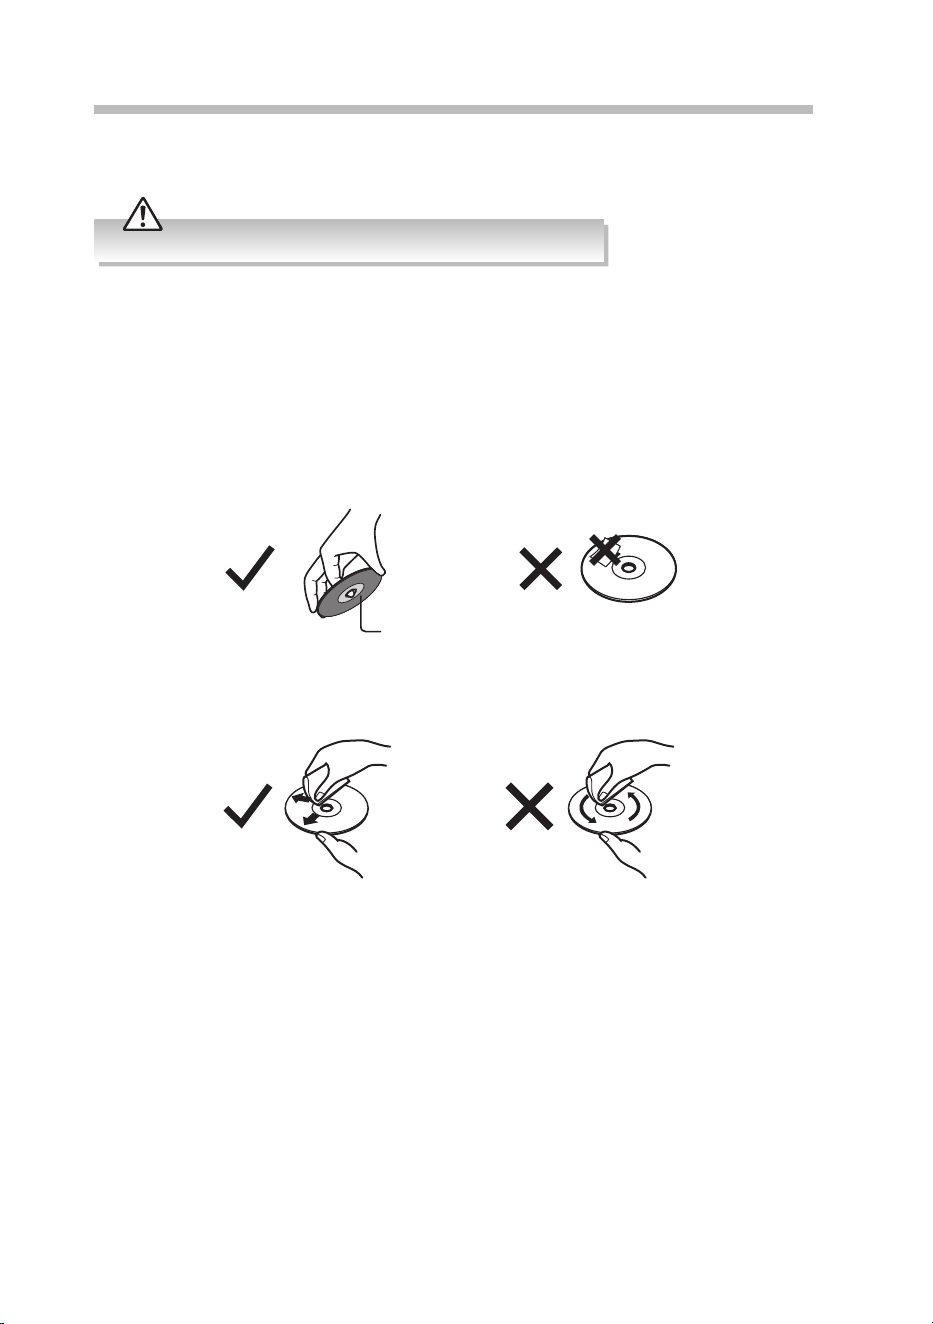
Handling Discs
• Do not touch the playback side of the disc.
• Do not attach paper or tape to the disc.
Cleaning Discs
• Fingerprints and dust on the disc cause picture and sound deterioration. Wipe the disc
from the centre outwards with a soft cloth. Always keep the disc clean.
• If you cannot wipe o the dust with a cloth, wipe the disc lightly with a slightly
moistened cloth and nish with a dry cloth.
• Do not use any type of solvent such as thinner, benzine, commercially available
cleaners or antistatic spray. They may damage the disc.
Storing Discs
• Do not store discs in places subjected to direct sunlight or near heat sources.
• Do not store discs in places subjected to moisture and dust such as a bathroom or near
a humidier.
• Storing discs vertically in a case, stacking discs or placing objects on discs outside of
their cases may cause warping.
Playback side
21
RC-D327B_IB_Final201006V5.indd 21RC-D327B_IB_Final201006V5.indd 21 06/10/2020 18:1306/10/2020 18:13
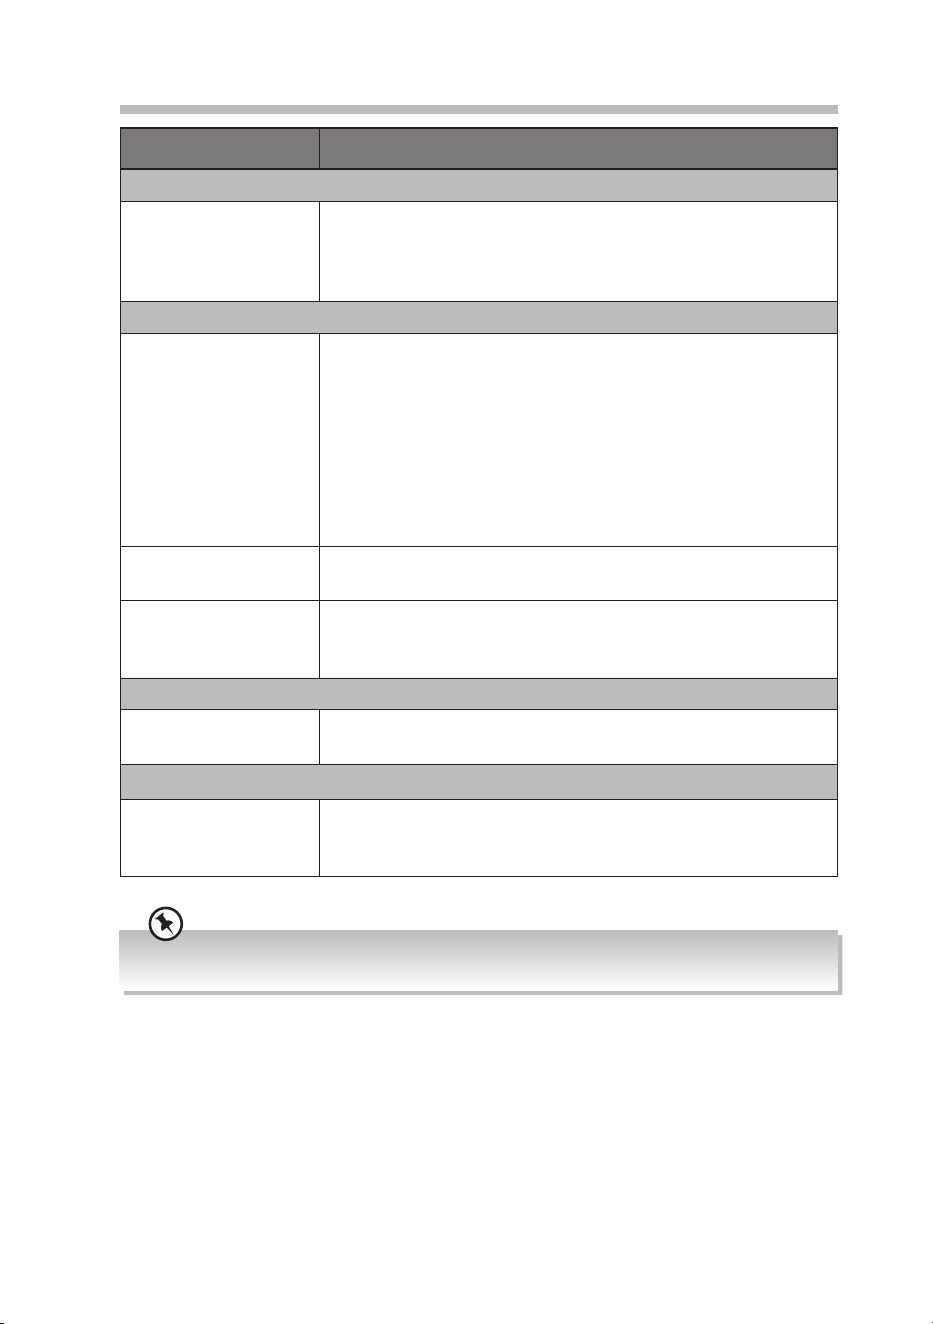
Hints and Tips
Problem Description
Cassette
Poor cassette sound
quality
• Dust or dirt on the heads, etc. Clean cassette compartment
parts, see Maintenance.
• Use of incompatible cassette types (METAL or CHROME). Only
use NORMAL (IECI) for recording.
CD
The disc does not
play
• There is no disc inside the unit (“NO DISC” appears on the
display).
• Insert the disc correctly with the label side facing up.
• Clean the disc.
• PAUSE mode may be activated, deactivate it.
• A non-valid disc has been inserted.
• Condensation may have formed inside the unit due to a
sudden change in temperature. Wait about an hour for it to
clear and try again.
Disc skips • Make sure the unit is on a secure spot. Vibrations or jarring
can cause the disc to skip.
File from Media
storage device does
not play
• Check the le format.
• This product only supports MP3 File formats.
Radio
Desired station not
found
• Weak signal. Use the Manual Tune function.
Bluetooth®
I cannot nd “RC-
D327B” on my
Bluetooth® device
• Ensure the Bluetooth® function is activated on your
Bluetooth® device.
If any functional abnormality is encountered, unplug the unit from the mains socket and reconnect it
again.
22
RC-D327B_IB_Final201006V5.indd 22RC-D327B_IB_Final201006V5.indd 22 06/10/2020 18:1306/10/2020 18:13
Product Fiche and Specifications
Brand JVC
Model RC-D327B
Bluetooth® Bluetooth®
Version
5.0
Maximum
transmitted
power
4 dBm
Frequency
band
2402 - 2480 MHz
Output Speaker Power 2 W RMS × 2
Standby Power < 1W
Frequency Response 50 Hz - 16 kHz
Speakers Total Impedance 4 Ω
Disc Format CD, CD-R, CD-RW, MP3
Frequency Range FM: 87.5 – 108 MHz
DAB: 174.928-239.2 MHz
Net Weight 1.86 kg
Dimensions 340 mm (W) × 227 mm (D) × 155 mm (H)
Mains Adapter
Manufacturer’s name and address Shenzhen Guijin Technology Co., Ltd.
301, No. 72, Songxin Industrial, Hongxing
Community, Songgang Street, Baoan,
Shenzhen, 518105, P.R. China
Model Number AK18WG-1200150B
Input Voltage and Frequency 100-240 ~50/60 Hz 0.5A
Output Voltage DC 12.0 V
Output Current 1.5 A
Output Power 18.0 W
Average Active Eciency 85.1%
Eciency at Low Load (10%) 76.5%
No-Load Power Consumption 0.09 W
Features and specications are subject to change without prior notice.
23
RC-D327B_IB_Final201006V5.indd 23RC-D327B_IB_Final201006V5.indd 23 06/10/2020 18:1306/10/2020 18:13

IB-RC-D327B-201006V5
The product is distributed and warranted exclusive by DSG Retail Ltd.
“JVC” is the trademark of JVCKENWOOD Corporation,
used by DSG Retail Ltd. under license.
For Help and Support Call
UK: 0344 561 1234
Ireland: 1890 818 575
Hereby, DSG Retail Ltd., declares that this product is in
compliance with Directive 2014/53/EU. The full text of the EU
declaration of conformity is available at the following internet
address: https://www.teamknowhow.com
Click on SEARCH and enter the model number.
Declaration of Conformity
RC-D327B_IB_Final201006V5.indd 24RC-D327B_IB_Final201006V5.indd 24 06/10/2020 18:1306/10/2020 18:13