
INSTANT
®
FROTHER STATION
USER MANUAL

Welcome to your new Instant™ Frother Station!
M
ake your morning a little more amazing. Be your own barista and create
c
afé-quality
drink
s.
We hope you fall in love with your Frother Station, and enjoy it in your
kitchen for years to come.
Download the
Instant Brands
®
Connect app
to access 1000+
recipe ideas
Welcome

CONTENTS
Important safeguards 2
What’s in the box 6
Before you froth 7
Using your Instant Frother Station 8
Frothing milk 12
Care, Cleaning and Storage 17
Troubleshooting 18
Learn more 20
Warranty 21

2
User Manual
3
User Manual
IMPORTANT
SAFEGUARDS
READ ALL INSTRUCTIONS
Placement
DO operate the appliance on a stable, noncombustible, level surface.
DO NOT place the appliance on or near a gas or electric burner, or in
an oven.
General Use
Spilled liquids from this frother can cause serious burns. Keep
appliance and cord away from children. Never drape cord over
edge of counter, never use outlet below counter, and never use
with an extension cord. A short power-supply cord is used to
reduce the risk resulting from it being grabbed by children,
becoming entangled in, or tripping over a longer cord.
DO NOT use this frother outdoors.
DO NOT let the frother operate without milk.
DO NOT use the appliance for anything other than its intended use.
Not for commercial use.
DO regularly inspect the appliance and power cord.
DO fill the pitcher with only water, milk or non-dairy milk
alternatives. Never fill the pitcher with oil or other liquids.
DO NOT leave the appliance exposed to sun, wind, and/or snow.
DO operate and store the appliance above 0°C.
DO NOT leave the appliance unattended when in use.
IMPORTANT
SAFEGUARDS

2
User Manual
3
User Manual
DO NOT allow children operate the appliance; close supervision is
required when any appliance is used near children.
DO NOT let children play with this appliance. To avoid the risk
of personal injury or damage to property, DO NOT open the top
cover during the foaming, frothing or warming process. There are
extremely hot liquids within the unit during the foaming, frothing
and warming process.
DO NOT touch hot surfaces. Use the handle.
The use of accessory attachments not recommended by the
appliance manufacturer may cause injuries.
Extreme caution must be used when moving an appliance containing
hot liquids.
Care and Storage
DO unplug from outlet when not in use before cleaning. Allow the
appliance to cool before putting on or taking off parts, and before
cleaning the appliance.
DO NOT store any materials in the frother pitcher when not in use.
Power Cord
This appliance has an earthed plug. To reduce the risk of electric
shock:
DO NOT attempt to modify the plug.
Electrical Warning
The unit contains electrical components that are an electrical shock
hazard. Failure to follow these instructions may result in electric
shock. To protect against electrical shock:
DO NOT use with power converters or adapters, timer switches or
separate remote-control systems.

4
User Manual
5
User Manual
DO disconnect the appliance by first pressing the Start/Cancel
button, and then grasping the plug and pulling from the outlet. Never
pull from the power cord.
DO keep appliance and cord away from children.
To reduce the risk of fire or electric shock, DO NOT remove the
bottom cover. No user-serviceable parts inside. Repair should be
done by authorised service personnel only.
DO regularly inspect the appliance and power cord.
DO NOT operate the appliance if the power cord or plug is damaged,
or after the appliance malfunctions or is dropped or damaged in any
manner. For assistance, contact Customer Care by email at
[email protected] or by phone at 0393 655 100
DO NOT attempt to repair, replace or modify components of the
appliance, as this may cause electric shock, fire or injury, and will
void the warranty.
DO NOT tamper with any of the safety mechanisms, as this may
result in injury or property damage.
To protect against electrical shock DO NOT immerse power cord,
plug or the appliance the appliance in water or other liquid.
DO plug this appliance into an earthed outlet ONLY.
DO NOT use the appliance in electrical systems other than
220-240V ~ 50-60Hz.
If a long detachable power-supply cord or extension cord is used:
- The marked electrical rating of the detachable power-supply cord
or extension cord should be at least as great as the electrical rating
of the appliance.
4
User Manual
5
User Manual
- The longer cord should be arranged so that it will not drape over
the countertop or tabletop where it can be pulled on by children or
tripped over.
SAVE THESE
INSTRUCTIONS
Failure to adhere to safety instructions may result in personal
injury and/or property damage and may void your warranty.

6
User Manual
7
User Manual
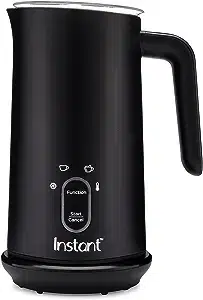
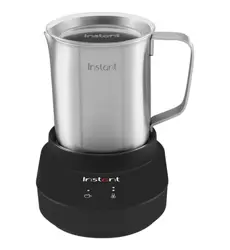
WHAT’S IN THE BOX
Instant Frother Station
Illustrations are for reference only and may differ from the actual product.
Remember to recycle!
We designed this packaging with sustainability in mind. Please recycle
everything that can be recycled where you live. Be sure to keep this
User Manual for reference.
Control Panel
Stainless Steel Pitcher
Lid
Frothing Whisk
Frothing Base
Stay-cool
Pitcher Handle

6
User Manual
7
User Manual
BEFORE YOU FROTH
Initial set up
1. Pull the Instant Frother Station and all parts out of the box.
2. Remove all packaging.
3. Place your frother on a dry, stable, level surface.
Initial washing
1. Wash the frothing whisk, pitcher and lid in warm soapy water,
then rinse and dry thoroughly. You can also clean these parts on
the top rack of the dishwasher.
2. With a barely damp cloth, wipe down the frother base and
control panel.
8
User Manual
9
User Manual
USING YOUR INSTANT FROTHER STATION
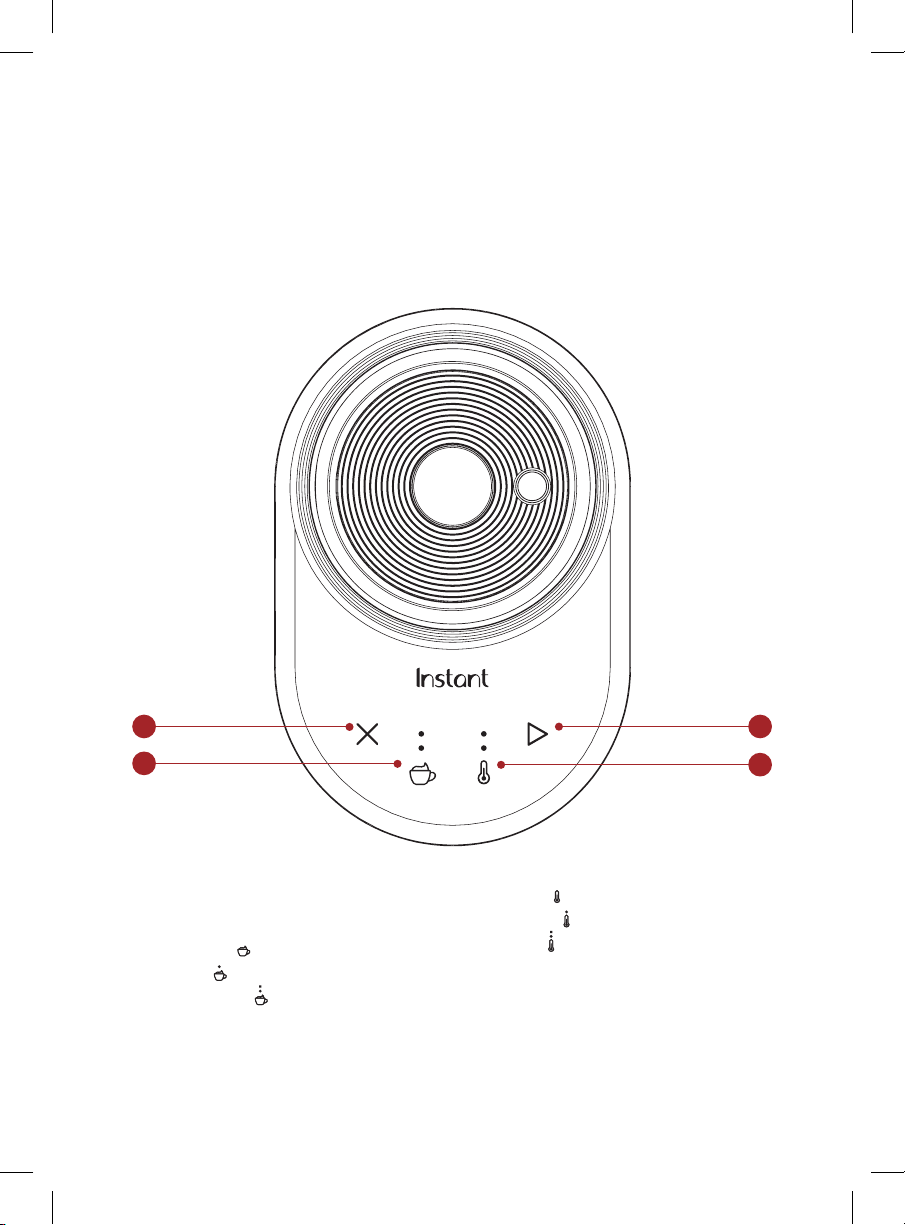
Control panel
Your Instant Frother Station was designed with an easy-to-use control
panel and 4 simple buttons.
1
3
2
4
1. Cancel
2. Start
3. Foam options
• No Foam
(Stir only)
• Foam (Low Speed)
• Extra Foam (High Speed)
4. Temperature level
• Cool
(Heat OFF)
• Warm
• Hot

8
User Manual
9
User Manual
Plugging in your Instant Frother Station
Once you’ve followed the initial setup and washing instructions, plug
the frother base power cord into an outlet.
• The control panel buttons will light up then enter Ready mode.
Default settings for Foam and Temperature levels will light up.
• After 5 minutes of inactivity, the frother enters Standby mode. The
control panel will dim.
• To re-enter Ready mode, press any button or place/remove the
frothing pitcher on/from the frother base.
Sound settings
Turn sound off
1. Press and hold and buttons together for 3 seconds.
2. Both and
indicator lights blink once. Sound is turned off and
the frother returns to Ready mode.
Turn sound on
1. Press and hold and buttons together for 3 seconds.
2. Both and indicator lights blink twice. Sound is turned on and
the frother returns to Ready mode.
10
User Manual
11
User Manual
Temperature and Foam Settings
Your Instant Frother Station has been designed to help you personalise
your foam at the touch of a button. The 3 temperature settings and
3 foam settings can be combined to create up to 9 different programs
for your perfect froth.
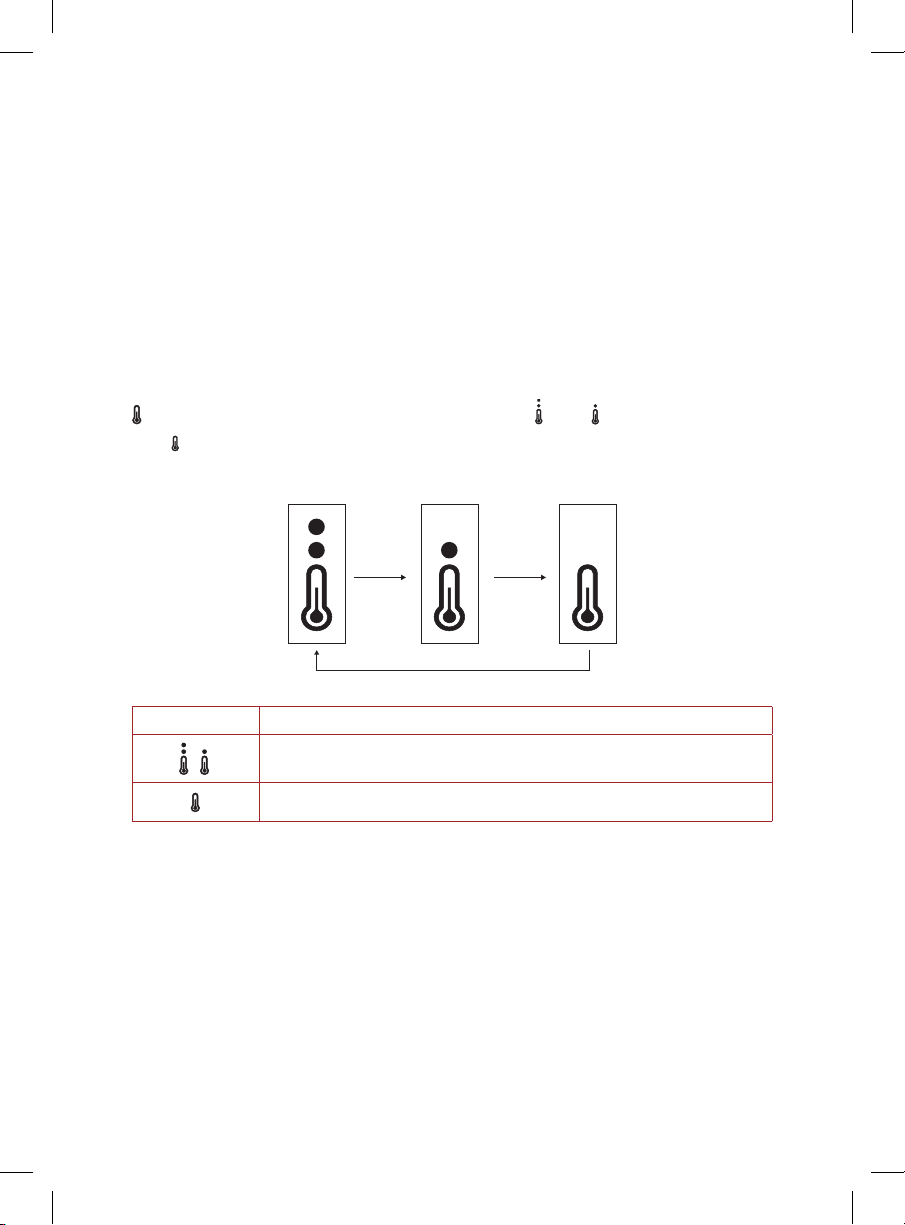
Temperature
The temperature setting lets you choose whether to froth up warm
foam and heated milk, or create cold foam for iced coffee and matcha.
To set or change your temperature level before frothing, press the
button to cycle through the three options:
Hot, Warm
and
OFF/Cold.
Hot Warm OFF/Cold
Temperature Try using it for…
Cappuccino, Latte, Mocha, Flat white, Hot chocolate,
heated milk
Chocolate milk, Iced coffee, Iced matcha
Drinks mentioned are only suggestions. Experiment with different settings and drinks, to your
personal taste.
10
User Manual
11
User Manual
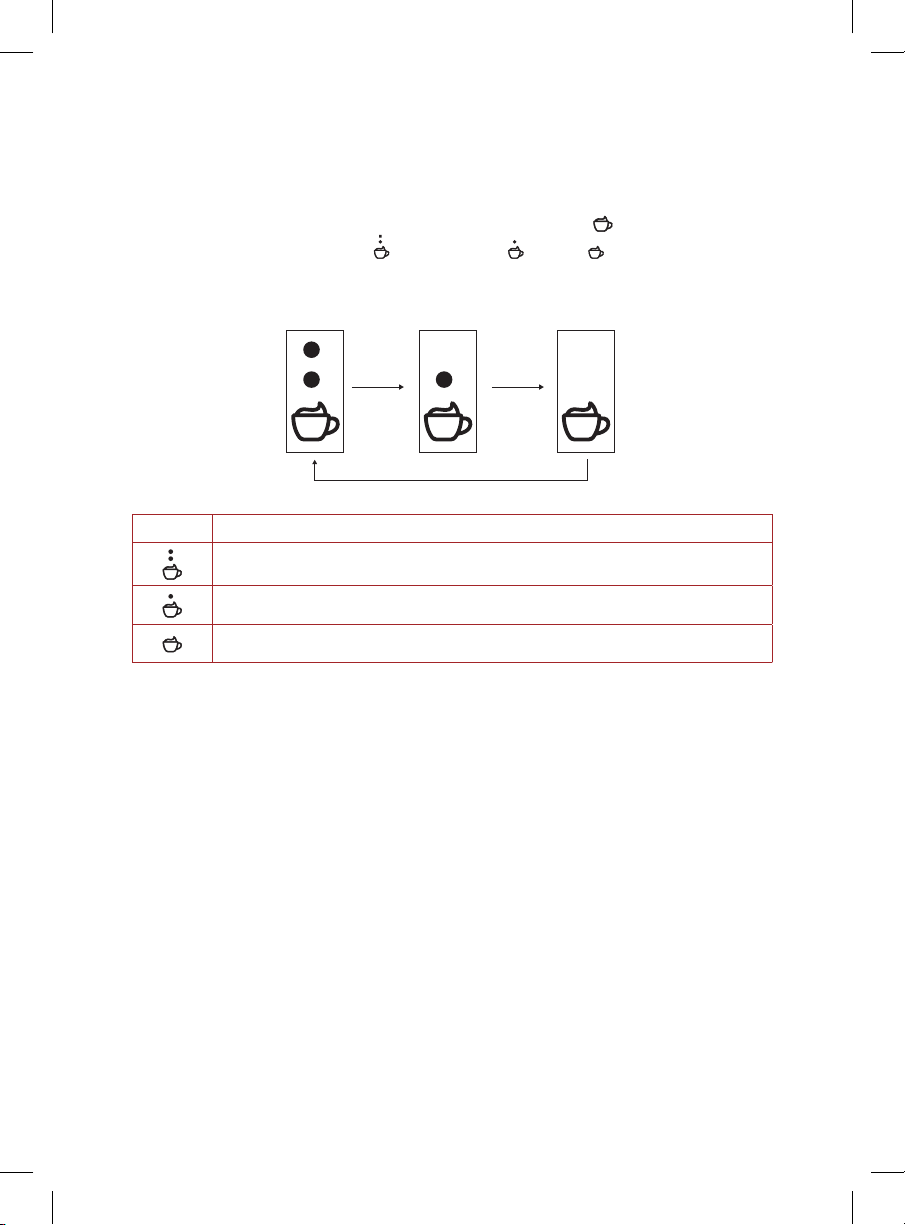
Foam level
With adjustable foam settings, you can froth up a little foam or a lot,
or turn foaming off to gently stir ingredients into heated milk. To set
or change the foam level before frothing, press the
button to cycle
through the three options:
Extra Foam, Foam, OFF/Stir Only.
Extra Foam Foam
OFF/Stir Only
Foam Try using it for…
Cappuccino, Macchiato
Latte, Matcha
Hot Chocolate, Chocolate milk, Chai, Flat white, Café au lait
Drinks mentioned are only suggestions. Experiment with different settings and drinks, to your
personal taste.

12
User Manual
13
User Manual
FROTHING MILK
1. Place frothing whisk securely into the frothing pitcher. Position
the flat end of the frother whisk over the rod at the bottom of the
frothing pitcher and push down until it is secure.
Do not operate the Frother Station without a frothing whisk installed into
the pitcher, as this can cause uneven heating and burning.
2. Pour fresh, cold milk of choice into the frothing pitcher between
the MIN and MAX frothing indicator lines. See “Milk Measurements”
on page 12.
Do not overfill the pitcher. Overfilling may cause the milk frother to overflow
when using a foam setting.
3. Cover the frothing pitcher with the lid.
4. Place the frothing pitcher securely on the frother base.
5. Press Start button to begin frothing with default or previously
used settings, or
6. Change the and settings and then press . See “Temperature
and Foam Settings” on page 9.
7. The frother will “beep” one time and begin the frothing cycle.
To stop frothing, press the Cancel button or remove the
frothing pitcher.
8. When the milk has reached the correct temperature and thickness
the frother will stop, return to Ready mode and “beep” one time.
9. Carefully remove the frothing pitcher from the frother base using
the stay-cool frother handle. Serve the foam with a spoon or pour
directly from the spout.
10. Enjoy your frothy beverage!
The frothing pitcher must always be in place on the frother base for your Instant
Frother Station to operate. Removing it at any time before or during use will
automatically stop frothing and the frother returns to Ready mode.
12
User Manual
13
User Manual
Be careful: Frothing reaches high temperatures. DO NOT touch the
frother pitcher or frother base during or immediately after the
frothing process as both will be very hot. T
ouching hot surfaces may
result in burns, other personal injury and/or property damage.
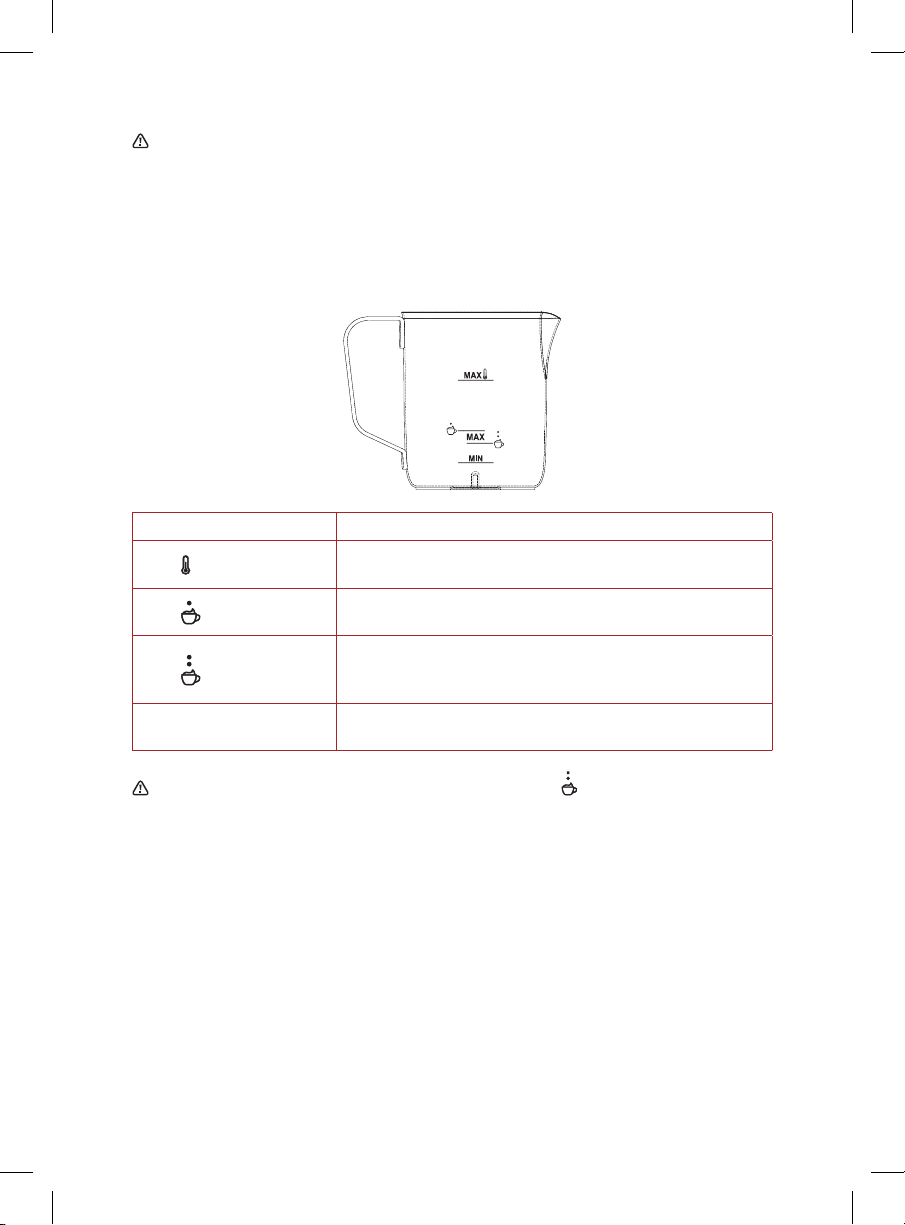
Milk Measurements
Milk Level Marking Components
MAX
500ml
Maximum level for stirring milk
MAX
250ml.
Maximum level for milk frothing at Foam setting
MAX
200ml
Maximum level for more milk frothing at
Extra Foam setting
MIN
100ml
Minimum level for milk heating and frothing
Be careful: To avoid overflow when using the Extra Foam setting,
do not add more than 200ml milk to the frothing pitcher.

14
User Manual
15
User Manual
Frothing Tips
Tip Details
Cold milk is best • Using the coldest, freshest milk will almost always
produce the best foam.
• When frothing, millions of tiny air bubbles are
introduced into the liquid. The longer it takes to heat
up, the more air can be infused into the liquid. The
end result is silky rich foam and less chance
of scalding.
Not all dairy-free
milks produce foam
• Milk with lots of fat will form a thick, creamy foam.
• Milk with less fat and more protein will create a light,
airy foam.
• Some plant-based milks are too watery to create the
best results. See “Types of Milk” on the following page.
Infuse your foam
with flavor
• Before frothing, add aromatic spices to the pitcher,
like cinnamon, cardamom or nutmeg, or other
fragrant items like lavender.
Let the frother rest
• When frothing up large batches of foam, we suggest
letting your frother rest for 3–4 minutes after every
2 frothing cycles to ensure it continues to perform at
its best.
Creating latte art
• As soon as the frother finishes whipping up your
warm foam, lift the pitcher off the base (lid on) and
gently swirl the pitcher. This helps give your latte
foam a glossiness ideal for latte art. Experiment with
different milks for the best results.

14
User Manual
15
User Manual
Types of Milk
As you begin using your Instant Frother Station you will discover
that different milk types and brands produce different types of
foam. Depending on your personal taste and desired results, you can
experiment with dairy, nut and plant-based milks. Some dairy free milk
brands offer barista specific formulas, these can produce better foam
compared to the standard formula.
Milk Type Froth Description Notes
Dairy Milk - Whole
Milk
The ideal overall frothing milk.
Creates a rich, creamy foam
with tiny micro bubbles.
May take a bit longer
to froth. Best if served
immediately as it can
deflate quickly. Good for
latte art.
Dairy Milk -
Skimmed Milk
Froths up quickly creating light,
airy foam that holds together a
long time, with larger bubbles.
Ideal for drinks with
a lower milk-to-coffee
ratio. Good for latte art.
Dairy Milk - Semi-
skimmed
Performs very similarly to whole
milk, creating rich, stable foam.
Froths up quickly.
A great, lower-fat
substitute to whole milk
froth. Good for latte art.
Oat Milk One of the best dairy-free
options. Creates a very rich,
sweet and creamy foam.
Try different brands to
find the best results.
May work for latte art.
Soy Milk A great dairy-free option.
Froths easily with creamy foam
comparable to dairy.
Froth does not pour
easily. Not ideal for latte
art. May curdle when
added to hot coffee.
Good for cold coffee.
Almond Milk Contains more fat than most
plant-based milks and froths up
well. A dense, but light foam.
Froths best at room
temperature.
Coconut Milk Produces very mixed results.
Will only produce cold foam,
without heat. Some brands froth
well, and others are too watery
to perform.
Choose carton milk over
canned for best results.
Cold foam only but a
great milk for heated
milk drinks.
Rice/Cashew/
Macadamia/
Hemp
Often too watery to produce
good foam or foam that lasts.
Try one of our suggested milks
above or experiment with
different brands to find one that
works best.
Good dairy-free options
for tasty cold or heated
milk beverages without
foam.
16
User Manual
17
User Manual
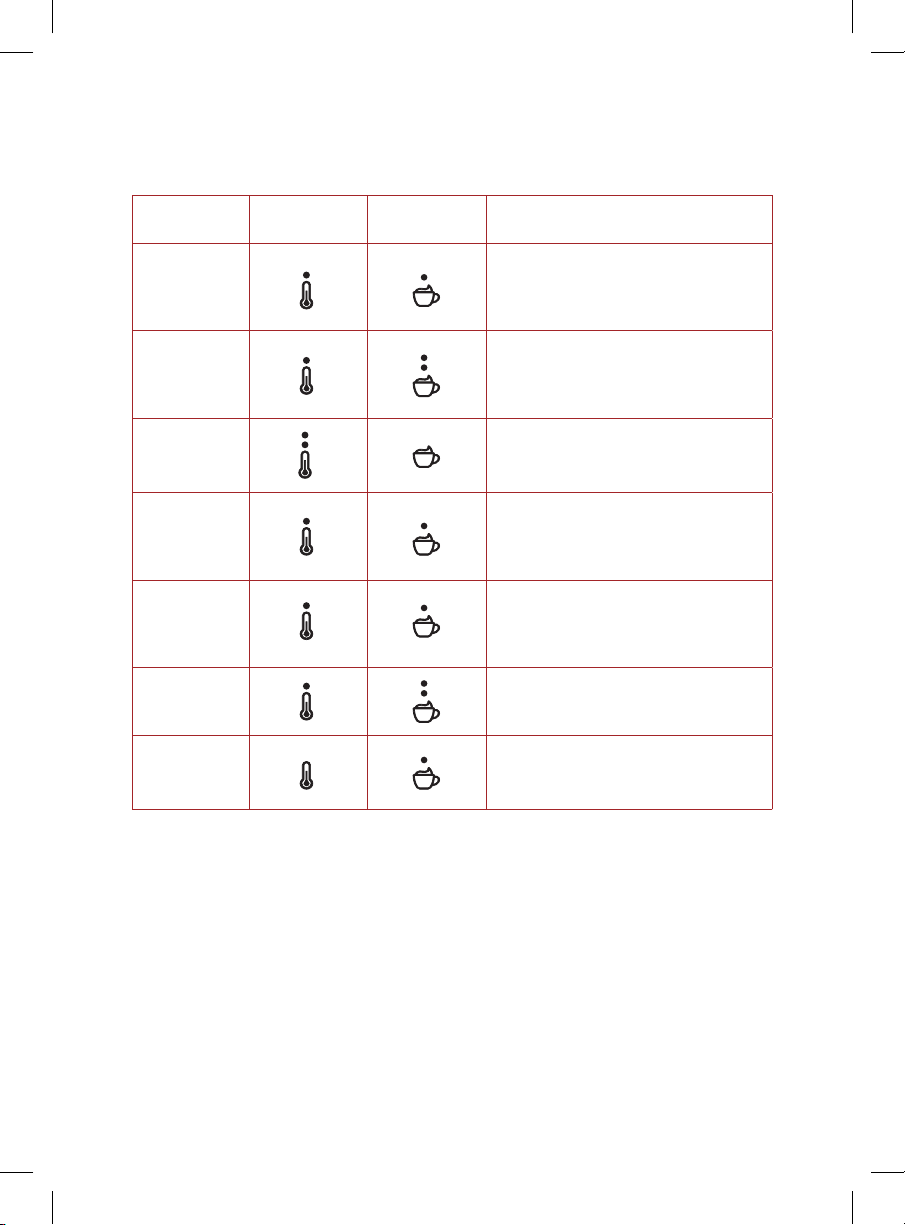
Recipes to try with your Instant Frother Station
Recipe Heat
Setting
Froth
Setting
Method
Latte
Pour a single shot of espresso
and fill 2/3 of the cup with heated
milk, then add a layer of rich milk
foam on the top.
Cappuccino
Mix 1/3 espresso and 1/3 of heated
milk, then finish with 1/3 of
creamy milk foam spooned over
top.
Hot
Chocolate
Blend chipped/melted chocolate
or cocoa powder with heated milk.
Café au lait
Fill a mug 3/4 full with hot coffee,
then top with warm frothed milk
for a creamier version of your
morning brew.
Flat white
Pour a double shot of espresso
into the cup, then add heated milk
to fill the cup and add a dollop of
foam to the top layer.
Macchiato
Top your espresso with an qual
part foam. You can add warm milk
for a Latte Macchiato.
Milkshake
Blend your choice of milkshake
power or syrup with cold milk.

16
User Manual
17
User Manual
CARE, CLEANING AND STORAGE
Your Instant Frother Station pitcher and whisk should be cleaned after
each use to avoid any residue buildup.
Unplug the frother’s power cord from the power outlet and let it cool
to room temperature before cleaning. Never use metal scouring
pads, abrasive powders, or harsh chemical detergents on any of the
frother’s parts.
Let all parts dry thoroughly before each use and before storage.
Parts and accessories Cleaning methods and instructions
Pitcher, lid and whisk Can be removed and washed by hand with dish
soap and warm water or placed in the top rack
of a dishwasher.
Frother base Use a soft damp cloth to clean the outside of
the frother and control panel.
Power cord DO NOT fold power cord when storing.
Be careful: The frother contains electrical components.
To avoid fire, electric shock, other personal injury and/or
property damage:
• DO NOT rinse or immerse the frother base, power cord or plug in
water or other liquids.

18
User Manual
19
User Manual
TROUBLESHOOTING
Problem Possible Cause Solution
Milk is not
frothing
The frothing whisk is not
installed correctly.
• Remove the liquid from
the pitcher.
• Position the square end
of the frother whisk over
the rod at the bottom
of the pitcher and push
down until it is secure.
Milk is too hot. • Use cold, freshly opened milk.
• Do not re-foam already
heated milk. Try a different
kind of milk. See “Types
of Milk” on page 14 for
suggestions.
Adding dense ingredients
like thick syrups can
reduce the amount of
foam produced.
• Consider adding these
ingredients to the heated
milk after frothing instead.
The inside of the pitcher
or the frothing paddle
contains milk residue.
• Clean the pitcher and
frothing whisk. See “Care,
Cleaning and Storage”
instructions on page 16.
Different types and brands
of milk and dairy-free
milk alternatives may
froth differently.
• See “Types of Milk” on
page 14 to experiment with
different milks.
Milk is not
heating
The temperature setting
is not correct.
• Make sure the pitcher is
correctly positioned on the
frother base.
• Increase the heating
temperature setting by
pressing the
button
and selecting a higher
temp option.

18
User Manual
19
User Manual
Problem Possible Cause Solution
Ingredients are
not melting
Ingredients were added
before the milk was heated.
• For best results, warm milk
to desired temperature
then add ingredients/
chocolate.
Ingredients were too large
to melt.
• Keep the ingredients cut
into small pieces — less
than 1/2 inch diameter.
Milk is burned Milk is not whisking/
frothing/stirring correctly.
• Make sure the frothing
whisk is correctly installed
in the pitcher. Position the
square end of the frother
whisk over the rod at the
bottom of the pitcher and
push down until it is secure.
The pitcher was not cleaned
after last use and the milk
residue has scorched.
• Always clean the pitcher
and whisk thoroughly after
each use for best results.
All four LEDs
blink repeatedly
The unit is defective
or damaged.
• Contact Customer Care.
Frother is
overflowing with
milk/foam
There was too much milk
added for the foam setting.
• Do not add milk beyond the
MAX level markings on the
frothing pitcher. See “Milk
Measurements” guide on
page 12.

20
User Manual
21
User Manual
LEARN MORE
There’s a whole world of Instant Frother Station information
and help just waiting for you. Here are some of the most helpful
resources.
Register your product
https://www.instantpot.com.au/pages/product-registration
Contact Consumer Care
[w] www.instantpot.com.au
[ph] 0393 655 100
Instant Brands Connect App with 1000+ recipes
iOS and Android app stores
Join the community
Product specifications
Model Volume Wattage Power Weight Dimensions
MFM-
2000
500 mL
pitcher
600 W 220-240V /
50-60Hz
1 kg cm: 18.9 L X 15.2 W X
16.75 H
@instant.anz

20
User Manual
21
User Manual
WARRANTY
one (1) year limited replacement warranty
statement.
If your product becomes defective due to faulty material or workmanship
within a period of 1 year from the date of purchase, we warrant to do the
following:
For New Zealand Consumers: We will replace the product with a new product, free of charge, or
repair the product at our cost, at our discretion.
For Australian Consumers: Our goods come with guarantees that cannot be excluded under the
Australian Consumer Law. You are entitled to a replacement or refund for a major failure and for
compensation for any other reasonably foreseeable loss or damage. You are also entitled to have
the goods repaired or replaced if the goods fail to be of acceptable quality and the failure does not
amount to a major failure.
YOUR WARRANTY IS SUBJECT TO THE FOLLOWING CONDITIONS:
• DO NOT operate the appliance with a damaged plug or cord, or if the unit has been dropped,
damaged or dropped in water. To avoid the risk of electric shock, do not disassemble or
attempt to repair the appliance on your own. If the supply cord is damaged, it must be replaced
by a qualified electrician in order to avoid a hazard. Incorrect reassembly or repair can cause a
risk of electric shock or injury to persons when the appliance is used.
• The item has not been misused, abused, neglected, altered, modified or repaired by anyone.
• The item has been subjected to fair wear and tear.
• The item has not been used for trade, professional or hire purposes.
• The item has not sustained damage through foreign objects, substances or accident.

22
User Manual
WARRANTY
YOUR WARRANTY DOES NOT COVER:
• Components that are subject to natural wear and tear caused by normal use in
accordance with operating instructions.
• Unauthorised/improper maintenance/handling or overload is excluded from this
warranty.
• For guarantee claims, you will need to submit a proof of purchase in the form of a
valid receipt that displays date and place of purchase.
This warranty does not replace but is in addition to your statutory rights.
This warranty does not apply to accessories supplied with the item.
This warranty applies only to the original purchaser and may not be transferred.
Replacement items will be covered by the limited warranty for the balance of the
warranty period from the date of the original purchase.
PLEASE NOTE:
Only the defective product or parts returned to place of purchase will be
replaced under this warranty.

22
User Manual