
Technical Support and E-Warranty Certificate
www.vevor.com/support
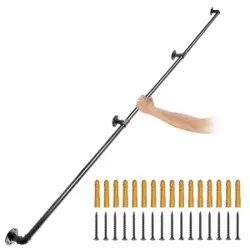
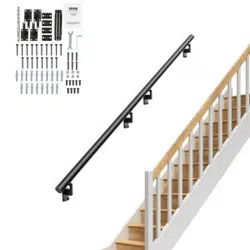
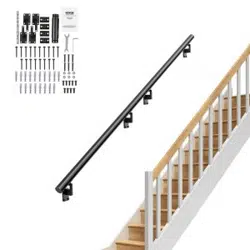
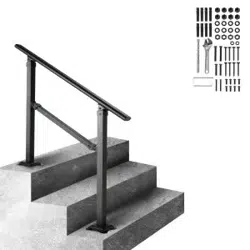
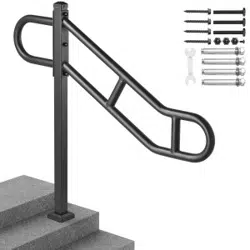
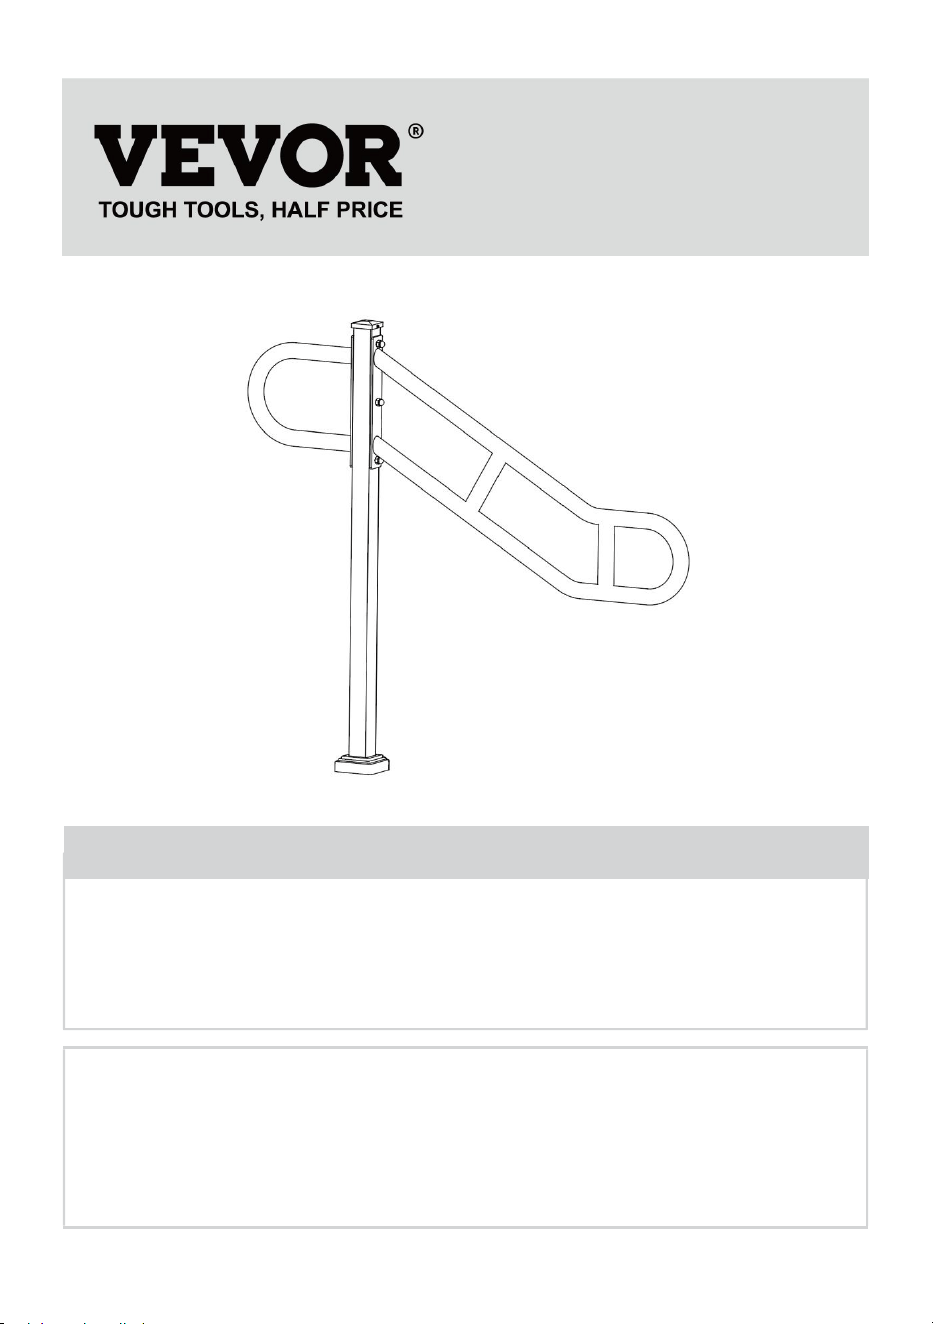
Outdoor Wall-mounted Handrail
MODEL: HR-09
We continue to be committed to provide you tools with competitive price.
"Save Half", "Half Price" or any other similar expressions used by us only represents an
estimate of savings you might benefit from buying certain tools with us compared to the major
top brands and does not necessarily mean to cover all categories of tools offered by us. You
are kindly reminded to verify carefully when you are placing an order with us if you are
actually saving half in comparison with the top major brands.

- 1 -
MODEL: HR-09
Have product questions? Need technical support? Please feel free to
contact us:
Technical Support and E-Warranty Certificate
www.vevor.com/support
NEED HELP? CONTACT US!
This is the original instruction, please read all manual instructions
carefully before operating. VEVOR reserves a clear interpretation of our
user manual. The appearance of the product shall be subject to the
product you received. Please forgive us that we won't inform you again if
there are any technology or software updates on our product.
Outdoor Wall-mounted
Handrail

- 2 -
SAFE INSTRUCTIONS
CAUTION: carefully read instructions and procedures for safe opera
tions. Failure to do so can result in serious injury.
WARNING:
1.Before using the handrail, ensure that the handrail is securely
installed to prevent personal injury and accidents.
2.When using the handrail, do not overload the handrail to avoid personal i
njury or accident.
3. Do not draw, cut, or use sharp objects on the handrail to avoid damage.
4. If you need to disassemble the handrail, please follow the reverse steps
to disassemble it and store it properly.
5. This product is not a toy. Do not allow children to play with this item.
Assembly precautions
1.Assemble only according to these instructions. Improper assembly can c
reate hazards.
2. Wear ANSI-approved safety goggles and heavy-duty work gloves durin
g assembly.
3.Keep assembly area clean and well lit.
4.Keep bystanders out of the area during assembly.
5.Do not assemble when tired or when under the influence of alcohol, drug
s or medication.
6.Product capabilities apply to properly and completely assembled product
only.
7. For additional information regarding the parts listed in the following pag
es, please refer to the Assembly Diagram of this manual. Unwrap and sep
arate all parts in a clean work area.
8. For safety reasons,This hardware is recommended to be installed by 2
people
SAVE THESE INSTRUCTIONS
- 3 -
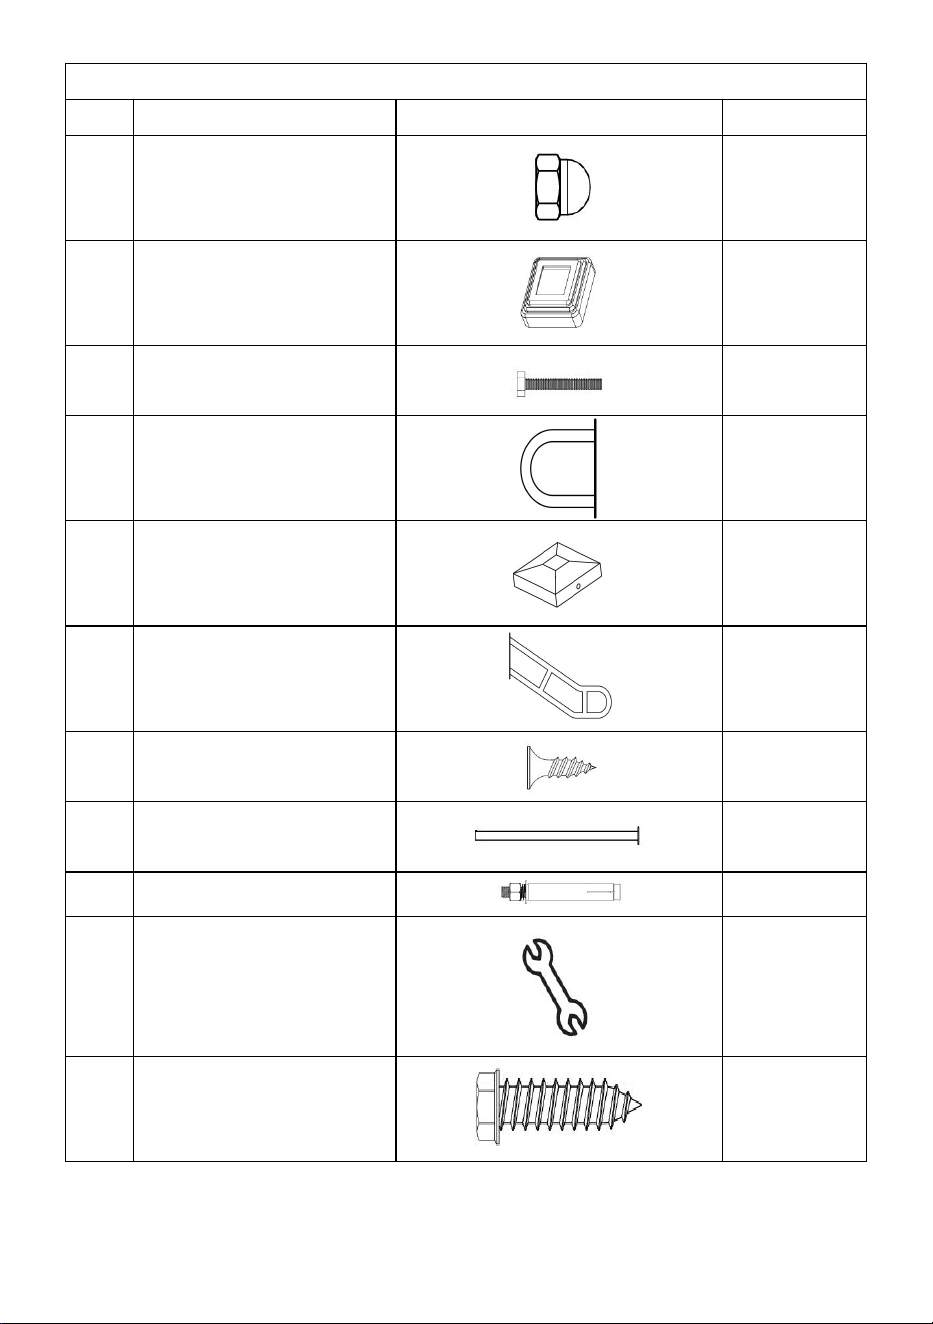
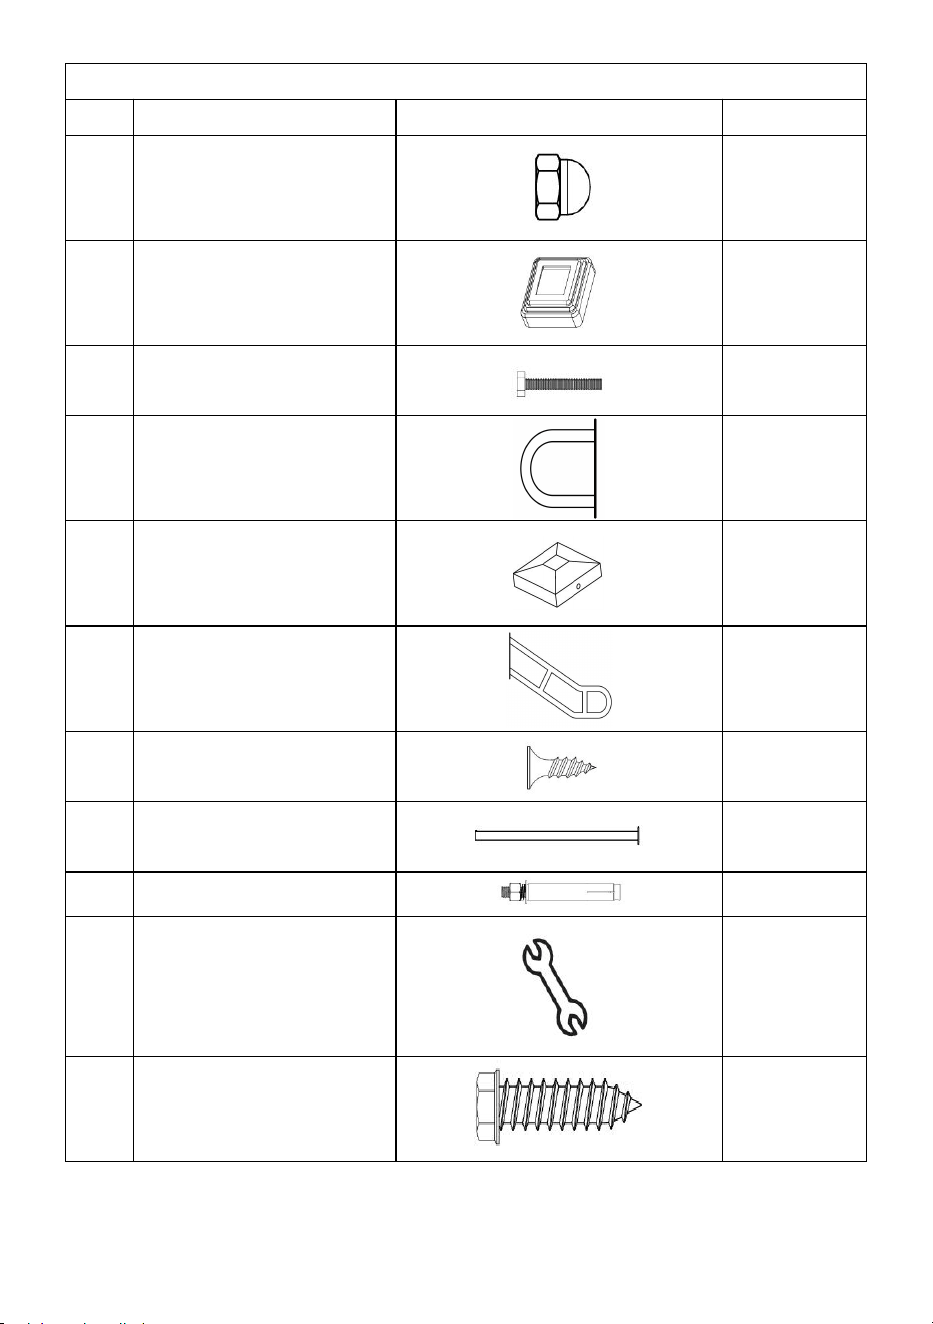
Part List
NO.
Name
Picture
Qty.
A
Nut M8
3
B
Lid
1
C
Screw M8*55
3
D
Short Handrail
1
E
Top Cap
1
F
Long Handrail
1
G
Screw M4*8
1
H
Pillar
1
I
Expansion Screw
4
J
Wrench
1
K
Screw M6*40
4

- 4 -
Product Installation
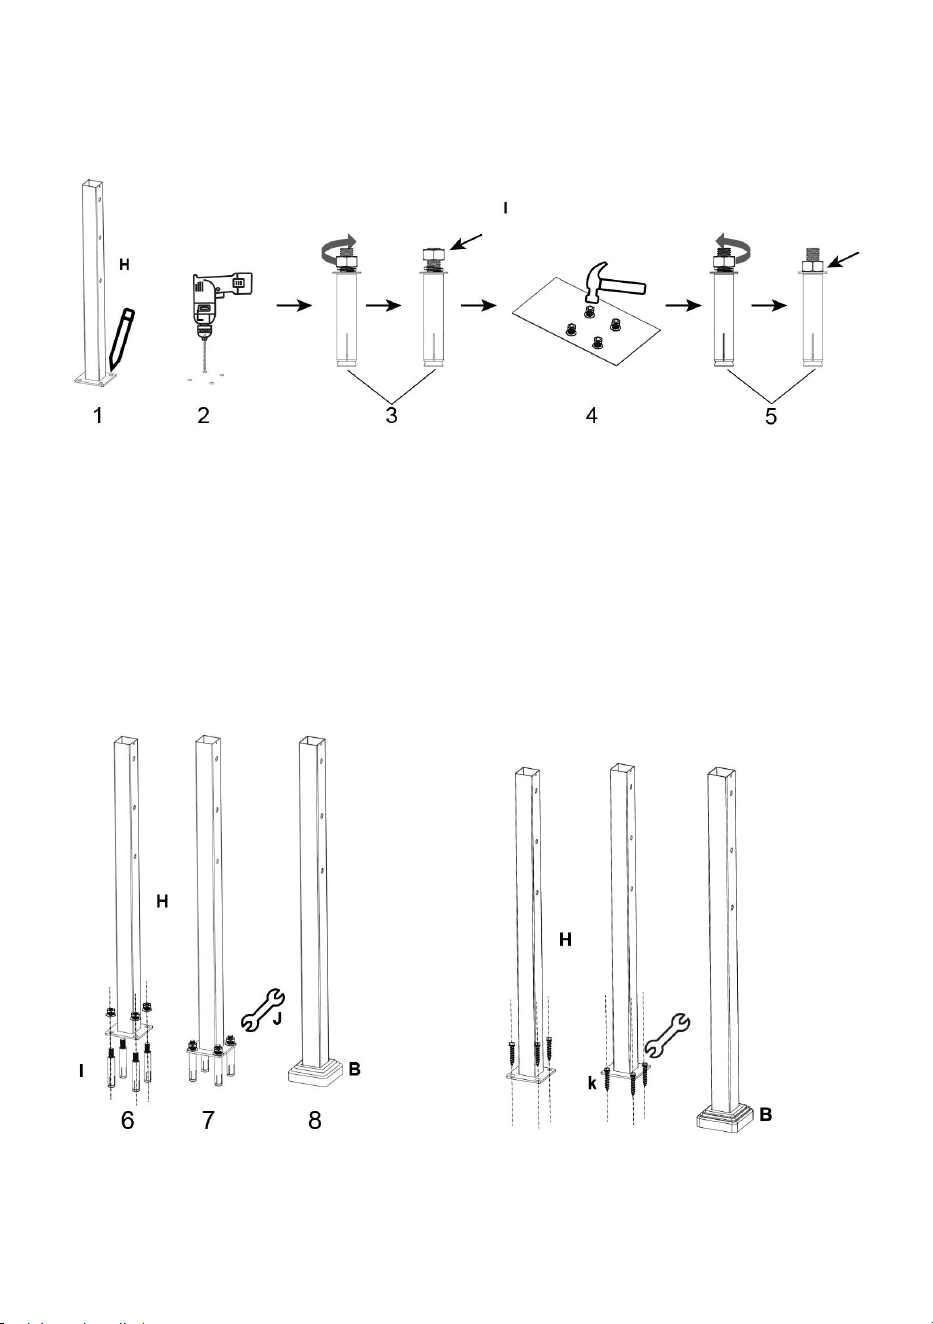
Step1:
●1.Use the H bracket to place on the ground to draw the positioning circle.
● 2.Drill holes in the locating ring.
● 3.Before installing the expansionscrews,twist the nut to the top.
● 4.Then set the expansion screws into the pre-drilled holes, use a
hammer to gently tap the head of the expansion screw to get it completely
into the hole.
●5.Tighten the nut.When the nutbegins to tighten,the anchor insidethe
expansion screw expands and locks securely to the hole wall.
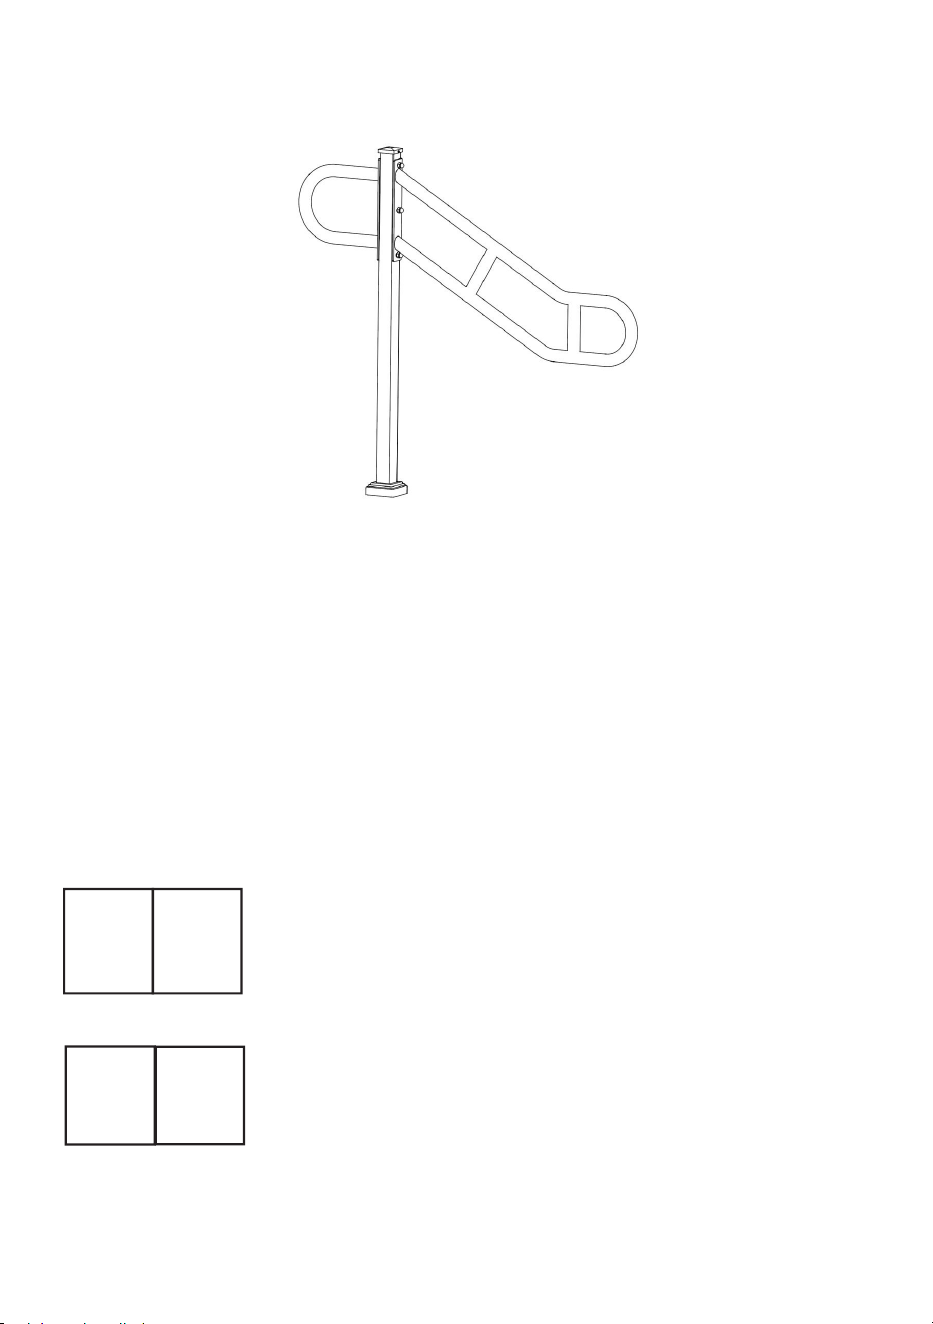
Concrete Ground Wooden Ground
Assembly Method Assembly Method
- 5 -
●6.Unscrew the nuts of the expansion screws completely,Put the H
bracket on the pre-embedded expansion screws.
●7.Tighten the nut with a small wrench.
●8.Put on the B fitting to cover the screws.
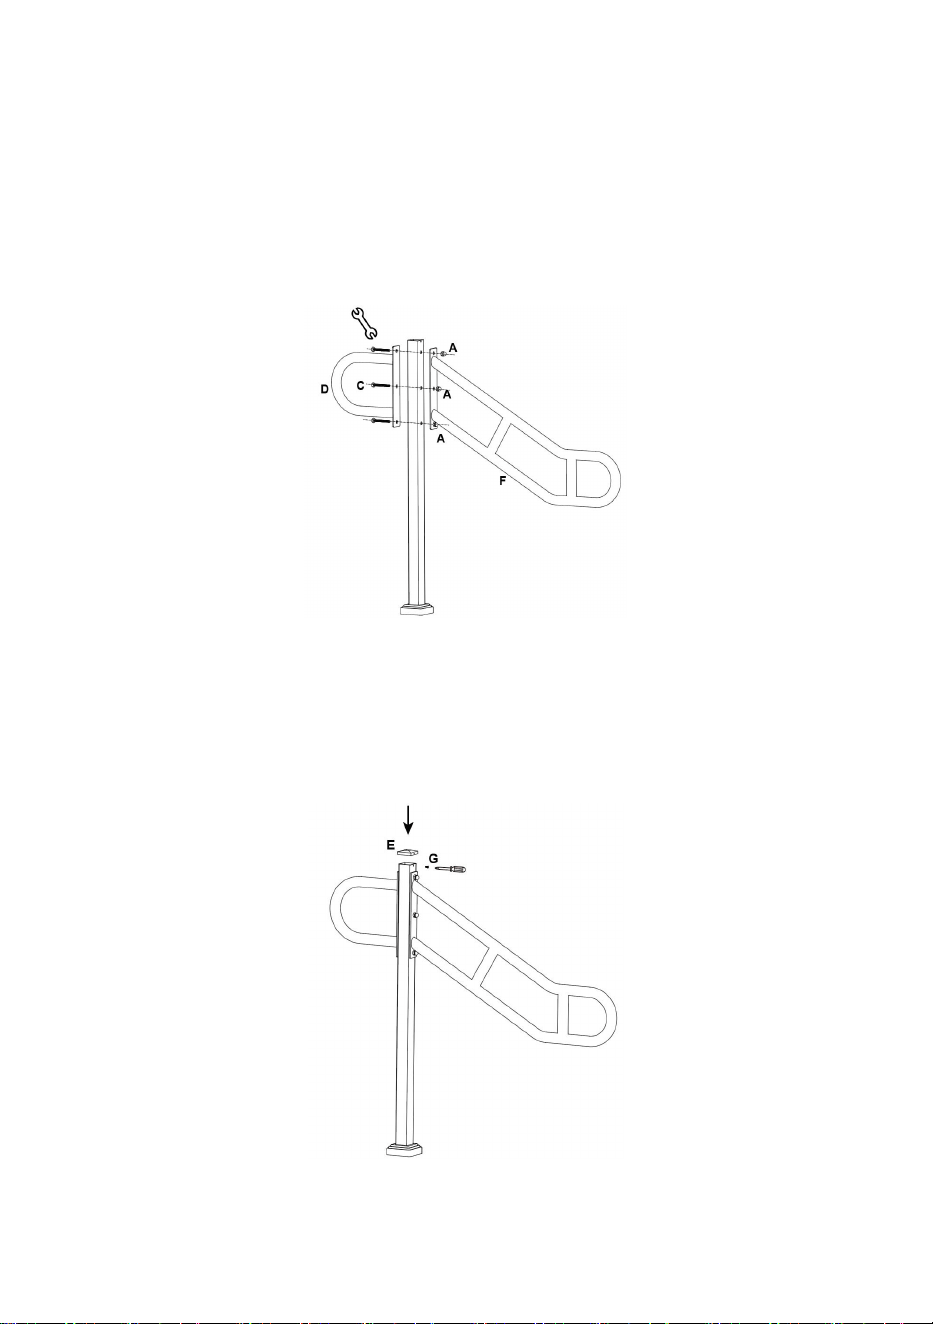
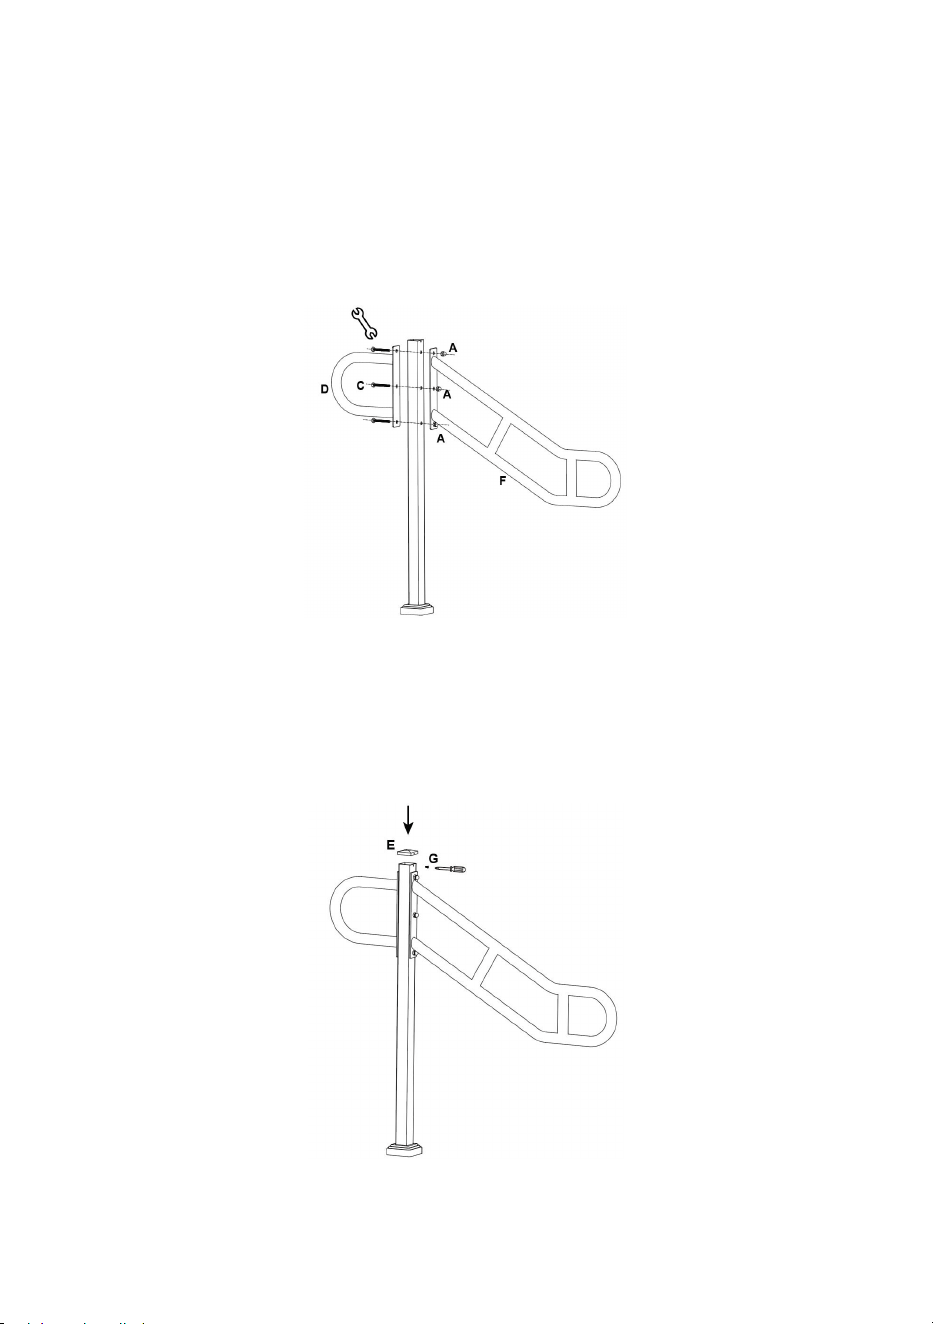
Step 2:
Secure the D fitting and F fitting to the Hbracket and tighten the screws and
nutswith a wrench.
Step 3:
Attach the E fitting to the H bracket andtighten it with a screwdriver.

- 6 -
Step 4:
Done!
Manufacturer: Shanghaimuxinmuyeyouxiangongsi
Address: Shuangchenglu 803nong11hao1602A-1609shi, baoshanqu,
shanghai 200000 CN.
Imported to AUS: SIHAO PTY LTD. 1 ROKEVA STREETEASTWOOD
NSW 2122 Australia
Imported to USA: Sanven Technology Ltd. Suite 250, 9166 Anaheim
Place, Rancho Cucamonga, CA 91730
REP
UK
YH CONSULTING LIMITED.
C/O YH Consulting Limited Office 147,
Centurion House, London Road,
Staines-upon-Thames, Surrey, TW18 4AX
REP
EC
E-CrossStu GmbH
Mainzer Landstr.69,
60329 Frankfurt am Main.


Technical Support and E-Warranty Certificate
www.vevor.com/support
Outdoor Wall-mounted Handrail
MODEL: HR-09
We continue to be committed to provide you tools with competitive price.
"Save Half", "Half Price" or any other similar expressions used by us only represents an
estimate of savings you might benefit from buying certain tools with us compared to the major
top brands and does not necessarily mean to cover all categories of tools offered by us. You
are kindly reminded to verify carefully when you are placing an order with us if you are
actually saving half in comparison with the top major brands.

- 1 -
MODEL: HR-09
Have product questions? Need technical support? Please feel free to
contact us:
Technical Support and E-Warranty Certificate
www.vevor.com/support
NEED HELP? CONTACT US!
This is the original instruction, please read all manual instructions
carefully before operating. VEVOR reserves a clear interpretation of our
user manual. The appearance of the product shall be subject to the
product you received. Please forgive us that we won't inform you again if
there are any technology or software updates on our product.
Outdoor Wall-mounted
Handrail

- 2 -
SAFE INSTRUCTIONS
CAUTION: carefully read instructions and procedures for safe opera
tions. Failure to do so can result in serious injury.
WARNING:
1.Before using the handrail, ensure that the handrail is securely
installed to prevent personal injury and accidents.
2.When using the handrail, do not overload the handrail to avoid personal i
njury or accident.
3. Do not draw, cut, or use sharp objects on the handrail to avoid damage.
4. If you need to disassemble the handrail, please follow the reverse steps
to disassemble it and store it properly.
5. This product is not a toy. Do not allow children to play with this item.
Assembly precautions
1.Assemble only according to these instructions. Improper assembly can c
reate hazards.
2. Wear ANSI-approved safety goggles and heavy-duty work gloves durin
g assembly.
3.Keep assembly area clean and well lit.
4.Keep bystanders out of the area during assembly.
5.Do not assemble when tired or when under the influence of alcohol, drug
s or medication.
6.Product capabilities apply to properly and completely assembled product
only.
7. For additional information regarding the parts listed in the following pag
es, please refer to the Assembly Diagram of this manual. Unwrap and sep
arate all parts in a clean work area.
8. For safety reasons,This hardware is recommended to be installed by 2
people
SAVE THESE INSTRUCTIONS

- 3 -
Part List
NO.
Name
Picture
Qty.
A
Nut M8
3
B
Lid
1
C
Screw M8*55
3
D
Short Handrail
1
E
Top Cap
1
F
Long Handrail
1
G
Screw M4*8
1
H
Pillar
1
I
Expansion Screw
4
J
Wrench
1
K
Screw M6*40
4

- 4 -
Product Installation
Step1:
●1.Use the H bracket to place on the ground to draw the positioning circle.
● 2.Drill holes in the locating ring.
● 3.Before installing the expansionscrews,twist the nut to the top.
● 4.Then set the expansion screws into the pre-drilled holes, use a
hammer to gently tap the head of the expansion screw to get it completely
into the hole.
●5.Tighten the nut.When the nutbegins to tighten,the anchor insidethe
expansion screw expands and locks securely to the hole wall.
Concrete Ground Wooden Ground
Assembly Method Assembly Method

- 5 -
●6.Unscrew the nuts of the expansion screws completely,Put the H
bracket on the pre-embedded expansion screws.
●7.Tighten the nut with a small wrench.
●8.Put on the B fitting to cover the screws.
Step 2:
Secure the D fitting and F fitting to the Hbracket and tighten the screws and
nutswith a wrench.
Step 3:
Attach the E fitting to the H bracket andtighten it with a screwdriver.

- 6 -
Step 4:
Done!
Manufacturer: Shanghaimuxinmuyeyouxiangongsi
Address: Shuangchenglu 803nong11hao1602A-1609shi, baoshanqu,
shanghai 200000 CN.
Imported to AUS: SIHAO PTY LTD. 1 ROKEVA STREETEASTWOOD
NSW 2122 Australia
Imported to USA: Sanven Technology Ltd. Suite 250, 9166 Anaheim
Place, Rancho Cucamonga, CA 91730
REP
UK
YH CONSULTING LIMITED.
C/O YH Consulting Limited Office 147,
Centurion House, London Road,
Staines-upon-Thames, Surrey, TW18 4AX
REP
EC
E-CrossStu GmbH
Mainzer Landstr.69,
60329 Frankfurt am Main.


Technical Support and E-Warranty Certificate
www.vevor.com/support
Outdoor Wall-mounted Handrail
MODEL: HR-09
We continue to be committed to provide you tools with competitive price.
"Save Half", "Half Price" or any other similar expressions used by us only represents an
estimate of savings you might benefit from buying certain tools with us compared to the major
top brands and does not necessarily mean to cover all categories of tools offered by us. You
are kindly reminded to verify carefully when you are placing an order with us if you are
actually saving half in comparison with the top major brands.

- 1 -
MODEL: HR-09
Have product questions? Need technical support? Please feel free to
contact us:
Technical Support and E-Warranty Certificate
www.vevor.com/support
NEED HELP? CONTACT US!
This is the original instruction, please read all manual instructions
carefully before operating. VEVOR reserves a clear interpretation of our
user manual. The appearance of the product shall be subject to the
product you received. Please forgive us that we won't inform you again if
there are any technology or software updates on our product.
Outdoor Wall-mounted
Handrail

- 2 -
SAFE INSTRUCTIONS
CAUTION: carefully read instructions and procedures for safe opera
tions. Failure to do so can result in serious injury.
WARNING:
1.Before using the handrail, ensure that the handrail is securely
installed to prevent personal injury and accidents.
2.When using the handrail, do not overload the handrail to avoid personal i
njury or accident.
3. Do not draw, cut, or use sharp objects on the handrail to avoid damage.
4. If you need to disassemble the handrail, please follow the reverse steps
to disassemble it and store it properly.
5. This product is not a toy. Do not allow children to play with this item.
Assembly precautions
1.Assemble only according to these instructions. Improper assembly can c
reate hazards.
2. Wear ANSI-approved safety goggles and heavy-duty work gloves durin
g assembly.
3.Keep assembly area clean and well lit.
4.Keep bystanders out of the area during assembly.
5.Do not assemble when tired or when under the influence of alcohol, drug
s or medication.
6.Product capabilities apply to properly and completely assembled product
only.
7. For additional information regarding the parts listed in the following pag
es, please refer to the Assembly Diagram of this manual. Unwrap and sep
arate all parts in a clean work area.
8. For safety reasons,This hardware is recommended to be installed by 2
people
SAVE THESE INSTRUCTIONS

- 3 -
Part List
NO.
Name
Picture
Qty.
A
Nut M8
3
B
Lid
1
C
Screw M8*55
3
D
Short Handrail
1
E
Top Cap
1
F
Long Handrail
1
G
Screw M4*8
1
H
Pillar
1
I
Expansion Screw
4
J
Wrench
1
K
Screw M6*40
4

- 4 -
Product Installation
Step1:
●1.Use the H bracket to place on the ground to draw the positioning circle.
● 2.Drill holes in the locating ring.
● 3.Before installing the expansionscrews,twist the nut to the top.
● 4.Then set the expansion screws into the pre-drilled holes, use a
hammer to gently tap the head of the expansion screw to get it completely
into the hole.
●5.Tighten the nut.When the nutbegins to tighten,the anchor insidethe
expansion screw expands and locks securely to the hole wall.
Concrete Ground Wooden Ground
Assembly Method Assembly Method
- 5 -
●6.Unscrew the nuts of the expansion screws completely,Put the H
bracket on the pre-embedded expansion screws.
●7.Tighten the nut with a small wrench.
●8.Put on the B fitting to cover the screws.
Step 2:
Secure the D fitting and F fitting to the Hbracket and tighten the screws and
nutswith a wrench.
Step 3:
Attach the E fitting to the H bracket andtighten it with a screwdriver.
- 6 -
Step 4:
Done!
Manufacturer: Shanghaimuxinmuyeyouxiangongsi
Address: Shuangchenglu 803nong11hao1602A-1609shi, baoshanqu,
shanghai 200000 CN.
Imported to AUS: SIHAO PTY LTD. 1 ROKEVA STREETEASTWOOD
NSW 2122 Australia
Imported to USA: Sanven Technology Ltd. Suite 250, 9166 Anaheim
Place, Rancho Cucamonga, CA 91730
REP
UK
YH CONSULTING LIMITED.
C/O YH Consulting Limited Office 147,
Centurion House, London Road,
Staines-upon-Thames, Surrey, TW18 4AX
REP
EC
E-CrossStu GmbH
Mainzer Landstr.69,
60329 Frankfurt am Main.


Technical Support and E-Warranty Certificate
www.vevor.com/support
Outdoor Wall-mounted Handrail
MODEL: HR-09
We continue to be committed to provide you tools with competitive price.
"Save Half", "Half Price" or any other similar expressions used by us only represents an
estimate of savings you might benefit from buying certain tools with us compared to the major
top brands and does not necessarily mean to cover all categories of tools offered by us. You
are kindly reminded to verify carefully when you are placing an order with us if you are
actually saving half in comparison with the top major brands.

- 1 -
MODEL: HR-09
Have product questions? Need technical support? Please feel free to
contact us:
Technical Support and E-Warranty Certificate
www.vevor.com/support
NEED HELP? CONTACT US!
This is the original instruction, please read all manual instructions
carefully before operating. VEVOR reserves a clear interpretation of our
user manual. The appearance of the product shall be subject to the
product you received. Please forgive us that we won't inform you again if
there are any technology or software updates on our product.
Outdoor Wall-mounted
Handrail

- 2 -
SAFE INSTRUCTIONS
CAUTION: carefully read instructions and procedures for safe opera
tions. Failure to do so can result in serious injury.
WARNING:
1.Before using the handrail, ensure that the handrail is securely
installed to prevent personal injury and accidents.
2.When using the handrail, do not overload the handrail to avoid personal i
njury or accident.
3. Do not draw, cut, or use sharp objects on the handrail to avoid damage.
4. If you need to disassemble the handrail, please follow the reverse steps
to disassemble it and store it properly.
5. This product is not a toy. Do not allow children to play with this item.
Assembly precautions
1.Assemble only according to these instructions. Improper assembly can c
reate hazards.
2. Wear ANSI-approved safety goggles and heavy-duty work gloves durin
g assembly.
3.Keep assembly area clean and well lit.
4.Keep bystanders out of the area during assembly.
5.Do not assemble when tired or when under the influence of alcohol, drug
s or medication.
6.Product capabilities apply to properly and completely assembled product
only.
7. For additional information regarding the parts listed in the following pag
es, please refer to the Assembly Diagram of this manual. Unwrap and sep
arate all parts in a clean work area.
8. For safety reasons,This hardware is recommended to be installed by 2
people
SAVE THESE INSTRUCTIONS

- 3 -
Part List
NO.
Name
Picture
Qty.
A
Nut M8
3
B
Lid
1
C
Screw M8*55
3
D
Short Handrail
1
E
Top Cap
1
F
Long Handrail
1
G
Screw M4*8
1
H
Pillar
1
I
Expansion Screw
4
J
Wrench
1
K
Screw M6*40
4
- 4 -
Product Installation
Step1:
●1.Use the H bracket to place on the ground to draw the positioning circle.
● 2.Drill holes in the locating ring.
● 3.Before installing the expansionscrews,twist the nut to the top.
● 4.Then set the expansion screws into the pre-drilled holes, use a
hammer to gently tap the head of the expansion screw to get it completely
into the hole.
●5.Tighten the nut.When the nutbegins to tighten,the anchor insidethe
expansion screw expands and locks securely to the hole wall.
Concrete Ground Wooden Ground
Assembly Method Assembly Method

- 5 -
●6.Unscrew the nuts of the expansion screws completely,Put the H
bracket on the pre-embedded expansion screws.
●7.Tighten the nut with a small wrench.
●8.Put on the B fitting to cover the screws.
Step 2:
Secure the D fitting and F fitting to the Hbracket and tighten the screws and
nutswith a wrench.
Step 3:
Attach the E fitting to the H bracket andtighten it with a screwdriver.

- 6 -
Step 4:
Done!
Manufacturer: Shanghaimuxinmuyeyouxiangongsi
Address: Shuangchenglu 803nong11hao1602A-1609shi, baoshanqu,
shanghai 200000 CN.
Imported to AUS: SIHAO PTY LTD. 1 ROKEVA STREETEASTWOOD
NSW 2122 Australia
Imported to USA: Sanven Technology Ltd. Suite 250, 9166 Anaheim
Place, Rancho Cucamonga, CA 91730
REP
UK
YH CONSULTING LIMITED.
C/O YH Consulting Limited Office 147,
Centurion House, London Road,
Staines-upon-Thames, Surrey, TW18 4AX
REP
EC
E-CrossStu GmbH
Mainzer Landstr.69,
60329 Frankfurt am Main.