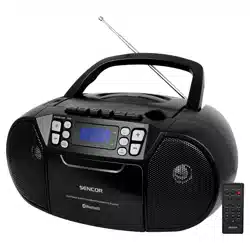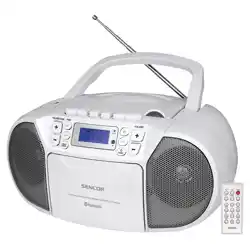
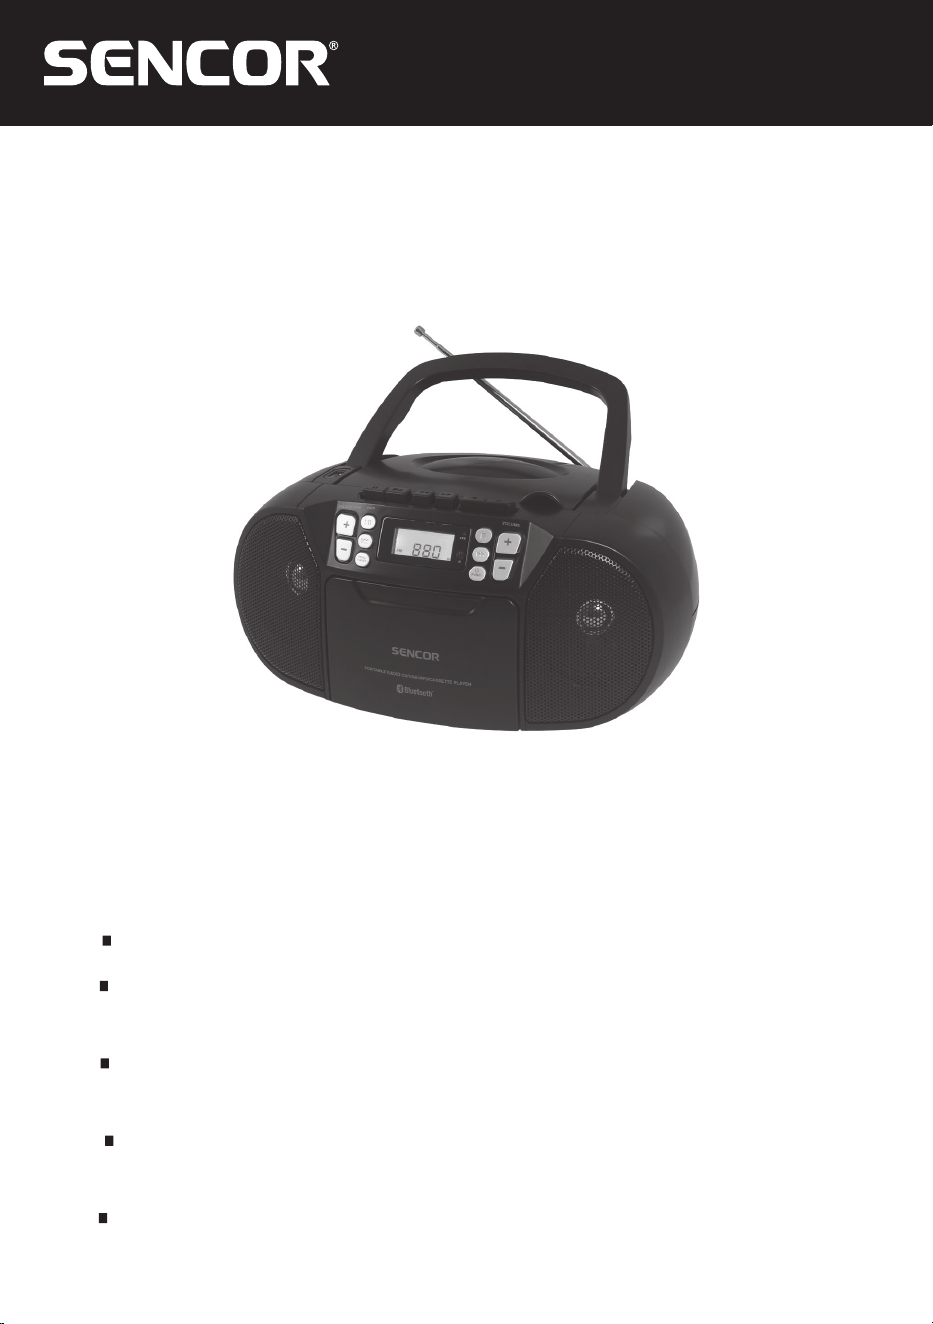
SPT 3907
EN User Manual CD/USB RADIO CASSETTE PLAYER
CZ
Uživatelská příručka RADIOMAGNETOFON
S CD/USB PŘEHRÁVAČEM
SK
Používateľská príručka RÁDIOMAGNETOFÓN
SCD/USB PREHRÁVAČOM
HU
Felhasználói kézikönyv RÁDIÓS MAGNETOFON CD/USB
LEJÁTSZÓVAL
PL
Podręcznik użytkownika
RADIOMAGNETOFON
Z ODTWARZACZEM CD/USB


EN - 1
IMPORTANT: Please read before using and retain for future reference.
IMPORTANT NOTES
INTRODUCTION
Thank you for buying our product.
Please read through these operating instructions, so you will know how to operate your equipment
SURSHUO\$IWHU\RX¿QLVKHGUHDGLQJWKHLQVWUXFWLRQVPDQXDOSXWLWDZD\LQDVDIHSODFHIRUIXWXUH
reference.
WARNING
7RSUHYHQW¿UHRUVKRFNKD]DUGGRQRWH[SRVHWKLVDSSOLDQFHWRUDLQRUPRLVWXUH7RDYRLGHOHFWULFDO
VKRFNGRQRWRSHQWKHFDELQHWUHIHUVHUYLFLQJWRTXDOL¿HGSHUVRQQHORQO\
CAUTION
8VHRIFRQWUROVRUDGMXVWPHQWRUSHUIRUPDQFHRISURFHGXUHVRWKHUWKDQWKRVHVSHFL¿HGKHUHLQPD\
UHVXOWLQKD]DUGRXVUDGLDWLRQH[SRVXUH
DANGER
,QYLVLEOHODVHUUDGLDWLRQZKHQRSHQDQGLQWHUORFNIDLOHGRUGHIHDWHG$YRLGGLUHFWH[SRVXUHWREHDP
CLASS 1 LASER PRODUCT
7KLV&RPSDFW'LVFSOD\HULVFODVVL¿HGDVD&ODVV/$6(5
352'8&7
7+(&/$66/$6(5352'8&7ODEHOLVORFDWHGRQWKH
UHDUH[WHULRU
Avoid installing the unit in locations described below:
3ODFHVH[SRVHGWRGLUHFWVXQOLJKWRUFORVHWRKHDWUDGLDWLQJDSSOLDQFHVXFKDVHOHFWULFKHDWHUV
on top of other stereo equipment that radiate too much heat.
2. Places locking ventilation or dusty places.
3. Places subject to constant vibration.
4. Humid or moist places.
2SHUDWHWXUQLQJFRQWUROVDQGVZLWFKHVDVLQVWUXFWHGLQPDQXDO
%HIRUHWXUQLQJRQWKHSRZHUIRUWKH¿UVWWLPHPDNHVXUHWKDWWKHSRZHUFRUGLVSURSHUO\LQVWDOOHG
6WRUH\RXUWDSHVRU&'LQDFRRODUHDWRDYRLGGDPDJHIURPKHDW
CAUTION:
725('8&(7+(5,6.2)(/(&75,&6+2&.'2'275(029(&29(525%$&.1286(5
6(59,&($%/(3$576,16,'(5()(56(59,&,1*7248$/,),('6(59,&(3(56211(/
WARNING:
5HPRYHEDWWHULHVLIH[KDXVWHGRULIWKH\ZLOOQRWEHXVHGDJDLQIRUDORQJSHULRG
– The incorrect use of batteries can cause electrolyte leakage and will corrode the compartment or
cause the batteries to burst, therefore:
± 'RQRWPL[EDWWHU\W\SHVHJDONDOLQHZLWK]LQFFDUERQDWH
– When inserting new batteries, replace all batteries at the same time.
EN - 2
EN - 3
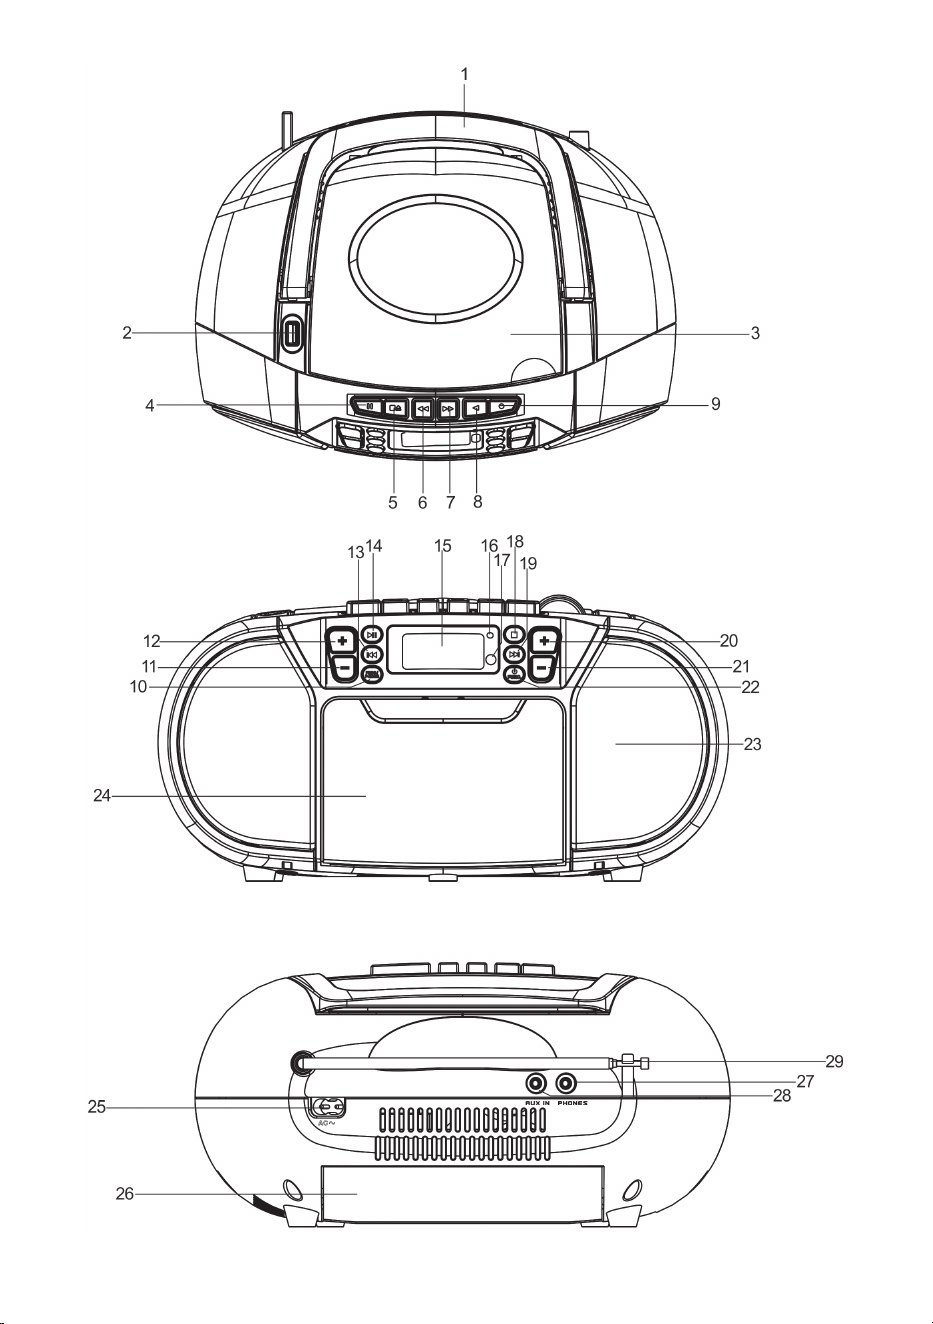
NAMES OF CONTROLS
)2/',1*+$1'/(
86%3257
&''225&203$570(17
&$66(77(3$86(.(<
&$66(77(6723(-(&7.(<
&$66(77()$67)25:$5'.(<
&$66(77(5(:,1'.(<
&$66(77(3/$<.(<
&$66(77(5(&25'.(<
352*302'(%87721
)2/'0%87721
)2/'0%87721
13. %87721
3/$<3$86(3$,5%87721
/&'',63/$<
67$1'%<,1',&$725
,5,1',&$725
6723%87721
19. %87721
92/80(%87721
92/80(%87721
)81&7,2167$1'%<%87721
63($.(5
&$66(77('225
$&62&.(7
%$77(5<&203$570(17
3+21(-$&.
$8;,1-$&.
)07(/(6&23,&$17(11$
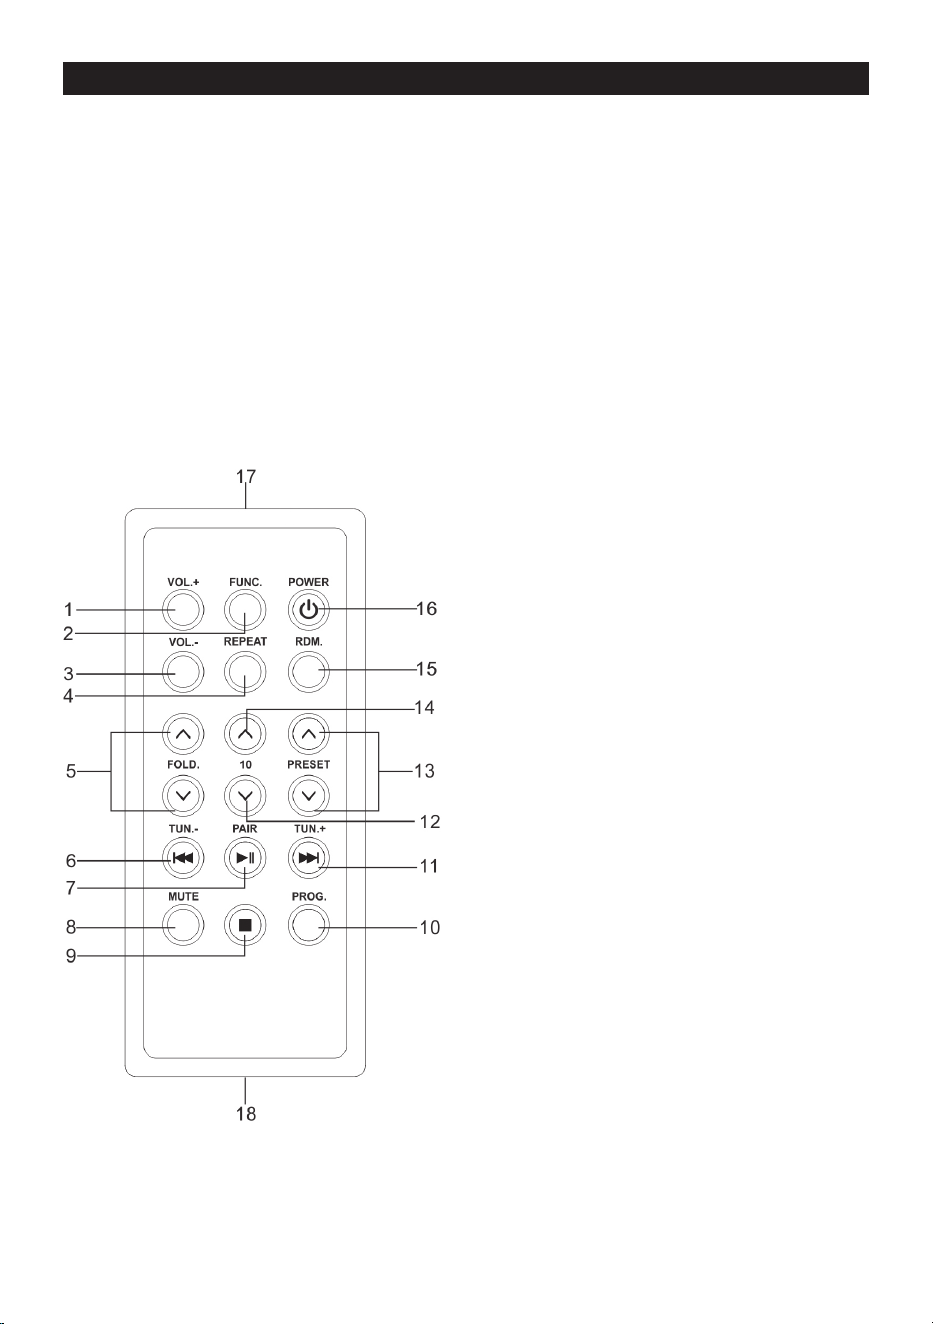
REMOTE HANDSET
92/
)81&7,21
92/
5(3($7
)2/'(583'2:1
35(9,2865(9(56(DQG781
3/$<3$86(3$,5
087(
6723
352*
1(;7)25:$5'DQG781
12. -10
35(6(783'2:1
5'0
67$1'%<32:(5
5HPRWHWUDQVPLWWHU
18. Battery compartment
Note:
3OHDVHUHPRYHWKHSODVWLFSURWHFWRUIURPWKHEDWWHU\FRPSDUWPHQWEHIRUHXVLQJIRUWKH¿UVWWLPH
EN - 4
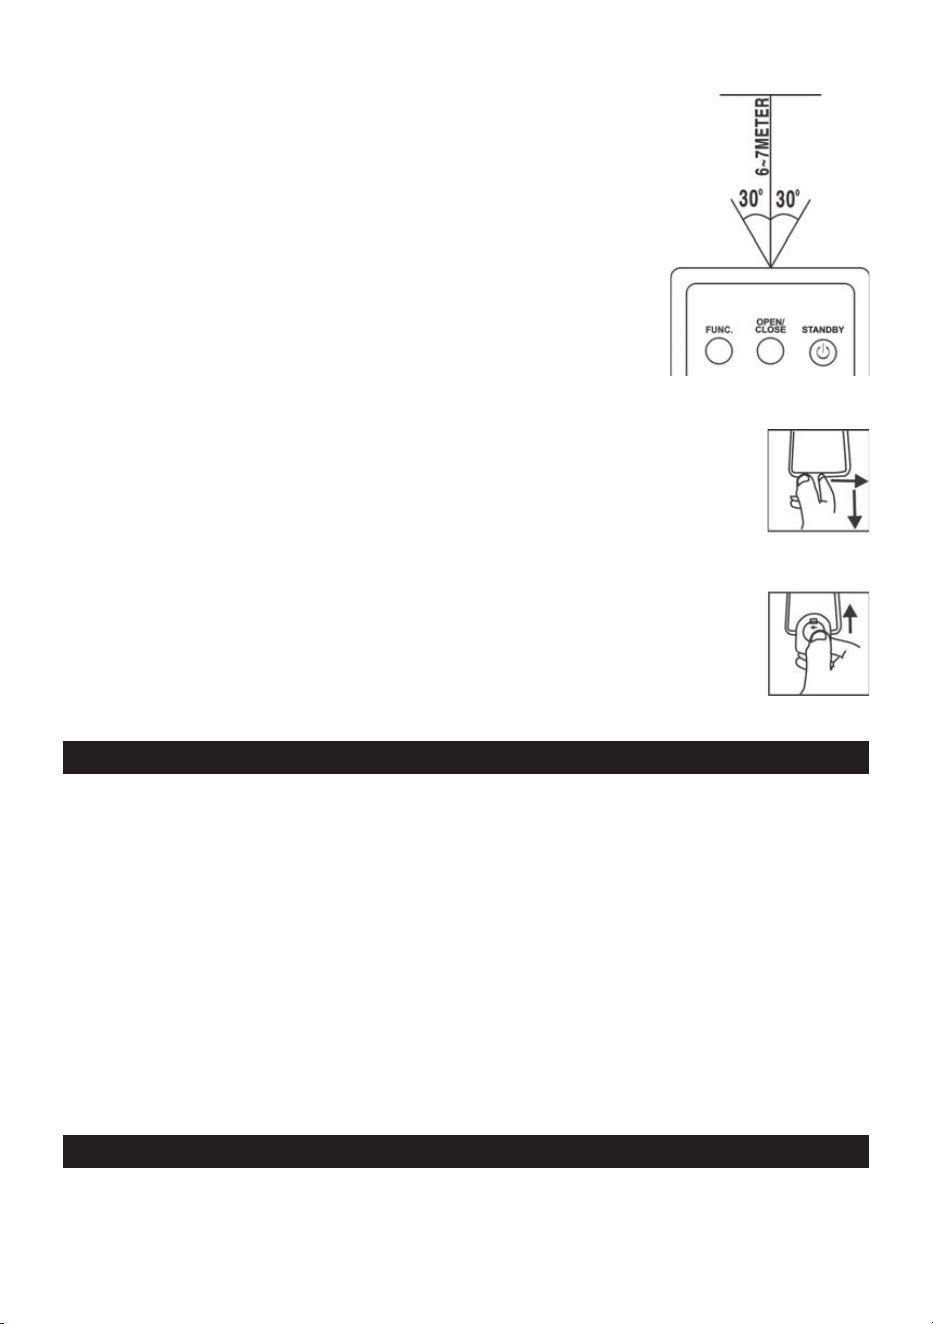
REMOTE CONTROL OPERATION
To operate the unit with the remote control, point the remote trans-
mitter >@RIWKHUHPRWHFRQWURODWWKH,5VHQVRURQWKHIURQWGLVSOD\
panel of the unit. Press the buttons on the remote control to use it.
The remote works best at a distance of no further than 5 meters and
within 30 degrees to either side of the sensor. Bright sunlight or other
lighting conditions in the room can interfere with the remote control.
If remote operation is unsatisfactory or stops working entirely, try
using a new battery in the remote or try darkening the room.
REPLACING THE REMOTE CONTROL BATTERY
7KHUHPRWHFRQWUROLQFOXGHVRQH&59OLWKLXPEDWWHU\5HPRYH
the plastic protector from the battery compartment before using the re-
PRWHIRUWKH¿UVWWLPH
To replace the battery, gently push the clasp to the right and then slide the
EDWWHU\FRPSDUWPHQWWUD\RXW5HPRYHWKHROGEDWWHU\DQGLQVWDOODQHZ
OLWKLXPEDWWHU\W\SH&5LQWKHWUD\7KHSRVLWLYHVLGHRIWKHEDWWHU\
should face up.
6OLGHWKHWUD\EDFNLQWRWKHFRPSDUWPHQWXQWLOWKHFODVSFOLFNVLQWRSODFH
POWER SOURCE
7KLVXQLWLVGHVLJQHGWREHRSHUDWHGRQ$&'&
AC OPERATION
Plug the tail of AC power cord into AC socket on unit and the plug into household AC wall outlet.
The batteries will be automatically disconnected.
DC OPERATION
2SHQWKH%$77(5<&203$570(17'225,QVWDOOSFV80'VL]HEDWWHULHVQRWLQFOXGHGLQWR
compartment. Please follow correct polarities as indicated.
CAUTION
5HPRYHEDWWHULHVLIWKH\DUHH[KDXVWHGRUORQJWLPHXVH
Batteries contain chemical substances, so they should be disposed of properly.
BASIC FUNCTION
SWITCHING ON THE UNIT
$IWHUFRQQHFWLQJWKHSRZHUSUHVV67$1'%<)81&EXWWRQWRWXUQRQWKHXQLWWKHQSUHVVWKH67$1'-
%<)81&EXWWRQDJDLQWRFKRRVH&'86%7$3(RU)0PRGH

EN - 5
NOTE:
,Q&'86%03$8;PRGHZKHQWKHXQLWLVQRWSURYLGLQJWKHPDLQIXQFWLRQIRUPLQXWHVWKHXQLW
will automatically switch into standby mode. In the tape mode, only the tape stops for 15 minutes, the
XQLWZLOODXWRPDWLFDOO\VZLWFKLQWRVWDQGE\PRGH7RWXUQRQWKHXQLWDJDLQSUHVVÄ67$1'%<)81&³
button or replug the unit.
ESD hints – The product maybe reset or not reset to operation of control due to electrostatic dis-
FKDUJHMXVWVZLWFKRႇDQGUHFRQQHFWDJDLQ
TO ADJUST VOLUME
3UHVV92/EXWWRQWRLQFUHDVHRUGHFUHDVHYROXPH
HEADPHONE JACK
)RU SULYDWH OLVWHQLQJ FRQQHFW D PP KHDGSKRQH QRW LQFOXGHG WR WKH +($'3+21( MDFN 7KH
63($.(5ZLOOEHDXWRPDWLFDOO\GLVDEOHG
CAUTION:
/,67(1,1*$7$+,*+92/80(29(5$/21*3(5,2',6127*22')25<285($56
USING THE RADIO
TUNING IN RADIO STATIONS
3UHVVWKH67$1'%<)81&EXWWRQWRFKRRVHUDGLRPRGH)0PRGH
2. Tune to the desired station by pressing or button, the station frequency will show on the
display.
3UHVVWKH92/EXWWRQWRDGMXVWWKHYROXPHWRDFRPIRUWDEOHOHYHO
7RRSWLPL]HUHFHSWLRQZKHQOLVWHQLQJWRVWDWLRQVRQWKH)0EDQGH[WHQGWKHWHOHVFRSLFDQWHQQDWR
LWVIXOOOHQJWK*HQWO\PRYHWKHXQLWEDFNDQGIRUWKWRJHWWKHEHVWUHFHSWLRQZKHQ\RXDUHOLVWHQLQJ
WR)0SURJUDPRUSODFHWKHXQLWLQDQRSHQSODFH:KHQWKHVWHUHRVLJQDOLVUHFHLYHGWKH67
show on the display.
AUTO PRESET MEMORY / SCAN
To search for and automatically save stations to preset memory, press and hold the PLAY/PAUSE
button. Any station with a strong enough signal will be saved to preset memory.
$IWHUWKHXQLW¿QLVKHVVFDQQLQJWKHXQLWZLOODXWRPDWLFDOO\WXQHWRSUHVHWVWDWLRQQXPEHU3
7RWXQHWRWKHQH[WRUSUHYLRXVSUHVHWVWDWLRQSUHVVM.+/M.- EXWWRQWRJRWRQH[WRUSUHYLRXVSUHVHW
station.
MANUAL PRESET MEMORY OPERATION
<RXPD\SUHVWRUHUDGLRVWDWLRQVLQPHPRU\IRU\RXUSUHIHUHQFH
1. Tune to the desired station that you want to save as a preset by pressing or button.
2. Press the PROG. EXWWRQRQXQLW352*LQGLFDWRUZLOOÀDVKDQG³3´ZLOOVKRZRQWKHGLVSOD\WR
indicate that you are saving the station as preset memory 01, to change the preset memory se-
quence, press M.+ or M.- button., then press PROG. button on unit again to enter.
6HDUFKDQRWKHUVWDWLRQUHSHDWVWHSVXQWLODOOGHVLUHGVWDWLRQVVWRUHG8SWR)0VWDWLRQV
can be programmed.
7RWXQHWRWKHQH[WRUSUHYLRXVSUHVHWVWDWLRQSUHVVPROG. EXWWRQ¿UVWWKHQSUHVVM.+ or M.- bu-
WWRQLPPHGLDWHO\WRJRWRQH[WRUSUHYLRXVSUHVHWVWDWLRQ

EN - 6
USING THE CASSETTE
UNDERSTANDING THE BUTTONS
PLAY – Press to play cassettes.
REWIND – )URPVWRSPRGHSUHVVWRUHZLQGWKHWDSHWRZDUGWKHEHJLQQLQJ
F.FWD – )URPVWRSPRGHSUHVVWRDGYDQFHWKHWDSHWRZDUGWKHHQG
STOP/EJ. – Press to stop current tape activity or to open the cassette compartment door when no
buttons are active.
PAUSE – Press to interrupt tape play or record mode. Press the second time to resume tape play or
tape record mode.
PLAYING A CASSETTE TAPE
3UHVVWKH67$1'%<)81&EXWWRQWR&KRRVH7$3(PRGH
3UHVV6723(-.H\WRRSHQWKHFDVVHWWHFRPSDUWPHQWGRRU
3. Insert cassette tape into the compartment with the open edge facing up and the full reel on the
right.
4. Close the door securely.
3UHVV5(:,1'RU)):'WRPRYHWDSHWRWKHGHVLUHGVWDUWLQJSRLQW
3UHVV3/$<NH\WREHJLQSOD\LQJWKHWDSH
7. Adjust the volume to your desired listening level.
AUTOMATIC STOP FEATURE
When the cassette deck is operating in play or record mode and the end of the tape is reached, the
XQLWDXWRPDWLFDOO\VKXWVLWVHOIRႇDQGUHWXUQVDOOEXWWRQVWRWKHRႇSRVLWLRQ
RECORDING FROM THE RADIO
/RDGDEODQNWDSHLQWRWKHWDSHFRPSDUWPHQWDQGFORVHWKHGRRU
6HWWKH)81&7,21VZLWFKWR5$',27XQHWRUHTXLUHGVWDWLRQE\URWDWLQJWKH781,1*.12%
3UHVV5(&25'NH\WREHJLQUHFRUGLQJ5(&25'NH\DQG3/$<NH\JRGRZQVLPXOWDQHRXVO\
3UHVV6723(-.H\WRHQGUHFRUGLQJ
7RKHDUZKDW\RXUHFRUGHGIROORZLQVWUXFWLRQVLQ3/$<,1*$&$66(77(7$3(
NOTE:
3$86()25$020(17±8VLQJWKH3$86(NH\RQWKHFDVVHWWHGHFNLQVWHDGRIWKH6723(-.H\WR
PRPHQWDULO\LQWHUUXSWUHFRUGLQJJLYHV\RXDPXFKFOHDUUHFRUGLQJ3UHVV3$86(NH\DJDLQWRUHVXPH
recording.
RECORDING FROM CD
1. Insert a blank cassette tape into the tape compartment.
6OLGHWKH)81&7,21VZLWFKWR&'$8;SRVLWLRQ
/RDGD&'DQGVHOHFWWKHGHVLUHGWUDFN\RXZDQWWRUHFRUG
3UHVV&'3/$<3$86(EXWWRQWRVWDUWSOD\EDFN3UHVV5(&25'NH\WREHJLQUHFRUGLQJ
5(&25'NH\DQG3/$<NH\JRGRZQVLPXOWDQHRXVO\
3UHVV3$86(NH\WRLQWHUUXSWRUHGLWUHFRUGLQJ3UHVVLWDJDLQWRUHVXPHUHFRUGLQJ
3UHVV6723(-.H\WRHQGUHFRUGLQJ
7RKHDUZKDW\RXUHFRUGHGIROORZLQVWUXFWLRQVLQ3/$<,1*$&$66(77(7$3(
TYPES OF CASSETTE
8VHRQO\JRRGTXDOLW\FDVVHWWHV,(&7<3(IRUPDNLQJUHFRUGLQJV0D\EHXVHGWRUHSOD\RWKHU
W\SHVRIFDVVHWWHEXWLVXQDEOHWRPDNHSURSHUUHFRUGLQJRQWKHVHPRUHVSHFLDOL]HGWDSHV
7KHXVHRI&FDVVHWWHVLV127UHFRPPHQGHGLQWKLVPDFKLQH
EN - 7
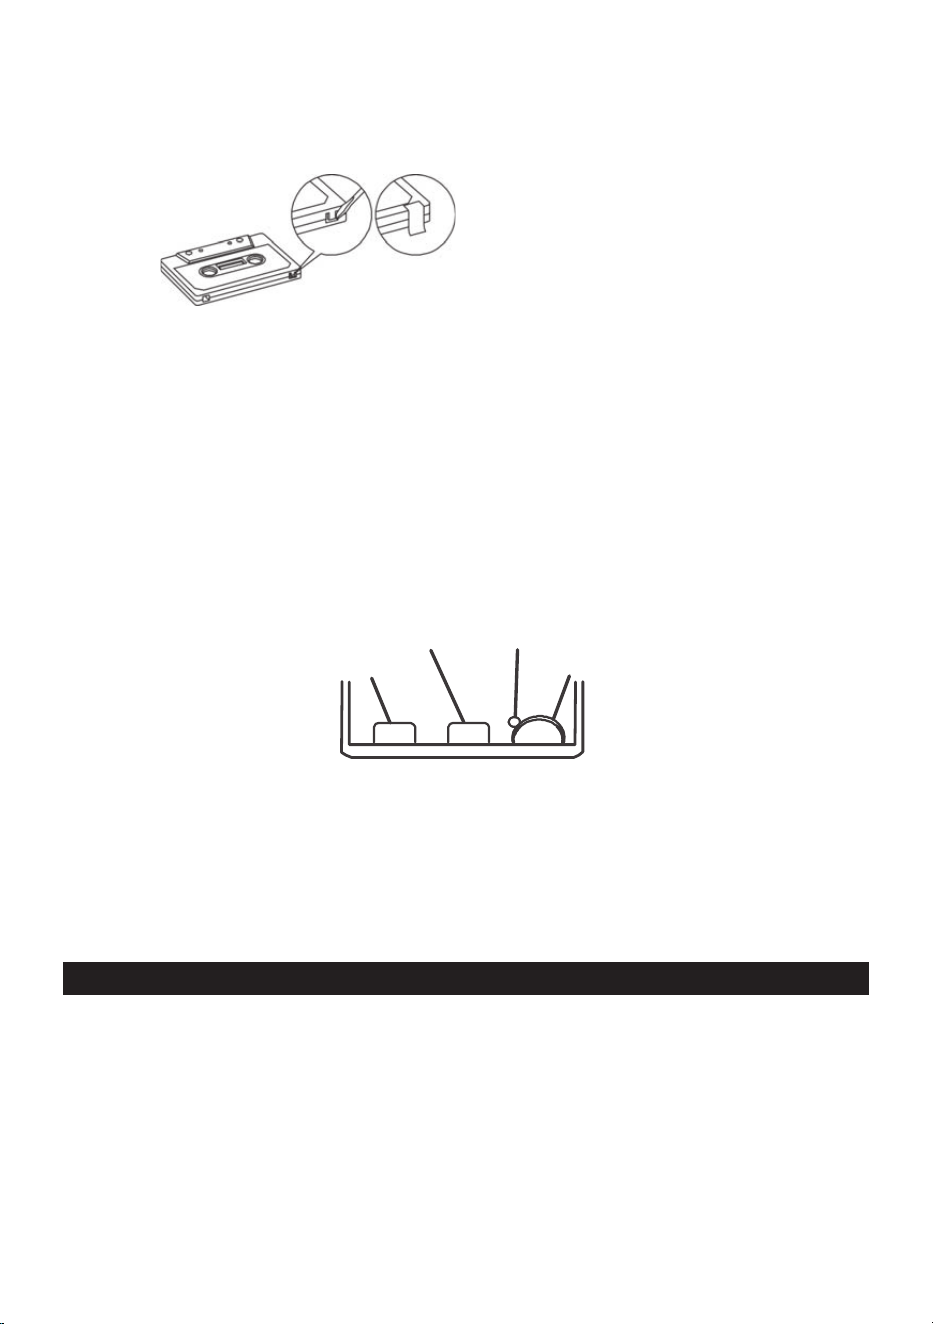
PROTECTING RECORDING
Normally, anything recorded on the tape is automatically erased when new recording is made. It is
possible to protect your recording from accidental erasure by removing the tabs found on the rear of
the cassette.
(5$6(7$%)256,'(³$´
:KHQWKHFDVVHWWHLVKHOGZLWKWKHUHFRUGHGVLGHXSSHUPRVWDQGH[SRVHGWDSHIDFLQJWKHIURQWWKH
protective tab will be found on the left rear of the cassette.
All pre-recorded cassette are protected in this way to prevent accidental erasure of the commercial
UHFRUGLQJ³3URWHFWHG´FDVVHWWHZLOOSUHYHQWWKHUHFRUGEXWWRQIURPEHLQJRSHUDWHG,IDWDQ\WLPH\RX
DWWHPSWWRUHFRUGDQG¿QGWKDWWKLVEXWWRQZLOOQRWGHSUHVVQHYHUIRUFHWKHPHFKDQLVPRULWPD\EH
damaged. Check that a cassette has been loaded and that tab has not been removed.
5HFRUGLQJRQDFDVVHWWHIURPZKLFKWKHWDEVKDYHEHHQUHPRYHGFDQEHGRQHE\FRYHULQJWKHWDE
openings with a piece of adhesive tape.
CARE OF CASSETTE MECHANISM
*HQWO\FOHDQWKHWDSHKHDGDQGSLQFKZKHHOFDSVWDQDVVHPEOLHVDIWHUHYHU\KRXUVRIXVLQJWKHXQLW
A range of cassette care products are available.
PINCH ROLLER
CAPSTAN
ERASE HEAD
RECORD/PLAY HEAD
7KHHUDVHKHDGDQGUHFRUGSOD\KHDGDQGWKHVXUIDFHRIWKHSLQFKUROOHUDUHGHOLFDWHDQGPXVWQRW
EHWRXFKHGZLWKPHWDOREMHFWVVXFKDVVFUHZGULYHUV<RXPD\¿QGLWHDVLHUWRFOHDQWKHDVVHPEO\E\
SUHVVLQJWKH3/$<EXWWRQWREULJKWKHDGDQGSLQFKUROOHULQWRYLHZ%HVXUHWRSUHVVWKH6723EXWWRQ
after cleaning the mechanism.
'DPDJHWRWKHSLQFKZKHHOFDQRFFXULIWKHXQLWLVOHIWLQ3/$<PRGHZLWKWKHSRZHUVZLWFKRႇ
Under no circumstances should you attempt to lubricate any part of the machine.
CD/MP3 OPERATION
Discs for Playback
7KLVV\VWHPFDQSOD\EDFNDOOGLJLWDODXGLR&'03:0$¿QDOL]HGGLJLWDODXGLR&'5HFRUGDEOH&'
5GLVFV¿QDOL]HGGLJLWDODXGLR&'5HZULWDEOH&'5:GLVFVDQG&''$IRUPDWGLJLWDODXGLR&'
&'5&'5:GLVFV
LOADING A DISC
3UHVVWKH67$1'%<)81&EXWWRQWRFKRRVH&'PRGH
2SHQWKH&'GRRU³OPEN´ZLOOEHVKRZQRQWKHGLVSOD\
3. Place an audio CD into the tray with the label side facing up.
&ORVHWKH&'GRRU7KHWRWDOQXPEHURIWUDFNVZLOODSSHDURQWKHGLVSOD\DIWHUUHDGLQJ¿QLVKHG

EN - 8
7RUHPRYHWKH&'SUHVV6723%87721DQGRSHQ&'FRPSDUWPHQWOLGJUDVSWKH&'E\LWV
edges, and carefully take it out.
Note:
1. To ensure good system performance; wait until the disc tray completely reads the disc before
proceeding.
2. If no disc is loaded into the compartment, or the disc is placed upside down, the display will show
NO DISC.
PLAYING A DISC
After loading the disc, the unit starts playback automatically.
7KHSOD\EDFNVWDUWVIURPWUDFNWKH³7UDFN´LQGLFDWRULVVKRZQRQWKHGLVSOD\
7RLQWHUUXSWSOD\EDFNSUHVVWKH3/$<3$86(EXWWRQ7KH³FXUUHQWSOD\LQJWLPH´LQGLFDWRUZLOOÀDVK
on the display.
7RUHVXPHSOD\EDFNSUHVVWKH3/$<3$86(EXWWRQDJDLQ
7RVWRSSOD\EDFNSUHVVWKH6723EXWWRQWKHWRWDOQXPEHURIWUDFNVDSSHDUVRQWKHGLVSOD\
SELECTING A DESIRED TRACK/PASSAGE
To select a desired track
Press the button repeatedly in stop mode or during play until the desired track appears
on the display.
3UHVVWKH3/$<3$86(EXWWRQWRVWDUWSOD\
To search for a particular passage during playback (track scanning at high speed)
Press and hold the button to scan the current playing track at high speed until desired pas-
sage appears, and then release the button. Playback will start again from this point.
To select a song which track number exceeds 10for MP3 disc only
7RVHOHFWDVRQJWUDFNZKLFKQXPEHUH[FHHGV3UHVVWKH)2/'0RU)2/'0EXWWRQ
HDFKWLPHWRVNLSIRUZDUGEDFNZDUGWUDFNVWKHQSUHVVWKH or button to select desired
WUDFN)RUH[DPSOHWRVHOHFWWKH
th
WUDFNSUHVV)2/'0EXWWRQDQGWKHQWKHEXWWRQVL[
times immediately.
To Select A Desired Folderfor MP3 disc only
LIWKH03GLVFFRQWDLQVPRUHWKDQRQHIROGHU
7RVNLSWRWKHGHVLUHGIROGHUGXULQJSOD\EDFNSUHVVDQGKROGWKH)2/'0RU)2/'0EXW-
WRQIRUDERXWVHFRQGVWRVNLSWRQH[WSUHYLRXVIROGHU
PROGRAM TRACKS
3URJUDPPLQJWUDFNVRIGLVFDUHSRVVLEOHZKHQSOD\EDFNLVVWRSSHG8SWR&'WUDFNV03WUDFNV
can be stored in the memory in any order.
,QVWRSPRGHSUHVVWKH352*302'(EXWWRQWKHP01 indicator will be on.
2. Press the CD or EXWWRQWRVHOHFWWKH¿UVWGHVLUHGWUDFNWREHSURJUDPPHG
3UHVVWKH352*302'(EXWWRQWRHQWHU7KHGLVSOD\FKDQJHVWRVKRZP02.
5HSHDWVWHSVWRVWRUHRWKHUGHVLUHGWUDFNVXQWLODOOWUDFNVDUHSURJUDPPHG
3UHVVWKH3/$<3$86(EXWWRQWRVWDUWSOD\EDFNIURPWKH¿UVWSURJUDPPHGWUDFN
3UHVVWKH6723EXWWRQWRVWRSSURJUDPSOD\EDFN
To Erase the Memory (Program)
To clear the program, you have two options:
3UHVVWKH6723EXWWRQZKHQWKHGLVFLVVWRSSHGDQG
2SHQWKH&'FRPSDUWPHQWOLGSURJUDPZLOOEHHUDVHG

EN - 9
REPEAT
<RXFDQSOD\RQHWUDFNRUDOOWUDFNVRQWKHGLVFUHSHDWHGO\
To Repeat a Single Track
3UHVV352G./P-MODE EXWWRQRQFHLQSOD\WKH5(3LQGLFDWRUZLOOÀDVKRQWKHGLVSOD\7KHFXUUHQW
WUDFNZLOOEHSOD\HGRYHUDQGRYHUDJDLQWLOO\RXSUHVV6723EXWWRQ
7RFDQFHOUHSHDWSOD\SUHVV352G./P-MODE EXWWRQXQWLOWKH5(3LQGLFDWRUGLVDSSHDUV
To repeat all the Tracks
3UHVV352G./P-MODE EXWWRQWZLFHLQSOD\WKH5(3LQGLFDWRUZLOOVKRZVWHDG\RQWKHGLVSOD\DOO
WUDFNVRQWKHGLVFZLOOEHSOD\HGRYHUDQGRYHUDJDLQWLOO\RXSUHVV6723EXWWRQ
7RFDQFHOUHSHDWSOD\SUHVV352G./P-MODE EXWWRQXQWLOWKH5(3LQGLFDWRUGLVDSSHDUV
To repeat current folder (for MP3 only)
3UHVV352*302'(EXWWRQLQSOD\PRGHWLOOWKH³5(3$/%80´VKRZVVWHDG\RQWKHGLVSOD\
WKHFXUUHQWIROGHUZLOOEHSOD\HGUHSHDWHGO\XQWLOWKH6723EXWWRQLVSUHVVHG
7RFDQFHO5HSHDWIXQFWLRQSUHVVWKH352*302'(EXWWRQXQWLOWKH³5(3$/%80´GLVDSSHDU
RQWKH/&'GLVSOD\
RANDOM PLAY
3UHVVWKH352*302'( EXWWRQLQ3OD\6WRSPRGHWRDFWLYDWHUDQGRPSOD\EDFNWKH5'0LQGLFDWRU
ZLOOVKRZRQWKHGLVSOD\SOD\EDFNZLOOVWDUWIURPDQ\RQHWUDFNQRWLQWKHRUGHURIWKHGLVF7RFDQFOH
WKH5$1'20SUHVVWKHRDM button again.
USB OPERATION
3UHVVWKH67$1'%<)81&EXWWRQWRFKRRVH86%PRGH
&RQQHFWWKH86%WRWKH86%,13877KH/&'ZLOOVKRZWKHWRWDOQXPEHURIWUDFNVDQGIROGHUV
VWRUHGLQWKH86%$IWHUUHDGLQJWKH86%7KHXQLWFDQVXSSRUWXSWR*86%GHYLFHWKHXQLW
will start playback automatically.
3. Press the EXWWRQRQXQLWWRVWRSSOD\LQJ7KHGLVSOD\ZLOOVKRZWRWDOQXPEHURI86%DQGIROGHUV
DQG6723
3URFHHGUHSHDWSOD\UHSHDWUHSHDWIROGHU±UHSHDWDOO,1752SURJUDPSOD\VNLSXSDQGEDFN
RSHUDWLRQDVWKHVDPHGHVFULEHGLQDERYH³&'0323(5$7,21´
CAUTION:
'RQRWXVHDQ\86%H[WHQVLRQFDEOHIRUFRQQHFWLQJWKH86%EDUZKLFKPD\FDXVHKDUPIXOLQWHUIHU-
ence
BLUETOOTH OPERATION
1. Press the FUNCEXWWRQRQXQLWRURQUHPRWHFRQWUROWRVZLWFKWR%/8(7227+IXQFWLRQWKH/&'
ZLOOGLVSOD\³E7´DQGWKH3DLU6WDQGE\LQGLFDWRUZLOOÀDVKDWKLJKVSHHG
7XUQRQWKH%OXHWRRWKIXQFWLRQRQWKHGHYLFHVFDQWKHXQLW³SPT 3907´DQGFRQQHFWWKHQLQSXW
WKHSDVVZRUGLIUHTXLUHGWKHGLVSOD\ZLOOVKRZ³EW´3UHVV/PAIR button on the unit or play
key on the device to star t playback. If the unit can‘t connect the relative Bluetooth within 2 minutes,
press the /PAIR EXWWRQRQXQLWRU3$,5NH\RQUHPRWHFRQWUROWRUHFRQQHFW
3. Press the VOLUME +/- button to your desired level.
4. Press button or on the unit or key on remote control to choose the desired track.
5. To stop playback, press /PAIR button on unit or key on remote control.
Note: The Bluetooth works best within 10 meters.

EN - 10
AUX IN OPERATION
This unit provides a 3.5mm AUX IN jack, through this jack other audio sources can be connected to
WKLVXQLWDQGEHDPSOL¿HG
3UHVVWKH67$1'%<)81&EXWWRQWRFKRRVH$8;PRGH
&RQQHFWWKHDXGLRFDEOHLQWRWKH$8;,1MDFNDQGWKHRWKHUHQGFRQQHFWVWRWKH$8',2287MDFN
RIWKHH[WHUQDODXGLRVRXUFH
3. Adjust the volume of the main unit to your desired level.
3UHVV3/$<RIWKHH[WHUQDODXGLRVRXUFHHJ03SOD\HUWRVWDUWSOD\EDFN
SPECIFICATIONS
GENERAL
3RZHU5HTXLUHPHQW $&±9a+]
'&980î3&6
Power FRQVXPSWLRQ 14 W
6WDQGE\SRZHUFRQVXPSWLRQ <0,5W
Automatic standby time PLQLQFDVHRIQRSOD\EDFNVRXUFH
Weight $SSUR[NJ
Dimensions $SSUR[PP:îPP'îPP+
2SHUDWLRQWHPSHUDWXUH ±&
RECEIVER SECTION
)0)UHTXHQF\5DQJH ±0+]
COMPACT DISC SECTION
2SWLFDO3LFNXS ±%HDP/DVHU
)UHTXHQF\5HVSRQVH +]±.+]
CASSETTE SECTION
%LDV6\VWHP DC Bias
)UHTXHQF\5HVSRQVH +]±N+]
:RZDQG)OXWWHU :506-,6
AUDIO SECTION
Power output :DWWVî506
Bluetooth
9
ACCESSORIES
Instruction Booklet 1
AC Cord 1
5HPRWHFRQWURO 1
EN - 11
7KLVGHYLFHKDVDSRZHUVDYLQJIXQFWLRQWKDWDXWRPDWLFDOO\WXUQVRႇRUVZLWFKWRVWDQGE\LIQREXWWRQ
is pressed for a certain period of time under certain operating conditions. If this function is disabled,
power consumption will increase.
Note:
6SHFL¿FDWLRQVDUHVXEMHFWWRFKDQJHIRUFRQWLQXRXVLPSURYHPHQWWKHUHIRUHZHUHVHUYHWKHULJKWVWR
WKRVHPRGL¿FDWLRQVZLWKRXWSULRUQRWLFH
INSTRUCTIONS AND INFORMATION REGARDING THE DISPOSAL OF USED
PACKAGING MATERIALS
Dispose of packaging material at a public waste disposal site.
DISPOSAL OF USED ELECTRICAL AND ELECTRONIC APPLIANCES
The meaning of the symbol on the product, its accessory or packaging indicates that this
product shall not be treated as household waste. Please, dispose of this product at your
DSSOLFDEOHFROOHFWLRQSRLQWIRUWKHUHF\FOLQJRIHOHFWULFDOHOHFWURQLFHTXLSPHQWZDVWH$OWHU-
natively in some states of the European Union or other European states you may return your
products to your local retailer when buying an equivalent new product. The correct disposal
of this product will help save valuable natural resources and help in preventing the potential
negative impact on the environment and human health, which could be caused as a result of
improper liquidation of waste. Please ask your local authorities or the nearest waste collec-
tion centre for further details. The improper disposal of this type of waste may fall subject to
QDWLRQDOUHJXODWLRQVIRU¿QHV
For business entities in the European Union
If you wish to dispose of an electrical or electronic device, request the necessary information from
your seller or supplier.
Disposal in other countries outside the European Union
If you wish to dispose of this product, request the necessary information about the correct disposal
method from local government departments or from your seller.
The product meets EU requirements.
+HUHE\)$67ý5DVGHFODUHVWKDWWKHUDGLRHTXLSPHQWW\SH637LVLQFRPSOLDQFH
ZLWK'LUHFWLYH(87KHIXOOWH[WRIWKH(8GHFODUDWLRQRIFRQIRUPLW\LVDYDLODEOHDWWKH
following internet address: sencor.com
&KDQJHVWRWKHWH[WGHVLJQDQGWHFKQLFDOVSHFL¿FDWLRQVPD\RFFXUZLWKRXWSULRUQRWLFHDQGZHUH-
serve the right to make these changes.
7KHRULJLQDOYHUVLRQLVLQWKH&]HFKODQJXDJH
Address of the manufacturer:
)$67ý5DV86DQLWDVXětþDQ\&=
&RS\ULJKW)DVWý5DV 5HYLVLRQ

EN - 12
EN
Warranty conditions
Warranty card is not apart of the device packaging.
This product is warranted for the period of 24 months from the date of purchase to the end-user. Warranty
is limited to the following conditions. Warranty is referred only to the customer goods using for common
domestic use. The claim for service can be applied either at dealer’sshop where the product was bought, or
at below mentioned authorized service shops. The end-user is obligated to set up aclaim immediately when
the defects appeared but only till the end of warranty period. The end user is obligated to cooperate to certify
the claiming defects. Only completed and clean (according to hygienic standards) product will be accepted.
In case of eligible warranty claim the warranty period will be prolonged by the period from the date of claim
application till the date of taking over the product by end-user, or the date the end-user is obligated to take it
over. To obtain the service under this warranty, end-user is obligated to certify his claim with duly completed
following documents: receipt, certificate of warranty, certificate of installation.
This warranty is void especially if apply as follows:
Defects which were put on sale.
Wear-out or damage caused by common use.
The product was damaged by unprofessional or wrong installation, used in contrary to the applicable
instruction manual, used in contrary to legal enactment and common process of use or used for another
purpose which has been designed for.
The product was damaged by uncared-for or insufficient maintenance.
The product was damaged by dirt, accident of force majeure (natural disaster, fire, and flood).
Defects on functionality caused by low duality of signal, electromagnetic field interference etc.
The product was mechanically damaged (e.g. broken button, fall).
Damage caused by use of unsuitable media, fillings, expendable supplies (batteries) or by unsuitable
working conditions (e.g. high temperatures, high humidity, quakes).
Repair, modification or other failure action to the product by unauthorized person.
End-user did not prove enough his right to claim (time and place of purchase).
Data on presented documents differs from data on products.
Cases when the claiming product cannot be indentified according to the presented documents (e.g. the
serial number or the warranty seal has been damaged).
Manufacturer:
FAST ČR, a.s., U Sanitasu 1621, Říčany 251 01, Czech Republic
info@sencor.com
Authorized service centers:
Visit www.sencor.com for detailed information about authorized service centers.
The original version of the instructions is in the Czech language, other language versions are made by the
appropriate translation.

FAST ČR, a.s.86DQLWDVXětþDQ\&=