USER
Laptop
MANUAL
IMPORTANT NOTE
Charging Port Headphone Jack
LFET RIGHT
GOODDEALER OFFICAL USER GUIDE
!

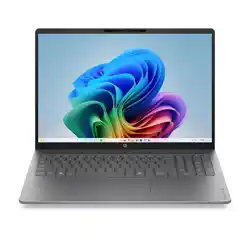
Introducing the DGBook Series Notebook PC
Base View
The followings are major sections of this User’s Manual:
2
2
Bottom View
4
Getting Started
Turning on the Power
Power System
Using the AC Power
Warning
Emergency Shutdown
Using the Touchpad
Using the Hotkeys
5
5
5
6
18
7
8
10
How to Connect to Wireless Network
How to Connect to an External SD Card Reader
How to Restore Your Laptop
Specifications
FAQs
12
12
13
17
13
Safety Precautions
15
About This User’s Manual
You are reading the DGBook Series Notebook PC User Manual.
This User’s Manual provides information regarding the various components in the
DGBook Notebook PC and how to use them.
Warranty
19
Base View
Your DGBook Notebook Tour
02
7
8
9
10
11
3
2
4
1
12
13
5
6
14
6 .5 0
U3

03
Touchpad
Power Button
12
13
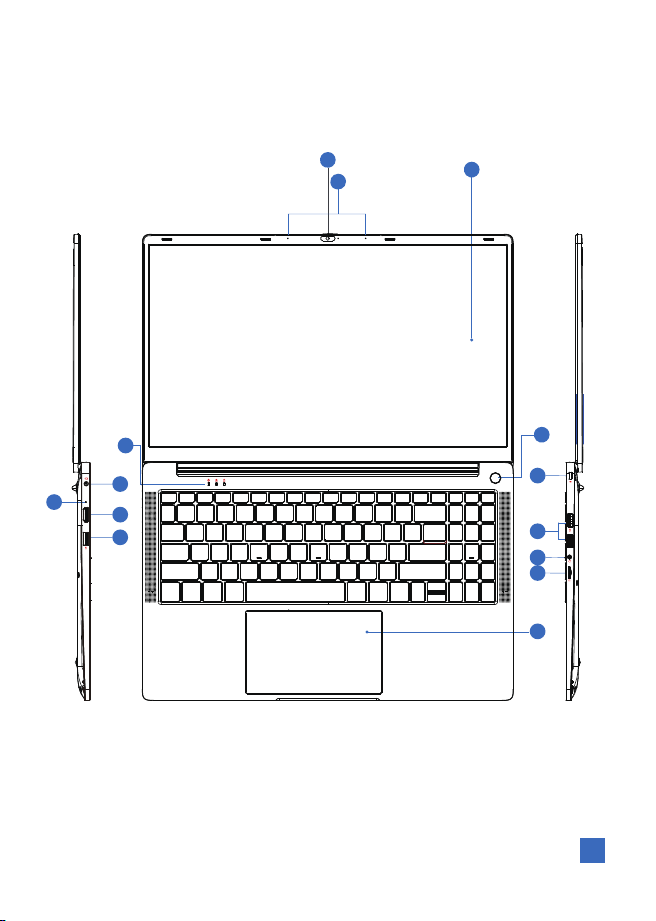
Turns the laptop on and off.
The built-in camera allows picture taking or video recording.
Can be used with video conferencing and other interactive applications.
For clear voice input during calls and voice commands.
Connects to USB devices
For use with a Kensington security cable to prevent theft.
Camera
Hidden Microphone
K-Slot
USB 3.0
Power Interface
Indicates the computer’s power status
USB 3.0
Connects to USB devices
Power, Caps Lock, Num Lock.
HDMI Port (HDMI 1.4)
Charging Indicator
Orange when charging, Blue when fully charged.
Supports high-definition audio and video transmission over a single cable
Maximum resolution: 4K @ 24Hz
1
2
3
4
5
6
The main laptop screen.
Screen
14
7
8
3.5mm 4-pole (TRRS) port for connecting headsets with microphone.
The same as a Micro-SD card that is used to store data in digital form. Micro SD and TF
Cards can be used in various types of devices such as smartphones, cameras, computers
and other such devices for storing information like videos, pictures and so.
Headphone jack
9
Micro SD / TF Card Slot
10
LEDs
11
Controls the direction of the moving upward and downward.
04
Mini HDM I
MENU
1
2
1
3
3
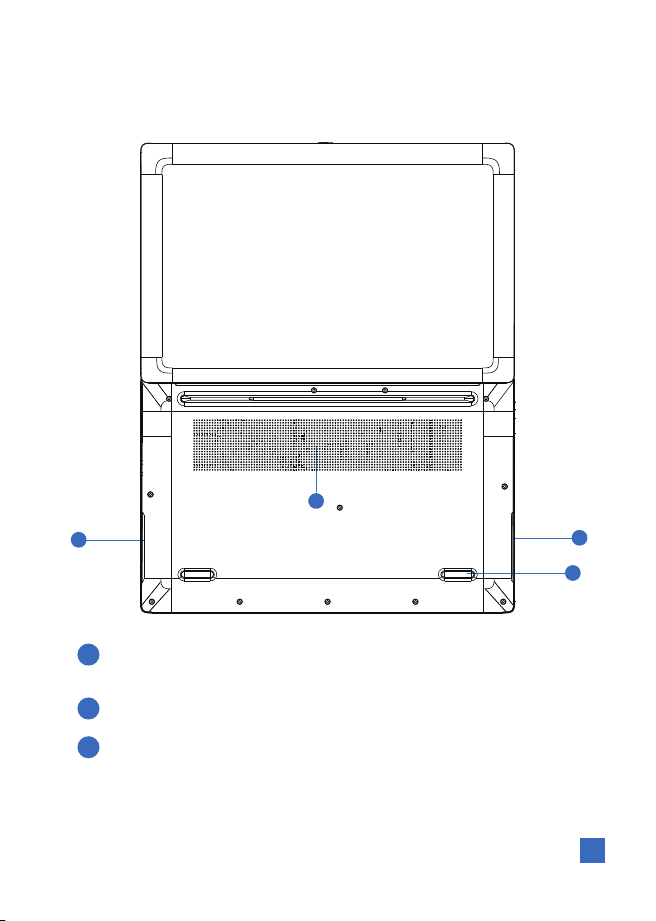
Heat Emission
To release heat from the laptop and to prevent overheating from
the button of the laptop.
Non-Slip Mat
To keep your DGBook Series from slipping.
1
2
Stereo Speakers
Built-in stereo speakers (Left/Right channels) for immersive audio output.
3
DGBook Bottom View
05
Getting Started
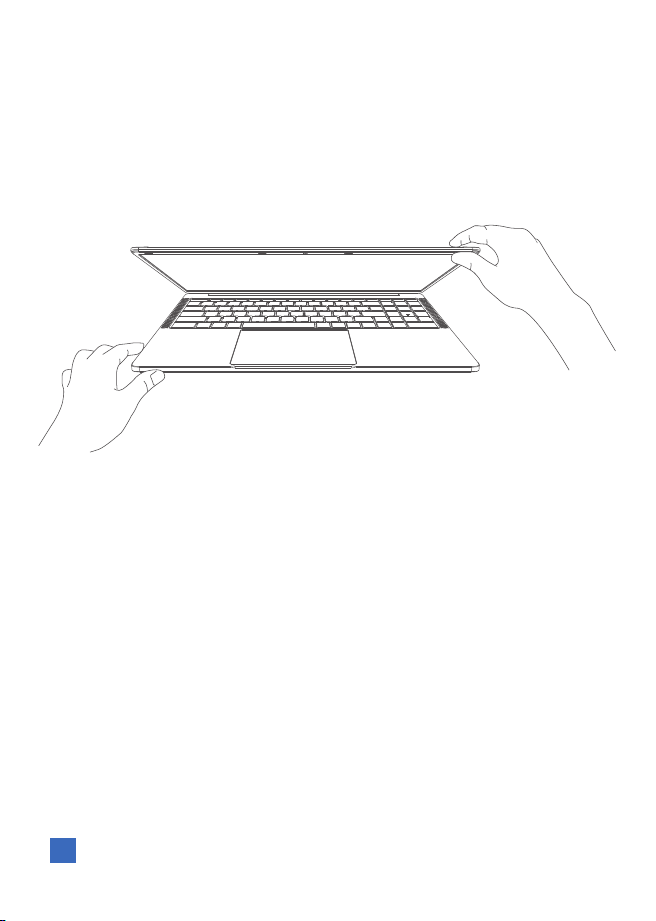
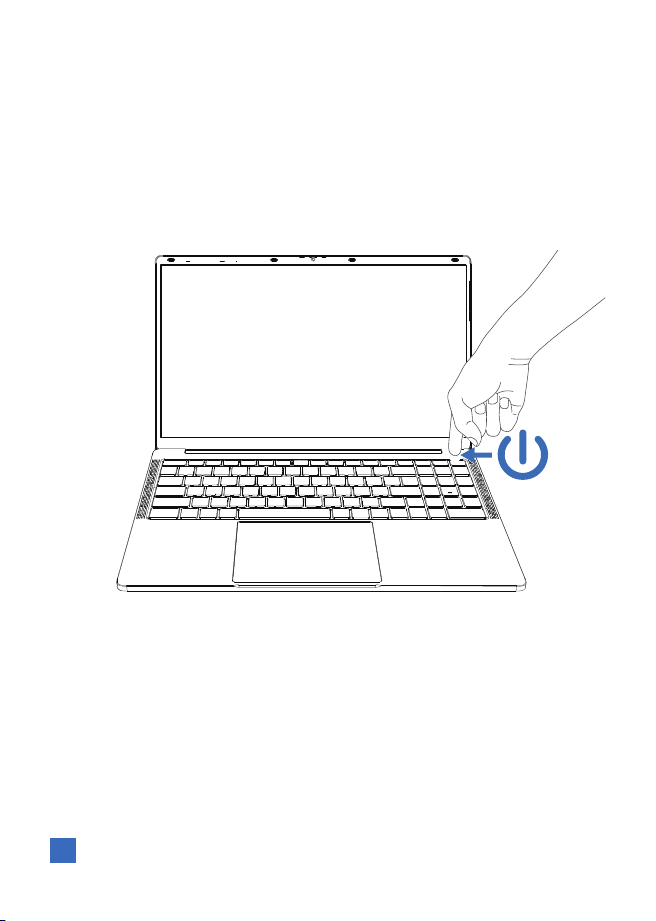
1.Push and release the power button located beneath the LCD display panel.
2.Use [Fn]+[F6] or [Fn]+[F7] to adjust the LCD brightness.
Power System
Turning on the Power
Using the AC Power
The DGBook Series Notebook PC power is comprised of two parts, the power
adapter and the battery power system. The power adapter converts AC power from a
wall outlet to the DC power required by DCBook series Notebook. Your Notebook PC
comes with a universal AC-DC adapter. That means that you may connect the power
cord to any 100V-120V as well as 220V-240V outlets without setting switches or using
power converters. Different countries may require that an adapter be used to connect
the provided US-standard AC power cord to a different standard. Most hotels will
provide universal outlets to support different power cords as well as voltages. It is
always best to ask an experienced traveler about AC outlet voltages when bringing
power adapters to another country.
06
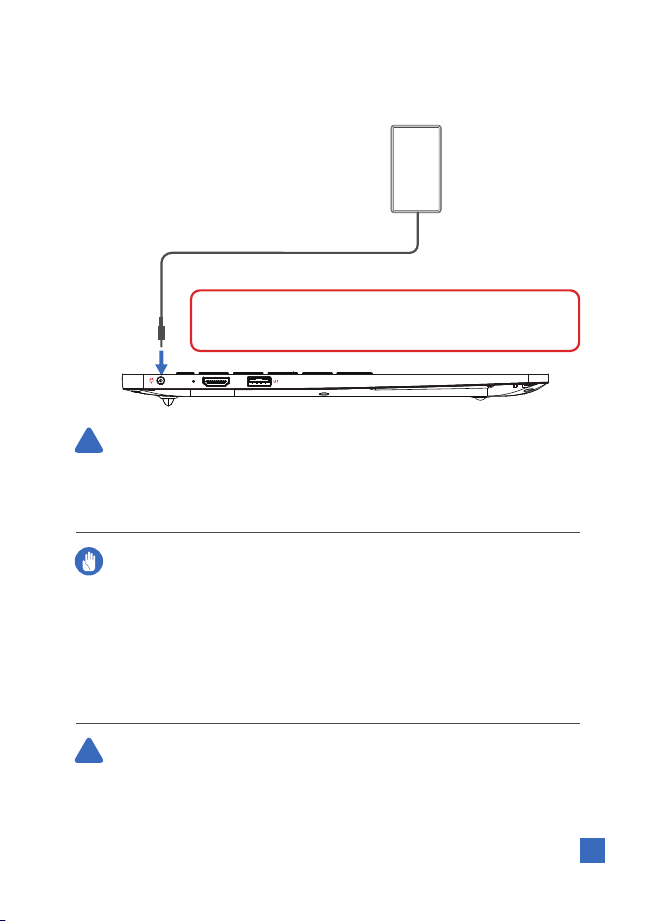
Warning: DO NOT connect the AC power cord to an AC outlet
prior to connecting the DC plug to the Notebook PC. Doing so may damage
the AC-DC adapter.
IMPORTANT! Damage may occur if you use a different adapter to power
the DGBook Series Notebook PC or use the DGBook Series Notebook PC’s
adapter to power other electrical devices. If there is smoke, burning scent,
or extreme heat coming from the AC-DC adapter, seek servicing. Seek
servicing if you suspect a faulty AC-DC adapter. You may damage both
your battery pack(s) and the DGBook Series Notebook PC with a faulty
AC-DC adapter.
!
WARNING! THE POWER ADAPTER MAY BECOME WARM TO HOT WHEN IN
USE. BE SURE NOT TO COVER THE ADAPTER AND KEEP IT AWAY FROM
YOUR BODY.
!
Ensure this is the left-side DC input,
distinct from the right-side audio port.
07
Press the emergency shutdown key firmly for five seconds to
shut down the laptop.
Emergency Shutdown
08
Moving the pointer
You can tap or click anywhere on the touchpad to activate its pointer, then slide your
finger on the touchpad to move the pointer onscreen.
The touch-sensitive pointing device:
The touchpad and selection buttons form a single surface. Press down firmly on the
touchpad surface to perform a left click. Press down firmly on the lower right corner
to perform a right click.
The touchpad allows you to use one-finger and multi-finger gestures to move the
pointer so you can select and click items, rotate and zoom images, scroll lists, as well
as swipe and switch between windows.
The touchpad is an interactive device that interprets the gestures and position of your
fingers to simulate the functions of a regular mouse. It is also an alternative to mouse
to position cursor onscreen.
Using the Touchpad
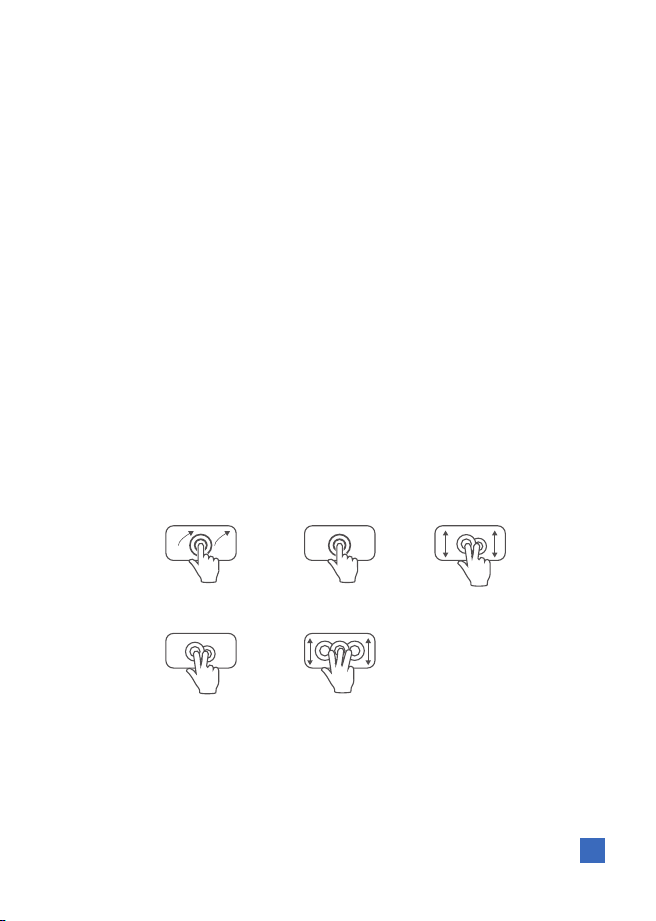
Touchpad Gestures:
use the touchpad to move the cursor or select an item
One Finger Tap
Two Fingers Tap
Swipe On The Trackpad
Two Fingers Scroll
Three Fingers Scroll
Tapping:
Tapping on the touchpad allows you to select items onscreen and open files. The
DGBook Series Notebook has multiple touchpad functions to support its touchpad.

09
Touchpad Gestures:
Tapping on the touchpad allows you to select items onscreen and open files. The
DGBook Series Notebook has multiple touchpad functions to support its touchpad.
Slide Up:
Move your fingers between the top and bottom of your touchpad to scroll up and
down, or move your fingers across the touchpad to scroll sideways. Be careful to
space your fingers a bit apart. If your fingers are too close together, they just look like
one big finger to your touchpad.
Slide Down:
Move your fingers between the top and bottom of your touchpad to scroll up and
down, or move your fingers across the touchpad to scroll sideways. Be careful to
space your fingers a bit apart. If your fingers are too close together, they just look like
one big finger to your touchpad.
Swipe On the Trackpad:
Use one finger to swipe upward toward the right side.
One Finger Tap:
The one finger tap feature lets you move an object on the desktop using just one
finger: tap twice and do not lift the finger from the touchpad, then slide to drag the
object.
Two Fingers Scroll:
Tapping and dragging with one finger will work as normal, but if you drag two fingers
across any part of the touchpad, it will scroll instead. Move your fingers between the
top and bottom of your touchpad to scroll up and down, or move your fingers across
the touchpad to scroll sideways.
Two Fingers Tap:
Place two fingers on the touchpad and pinch in or stretch out.
10
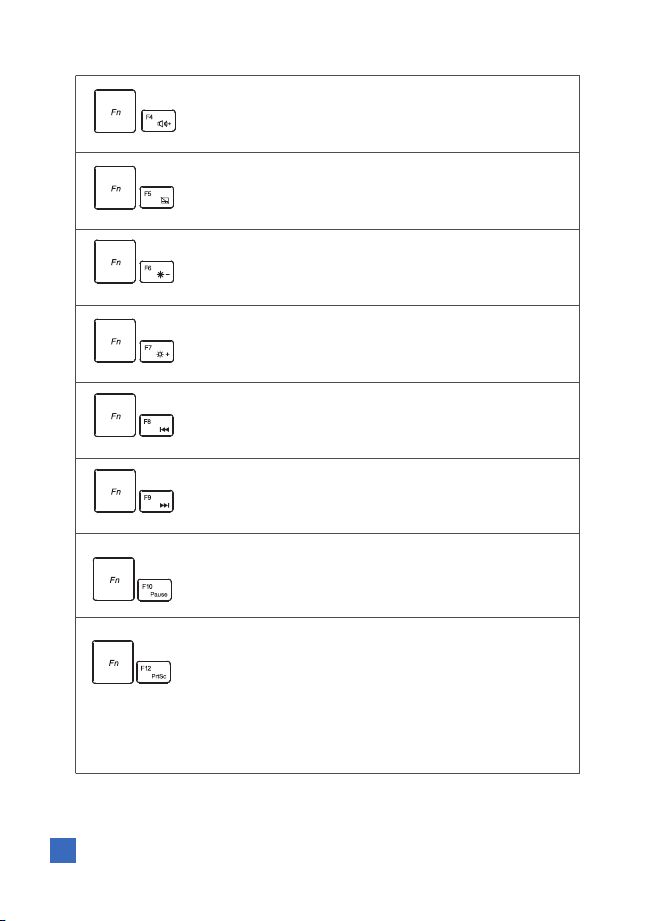
Using the Hot Keys
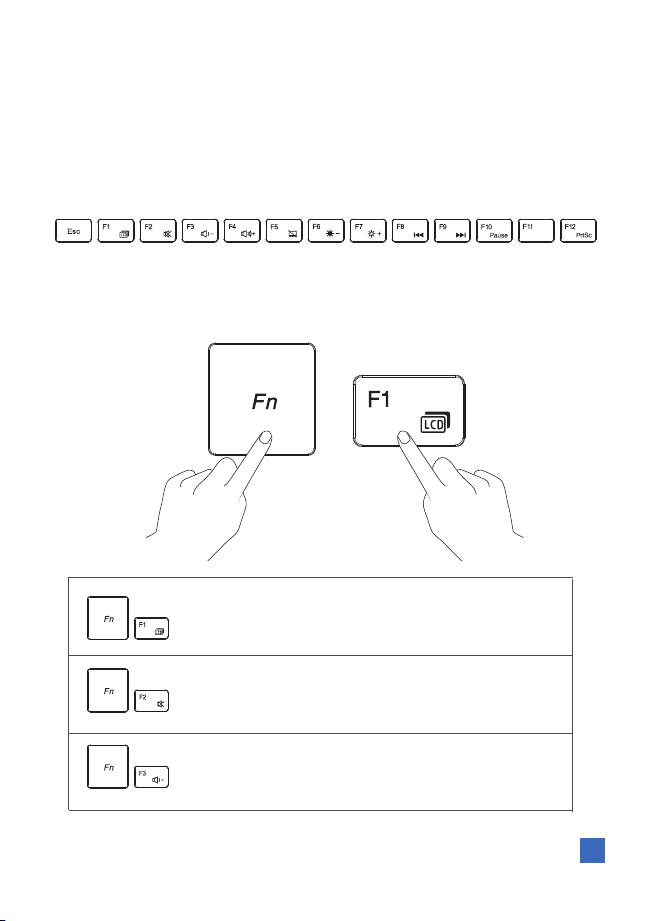
The computer employs hotkeys or key combinations to access most of the computer's
controls like screen brightness and volume output. To activate hotkeys, press and
hold the Fn key before pressing the other key in the hotkey combination.
Crossed Speaker Icons F2:
Press FN+F2 to turn the speakers ON and OFF.
Speaker Down Icon F3:
Press FN+F3 to decrease the speaker volume.
LCD/Monitor Icons F1:
Press Fn+F1 to switch the display settings between LCD only,
LCD+Monitor, or Monitor only
11
Speakers Up Icon F4:
Press FN+F4 to increase the speaker volume.
Restrict Icon F5:
Press FN+F5 to restrict the function of the touchpad.
Sun Down Icon F6:
Press FN+F6 to decrease the display brightness.
Sun Up Icon F7:
Press FN+F7 to increase the display brightness.
Music Previous Icon F8:
Press FN+F8 to play the previous track.
Music Next Icon F9:
Press FN+F9 to play the next track.
Pause Icon F10:
Press FN+F10 to pause or resume playback.
Screenshot Icon F12:
Use the keyboard shortcut: PrtScn (Print Screen) or CTRL +
PrtSc. The first method is also the best known and it works
in all versions of Windows: on your keyboard, press the
PrtSc (Print Screen) key or CTRL+PrtScn keys. Windows
creates a screenshot of the whole screen and saves it to the
clipboard.
12
Guest
Open
Network settings
Wi-Fi Airplane mode
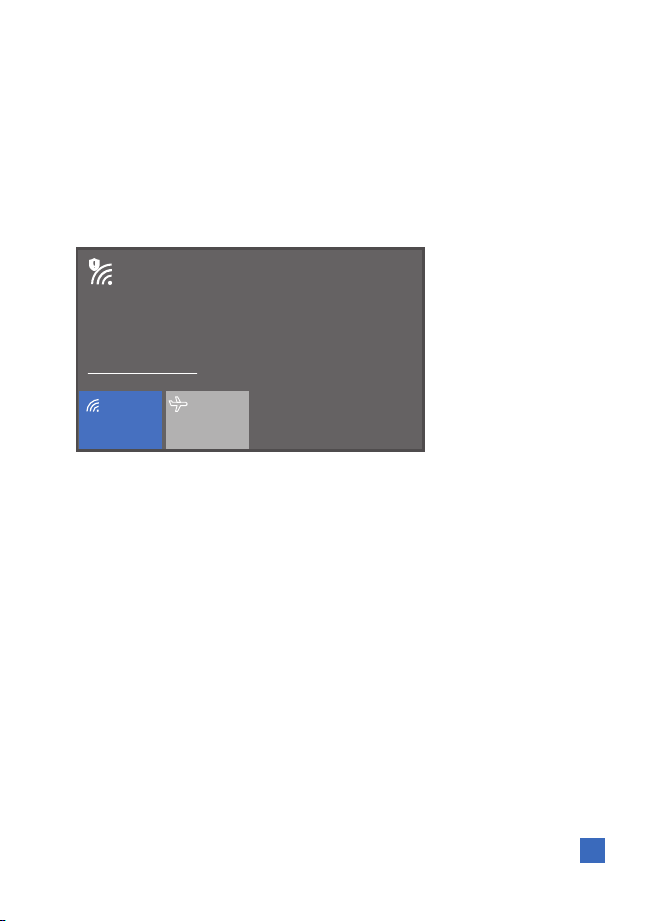
How to Connect to Wireless Network
How to Connect to an External SD Card Reader
SD (Secure Digital) cards are used in a wide selection of digital cameras,
tablets, media players and cellular phones.
A wireless LAN (or WLAN) is a wireless local area network, which can link two or
more computers without using wires. Once connected to WLAN, you can access the
internet. You can also share files, other devices, and even your internet connection
itself. Your computer's wireless connection is turned on by default and Windows will
detect and display a list of available networks during setup. Select your network and
enter the password if required.
Inserting an SD card
1.Align the card so that the connector points towards the port, with the connectors
facing down.
2.Carefully slide the card into the port. If you find you need to use any force to insert
the card, try re-orientating the card slightly.
3.Push the card until it clicks into place. A few millimeters of the card will extend
If the card contains some files, the Windows AutoPlay window may appear (this
depends on the contents of the card) and ask you if you wish to use a program to
access the contents of the card.

13
Recovery Management allows you to quickly and easily restore your computer back to
its default status. You can choose to keep your files or remove them before
reinstalling Windows.
1.From Start, select system reset.
2.Select the Restore tab and click Get started to Choose an option.
3.Select Keep my files to refresh your PC and reinstall your operating system without
removing your personal files. Click Next to continue.
4.Resetting the PC will reinstall Windows, change settings back to their factory
defaults and remove all preinstalled apps and programs without removing your
personal files. Click Reset to continue.
5.You will be shown the reset progress on the screen. The screen will turn off during
the reset process.
6.The screen will turn back on when it is installing Windows. Your PC will restart
several times during the reset process.
7.Follow the process until it completes.
8.When your PC has completed the reset process, Windows will have been reset back
to its factory default settings without removing your personal files.
How to Restore Your Laptop?
Q: What if the computer stops responding?
A: Press CTRL+ALT+DEL to end the application that is not responding. Press the blue
power button for at least 4 seconds to turn off the computer. Then press the blue
button again to turn the computer back on.
Q: What if the computer doesn’t respond at turn-on?
A: Connect the AC adapter and press the blue power button to try turning on the unit.
If you get no response, remove the AC adapter, remove any PC cards, and undock the
computer—then plug in the AC adapter and try resetting. If you still get no response,
contact DGBook Series customer support for assistance.
FAQs
Q: What if the battery doesn’t charge?
A: Make sure the AC adapter is plugged into the power source and that the light on
the adapter is on. If you're using a power strip, remove the AC adapter from the power
strip and plug it directly into a wall outlet. Move the computer away from any nearby
heat source. Unplug the AC adapter and allow the battery to cool down. An elevated
battery temperature prevents charging.

14
Q: What if the computer turns off immediately after it turns on?
Battery power is probably extremely low. Plug in the AC adapter to charge and make
sure the operating temperature is within the acceptable range.
Q: What if the computer pauses or runs sluggishly?
A: Press CTRL+ALT+DEL to see if an application is not responding. Reboot the
computer. Delete temporary and unneeded files. Certain background operations
(such as VirusScan) can affect performance while they’re running.
Q: What if the touch pad is difficult to control
A: Customize the touch pad by using the Mouse applet in Control Panel (Start,
Settings, Control Panel).
15
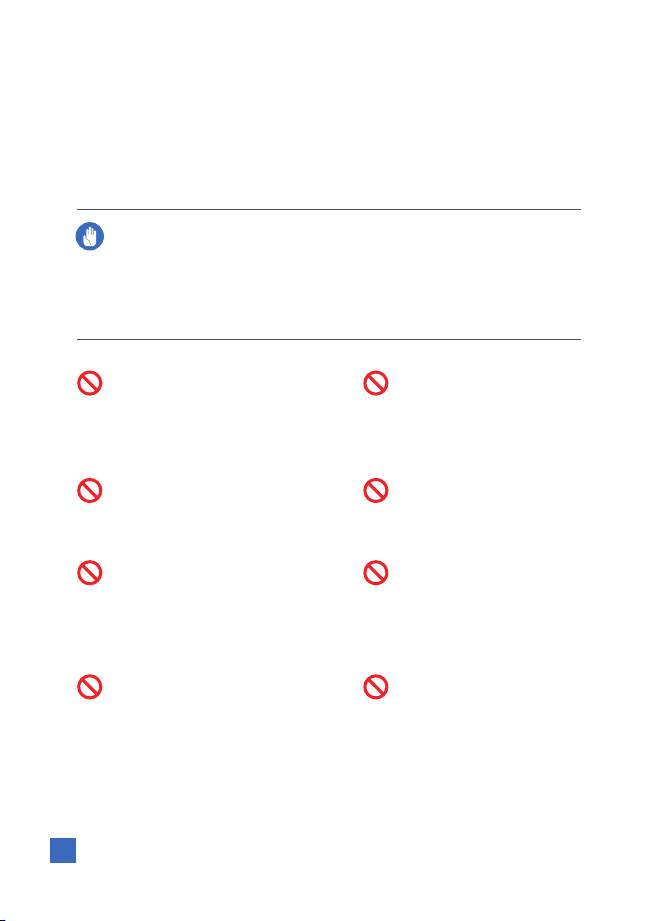
Safety Precautions
The following safety precautions will increase the life of the DGBook Series
Notebook PC. Follow all precautions and instructions. Except as described in this
manual, refer all servicing to qualified personnel.
Disconnect the AC power and remove the battery pack(s) before cleaning.
Wipe the DGBook series Notebook PC using a clean cellulose sponge
or chamois cloth dampened with a solution of nonabrasive detergent and a
few drops of warm water and remove any extra moisture with a dry cloth.
DO NOT expose to dirty
or dusty environments.
DO NOT operate during a gas leak.
DO NOT expose to
strong magnetic or
electrical fields.
DO NOT press or touch
the display panel. Do not place
together with small items that may
scratch or enter the DGBook
Series Notebook PC.
DO NOT expose to or
use near liquids, rain,
or moisture. DO NOT
use the modem during
electrical storms.
DO NOT leave the
DGBook Series
Notebook PC on your lap
or any part of the body
to prevent discomfort or
injury from heat exposure.
Battery safety warning:
DO NOT throw the
battery in fire. DO NOT
short circuit the contacts.
DO NOT disassemble
the battery.
DO NOT place or drop
objects on top and do not
shove any foreign objects into
the DGBook Series
Notebook PC.
DO NOT place on
uneven or unstable work
surfaces. Seek servicing
if the casing has been
damaged.

16
SAFE TEMP: This
DGBook series
Notebook PC should
only be used in environments
with ambient temperatures
between 5°C (41°F) and
35°C (95°F).
INPUT RATING: Refer to
the rating label on the
bottom of the DGBook
series Notebook PC
and be sure that your
power adapter complies
with the rating.
DO NOT carry or cover
a DGBook Series
Notebook PC that is powered
ON with any materials that will
reduct air circulation such as
carrying bag.
DO NOT use strong
solvents such as
thinners, benzene, or
other chemicals on or
near the surface.
DO NOT use damaged power cords, accessories, or other peripherals.
Incorrect installation of battery may cause explosion and damage the
DGBook Series Notebook PC.
DO NOT throw the battery in municipal waste. The symbol of the crossed out
wheeled bin indicates that the battery should not be placed in municipal
waste.
DO NOT throw the DGBook Series Notebook PC in municipal waste.
This product has been designed to enable proper reuse of parts and
recycling. The symbol of the crossed out wheeled bin indicates that the
product (electrical, electronic equipment and mercury-containg button cell
battery) should not be placed in municipal waste. Check local regulations for
disposal of electronic products.

17
Specifications DGBook Series
Display
GPU
CPU
RAM
SSD
Camera
Speaker
Battery
WiFi
System
Memory card socket
Ports
Memory Slots
Power adapter
15.6" 1920 x 1080 pixels FHD IPS screen
6GB LPDDR3, Dual Channel
128GB SSD, Supports up to 2TB M.2 SATA SSD
Front Facing 2.0MP
Speaker x 2
Li-ion battery 5000mAh 7.7V
Supports up to 1TB capacity,
WiFi 2.4Ghz
Windows 11 Home
Data transfer via USB 2.0
HDMI, USB 3.0*3, Headphone Jack
Onboard, Non-Removable
Max Capacity per Slot
3GB+3GB LPDDR3
3.5mm power connector 12V/3A
4305U, 2.2GHz [DGBook T1]
Product Dimensions
357.5 x 229.5 x 19.5 mm
Operating system
Windows 11 home
UHD Graphics 610
18
Warning:
following two conditions:
(1) this device may not cause harmful interference, and (2) this device must accept any
interference received, including interference that may cause undesired operation.
Changes or modifications not expressly approved by the party responsible for
compliance could void the user's authority to operate the equipment.
NOTE: This equipment has been tested and found to comply with the limits for a Class
This equipment generates, uses and can radiate radio frequency energy and, if not
installed and used in accordance with the instructions, may cause harmful
interference to radio communications. However. there is no guarantee that
interference will not occur in a particular installation.
If this equipment does cause harmful interference to radio or television reception
which can be determined by turning the equipment off and on, the user is encouraged
to try to correct the interference by one or more of the following measures:
-- Reorient or relocate the receiving antenna.
-- Increase the separation between the equipment and receiver
-- Connect the equipment into an outlet on a circuit different from that to which the
receiver is connected.
-- Consult the dealer or an experienced radio/TV technician for help
NOTE: This device and its antenna(s) must not be co-located or operation in
conjunction with any other antenna or transmitter
Changes or modifications not expressly approved by the party responsible for
compliance could void the user's authority to operate the equipment.
The device has been evaluated to meet general RF exposure requirement. The device
can be used in portable exposure condition without restriction.
Warranty & Support
DGBook Series User Guide
Need Help or Service?
www.gooddealer.cn/contact
Visit our support portal for instant assistance:
Check warranty status • Download drivers • Submit repair requests
1-Year Limited Warranty: DGBook Series products are warranted against defects
in materials and workmanship for one year from the original purchase date.
Service Process: For warranty service, please contact the DGBook Customer Care
Center first. Our technicians will verify your eligibility based on the purchase date
and guide you through the repair process.
Out-of-Warranty Repair: If your device is no longer under warranty, visit our
website or contact support for paid repair options and pricing.