Whats Included:
• Walkie Talkies
Quick Tips:
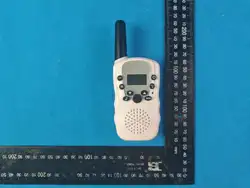
• This package contains 2 walkie-talkie units. They are communication devices operating on
public radio frequencies, equipped with optional 8 / 20 / 22 channels and a backlit LCD screen.
You can make free communications over several kilometers, with a maximum range of up to 3
kilometers in open areas.
2 Long Range Walkie Talkies
Battery/Charging:
• To insert batteries into the device, first remove the belt attachment, lift the attachment clip on
top and push the belt attachment upwards.
• Slide and lift open the battery compartment cover on the back of the walkie-talkie, then insert
4 AAA batteries (not included) aligned with the "+" and "-" polarity markings. Replace the
battery cover and reattach the belt clip.
• The battery icon on the LCD screen displays remaining power via segmented bars: full power,
two-thirds power, one-third power and empty power. When power is low, the battery icon
flashes continuously and a warning beep sounds, reminding you to replace or recharge the
batteries.
Power on/off:
• Hold the Power Button for 3 seconds to switch the radio on or off. A beep tone will sound as a
confirmation prompt.
Adjusting volume level:
• Press the Up Button to turn up the volume, and press the Down Button to turn it down. The
current volume level will be displayed on screen.
Receiving and Transmitting:
• When the indicator lights up, the device enters Reception mode, ready to receive incoming
calls or audio signals transmitted on the active frequency.
• Press the Call button to switch the device to Transmission mode, which will send an audio
signal to the paired unit.
• To transmit a voice message, press the TALK button and speak into the microphone. Keep
pressing the button throughout your speech, and release it only after you finish speaking.
• Maintain a minimum distance of 5 cm between your mouth and the microphone.
Note: The paired device needs identical channel and CTCSS code. After releasing the TALK
button upon finishing your speech, the opposite device will beep to signal transmit readiness.
Changing Channels:
• Press the MENU button once; the current channel number will flash on the display.
• Press the Up button or Down button to switch channels.
• Press the TALK button to confirm the setting and return to standby mode.
Note: If no button is pressed within 15 seconds during setup, the unit will automatically revert to
standby mode.
CTCSS & DCS Introduction:
• License-free radios operating within the 400~470 MHz frequency band are equipped with
8/20/22 available communication channels. There are 99 selectable tone options available for
you to choose freely.
• If many radio users are present in your neighborhood, it is possible that some of them are
using the same communication channel.
• Sub-channels are designed to prevent you from receiving unwanted signals from other users.
• Two radios can communicate with one another only if they are set to the same main channel
and selected with an identical sub-channel. There are two types of sub-channels:
Continuous Tone Coded Squelch System (CTCSS, Analog Subtone):
• When CTCSS is activated, a low-frequency tone (67–250 Hz) is transmitted alongside your
voice signal. These tones are filtered out during audio processing, so they are generally
inaudible and will not interfere with normal conversation.
Digital Coded Squelch (DCS):
• DCS stands for Digital Coded Squelch, an internal digital private-line encrypted squelch
signaling built into the radio. It works in parallel with CTCSS analog subtone; both serve to
isolate irrelevant radios sharing the same frequency, and communication is only available
between radios set to the identical main channel plus matching DCS code.
This radio is programmed with a total of 99 sub-channel codes:
Codes 01–38: 38 groups of CTCSS analog subtone
Codes 39–99: 61 groups of DCS digital codes
Important Note: CTCSS and DCS cannot be enabled simultaneously on a single channel; you
may select only one type for use. Setting to code 0F means subtone function is disabled, and
the radio will receive all signals on the selected main channel.
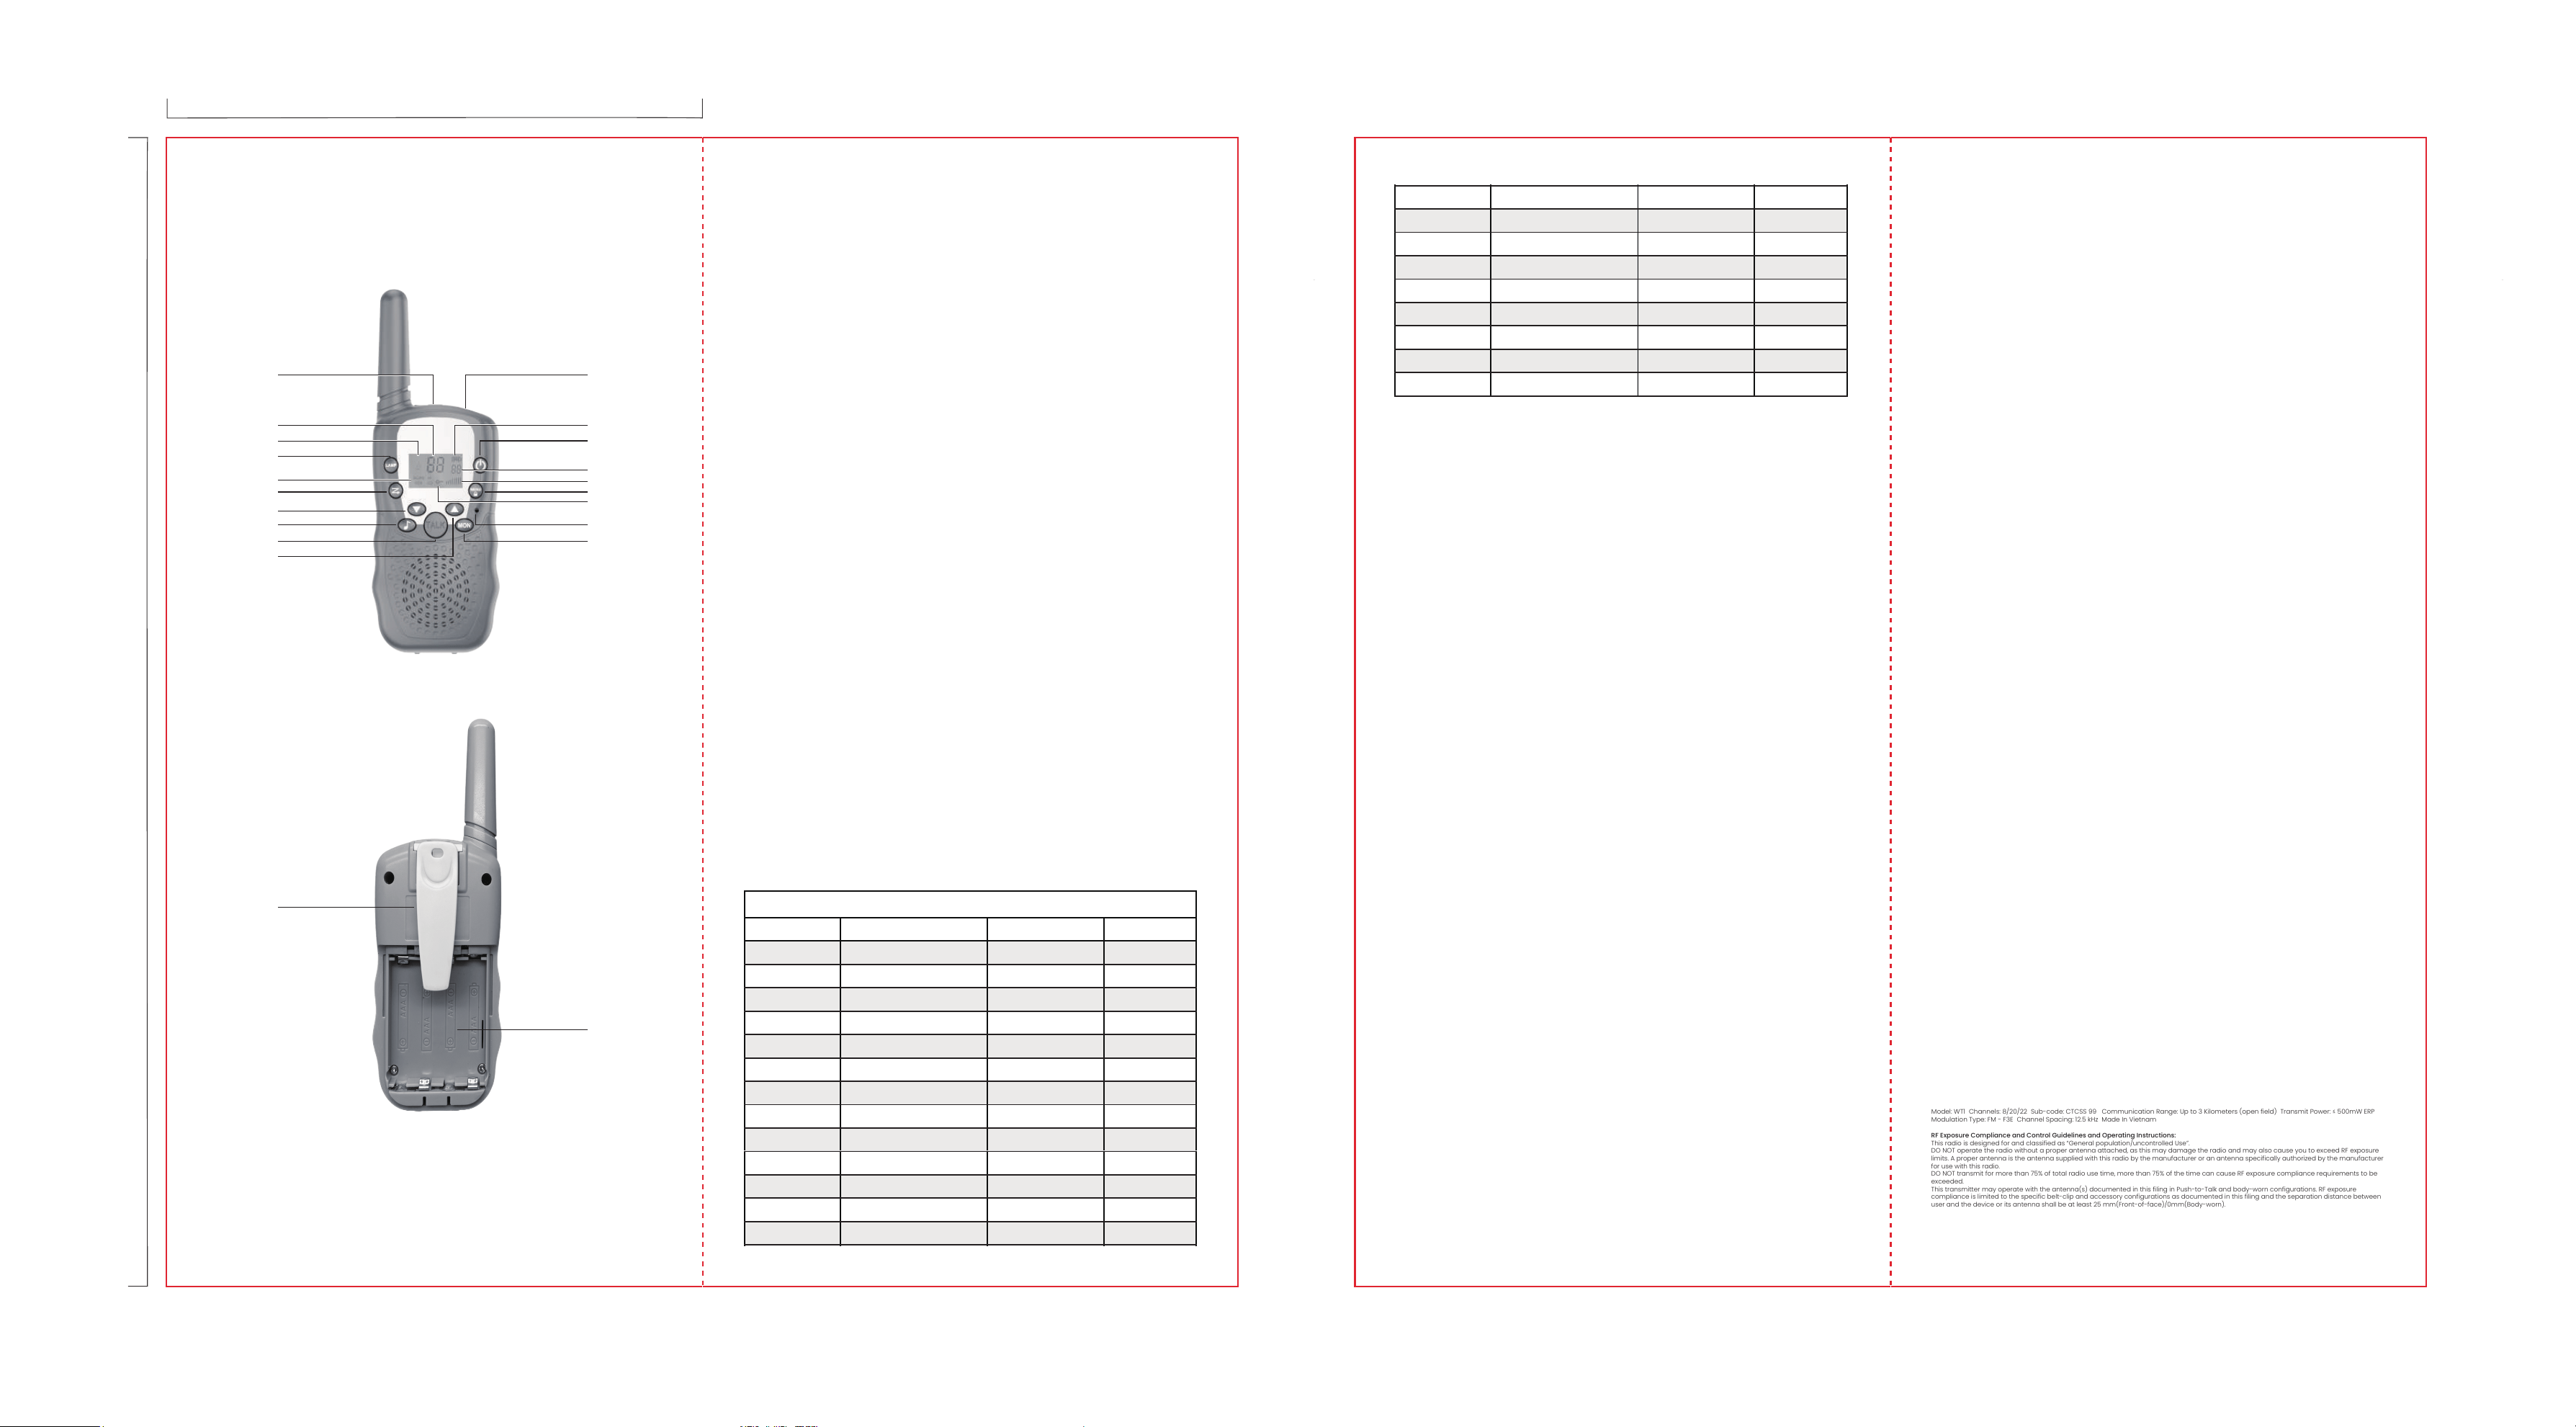
Walkie Talkies
Front
Back
Speaker/Mic
(on the top)
Channel/
Menu item
TX/RX Icon
Lamp Button
Scanning/Vox
Scan Button
Down Button
Call Button
Talk Button
Up Button
Lamp
(on the top)
Battery Level
Power Button
Volume
MENU Button
Keypad Lock
Microphone
Monitor Button
CTCSS / DCS
Menu Option
Belt Clip
Battery
Compartment
(removed
battery cover)
CTCSS/DCS Setting:
• Press the MENU button twice; the current CTCSS/DCS code will flash on the display.
• Press the Up button or Down button to select a different code.
• Press the TALK button to confirm the setting and return to standby mode.
Note: To turn off the CTCSS/DCS function, select the "OF" option in the CTCSS/DCS menu. After
confirmation, "OF" will be displayed on the screen.
Monitor:
• The monitor function allows you to detect weak signals on the current channel.
• Press and hold the MON button to activate channel monitoring.
• Channel monitoring stops when you release the MON button.
Note: During channel monitoring the receiver circuit in the Radios will not listen to CTCSS codes.
VOX Selection (Voice-Activated Transmission):
• This radio supports VOX voice-activated transmission. When VOX mode is enabled, the radio
automatically transmits audio once triggered by your voice or surrounding sounds.
• VOX function is not recommended for use in noisy or windy environments.
Note: Pressing the TALK button will override VOX mode.
• Press the MENU button three times; the current VOX setting will flash on the screen, and the VOX
icon will appear.
• Press the Up button to adjust VOX sensitivity between Level 1 and Level 3 (Level 3 = highest
sensitivity).
• Press the Down button repeatedly until "OF" appears on the display to disable VOX.
• Press the TALK button to save the setting and return to standby mode.
Scanning for Active Channels:
• Press the SCAN button the "Scan" indicator icon will appear on the screen, and the channel
number will automatically scan upward sequentially from channel 1 up to 8 / 20 / 22.
• Press the Down button to reverse scanning direction, scanning from channel 8/20/22 down to
channel 1.
• When an occupied active channel is detected, scanning pauses so you can listen to ongoing
transmissions.
• Once activity on that channel ends, scanning will resume automatically.
Note: If you press the TALK button while listening to a found channel, the radio will lock onto this
channel and enter standby mode.
Call Tones:
• A call tone serves as an alert to notify the other party that you are ready to start speaking.
Setting the Call Tone:
• The Twintalker radio series is equipped with 10 selectable call tones.
• Press the MENU button four times; the screen will display "CA", and the currently selected call
tone number will flash.
• Press the Up button or Down button to switch between different call tones.
• Press the TALK button to save your selection and return to standby mode.
Sending a Call Tone:
• Briefly press the CALL button, and the preset call tone will be transmitted on the current channel.
Key Tone On/Off:
• Whenever you press a button, the unit will emit a short beep. To adjust the key tone setting:
• Press the MENU button five times. The display will read “to”.
• Press the up button to turn Key Tones ON, or press the down button to turn Key Tones OFF.
• Press the TALK button to save your selection and return to standby mode.
Roger Beep On/Off:
• When you release the TALK button, the radio transmits a roger beep tone to signal to the other
party that you have finished speaking.
• Press the MENU button six times; the display will show “rO”.
• Press the up button to turn the Roger Beep ON, or press the down button to turn the Roger Beep
OFF.
• Press the TALK button to save your setting and return to standby mode.
Button Lock:
• Press and hold the MENU button for two seconds to turn on Button Lock mode. A lock icon will
appear on the LCD screen.
• Press and hold the MENU button for two seconds again to turn off Button Lock mode.
Note: When Button Lock is enabled, these buttons still remain usable:
PTT button , Call button, MON button, Lamp button, and Power On/Off button.
Display Backlight:
• To turn on the LCD screen backlight, press any button except the Power button.
The LCD backlight will stay illuminated for 5 seconds.
Earpiece Connection:
• This walkie talkie is compatible with 2.5mm wired earbuds.
• The earpiece jack is located on the top side of the unit.
Battery Saving Function:
• If the unit remains idle for several seconds, it will automatically enter power-saving mode.
• This feature will not interfere with incoming signal reception.
• The radio will automatically revert to normal operating mode immediately once a signal is
detected.
Built-In Flashlight:
• As an extra feature, this radio comes equipped with a built-in flashlight. It can be used for
general illumination needs or to send visual light signals.
Troubleshooting:
• Unit fails to power on
1. Verify batteries are installed with correct polarity.
2. Replace disposable batteries or recharge NiMH batteries if power is low.
• Weak transmit or receive signal
1. Turn up the volume; press the Monitor button to pick up faint signals.
Safety:
WARNING
• Please read this manual carefully before using this two-way radio.
• Do not use or charge this radio in flammable, explosive, or radio-restrictedareas (such as gas
stations, airports, etc.).
• Do not operate this radio without a license in areas where it is prohibited by government law.
• Keep the radio away from direct sunlight and do not place it near any heating equipment.
• Keep the radio away from dusty, damp, or splash-prone areas, and do not place it near any
heating equipment.
• If the radio emits an unusual odor or smoke, immediately remove the battery pack from the
radio and contact your nearest dealer.
• Maintenance of this radio must be performed by qualified technicians only. Unauthorized
disassembly is strictly prohibited.
• Do not use in high temperatures or extreme weather.
• Do not use chemical detergents to clean your device, use a soft dry cloth.
SAVE THESE INSTRUCTIONS
RF Exposure Compliance and Control Guidelines and Operating Instructions:
This radio is designed for and classified as “General population/uncontrolled Use”.
DO NOT operate the radio without a proper antenna attached, as this may damage the radio and may also cause you to exceed RF exposure
limits. A proper antenna is the antenna supplied with this radio by the manufacturer or an antenna specifically authorized by the manufacturer
for use with this radio.
DO NOT transmit for more than 75% of total radio use time, more than 75% of the time can cause RF exposure compliance requirements to be
exceeded.
This transmitter may operate with the antenna(s) documented in this filing in Push-to-Talk and body-worn configurations. RF exposure
compliance is limited to the specific belt-clip and accessory configurations as documented in this filing and the separation distance between
user and the device or its antenna shall be at least 25 mm(Front-of-face)/0mm(Body-worn).
gemsfindyours.com 7157 Shady Oak RD, Eden Prairie, MN 55344 Distributed by Chug, Inc.
For qualified repair specialists requesting repair information and parts please contact the original manufacturer at
Model: WT1 Channels: 8/20/22 Sub-code: CTCSS 99 Communication Range: Up to 3 Kilometers (open field) Transmit Power: ≤ 500mW ERP
Modulation Type: FM - F3E Channel Spacing: 12.5 kHz Made In Vietnam
Channel Frequency (MHz) CTCSS/DCS Power
1 462.5625 67 0.5W
2 462.5875 71.9 0.5W
3 462.6125 74.4 0.5W
4 462.6375 77 0.5W
5 462.6625 79.7 0.5W
6 462.6875 82.5 0.5W
7 462.7125 85.4 0.5W
8 467.5625 88.5 0.5W
9 467.5875 91.5 0.5W
10 467.6125 94.8 0.5W
11 467.6375 97.4 0.5W
12 467.6625 100 0.5W
13 467.6875 103.5 0.5W
14 467.7125 107.2 0.5W
Factory Frequency Tables
6 462.6875 82.5 0.5W
7 462.7125 85.4 0.5W
8 467.5625 88.5 0.5W
9 467.5875 91.5 0.5W
10 467.6125 94.8 0.5W
11 467.6375 97.4 0.5W
12 467.6625 100 0.5W
13 467.6875 103.5 0.5W
14 467.7125 107.2 0.5W
15 462.55 110.9 0.5W
16 462.575 114.8 0.5W
17 462.6 118.8 0.5W
18 462.625 123 0.5W
19 462.65 127.3 0.5W
20 462.675 131.8 0.5W
21 462.7 136.5 0.5W
22 462.725 141.3 0.5W
4.65 inches
9.97 inches
FRONT BACK