COMMERCIAL DISHWASHER
User Manual
Please read this manual carefully for proper installation and safe operation
of the commercial dishwasher.
For any service related issues, please contact us:
718-576-6342
suppor[email protected]
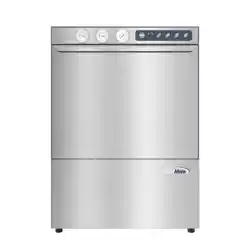
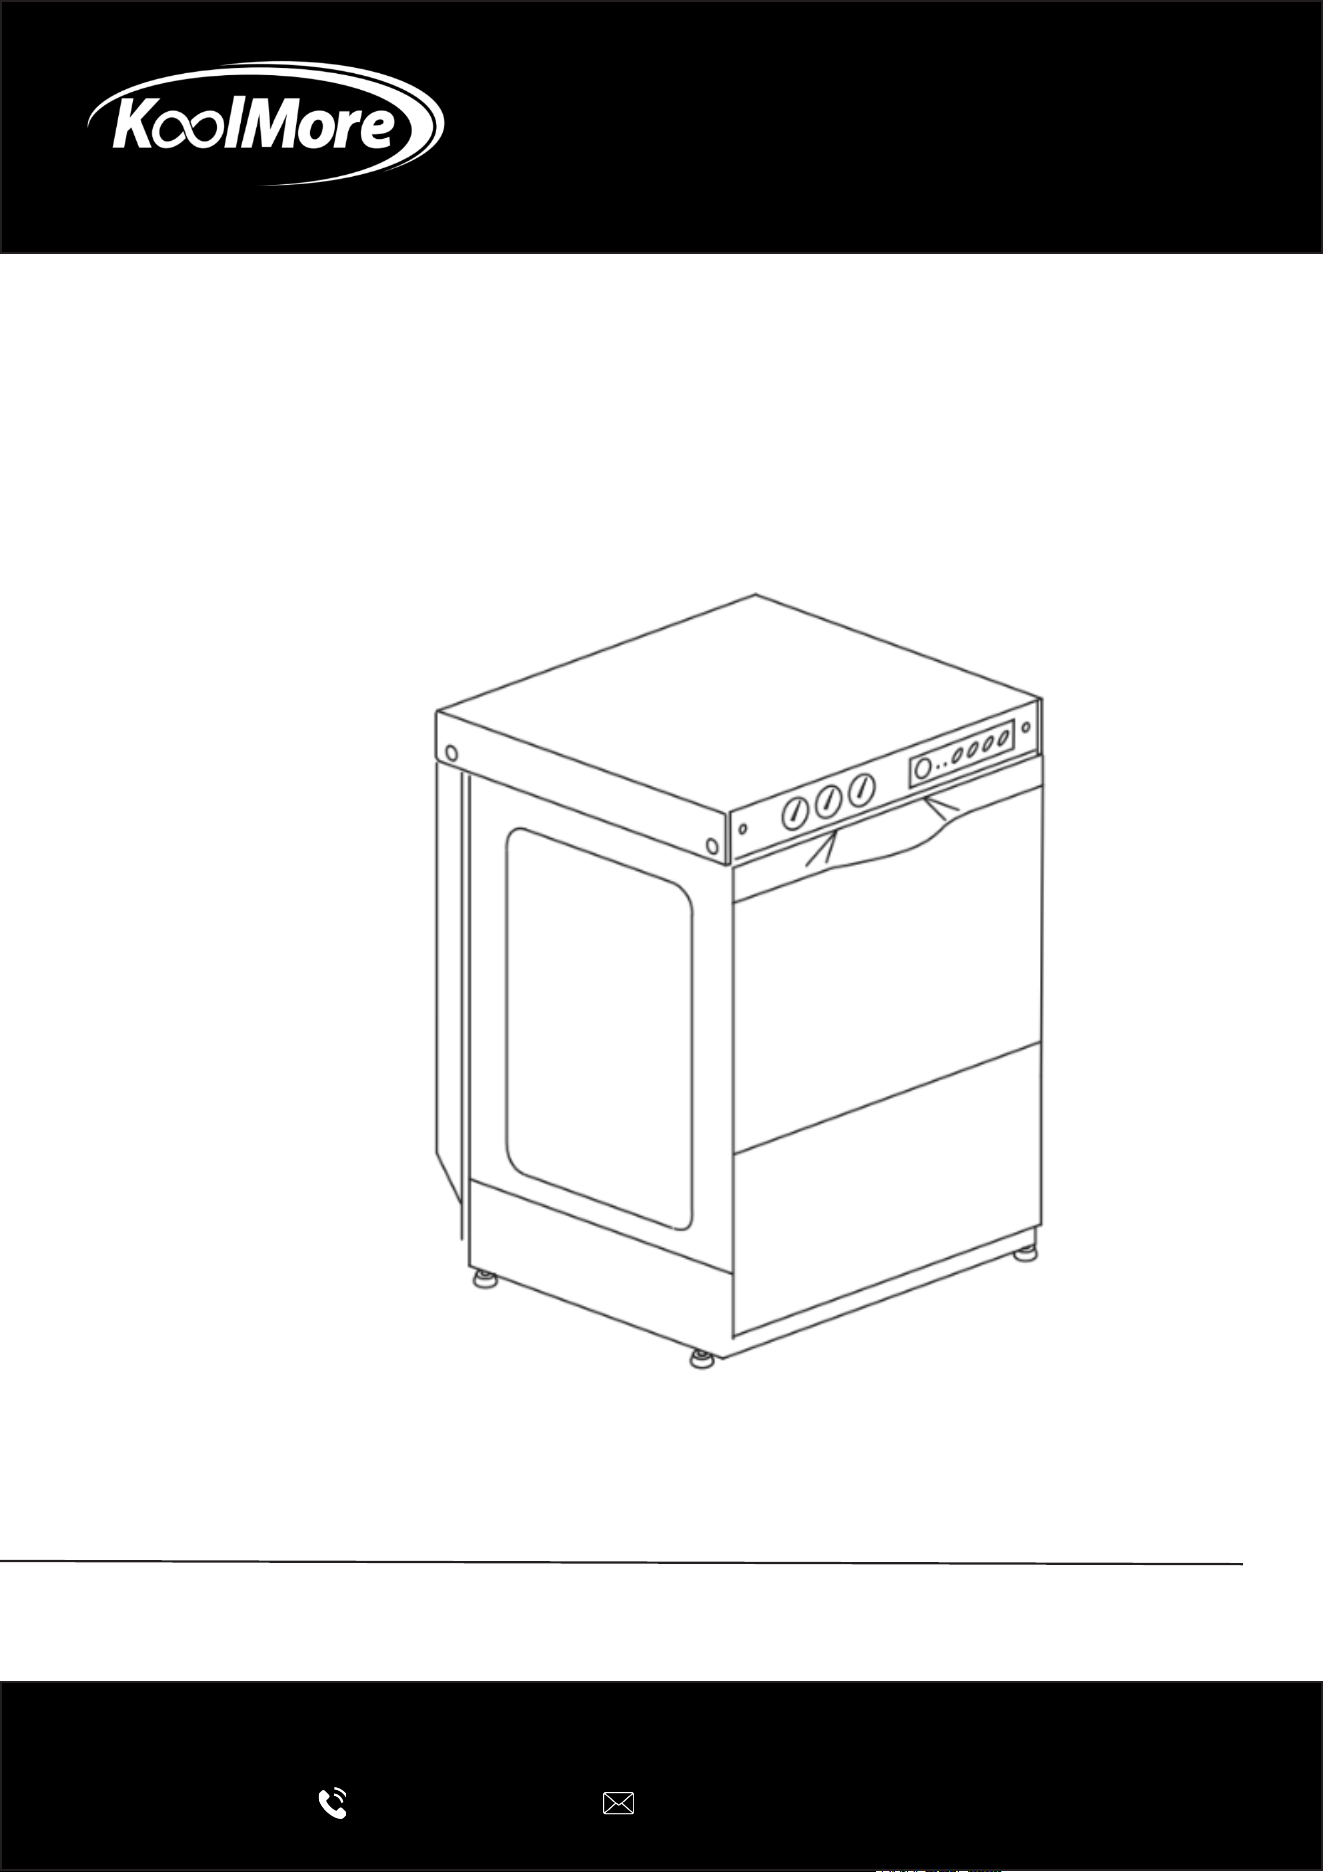
Commercial Under Counter Dishwasher
Model: KM-UCD-H1
Stay informed with the latest information for your
KoolMore appliance.
Scan the QR code below to access the most up-to-date user manual.
If you need any assistance or have questions, our customer support
team is here to help.
Phone: 718-576-6342 Email: suppor[email protected]
Please write down the model number and serial number below for future reference. Both numbers are located on the
rating label on the back of your unit or inside the unit and are needed to obtain warranty service. You may also want
to staple your receipt to this manual as it is your proof of purchase and may also be needed for service
under warranty.
Model Number:
Serial Number:
Date of Purchase:
To better serve you, please do the following before contacting customer service:
If you received a damaged product, immediately contact the retailer or dealer that sold you the product.
Read and follow this User Manual carefully to help you install, use, and maintain your unit.
Refer to the Troubleshooting section of this manual as it will help you diagnose and solve many common issues.

3
Contents
Safety ............................................................................................ 4
Installation ..................................................................................... 6
Operation ....................................................................................... 12
Maintenance .................................................................................. 15
Troubleshooting ............................................................................. 17
Warranty ........................................................................................ 19

4
Safety
IMPORTANT SAFETY INSTRUCTIONS
Read this manual carefully before installing, operating, or servicing the dishwasher. Keep this man-
ual for future reference.
If the appliance is sold or transferred to another owner, ensure this manual remains with the unit.
Installation & Compliance
This dishwasher must be installed in accordance with all applicable local codes and regulations.
In the absence of local codes, installation must comply with:
• National Electrical Code (NFPA 70)
• Canadian Electrical Code (CSA C22.1)
• NFPA 96 — Standard for Ventilation Control and Fire Protection of Commercial Cooking Opera-
tions
This appliance is intended for commercial use only and complies with applicable UL and NSF stan-
dards
Qualied Personnel Only
• Installation, electrical connection, plumbing connection, service, and maintenance must be
performed by qualied personnel only.
• Only authorized service technicians should access internal components or perform repairs.
• Use genuine replacement parts only. The use of non-approved parts may void the warranty and
create unsafe operating conditions.
General Safety Rules
• This dishwasher is designed exclusively for washing commercial food-service items such as
plates, glasses, trays, utensils, pots, and pans.
• Do not wash items not intended for commercial dishwashing applications.
• Do not use damaged hoses or ttings.
• Keep children away from the appliance.
• Cleaning and maintenance must not be performed by unsupervised children.
• Do not operate the appliance if it has been damaged or is malfunctioning.
Electrical Safety
WARNING
• The appliance must be properly grounded.
• The dishwasher must be connected to a dedicated electrical circuit.
• Install an appropriately rated disconnect switch and overcurrent protection device according to
local electrical codes and the rating plate specications.
• The main disconnect switch must be easily accessible to the operator.

5
Before servicing or cleaning the appliance:
1. Turn the dishwasher OFF using the control panel.
2. Disconnect power at the main disconnect switch.
3. Shut off the water supply.
Operating Safety
WARNING
• Do not open the dishwasher doors during operation.
• Wait at least 15 seconds after the wash cycle ends or motors stop before opening the ma-
chine.
• Do not insert hands or touch internal components during operation or immediately after a cy-
cle.
• Hot water, steam, and moving components may cause injury.
Water Supply Requirements
• Maximum incoming water pressure:
• 60 PSI (400 kPa)
Use only approved water supply connections suitable for commercial dishwashers.
Chemical & Detergent Safety
NOTICE
This dishwasher must be operated with a compatible commercial detergent dispensing system.
The detergent system should provide:
• Proper detergent dosing
• A visual or audible alert when detergent is low or unavailable
Follow all detergent manufacturer instructions and safety guidelines.
Ventilation & Fire Safety
• Do not block ventilation openings or airow around the appliance.
• Do not use water to extinguish electrical res.
• Disconnect power immediately in the event of electrical malfunction or emergency.
Important
Failure to follow the safety instructions in this manual may result in:
• Property damage
• Equipment damage
• Personal injury
• Electrical shock
• Fire
The manufacturer is not responsible for damage caused by improper installation, misuse, unau-
thorized modications, or failure to follow the instructions in this manual.
6
Installation
ATTENTION:
After installation is complete, retain this manual for future reference. Installer-specic instructions
may be removed after installation if desired.
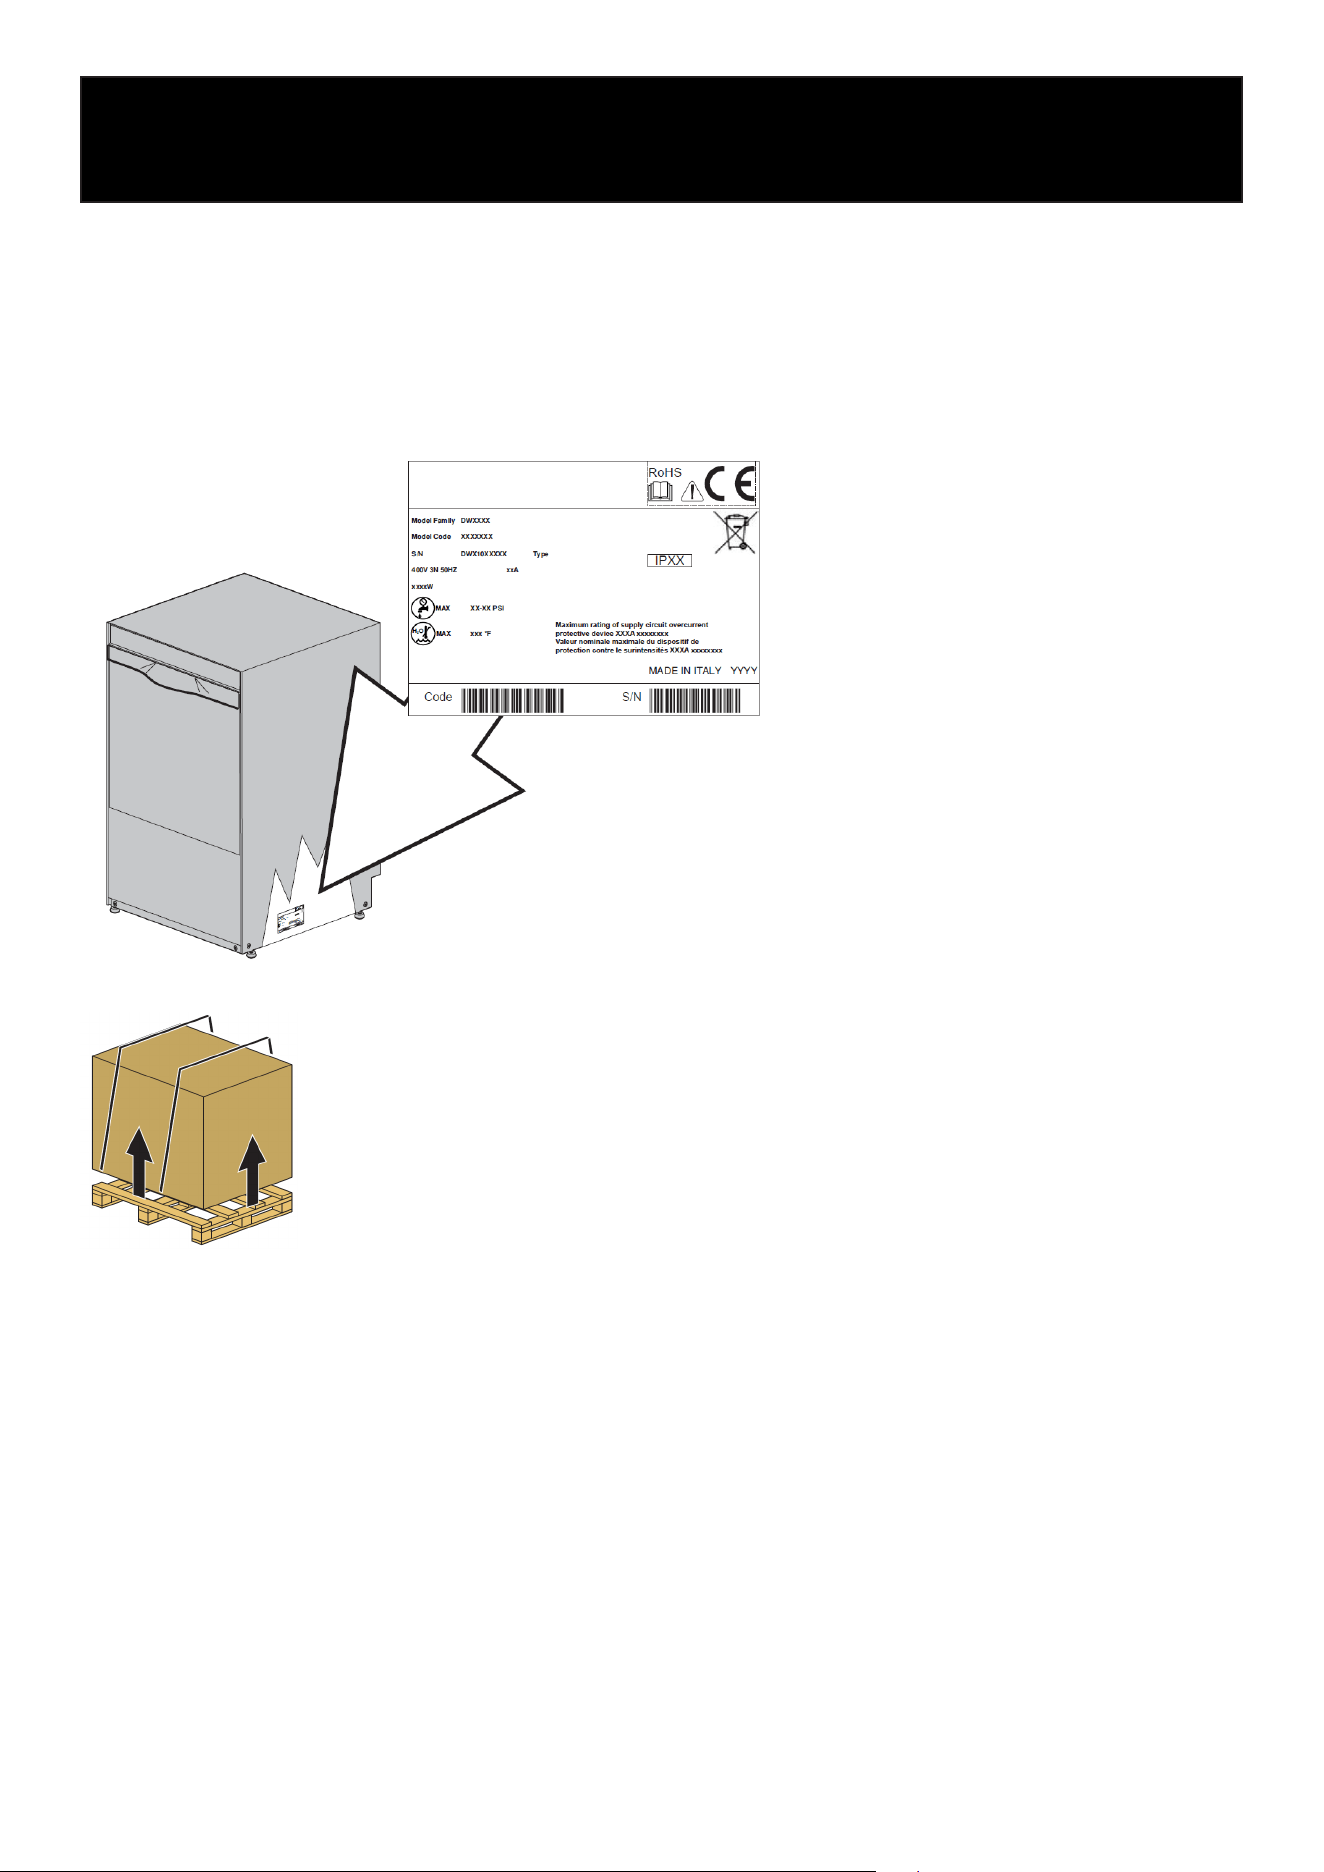
Rating Label
A. Electrical Supply
B. Total Connected Load
C. Water Supply Pressure
D. Protection Rating (IP Rating)
E. Total Power Consumption
Receiving the Machine
Use caution when lifting or moving the dishwasher. Pay close attention to the
designated lifting points and the unit’s center of gravity during loading, un-
loading, and positioning.
Before accepting the shipment, verify that:
• The model and electrical specications on the rating plate match the order
requirements.
• The available electrical supply is compatible with the machine specica-
tions.
• The appliance has not been damaged during transport.
Storage
Store the dishwasher in a clean, dry environment.
Recommended storage conditions
• Temperature: 40°F to 122°F
• Relative Humidity: Below 90%
• Inspect stored units periodically for signs of damage or deterioration.
• Do not store the machine outdoors or expose it to rain, direct sunlight, freezing temperatures,
or excessive moisture.
• Do not place heavy objects on top of the packaged appliance.
7
Water Connections
Water connections must comply with local plumbing codes and regulations.
Install a readily accessible water shut-off valve near the appliance.
Use only new exible water supply hoses suitable for commercial dishwashing equipment.
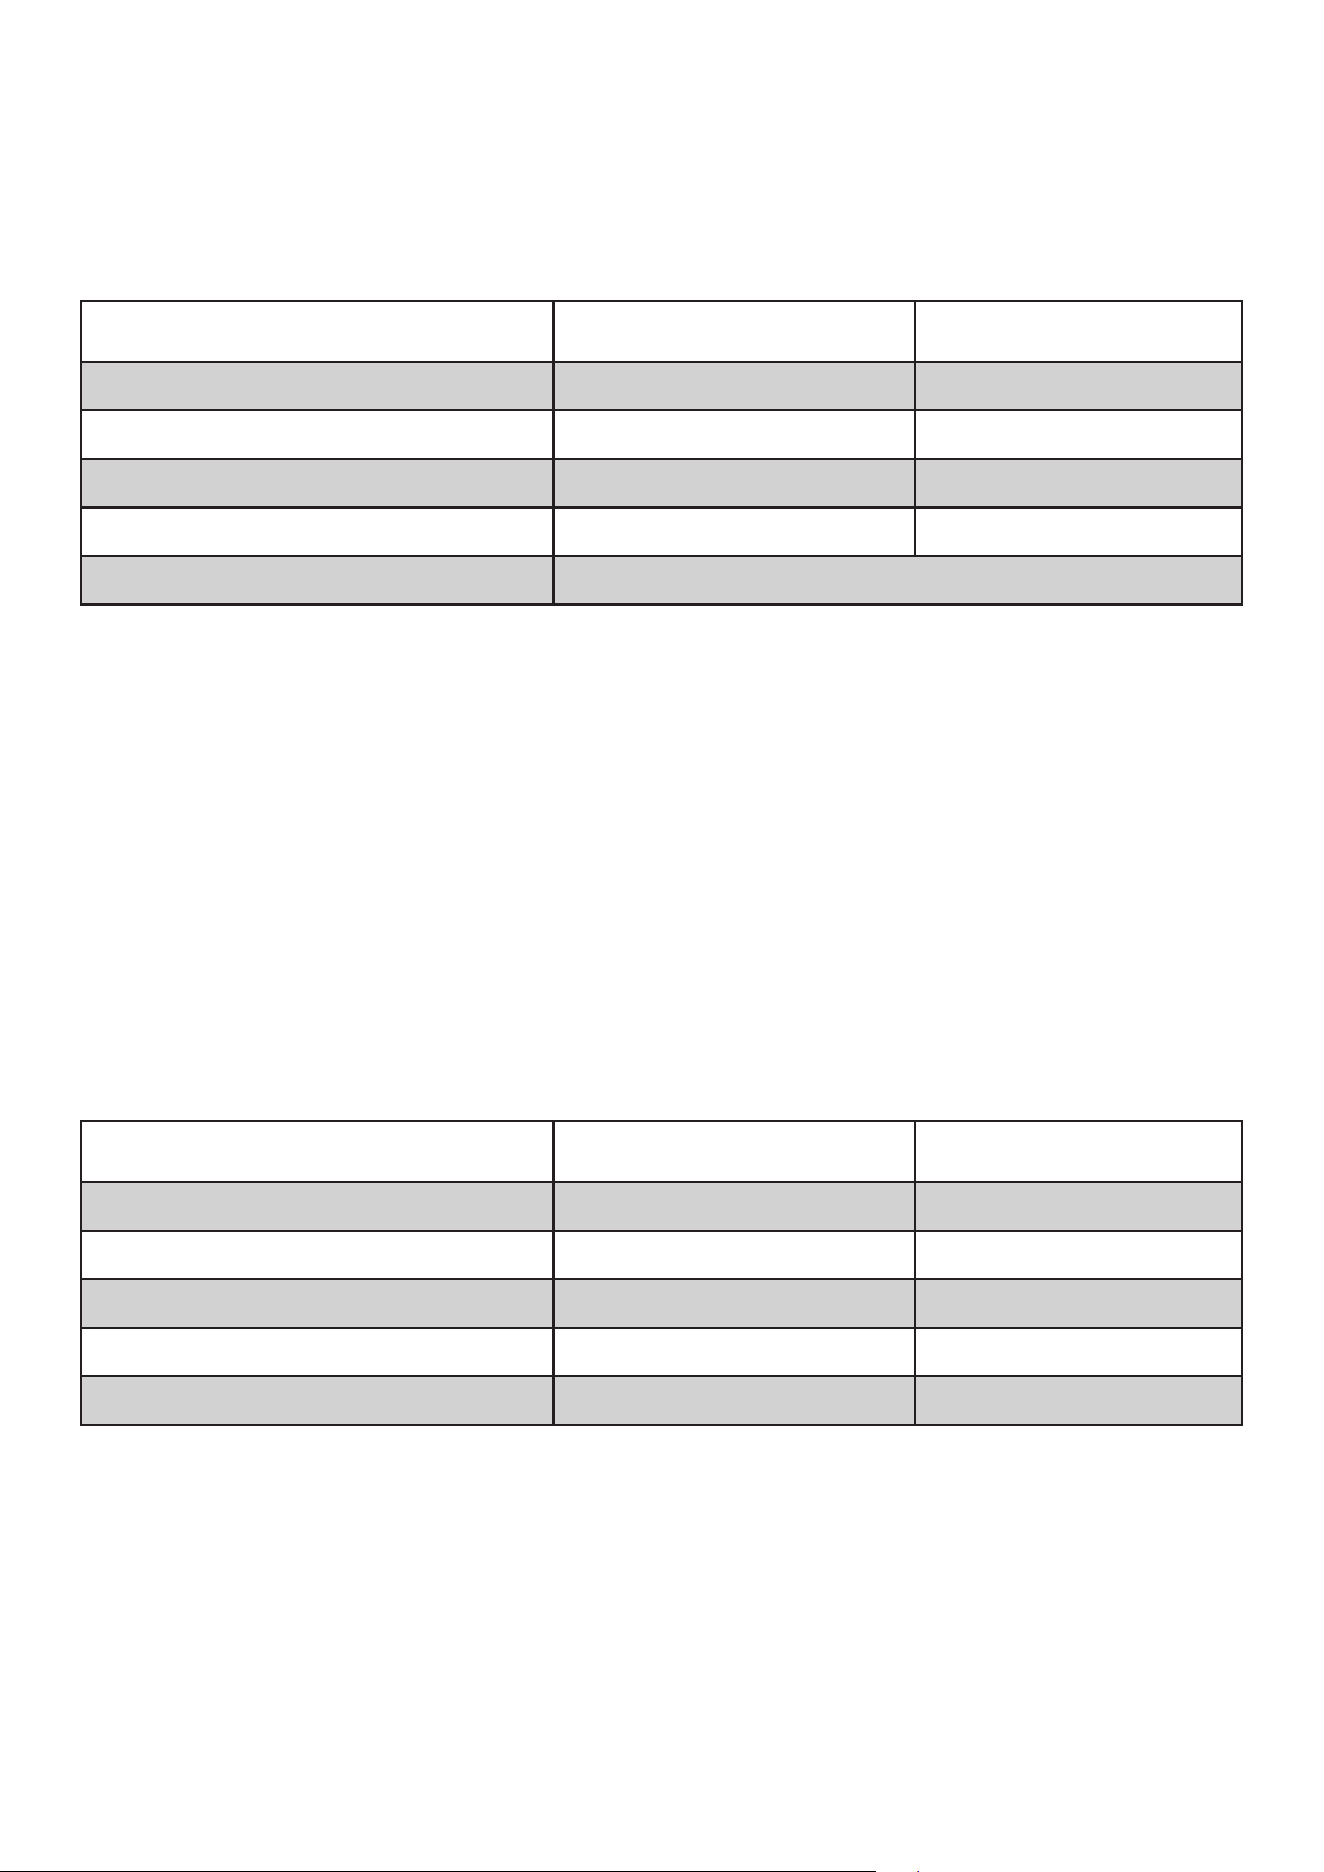
Water Supply Requirements
Water Supply Characteristics Minimum Maximum
Static Water Pressure 30 PSI (200 kPa) 60 PSI (~400Kpa)
Dynamic Water Pressure 30 PSI (200 kPa) 50 PSI (350 kPa)
Cold Water Supply Temperature 110°F (43°C) 150°F (65°C)
Hot Water Supply Temperature 140°F (60°C) 150°F (65°C)
Water Flow Capacity 2.6 GPM (10 L/min)
Important
• If incoming water pressure exceeds 60 PSI (400 kPa), a pressure regulator must be installed.
• For best washing performance, maintain water temperature within the recommended ranges.
Temperature Requirement Note
The temperatures shown above indicate the allowable operating range for the incoming water
supply. The minimum temperature is required to ensure proper washing performance, while the
maximum temperature is established to protect internal dishwasher components. Incoming water
temperature must not exceed 150°F (65°C).
Water Quality Requirements
The dishwasher must be connected to a potable water supply.
Incoming water quality must meet the following requirements:
Water Quality Characteristics Minimum Maximum
Chlorine
-
2 mg/L
pH 6.5 8.5
Water Hardness
-
8°f
Iron
-
0.2 mg/L
Manganese
-
0.05 mg/L
Poor water quality may affect washing performance, increase maintenance requirements, and
reduce equipment lifespan.

8
Water Quality Notes
1. Water conditions outside the recommended limits may cause corrosion and reduce the lifes-
pan of the machine.
2. If water hardness exceeds the recommended range, installation of a water softener is recom-
mended. Inspect and maintain the softening system regularly.
3. Poor water quality may result in scale buildup and sediment accumulation, which can reduce
washing performance and machine eciency.
4. Improper water conditions may also cause discoloration or staining of stainless steel compo-
nents.
To maintain optimal performance, it is recommended to test the water supply at least once per
year.
Positioning the Machine
• Remove all packaging materials carefully.
• Maintain a minimum clearance of approximately 2” (50 mm) from surrounding walls to allow
proper ventilation.
• Ensure the machine is level by adjusting the leveling feet as needed.
• Do not allow the appliance to rest on the power cord, water supply hose, or drain hose.
• Verify the unit is stable after positioning.
Electrical Connection
Electrical installation must be performed by qualied personnel and in accordance with all ap-
plicable local electrical codes.
Before connecting the appliance:
• Verify that the electrical supply voltage matches the rating plate specications.
• Conrm that the electrical circuit is properly rated for the appliance requirements.
• Ensure the appliance is properly grounded.
The dishwasher must be connected to:
• A dedicated electrical circuit
• Proper overcurrent protection
• An accessible disconnect switch installed near the machine
The disconnect switch must completely isolate the appliance from the electrical supply during
servicing or maintenance.
Grounding Requirements
WARNING
Proper grounding is required for safe operation.
An improper or inadequate ground connection may:
• Create an electrical hazard
• Cause equipment damage
• Increase the risk of corrosion or damage to stainless steel components

9
The appliance must be connected to an effective grounding system that complies with local elec-
trical codes.
Equipotential Ground Connection
The machine includes an equipotential bonding terminal located on the rear panel.
This terminal is intended to connect the metal structures of nearby equipment to help reduce the
risk of electrical potential differences in commercial installations.
IMPORTANT
• Do not modify, bypass, or remove any safety devices or protective components.
• Always disconnect power at the main disconnect switch before servicing or accessing electri-
cal components.
• Lock and tag the disconnect switch during service to indicate maintenance is in progress.
DANGER
• Do not connect this dishwasher using a power cord or GFCI receptacle.
• This appliance must be permanently hardwired to a dedicated circuit with appropriately sized
overcurrent protection, in accordance with local electrical codes.
Temperature Adjustment
Wash and rinse temperatures are factory preset and normally do not require adjustment.
If adjustment is necessary, qualied service personnel may adjust the thermostat settings
Factory Temperature Settings:
• Wash Tank: 160°F
• Final Rinse / Boiler: 185°F
Rinse Aid Dispenser Operation
Operation
The rinse aid dispenser operates automatically using pressure changes generated during the wash
and rinse cycles.
Water Connections
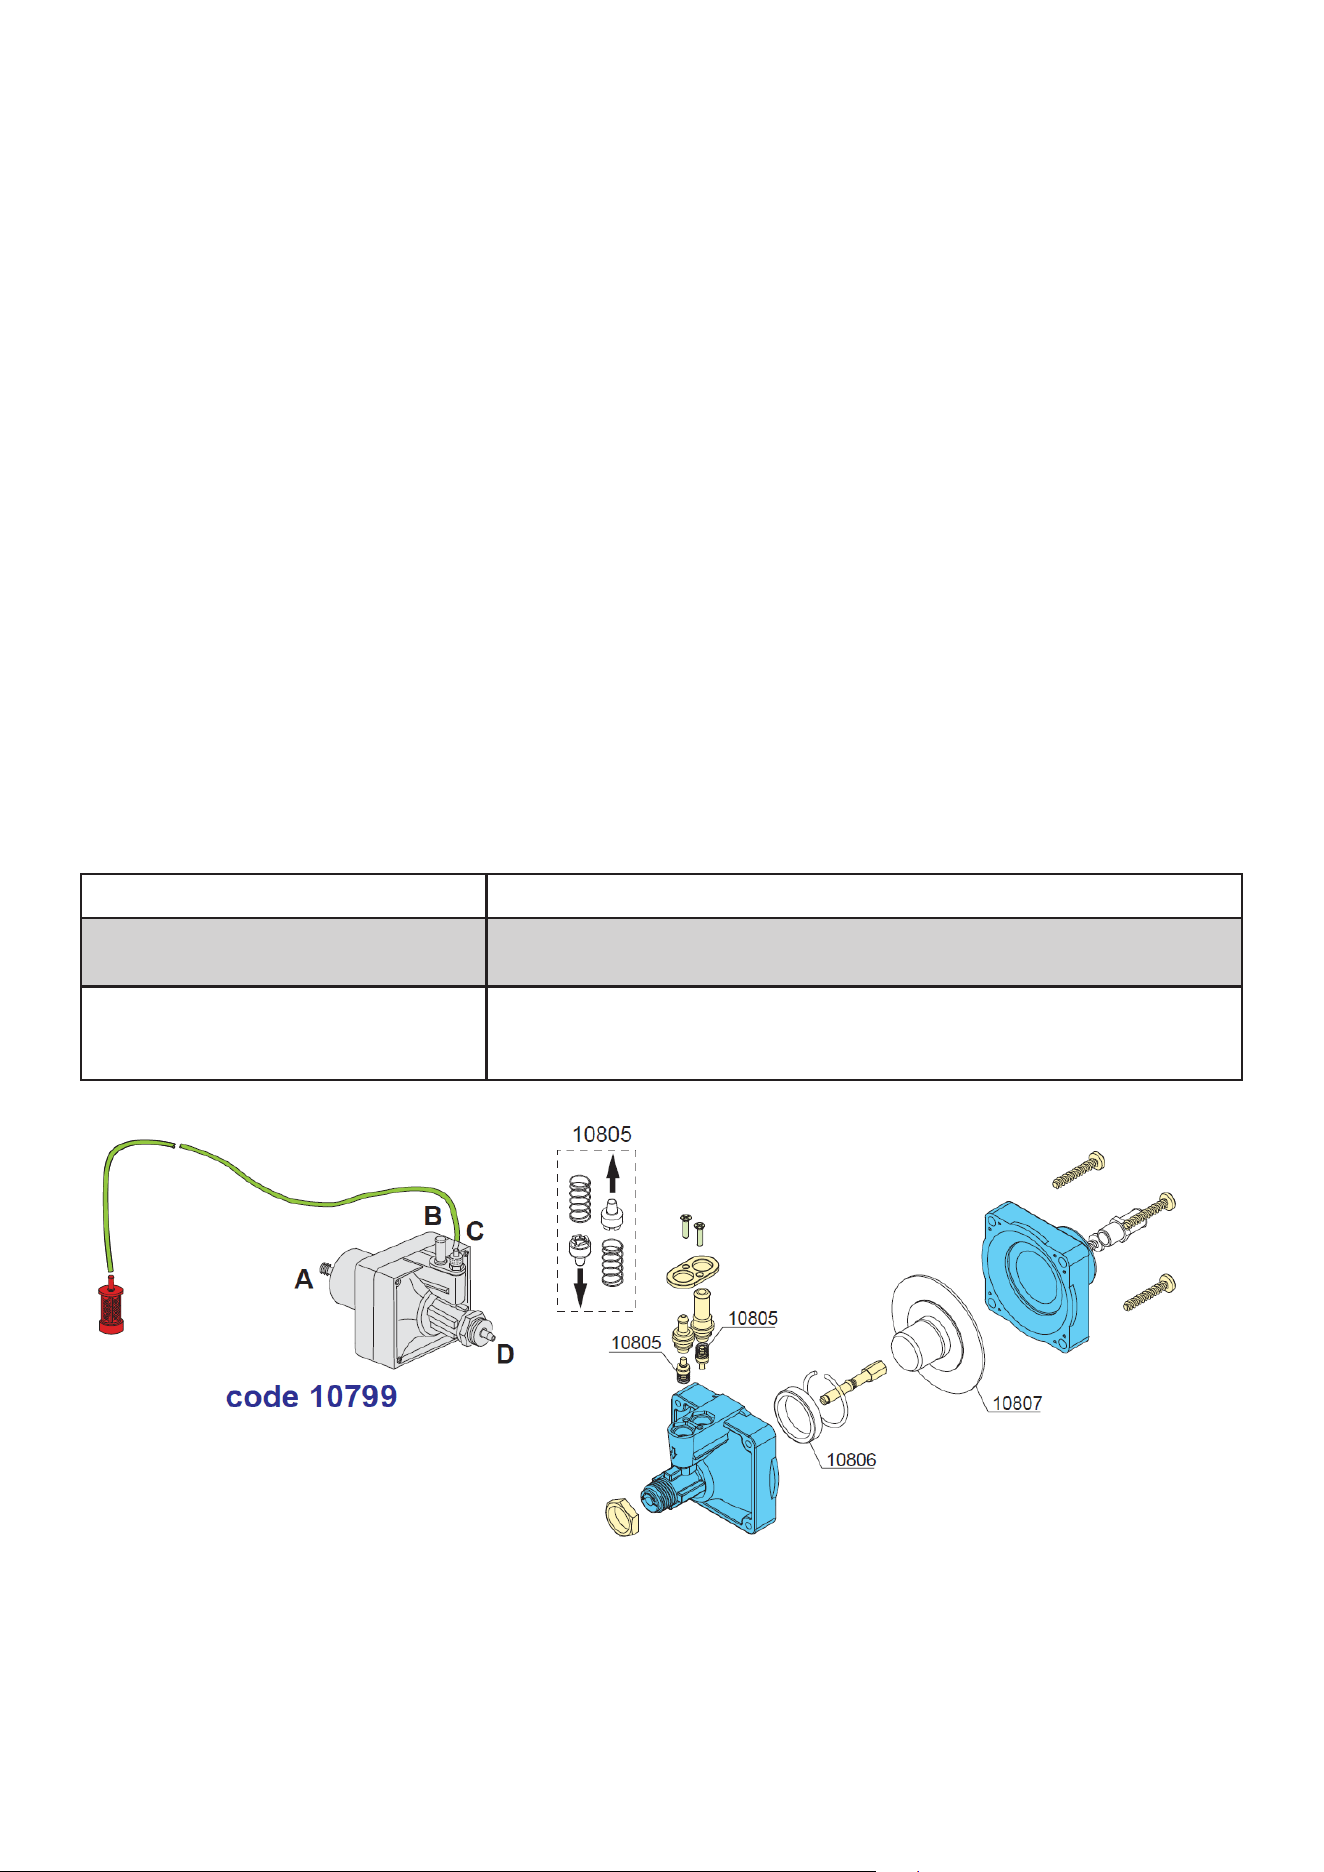
1. Connect the rinse aid supply tube to the dispenser pump connection.
2. Connect the discharge tube from the dispenser to the rinse injection tting near the boiler.
3. Insert the rinse aid suction tube into the rinse aid container and ensure the lter/weight assem-
bly is installed correctly.
Priming the Dispenser
To prime the rinse aid system:
• Turn the dishwasher ON.
• Run several complete wash cycles until rinse aid begins dispensing normally.
If manual priming is required:
• Activate the dispenser priming function according to the dispenser adjustment instructions.
10
Detergent Dispenser Installation
Electrical Connection
Connect the detergent dispenser according to the wiring diagram supplied with the machine.
Electrical connections must be performed by qualied personnel only.
Dispenser Adjustment
The rinse aid dosage can be adjusted to achieve the desired rinse performance.
• Turn the adjustment screw clockwise to decrease rinse aid dosage.
• Turn the adjustment screw counterclockwise to increase rinse aid dosage.
Adjustments should be made gradually while monitoring rinse and drying performance.
Rinse Aid System Notes
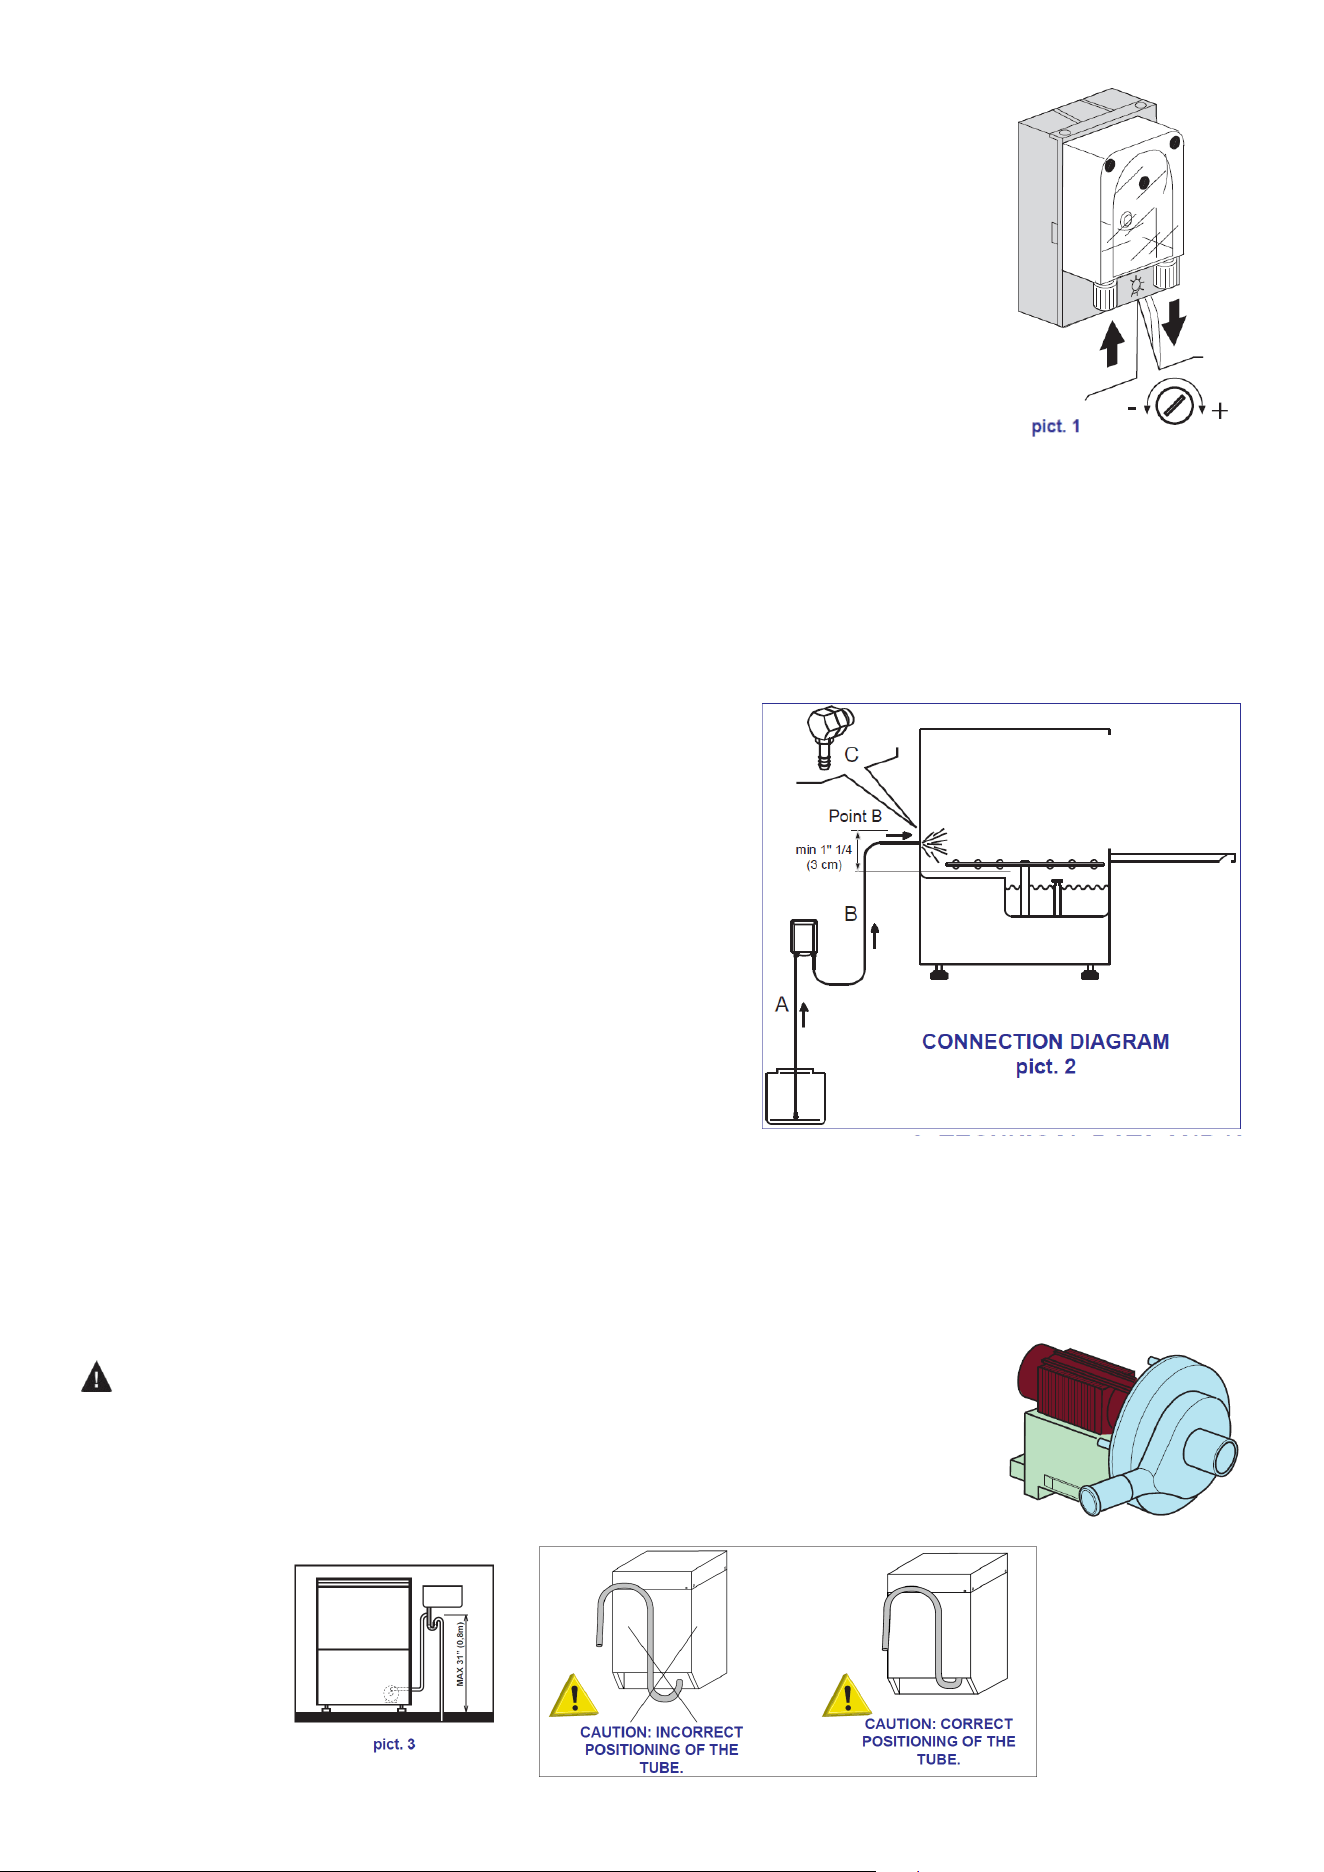
For proper operation, the height difference between the bottom of the dishwasher and the rinse aid
container must not exceed:
• 31” (80 cm)
The rinse aid dispenser is factory preset during testing and inspection.
Factory setting:
• Approximately 2” (5 cm) product intake
The nal rinse aid dosage should be adjusted based on:
• Water hardness
• Rinse aid concentration
• Washing performance
• Drying results
Rinse Aid Dispenser Troubleshooting
Problem Possible Cause / Solution
Water exits from the rinse aid suction
tub
Check the suction and delivery valves for debris or blockage. Clean the
valves and verify the rinse aid lter is installed correctly.
Dispenser does not draw rinse aid
Verify the delivery valve seals properly and is free from debris. Inspect the
piston seal and diaphragm for wear or damage. Replace damaged compo-
nents with approved replacement parts.
11
Technical Information – Drain Pump
Drain Hose Positioning
When installing the drain system, pay close attention to the positioning of the drain hose, as
shown in picture 3.
CAUTION
Incorrect drain hose positioning may affect drainage performance.
Install the drain hose only as shown in the “Correct Positioning” illustration.
Detergent Dispensing Adjustment
The detergent dispenser dosage can be adjusted using a screwdriver, as shown in picture 1.
Every 13/16” of product drawn into the tube corresponds to approximately:
• 1/64 cubic inches (0.25 cm³)
• 0.01 oz (0.3 g)
For proper dispensing settings, refer to the Operation section.
Detergent Connection Diagram
Refer to picture 2 for the correct installation of:
• Suction tube
• Delivery tube
• Injection tting
Maintain a minimum distance of:
• 1 1/4” (3 cm)
Between the injection point and the tank overow level,
as shown in the illustration.
Tubing Connections
1. Remove the protective cap from the detergent injection connection.
2. Install the detergent injector using the appropriate ttings.
3. Connect the suction tube to the dispenser suction inlet.
4. Connect the delivery tube between the dispenser outlet and the injection
tting.
5. Insert the suction tube with lter/weight assembly into the detergent
container.
6. Prime the detergent system and verify proper dispensing operation.
Control Panel Overview
12
Operation
Controls Indicators
Before First Use
1. Remove all packaging materials and protective lms.
2. Verify that the machine is properly connected to the water supply, drain, and electrical service.
3. Ensure the lter and overow tube are correctly installed.
4. Fill the detergent and rinse aid containers according to the chemical manufacturer’s recom-
mendations.
5. Open the water supply valve.
6. Turn the machine ON.
Starting a Wash Cycle
1. Install the overow tube in the wash tank.
2. Verify that the lter is clean and correctly positioned.
3. Open the water supply valve.
4. Turn the power switch to the ON position.
5. Allow the machine to ll with water automatically.
6. Wait until the operating temperature is reached and the temperature indicator illuminates.
7. Load the dish rack and close the door.
8. Select the desired wash cycle.
9. Press the START button.
10. The machine will automatically complete the wash and rinse cycle.
11. When the cycle is complete the power indicator will turn off. Carefully open the door and re-
move the rack(s).
IMPORTANT
Opening the door during a wash cycle will stop machine operation. The cycle will resume when the
door is closed.
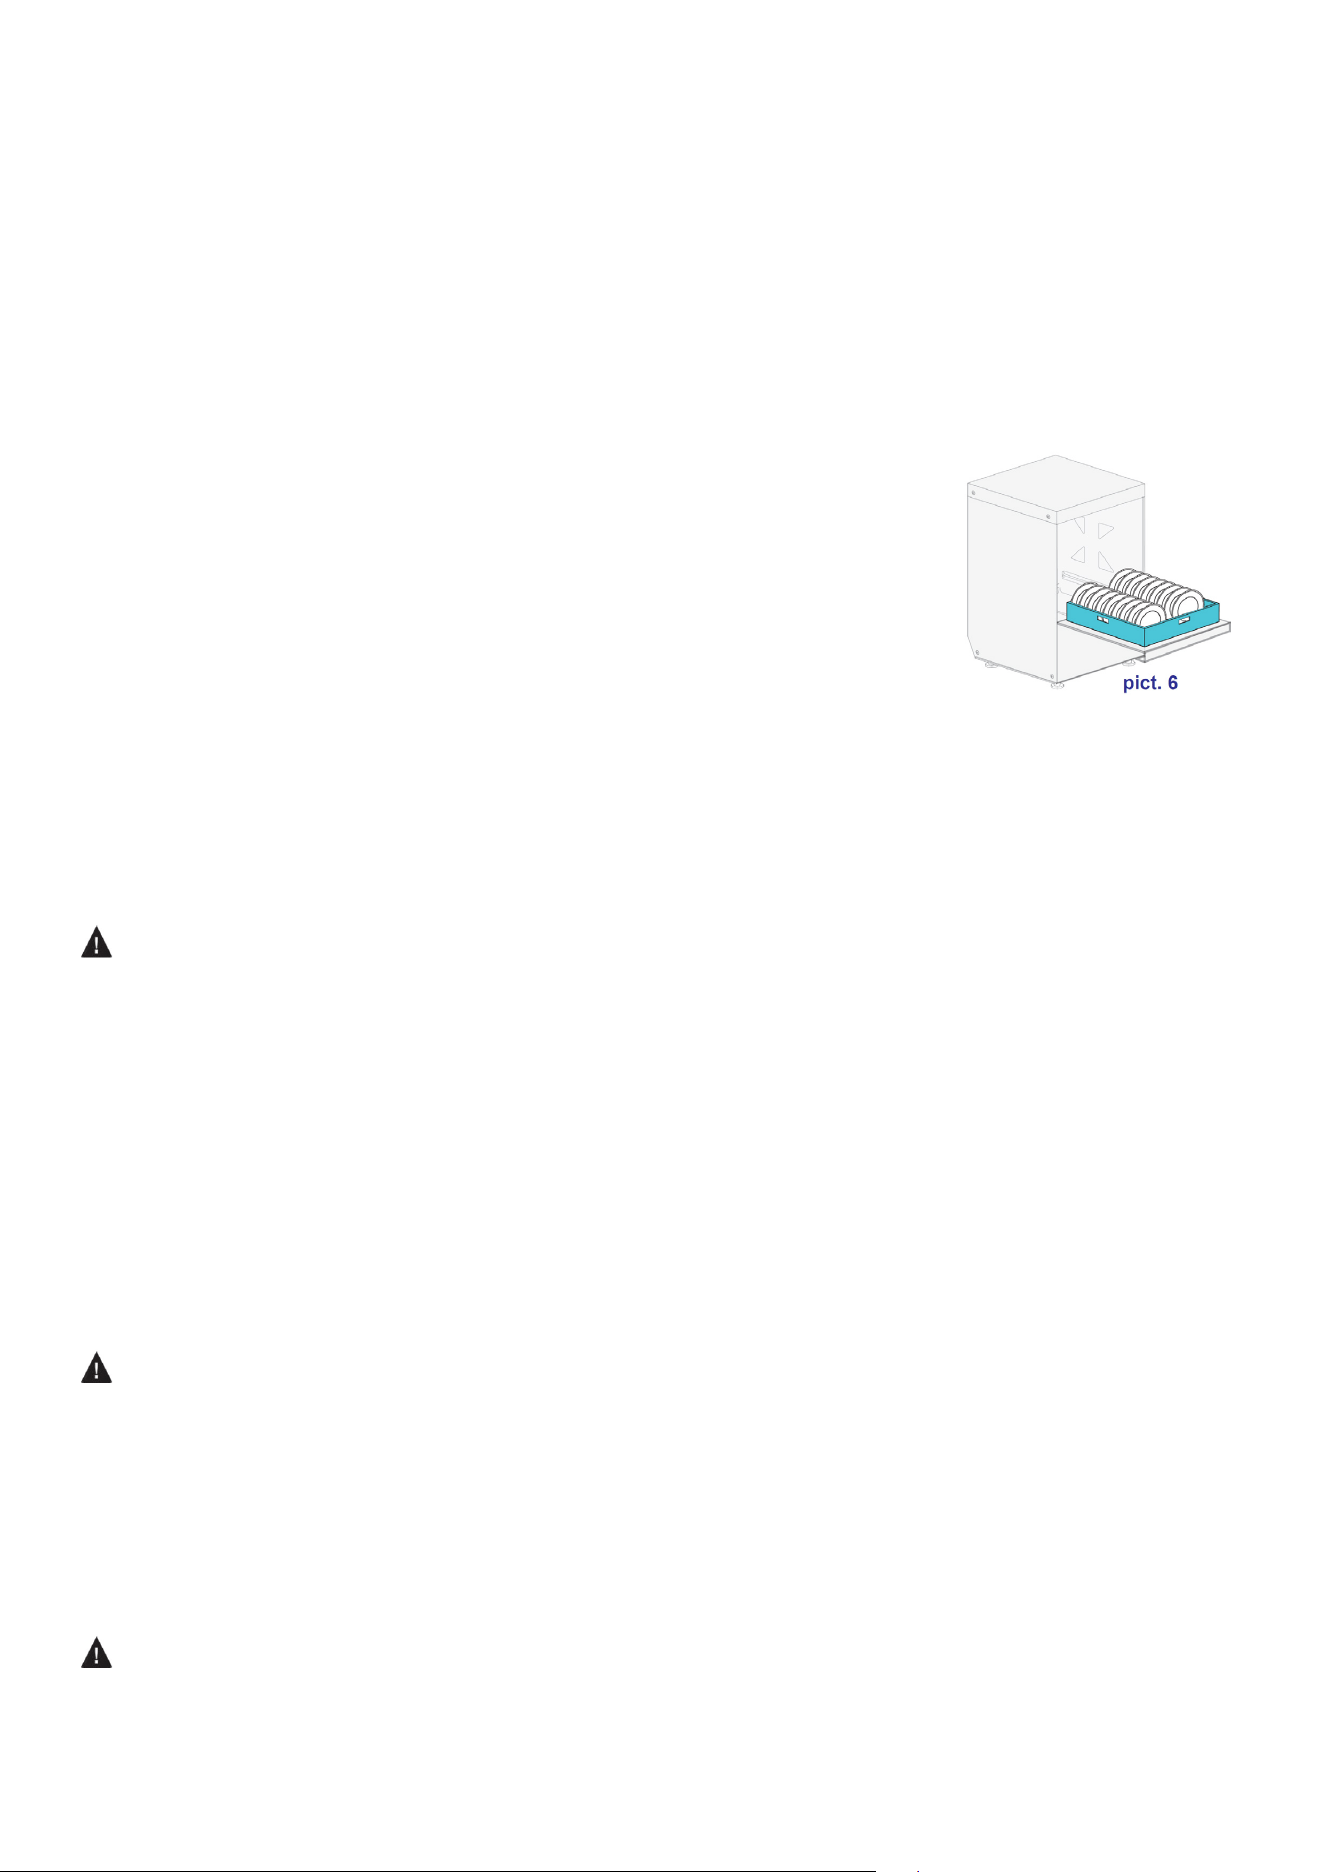
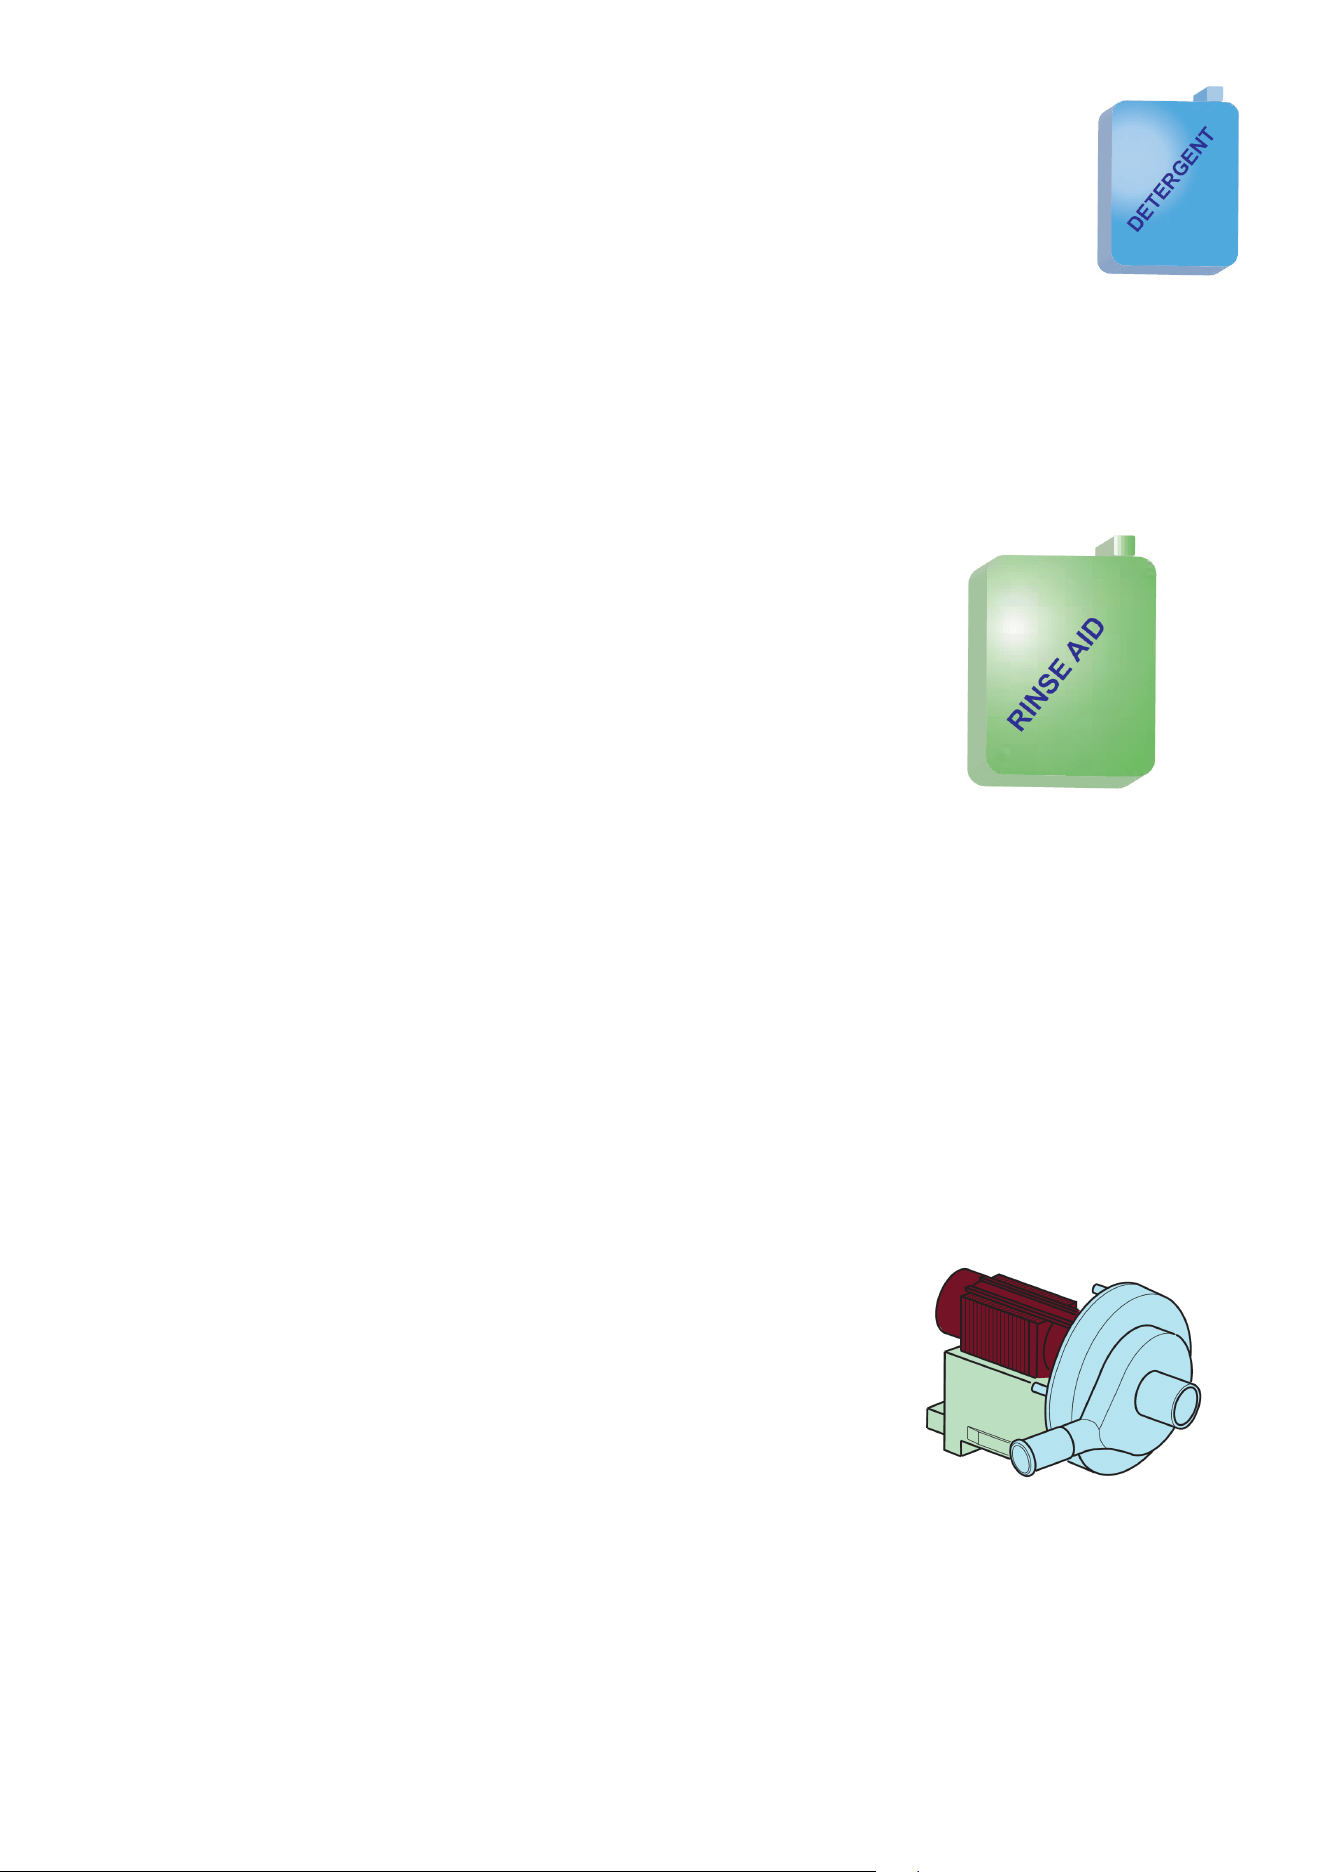
Loading Dishes and Cutlery
For best washing performance:
• Remove large food particles before loading.
• Do not overload racks.
• Arrange dishes so all surfaces are exposed to the wash water.
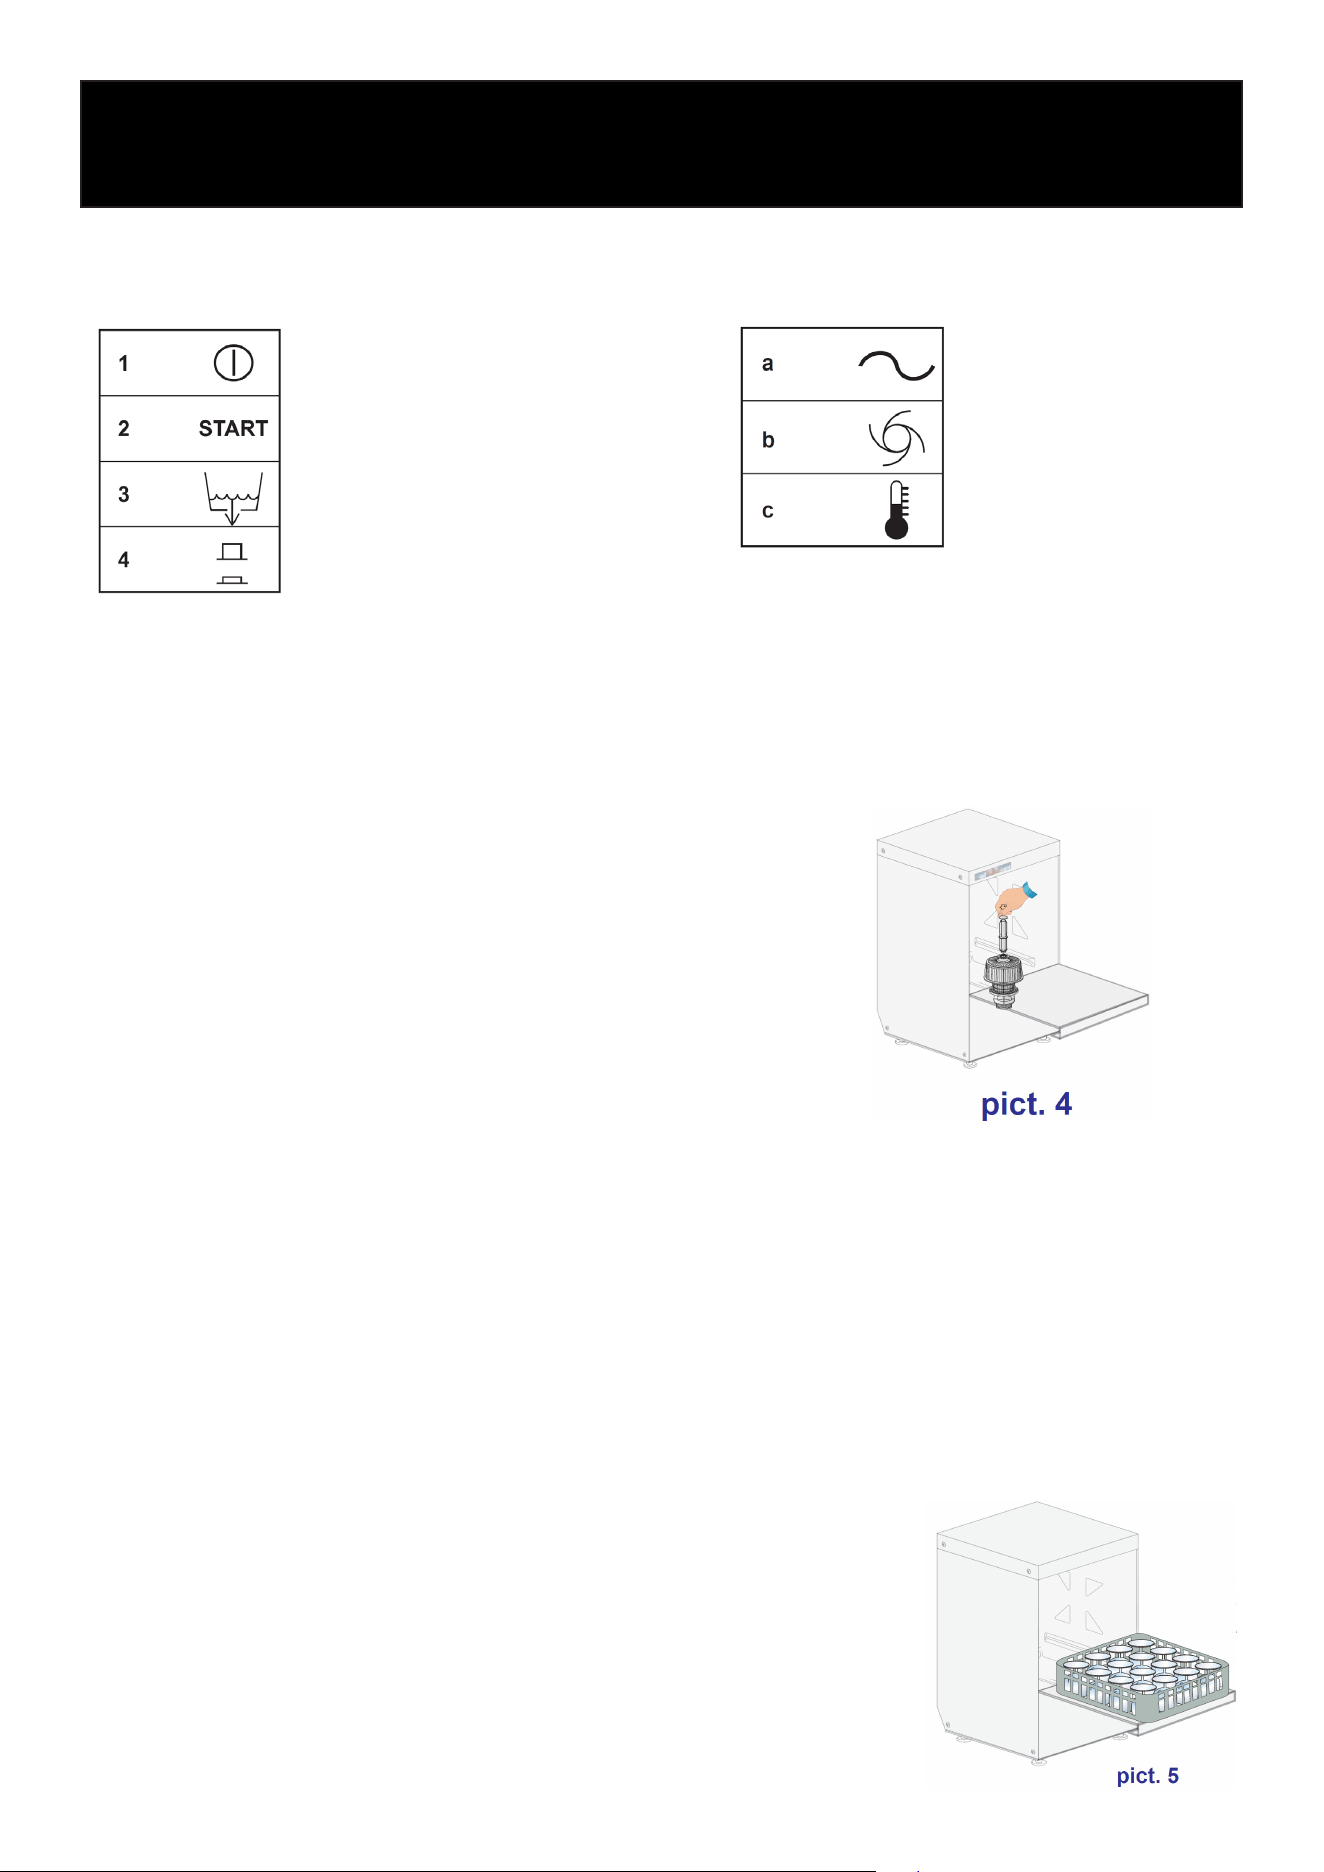
Turns the dishwasher ON or OFF
Starts the selected wash cycle
Drains the wash tank
Selects the desired wash cycle
Illuminates when the ma-
chine is powered on
Illuminates while a wash
cycle is running
Illuminates when the ma-
chine has reached the re-
quired operating temperature
13
• Do not stack or nest items together.
• Place cups, glasses, bowls, and containers upside down.
• Position items securely to prevent movement during washing.
• Ensure wash arms can rotate freely and are not blocked by dishes or utensils.
• Load lightweight items securely to prevent them from shifting during operation.
NOTE
Certain foods, such as tomato products, carrots, and other highly pigmented substances, may
cause discoloration of plastic items. Such discoloration does not indicate a machine malfunction.
Items Not Suitable for Dishwasher Use
The following items are not recommended for washing in this dishwasher:
• Wooden utensils, cutting boards, and wood-handled items
• Hand-painted or decorative glassware
• Crystal glassware
• Non-heat-resistant plastics
• Copper, brass, pewter, or aluminum items
• Delicate or antique dishware
• Items bonded with adhesives not intended for dishwasher use
Repeated washing may cause some decorative nishes and glassware to lose their original ap-
pearance.
Safety Information
WARNING
Do not wash items contaminated with:
• Gasoline
• Paint
• Solvents
• Lubricating oils or grease
• Steel wool residue
• Ash
• Sand
• Wax
These substances may damage the machine and create unsafe operating conditions.
WARNING
• Do not slam the door when opening or closing.
• Do not place objects on top of the dishwasher.
• Never operate the machine with wet hands.
• Do not operate the machine while barefoot.
• Do not expose the appliance to excessive water spray.
• Disconnect electrical power before servicing or maintenance.
WARNING
Allow the machine to cool for at least 10 minutes before performing internal cleaning or mainte-
nance.
14
Detergent Use
IMPORTANT
Use only low-foaming commercial dishwasher detergent
designed for professional warewashing equipment.
Improper detergent use may reduce cleaning performance and damage the machine.
Follow the detergent manufacturer’s recommendations regarding:
• Water hardness
• Dosage requirements
• Product concentration
Machines equipped with automatic detergent dosing systems should be checked regularly to en-
sure proper operation.
Rinse Aid Use
This dishwasher is equipped with a rinse aid dispensing system.
Use only rinse aid formulated for commercial dishwashers.
Proper rinse aid usage helps:
• Improve drying performance
• Reduce spotting
• Improve glass clarity
• Enhance overall washing results
Adjust rinse aid dosage according to water conditions and manufacturer recommendations.
HACCP and Sanitation Guidelines
To maintain sanitary washing conditions:
• Operate the machine only after proper wash and rinse temperatures have been reached.
• Verify incoming water pressure is within the specied operating range.
• Remove food debris from dishes before loading.
• Clean lters regularly throughout the day.
• Maintain adequate detergent and rinse aid levels.
• Keep work surfaces and surrounding areas clean.
• Handle clean racks and utensils with clean hands or gloves.
• Do not dry dishes using unclean cloths or towels.
Draining the Wash Tank
1. Remove the overow tube from the wash tank.
2. Close the door.
3. Press and hold the DRAIN button for approximately one second.
4. The drain pump will automatically empty the wash tank.
5. When draining is complete, turn the machine OFF.
6. Remove and clean the lters.
7. Clean the wash tank before the next operating period.
NOTE
During the drain cycle, excess water will be automatically discharged from the machine.

15
Routine Maintenance
IMPORTANT
This dishwasher is not designed to be cleaned with pressurized water. Do not use pressure wash-
ers, steam cleaners, or high-pressure spray equipment on any part of the machine.
Do not use bleach, chlorine-based cleaners, or abrasive cleaning products.
For best results, consult your chemical supplier regarding approved cleaning and sanitation proce-
dures.
Daily Cleaning Procedure
Perform the following steps at the end of each operating day:
1. Turn the power switch OFF.
2. Shut off the water supply valve.
3. Drain the wash tank by removing the overow tube or using the drain cycle.
4. Remove and clean the lter under running water.
5. Remove the wash and rinse arms according to the service instructions.
6. Clean all nozzles and spray arms thoroughly to remove debris and mineral buildup.
7. Reinstall all components securely in their original positions.
8. Clean the wash tank using an approved commercial dishwasher cleaner.
9. Wipe down all interior and exterior surfaces with a soft cloth.
10. Leave the dishwasher door slightly open to allow the interior to dry and prevent odors.
WARNING
Always disconnect electrical power before performing maintenance or servicing.
Preventive Maintenance
At least once or twice per year, have the dishwasher inspected by a qualied service technician.
Recommended inspection items include:
• Cleaning the water inlet lter
• Inspecting heating elements for scale buildup
• Inspecting door gaskets and seals
• Checking electrical and mechanical components for wear
• Verifying detergent and rinse aid dispensing system operation
• Inspecting water connections and drain components
Environmental Information
Packaging Materials
The packaging materials used for this appliance are recyclable and may include:
• Wood pallet
• LDPE plastic lm
Maintenance

16
Disposal
At the end of the appliance’s service life:
1. Disconnect the electrical supply.
2. Disconnect the water supply and drain connections.
3. Render the appliance unusable by removing or cutting the power cord.
4. Dispose of the appliance in accordance with local, state, and federal regula-
tions.
Many appliance components, including stainless steel and certain plastics, can
be recycled through approved recycling facilities.
Energy and Water Conservation
To maximize eciency:
• Operate the dishwasher only with full racks whenever practical.
• Maintain proper detergent and rinse aid settings.
• Keep lters, wash arms, and nozzles clean.
• Follow the manufacturer’s recommended operating temperatures.
• Repair leaks and service issues promptly.
Proper operation helps reduce water, energy, detergent, and rinse aid consumption.
Detergent and Rinse Aid Recommendations
Use only commercial-grade detergent and rinse aid intended for professional warewashing equip-
ment.
Verify chemical concentrations periodically to ensure proper cleaning performance and compli-
ance with sanitation requirements.
Overdosing chemicals may increase operating costs and environmental impact, while underdosing
may result in poor cleaning performance and sanitation issues.
Cleaning Recommendations
To improve washing results:
• Remove large food particles before loading dishes.
• Soak heavily soiled items when necessary.
• Clean dishes promptly to prevent food residue from drying onto surfaces.
• Maintain the dishwasher according to the cleaning schedule outlined in this manual.
Regular maintenance will help ensure reliable performance, improve cleaning results, and extend
the service life of the appliance.
• Corrugated cardboard
• Expanded polystyrene (EPS) foam
• Polypropylene (PP) supports
Dispose of all packaging materials in accordance with local regulations.
17
Troubleshooting
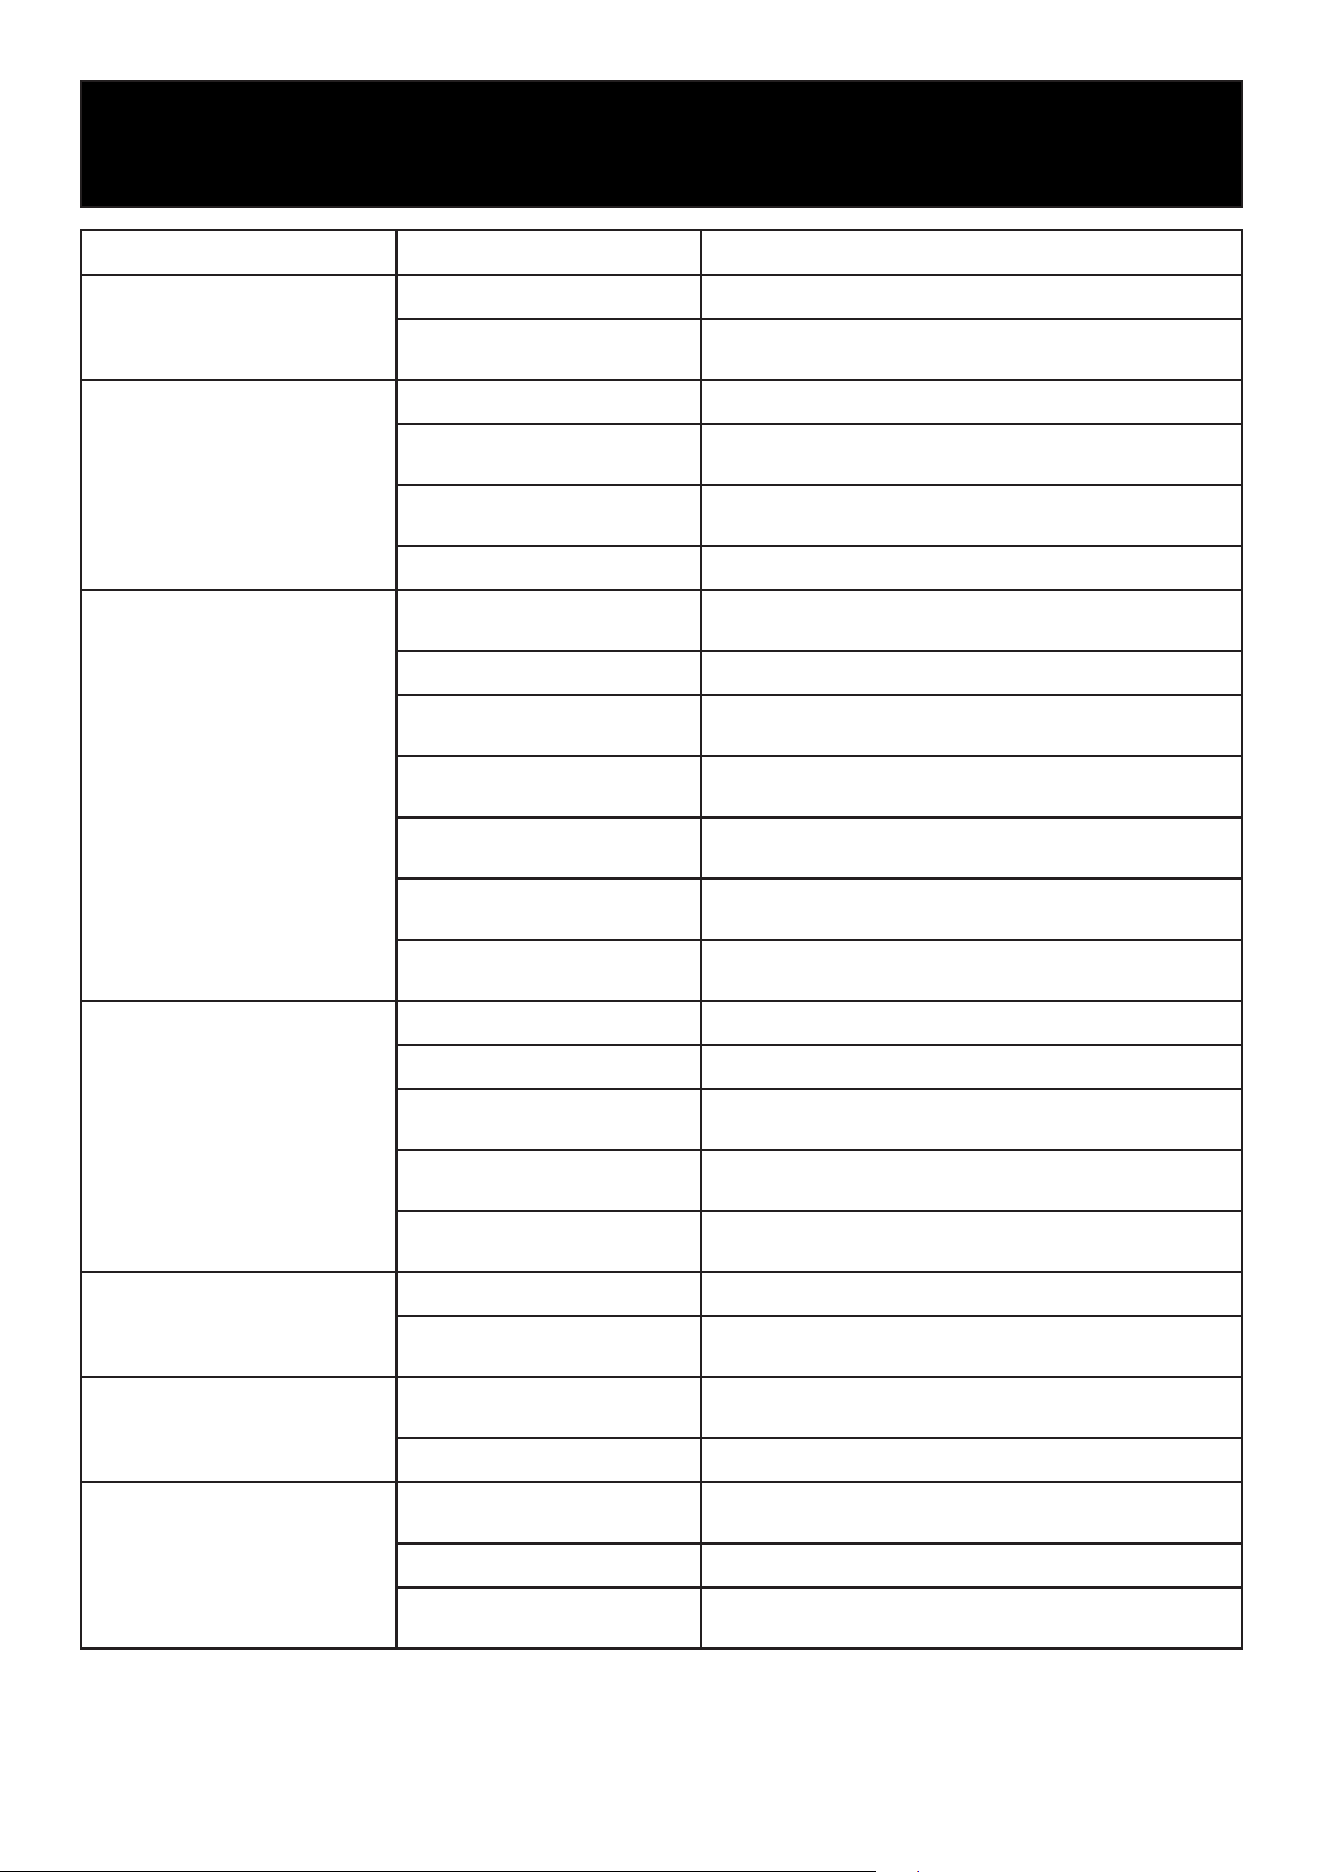
Problem Possible Cause Recommended Solution
Appliance does not power on
Power switch is OFF Turn the power switch ON.
No power supply
Verify power supply, circuit breaker, and electrical
connections.
Dishwasher does not ll with
water
Water supply valve is closed Open the water supply valve completely.
Spray arms, lter, pipes, or
solenoid valve are clogged
Clean the spray arms, lter, and water inlet compo-
nents.
Excessive mineral buildup
Remove scale deposits and service the machine as
required.
Faulty pressure switch Contact a qualied service technician.
Poor cleaning performance
Spray arms are blocked or
unable to rotate
Remove obstructions and verify free rotation of the
spray arms.
Dirty lters Remove and clean all lters.
Excessive foam
Use only low-foaming commercial dishwasher deter-
gent. Verify detergent dosage settings.
Insucient detergent con-
centration
Adjust detergent dosage according to the chemical
supplier’s recommendations.
Water temperature too low
Verify proper operating temperature and heating
system performance.
Wash cycle too short for soil
level
Select a longer wash cycle or run an additional cycle.
Dirty wash water
Drain the machine, clean the tank and lters, and
rell with fresh water.
Dishes do not dry properly
Insucient rinse aid Check rinse aid level and dosage settings.
Incorrect rack loading Arrange dishes to allow proper water drainage.
Dishes left in the machine
too long after washing
Remove racks promptly after cycle completion
Rinse temperature too low
Verify rinse temperature and heating system perfor-
mance.
Worn or damaged dishware
surfaces
Replace damaged or excessively worn items.
Spots or streaks on dishes
and glassware
Incorrect rinse aid dosage Adjust rinse aid settings.
Hard water conditions
Install or service a water softener and verify water
quality.
Dishwasher stops during
operation
Overloaded electrical circuit
Verify that the dishwasher is connected to a properly
sized dedicated circuit.
Safety device activated Contact a qualied service technician.
Dishwasher drains unexpect-
edly during operation
Dirty or contaminated wash
water
Drain and rell the wash tank with clean water.
Faulty pressure switch Contact a qualied service technician.
Overow tube improperly
installed
Verify the overow tube is correctly positioned and
fully seated.

18
Service Assistance
If the problem cannot be resolved using the troubleshooting information above, disconnect the
dishwasher from the power supply and contact KoolMore Customer Service or a qualied service
technician.
WARNING
Do not attempt to repair electrical, heating, or control system components unless qualied to do
so. Improper repairs may result in equipment damage, personal injury, or voiding of the warranty.
19
WARRANTY
LIMITED WARRANTY
KoolMore Supply Inc. extends a limited warranty to the original purchaser, guaranteeing that this KoolMore product is
free from manufacturing defects in material or workmanship for one year from the date of purchase.
Should you discover any such defect within the warranty period, KoolMore Supply Inc. reserves the right to repair or re-
place the product without charge, or to cover the cost of replacement parts and repair labor needed to correct defects
present at the time of purchase or resulting from regular usage, when the appliance has been installed, operated, and
maintained as per the instructions provided.
At its sole discretion, KoolMore Supply Inc. may decide to replace the product. In such an event, your replacement
appliance will carry the warranty for the remaining term of the original unit’s warranty period.
This warranty is valid exclusively to the original purchaser of the product and only applicable within the United States.
The warranty commences from the date of original consumer purchase. Proof of the original purchase date will be
required to obtain service under this warranty.
Under this limited warranty, your sole and exclusive remedy will be product repair, as outlined above. All services must
be provided by a KoolMore designated service company.
KoolMore shall not be responsible or liable for any loss, spoilage, or damage to food, beverages, pharmaceuticals,
medical supplies, or any other contents stored in the unit resulting from failure, malfunction, defects, improper instal-
lation, improper use, power interruption, or any other cause. Any such losses are expressly excluded from coverage
under this warranty.
To claim warranty or request repair service:
Email [email protected]. Please include your name, address, phone number, warranty repair request, and a copy
of your proof of purchase receipt. Alternatively, visit koolmore.com and use the Contact Us page. A KoolMore custom-
er service representative will promptly arrange service for your appliance.
We thank you for choosing KoolMore.
WARRANTY EXCLUSIONS
This limited warranty will not cover:
1. Failure of the product to perform during power failures or interruptions, or due to inadequate electrical service.
2. Damage incurred during transportation or handling.
3. Damage caused by accidents, vermin, lightning, winds, re, oods, or acts of God.
4. Damage resulting from accidents, alterations, misuse, abuse, improper installation, repair, or maintenance. This
includes using any external device that alters or converts the voltage or frequency of electricity.
5. Unauthorized product modications, repairs by unauthorized centers, or use of non-approved replacement parts.
6. Abnormal cleaning and maintenance not aligned with the user’s manual.
7. Use of incompatible accessories or components.
8. Any costs associated with repairs or replacements under these excluded circumstances shall be the responsibility
of the consumer.