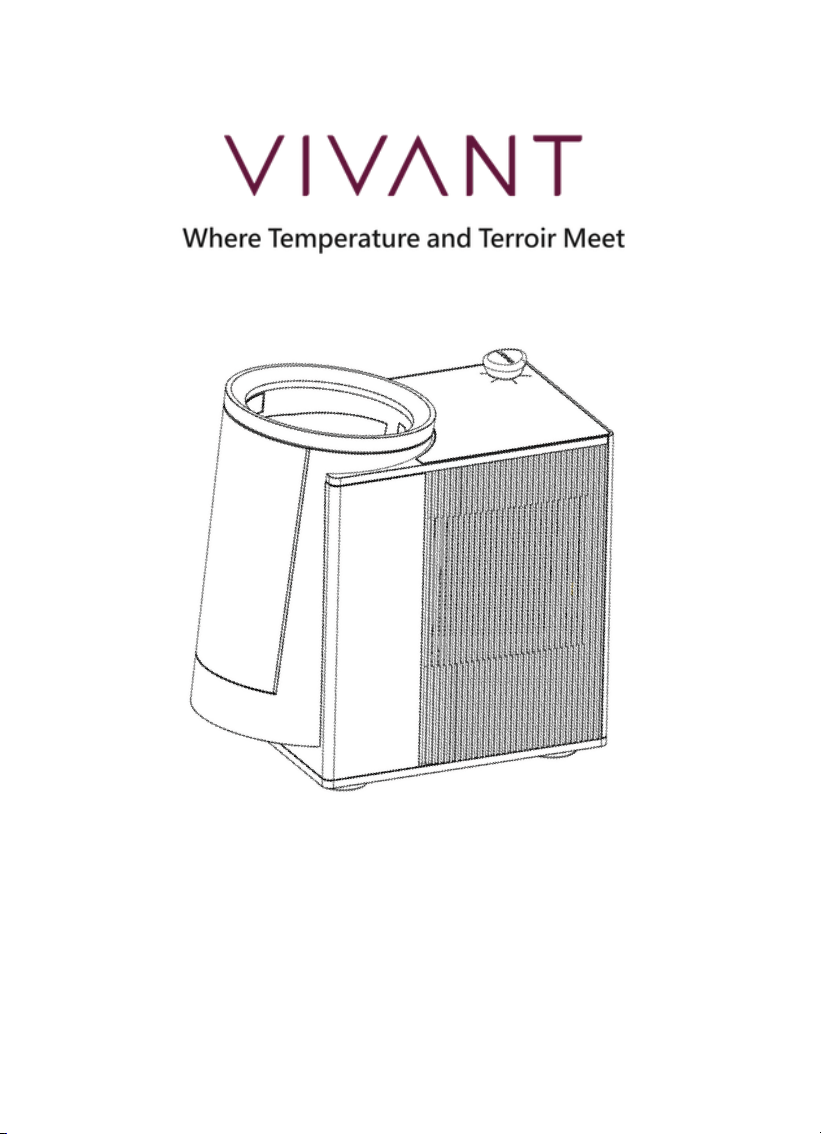
Venus G2 Portable Wine Chiller
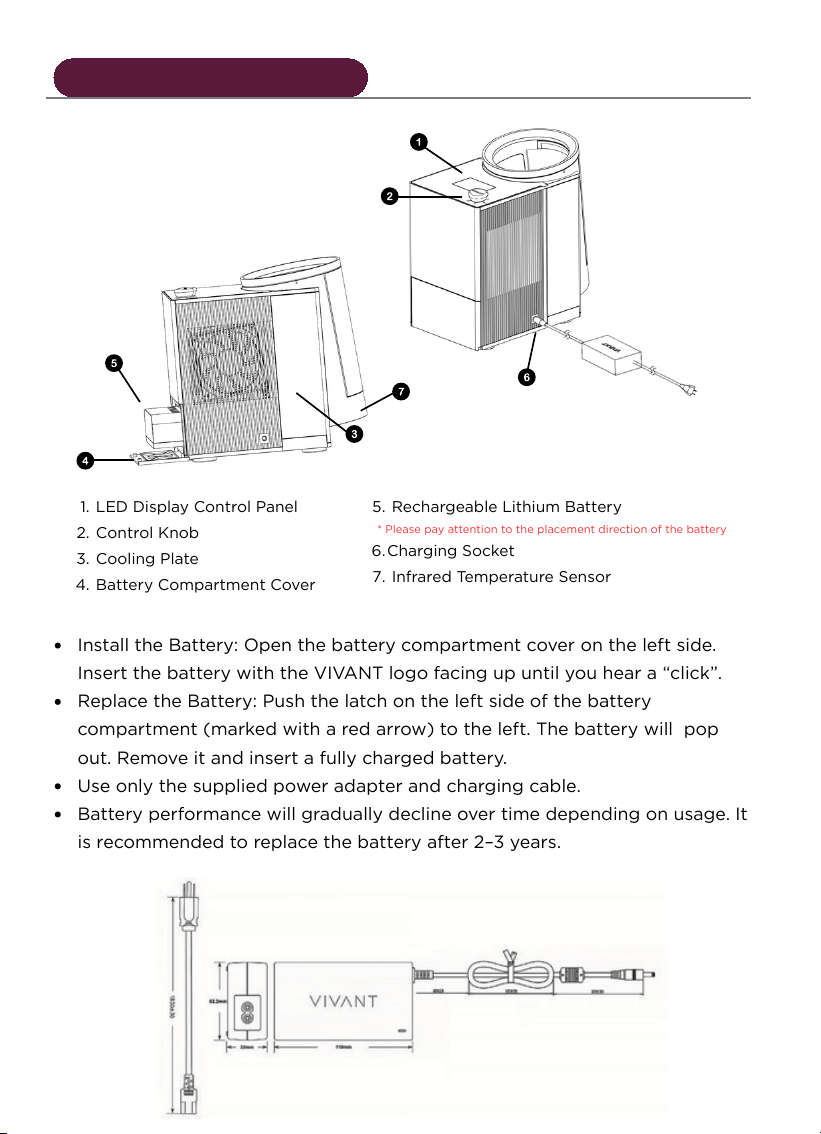
1. LED Display Control Panel
2. Control Knob
3. Cooling Plate
4. Battery Compartment Cover
5. Rechargeable Lithium Battery
* Please pay attention to the placement direction of the battery
6.Charging Socket
7. Infrared Temperature Sensor
Device Description
Install the Battery: Open the battery compartment cover on the left side.
Insert the battery with the VIVANT logo facing up until you hear a “click”.
Replace the Battery: Push the latch on the left side of the battery
compartment (marked with a red arrow) to the left. The battery will pop
out. Remove it and insert a fully charged battery.
Use only the supplied power adapter and charging cable.
Battery performance will gradually decline over time depending on usage. It
is recommended to replace the battery after 2–3 years.
How to Use
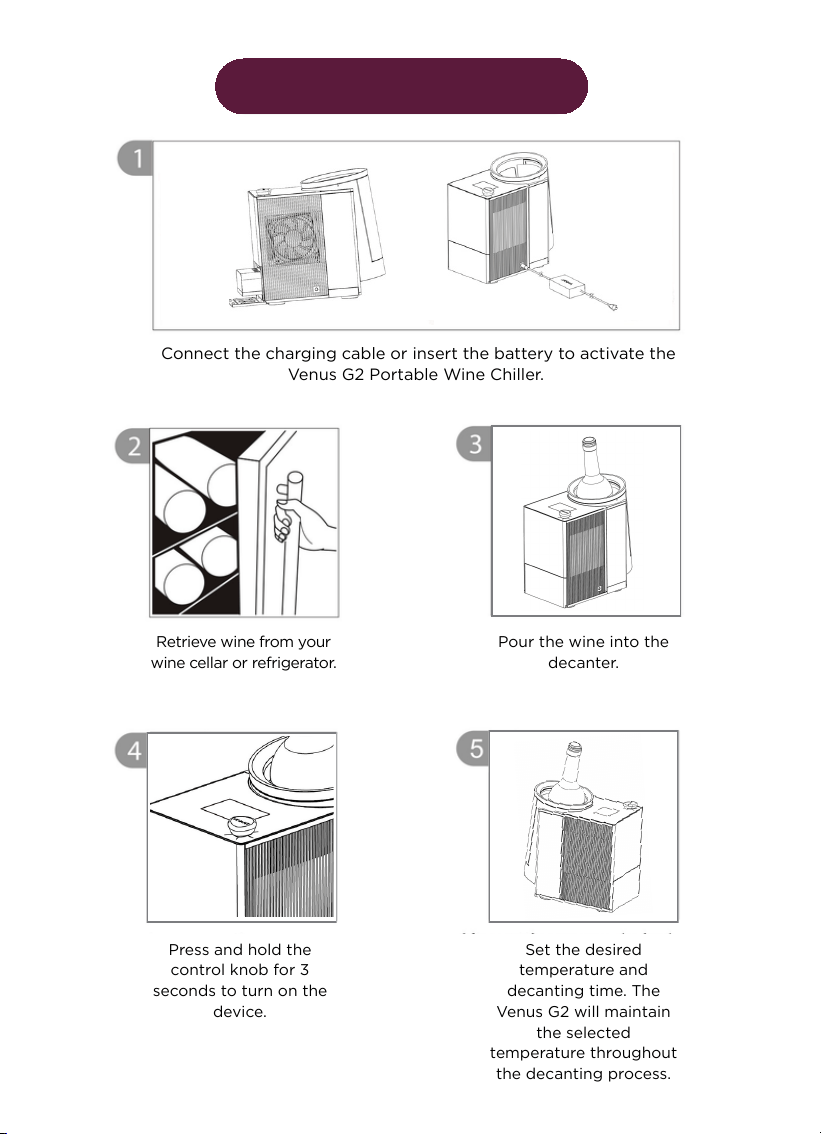
Retrieve wine from your
wine cellar or refrigerator.
Press and hold the
control knob for 3
seconds to turn on the
device.
Pour the wine into the
decanter.
Set the desired
temperature and
decanting time. The
Venus G2 will maintain
the selected
temperature throughout
the decanting process.
Connect the charging cable or insert the battery to activate the
Venus G2 Portable Wine Chiller.
00:00
00:00
00:00
00:00
00:00
00:00
00:00
00:00
00:00
00:00
00:00
00:00
00:00
00:00
Set up mode
Startup Screen
00:00
00:00
Setting Temperature
00:00
00:00
00:00
00:00
00:00
00:00
Set up mode
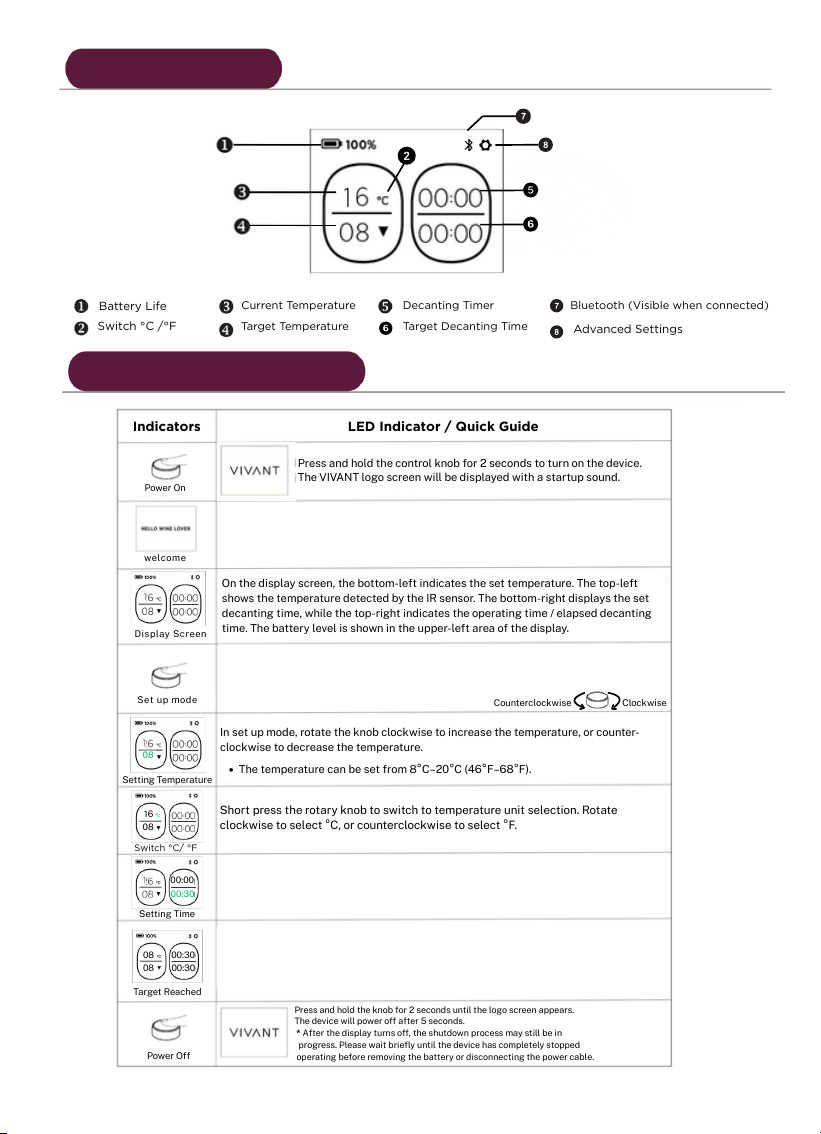
Current Temperature
Decanting Timer
Target Temperature
Target Decanting Time
Battery Life
Switch °C /°F
Advanced Settings
Bluetooth (Visible when connected)
On the display screen, the bottom-left indicates the set temperature. The top-left
shows the temperature detected by the IR sensor. The bottom-right displays the set
decanting time, while the top-right indicates the operating time / elapsed decanting
time. The battery level is shown in the upper-left area of the display.
Setting Time
00:30
08
c
o
Target Reached
00:30
00:30
08
08
16
08
00:00
Press and hold the control knob for 2 seconds to turn on the device.
The VIVANT logo screen will be displayed with a startup sound.
The welcome screen will be shown briefly, followed by the startup screen.
welcome
Display Screen
Switch °C/ °F
Power Off
Power On
Indicators
LED Indicator / Quick Guide
Indicators
Indicator / Quick Guide
Short press the control knob to enter set up mode. The active setting will flash to
indicate that it can be adjusted. Each short press advances to the next setting item.
Rotate the knob clockwise or counterclockwise to make adjustments. After the
fourth short press, the decanting process will begin.
Counterclockwise
Clockwise
In set up mode, rotate the knob clockwise to increase the temperature, or counter-
clockwise to decrease the temperature.
The temperature can be set from 8°C–20°C (46°F–68°F).
Short press the rotary knob to switch to temperature unit selection. Rotate
clockwise to select °C, or counterclockwise to select °F.
Rotate the control knob to adjust the desired decanting duration.
For safety protection, the TITAN will automatically power off 8 hours after the last
operation. For extended decanting sessions, the device may be reactivated as needed
to maintain temperature control while the device be attended during operation.
After confirming the decanting time, the decanting process will begin.
Once the target temperature and decanting time are reached, an audio alert will
sound. The audio alert can be disabled through the VIVANT Wine App.
Press and hold the knob for 2 seconds until the logo screen appears.
The device will power off after 5 seconds.
* After the display turns off, the shutdown process may still be in
progress. Please wait briefly until the device has completely stopped
operating before removing the battery or disconnecting the power cable.
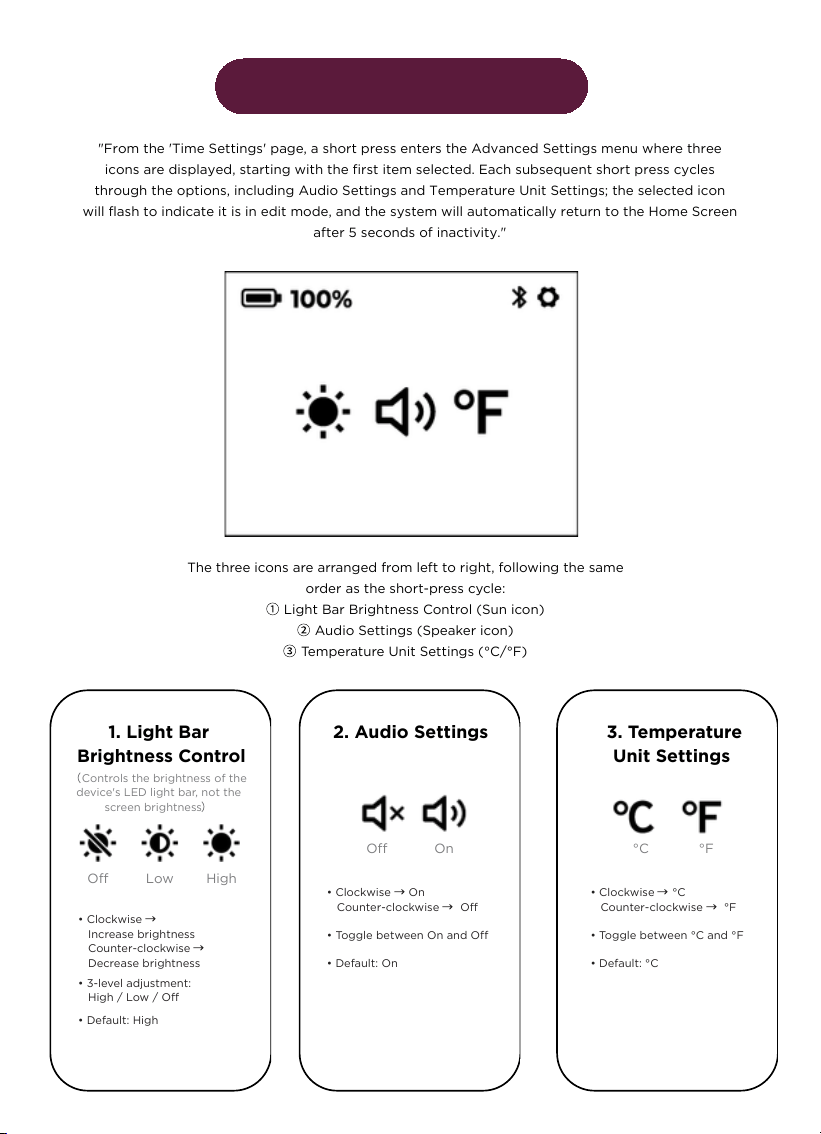
Advanced Settings
"From the 'Time Settings' page, a short press enters the Advanced Settings menu where three
icons are displayed, starting with the first item selected. Each subsequent short press cycles
through the options, including Audio Settings and Temperature Unit Settings; the selected icon
will flash to indicate it is in edit mode, and the system will automatically return to the Home Screen
after 5 seconds of inactivity."
1. Light Bar
Brightness Control
2. Audio Settings
3. Temperature
Unit Settings
(
Controls the brightness of the
device's LED light bar, not the
screen brightness
)
The three icons are arranged from left to right, following the same
order as the short-press cycle:
①
Light Bar Brightness Control (Sun icon)
②
Audio Settings (Speaker icon)
③
Temperature Unit Settings (°C/°F)
Off
Off
On
°C
°F
• Clockwise
→
Increase brightness
Counter-clockwise
→
Decrease brightness
• Clockwise
→
On
Counter-clockwise
→
Off
• Clockwise
→
°C
Counter-clockwise
→
°F
• 3-level adjustment:
High / Low / Off
• Toggle between On and Off
• Toggle between °C and °F
• Default: On
• Default: °C
• Default: High
Low
High
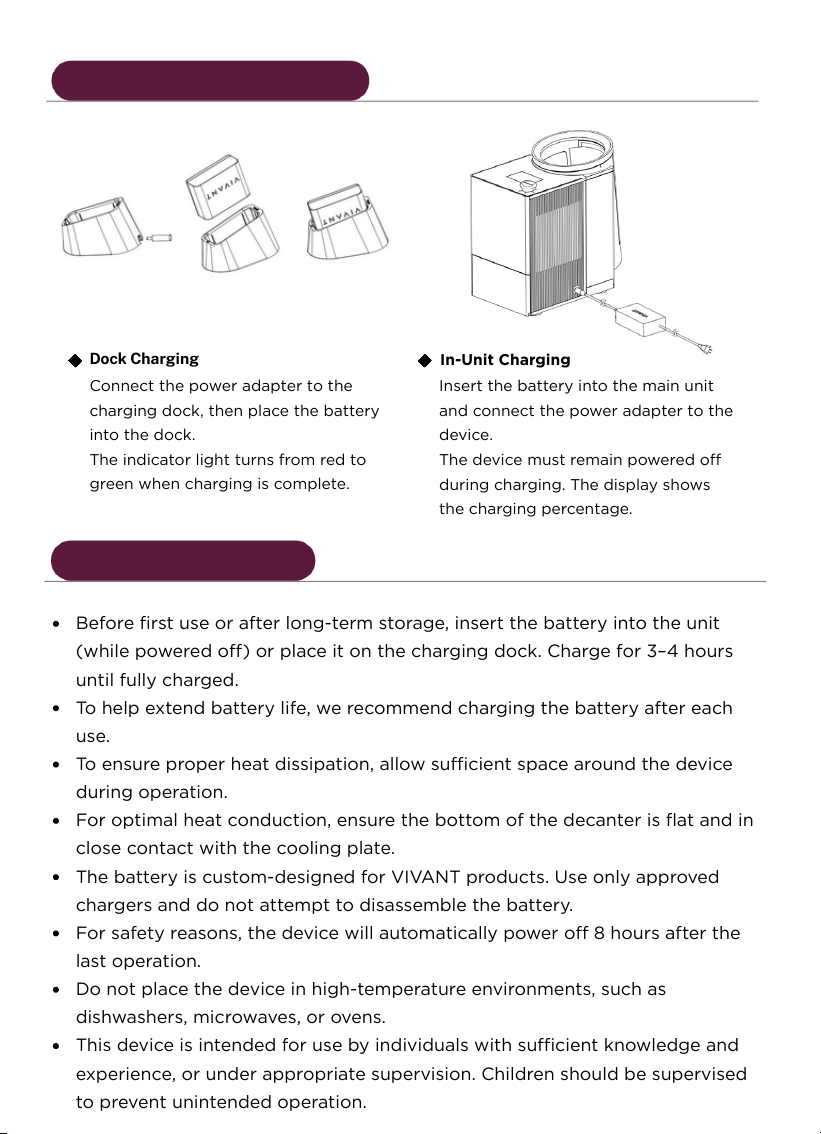
Ensure the main unit is powered off.
Insert the battery into the TITAN
Portable Electronic Decanter Chiller
and connect the charging cable to the
charging port.
Before first use or after long-term storage, insert the battery into the unit
(while powered off) or place it on the charging dock. Charge for 3–4 hours
until fully charged.
To help extend battery life, we recommend charging the battery after each
use.
To ensure proper heat dissipation, allow sufficient space around the device
during operation.
For optimal heat conduction, ensure the bottom of the decanter is flat and in
close contact with the cooling plate.
The battery is custom-designed for VIVANT products. Use only approved
chargers and do not attempt to disassemble the battery.
For safety reasons, the device will automatically power off 8 hours after the
last operation.
Do not place the device in high-temperature environments, such as
dishwashers, microwaves, or ovens.
This device is intended for use by individuals with sufficient knowledge and
experience, or under appropriate supervision. Children should be supervised
to prevent unintended operation.
Connect the power adapter to the
charging dock, then place the battery
into the dock.
The indicator light turns from red to
green when charging is complete.
Dock Charging
Insert the battery into the main unit
and connect the power adapter to the
device.
The device must remain powered off
during charging. The display shows
the charging percentage.
In-Unit Charging
Charging
Notices