
Heat Press Machine
User Manual
Read Carefully Before Use
Keep for Future Reference
V20230717

1
SAFETY INFORMATION
• When used properly, this machine is safe and user friendly. However, it has the potential to
cause severe burns and res when used incorrectly. Read these instructions carefully before
use. Provide them to any other users and provide them with this machine if it is ever given
or sold to a third party. Failure to do so may result in res, electric shock, serious property
damage, and serious personal injury.
• ONLY use this machine for its intended purpose, using heat to transfer designs onto cups,
mugs, and similar cylindrical objects made of heat-resistant materials such as ceramic, glass,
and stainless steel.
• DO NOT let children or untrained personnel use this machine. Do not allow use by persons with
impaired mental or physical capabilities without close and constant supervision. Do not use this
machine when tired or while under the inuence of drugs, alcohol, or strong medication.
• ONLY use this machine with stable, compatible, and grounded power sources. Never use
3-to-2 prong adapters, ungrounded extension cords, or extension cords of insucient gauge
for this machine’s expected electrical load. Always ensure all plugs are securely fastened,
all power cords are undamaged, and the machine is protected against any possible surge
along the line. In standard residential and commercial settings, do not add other machines
on the same circuit being used by this machine.
• DO NOT adjust this machine's electrical components or allow them to become wet. Do not use
it with wet hands or in highly humid environments. If this machine develops condensation from
temperature or elevation change or ever accidentally becomes wet, leave it disconnected from
power until it has completely dried. Discontinue use until it is serviced by a trained technician if
any malfunction occurs.
• Keep your work area clean and well lit. Cluttered or dark areas invite accidents.
• NEVER use or store this machine around highly ammable or explosive substances or gases.
• ALWAYS adju s t t he tem p e rat u r e an d ti me set t in g s ap p ro p r i at e ly fo r di e r ent ma te r i a ls. Re s ear c h
your material BEFORE use and avoid any that won't be able to withstand the prolonged high
temperatures of the transfer process. Be EX TR E M ELY careful with glass.
• ALWAYS be careful not to confuse the machine's Fahrenheit and Celsius settings.
• Post the number of the local re department and keep a re extinguisher nearby in case of
accidents. Inform any users of their locations.
• NEVER leave this machine unattended during use. Someone should always be available to
respond quickly to any accidents or emergencies that might occur.
• NEVER touch heated surfaces of the machine during or shortly after use. ONLY use the handle
and controls. Be careful to avoid direct contact with the heated mug attachment while removing
your nished products. Use of heat-resistant gloves to protect your hands and heat-resistant
tape to secure your designs are both highly recommended.
• NEVER use if any parts are missing, loose, worn, damaged, or otherwise display signs of
malfunction. Tighten, repair, or replace any problematic components before further use. Only
allow trained technicians to work on internal components. Always fully replace damaged power
cords and only replace components with identical parts.
• For best results, unplug this machine when it is not in use or otherwise fully disconnect it from
power. Only clean, repair, or perform other maintenance while this machine is fully disconnected
from power and fully cooled. Only use and store it in a location protected against unauthorized
use and inaccessible to any children or pets.
Warning!
2
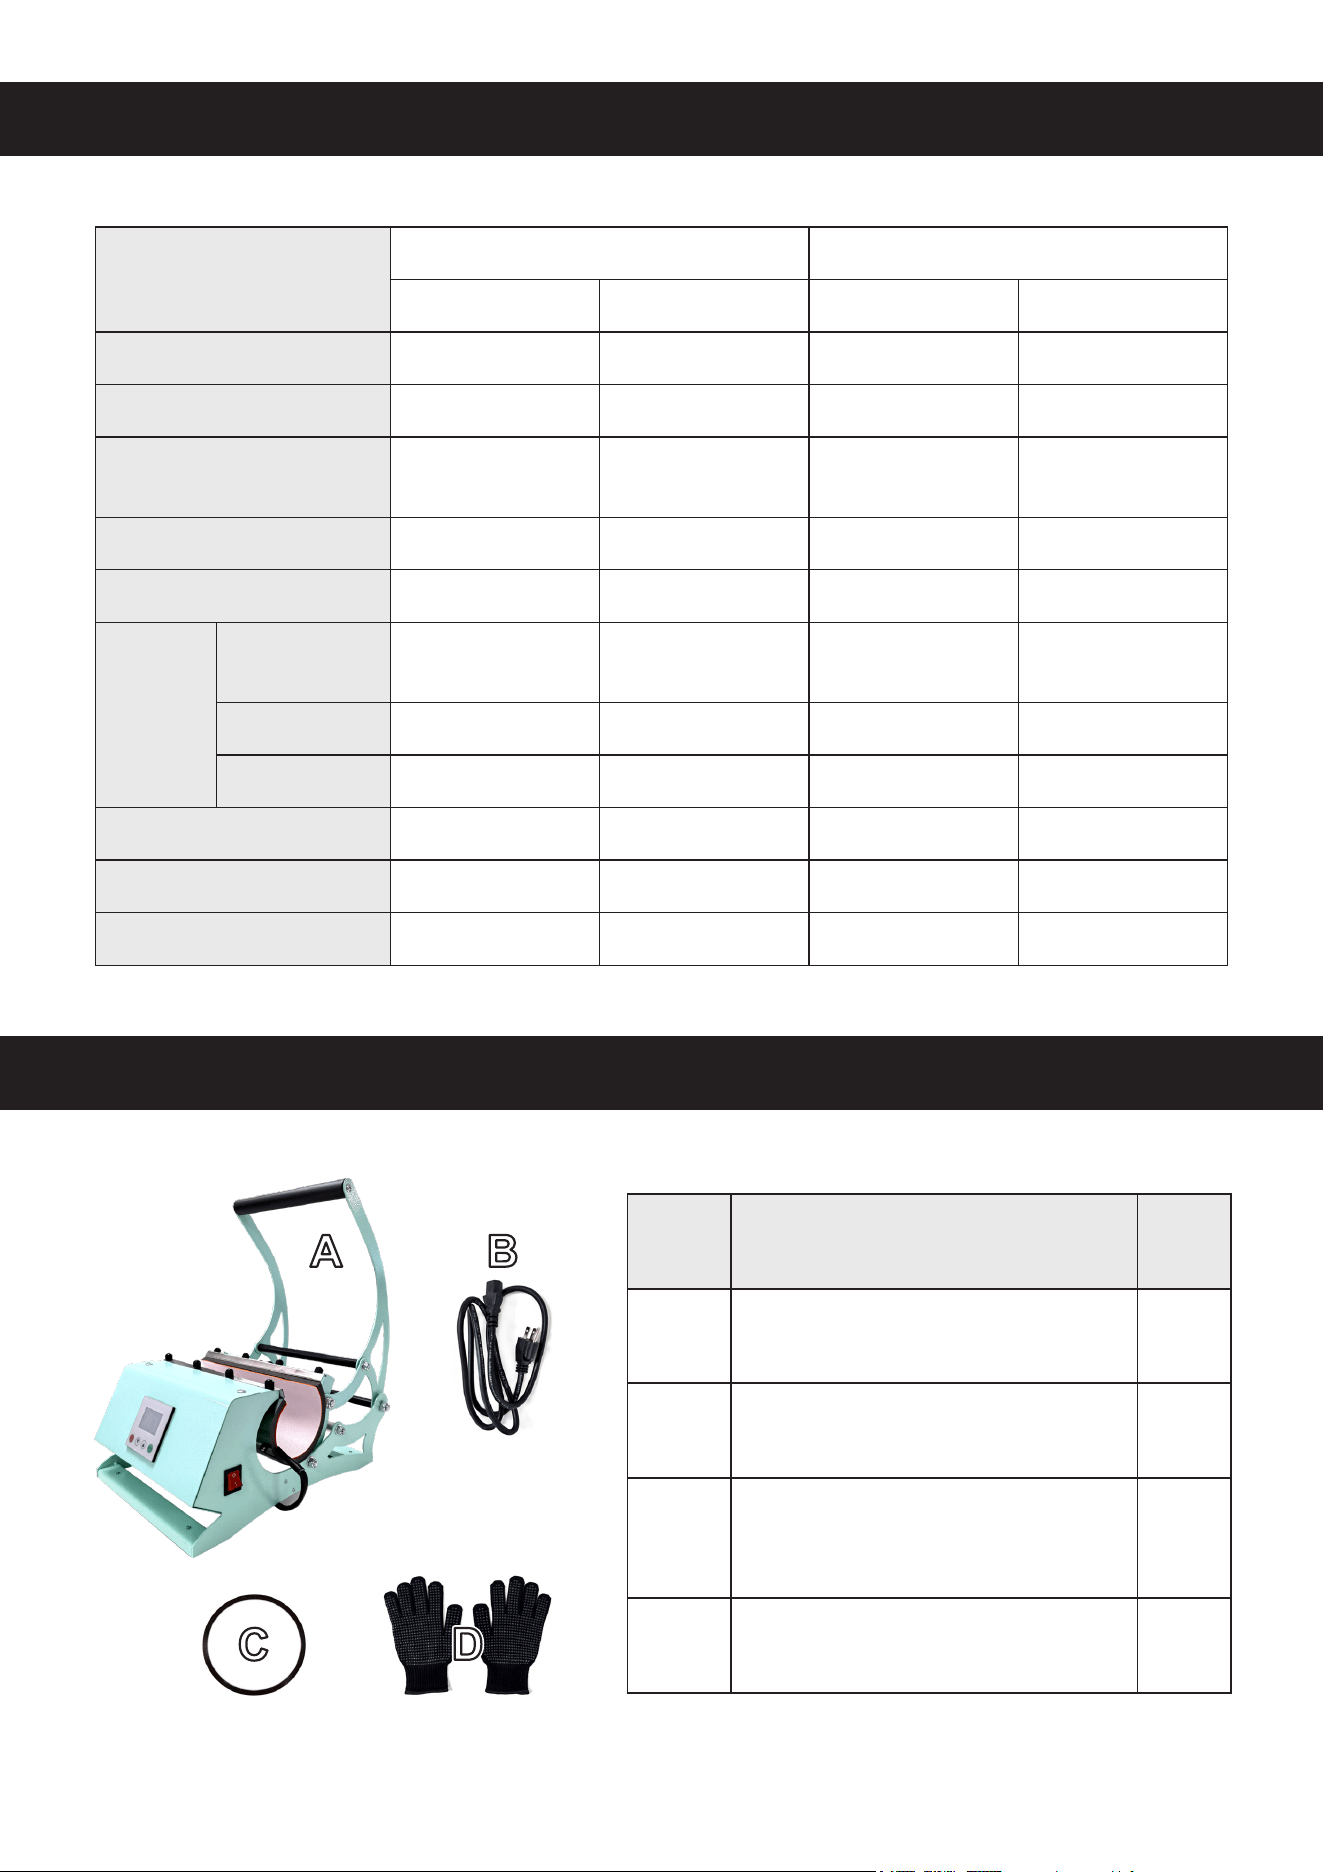
SPECIFICATIONS
Model
WBFHPM20OZ WBFHPM30OZ
UK, EU, AU North America UK, EU, AU North America
Rated Power
500 W 500 W 500 W 500 W
Input Voltage & Freq.
220–240 V~ 50 Hz 110–120 V~ 60 Hz 220–240 V~ 50 Hz 110–120 V~ 60 Hz
Fuse Type
20AL250V (5×20 mm) 20AL250V (5×20 mm) 20AL250V (5×20 mm) 20AL250V (5×20 mm)
Max. Time Setting
999 sec. (16⅔ min.) 999 sec. (16⅔ min.) 999 sec. (16⅔ min.) 999 sec. (16⅔ min.)
Max. Temperature
240°C 464°F 240°C 464°F
Compatible
Products
Volume Range
147.9–591.5 mL
9.4–20.8 imp. . oz.
9–20 US . oz.
147.9–887.2 mL
9.4–31.2 imp. . oz.
9–30 US . oz.
Outer Dia. Range
6–12 cm 2.4–4.7 in. 6–15 cm 2.4–5.9 in.
Max. Height
25 cm 9.8 in. 27 cm 10.6 in.
Main Power Cord Length
1.5 m 4.9 ft. 1.5 m 4.9 ft.
Overall Dimensions
41×26×46.5 cm 16.1×10.2×18.3 in. 41×26×46.5 cm 16.1×10.2×18.3 in.
Net Weight
7 kg 15.4 lb. 7.2 kg 15.8 lb.
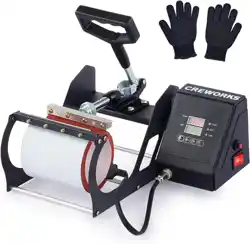
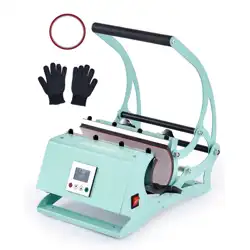
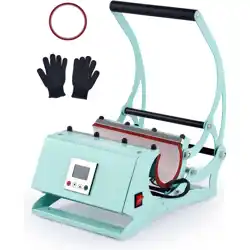
PACKAGE LIST
Item Name Qty.
A
Heat Press Machine 1
B
Main Power Cord 1
C
Heat-Resistant
Adhesive Tape Roll
1
D
Heat-Resistant Gloves 1
3
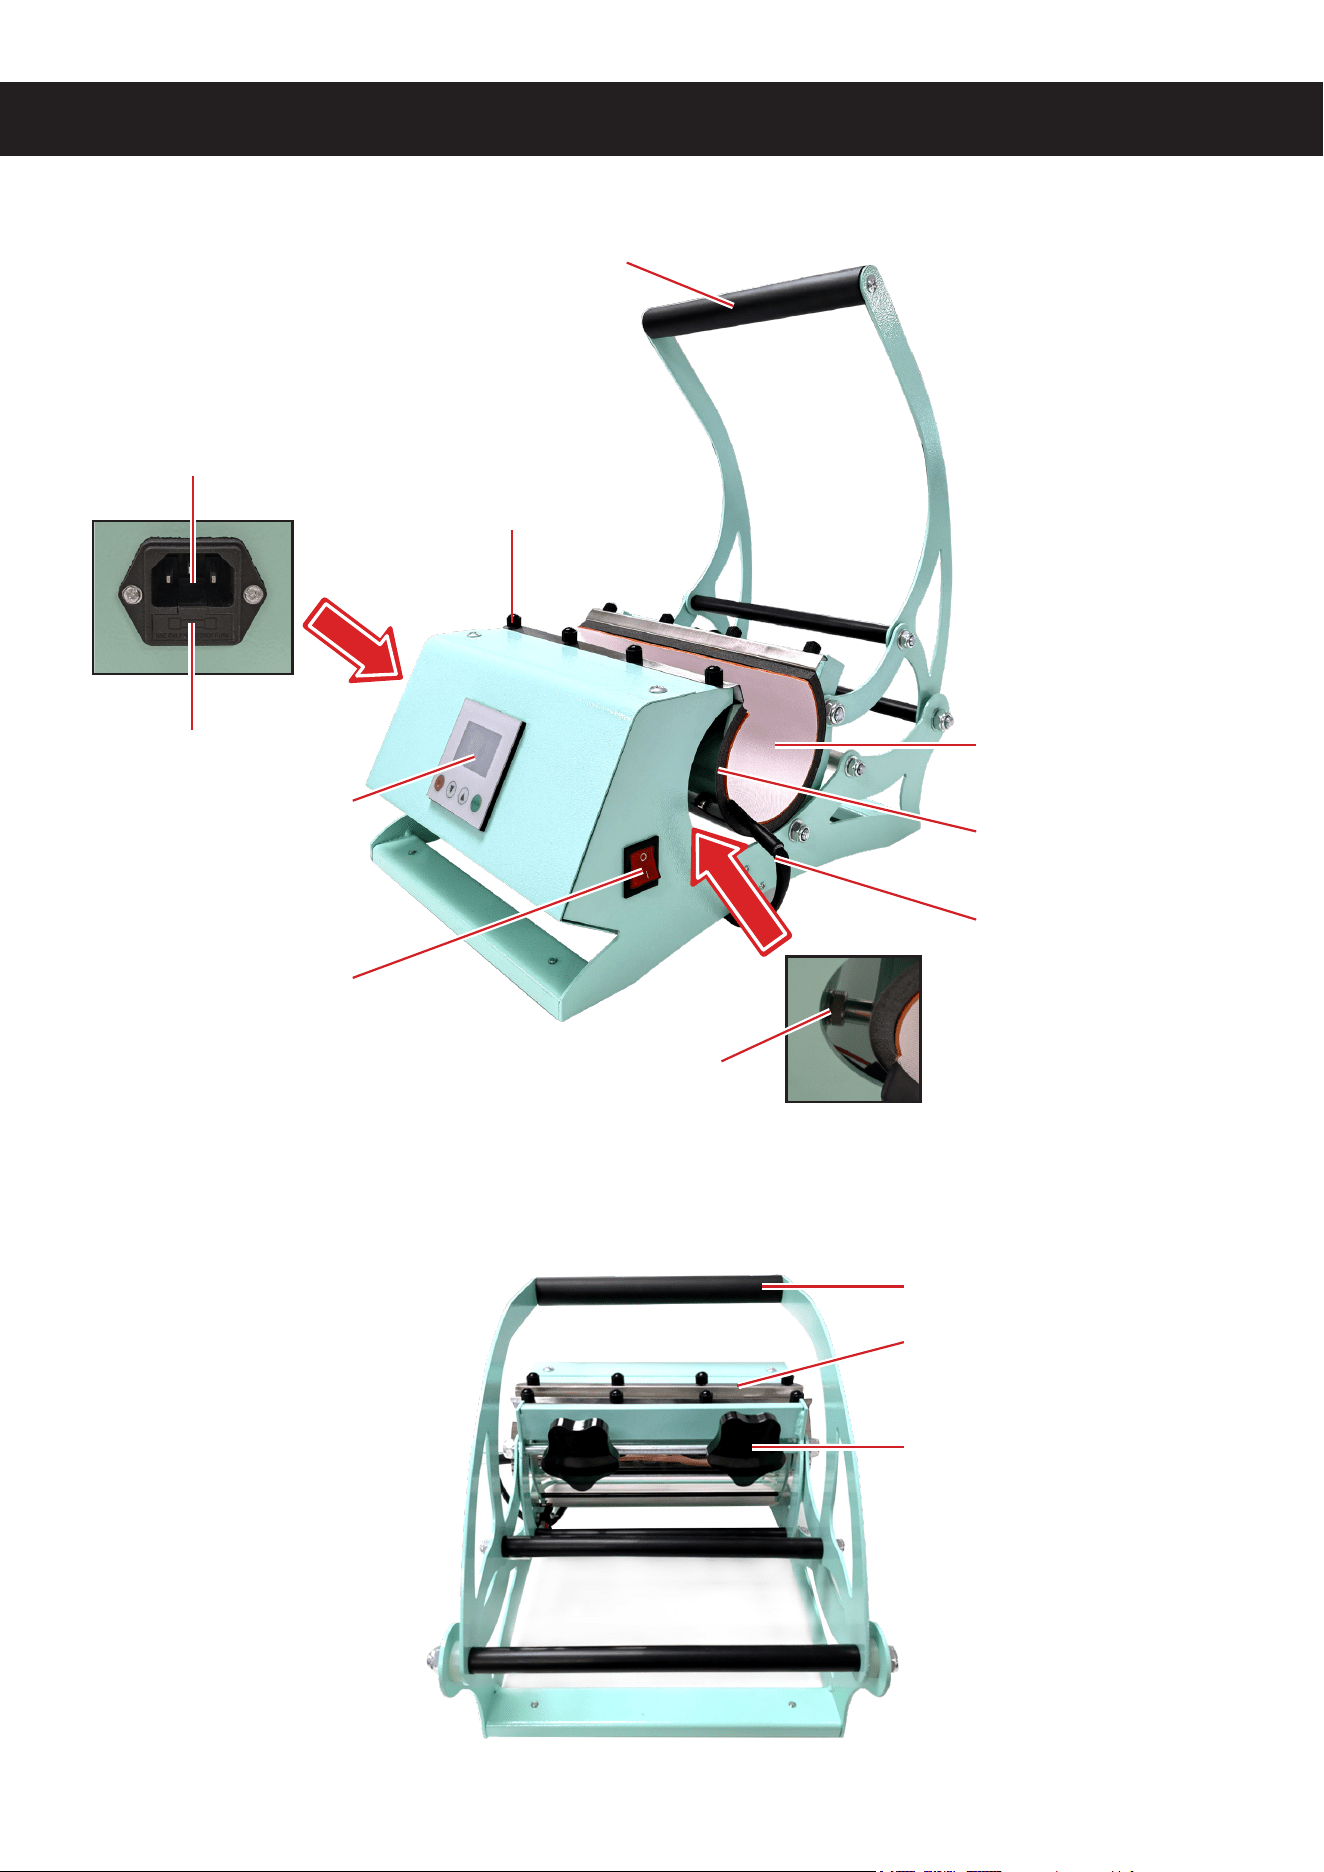
PRODUCT DIAGRAM
Power Inlet
Locking Bolt
Mug Attachment
Handle
Control Panel
Power Switch
Heating Power Socket
Mug Attachment
Pressure Adjustment Knob
Handle
Heating Power Cord
Fuse
Side View
Back View
Heating Unit
4
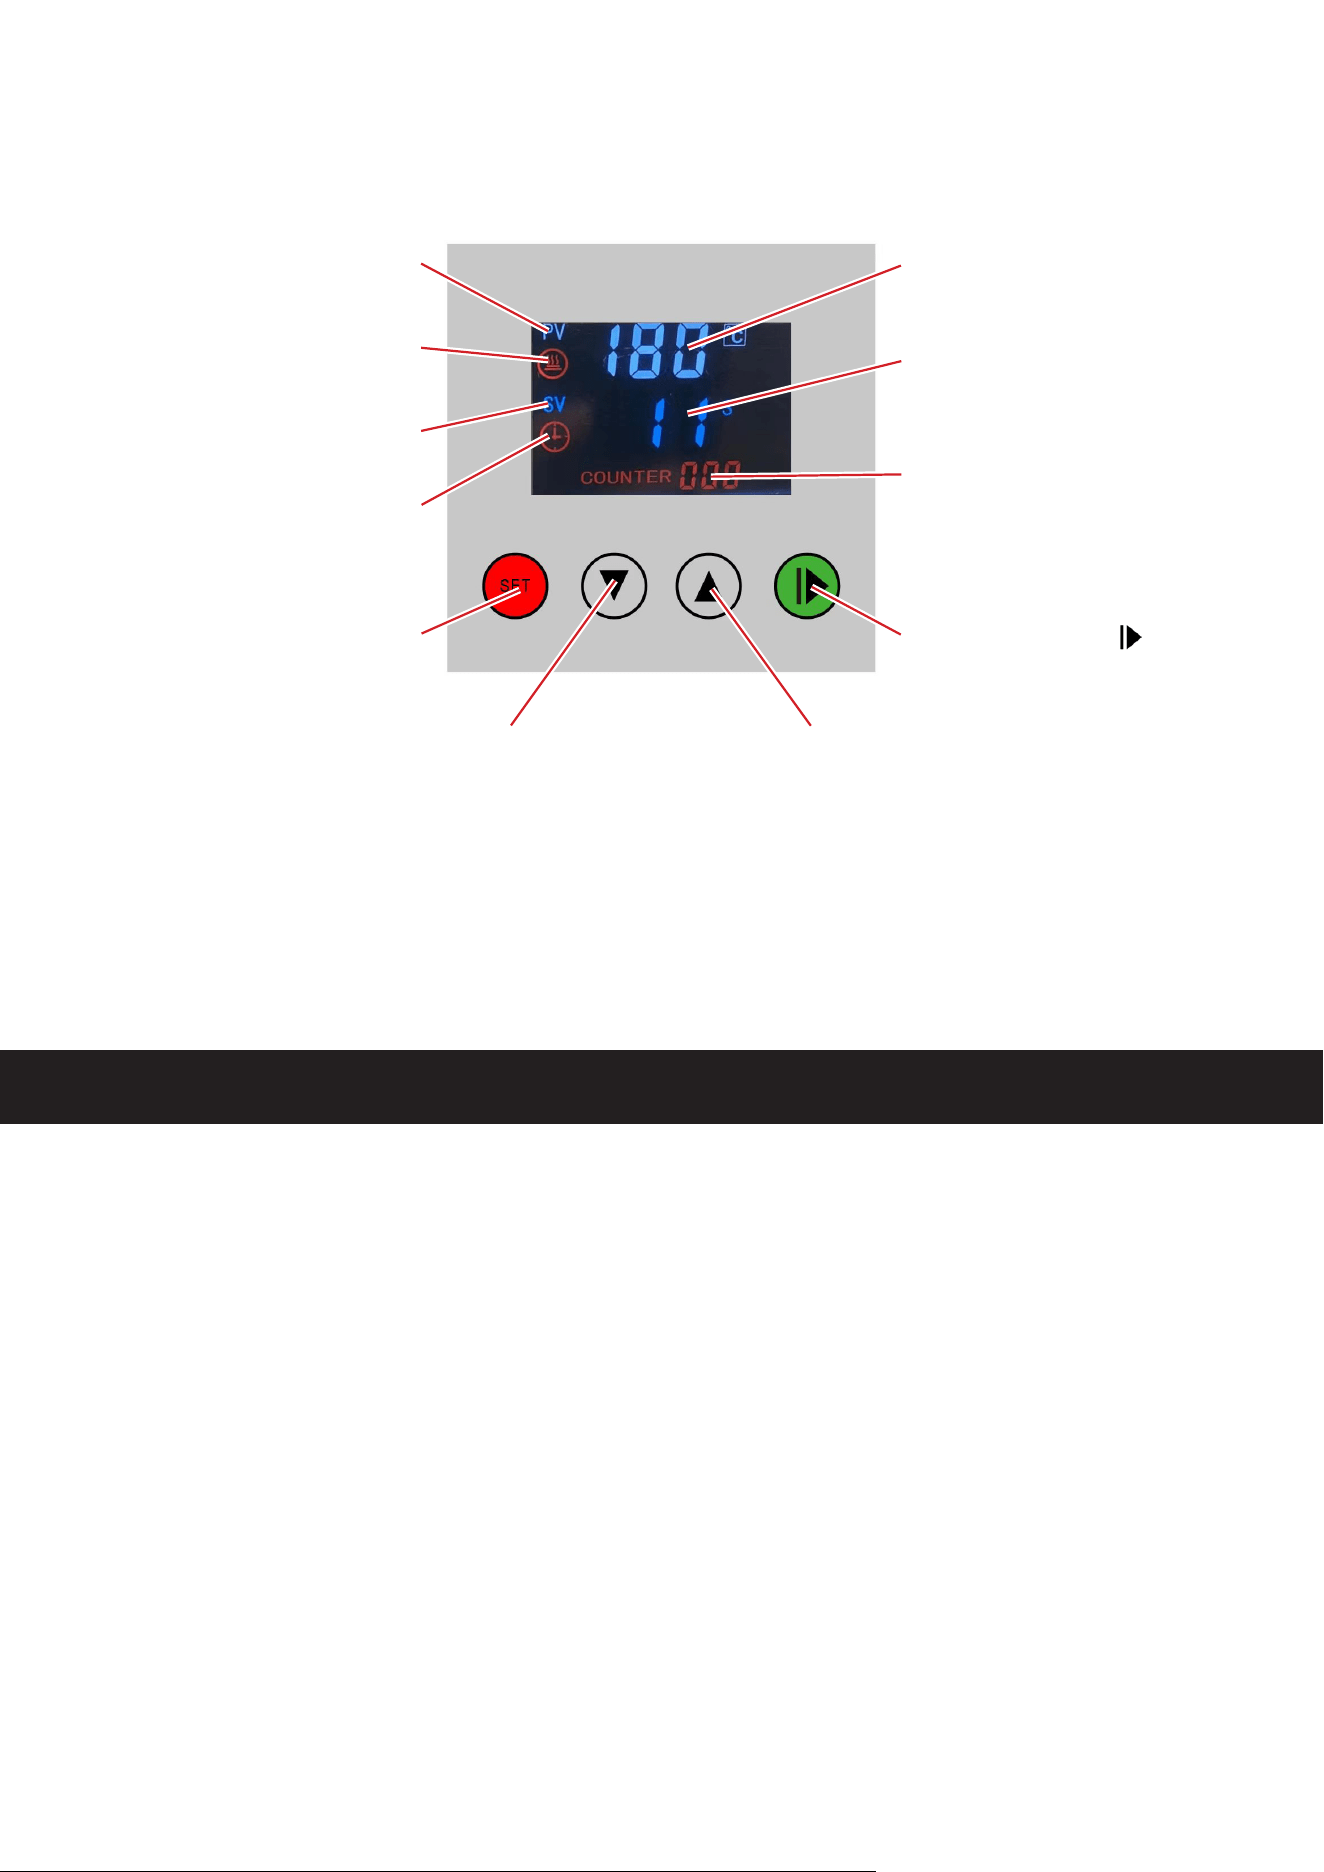
Control Panel
Heating Indicator
Secondary Display
Indicator
Primary Display
Indicator
Timer Indicator
Parameter Menus
and Conrm (
Set
)
Start/Stop/Reset ( )
Batch Counter
Timer (
s
) and
Value Display
Temp (
°C
/
°F
) and
Parameter Display
Down (▼) Up (
▲
)
INSTALLATION
1. Place the heat press machine (A) on any rm, level, and heat-resistant surface able to
easily bear its weight.
2. Remove any heat-sensitive or easily ammable materials from the area.
3. Check that the mug attachment is securely xed to the heating unit, tightening its locking
bolts as needed.
4 Check that the heating unit is well connected to its cable and the handle opens and
closes easily and smoothly.
5. Connect the power cord (B) to the inlet on the left side of the machine and to a
compatible, stable, and grounded power supply.
6. Prepare one area for items about to be loaded into the press and a separate area for
cooling heated items after processing.
5
OPERATION
1. Prepare your design on a suitable transfer.
Remember that most transfers (but not all!) require the design to be applied in
reverse. Make the necessary adjustments for the style of transfer you
ʼ
re using.
2. Fix your design exactly into position on your product using the heat-resistant adhesive
tape (C).
Research your specic material and its ideal settings before use. Most ceramics can
be pressed, but some sublimation plates and mugs are especially formatted for easy
design transfer. Use medium to low pressure for glass but apply full and even
contact with the transfer. Sublimation transfers are suitable for using this machine on
stainless steel surfaces while other transfer types can be ineective.
3. Check that your product will be able to t easily within the press without disturbing the
transfer. Adjust the pressure knobs as needed to provide room for placement but to allow
full contact when the handle is closed.
4. Put on the heat-resistant gloves (D) and any other necessary PPE. Connect the press to
power and ip its power switch to
I
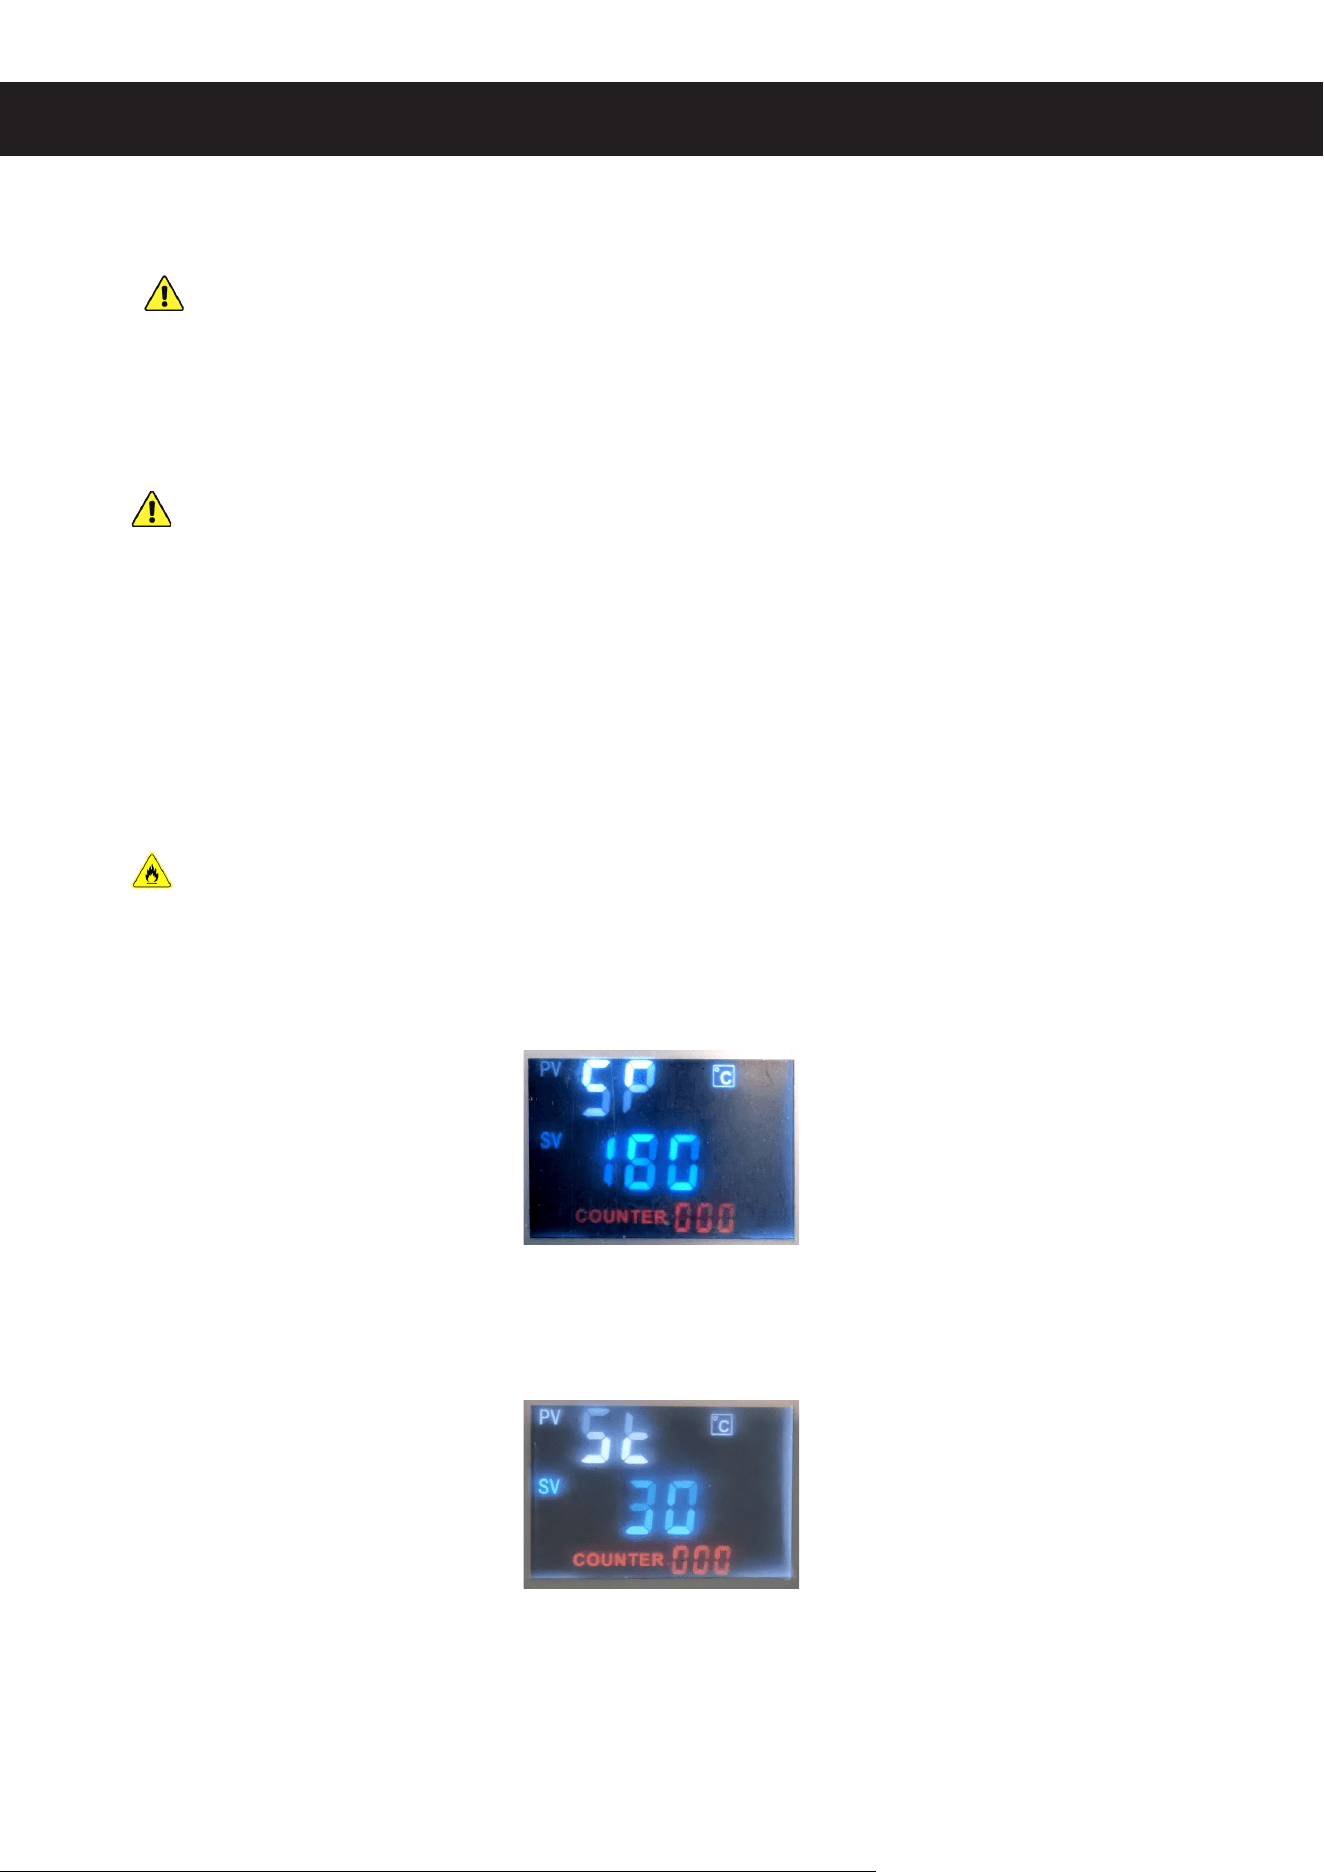
. During rst use, the press should begin preheating to
its default setting of 180°C or 356°F. The default countdown is 30 seconds.
The press preheats the
ENTIRE
time that it is connected to power and turned on.
DO NOT
leave it unattended and be careful to avoid any risk of burns or re.
If you need to use a dierent heat or time setting, press
SET
once. The upper display
should read “SP” and the lower display should show the current target temperature. Use
▲ and ▼ to set your new temperature. Hold either button to speed up adjustment.
Press
SET
a second time. The upper display should read “St” and the lower display
should show the current countdown in seconds. Again, use ▲ and ▼ to set the new timer
value.
Press
SET
a third time to conrm your changes. These values will be saved and reused
the next time you start the press. The display should reset to the current temperature of
the press.

6
5. Check your transfer and its placement while the press finishes preheating. When it
reaches your target temperature, slowly and carefully place your product into the press
without disturbing the transfer. Position it with one hand so the transfer will be in full
contact with the heated press once it is closed.
6. Lower the handle with your other hand until your product is securely held. If you
previously loosened the pressure knobs to t your product, you may need to retighten
them now.
7. The countdown should begin immediately once the press detects that the handle has
been lowered. Some larger products may not trigger this automatic activation. If so,
manually begin the countdown by pressing . Each time you press after this will reset
or restart the counter but it will
NOT
stop the press from continuing to heat.
8. There will be an audible chime when your countdown is finished. Press to mute.
If necessary, loosen the pressure knobs. Support your product with one hand while
opening the handle with the other. Remove the product and then remove the transfer at
the appropriate time so there is no damage to the area of the transfer. Place your heated
product in the area you previously prepared for cooling objects.
9. For batch work, simply repeat the positioning and activation steps. The temperature and
timer will continue from one use to the next, while the batch counter tracks the number
of repetitions. (Hold to reset this count.) For separate projects, use the instructions in
Step 4 to match the settings to your work.
10. When you are completely nished, turn o the machine by ipping its power switch to
O
and then fully disconnect it from power.
Continue to be careful and to keep any children or pets away from the area until the
press and your heated objects have fully cooled.
To avoid damage to its internal components, the press will also shut itself off
automatically if it is ever left undisturbed for thirty minutes at a time. However, you
should never leave the heated press unattended in this way. If you need to leave during
the middle of a batch, make sure all heated items are safely placed and then turn o and
disconnect the press from power before leaving.

7
RECOMMENDED SETTINGS
Material Transfer Temperature Time Pressure
Ceramics
Sublimation
195–205°C 380–400°F 45–60 sec. Medium/High
Waterslide
180°C 350°F 15–20 sec. Medium
Transfer Paper
180–190°C 350–370°F 10–15 sec. Medium/High
Glass
Sublimation
205°C 400°F 45–60 sec. Medium
Vinyl (HTV)
150–160°C 300–320°F 10–15 sec. Low/Medium
Transfer Paper
150–160°C 300–320°F 10–15 sec. Low/Medium
Stainless
Steel
Sublimation
205°C 400°F 45–60 sec. Medium/High
ADDITIONAL TIPS
• Remove transfer paper from nished products quickly to prevent it from cooling and sticking to
your design, but continue to be careful of all heated surfaces. Allow vinyl a little more time to
set but still remove it before it cools.
• To achieve optimal outcomes, use the recommended settings for the exact transfers and
materials as described above. Experiment with your specic transfers and materials to nd the
best results, especially before large batches.
• Avoid washing newly printed products for at least 24 hours.
8
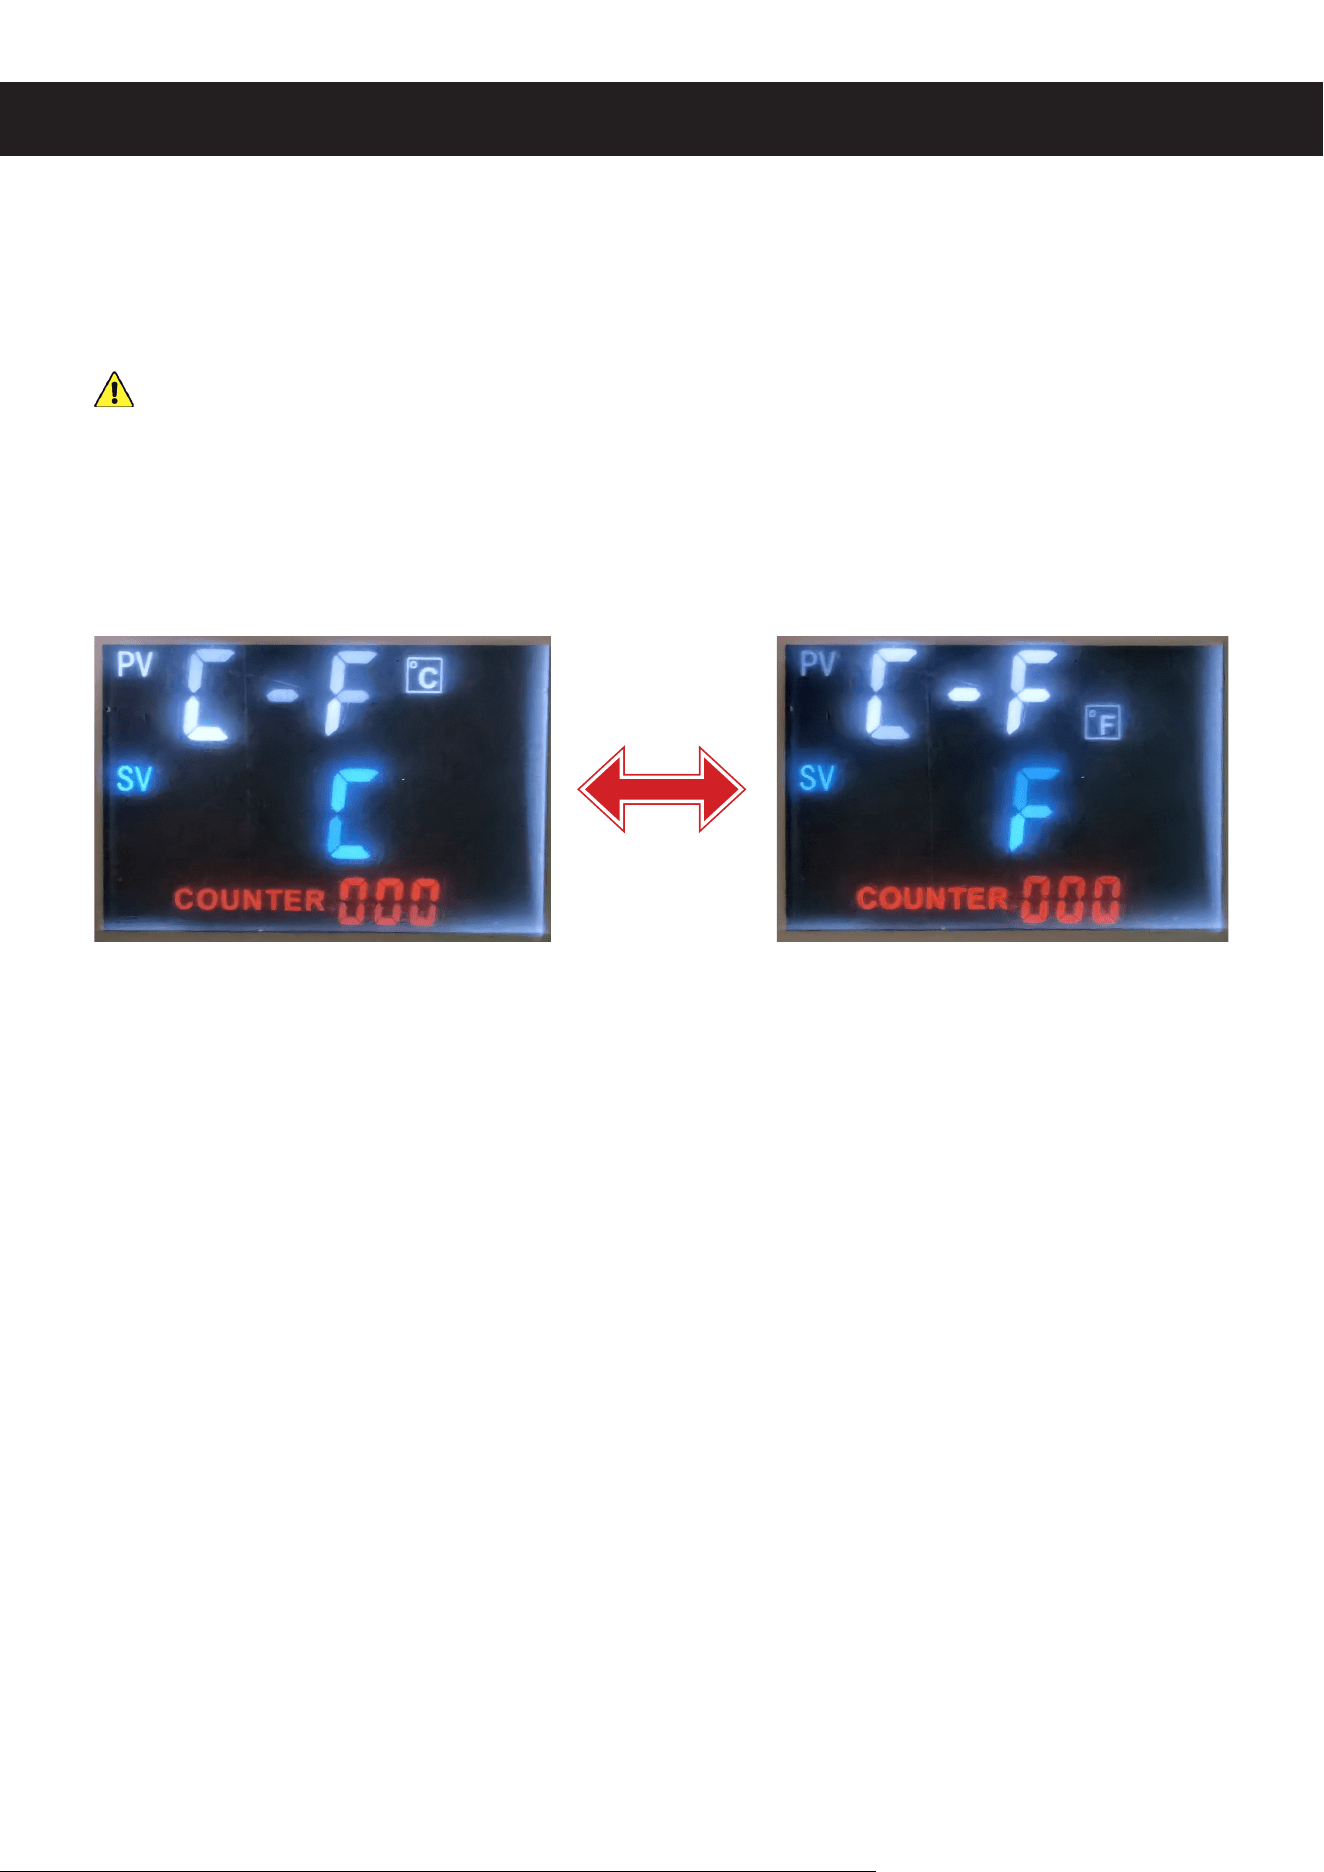
Hold
SET
to enter the settings adjustment menus. You will automatically start with Temperature
Units “C-F”. Press
SET
to cycle through the other parameters in order. Use ▲ and ▼ to adjust
any value. When you are done, hold
SET
to save your changes and exit.
Aside from the display units and heating cycle, the other parameters should never require
any adjustment. If they do,
ONLY
undertake such adjustment in coordination with customer
service or a trained technician. Failure to do so may cause abnormal functioning, void any
warranty stated or implied, and create a risk of electrical and/or re hazards.
Temperature Units (C-F)
By default, the temperature values are displayed in either metric or English customary units,
depending on the dominant local system. Use ▲ and ▼ to toggle between the two units. Setting
C is degrees Celsius and Setting F is degrees Fahrenheit.
Temperature Calibration (SC)
Sensor calibration is the oset applied to the device’s sensors and is set separately for each
machine at the factory. Do not adjust the default value for your press.
Overheating Protection (P)
Overheating protection is the hysteresis value used to smooth the machine’s heating
adjustments. Do not adjust the default value of “5”.
Input Reaction (I)
Input reaction is the speed at which the system responds to sensor inputs. Do not adjust the
default value of “150”.
ADJUSTMENT

9
Heating Cycle (t)
Heating cycle is the length of each period of heating in seconds. It is followed by an equal
duration of rest before the next cycle begins. For optimal service, the default setting of “8” may
need to be reduced somewhat in colder environments to maintain more constant heat but doing
so under normal conditions simply produces needless wear on the press components. The
value can be increased somewhat in warmer environments to reduce wear. Only adjust the
value up or down a little at a time and undo your adjustments or contact customer service if any
abnormality occurs.
MAINTENANCE
• Always completely disconnect this machine from power and wait for it to cool before any
cleaning, repair, or other maintenance.
• Clean with a soft dry cloth. If a damp cloth is necessary, be sure not to get any electronic
components wet. Do not use caustic chemicals or harsh abrasives.
• Check this machine periodically for any looseness, wear, or damage. Tighten, repair, or replace
any problematic parts before further use. Only allow trained technicians to do any testing or
repairs to internal components.
• Store in a cool dry location inaccessible to children and away from direct sunlight. For best
results, disconnect from power after each use. Always disconnect completely from power if it
will not be used for an extended period of time.
10
TROUBLESHOOTING
Possible Problems Usual Solution(s)
Burnt or blurry images
Decrease the working time and/or temperature using the control
panel.
Decrease the pressure using the adjustment knobs and handle.
Faded or pale images
Increase the working time and/or temperature using the control
panel.
Increase the pressure using the adjustment knobs and handle.
Startup failure or sudden
shutdown
Ensure the main power cord is rmly and fully inserted into the
machine’s power inlet and an appropriate power source.
Check for damage to the main power cord. Replace it with an
identical cord if needed.
Pry the cover below the machine’s power inlet open using a athead
screwdriver or similar tool and check the fuse inside. If necessary,
replace it with a new identical 20AL250V (5×20 mm) fuse.
Have a trained technician repair the machine’s wiring and/or your
power source.
Using SET does not
open the settings menus
Press to stop any timer and try entering the menus again. If
necessary, turn o the press, disconnect it from power for several
seconds, reconnect the power, and restart before trying again.
Lack of heat despite
correct control display
Have a trained technician inspect the machine and adjust the sensor
calibration “SC” setting as needed.
Have a trained technician assess your work area and adjust the
heating cycle “t” setting as needed.
Firmly reconnect the heating power cord to its socket behind the
control panel and beside the heating unit.
Repair the heating unit or replace it with a new identical one.
Excessive heating
Have a trained technician inspect the machine and adjust the various
settings as needed.
Have a trained technician repair or replace the electrical relay inside
the machine.

11
DISPOSAL
Electrical products should not be disposed of with household products. In the EU
and UK, according to European directive 2012/19/EU for the disposal of electrical
and electronic equipment and its implementation in national laws, used electrical
products must be collected separately and disposed of at the collection points
provided for this purpose. Locations in Australia, Canada, and the United States
may have similar regulations. Contact your local authorities or dealer for disposal
and recycling advice.
CONTACT US
Thank you for choosing our products! If you have any questions or comments,
contact us at contact@b2ccsgroup.com and we'll resolve your issue ASAP!
For a .pdf copy of the latest version of these instructions, use the appropriate
app on your smartphone to scan the QR code to the right.
HPM-MC20-U0 HPM-MC30-U0 HPM-MC30-A0
Rev. 17 Jul. 2023