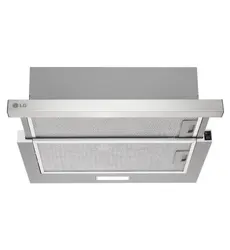

OWNER'S MANUAL
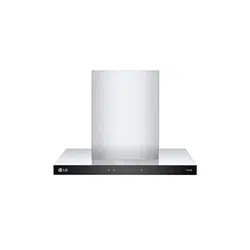
RANGE HOOD
Before beginning installation, read these instructions
carefully. This will simplify installation and ensure that the
product is installed correctly and safely. Leave these
instructions near the product after installation for future
reference.
ENGLISH
BR605S1S
MFL71950208
Rev.00_121925
www.lg.com
Copyright © 2025 LG Electronics. All Rights Reserved
Scan the QR code to see the manual.

TABLE OF CONTENTS
This manual may contain images or
content that may be different from the
model you purchased.
This manual is subject to revision by the
manufacturer.
SAFETY INSTRUCTIONS
READ ALL INSTRUCTIONS BEFORE USE...........................................................3
WARNING............................................................................................................3
CAUTION .............................................................................................................8
INSTALLATION
Product Overview...............................................................................................9
Installation ..........................................................................................................9
OPERATION
Using the Appliance.........................................................................................13
MAINTENANCE
Cleaning and Replacing...................................................................................14
TROUBLESHOOTING
Before Calling for Service................................................................................16

3
SAFETY INSTRUCTIONS
ENGLISH
SAFETY INSTRUCTIONS
READ ALL INSTRUCTIONS BEFORE USE
The following safety guidelines are intended to prevent unforeseen
risks or damage from unsafe or incorrect operation of the appliance.
The guidelines are separated into ‘
WARNING
’ and ‘
CAUTION
’ as
described below.
Safety Messages
WARNING
WARNING
• To reduce the risk of explosion, fire, death, electric shock, injury or
scalding to persons when using this product, follow basic
precautions, including the following:
Installation
• This appliance is to be properly installed and earthed only by a
suitably qualified person.
• Follow the local laws applicable for external air evacuation.
This symbol is displayed to indicate matters and operations
that can cause risk. Read the part with this symbol carefully
and follow the instructions in order to avoid risk.
WARNING
This indicates that the failure to follow the instructions can
cause serious injury or death.
CAUTION
This indicates that the failure to follow the instructions can
cause the minor injury or damage to the product.

4
SAFETY INSTRUCTIONS
• The manufacturer will not be held liable for any damages resulting
from incorrect or improper installation.
• The minimum safety distance between the cooker top and the range
hood is 650 mm.
• The minimum distance between the supporting surface for the
cooking vessels on the hob and the lowest part of the range hood.
This distance shall be at least 65 cm. If the instructions for installation
specify a greater distance, this has to be taken into account. The
distance of 65 cm can be reduced for : non-combustible parts of
range hoods, except grease filters, and parts operating at safety
extra low voltage, provided these parts do not give access to live
parts if deformed.
• If the instructions for installation for the gas hob specify a greater
distance specified above, this has to be taken into account.
Regulations concerning the discharge of air have to be fulfilled.
• Check that the mains voltage corresponds to that indicated on the
rating plate fixed to the inside of the range hood.
• Check that the domestic power supply guarantees adequate
earthing.
• Connect the range hood to the exhaust flue through a pipe of
minimum diameter 150 mm. The route of the flue must be as short as
possible.
• Do not connect the range hood to exhaust ducts carrying combustion
flumes (boilers, fireplaces, etc.).
• If the range hood is used in conjunction with non-electrical
appliances (e.g. gas burning appliances), a sufficient degree of
aeration must be guaranteed in the room in order to prevent the
backflow of exhaust gas. The kitchen must have an opening
communicating directly with the open air in order to guarantee the
entry of clean air. When the range hood is used in conjunction with
appliances supplied with energy other than electric, the negative
pressure in the room must not exceed 0.04 mbar to prevent fumes
being drawn back into the room by the range hood.

5
SAFETY INSTRUCTIONS
ENGLISH
• Children may put packaging material over their heads or wrap
themselves up in it and suffocate. Keep packaging material away
from children. Do not let children play with packaging material.
• Children may breathe in or swallow small parts, causing them to
suffocate. Keep small parts away from children. Do not let children
play with small parts.
• The air must not be discharged into a flue that is used for exhausting
fumes from appliances burning gas or other fuels.
• Range hoods and other cooking fume extractors may adversely affect
the safe operation of appliances burning gas or other fuels (including
those in other rooms) due to back flow of combustion gases. These
gases can potentially result in carbon monoxide poisoning. After
installation of a range hood or other cooking fume extractor, the
operation of flued gas appliances should be tested by a competent
person to ensure that back flow of combustion gases does not occur.
• Do not install the range hood near a heat producing appliance for
solid fuel (e.g.wood or coal) unless a closed, nonremovable cover is
available. There must be no flying sparks.
• Observe 'INSTALLATION' when installing the appliance.
Operation
• The range hood has been designed exclusively for domestic use to
eliminate kitchen smells.
• Never use the range hood for purposes other than for which it has
been designed. The range hood is for home use only, not suitable for
barbecue, roast shop and other commercial purposes.
• Never subject the hood to any naked flames that might
unintentionally occur from foods being cooked on the hob below it or
at any other time.
• Adjust any gas burner flame onto the bottom of the pan only, making
sure that it does not engulf the sides.
• Deep fryers must be continuously monitored during use: overheated
oil can burst into flames.

6
SAFETY INSTRUCTIONS
• Do not apply any flame to the range hood; risk of fire. Grease deposits
in the grease filter may catch fire. Never work with naked flames close
to the appliance (e.g. flambéing).
• This appliance can be used by children aged from 8 years and above
and persons with reduced physical, sensory or mental capabilities or
lack of experience and knowledge if they have been given supervision
or instruction concerning use of the appliance in a safe way and
understand the hazards involved.
• Children should be supervised to ensure that they do not play with
the appliance.
• There shall be adequate ventilation of the room when the range hood
is used at the same time as appliances burning gas or other fuels.
• Accessible parts may become hot when used with cooking
appliances. Never touch hot parts. Keep children at a safe distance.
• Hot oil and fat can ignite very quickly. Never leave hot fat or oil
unattended. Never use water to put out burning oil or fat. Switch off
the hotplate. Extinguish flames carefully using a lid, fire blanket or
something similar.
• When gas burners are in operation without any cookware placed on
them, they can build up a lot of heat. A range hood installed above the
cooker may become damaged or catch fire. Only operate the gas
burners with cookware on them.
• Operating several gas burners at the same time gives rise to a great
deal of heat. A range hood installed above the cooker may become
damaged or catch fire. Never operate two gas burners
simultaneously on the highest flame for longer than 15 minutes. One
large burner of more than 5 kW (wok) is equivalent to the power of
two gas burners.
• Components inside the appliance may have sharp edges. Wear
protective gloves when cleaning the filters and never disassemble the
appliance for maintenance or repairs.
• Items placed on the appliance may fall down. Do not place any
objects on the appliance.

7
SAFETY INSTRUCTIONS
ENGLISH
• The light emitted by LED lights is very dazzling, and can damage the
eyes (risk group 1). Do not look directly into the switched on LED
lights for longer than 100 seconds.
• Plug the power cord to a suitable and matching voltage socket outlet
with earthing continuity terminal. appliance has been designed to
operate from a mains grid power supply.
• Use the unit according to the instructions to avoid any fire hazard.
• Never operate the appliance without a grease filter.
Maintenance
• Do not repair or replace any part of the appliance unless specifically
recommended in the manual. All other servicing should be done by a
qualified technician.
• Cleaning and user maintenance shall not be made by children
without supervision.
• There is a fire risk if cleaning is not carried out in accordance with the
instructions.
• Switch off or unplug the appliance from the mains supply before
carrying out any maintenance work.
• Clean and/or replace the filters after the specified time period (to
avoid a fire).
• Fatty deposits in the grease filter may catch fire. Regularly clean the
grease filter.
• Prior to any maintenance, cleaning operation, ensure the power is cut
off. Penetrating moisture may cause an electric shock. Do not use wet
sponge cloths or flammable liquid cleaning solutions.
• If the supply cord is damaged, it must be replaced by the
manufacturer, service agent or similarly qualified person in order to
avoid a hazard. The replaced power cord should be provided by
manufacturer or seller.
• If the plug or cord is damaged, contact an LG Electronics Customer
Information Centre.

8
SAFETY INSTRUCTIONS
CAUTION
CAUTION
• To reduce the risk of injury to persons, malfunction, or damage to the
product or property when using the appliance, follow basic safety
precautions, including the following:
Maintenance
• Do not use corrosive detergents or flammable liquids or solvents for
cleaning. The proper function of the unit is conditioned by the
regularity of the maintenance.
• If a malfunction or fault has occurred with the appliance, contact an
LG Electronics Customer Information Centre.
• The grease filters may become damaged if they are squeezed. Do not
squeeze the grease filters.

9
INSTALLATION
ENGLISH
INSTALLATION
Product Overview
Parts
a
Control Button
b
Telescopic
c
Hood Body
d
Grease Filter
e
Light
Accessories
a
Screws (Φ5 mm x 50 mm, 4 ea)
b
Wall Plugs (4 ea)
c
Activated Charcoal Filters (2 ea)
NOTE
• Always wear work gloves for all installation and
maintenance operations.
• Wall plugs are provided to secure the hood to
most types of walls/ceilings. However, a
qualified technician must verify suitability of the
materials in accordance with the type of wall/
ceiling. The wall/ceiling must be strong enough
to take the weight of the hood. Do not tile, grout
or silicone this appliance to the wall. Surface
mounting only.
• This product requires installation by a qualified
professional, who will ensure the complete
removal of all packaging materials, including
expanded or moulded plastics, and will
responsibly recycle or dispose of such packaging
following the installation at the customer's
premises. Do not dispose any expanded plastic
packaging in the household bin.
Scope of Delivery
After unpacking all parts and accessories, check for
any damage in transit upon completion of the
delivery.
Specifications
The parameters are tested under conditions of 230
V 50 Hz when the voltage is 220-240 V~ 50/60 Hz
and without activated charcoal filters.
Installation
Dimensions and Clearances
• Make sure the appliance is placed horizontally to
avoid grease collection at one end.
Model BR605S1S
Voltage 220 - 240 V ~ 50/60 Hz
Rated Power 216.5 W
Lighting Power 1.5 W
Motor Power 215 W
Diameter of Air Tube 150 mm
Air Flow
640 m
3
/h (High)

10
INSTALLATION
• After installation, make sure that the power plug
is accessible and can be pulled out if necessary.
• The appliance should be placed 650-750 mm up
from the highest point of the Cooktop's surface
for safety and effective operation.
• There must be adequate ventilation of the room
when the appliance is working.
WARNING
• The air must not be discharged into a flue that is
used for exhausting fumes from appliances
burning gas or other fuels.
• Do not install the range hood near a heat
producing appliance for solid fuel (e.g. wood or
coal) unless a closed, nonremovable cover is
available. There must be no flying sparks.
Choose the working mode
The range hood can be operated in recirculation or
extraction-air mode. Extraction-air mode, the air is
discharged out of the house by a pipe.
Recirculation mode, the air is purified and
discharged into the house through two rows of
holes on the adjustable decorative chimney.
• Extraction-air mode
• Recirculation mode
For recirculation mode, assembled activated
charcoal filters on each side as cover to both the
shield grids of the motor impeller, then turn

11
INSTALLATION
ENGLISH
clockwise
a
. For the disassembly, turn counter-
clockwise
b
.
NOTE
• For recirculation mode, without the exhaust
pipe, install activated charcoal filters. When
activated charcoal filters attached, the suction
power will be lowered.
Installing the Appliance
There are two ways to install an appliance :
installing appliance directly into a cabinet or wall
mounting appliance.Install appliance in a way that
suits your kitchen environment.
Before installing the appliance, a Φ150 mm hole
must be drilled in the upper cabinet.
Installing the appliance directly into
a cabinet
1
After pulling out the telescopic rail, remove the
two metal grease filters.
2
Fix the appliance to the cabinet by using screws
a
. The screws are fastened from bottom to
top.
a
Screws (Φ5 mm x 50 mm, 4 ea)
3
If the screw protrudes above the cabinet, it
may cause stability problems, insert the wall
plug into the screw and turn it.
4
Fix the metal grease filters.
5
Connect the power cord.
Installing the appliance : wall
mounting
1
Make sure that there are no electrical lines,
water lines or other utilities in the drilling area
before drilling.

12
INSTALLATION
2
Mark 2 points horizontally 885-985mm above
the hob. The distance between the two points
is 400 mm.
a
Screws (Φ5 mm x 50 mm, 4 ea)
3
Drill at the marked points using a Φ10 mm drill
bit.
4
Insert the wall plugs into the holes.
5
Insert 2 screws
a
into the wall plug,
protruding 3 mm from the wall. Then hang the
appliance and mark the remaining points
where there are no screws.
6
Remove the appliance. Drill the marked points
using a Φ10 mm bit and insert the wall plugs
into the holes.
7
Hang the appliance and fix the appliance with 4
screws
a
.
8
Connect the power cord.
NOTE
• When using the Extraction-air mode, install an
exhaust pipe. The exhaust pipe’s minimum
diameter is 150 mm.
• Once installation is complete, please perform a
test run.

13
OPERATION
ENGLISH
OPERATION
Using the Appliance
Control Button
a
Power
You can set the power of the appliance by pressing
the button.
When you pull the telescopic panel, the appliance
operates at the set power.
When you push the telescopic panel, the appliance
stops operating.
•
b
Low Speed
•
c
Off mode
•
d
High Speed
e
Light
• You can set the
Light
ON/OFF by pressing the
button.
• When you pull the telescopic panel, the
Light
turns ON.
• When you push the telescopic panel, the
Light
turns OFF.
NOTE
• We recommend that you switch on the appliance
for a few minutes before you start cooking, and
then leave it running for approximately 8
minutes afterwards to ensure that all odors are
extracted.

14
MAINTENANCE
MAINTENANCE
Cleaning and Replacing
WARNING
• Switch off or unplug the appliance from the
mains supply before carrying out any
maintenance work.
• Make sure that the appliance is shut off before
cleaning.
CAUTION
• Falling grease filters may damage the hob
below. Grip below the grease filter with one
hand and make sure they are properly secured
when refitted.
Cleaning
Cleaning the appliance
1
Observe the instructions of the cleaning agent
manufacturer.
2
Clean stainless steel surfaces in the direction of
the finish using a sponge cloth and hot soapy
water. To protect the main body from corrosive
of the long time accumulation of dirt, the range
hood should be cleaned with hot water with
noncorrosive detergent every two months.
3
Dry with a soft cloth.
4
Apply a thin layer of the stainless steel cleaning
product to stainless steel surfaces using a soft
cloth.
Cleaning Grease Filters in the
Dishwasher
1
Remove all grease filters.
2
Put the grease filters into a dishwasher with
detergent, set the temperature below 60
degrees. The filters must be cleaned every 2
months of operation, or more frequently for
particularly heavy usage, and can be washed in
a dishwasher.
3
Do not use abrasive detergent for it will
damage the appliance.
4
Allow the grease filters to drain.
5
Fitting the grease filters.
NOTE
• Steam cleaner is not to be used.
• When cleaning the grease filter in the dish-
washer, light discolouration may occur. This
discolouration has no effect on the performance
of the grease filters.
Cleaning Grease Filters manually
1
Observe the instructions of the cleaning agent
manufacturer.

15
MAINTENANCE
ENGLISH
2
Soak the grease filter in hot soapy water.
3
Use a brush to clean the grease filters.
4
Rinse the grease filters thoroughly.
5
Allow the grease filters to drain.
6
Fitting the grease filters.
Replacing
Replacing the Activated Charcoal
Filter (Recirculation Version)
These filters are not washable and cannot be
regenerated, and must be replaced approximately
every 4 months of operation, or more frequently
with heavy usage.
1
Remove the grease filters.
2
Remove the saturated activated charcoal filter.
For the disassembly, turn counter-clockwise
b
.
3
Fit the new activated charcoal filters, apply one
on each side as cover to both the shield grids of
the motor impeller, then turn clockwise
a
.
Replacing the Light
LED light
Call for service. Repairs should be performed by a
licensed technician only. Improper repair may
result in considerable danger to you and others.
Square/Diameter 33.2 mm x 120 mm
Max. Power 1.5 W
Voltage 220 – 240 V
Picture
Lamp Cap -
ILCOS D code DBS-1.5-H-33.2/120

16
TROUBLESHOOTING
TROUBLESHOOTING
Before Calling for Service
Repairs should be performed by a licensed technician only. Improper repair may result in considerable
danger to you and others. However, some minor problems can be resolved as in the table below:
If a problem is not solved, please contact an LG Electronics Customer Information Centre.
Parts and Features
The manufacturer will decline all responsibility if the recommendations and instructions regarding
installation, maintenance and use are not observed and respected when using the appliance.
Symptoms Possible Cause & Solution
Light on, but motor
does not work
The motor is blocked.
• Call for service.
The internal wiring of motor is cut off/disconnected. An unpleasant
smell may be produced.
• Call for service.
Both light and motor
do not work
Apart from the possibilities mentioned above, check the following:
Light is damaged.
• Call for service.
Vibration The motor, if damaged, can cause vibration.
• Call for service.
The motor is not tightly fastened.
• Call for service.
The appliance is not securely fixed.
• Fixed the appliance securely.
Insufficient suction The distance between the appliance and the cooker top is too great.
• Readjust the distance.
Too much ventilation from open doors or windows.
• Close some doors / windows.
The appliance is not
level
The fixing screws are not tight enough.
• Tighten the fixing screws and ensure that the appliance is horizontal.
The hanging screws are not tight enough.
• Tighten the hanging screws and ensure that the appliance is horizontal.

Memo

Memo

Memo