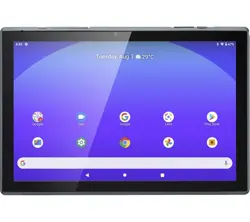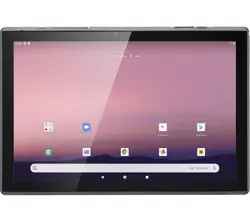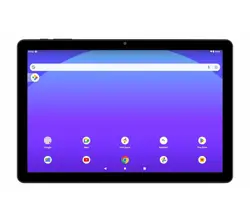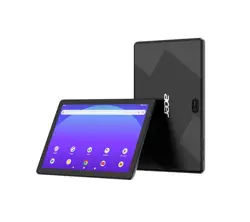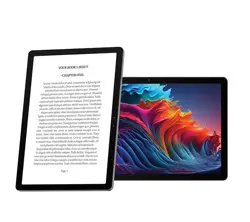
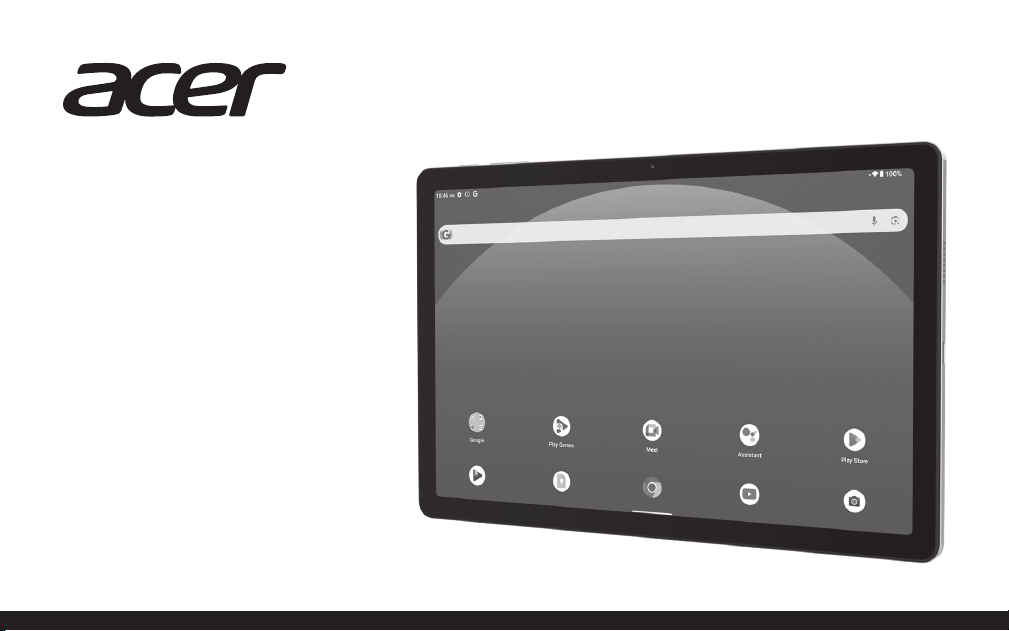
10.95” Tablet
Instruction Manual
ACTAB1125
• Before using this product, read all safety instructions
carefully rst in the Safety Warnings booklet and keep
them for future reference.
• For the latest version of the Safety and Instruction
Manual, please visit the ocial website below (other
websites may not contain the full and most updated
version): https://www.currys.co.uk/services/repairs-
maintenance/product-service-manuals.html

Contents
Safety Warnings ............................ Safety Warnings Booklet
Unpacking ............................................................................. 4
Product Overview ................................................................. 5
Setup at the First time .......................................................... 6
Power On/O ........................................................................ 6
Charging Your Tablet ............................................................ 7
Connecting to the Internet .................................................. 7
Touching and Typing ............................................................ 8
Home Screen ......................................................................... 9
Navigation Mode ................................................................ 10
Using the Cameras .............................................................. 11
Tablet Updates .................................................................... 12
SD Card Slot (Micro SD) ...................................................... 12
Google Play ......................................................................... 13
Using Google Play Games .................................................. 14
Using Google Play Books ................................................... 15
E-reader Mode .................................................................... 16
Introducing Google Kids Space ......................................... 17
Setting up Google Kids Space ........................................... 18
Turning o Google Kids Space .......................................... 19
Turning on Google Kids Space ........................................... 19
Managing Google Kids Space ............................................ 20
Battery Information & Maintenance ................................. 21
Force Reboot/Shutdown .................................................... 22
Troubleshooting ................................................................. 22
Specications ...................................................................... 23
Safety Warnings
• Read all the instructions carefully before using the unit and keep them for future
reference.
• Retain the manual. If you pass the unit onto a third party, make sure to include this
manual.
• The device is restricted to indoor use only when opening in the 5G WLAN band in
the following countires:
AT BE BG HR CY CZ DK
EE FI FR DE EL HU IE
IT LV LT LU MT NL PL
PT RO SK SI ES SE UK
Damage
• Please inspect the unit for damage after unpacking.
• Do not continue to operate the unit if you are in any doubt about it working
normally, or if it is damaged in any way - switch o, unplug from the mains socket
and consult your dealer.
Wireless Devices
• Wireless devices can transmit radio frequency (RF) energy, whenever batteries are
installed and the wireless device is turned on (If it has an On/O switch).
Temperature
• Avoid extreme degrees of temperature, either hot or cold. Place the unit well away
from heat sources such as radiators or gas / electric res.
• Avoid exposure to direct sunlight and other sources of heat.
Naked Flames
• Never place any type of candle or naked ame on the top of or near the unit.
Interference
• Do not place the unit on or near appliances which may cause electromagnetic
interference. If you do, it may adversely aect the working performance of the unit,
and cause a distorted sound.
Audio Safety
• Listening to loud sounds for prolonged periods of time may permanently
damage your hearing.
• Before putting on earphones, turn the volume down then put the earphones on
and slowly increase the volume until you reach a comfortable listening level.
• For trac safety, do not use earphones while driving or cycling.
• This product is capable of producing loud noises which may damage your hearing.
It is recommended to place the product at a safe distance from your ear.

Battery-Powered Devices:
Rechargeable Lithium Ion batteries are potentially hazardous
and can present a serious FIRE HAZARD if damaged, defective or
improperly used.
• Always charge in a well ventilated area. Do not charge under pillows, blankets or
on ammable surfaces.
• Do not operate the product if it has been wet or otherwise damaged, to prevent
against electric shock, explosion and/or injury. Contact the dealer or authorized
agent.
• Disposal of battery into re or a hot oven, or mechanically crushing or cutting of a
battery, can result in explosion.
• Leaving a battery in an extremely high temperature environment can result in
explosion or leakage of ammable liquid or gas.
• A battery subjected to extremely low air pressure may result in an explosion or
leakage of ammable liquid or gas.
• Do not short-circuit the product or store it in a receptacle where it may be short-
circuited by other metallic or conductive objects.
• Improper use of batteries may result in battery uid leakage, overheating or
explosion.
• Do not disassemble the product or remove any parts.
• Never discharge a Li-ion battery at a rate exceeding the maximum discharge
current specied for that battery.
• Immediately discontinue use of the battery if, while using or charging the battery
emits an unusual smell, feels hot or appears abnormal in any other way.
• Do not use the product where strong electromagnetic waves are present. Strong
electromagnetic waves will cause damage to the product.
• Do not use the product if the temperature is too high or too low, your batteries
may be damaged. If the humidity is too high, your batteries may be damaged.
• When the product is charging, keep it away from direct sunlight, moisture, dirt or
abrasive chemical products (cleaning products etc.).
• Battery life and charge cycles may vary by use and settings.
Built-in Battery Care
• Your product is powered by a built-in rechargeable battery.
• The battery can be charged and discharged hundreds of times, but will eventually
wear out.
• Unplug the charger from the electrical plug and the product when not in use.
• Do not leave a fully charged battery connected to a charger, since overcharging
may shorten its lifetime.
• If left unused, a fully charged battery will lose its charge over time.
• Leaving the product in hot or cold places, such as in a closed car in the summer
and winter conditions, will reduce the capacity and lifetime of the battery.

• Always try to keep your device in a cool, moisture-free environment that’s less
than 32°C. A product with a hot or cold battery may not work temporarily, even
when the battery is fully charged. Battery performance is particularly limited in
temperatures well below freezing.
• If you plan to store your device for longer than six months, charge the battery for
an hour every six months to keep it fresh.
• The unit should be fully recharged after using the device each time. This will keep
the health of the battery.
Battery Warning!
• The battery used in this product may present a risk of re or chemical burn if
mistreated.
• Do not attempt to open the product or replace the battery. It is built-in and not
changeable. Use of other batteries may present a risk of re or explosion and the
warranty will be terminated.
• Only recharge your battery with the provided approved USB cable designated for
this product.
• Dispose of batteries according to local regulations. Please recycle when possible.
Do not dispose as household waste or in a re as they may explode.
• Batteries may explode if damaged.
Wall Charger (if included)
• Always insert the USB device in the correct direction. Failure to do so may result in
damage to the USB device and this unit.
• Only use with products designed to be powered or charged via a USB socket.
• The power supply must be located near the unit and should be easily accessible.
• Do not use the charger when it is damaged.
• Do not use with a damaged USB charging cable as it can cause overheating and
damage to your device.
• Do not drop, tamper, disassemble or attempt to repair the unit by yourself.
• Do not immerse it in water or expose it to wet conditions.
• For IT equipment use only.
This unit is designed for indoor use only.
This equipment is a Class II or double insulated electrical appliance. It has been
designed in such a way that it does not require a safety connection to electrical
earth.
AC voltage: This symbol indicates that the rated voltage marked with the
symbol is AC voltage.
DC voltage: This symbol indicates that the rated voltage marked with the
symbol is DC voltage.
Visit Partmaster.co.uk today for the easiest way
to buy electrical spares and accessories. With
over 1 million spares and accessories available
we can deliver direct to your door the very next
day. Visit www.partmaster.co.uk or call 0344
800 3456 (UK customers only). Calls charged at
National Rate.
Notes for battery disposal
The batteries used with this
product contain chemicals that
are harmful to the environment.
To preserve our environment,
dispose of used batteries according to your
local laws or regulations. Do not dispose of
batteries with normal household waste.
For more information, please contact the
local authority or your retailer where you
purchased the product.
The symbol on the product or its
packaging indicates that this
product must not be disposed
of with your other household
waste. Instead, it is your
responsibility to dispose of your waste
equipment by handing it over to a
designated collection point for the recycling
of waste electrical and electronic equipment.
The separate collection and recycling of your
waste equipment at the time of disposal will
help conserve natural resources and ensure
that it is recycled in a manner that protects
human health and the environment.
For more information about where you can
drop o your waste for recycling, please
contact your local authority, or where you
purchased your product.
The Bluetooth® word mark and logos
are registered trademarks owned by the
BluetoothSIG, Inc. and any use of such marks
by Currys Group Limited is under license. Other
trademarks and trade names are those of their
respective owner.
Google, Android, Gmail, Google Drive and other
marks are trademarks of Google LLC.
The Acer trademark is licensed to Currys Group
Limited by Acer Incorporated, a Taiwan R.O.C.
company.
Safety-Tablet-UK-250106V11
UK Representative and Responsible Person
Currys Group Limited (No. 504877)
1 Portal Way, London, W3 6RS, UK
https://www.currys.co.uk
EU Representative and Responsible Person
Currys Ireland Limited (No. 259460)
3rd Floor Oce Suite, Omni Park SC,
Santry, Dublin 9, Republic of Ireland
https://www.currys.ie
UK & EU Contact details:
4
Thank you for purchasing your new
product.
We recommend that you spend some time reading
this instruction manual in order that you fully
understand all the operational features it oers. You
will also nd some hints and tips to help you resolve
any issues.
Read all the safety instructions carefully before
use and keep this instruction manual for future
reference.
Unpacking
Remove all items from the packaging. Retain the packaging.
If you dispose of it please do so according to local
regulations.
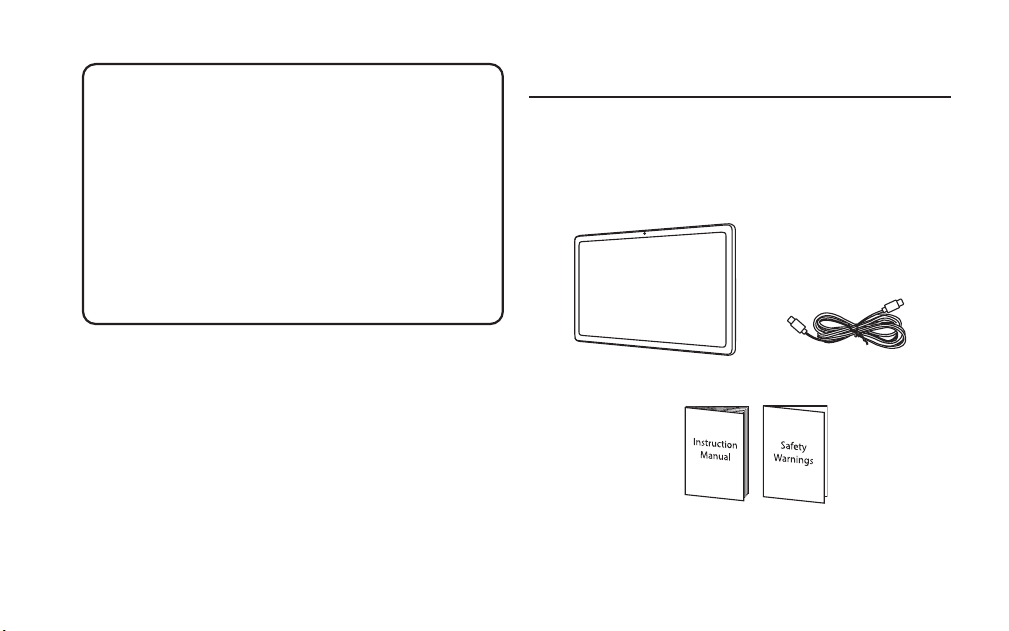
The following items are included:
Main unit
Instruction manual &
Safety warnings
USB cable
5
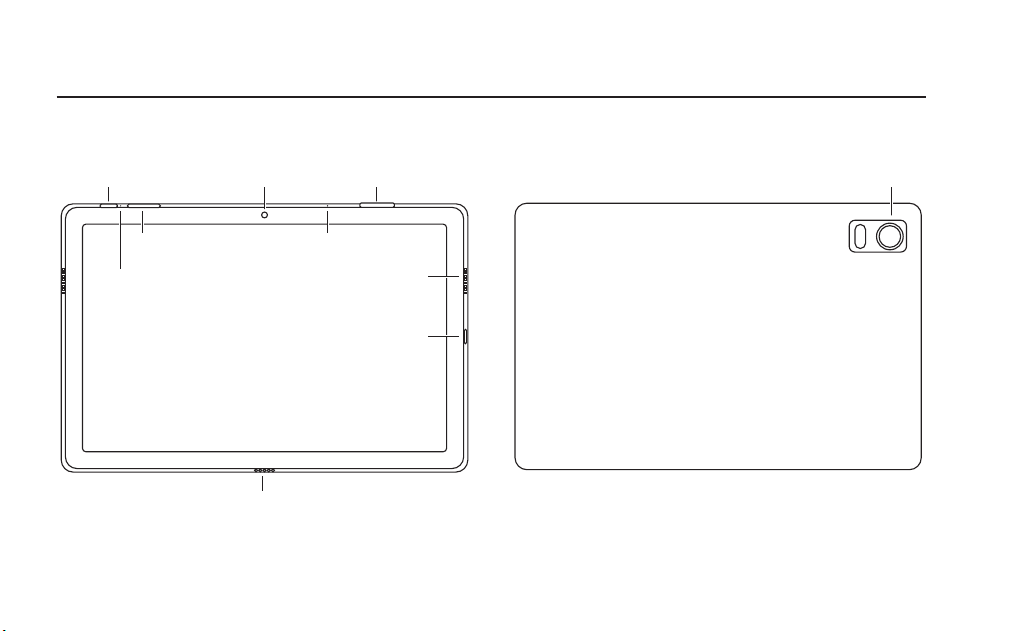
Front View
Product Overview
Rear View
Front camera
Rear camera
Power button SD Card Slot
Volume control
Pinhole Reset
Button
Microphone
Speaker
USB Charging
Port
Connection Port
For keyboard case
(sold separately)
6
Setup at the First time
1. Press and hold the Power button for 2-3 seconds.
2. Startup Wizard
3. The rst time you start up the tablet, the startup wizard
will help you set up:
- Language
- WiFi connection
- Date & time
- Your name
- Location service options
- 3rd party apps
We strongly recommend that you open a Google
Account (you need this to download new apps)
and we recommend that you answer yes to back
up your tablet to the Google Account. This will save
your les and settings in case you need to restore
your tablet to factory defaults at any point.
Power On/O
1. During standby mode, press the Power button to turn
on the tablet.
2. At the Start-up screen, swipe up from the bottom of the
screen to unlock.
3. Once you’ve arrived at the Home screen, you can begin
using the tablet.
4. Press the Power button to switch to standby mode.
If you are not using the tablet for a long time, you
can press and hold the Power button to shut it
down completely.
7
Connecting to the Internet
To connect to the internet, ensure you have the following:
• A wireless router or an access point with a broadband
connection.
• The name of your network (SSID) and the password or
other necessary credentials if your network is secure. (The
wireless router must supports WiFi 802.11 a/b/g/n/ac
connections).
Go to SETTINGS > Network & internet > Internet
Tap on "Internet" to enable wireless connectivity. The tablet
will then scan for available WiFi networks within range. For
secured networks, you will need to enter a password. Once
entered successfully, the tablet will remember your settings
for future connections.
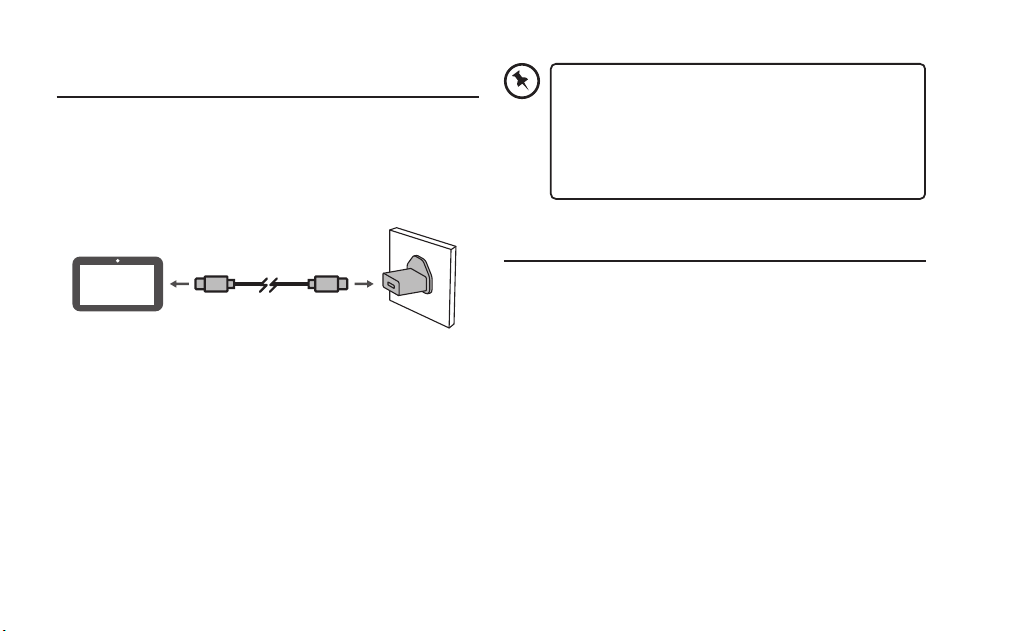
Charging Your Tablet
It is recommended to fully charge the tablet before rst use.
To charge the tablet,
• Plug the USB cable into the wall charger.
• Attach the other end to the USB-C input on the tablet.
• Plug the wall charger into a wall socket.
When the tablet is ON and charging, the battery icon will
pulsate. A full charge takes up to 3 hours. It is normal for
the tablet to get warm while charging, playing games, or
streaming video. Battery life will vary depending on usage.
• When the tablet's battery is fully depleted, the
charging screen may take up to 2 minutes to
appear. This is normal and does not signify a
problem with the device.
• Leave the tablet in a well ventilated area while
charging.
(Charger not
included)
8
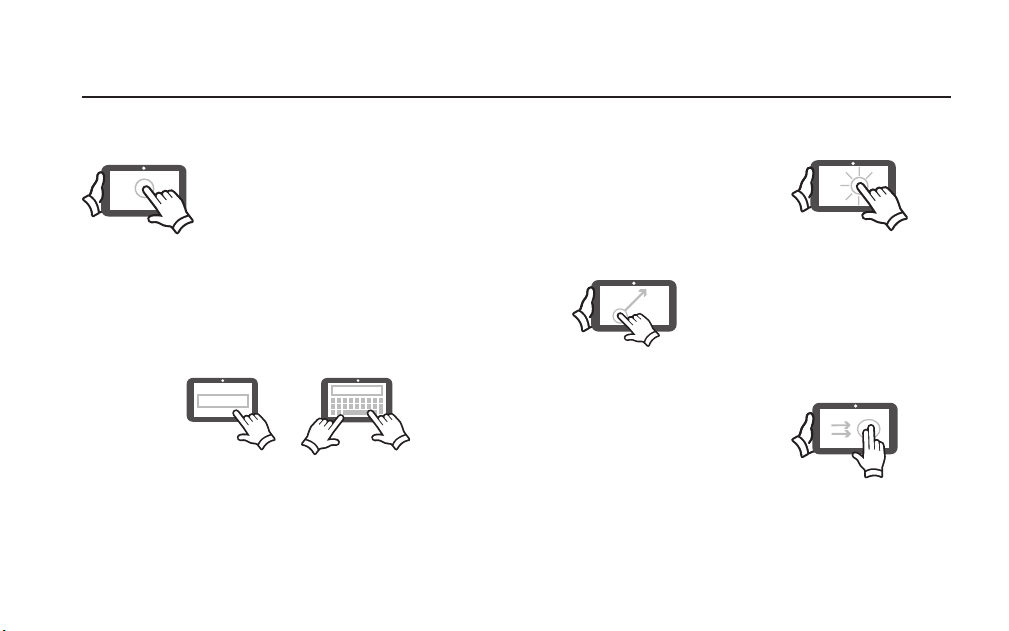
Touching and Typing
To select an item on the screen, simply tap
it once with your ngertip. Some items
may require you to “double-tap”.
To type in to a text eld (e.g., when inputting your name , or
a web address), tap the text eld. The on-screen keyboard
will appear, and allow you to type the information you wish
to enter.
Touch and Hold: Keep your
nger on an on-screen item
until it glows or activates an
alternate menu.
Drag: Move an App or
object by touching and
holding the image, then
moving it to the destination.
Slide: When there are extra
“screens” to the side, slide
one or more ngers from
one side to another.
XXXXX
XXXXX
9
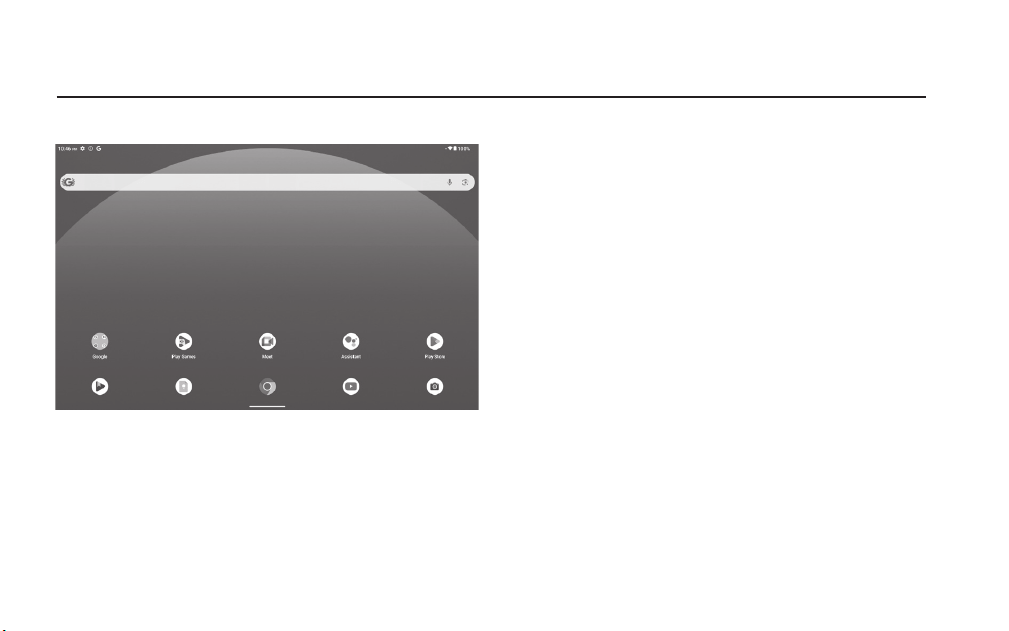
Home Screen
On the default home screen, you will nd a Google search
bar and some useful apps pre-installed for quick access.
You can customize your home screen at any time.
Home Screen
Add a Widget to a Home Screen
Press and hold on an empty area of the home screen, then
select "Widgets" from the pop-up menu. Press and hold the
widget you want to add, drag it to your desired location on
the screen and release.
Change the Wallpapers
Press and hold on an empty area of the home screen, select
'Wallpaper and style' from the pop-up menu, and then
choose your preferred wallpaper.
Move an App to Another Screen
Press and hold the app you want to move, then drag it to the
desired location on another screen and release.
Adjust Display Size
Go to Settings > Display > Display size and text. Use the
slider at the bottom of the page to change the size. You
can choose from ve sizes: small, default, large, larger, and
largest. The default setting is 'default'.
Uninstall an App
Press and hold the app you want to uninstall, select 'App
Info' from the pop-up menu, and then tap 'Uninstall'.
Note: Some system apps cannot be uninstalled.
10
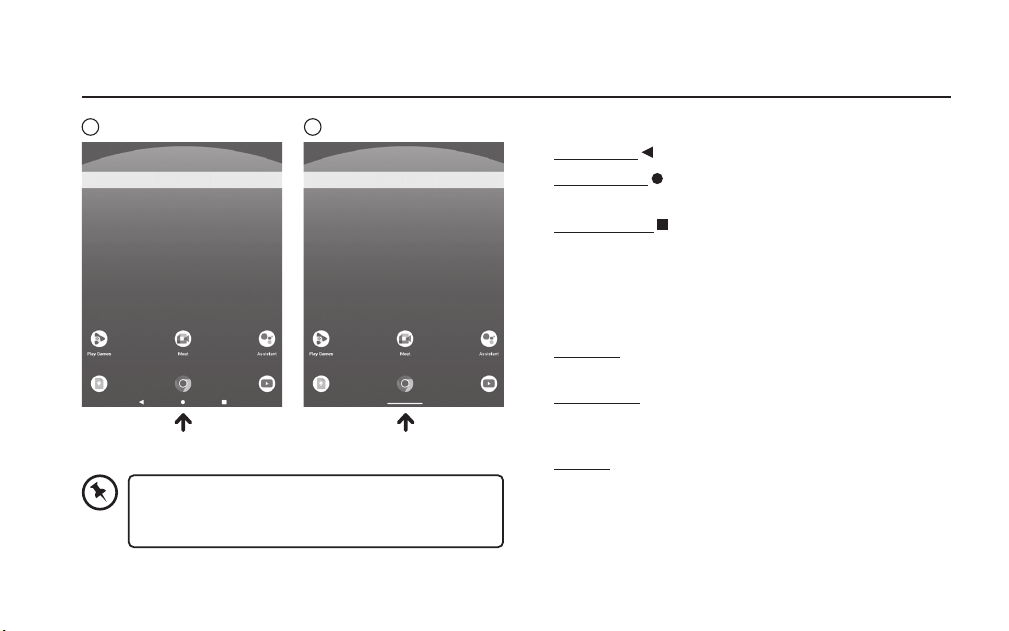
Note: To switch navigation modes, go to Settings >
System > Gestures > Navigation mode, and select
either 3-Button Navigation or Gesture Navigation.
1. 3-button navigation
Back button
: Tap to return to the previous page.
Home button
: Tap to return to the default home
screen.
Recent button
: Tap to view recent apps. Then you can
do the following.
• Tap an app to open it.
• Select CLEAR ALL to stop running all apps.
2. Gesture navigation
Go Home: Swipe up from the bottom of the screen to
return to the home screen.
Switch Apps: Swipe up from the bottom of the screen
and hold for a moment before releasing to view and
switch between open apps.
Go Back: Swipe from either the left or right edge of the
screen towards the center to go back to the previous
screen.
Navigation Mode
1 2
11
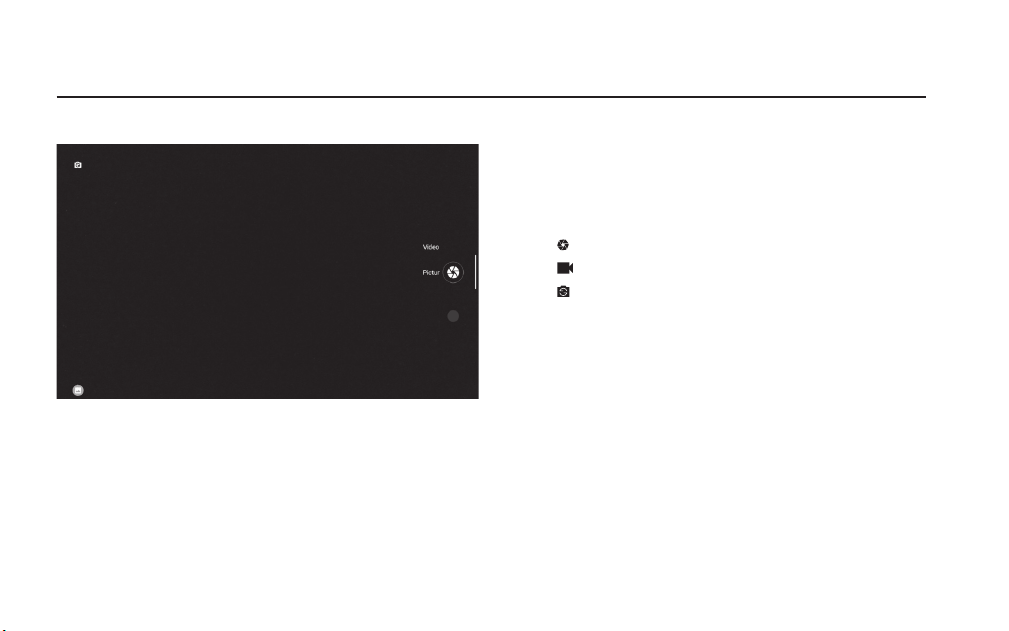
Swipe up from the bottom of the screen to show all apps,
select Camera app.
Taking photos and videos
You can take photos and record videos with your tablet’s
built-in camera.
• Tap
to take a photo.
• Tap
to record a video.
• Tap
to switch between the front and the rear camera.
Taking screenshots
Press and hold the "Power" button and the "Volume down"
button at the same time.
Viewing pictures and videos
Photos, videos and screenshots are stored in the tablet’s
internal storage. You can view your photos and videos by
using the following methods:
• Tap the thumbnail when using the "Camera" app.
• Go to "Photos" app.
Using the Cameras
12
Tablet Updates
To ensure the tablet runs smoothly, it is recommended to
perform periodic system software updates, especially during
the initial setup. You may receive notications on the Lock
screen indicating that updates are available.
Tap the notication to be directed to the update.
Alternatively, you can go to Settings > System > System
update > Check for Update to manually search for available
updates.
To perform an update, your tablet must be
connected to a WiFi network.
SD Card Slot (Micro SD)
• Open the MicroSD cover on the side of the tablet.
• To insert a MicroSD card, push it into the slot until a soft
click is heard; to remove the card, push it down then
release hold, it will sprung up from the slot.
To ensure compatibility between your tablet and
Windows® 10 or 11 computers, format the SD
card to FAT32 on the tablet before initial use. Note
that the tablet only supports FAT32 and is not
compatible with ExFAT or NTFS. Using unsupported
le systems may lead to compatibility issues.
13
Automatic Updates
When you rst sign into Google Play on your Android device,
it automatically checks for updates to your installed apps
and begins downloading them. This ensures that all your
apps are up-to-date. You'll see a download icon
appear
in the status bar at the top of your screen to indicate that
updates are in progress.
Performance Tips
Installing a new application while multiple apps are
downloading can reduce tablet speed and performance.
Once all downloads and updates have been completed, the
tablet will return to normal operating performance.
Google Play
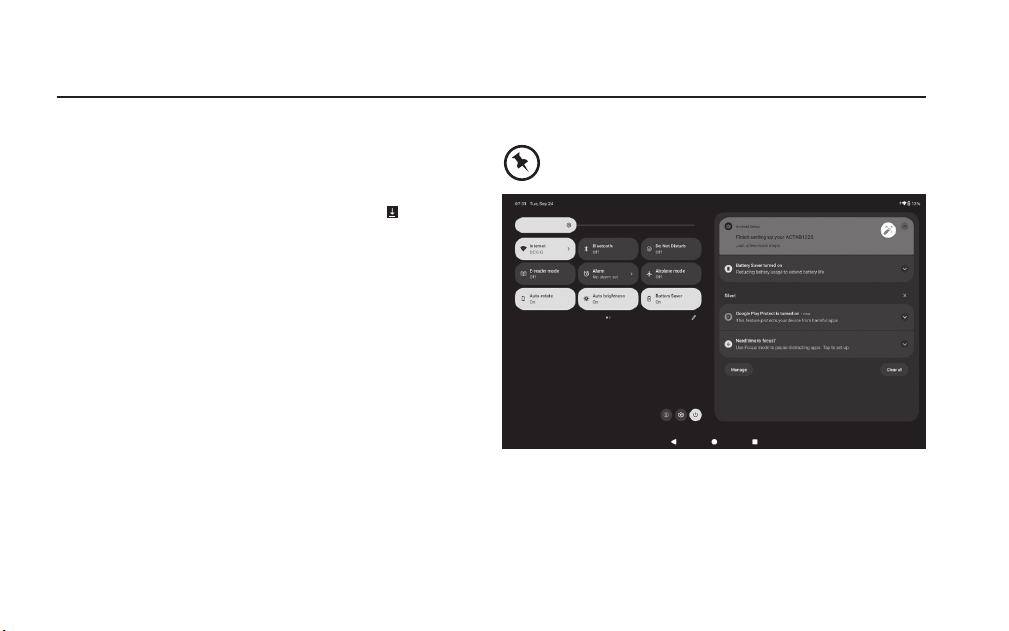
To view ongoing download progress, swipe down
from the top of the screen.
14
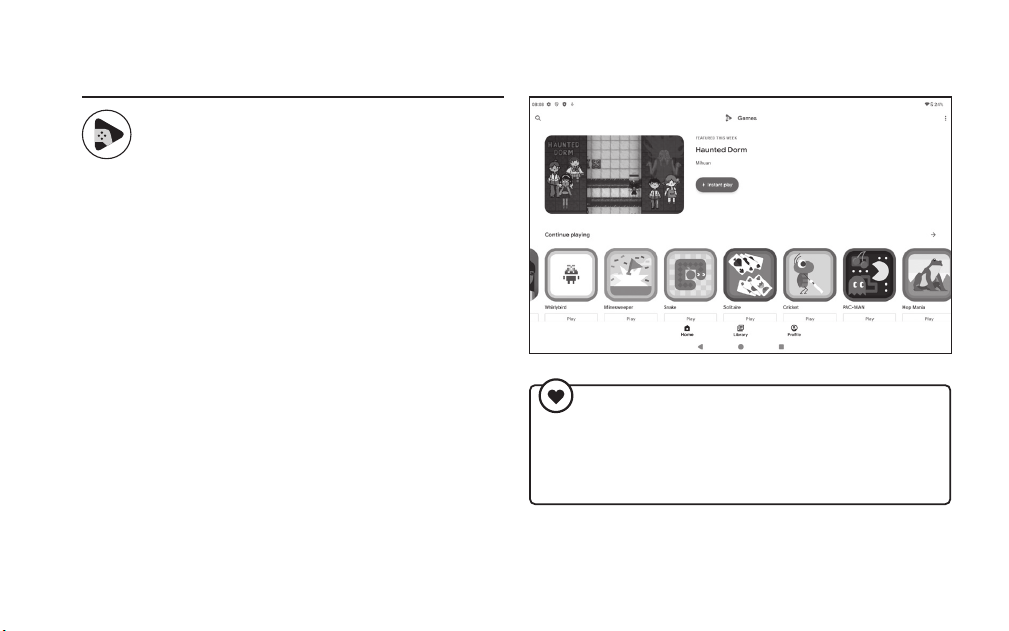
Using Google Play Games
To enjoy Google Play Games, make sure you have a
Google Account. Here’s how to get started:
1. Open "Google Play Games" on your tablet.
2. Sign in with your Google Account to access your games
and save your progress.
3. Adjust your preferences in the app settings for a better
gaming experience.
4. Navigate and Play:
• Home Button: Tap to discover new games and catch
up on the latest updates.
• Library Button: Tap to access and revisit your games.
• Prole Button: Tap to check your achievements and
edit your prole.
Quick Tip
Visit the Prole page to view your latest achievements and
compare your progress with friends to make gaming more
interactive and rewarding. For more tips and advanced
features, visit the ocial Google Play Games website.
15
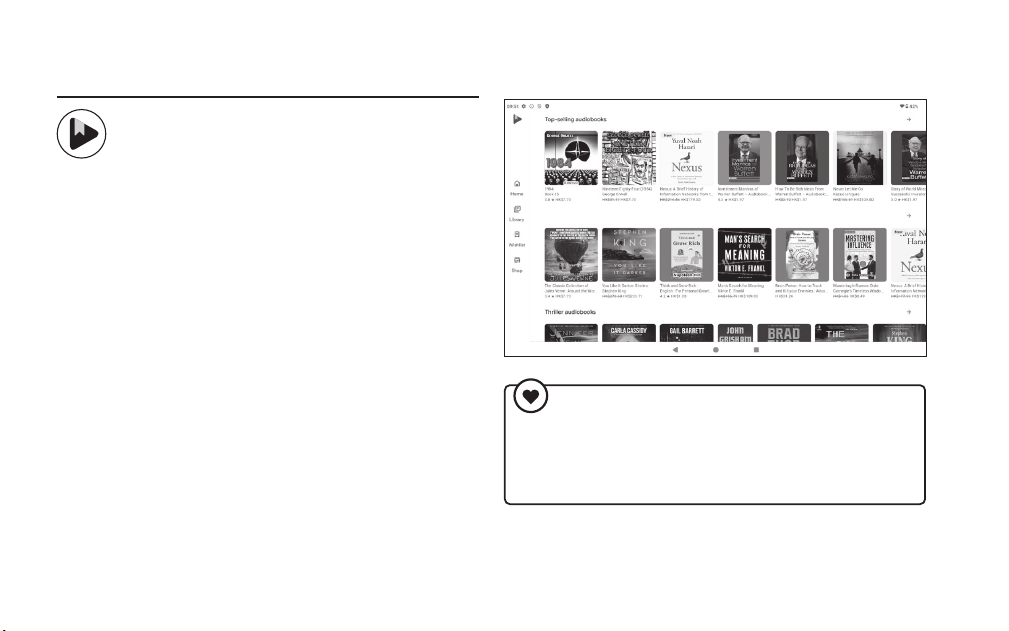
Using Google Play Books
To start enjoying eBooks and audiobooks with
Google Play Books, follow these simple steps:
1. Open "Google Play Books" on your tablet.
2. Sign in with your Google Account to sync your library,
bookmarks, notes, and reading positions across devices.
3. Navigate and Discover Books:
• Home Button: Tap to browse personalized
recommendations and trending books.
• Library Button: Tap to choose an eBook or audiobook
from your collection to start reading or listening right
away.
• Wishlist Button: Tap to save titles that you are
interested in for future exploration or purchase.
• Shop Button: Tap to search for new releases,
bestsellers, or specic titles. Here you can either
purchase new books or download available free books
directly to your device.
Quick Tip
Discover the full potential of Google Play Books!
Customize your settings and enjoy seamless reading
across all your devices. For more tips and advanced
features, visit the ocial Google Play Books website.
16
E-reader Mode
Our tablet comes with a special built-in feature called
"E-reader mode," designed to optimize the display for
reading. Turning on this mode adjusts the screen settings
to reduce eye strain and make reading more comfortable,
especially during long sessions.
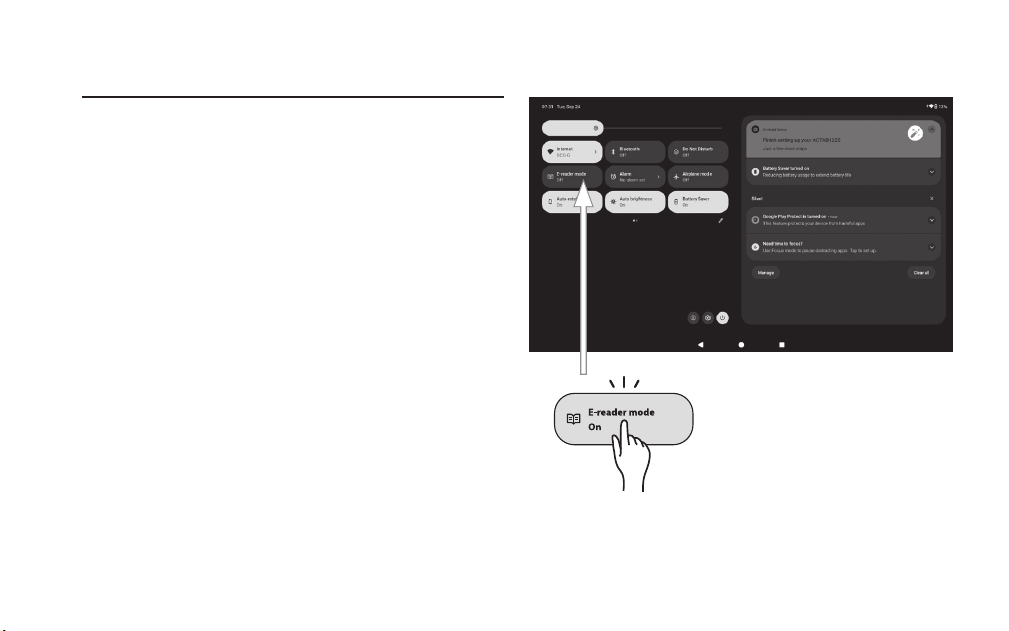
How to Activate E-reader Mode:
1. Swipe down from the top of the screen to access the
quick settings.
2. Tap on "E-reader mode" to enable it.
17
Introducing Google Kids Space
Ï Screen image is for demonstration purposes only. Actual display
may look dierent.
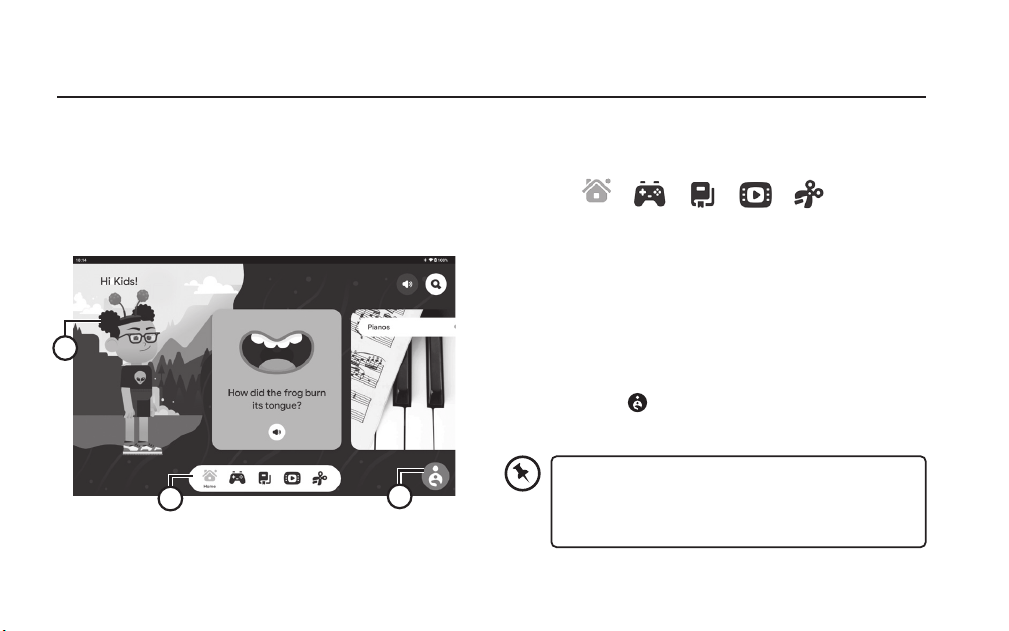
Google Kids Space is a tablet experience featuring a custom
home screen and a library of quality content for kids. Kids
can personalize their experience with unique avatars and
receive content recommendations tailored to their interests.
Meanwhile, parents can set boundaries using parental
controls.
1
3
2
Home Play Read Watch Make
Important: Books and video content may not be available in
all regions. Video content is subject to the availability of the
YouTube Kids app. Book content requires the Google Play Books
app. The availability of apps, books, and video content may
change without notice.
1. Customizable Avatar
2. Google Kids Space tab
Home: A mix of activities and suggestions for exploration.
Play: Teacher-approved apps and games.
Read: Books handpicked by experts.
Watch: Recommended videos with engaging content.
Make: Videos that spark hands-on creativity & play.
3. Parent Menu
Press and hold
to open a popup menu with various
options for managing your child's device and settings.
18
Setting up Google Kids Space
To use Google Kids Space, ensure the tablet is
connected to a WiFi network and set up using a
child's account.
1. When setting up the tablet for the rst time, you will be
asked who is going to use this device. Tap "A child."
• If you have previously set up the tablet for your child, tap
Google Kids Space
and tap "Get Started".
2. Sign in to your child’s existing Google Account or follow
the prompts to create a new Google Account for your
child under 13 (or the applicable age in your country).
3. Sign in with your own Google Account to verify that you
are the parent. If your child's account is newly created,
Google will perform additional checks to conrm your
identity. Choose your preferred verication method
when prompted.
4. Follow the on-screen instruction until you see "Set up
Google Kids Space?", then tap "Set Up".
5. Continue following the prompts for additional settings.
6. Tap "Next" when prompted to hand over the device to
your child.
7. Work with your child to choose their interests and tap
"Next."
8. Tap "PUSH".
9. Congratulations! Your child can now create his or her
own character. When nished, tap "Done".
For the latest features and setup instructions for
Google Kids Space, please visit the ocial Google
website. Information may change without prior
notice.
19
Turning o Google Kids Space
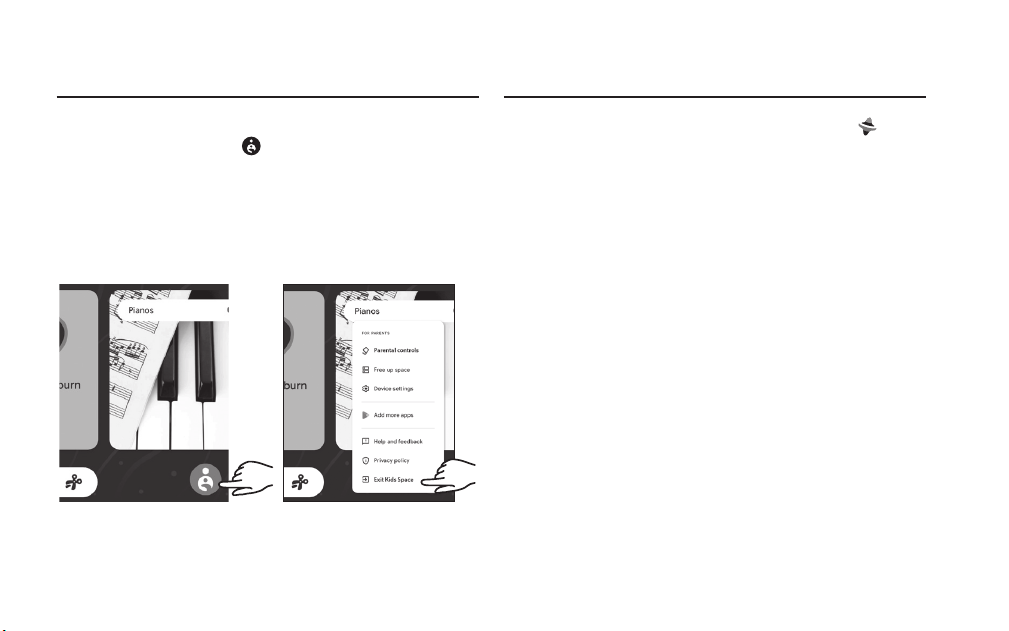
1. From the "Google Kids Space" home screen, press and
hold the "Parent menu ".
2. Tap "Exit Kids Space"
3. Tap "Turn o".
4. To verify you're the parent, enter your Google Account
password, then tap "Next".
Turning on Google Kids Space
1. From the home screen, tap Google Kids Space .
2. Tap "Turn on".
3. To verify you're the parent, enter your Google Account
password, then tap "Next".
Ï Screen image is for demonstration purposes only. Actual display
may look dierent.
20
Managing Google Kids Space
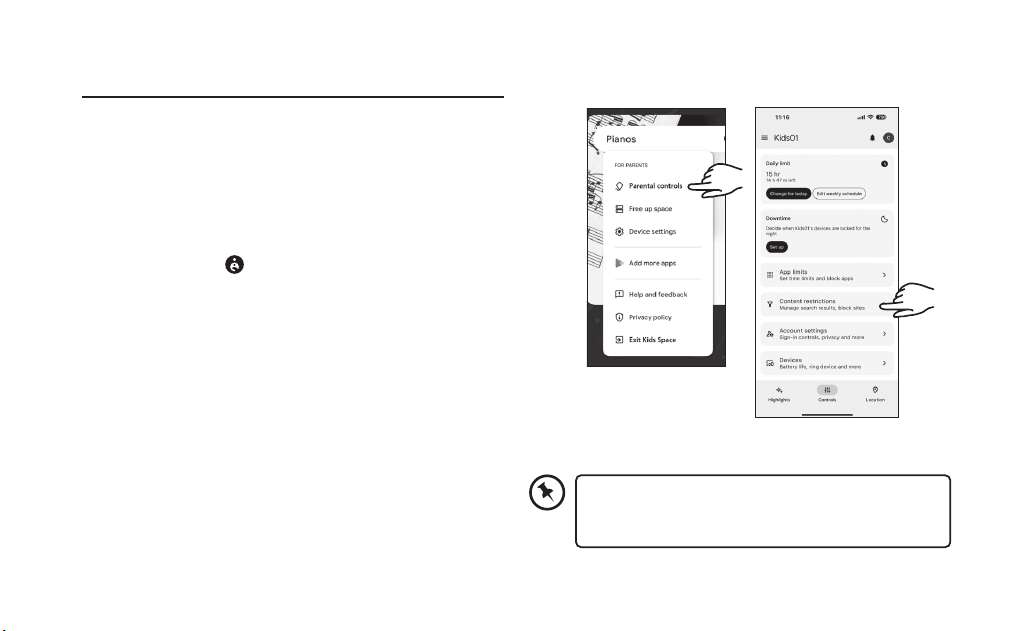
Parents can manage Google Kids Space settings using either
the Parental Controls function within the Google Kids Space
app or remotely through the Family Link app on a parent's
device. Here are the basic steps for each method:
1. Parental Controls
• From the Google Kids Space homescreen, press and hold
the "Parent Menu
".
• Tap "Parental Controls" to adjust settings directly on the
tablet.
2. Family Link
• Open the app and log in to your Google Account.
• Select your child's prole.
• Go to "Controls," then "Content restrictions," and choose
"Google Kids Space*" to manage specic settings.
For full functionality and the latest features of
Family Link, please visit the ocial Google website.
Information may change without prior notice.
Ð Screen image is for demonstration purposes only. Actual display
may look dierent.
Parental Controls
Family Link
*Note: "Google Kids Space" appears in "Content restrictions"
only when your child is logged into the app on their tablet.
21
Battery Information & Maintenance
Your tablet's battery data allows you to monitor its
performance over time. This section shows how to access
battery management system information and oers tips to
enhance its lifespan.
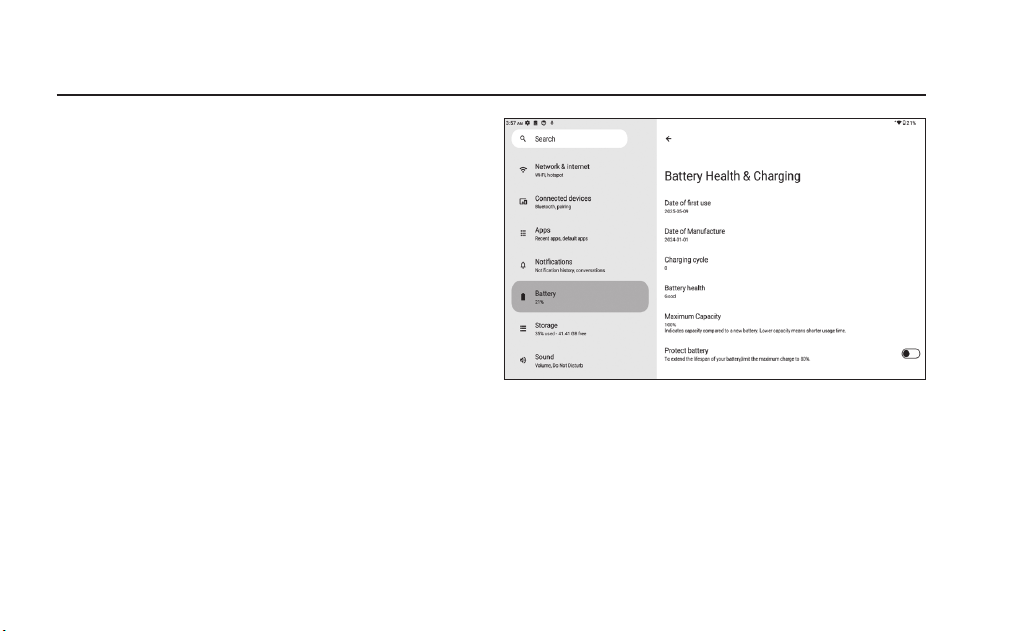
1. To view your tablet's battery details:
Go to Settings > Battery > Battery Health & Charging
Available information includes:
• Date of First Use
When the battery was rst used after setup.
• Date of Manufacture
When the battery was produced.
• Charging Cycle
Total number of full charge/discharge cycles.
• Battery Health
The current status of the battery's health.
• Maximum Capacity
Current remaining capacity (%) compared to its original
state.
• Battery Protection
Feature(s) on how to maintain your battery's lifespan.
2. To optimize battery lifespan and performance:
• Avoid exposing your device to extreme temperature.
• Avoid full charges and full discharges. Partial charging (20-
80%) is recommended for daily use.
• Disable unused wireless features (Wi-Fi, Bluetooth).
• Recharge to 50% every 6 months if storing >30 days.

22
Force Reboot/Shutdown
There are 2 methods to force reboot/shutdown the tablet.
• Press and hold the "Power" button for about 10 seconds
until the tablet reboots.
• Use a toothpick to punch into the "Pinhole reset" button
until the tablet turns o, then turn it on again in the
normal way.
Troubleshooting
If your tablet is frozen:
Press the "Power" button for at least 10 seconds or use the
hardware reset.
To use the Hardware reset, press the “pinhole reset” button
by using a sharp object such as a toothpick.
If your tablet doesn’t turn on:
Charge your tablet then switch on normally.
If this does not work, press the “pinhole reset” button by
using a sharp object such as a toothpick.
If your WiFi reception is poor:
• Make sure you are not far from the WiFi hotspot.
• Update the rmware of the tablet.
• Reset and redene your connection parameters.
• Reset your wi setting, go to Settings > System > Reset
options > Reset Bluetooth & WiFi > Reset
• Contact your WiFi connection provider.
If you want to extend the life of your battery:
Decrease the screen brightness and turn of the wireless
connections if not in use.
If your tablet is functioning too slowly:
Close all apps which are not currently being used.
If you want to restore your product (erase all your
settings or forgotten password) :
1. Go to Settings > System > Reset options > Erase all
data (factory reset) > Erase all data
2. This will erase all your les, settings and applications, so
make sure you have backed-up your data in your Google
Account.
3. When you restart your tablet it will open the Startup
wizard again, follow the onscreen instructions.
23
4. Access your Google Account to retrieve your backed-up
data in Google.
If the device does not power on or system crashes:
Charge the battery for half an hour and then press and
hold the "Power" button for more than 10 seconds until the
device reboots.
If the device cannot wake up from sleep mode:
Press and hold the "Power" button for more than 10 seconds
until the device reboots.
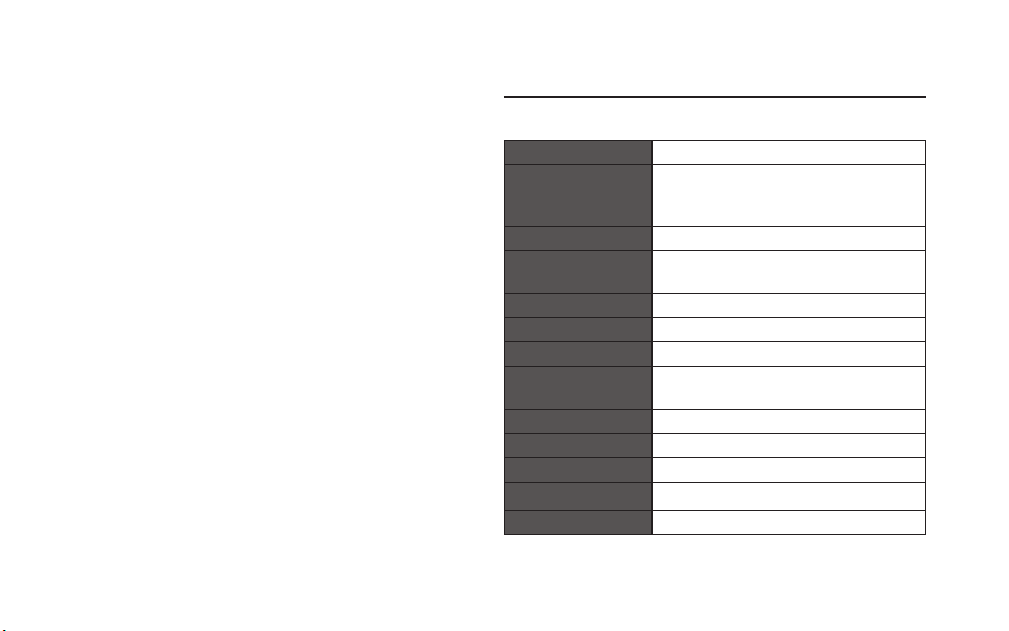
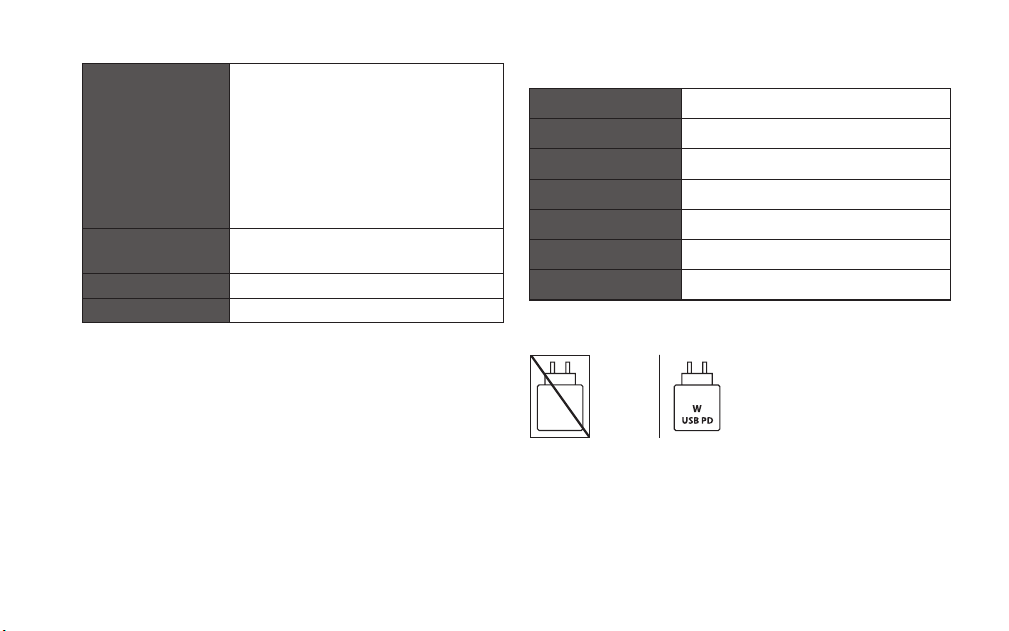
Specications
Tablet
Model ACTAB1125
Processor
MT8786 (G80) ARM Cortex-A75 &
Cortex-A55 Octa-Core Processor
(@ 1.8GHz)
Operating System Powered by Android™ 14
Display
10.95” (1920 x 1200) IPS tempered glass
panel with 10 points multitouch
Audio Two side speakers
Memory 4GB Low-Power LPDDR4
Battery capacity 8000 mAh
Storage
64GB - Expendable by an additional 1TB
with Micro SD card
Ports TYPE C 2.0 / Micro SD Card slot
Camera Front 5MP / Rear 8MP
Connectivity
Dual Band WIFI, Bluetooth
® 5.2
GPS YES
Microphone YES
24
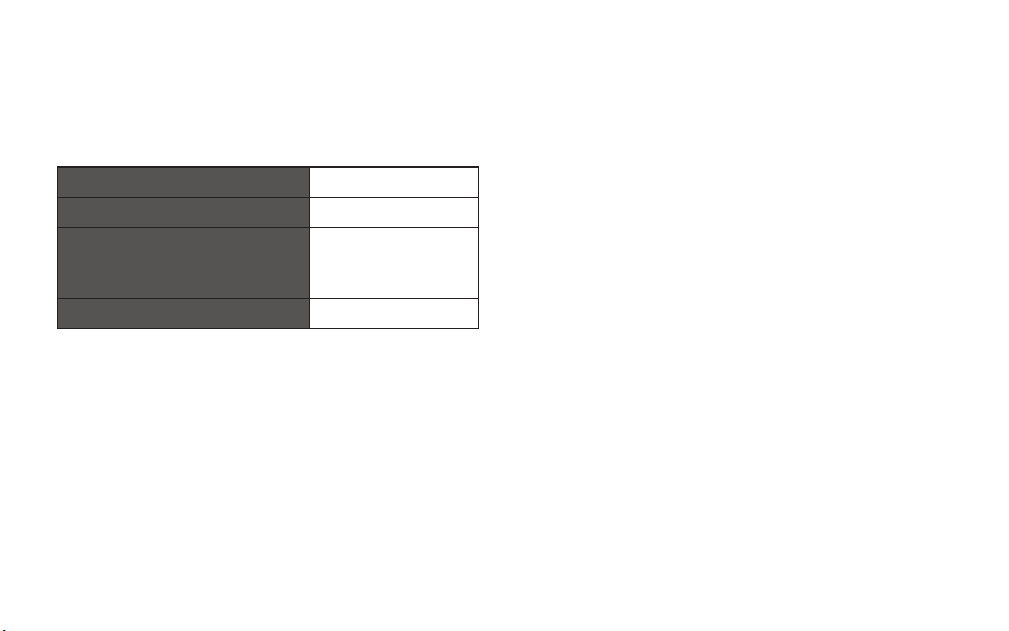
Frequency Range
and Max. Radio
Frequency Power
Transmitted
Bluetooth®: 2400–2482 MHz,
Max power (EIRP): 5 dBm
2.4G Wifi: 2410–2474 MHz,
Max power (EIRP): 17 dBm
5.2G Wifi: 5178–5242 MHz,
Max power (EIRP): 16 dBm
5.8G Wifi: 5743–5827 MHz,
Max power (EIRP): 14 dBm
GPS Receiving
Frequency
1575.42 MHz
Dimensions 258.5 × 170.1 × 8.0 mm
Weight 525 g
Built-in Battery
Model U318991PV-2P
Battery Type Li-ion Polymer Battery
Battery Rating 3.8V 8000mAh 30.4Wh
Designation Code 1ICP4/89/91-2
Manufacturer Shenzhen Utility Energy Co., Ltd.
Dimension 177.2 × 92 × 3.3 mm
Net Weight 122 g ± 5 g
Features and specications are subject to change without prior notice.
The power delivered by the charger
must be between min 10 Watts required
by the radio equipment, and max 18
Watts in order to achieve the maximum
charging speed.
Charger
is not
included.
10-18
For environmental reasons this package does not include a charger. This
device can be powered with most USB power adapters and a cable with USB
Type-C plug.
25
Environmental Information
The following are the weight ranges of the critical raw
materials and environmentally relevant materials used in the
tablet:
Cobalt in the battery < 10g
Tantalum in capacitors < 0.01g
Neodymium in loud speakers,
vibration motors, and other
magnets
0.2g - 1g
Gold in all components < 0.02g
Exposure to Radio Waves
• Your mobile is designed not to exceed the limits for
exposure to radio waves (radio frequency electromagnetic
elds) recommended by international guidelines.
• The guidelines were developed by an independent
scientic organization (ICNIRP) and include a substantial
safety margin designed to assure the safety of all persons,
regardless of age and health.
• The radio wave exposure guidelines use a unit of
measurement known as the Specic Absorption Rate, or
SAR. The SAR limit for mobile devices is 2.0 W/kg.
• Tests for SAR are conducted using standard operating
positions with the device transmitting at its highest
certied power level in all tested frequency bands. The
highest SAR values under the ICNIRP guidelines for this
device model are:
Body SAR : 0.205W/Kg(10g)
• During use, the actual SAR values for this device are
usually well below the values stated above. This is
because, for purposes of system eciency and to
minimize interference on the network, the operating
power of your mobile device is automatically decreased
when full power is not needed for the call. The lower the
power output of the device, the lower its SAR value.
26
Declaration of Conformity (RER)
Hereby, Currys Group Limited declares that the radio
equipment type [ACTAB1125] is in compliance with
Radio Equipment Regulations 2017(S.I. 2017/1206).
The full text of the UK declaration of conformity is
available at the following internet address:
https://www.currys.co.uk
Scan the QR code, then click on the 'product manual'
search box and enter the model number.
The Acer trademark is licensed to Currys Group Limited by Acer
Incorporated. Google, Android, Youtube, Google Play and other marks are
trademarks of Google LLC.
The Bluetooth® word mark and logos are registered trademarks owned
by Bluetooth SIG, Inc. and any use of such marks by Currys Group Limited
is under license. Other trademarks and trade names are those of their
respective owners.
All brands and product names are registered trademarks and the property
of their respective owners.
Privacy Notice
This product is equipped with external sensing
componentssuch asGPS, camera and microphone. These
sensing capabilities, which could involve collection of
privacy - related information (location, sound, video,
pictures, etc.).
GPS Sensor: The GPS sensor may collect your location
information to provide location-based services and
features.Camera: The camera may capture video and
still images when you use features that require visual
input.Microphone: The microphone may record audio
when you use features that require voice input or
communication.


ACTAB1125-IB-UK-250613-V3